
Don't wanna be here? Send us removal request.
Statistics
We looked inside some of the posts by 8586prcaticetobystevenson and here's what we found interesting.
Average Info
Notes Per Post
0
Likes Per Post
0
Reblog Per Post
0
Reply Per Post
0
Time Between Posts
25 days
Number of Posts By Type
Text
4
Last Seen Tumblr Blogs


Fun Fact
The KCSC sent more than 20K requests to delete posts related to prostitution and porn to Tumblr from January to June 2017.
Text
Final piece based on pitch
Developing my favourite idea
The idea that I have chosen to follow through with is the third idea as I think it’s not that similar to other projects I have done, unlike the other two ideas where I have used most of the techniques before and wouldn’t be learning a lot of new things.
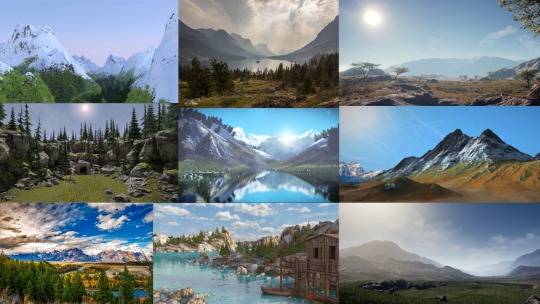
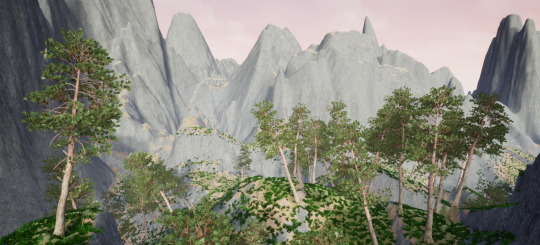
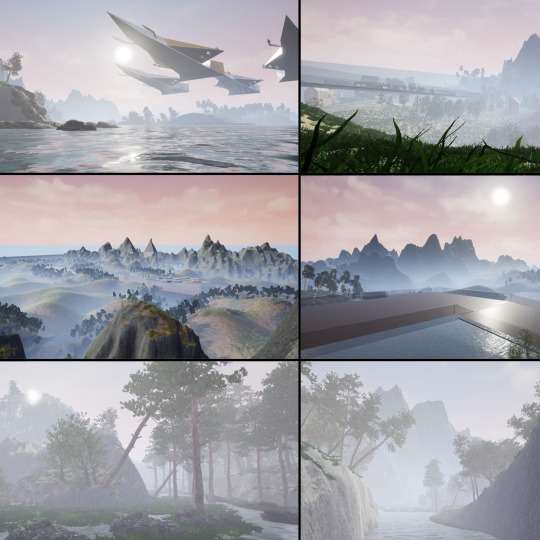
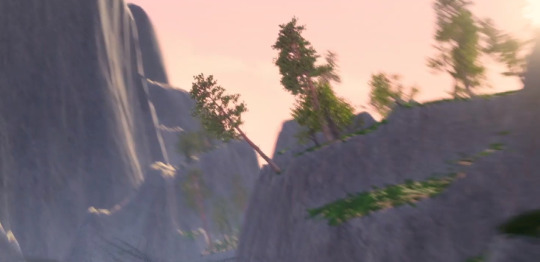
To start, I created a mood board of different 3D environments that people have created to get a better idea on multiple things such as which surrounding climate I would prefer the piece to take place in, the appearance of the sky and the size of the mountains.
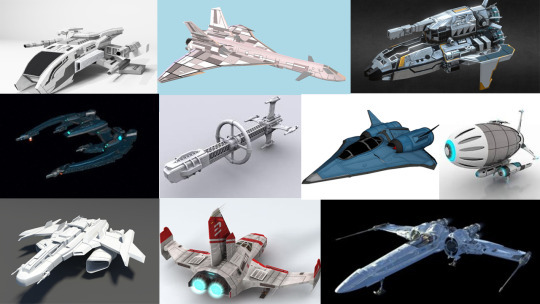
Creating a mood board for the potential main object which would be a spaceship. I decided a spaceship as I thought it would be interesting to animate as well as it’s more adventurous than the standard plane which could potentially look good but wouldn’t be as imaginative.
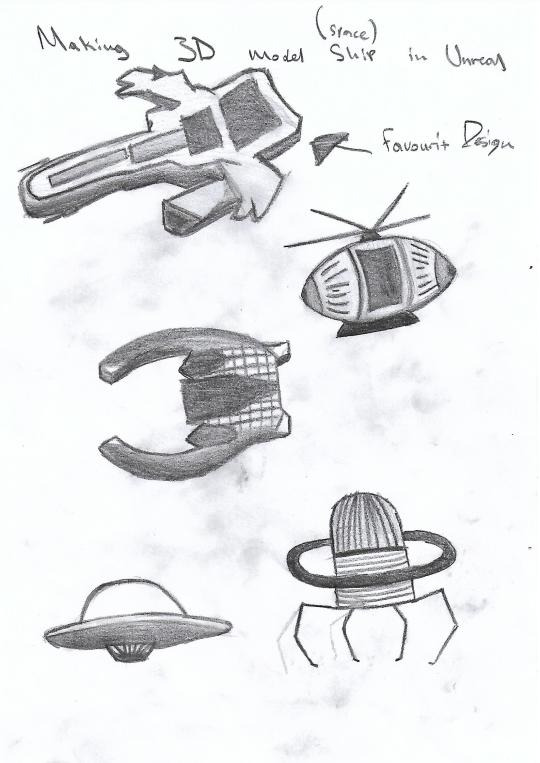
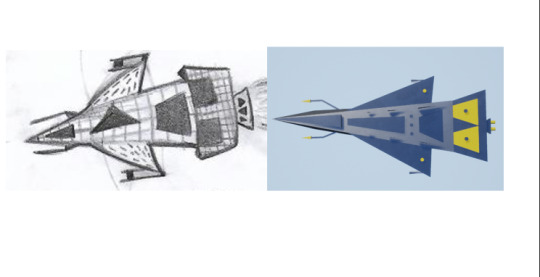
Sketching out different ship designs which could then suit as a good foundation for development.
After choosing the ship design I liked the most out of my ideas I began to develop it.
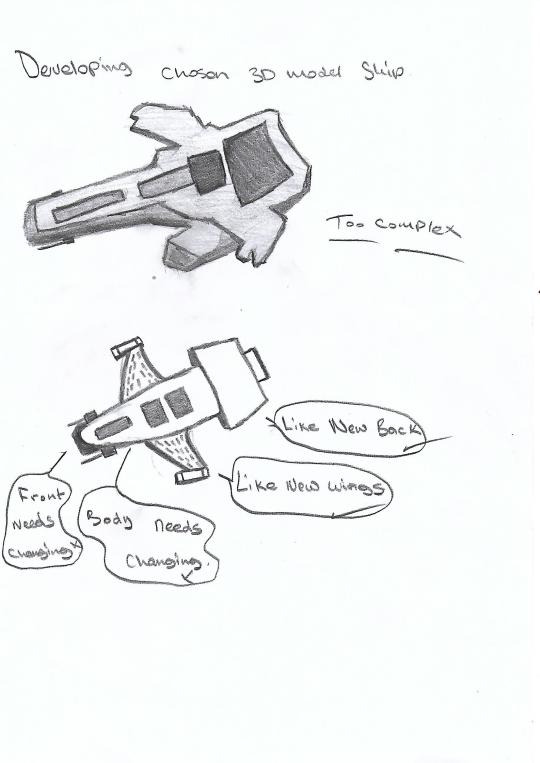

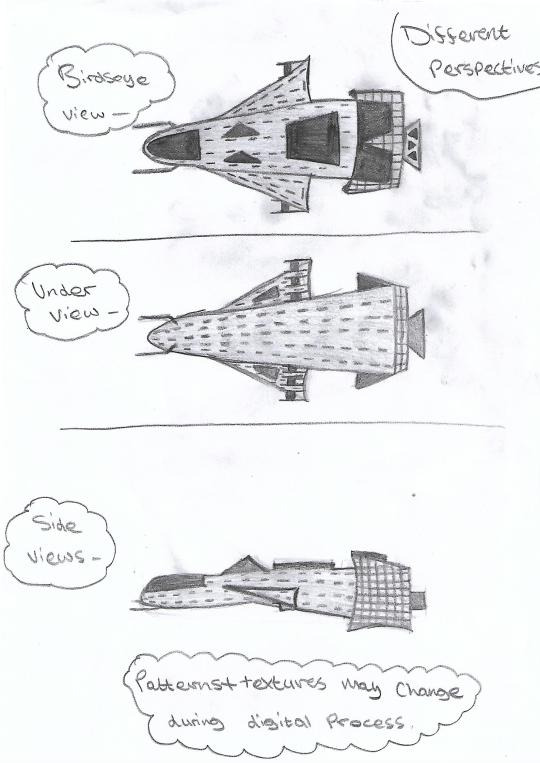
After coming up with a final design for the ship I sketched out the different perspectives as it would be created in a 3D environment.
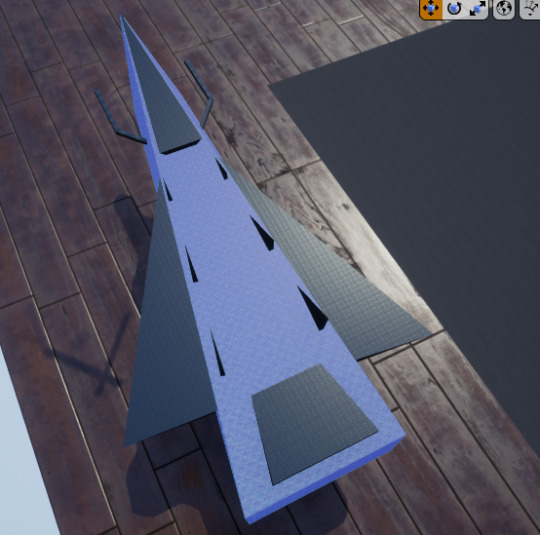
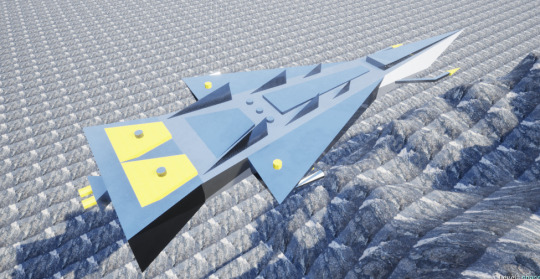
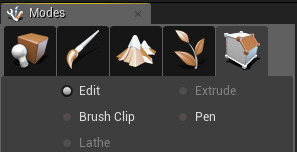
I then began to create the ship using Unreal Engine.
To start, geometry shapes were added and then edited using the geometry editor where each point of the 3D shape would have to be adjusted.
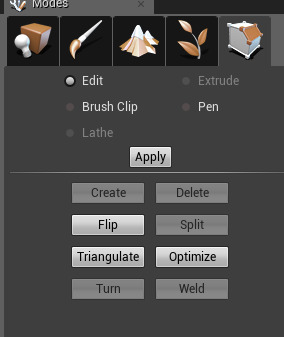
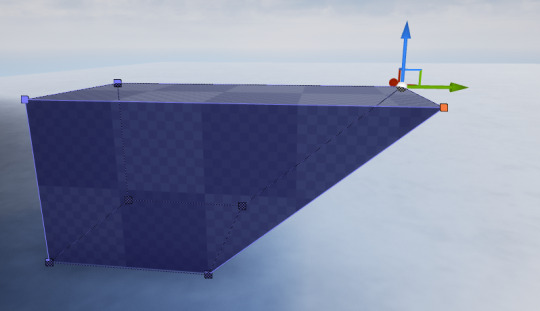
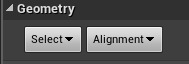
After the shape was completed I would select all of the faces.
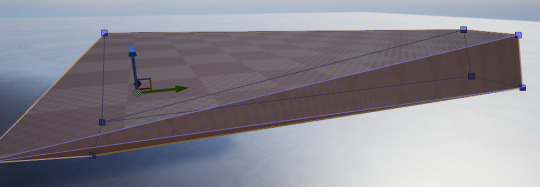
Then change the alignment settings to “Align Surface Planar” which would even out the surface so that when the material was added it wouldn’t appear stretched like the shape was.

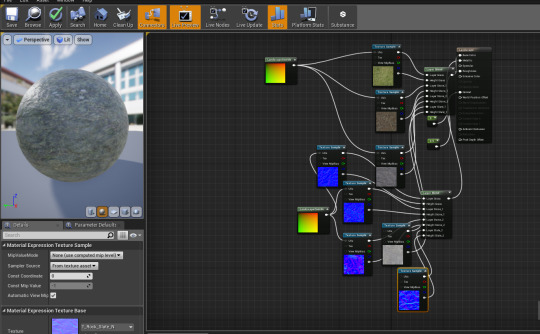
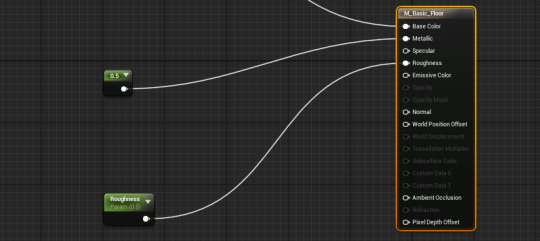
After some of the shapes were created the materials were then changed to give me an idea as of to how the final ship would look like.
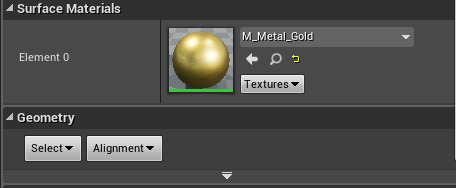
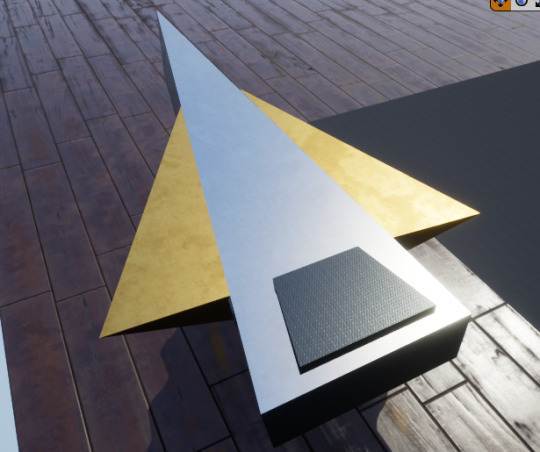
These materials were experimented with more until I found a style that I thought I could work with.
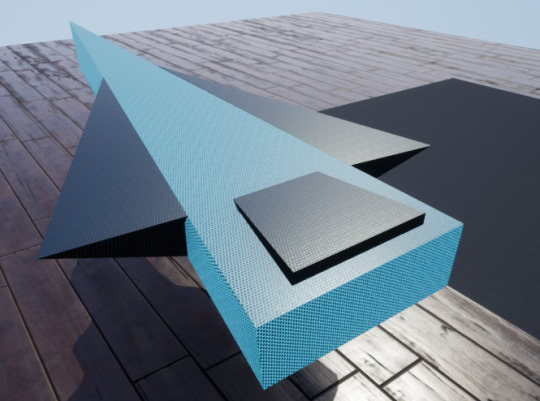
The rest of the ship was created using the same techniques with some added features that I thought would add interest.
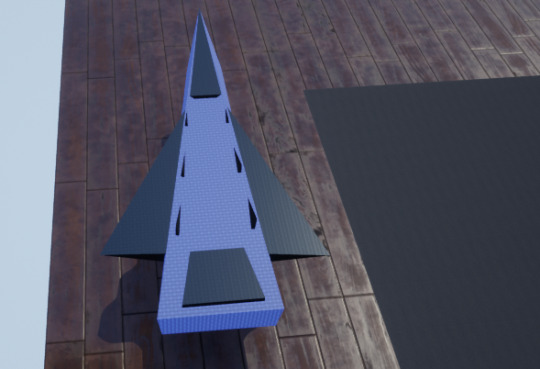
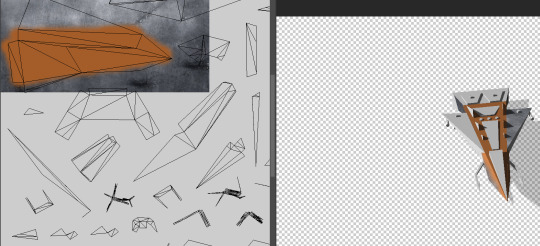
The ship shapes were then compiled into one static mesh for it to be exported as an OBJ and opened in Photoshop. This was done to experiment and create an even more realistic personalised material.

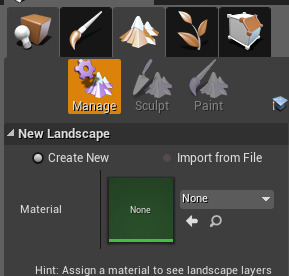
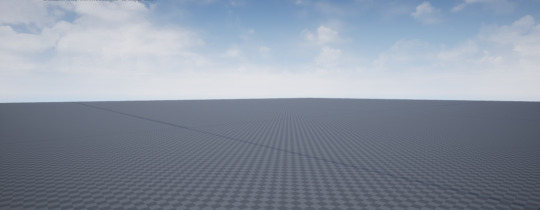
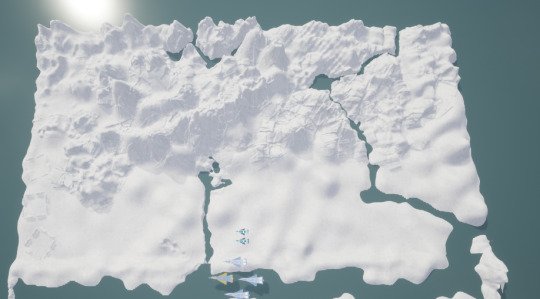
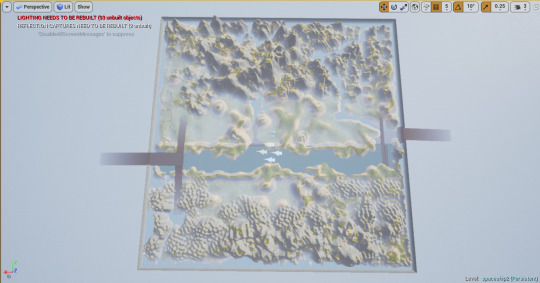
As I liked the ship how it was and time was running out I decided to begin working on my landscape. To start I had to create a basic flat landscape using the manage landscape settings.
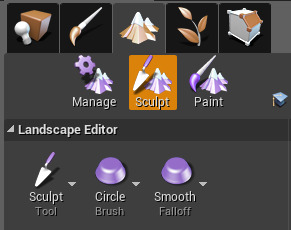
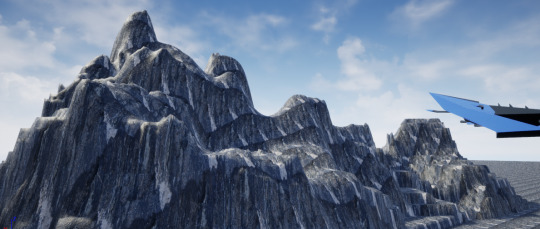
The sculpt and material tools were then used to build a simple mountain range.
Whilst I was creating the landscape the ship colour didn’t fit in with the rest of the scene so I decided to create a mood board of different ships to change the colour to make it more believable.
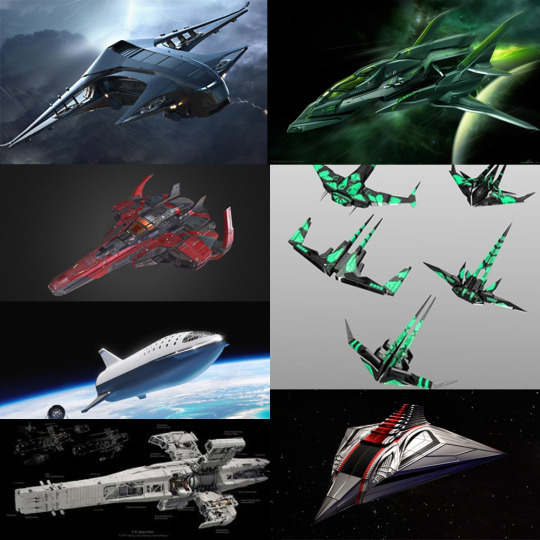
I noticed similar ships tended to include white and grey colours along with some elements of a more interesting colour such as red or blue.
I also looked up what the exterior of a standard spaceship is made out of so the material would look more realistic.
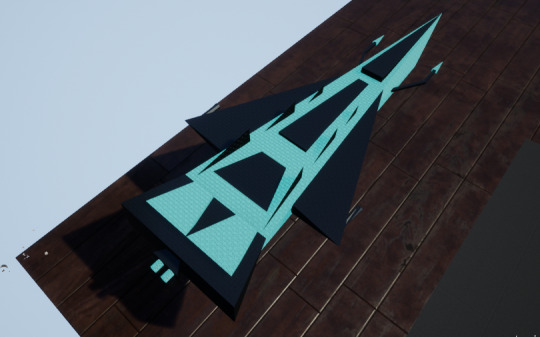
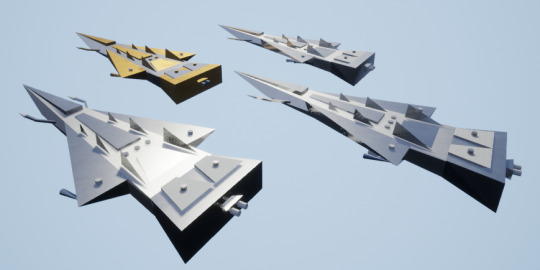
Comparing my digital ship to my drawings from different perspectives.
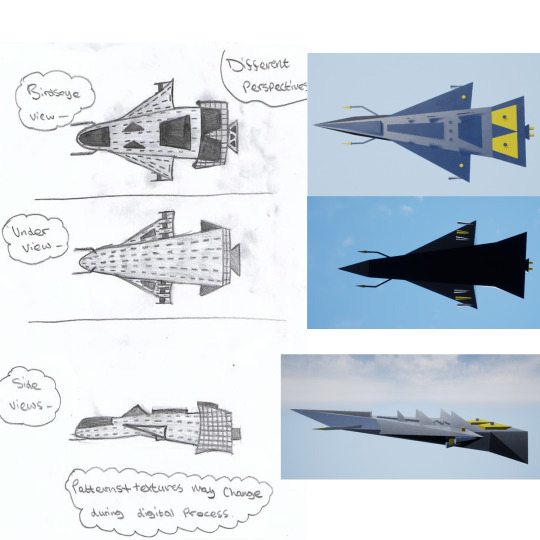
Overall the digital version looks more like an older idea which resembles too much of a jet fighter and less of a spaceship due to it’s pointed edges. However, since additional elements such as the objects coming out of the sides and from under the ship were added it still resembles something from the future to some degree which is what I was going for.
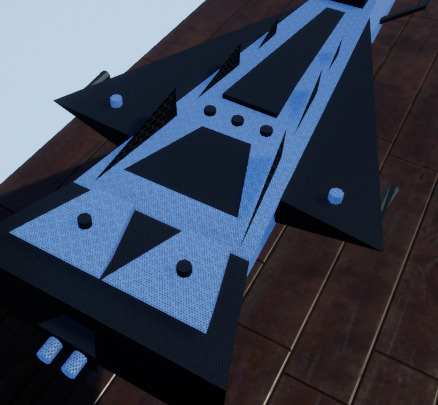
I thought about my idea more and thought that the scene would look better with more ships with one main ship standing out as this would look more interesting.
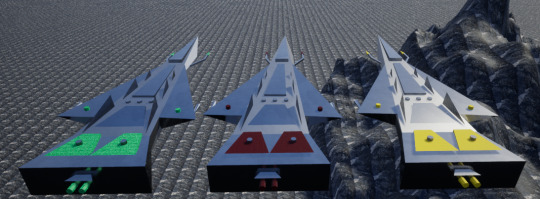
I changed the three other colours to red, white and blue as I think these three colours have really good contrast together.
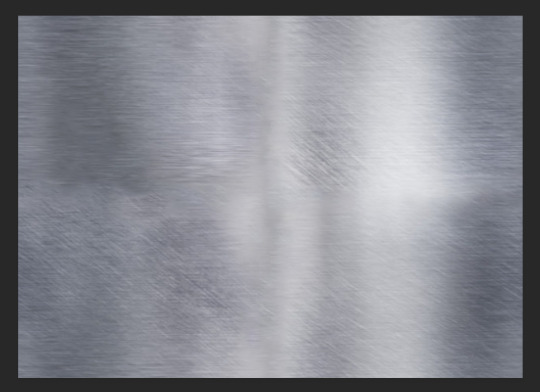
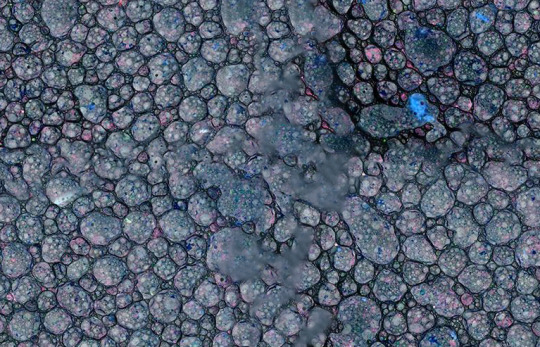
Creating metallic shine texture in Photoshop for my final ships.
By first finding an image, splitting it into four and rotating it, this was done by going to “Filter”, “Other” then “Offset” where I entered half the amount of the aspect ratios.
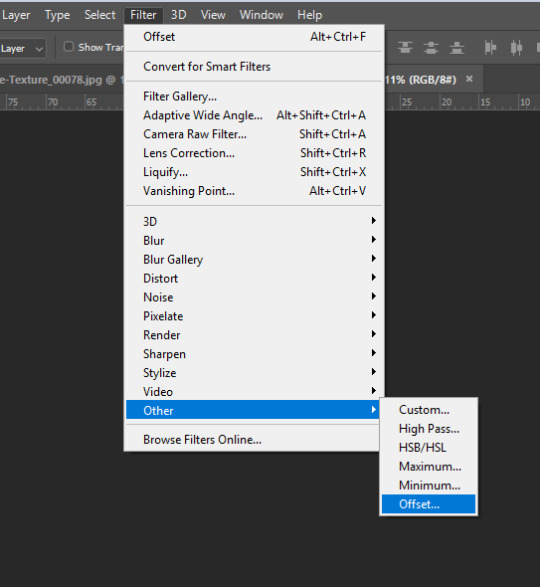
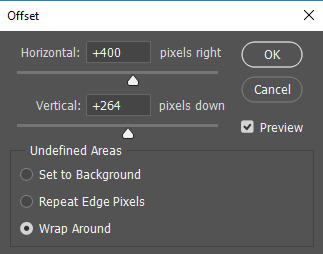
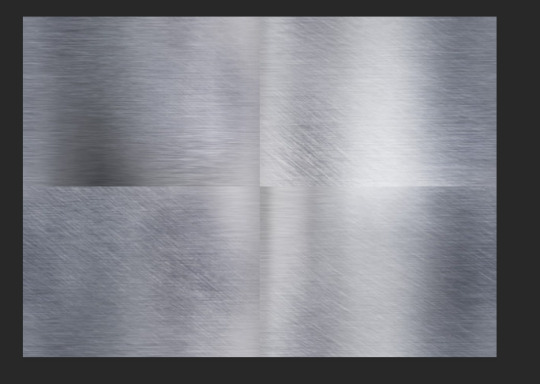
It was then blended using the spot healing brush to make the to be material seem seamless and wouldn’t be obvious that it was just the same image repeated.

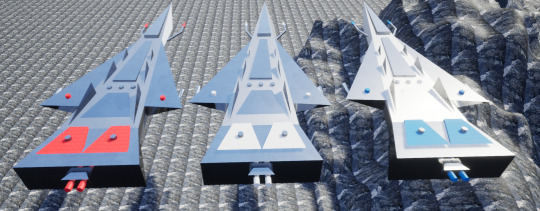
For my main ship, I decided to have half the ship be a gold material to emphasize that it’s more important than the other three.
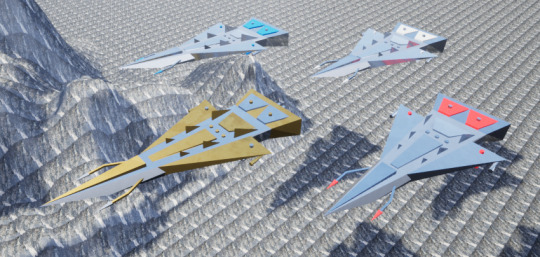
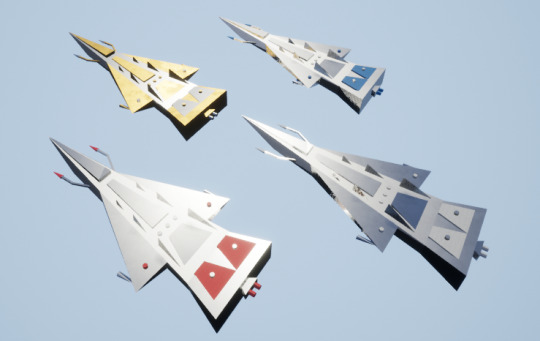
Changing other ship colours to all chrome to make the main ship stand out even more.
After I was satisfied with the final versions of the ships I continued working on my environment.

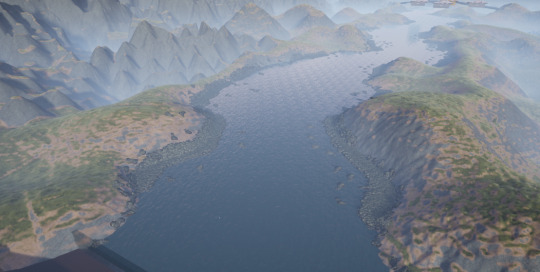
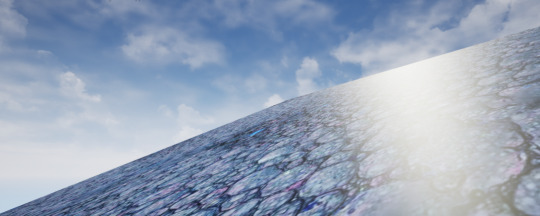
Adding streams created by sculpting out the landscape under a liquid materialised layer.
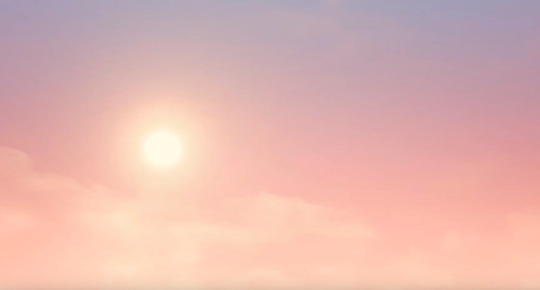
Was going to use a preset sky…
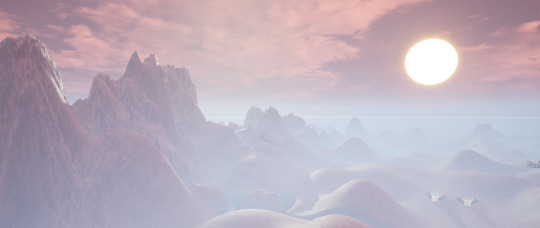
But decided against it as I didn’t see it as an asset which could be given to me if I were to do this in the VFX industry.
Instead, I tried to create a sky that I thought looked similar using the colour and cloud opacity settings.
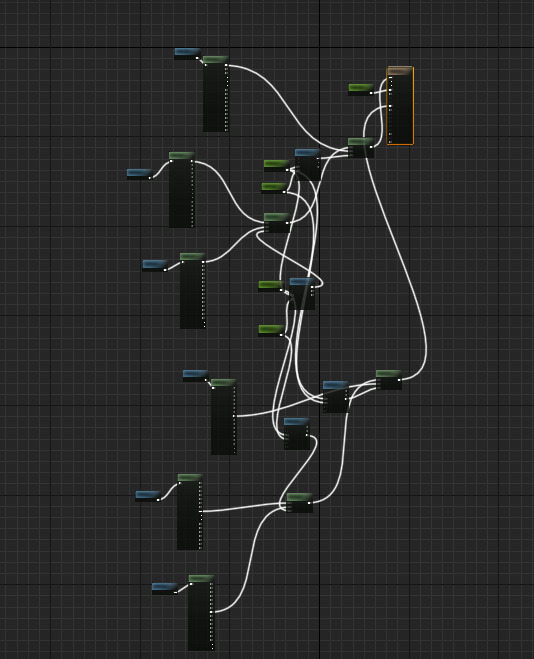
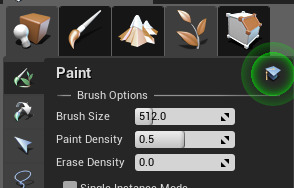
Following multiple tutorials then experimenting with creating materials to paint the landscape with.

I then added rocks along the main stream using the foliage tool.
Although I didn’t create the rocks, the way they would be distributed wasn’t pre-set, unlike the sky plugin.
I also did this to add trees and grass.
Creating a cabin asset in its own environment.
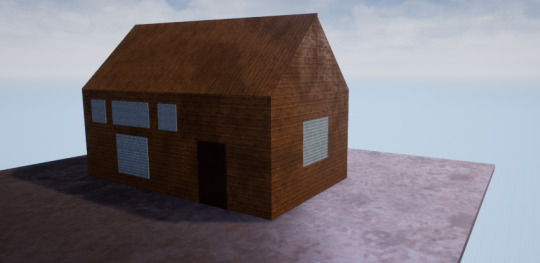
Then converting into a static mesh and importing into the mountainous environment.
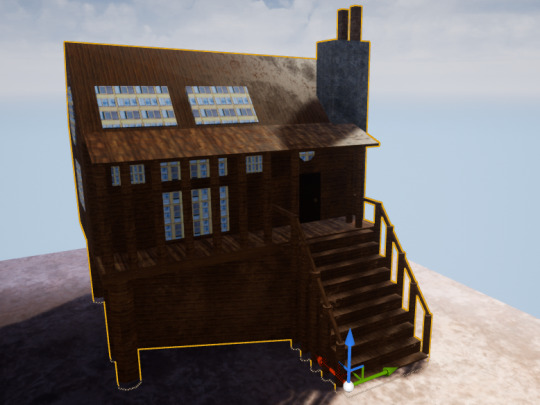
I decided to duplicate then recolour my imported cabin.
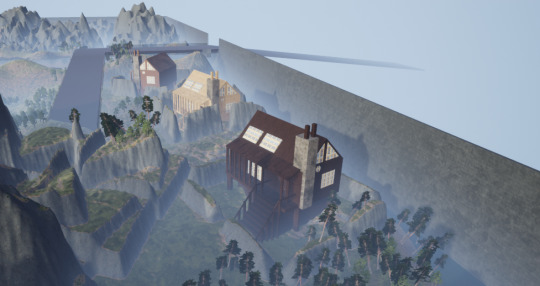
I noticed that the size was just too inaccurate after comparing them to the spaceship and the trees so I shrunk and duplicated them even more.
I thought that one side of the environment didn’t look effective as it was just mountainous like the other half and didn’t help add character to it. So, to fix this I thought I would stick with the surreal theme and try to create a castle design to be implemented.
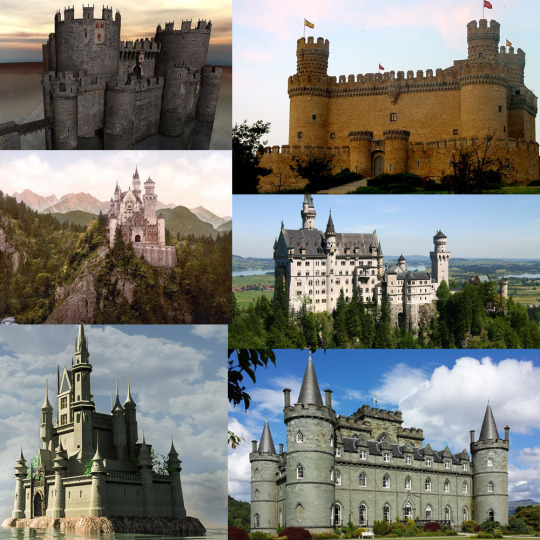
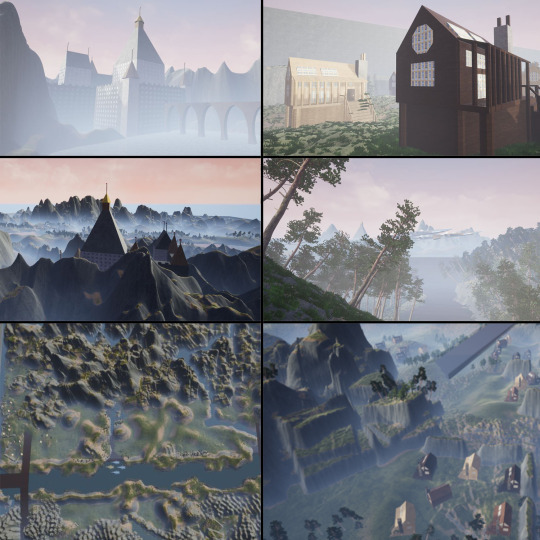
Creating a storyboard of different castles from 3D models and real life to influence and help design my own castle design.
Sketching out some ideas of the castle which could work.
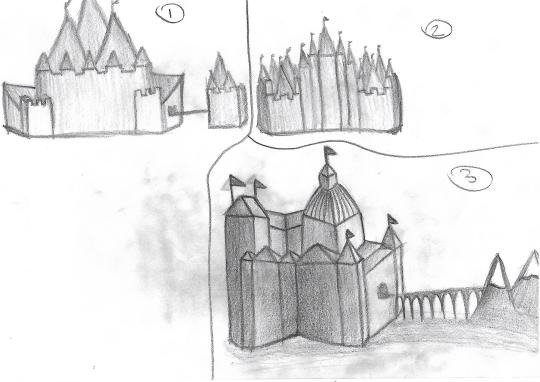
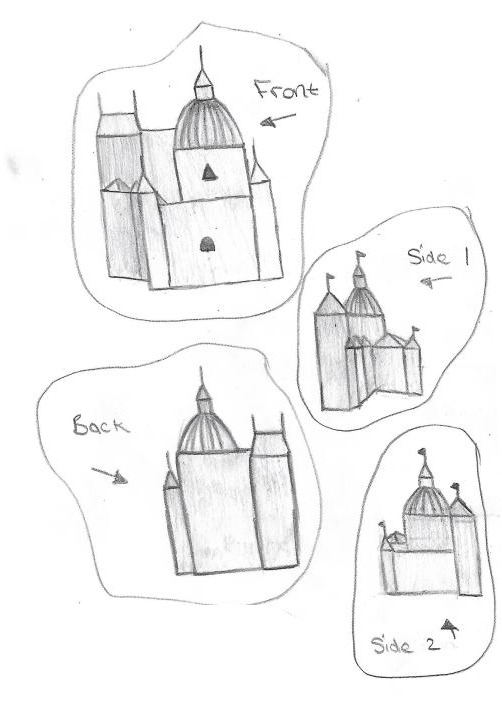
I decided to keep the design simple as I was still low on time.
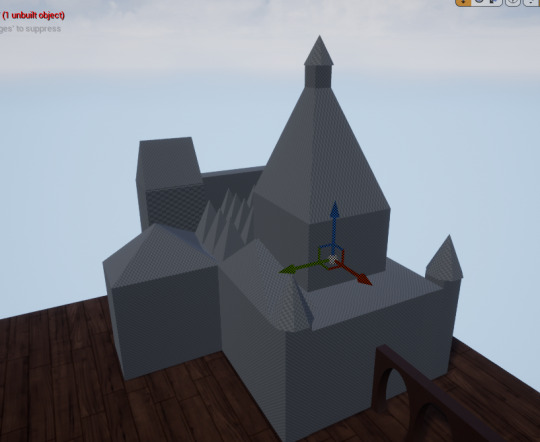
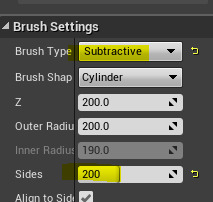
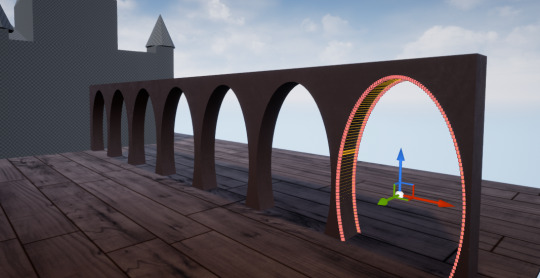
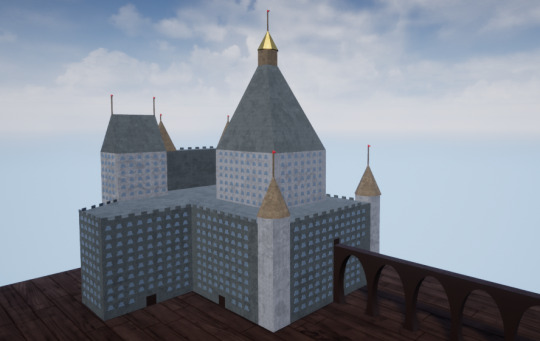
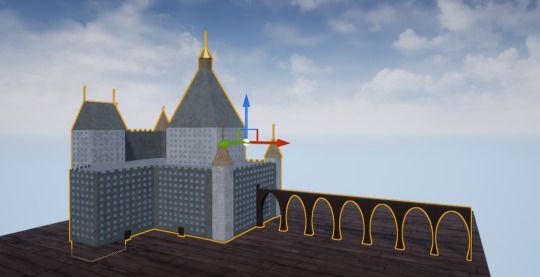
Apart from the bridge, the castle was created using the same techniques as the cabin and the ship. The bridge was created by first creating a cuboid then adding cylinder shapes with the number of sides turned up and the brush type set to “Subtractive” which removed parts of the cuboid where the cylinder was placed.
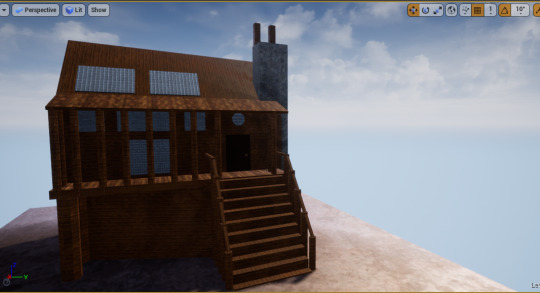
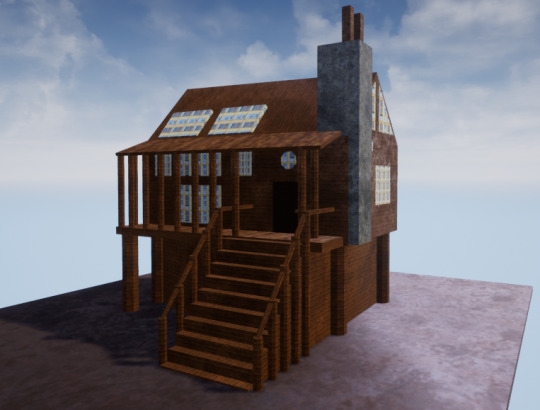
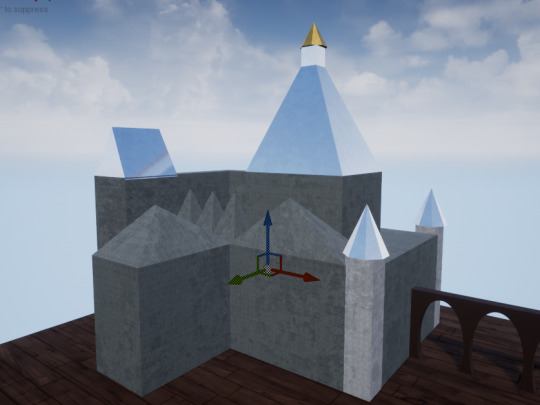
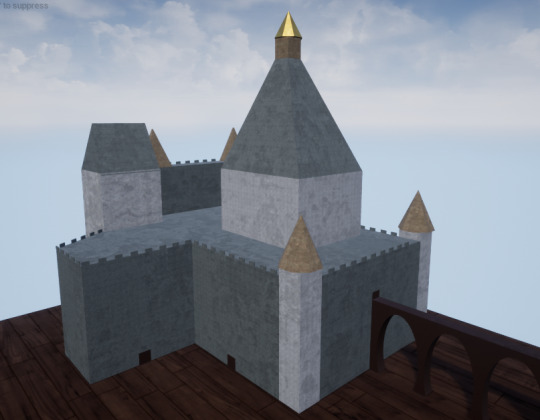
I didn’t like how uneven the castle looked or the colours which didn’t work together very well, so I experimented with the design until it looked somewhat decent.
Before -
After -
Converting to static mesh.
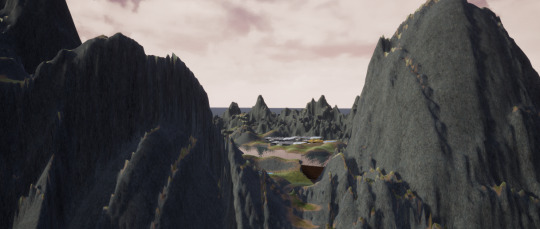
Importing into the environment -
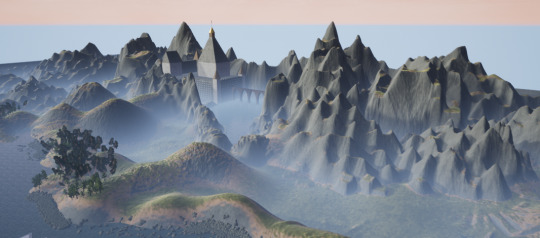
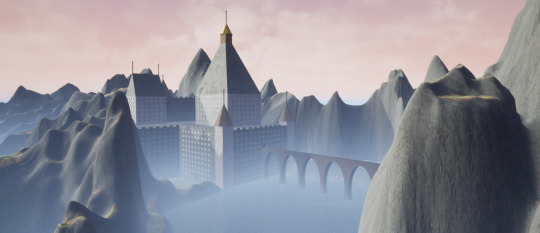
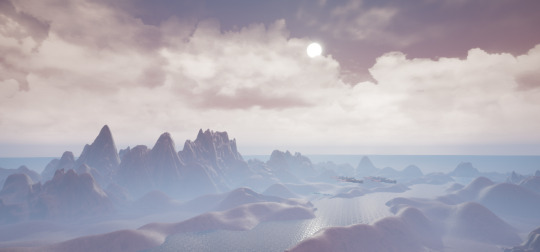
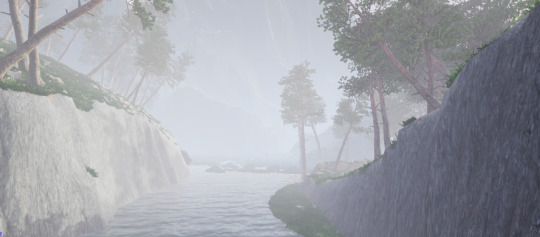
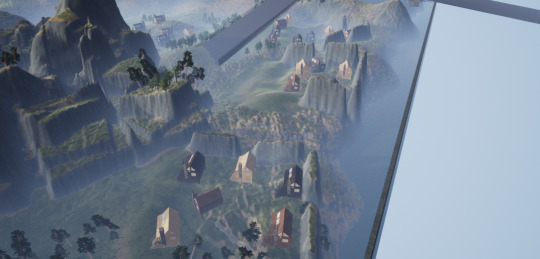
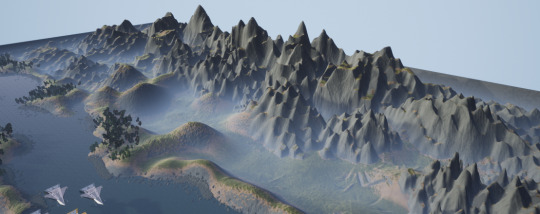
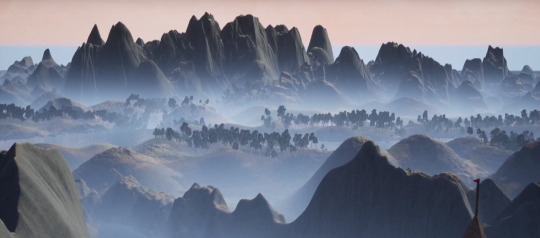
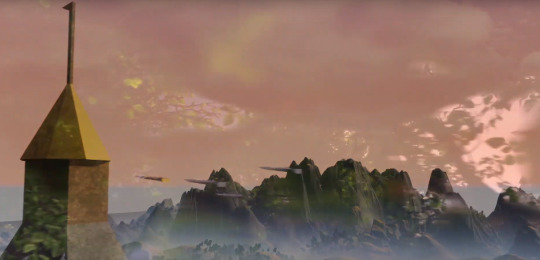
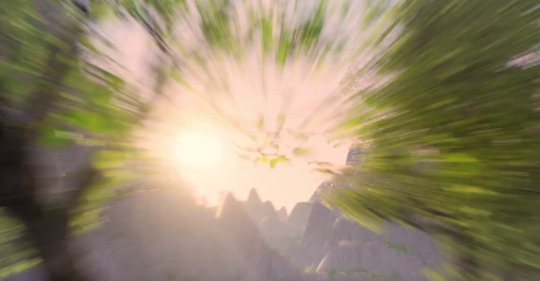
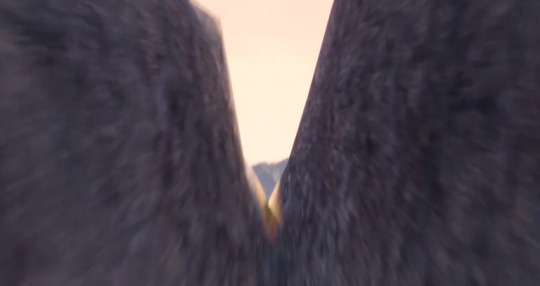
Images of areas from the final environment -
Since I planned to record my environment I looked at how different 3D environments were recorded to give me an idea of how to record my own. I liked this map reveal showing different heights through the perspective of multiple cameras.
youtube
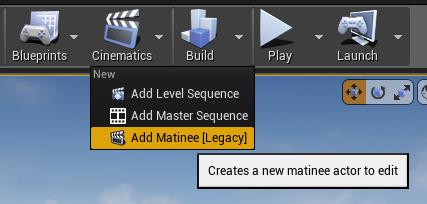
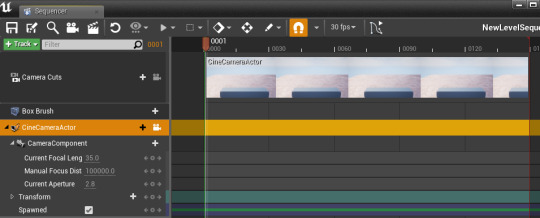
Recording the journey sequence throughout the environment in Unreal Engine using the matinee settings.

I also decided to record different sequences of areas which I thought needed to be highlighted as they wouldn’t get much film time if the environment was just recorded in one continuous journey. I would add these different short recordings between the journey so it remains interesting.
Unfortunately, during the main journey recording in, the camera kept rotating itself between two keyframes which I couldn’t fix even after replacing the keyframes multiple times. To get over this issue I thought to just replace the moment when the camera did this with other recorded sequences.
The video below is just the journey recording so the error is still visible at 1:02.
youtube
The rest of the recording sequences in the form of just one video since Tumblr doesn’t allow more than 5 videos to be embedded into one post -
youtube
After Effects -
I used After Effects to trim down the footage and make the files smaller by exporting them as a Quick Time H.264 format which changed the total size from 7.28 GB to 2.21 GB.
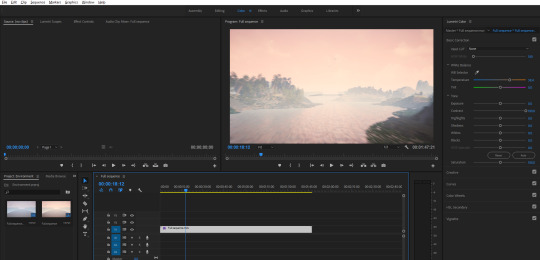
Premiere Pro -
Premiere Pro was used to put the separate recordings together, change the pace and change other visual aspects such as the colour grading, the tint and the contrast to make it look more professional.
Putting the clips together -
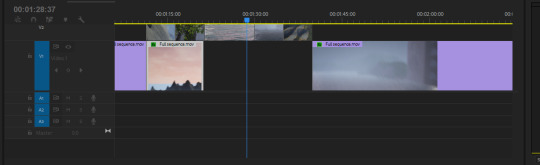
The clips were put together by placing them next to each other on a timeline and adding blend effects so that the transitions would be smooth.
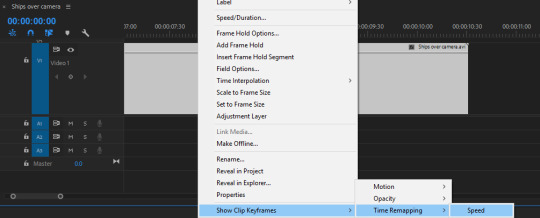
Changing the pace -
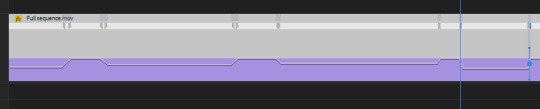
The pace was changed by right-clicking on the timeline, going to “Show Clip Keyframes”, then “Time Remapping” and selecting “Speed”.
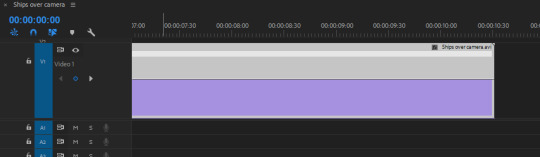
I then used the pen tool to select certain times of the footage I wanted to change.
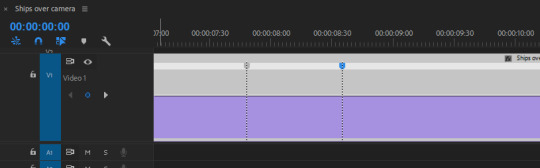
And either lowered or heightened the cutout area to change the time.
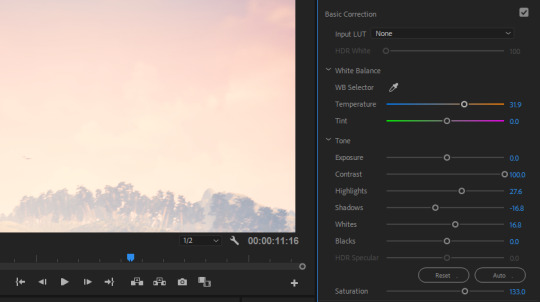
Changing the visual aspects -
I changed the visual appearance by going to the colour options

And changing the settings on the right.
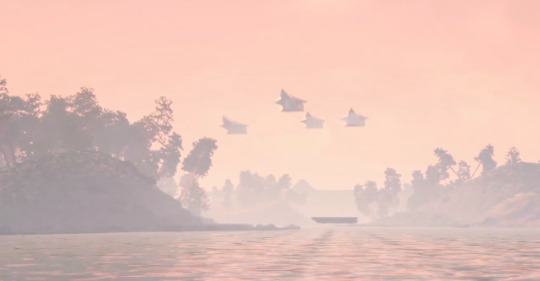
Video so far -
youtube
More After Effects to add audio -

I first imported the music I wanted to use then placed it on the timeline, I then added rainforest sounds and used keyframes to fade in and out the sounds depending on where the camera was in the scene.
Final video -
youtube
Final video on Behance - https://www.behance.net/gallery/81319421/3D-Unreal-Environment
Evaluation -
Successful?
I would say that this project was carried out successfully as I think the animation looks interesting throughout the whole duration in terms of motion and colour. The cameras showing the ships going over the water (from 1:21 to 1:27) in my opinion looks especially impactful as the combination of the two shots made it look more professional and thought out.
However, I think I could have done a better job when using the foliage tool as some of the trees are at unrealistic angles.
The mountains could also have been sculpted out more using the hydration tool to make them appear less rounded and natural.
What skills have I learned?
During this project, I have become a lot more comfortable with using Unreal Engine in general. Including how to distort and manipulate geometries, how to align panels of objects, how to experiment with material appearances, and how to record and render without external software such as OBS.
Regarding areas outside Unreal Engine, I have learned other things such as how to create my own raw materials and textures in Photoshop, and how to blend and edit videos to a much better degree than what I could before in Premiere-Pro.
What went well?
During this project manipulating the shapes in Unreal went well since this was easy to pick up and allowed me to create objects and looks which I couldn’t create before.
Another thing that went well was the recording stage in Unreal as it was, in my opinion, entertaining to carry out due to how I could control the motion and the perspective of the camera allowing me to be more specific with what I could show and how it would be presented.
What didn’t go so well?
One thing that didn’t go so well was that making the size of the environment so large caused vast amounts of foliage to be added and therefore created lag which strained the computer and showed in the final rendering of the video.
Although the texturing and materialising for the mountains looks decent, I think it could have looked a lot more realistic with overlapping the textures and having less consistency.
After reviewing the final animation even more, I noticed that the camera seems to appear sharp and jittery in areas where too many keyframes were added, this causes the flow of the animation to be halted for a brief moment causing the viewer to be taken out of the journey through the environment.
What I would do differently next time
Following on from the point made about the jittery camera movements I think next time I would have to try and use less individual keyframes within short durations.
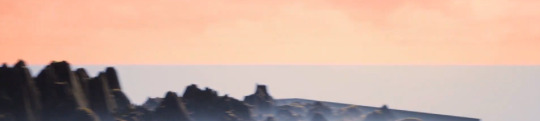
In addition, when looking at my environment from a higher perspective like shown at the end of the video, the horizon line is flat causing the piece to look smaller than what it actually is as well as it looking unfinished and obvious that the landscape is computer generated. So, to fix this for next time, I could make the landscape larger and sculpt the horizon line or I could create or find a landscape image which blends into my environment background like a matte painting.
0 notes
Text
Pitch and development
Coming up with three different ideas
Idea one -
The first idea is to add textures and other elements to buildings, characters and general environments using Photoshop to create something surreal. I would have to borrow a camera from College and take pictures around Nottingham to capture the raw footage.

What is the theme?
The theme would probably be eerie as I think this would allow me to experiment the most with the atmosphere and add multiple elements such as mist and possible cracked textures on buildings.
After looking at multiple examples of different eerie scenes they tend to be situated in more rural areas so I would have to take this into account and maybe focus on the older and out of the way locations, for example, certain churches around Nottingham.

Why this idea?
I think this idea could look really effective if carried out well and think that it also relates to my specialist VFX subject as the backgrounds could be used as some sort of matte painting. If my idea was to create a matte painting, I would probably have to capture locations from a further distance.
Who is the audience?
The audience for this idea would definitely depend on what theme I was going to carry out but in general probably someone who can appreciate detail and who understands what makes up the effects so they’d notice all the added features, so probably a more mature viewer.
For an eerie theme, the audience would probably be someone who likes a more mysterious environment with less distracting objects and focuses more on asking themselves questions about the image such as where it is and why little is happening.
What is the purpose of this idea?
The purpose behind carrying out this idea would be to experiment with different Photoshop techniques to create the most realistic effect and paying attention to detail. This would also give me even more experience with camera work and composition. This idea could also include compiling different individual edited characters into a scene and seeing how well I could implement and blend them in which would cause the characters to follow the same theme as the background.
This idea could be to be used as some sort of still advertisement for an upcoming film or for an event. The idea could develop into a poster causing a title to be added which I think would also look intriguing.

Idea two -
My second idea was to use a camera again but this time to record different areas around Nottingham and add 3D models into the film, the 3D models would either be simply downloaded and imported or created by myself using probably Blender. To have the motion of the object this could have to be done using After Effects where the spaceship would have to be moved across the screen using position keyframes, the ship would also have to be masked out during some parts to give the impression that it’s behind buildings.
It was suggested that a 3D spaceship could be added going across the sky above the council house where I would have to focus on depth, timing and lighting to make it look as believable as possible.

What is the theme?
The theme for this second idea would be unearthly and dramatic. These themes would be chosen as it would relate to the 3D object being imported (the spaceship) and would also help fit the slower paced timing of the idea.
What will I be creating?
For this idea, I would probably be creating a 3D model as well as the raw footage for the recording/s. When the two are combined it should look like something that could be in a live action sequence combining real life with CGI.
Since the outcome would be in motion it would be expected that audio would have to be added, this would probably include the original sound caught from the camera, other added street sound effects, loud engine sounds for the spaceship and probably some faint dramatic music to help elevate the tension and make the atmosphere stronger.
Why am I creating it?
Out of the three ideas, this one relates most to how VFX is commonly used today. It would also help me get an idea of how 3D models and effects can be purchased and used in different ways, as well as generally knowing how expensive certain assets are. I would have to focus heavily on lighting and shadows as through research I’ve realised that these are two of the most important aspects when it comes to making things look believable.

Who is the audience?
The audience for this idea could be someone who likes slow and dramatic sequences as well likes the more science fiction type of movies so they can be more engaged.
What is the purpose of this idea?
The purpose of this idea would be to make me experiment with different software such as Blender and Unreal where I would learn some new techniques as well as how to export and import certain assets to a film. This sort of idea could be for a small scene in a live action film.
Idea three -
My final idea would be to create my own 3D environment including objects such as houses in Unreal Engine. After the final environment is created it would be recorded using the matinee sequence recorder in Unreal.
It would be nice to have the final piece coming out looking as realistic as possible but the clear cartoon CGI environment also I think would look effective.
More realistic -

More animated CGI -

Like the other idea as it’s in motion, audio would have to be added, in this case, audio would probably consist of forest/jungle noises as well as traditional music to set a more adventurous theme.
What is the theme?
The theme of the final idea would be adventurous with earthly nature aspects but overall has a science fiction vibe, this could be done by creating and adding simple spaceships going around the environment.
What will I be creating?
I would be creating a sculptured materialised landscape along with aspects such as water and bridges where it would be recorded using the recording sequencer in Unreal Engine.
Who is the audience?
The audience for this idea could be someone who likes to explore and has a creative imagination. The age of the audience could depend on how real the final environment turns out whether clear cartoon-like CGI for a younger demographic or realistic for an older one.
What is the purpose of this idea?
The purpose of this idea would be to learn even more techniques regarding Unreal Engine such as sculpting out scenes and recording in the software.
0 notes
Text
Investigate and practice
What materials will I need to use (traditional and digital)?
For my materials in the more traditional sense, I’ll need paper and a pencil to draw out my original ideas where they would then be developed.
For my materials in the digital sense, I’ll need reference images to create a mood board and gain inspiration, I’ll also need different software either being Blender or Unreal Engine to create my 3D object/s and environment depending on which I think would work better for my idea. Photoshop may be used to add certain textures to the 3D objects, and finally, since my idea is to be recorded, After Effects will probably be used to make the animation include more motion and help emphasise features if required.
What techniques do I need to know?
For the techniques that I need to know, I’ll probably have to imagine and draw out how my objects and environments would look from different angles and sides as they would be 3D.
A technique for my software that might be used being Blender and Unreal I’ll have to find a way to be able to distort and manipulate shape points to create more unique looking objects to better fit my idea.
From my research, I figured that I’ll have to find out which recording will create the best effect by either keeping the camera still as the scene moves or more likely have the camera also moving around the scene. Staying on the topic of the camera, I’ll have to think about whether more closer up shots would work better or more further away, as the scene is probably going to be a landscape far out shots would work better.
My research also told me that light was very important so I will take this into consideration during the recording process and when adding effects to make sure that some areas aren’t overpowering others.
What would I need to do to plan and prepare for a successful outcome?
To achieve a successful outcome for this project, I will, first of all, think through my idea and see whether it’s possible in the time frame and plan how much time to use on different stages of the process. Another initial thing I should think about is whether the software I will be using can actually produce what I want it to.
I’ll also have to develop my ideas until I’m comfortable enough with a design that I think looks effective and interesting but not too complex so that creating it in Unreal or Blender will be feasible.
As well, I would have to experiment and practise more in the 3D software/s so that I can achieve my desired look.
For the recording, I will have to imagine and determine where the added effects will be included for when using After Effects, this is so that when I control the camera it will show the areas where the most motion will be added.
After having created my environments and object using shapes, I will have to experiment with different materials and colours to see which looks the most effective.
Time schedule for a plan -


Possible initial broad ideas -
Texturing a face or building using Photoshop or changing more drastically.

Creating a 3D environment for like a matte painting still scene. Or motion through the scene with moving objects.

Practising -
I first wanted to create a simple environment where the project would take place, I knew that for one Idea a general simple mountainous landscape would work well as to me they seem impactful and interesting to look at.
Experimenting with unreal -

youtube
After experimenting with Blender and Unreal Engine the software that I think would work better for my project is Unreal Engine as I have used it before and feel more comfortable with it anyway. I also think the ability to move around is much simpler and efficient which will save me time.
Practising with Photoshop and applying certain textures to characters -
Before -

During -

After -

0 notes
Text
My specialist practice
What is an animated VFX artist?
An animated visual effects artist usually specialises in creating and or manipulating imagery or video using computers then adding them into live action shots to give the illusion that someone or something real is interacting with something else that if done using no technology would be much more difficult to do. Timing and physics also play a crucial role in VFX as they’re required to help achieve the most realistic effect.
Common materials and techniques used in VFX
Software used in VFX often has to have the capability to work with 3D software and multiple layers, these softwares include but are not limited to 3D Max, After Effects, Boujou, Cinema 4D, Maya and Nuke.
Common techniques include green screening where something or someone is filmed performing an action in front of a screen of one colour. Due to the green screen, the action in front of the screen can be put onto its own layer then placed in front of another background. Motion tracking is often used also but for more when someone or something real is to interact with an object, motion tracking can also be used to edit the position, scale, orientation, and overall motion.

Matte painting is used to combine two or more different images/scenes into one such as placing actors into background images. Often used to create the illusion of a setting and is used in almost all live-action films. Matte paintings are now often created in computer programs but originated as actual paintings which were added to photographs.

Physical simulators are used to create dynamic simulations which are often very hard to pull off and are common amongst big budget movies such as 2012.

Rotoscoping is another technique used by VFX artists where something real is recorded and the artist goes over the object or character to get the correct motion and be able to be as accurate as possible.

History of VFX and How long it has been practised
VFX first started to be used in films since the late 1800s, although not digital, props were used to change how something appeared, for example, Georges Méliès would use cloth or card to cover part of the camera lens to prevent light reaching areas of the film.
youtube
In 1975 Industrial light and magic founded by George Lucas used computers to create VFX in the movie Star Wars. the computers would be used to control the cameras and remember the movements used by the VFX teams. This was done so that a camera not in motion wouldn’t have to be surrounded by moving objects to create the same effect. So far Industrial light and magic have worked on over 300 films which gained them vast amounts of experience to make their VFX look more realistic than before.

In 1982 for the film Tron computer animation was used to help develop the plot and characters. Tron also used an effect called backlit animation which shined light and therefore, creating a glowing light on the characters and the background.

For movies such as planet of the apes and Godzilla, actual people in costumes and sometimes animatronics would be used to form characters as this would still look the most believable at the time. Decades later during the remakes of the movies, full-motion tracking was used to create the character’s appearance.
This method goes far back as 1938 where the voice actors for Snow White would also act out the scenes in front of the animators to give them a better understanding of how certain actions would be carried out.

21st century VFX -
colour grading -
Although colour grading had been used in previous movies for large shots and in some scenes it was during the 2000s that this is when a full movie was colour graded using computers. Now almost all movies have colour grading created digitally to create certain atmospheres and moods.
Water -
Before the 2000s it was near impossible to create water that looked fully believable but during 2000 industrial light magic created a solution to combine the two approaches of calculating particle by particle and considering all of the fluid at once. This required the use of volume calculations for larger portions of the water and droplet type simulation for when they broke down. This technique was first debuted in the 2000 film The Perfect Storm.

Artificial Intelligence -
This method was first used in The Lord Of The Rings to generate large battle sequences instead of hiring thousands of actors. Each character would be randomised with their size, proportions, and outfits all being different. Each character would then be given a range of actions for them to perform in a time frame.

Universal capture -
Multiple 3D scannings of the actor speaking and/or carrying out actions from different angles would be recorded where each different pixel would be motion tracked. This would allow the VFX designers to apply the same face to 3D models.

Live rendering technology -
This technique was first used on the film Avatar which took over 10 years to make, this technique allowed James Cameron to stage his motion-captured actors and in real time watch the simplified CGI performances created from their movements. This technique changed the VFX industry so guessing and measuring weren’t needed as there was real-time feedback.
Avatar was also the first film to involve a motion tracked dummy camera which would be used to control a virtual camera so operators could film scenes and watch them at the same time on their monitors.

How is my specialism practised today?
VFX is used almost all of the time in different media such as games, animation, and most if not all live action films. In films specifically, it’s important that they do well at the box office as it keeps the VFX industry afloat, research reveals that this is not in danger as in the U.S. and Canada alone they earned $11.8 billion in ticket sales for 2017 and in 2018 $11.9 billion. All of the top 10 highest grossing films in the U.S. were either VFX heavy or computer-animated films. Many of the most popular streaming shows also relied heavily on the use of VFX. VFX is being used more and more within movies, to compare the Titanic in 1997 only had a total of around 300 VFX shots and Infinity War in 2018 had over 3000 which has become the standard. This creates more jobs to work on the films and also higher wages for the VFX supervisors as the budget becomes a lot larger and having them supervise more artists.
New technologies are also being created to be used by artists to design virtual reality visuals and general 360 videos so it’s common for artists and coders who also work on the team to learn the new software and use it to their advantage.
The future of the VFX industry -
It’s expected that demand for VFX will increase over time as more movies with higher budgets are made, it’s also thought that the industry will focus more on creating more realistic CG human characters which can replace the actor, the best example of this happening now would be the CG Paul Walker in Furious 7 in 2015. However, as demand increases the technology will also develop causing workers to have to be up to date and learning the new software. A lot of people also do VFX as a second job as the financial intake can be unstable.

The people in the VFX industry
The general income -
It mainly depends on how much experience one has in the industry and where the workplace is located. Within the first year, it’s expected to be only around £15,000 to £17,000. From one to three years in the industry, the average salary is to be around £27,000. A mid-level artist with four to seven years experience can earn around £38,000. And a senior VFX artist with over seven years could make around £54,000. These numbers are just by experience but there are multiple other factors which can affect the income of an artist such as the role they carry out.
The roles -
Runner -
Using VFX to create multiple outcomes for a company is all about teamwork comprised of people at different levels. When first going into the VFX industry it’s likely the person will start off in the “Runner” role which is an entry-level position. Runners are just general helpers at the studio with duties that may not be technical but can practice and learn from the more experienced VFX artists. This role normally is more common amongst people who may not have a somewhat relevant degree in the industry but have a decent portfolio that portrays their passion and interest for VFX. Runners only tend to make around £15,000 to £17,000 per year until they’re promoted which can take a few months or a few years.
VFX artist -
The next level is where you would find the artists who carry specify in certain areas such as rotoscoping, matte painting, 3D modelling, compositing artists and prep artists just to name a few. These are the main people behind the actual visuals for a project using their skills either learnt from a degree or taught from the previous artists when runners. At this stage, people would make around the amount of £25,000 to £30,000 depending on the company.

VFX Director -
Above the main artists are the directors. There are many different types of directors, for example, a pipeline director uses their coding skills to come up with scripts for the artists to use. A shader development director uses their skills to write codes to describe where and how lighting reflects from 3D objects onto different materials. Some directors specialise in rigging by also possibly creating the textures and muscle structure for certain characters. Another type of director goes by the title “assistant technical director” who maintains tools and scripts as well as helping out the artists when needed, they also render out quick time videos for people in higher stages or clients to review. The average salary of a VFX director varies from £40,000 to £60,000 depending on the role.

Production coordinator -
The next stage goes by the title of a production coordinator which is a specific role often not carried out by people who have worked in previous lower roles. The production coordinator’s job is to collect data and updates on tasks and feedback to work in progress. They pass along information from the client to the rest of the company and vice versa, this could be the idea of changing deadlines. The average salary of the production coordinator sits around £25,000 to £30,000 which is one of the reasons why this stage is not offered very often to lower roles.
VFX producer -
The producer works very closely to the person/people of the highest role to manage the whole VFX production process, defining what sources are needed and hiring new VFX artists and staff. They have to be able to listen to the client requirements and listen to the needs of the artists. The average salary for a VFX producer is between £50,000 and £70,000.

VFX supervisor -
The supervisors in larger studios take charge over individual departments such as a CG supervisor. Normally there are also supervisors over the whole VFX production who are normally hired by the directors of the TV show or movie or by the VFX company they work for that has been asked to carry out the production. A supervisor will have years upon years of experience with strong artistic, technical, and communication skills. The average salary of a VFX supervisor is between £80,000 and £120,000 depending on multiple things such as the size of the project or actual worth of the supervisor if they have a lot of credit to their name.

VFX pipeline and workflow -
Stage one, pre-production -
Research and development -
The first stage is research and development where it’s figured out which software/s and technique/s will be used along with how long it will take so they can estimate a deadline time to tell the client. During this stage, it’s taken into consideration what plugins will have to be used, a lot of plugins for films with a larger budget have to custom built and it’s normally the programmers, artists, mathematicians, and scientists who develop these tools to use for the rest of the project.
Pre-Visualization -
Pre-visualisation is where rough sketches and storyboards are converted into quick low quality 3D animated backgrounds to help give the directors of the project and idea of how the final piece could look.

Stage two, production -
3D modelling -
This process happens during all three stages of the production with different amounts of detail being developed depending on the stage the team are on. Like mentioned previously if the team are on stage one low-quality 3D models will be used and then perhaps built upon from there if the design looks workable.

Matte Painting -
Although most of the background is already 3D modelling, matte paintings are still used for certain aspects in the far distance such as buildings or sky colours. Matte Paintings can also give an idea to the 3D modellers for how the scene could look.

Reference photography -
During the recording process of the actors, certain VFX members will be on set to take pictures of the stage, props and the actors themselves for reference. These images can be used for the artists to think of possible sizes and textures and see how it can react with the light source/s depending on where it’s coming from.

Stage three, post-production -
Scene preparation -
Scene preparation is to prepare the provided footage for elements to be inserted in. This could be done by motion tracking, rotoscoping, keying or colour correcting.
Motion tracking -
Motion tracking tracks the 3D motion of the footage to simulate the camera movement so objects can be placed into scenes convincingly. Without this VFX that gets implemented whilst the camera is moving wouldn’t look as convincing and wouldn’t look seamless.

Colour correcting -
Colour correcting is the process of adjusting the light and colour profile on objects. This has to be done per shot to make the effect look consistent.
Colour grading -
This is something that’s carried out at the end of the project to also highlight certain areas but as well give the piece a more polished and finished look.

Rigging -
Rigging is to make the motion look far more realistic, an example of this would be making the limbs of a person rotate around the joints.

Animators -
Animators are the people who give the motion to the rigged objects to help portray the character's personality.

Polishing effects -
Effects and simulation -
The simulations mainly consist of explosions, smoke, and water which are made to be as realistic and believable as possible. Adding these effects requires a good understanding of physics and how certain forces could impact the look.

Texturing -
This is the step where surface colours and textures to the 3D models are added, this could be to give a certain metallic shine or just the look of human skin.
Final lighting -
Lighting is one of the most important stages of the whole project as poor lighting could be an easy giveaway that CGI has been used and make the piece look less believable. Because light during the day is much harder to replicate most of the shots where CGI is used is set at night.

Compositing -
Compositing is the final stage where all the created assets are put into the original recording with the actors by the compositor and the visuals for the project is complete.

Some key “individuals” in the VFX industry -
For my first “individual” I have decided to focus more on a company rather than a specific person for my research of as it would be easier to track the process with VFX not generally being carried by just one person.

The company hires more than 1,000 staff from VFX supervisors to Scientists to create the most realistic display, a lot of the VFX supervisors have multiple degrees to have the best understanding of how the industry works and what creates the best effect, for example, Habib Zargarpour has two bachelor’s degrees, one being in applied science and mechanical engineering and the other being for industrial design. Zargarpour was also the main person behind the water look used in The Perfect Storm as already mentioned.
The process of how one of their films gets created goes as such;
The script gets written
Sets of storyboards are created for each individual shot, if two characters are talking to each other and the camera focuses on one character then the other this would be considered two separate shots, this can cause a film to easily accumulate over 2500 shots. A lot of the time also during this stage very basic 3D animatics are generated carrying out the whole storyline then shown to the director/s to get confirmation that they have the correct ideas before more time is spent developing.
The film team then splits into several groups with one focussing on the designing and construction of the set. Another group starts the research and development process for the elements for the CG shots. Another group starts preparing all the shots for any scenes involving stunts. One group that focuses on the physical aspects such as animatronics to be used in the film. And the last of the groups prepare the cameras, lights, and sound equipment for different shots in the film.
The actual recordings for the film are then carried out.
CG elements and live action elements are added with some of the footage being removed such as cables and lights.
All of the shots and recordings captured are then placed together to create the story.
Possible sound effects are added and exaggerated.
Light and Magic example -
youtube
Key Individual -
For my individual, I have decided to research Joe Letteri born in Pennsylvania, The United States during 1957. Letteri has worked on numerous films such as Avatar with James Cameron, War for the Planet of the Apes, King Kong (2005), as well as multiple Lord of the Rings sequels, for some of these movies and more Letteri has won four Academy Awards, four BAFTA awards and four VES awards.

Joe Letteri would work closely with the director and producer of the film (as a VFX supervisor should) to create the best looking final project. Letteri would sort out which VFX is needed for each shot which would impact how the footage would be recorded. Next, Letteri would then work with his team to create a simple prototype animatic for the director and producers to examine.
Once the ideas of the designs are approved by the director and the producer, Letteri would work with the director to plan every shot during the film, this would require certain footage to be recorded in different ways as it would make the process for the VFX artists much easier.
Letteri would often rotate between set and studio (if not using live render technology as previously mentioned) to make sure that the techniques and technologies are being deployed correctly until the project is complete.
The role that Letteri fills requires a thorough understanding of 3D animation software and a very good understanding of current filmmaking techniques. Finally, Letteri needs good team leadership skills to be able to supervise a large team effectively with clear communication.
Joe Letteri work example -
youtube
Example of work from an independent (Samuel VIčan) -
vimeo
Looking at the three different examples of work it’s clear that it’s more of a long haul task with most of the time multiple people working on one project at once and if being carried out by an individual the quality of the final outcome will generally be lower than that of a team.
It’s also apparent that lighting, environment and good camera angles are taken into consideration when creating the visuals and play a larger role than I once thought.
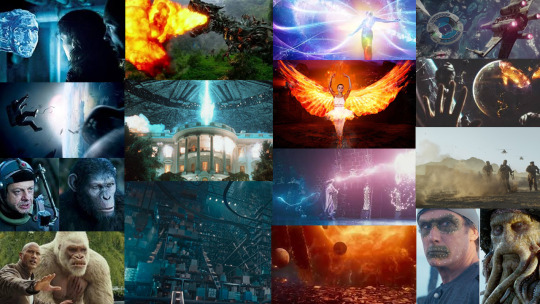
General mood board containing different lighting, environments and textures -
Sources -
History of VFX - https://www.youtube.com/watch?v=tsDdAXKtYAE
21st century VFX - https://www.youtube.com/watch?v=G0cPeEAhzWU
VFX Pipeline - https://myfirstjobinfilm.co.uk/resources/careers-guide/detail?page_id=1
Jobs in VFX - https://www.screenskills.com/careers/job-profiles/animation-games-and-vfx/vfx/
VFX techniques and process - https://www.premiumbeat.com/blog/how-an-average-vfx-pipeline-works/
Light and Magic research - https://entertainment.howstuffworks.com/perfect-storm1.htm
0 notes