
Don't wanna be here? Send us removal request.
Statistics
We looked inside some of the posts by aioome2 and here's what we found interesting.
Average Info
Notes Per Post
0
Likes Per Post
0
Reblog Per Post
0
Reply Per Post
0
Time Between Posts
7 hours
Number of Posts By Type
Text
17
Last Seen Tumblr Blogs


Fun Fact
The “We are the 99%” Tumblr blog became the slogan for the Occupy Wall Street movement.
Text
How to Achieve Top Google Ranking for Ecommerce (Secrets of SEO)

Ranking Number One on Google: A Guide to Boosting Your Website's Visibility Introduction Ranking number one on Google may seem like an impossible task, especially with all the SEO experts out there claiming to have secret powers. But the truth is, it doesn't require supernatural abilities. In fact, it's all about creating content that appeals to both humans and web crawlers. In this guide, I, Ben Mellor, will break down the process for you, step by step. Why Ranking Number One Matters Before we dive into the details, let's talk about why ranking number one on search engines like Google is so important. When people search for something, they are already aware of the problem they have and are actively looking for a solution. If your website is the first one they see and it impresses them, they are more likely to choose your product or service. On the other hand, if your website is buried on the second page of search results, you're missing out on a vast majority of potential customers. So, ranking number one is crucial for driving consistent, high-quality traffic to your website. Step One: Conducting Keyword Research The first step in your journey to the top of the search results is keyword research. Start by using Google and Amazon's auto-complete features to see what people are searching for in your industry. Make a list of these keywords and analyze them to identify the most relevant and high-potential ones. Pay attention to long-tail keywords, as they often indicate higher purchasing intent. Remember, the goal here is to understand what your target customers are typing into the search bar and align your content with those keywords. Step Two: Planning Your Site Architecture Once you have a list of keywords, it's time to plan your website's site architecture. The key here is to keep it simple and ensure that every page is easily accessible from the homepage. This not only helps search engines understand your website better but also improves the user experience. Avoid thin content (pages with minimal text) and content duplication (copy-pasting content from other sources). Craft unique and descriptive content for each page, incorporating relevant keywords naturally. Additionally, create internal links between pages to keep visitors engaged and increase the likelihood of conversions. Step Three: On-Page SEO and Content Creation Optimizing your on-page SEO and creating valuable content is an essential step in improving your search engine rankings. Focus on optimizing your individual product and category pages by incorporating relevant keywords in the URL, product names, and descriptions. However, don't overdo it and spam keywords. Instead, make your content natural and engaging for human readers. Craft custom product descriptions that tell a story and provide useful information to potential buyers. This also gives you an opportunity to include more keywords organically. Additionally, leverage blogging to create fresh and relevant content that not only boosts your authority but also allows you to target trending topics in your industry. Don't forget to include internal links within your blog posts to drive visitors to your product pages. Step Four: Building Backlinks The final step in your journey to the top of the search results is building backlinks. Backlinks are links from other websites that point to yours, indicating to search engines that your website is a credible source. There are passive and active ways to generate backlinks. The passive approach involves creating share-worthy content that naturally attracts links from other websites. The active approach involves collaborating with other businesses or content creators to generate backlinks. For example, writing guest posts on relevant blogs or engaging in cross-promotion can help you build valuable backlinks. Remember, backlinks play a significant role in improving your website's authority and visibility. Conclusion Ranking number one on Google is not a magical feat, but rather a strategic approach to optimizing your website and creating valuable content. Keyword research, site architecture planning, on-page SEO, and building backlinks are the keys to success. By following these steps, you can improve your website's visibility, drive consistent traffic, and increase your chances of converting visitors into customers. So, don't be intimidated by the jargon and complex algorithms. With dedication and the right strategies, you can conquer the search engine rankings and achieve your e-commerce goals. Thank you so much for taking the time to read this article! If you found it helpful or interesting, we would really appreciate your support by following our blog. Stay up to date with our latest posts by subscribing to our email list, or by following our Facebook fanpage and YouTube channel. Your support means the world to us! #### Frequently Asked Questions **1. How can I rank number one on Google?** Ranking number one on Google requires effective SEO strategies, such as keyword research, site structure, and on-page optimization. By creating valuable and user-friendly content, you can improve your website's ranking and attract consistent, high-quality traffic. **2. Why is it important to rank number one on search engines?** Ranking number one on search engines is crucial because most users rarely go beyond the first search result page. By securing the top spot, you can increase your chances of attracting potential customers and outperforming your competitors. **3. What is keyword research, and why is it important?** Keyword research involves identifying the terms and phrases that your target customers are likely to search for. By understanding their search intent, you can optimize your website's content to match their queries, improving your chances of ranking higher on search engine results pages. **4. How should I plan my e-commerce website's site architecture for better SEO?** To optimize your website's architecture, aim to have every page as few clicks away from the homepage as possible. This ensures that both search engines and visitors can easily navigate and understand your site's structure. Avoid thin content and content duplication, as they can negatively impact your rankings. **5. How can I leverage blogging to boost my e-commerce store's SEO?** Blogging is a powerful strategy to improve SEO. By regularly posting high-quality, relevant, and valuable content, you can build your website's authority and attract more organic traffic. Be sure to integrate keywords naturally, create internal links, and maintain consistency in both quality and frequency. Read the full article
0 notes
Text
StableCode: AI's NEW Ultimate Language Model for Developers

Introducing Stable Code: The AI Coding Assistant for Developers by Ben Mellor The Innovation of Stable Code Stable Code is an innovative AI product designed to assist developers and casual users with their daily coding tasks. It is the very first large language model generative AI product for coding, and it has been developed to enhance efficiency and effectiveness in coding. This tool is particularly useful for new developers who want to improve their skills and ensure that their code is efficient. The base model of Stable Code was developed and trained using the stack dataset, created by Big Code. It was further refined through training with popular programming languages such as Python, JavaScript, Java, C, Markdown, and C++. Many other models were also used to help code and train the application. A Demonstration of Stable Code To showcase the capabilities of Stable Code, let's take a look at an example using the Stable Code app implemented on Google Colab. The creator of this Google sheet was able to integrate the Stable Code app, allowing users to access and interact with it. You can find the link to the sheet in the description below, along with other relevant links. In this example, the instruction given was to write a Python program to perform a binary search in a given list. For those unfamiliar with binary search, it involves creating a code snippet that efficiently searches for a target value within a sorted list. The binary search algorithm repeatedly divides the list in half and compares the target value with the middle element, reducing the search space in each iteration. As you can see from the code provided in the example, Stable Code was able to output the necessary code to perform the binary search efficiently and reduce the search space in each iteration. Join the World of AI Community Before we delve further into Stable Code, I would like to encourage you to become a patron of World of AI. By joining our Patreon community, you gain access to exclusive features, including participation in our amazing Discord community, where you can engage with other members, access valuable partnerships, and stay updated with the latest AI trends. Check out the link in the description below to learn more. Also, make sure to follow World of AI on Twitter to stay up to date with the latest AI trends. If you haven't already, please subscribe to our YouTube channel, turn on the notification bell, and check out our previous videos. We have a wealth of valuable content that will surely benefit you. The Evolution of Stable Code Stable Code introduces an innovative approach that maximizes the efficiency of developers by integrating three distinct models designed to optimize various aspects of the coding process. As mentioned earlier, the base model of Stable Code was built upon the stack dataset, created by Big Code, and further refined through training with various programming languages, such as Python, Go, JavaScript, Markdown, and C++. This wide range of training ensures that the Corpus of data for Stable Code covers a vast spectrum of programming scenarios. The developers behind Stable Code went a step further to create an instruction model specifically tailored to solve complex programming tests. With approximately 120k code instruction responses in a structured format, this model was honed to deliver precise and effective solutions. This means that Stable Code can handle both simple and complex programming tasks efficiently, making it suitable for commercial use cases. Benchmarking Stable Code To evaluate the performance of Stable Code, benchmark scores were analyzed in comparison to Star Coder Base and Replica Coders, two other prominent coding assistance tools. The human evaluation benchmarks, labeled Pass@1 and Pass@10, provide valuable insights into the accuracy and effectiveness of these tools in suggesting correct coding solutions. The Pass@1 metric measures the percentage of times the highest-ranked suggestion from each tool is correct for a given coding test. A higher Pass@1 score indicates that the tool consistently delivers accurate solutions immediately, thereby enhancing developer productivity. Alternatively, the Pass@10 metric evaluates the percentage of times the correct solution is found within the top 10 recommendations provided by the tool. Although the Pass@10 metric allows for some leniency by acknowledging that the top suggestions may not always be correct, a higher score still indicates the tool's ability to provide accurate solutions within a small number of suggestions, streamlining the coding process for developers. Stable Code has performed admirably in comparison to Star Coder Base and Replica Coders, achieving impressive results in both the Pass@1 and Pass@10 metrics. While Star Coder Base outperformed in terms of Pass@1, Stable Code proved its effectiveness by providing accurate solutions within the top recommendations. Deploying Stable Code If you wish to download the Stable Code model, you can do so through the Hugging Face model card, which provides an easy way to deploy it within your own web UI. Various platforms, such as Pinocchio and Ogabuga, can assist you in deploying the Stable Code model effortlessly. To run Stable Code on Google Colab, follow these steps: 1. Save a copy of the provided Google Collab link to your Google Drive. 2. Go to the "Runtime" tab and change the runtime type to Python 3. 3. Choose the desired hardware acceleration option (e.g., CPU) and save the changes. 4. Click on the play button to run the required tasks. 5. When prompted, enter your Hugging Face API key. 6. In another tab, copy the token from your Hugging Face token page and paste it into the designated area. Click login. 7. Install the necessary requirements to begin utilizing Stable Code within Google Colab. 8. Access the designated tab to start interacting and utilizing Stable Code. Real Use Cases of Stable Code Stable Code offers a wide range of use cases for solving both basic and complex coding problems. From generating Python classes and functions to writing programs for various tasks, Stable Code proves its versatility and value in the coding world. The Google Colab link provided in the demonstration allows users to explore different demos and experiment with Stable Code's capabilities. In Conclusion Stable Code is an exceptional tool that significantly enhances the coding process for developers. As Stability AI continues to evolve and improve its coding applications and AI systems, Stable Code is set to grow even further. I hope you have gained valuable knowledge from this video and article. Thank you for watching, and make sure to check out World of AI's Patreon page for exclusive features. Stay connected with World of AI for the latest AI trends. Don't forget to subscribe, like, and share this video, and explore our previous content. Until next time, have an incredible day. Peace out! Thank you for taking the time to read this article. I hope you found it insightful and helpful. If you enjoyed the content, I would like to invite you to stay connected with us by following our blog through email updates. By subscribing, you'll never miss out on our latest articles and valuable insights. Additionally, we have an active Facebook fan page where we share more great content and engage with our readers. Join our community and be a part of the discussion. If you prefer to consume content in video format, we also have a YouTube channel where we regularly upload informative and engaging videos. Subscribe to our channel and stay updated with our latest video releases. We value your support and would love to have you as a part of our growing community. Thank you again for reading, and we look forward to connecting with you! Frequently Asked Questions: 1. What is Stable Code? - Stable Code is an AI coding assistant designed to assist developers and casual users in their daily tasks and to improve their coding skills. 2. How was Stable Code developed and trained? - Stable Code was developed using a base model created from the Big code stack dataset, and further trained with popular languages like Python, JavaScript, Java, C++, and more. 3. How does Stable Code help with coding tasks? - Stable Code can efficiently generate code snippets for various tasks, such as performing a binary search or finding the number of CPU cores. It provides accurate and effective solutions to coding challenges. 4. How does Stable Code compare to other coding assist tools? - Stable Code has been benchmarked against other coding assist tools like Star Coder Base and Replica Coders. It has shown high accuracy and effectiveness in suggesting correct solutions for coding tests. 5. How can I access and use Stable Code? - Stable Code can be accessed and used on platforms like Google Colab. You can follow the provided link to run it on Google Colab and utilize its features for coding tasks. Read the full article
0 notes
Text
The Best Side Hustle for Tik Tok, Instagram, and YouTube

The Growing Demand for Video Editors Introduction Hey there, I'm Ben Mellor! Today, let's dive into the ever-expanding world of video editing. It's mind-blowing to think that every passing minute, a staggering 300 hours of video content is being uploaded on YouTube alone. And mind you, we haven't even mentioned popular platforms like Instagram and TikTok. Behind every video, there's a skilled video editor working diligently, contributing to this mammoth feat. This creates an incredible pool of opportunities for aspiring editors. Starting Your Journey If you're just getting started and want to dip your toes into the world of video editing, fear not. Simple jobs can be a great way to begin your editing adventure. Applications like Adobe Rush or iMovie can serve as your training wheels. These user-friendly tools will help you learn the basics and familiarize yourself with the editing process. As you progress and hone your skills, you can then move on to more advanced software like Premiere and Final Cut. Don't let the lack of formal education discourage you. The beauty of video editing is that your talent can speak for itself. By showcasing a strong portfolio with samples of your work, you can prove to potential clients that you're a capable editor, no degree required. Landing Exciting Opportunities So, how do you secure those coveted editing gigs? Luckily, the process isn't overly complicated. Freelance websites such as Upwork and Fiverr are excellent platforms to market yourself. By creating a compelling profile and highlighting your skills and expertise, you can attract clients looking for video editors. Additionally, targeting mid-tier YouTubers who have a subscriber base ranging in the tens of thousands is another effective strategy. While some content creators prefer editing their own videos, many simply lack the time or skills to do so. This opens up a perfect opportunity for you to step in and offer your services. You can reach out to these creators directly via their social media direct messages (DMs) or by sending them a professional email along with a link to your previous work. Learning Resources Just like any craft, continuous learning is crucial to stay competitive in the world of video editing. Thankfully, there are numerous resources available to enhance your skills. Online platforms like Udemy offer a wide range of video editing courses catered to different skill levels. You can find tutorials, guides, and comprehensive courses that cover everything from beginner techniques to advanced editing tricks. In addition to dedicated learning platforms, YouTube itself is a goldmine of educational content. Many experienced video editors share their knowledge and expertise through tutorial videos, providing valuable insights and tips that can help you refine your craft. The Power of Video Editing Expanding Opportunities As technology continues to advance, the demand for video content only increases. Whether it's businesses showcasing their products, filmmakers creating compelling stories, or influencers engaging their audiences, the need for skilled video editors is undeniable. By tapping into this burgeoning field, you open yourself up to countless opportunities. A Creative Playground Video editing is more than just technical expertise – it's a canvas for your creative expression. With each project, you have the chance to bring a vision to life, crafting a narrative through careful editing. The possibilities are endless, from adding visual effects to fine-tuning audio, and seamlessly blending footage to create a cohesive and captivating story. Building Connections Working as a video editor allows you to collaborate with a diverse array of individuals, from fellow creatives to clients with unique visions. Through these collaborations, you can build lasting relationships that may lead to exciting future projects. Networking within the industry is key, as it can open doors to new opportunities and connections that can propel your career forward. Achieving Financial Independence The flexibility of freelance video editing allows you to take control of your financial destiny. As you gain experience and build a reputation, you have the freedom to set your own rates and choose the projects that align with your interests and goals. With dedication and persistence, video editing can become a lucrative side hustle or even a full-time career. Conclusion In this fast-paced digital era, the demand for video editing skills continues to skyrocket. Whether you're a beginner starting with user-friendly editing software or an experienced editor expanding your portfolio, opportunities abound. By showcasing your talent, leveraging online platforms, and learning from available resources, you can carve your own path in this exciting field. So, seize the moment, jump into the world of video editing, and let your creativity flow. Remember, every frame is an opportunity to tell a story and make an impact. With passion, dedication, and the right skills, you can embark on a rewarding journey as a video editor. Thank you for taking the time to read our article! We truly appreciate your support. To stay updated with the latest content, valuable insights, and interesting topics, we encourage you to follow our blog via email subscription or through our Facebook Fanpage and YouTube channel. Your engagement means a lot to us, and we would love to have you be a part of our growing community. Thank you once again, and we look forward to providing you with even more quality content in the future! Frequently Asked Questions: 1. How much video content is uploaded to YouTube every minute? On average, 300 hours of video is being posted on YouTube every minute. 2. Where can I find courses on video editing? You can find courses on video editing on platforms like Udemy and YouTube. 3. Do I need to go to school to become a video editor? No, you do not need to go to school to become a video editor. Having samples of work that demonstrate your skills is more important. 4. How can I find freelance video editing gigs? To find freelance video editing gigs, you can list yourself on websites like Upwork and Fiverr. You can also reach out directly to mid-tier YouTubers. 5. Can I reach out to YouTubers who edit their own videos? Yes, some YouTubers edit their own videos, but many of them also contract the work out. You can reach out directly to them through their DMS or by emailing them links to your previous work. Read the full article
0 notes
Text
Installing DevOpsGPT Locally: Harnessing Fully Autonomous AI Agents to Create Powerful Software!

How to Install Devout CBT and Create Your Own Software Applications Introduction Hey there, it's Ben Mellor, and in today's video, I'll be showing you how to install Devout CBT locally on your computer and create your own software applications. But before we dive in, let's have a quick recap on what Devout CBT is. Devout CBT is a self AI-driven software development solution that allows you to create high-quality software autonomously. With the help of AI agents, it combines large language models with devop tools to convert natural language requirements into working software. What is Devout CBT? Devout CBT is an innovative GBT model and a new approach to developing efficient, effective, and cost-reduced software with AI. It revolutionizes the software development process by enabling the creation of software without the need for manual coding. You can see the power of Devout CBT in action in this clip, where someone develops a game from scratch in under two minutes. As you can see, the developer enters the requirements for a snake game, and the AI guides them to clarify the details of the game's functionality. In just two minutes, the AI creates a fully functional snake-like game where you have to chase the points. This example demonstrates the incredible potential of Devout CBT beyond just game development. You can use it to create templates for websites, develop data entry forms, and much more. Installing Devout CBT Locally Now let's get into the nitty-gritty of how you can install Devout CBT on your computer. To start, there are a few things you'll need: Git, Visual Studio Code, and Python. Git is an application that helps you clone the Devout CBT repository, Visual Studio Code is used to edit and enter your Open AI API key, and Python is your code editor of choice. Once you have these tools ready, follow these steps to install Devout CBT: Step 1: Clone the Devout CBT Repository Go to the GitHub repository of Devout CBT and click on the green button to copy the repository's link. Open your command prompt and type in "git clone" followed by the copied link. Press enter, and it will start cloning the repository onto your computer. Step 2: Open Visual Studio Code and Enter Your API Key Open Visual Studio Code and navigate to the Devout CBT folder you cloned in the previous step. Inside the folder, locate the "m.eml.tpl" file. Rename the file by removing the ".tpl" extension. Open the file and input your Open AI API key. This key allows Devout CBT to utilize the Open AI API for generating software. Step 3: Configure the Interface Information Scroll down in the file until you find the section to configure the interface information of Open AI. Enter your API key in the appropriate field. Optionally, if you have other APIs you want to use with Devout CBT, you can input their keys as well. Save the changes. Step 4: Run the Devout CBT Application Open the command prompt again and navigate to the Devout CBT folder using the command "cd devops-gbt". Once in the folder, paste the command for running the application, which may be "run.bat" for Windows users. This command will install any missing dependencies and load the necessary files for Devout CBT to function. Step 5: Access the Devout CBT Application After the installation is complete, you can access the Devout CBT application through your web browser by opening the local host. The application will primarily be in English, with some portions potentially in Chinese. From here, you can input your requirements and start creating software. Creating Your Own Software Applications Now that you have Devout CBT up and running, let's explore how you can use it to create your own software applications. To demonstrate, I'll walk you through the process of creating a simple snakes and ladders game. 1. Start a Development Task Click on the button to start a development task. You can choose from various presets or select "Any Development Needs" for a broader scope. 2. Input Your Requirements Input your requirements for the game. For example, you can specify the design preferences, whether it should support single or multiple players, and any other specific functionalities you desire. 3. Submit Your Requirements Once you've entered your requirements, click submit to allow Devout CBT to analyze and generate the necessary code for your game. 4. Review the Generated Documentation Devout CBT will present you with a documentation interface that outlines the requirements it has generated. Review the documentation and make any necessary modifications or clarifications. 5. Analyze and Modify the Code Devout CBT will then analyze how to modify the code based on your requirements. It may take a few minutes to generate the modified code that aligns with your desired functionalities. 6. Review and Self-Check the Code Once the code has been generated, you can review it and make any additional changes or improvements. You can also choose to input your own code or implement specific features if desired. 7. Submit the Code to GitHub If you're satisfied with the generated code, you can submit it to a GitHub repository for version control and collaboration purposes. Connect your GitHub account and specify the repository where the code will be cloned. Conclusion And there you have it! You've successfully installed Devout CBT and learned how to create your own software applications. Devout CBT is a game-changer in the field of software development, empowering developers to create high-quality software autonomously with the help of AI. Remember, you can use this powerful tool to develop more than just games – the possibilities are endless. Give it a try and see what amazing software you can create. Thank you for watching, and have an amazing day! Thank you for taking the time to read this article! If you found it interesting and want to stay updated with more similar content, make sure to follow our blog via email or by following our Facebook fan page. Additionally, you can also subscribe to our YouTube channel for video updates. We appreciate your support and look forward to bringing you more insightful articles in the future! 1. What is DeVos GPT and how does it work? Answer: DeVos GPT is a self AI-driven software development solution that allows you to create high-quality software autonomously. It combines large language models with devop tools to convert natural language requirements into working software. 2. How can I install DeVos CBT locally on my computer? Answer: To install DeVos CBT locally, you will need to have Git, Visual Studio Code, and Python as your code editor. You can find step-by-step instructions in the video description. 3. Can DeVos GPT be used to create other types of software besides games? Answer: Yes, DeVos GPT can be used to create a variety of software applications. It can be used to create templates for websites, type forms for data entry, and much more. 4. How do I input my API keys into DeVos GPT? Answer: In the application folder, there is an m.dotEML.TPL file where you can input your API keys. Rename the file to remove the .TPL extension, open it, and paste your API keys into the appropriate places. 5. What happens after I input my requirements and submit them in DeVos GPT? Answer: After submitting your requirements, DeVos GPT will analyze them and generate the code necessary to meet the requirements. It will provide you with an interface documentation and modified code. You can review and modify the code if necessary, and then submit it to a GitHub repository if desired. Read the full article
0 notes
Text
The Key to Achieving Success in Earning Twitch Income

selling your own branded merchandise. Hey there, I'm Ben Mellor, and I want to talk to you about the incredible opportunity of streaming on Twitch. It's not just about playing video games and having a blast; it's a platform that allows you to connect with others and even make a living out of it. But wait, there's more to it than meets the eye. See, one of the key factors to success in the streaming world is selling your own branded merchandise. Let's dive into why this is so important and how it can benefit you as a Twitch streamer. First things first, even if you currently have a small audience, don't underestimate the power of merch. In fact, it can be a game-changer for you. You see, when your loyal fans wear your merch, they become walking ambassadors for your brand. They proudly display their support for you, and in turn, this helps to spread awareness of your stream to their friends and family. It's like a positive feedback loop that can greatly contribute to the growth of your audience. Isn't that amazing? Now, you might be wondering, why start selling merch now? Well, the truth is, whether you have a loyal following or are just starting out, now is the perfect time to kickstart your merchandise journey. Not only does it help to solidify your brand identity, but it also allows you to engage with your community on a whole new level. By offering them the opportunity to wear something that represents their love for your stream, you are creating a deeper connection and forging a sense of belonging. And let's be honest, who doesn't love having cool merch to show off? Let's dig a bit deeper into why selling your own branded merchandise is a must for any Twitch streamer. The Merchandise Advantage When you have your own branded merchandise, it sets you apart from the crowd. It's a unique selling point that gives you an edge and makes you memorable in the minds of your fans. Just think about it – every time someone wears a t-shirt with your logo or design, they are not only showing support for you, but they are also becoming a walking advertisement for your stream. It's a win-win situation! Building Brand Loyalty Merchandise plays a crucial role in building and nurturing brand loyalty. Your most dedicated viewers want to feel connected to you, and what better way to achieve that than by offering them a piece of your brand? When they wear your merch, they are proudly declaring their allegiance to your stream, and this fosters a sense of loyalty and community. In turn, this loyalty drives them to spread the word about your stream, helping you gain more exposure and bringing in new viewers. A Boost to Your Revenue Let's not forget the financial aspect of selling merchandise. As a Twitch streamer, monetizing your channel is vital for sustaining your passion and turning it into a viable career. Selling your own branded merchandise provides an additional revenue stream that can greatly contribute to your income. Whether it's t-shirts, hoodies, hats, or even custom gaming accessories, each sale adds up and helps support your streaming endeavors. It's a way for your fans to show their support while also benefiting you financially. Strategies for Selling Merchandise Now that we understand the importance of selling merchandise as a Twitch streamer, let's explore some effective strategies to maximize your sales and reach. Create Eye-Catching Designs When it comes to merchandise, design is key. Invest time and effort into creating visually appealing and eye-catching designs that reflect your brand and resonate with your community. Consider working with talented graphic designers who can bring your vision to life. Remember, the more unique and appealing your designs are, the more likely your fans will be eager to wear them proudly. Offer a Variety of Products Diversify your merchandise offerings by providing a range of products that cater to different preferences. While t-shirts are a popular choice, consider expanding your options to include hoodies, hats, mugs, or even limited-edition items. This variety allows fans to choose something that suits their style and increases the chances of making a sale. Engage with Your Community Building a strong community is at the core of Twitch streaming, and it applies to merchandise sales as well. Interact with your fans, gather feedback, and involve them in the design process. Conduct polls to understand their preferences and desires when it comes to merchandise. By actively involving your community, you not only make them feel valued but also create a sense of ownership and pride in the final products. This, in turn, translates to more sales and increased brand loyalty. Promote, Promote, Promote Don't shy away from promoting your merchandise. Utilize your streams, social media channels, and any other platforms available to showcase your products. Highlight the benefits of wearing your merch and the impact it has on supporting your stream. Consider running exclusive promotions or limited-time offers to create a sense of urgency and excitement among your fans. Collaborate with other streamers or influencers to reach a wider audience and cross-promote each other's merchandise. The more you promote, the greater the chances of reaching potential customers and increasing your sales. The Future of Your Merch Empire As a Twitch streamer, selling your branded merchandise is just the beginning. With the right strategies and a growing community, you can expand your merch empire and unlock even greater opportunities. Here are some ideas to fuel your merch journey: Introduce Limited-Edition Drops Create a sense of exclusivity and excitement by introducing limited-edition merchandise drops. These special releases can consist of unique designs or collaborations and are only available for a limited time. The limited supply and time frame create a sense of urgency among your fans, driving them to make a purchase before it's gone forever. This not only boosts sales but also generates buzz and anticipation around your brand. Attend Conventions and Events Once the world is back to normal and physical events resume, consider attending conventions, gaming expos, or esports tournaments. These events provide an excellent opportunity to showcase your merchandise to a targeted audience who are already interested in the gaming and streaming community. It allows you to connect with fans on a personal level, build brand awareness, and even make sales on the spot. So, keep an eye out for upcoming events in your area and seize the chance to expand your reach. Create Special Collaborations Collaborating with other streamers, artists, or influencers can be a game-changer for your merchandise business. By joining forces, you tap into their audience and gain exposure to a whole new group of potential fans. Consider designing a collaborative piece together or even creating limited-edition items featuring their branding alongside yours. It's a win-win situation that expands your reach and strengthens your connections within the streaming community. Explore Custom Gaming Accessories Take your merchandise to the next level by exploring the world of custom gaming accessories. From branded mousepads to themed controller skins, these products not only offer practical value to gamers but also serve as a constant reminder of your stream. Customize and design accessories that resonate with your audience, adding an extra layer of personalization to their gaming setup. This opens up new opportunities for revenue and strengthens your brand presence in the gaming community. In conclusion, selling your own branded merchandise is an essential step for any Twitch streamer looking to grow their audience, foster loyalty, and boost their revenue. Don't underestimate the power of merch; it goes beyond being just a piece of clothing or an accessory. It becomes a symbol of support and connection for your fans. So, start brainstorming design ideas, engage with your community, and let your merch empire take flight. May your streams be lively, your following be strong, and your merchandise store be bustling with activity. Happy streaming, fellow Twitch streamers! Thank you for taking the time to read our article! If you enjoyed our content, we would like to invite you to follow our blog for more exciting updates. You can do so by subscribing to our email newsletter or following our Facebook fanpage. Additionally, we also have a YouTube channel where you can find informative videos. We'd love to have you as part of our community! ## Frequently Asked Questions ### **What is Twitch streaming?** Streaming on Twitch refers to broadcasting live video content of yourself playing video games or engaging in other activities on the Twitch platform. It allows viewers to watch the stream in real-time and interact with the streamer through chat. ### **How can I earn a living through streaming on Twitch?** While playing video games is a significant aspect of streaming, earning a living through Twitch goes beyond that. One way to generate income is by selling your own branded merchandise. This can be an additional revenue stream apart from donations, subscriptions, or sponsorships. ### **Why is selling merch important for Twitch streamers?** Selling merchandise can have multiple benefits for Twitch streamers. It allows you to engage with your audience on a deeper level and create a sense of community. Furthermore, by wearing your branded merch, your fans become ambassadors who help spread awareness of your stream to their friends and family, potentially growing your audience. ### **When is the right time to start selling merch as a Twitch streamer?** Regardless of the size of your current audience, it is always a good time to start selling merch. Even if you have a small following, your most loyal and enthusiastic fans can become your early ambassadors and wear your merchandise to promote your stream. Hence, beginning to sell merch can help you grow your audience further. ### **What kind of merch can Twitch streamers sell?** As a Twitch streamer, you have the flexibility to sell a wide range of merchandise items. These can include branded t-shirts, hoodies, hats, mugs, stickers, and more. The choice of merch should align with your personal brand and resonate with your audience to encourage them to support and promote your stream. Read the full article
0 notes
Text
How to Obtain Instagram Verification in 2023 (Even with a Limited Follower Count)

How to Get Verified on Instagram: A Step-by-Step Guide by Ben Mellor Introduction Getting the verified badge on Instagram, commonly known as the blue tick, is a dream come true for many users. It's a status symbol that sets you apart from the crowd and boosts your credibility. People often associate the blue tick with celebrities and major brands, assuming that it's only reserved for those with millions of followers. However, the truth is that anyone can apply for verification, and the process has become much simpler in recent years. In this article, I will guide you through the steps to get verified by Instagram and share essential tips to increase your chances of success. So, let's dive in! Why Should You Strive for Verification? Before we proceed, let's understand the reasons behind wanting to get verified on Instagram. Firstly, verification prevents impersonation. Whether you are an e-commerce brand or an influencer, having that blue tick next to your name assures your profile visitors that they are indeed interacting with the genuine you. Secondly, verification enhances your credibility. The blue tick has become a symbol of trustworthiness, making your profile a key player in your niche. This, in turn, boosts your engagement and drives sales. Lastly, verification contributes to your continued growth. Verified accounts rank higher in search results, attracting more visibility, brand recognition, and conversions. Now that you know the benefits of verification, let's move on to the requirements. The Four Requirements for Verification To be eligible for verification on Instagram, you need to fulfill four criteria: 1. Authenticity Instagram requires you to be a real human or a legitimate brand. You must be prepared to provide necessary documentation to prove your authenticity. 2. Uniqueness Your profile must be unique. This means that you cannot have multiple accounts representing the same person or business, unless they are different language accounts. Additionally, your content should be original. Even if you have millions of followers, if you are operating as a meme account or fan account, you won't be approved for verification. 3. Complete Profile Having a complete profile is essential. At the very least, you need to have a public profile, a profile picture, a written bio, and be an active user. While Instagram doesn't explicitly define what it means to be an active user, it is safe to assume that regularly posting, sharing, and commenting on content is expected. 4. Notability Being notable is the most challenging requirement to fulfill. While Instagram doesn't provide a clear definition of notability, they state that your profile should represent a well-known or highly searched for person or brand. In other words, your profile must be recognized and respected in your industry or community. The Application Process Now, let's walk through the process of applying for verification on Instagram: Step 1: Fill Out Your Information Open the Instagram app and go to your profile. Tap on the menu button located at the top right corner, and then select "Settings" followed by "Account." Scroll down and tap on "Request Verification." Fill out the required information, including your full name (or business name for business accounts) and upload the necessary documentation, such as a driver's license or articles of incorporation/LLC registering paperwork. Step 2: Confirm Your Notability In this step, you need to select your category from a list provided by Instagram. Choose the category that best represents your profile. Next, select your country or region from another list. Here, you also have the option to provide additional information about your audience and the other names your account is publicly known as. Step 3: Add Supporting Links While this step is optional, it is highly recommended to include relevant links that can support your notability. These links can be news articles, social media accounts where you are already verified, or other credible sources that showcase your profile's significance. Add as many links as possible, highlighting your achievements and recognition. Step 4: Submit Your Application Once you have filled out all the information and added the supporting links, review your application and hit the submit button. Instagram will then proceed to review your application within 30 days. You will receive a notification through your activity feed regarding the status of your application. If your application is approved, you will be granted the coveted blue tick badge. Tips for Increasing Your Chances of Verification While the application process itself is straightforward, meeting the notability requirement can be challenging. Here are some tips to improve your chances of getting verified on Instagram: 1. Build a Strong Social Media Presence Growing your social media presence is crucial. Focus on creating engaging and high-quality content that resonates with your target audience. Consistency is key, so make sure to post regularly and interact with your followers by responding to comments and engaging with other accounts in your niche. 2. Seek Traditional Media Coverage One effective way to establish notability is to secure coverage in traditional news media and major publications. Reach out to bloggers, local newspapers, and news sites to share your unique story or the extraordinary things you are doing. Aim for real editorial mentions, as they hold more weight and credibility. 3. Leverage Existing Verification on Other Platforms If you are already verified on other social media platforms like Twitter or YouTube, make sure to include those account links in your Instagram verification application. Instagram considers verification on other platforms as a testament to your notability. 4. Avoid Paid or Promotional Content When submitting links as supporting evidence, refrain from using paid articles or promotional content. Instagram does not consider these as valid sources for verification. Focus on showcasing genuine editorial coverage and reputable sources. Considerations and Final Thoughts While there are agencies that claim to help you get verified for a fee, it's important to note that the verification process is ultimately up to Instagram's verification team. Hiring a PR agency may speed up the process, but there are no guarantees. Additionally, remember to follow Instagram's community guidelines and terms of use to maintain a positive presence on the platform. In conclusion, getting verified on Instagram is an achievable goal for anyone who meets the authenticity, uniqueness, completeness, and notability requirements. By focusing on building a strong social media presence, seeking traditional media coverage, and providing compelling supporting links, you can increase your chances of obtaining the coveted blue tick. Good luck on your journey to verification! Sources - Instagram Help Center - Ryan Holiday - Trust Me, I'm Lying Thank you for taking the time to read this article! If you enjoyed it and would like to stay updated with our latest content, please consider following our blog via email subscription or our Facebook fanpage. Additionally, you can also find us on YouTube for more interesting videos. We appreciate your support and look forward to sharing more valuable information with you in the future! Frequently Asked Questions: 1. How can I get the verified badge on Instagram? Answer: To get the verified badge on Instagram, you need to complete the verification process. This involves filling out your information, confirming your notability, and providing supporting links that show your account's notability. Once you've submitted your application, Instagram will notify you within 30 days if your application was successful. 2. Can anyone get verified on Instagram? Answer: Yes, anyone can apply for verification on Instagram. You don't need to be a celebrity or have millions of followers. However, there are certain requirements you need to meet, such as being authentic, having a complete profile, and being notable. Meeting these requirements will increase your chances of getting verified. 3. Why should I try to get verified on Instagram? Answer: There are several reasons to try and get verified on Instagram. Firstly, it stops impersonation and lets your profile visitors know that you are the real deal. Secondly, it adds credibility to your profile and increases trustworthiness for Instagram users. Lastly, verified accounts appear higher up in search results, helping to increase brand awareness and audience growth. 4. What are the requirements to get verified on Instagram? Answer: The requirements to get verified on Instagram include being authentic (having documentation to prove it), being a unique profile (no multiple accounts for the same person or business), having a complete profile (public profile, profile picture, and written bio), and being notable (representing a well-known or highly searched for person or brand). 5. How can I increase my chances of getting verified on Instagram? Answer: To increase your chances of getting verified on Instagram, you should focus on being authentic, having a complete profile, and building notability. This can be done by consistently posting engaging content, engaging with other accounts, and reaching out to news and magazine writers to share your story. Providing relevant and credible supporting links, such as news articles or other verified social media profiles, can also help to boost your chances of verification. Read the full article
0 notes
Text
I Made $500 in 10 Days by Selling Artificial Intelligence (AI) Christmas Videos

Hey there, beautiful people! My name is Ben Mellor, and I'm here to show you how to create awesome Christmas promo videos. 'Tis the holiday season, and everyone is all about spreading the festive cheer through videos. In this article, I'll guide you through the process of making your very own Christmas promos. But wait, there's more! At the end of the video, I'll also share a secret on how you can earn some money. So, let's dive right in, shall we? Step 1: Visit vid NOS and Sign Up First things first, head over to the website called vid NOS (link will be provided in the description box). Once you're there, click on "Create Free Video Now" and sign up using your Google or Facebook account. For this demonstration, I'll be signing up with my Google account. Step 2: Explore the Templates Once you've signed up, you'll be greeted by a user-friendly interface. Here, you'll find a plethora of templates to choose from. To start creating your Christmas promo video, navigate to the "Templates" section. Within this section, you'll discover various categories of templates to suit your needs. Click on the "Festival" category to access an array of beautiful festival templates, including ones specifically designed for Christmas. Take your time to browse through the templates and select the one that appeals to you the most. For this tutorial, I'll be using a particularly stunning Christmas template. Step 3: Customize the Template After selecting your desired template, the editor tool will appear before you. This is where the magic happens! You have the power to customize the template according to your own preferences. First things first, let's work on the script. Simply remove the previous script in each scene and replace it with your own. Take your time to craft a compelling script that matches the theme of your Christmas promo. Add Your Branding: In Scene 1, you can add text by clicking on the designated area. Here, you can proudly display your brand name or any other relevant information. Feel free to experiment with different colors and fonts until you find the perfect combination that resonates with your brand's identity. Additionally, you can animate the text to make it more visually appealing. Simply select the text, navigate to the animation menu, and choose your preferred animation style, duration, and delays. With just a few clicks, your text can come to life! Scene 2: Incorporate Images In Scene 2, you'll have the opportunity to include images. Remove the placeholder images and replace them with your own brand images. You can access the image library provided by vid NOS or upload your own images from your PC. Arrange the images on the template to create a visually stunning layout. Don't forget to add animations to your images as well, just like we did with the text in Scene 1. Scene 3: Final Touches In Scene 3, customize the text to fit your message. If the rest of the slide is already perfect, simply add your website's link to make it look more professional. You can go the extra mile by adding transitions between the scenes. Just click on the three dots and explore the transition options available. Step 4: Preview and Finalize Your Video Once you've finished editing all of your scenes, it's time to see how your video turned out. Click on the preview button to watch your masterpiece before exporting. If you notice any changes that need to be made, feel free to go back and make the necessary adjustments. You also have the option to change the speed of the video, add subtitles, or even switch up the voice-over artist. Play around with these features to make your video truly exceptional. vid NOS provides a wide range of voice-over artists for you to choose from, with options for both male and female voices. To apply the chosen voice to all scenes, simply click on "Apply New Voices to All Female Avatars" and select your preferred voice. If you're feeling particularly creative, you can even upload your own voice-over. Step 5: Adding the finishing touches To make your video even more captivating, you can enhance it with stickers. Simply select the desired stickers and add them to your video. Step 6: Generate and Download Congratulations! Your video is now ready to be shared with the world. Click on the "Generate" button and wait for the magic to happen. Once the video is generated, you can download it to your device. And voila! You now have an incredible Christmas promo video that showcases your brand and spreads the holiday spirit. Bonus: Make Money with Christmas Promo Videos Now, let's talk about how you can turn your video-making skills into a profitable venture. If you visit a site like Upwork, you'll find a thriving market for Christmas promotional videos. Many individuals and businesses are willing to pay top dollar for high-quality videos that capture the essence of the holiday season. Take a look at this example, where someone is earning $50 per video by simply creating 15-second Christmas promotional videos. Follow in their footsteps by creating an account on Upwork and offering your video creation services. With the assistance of vid NOS, you'll have the tools and templates necessary to deliver stunning results. Embrace the Christmas season and make the most of this opportunity to sell your videos and earn a substantial income. In conclusion, creating Christmas promo videos has never been easier. Thank you for joining me today, and I hope you found this tutorial helpful. If you enjoy the content, please like and subscribe to show your support. With your encouragement, I'll be able to create even more AI-driven videos for you in the future. Happy holidays, and goodbye for now! Thank you for taking the time to read this article! If you enjoyed it and would like to stay updated with our latest content, we kindly invite you to follow our blog via email subscription or through our Facebook fanpage and YouTube channel. Your support means the world to us, and we would love to have you as part of our growing community. Thank you again for your time and we look forward to sharing more valuable content with you in the future. Frequently Asked Questions 1. What website should I go to create Christmas promo videos? You should go to the website called VidNOS. The link will be mentioned in the description box of the video. 2. Can I use my own images in the video? Yes, you can upload your own images from your PC and add them to the template. 3. How can I add animations to the text and images? To add animations to the text or images, select the element and go to the animation menu. Choose your preferred animation and set the duration and delays. 4. Can I change the voice-over artist in the video? Yes, you can change the voice-over artist. VidNOS provides a variety of voice-over artists that you can select from. 5. How can I earn money through this? You can earn money by offering Christmas promotional video services on platforms like Upwork. Many people are willing to pay for these services, and you can create and sell videos using VidNOS. Read the full article
0 notes
Text
How to Utilize CHATGPT for College Assignments (Improve Your Grades without Plagiarism)

Hey everyone, my name is Ben Mellor and in today's article, I will be sharing a fantastic method with you on how to complete your college assignments using chat GPT. Not only that, but I will also show you a trick to avoid plagiarism. So, without further ado, let's jump right into it. Using chat GPT, you can actually have it write an essay for you. For instance, I had it write two different essays for me, ranging from 100 to 200 words. However, the length can be as long as you need it to be, so don't worry about that. And now, let's test the content we generated to see if it contains any signs of plagiarism. For this, we will be using the website writer.com, which is designed to detect AI-generated content. All you have to do is copy the text you generated using chat GPT and paste it into the designated field on the website. Then, click on the "Analyze Text" button. According to the results, it shows that 72 percent of the content is human-generated. However, this score is not ideal as it still leaves a chance of 28 percent being plagiarized. To solve this issue, we can utilize a paraphrasing tool offered by quillboard.com. Simply copy the text you obtained from chat GPT and paste it into the tool. Then, click on the "Paraphrase" option. Once you have the newly paraphrased text, copy it from the tool and proceed to test it again on writer.com. Make sure to remove the previous text and replace it with the new one. Click on the "Analyze Text" button once again. Now, you'll notice a significant improvement in the results. Previously, we had a score of 72 percent, but now it has jumped to an impressive 93 percent. This means that the content is much less likely to be considered plagiarized. This method allows you to use chat GPT for your college assignments without any worries of plagiarism. In summary, here's how it works: you have chat GPT write any essay you need, regardless of its length. Then, you can utilize the paraphrasing tool to rephrase or rewrite the essay. Afterward, test the new content on writer.com to ensure a higher score and avoid plagiarism. It's a simple yet effective way to make the most out of chat GPT for your college assignments. I hope this article has been helpful to you. Remember, if you found value in this information, please let us know by giving it a like and subscribing to our channel. Also, be sure to check out our other videos for more valuable insights. Thank you for reading! Thank you for taking the time to read this article! I hope you found it informative and enjoyable. If you would like to stay updated with our latest posts, please consider following our blog via email subscription or by liking our Facebook fanpage. Additionally, we have a YouTube channel where we share engaging content related to the topics we cover. We would be thrilled to have you as part of our community! Frequently Asked Questions 1. How can I use chat GPT for writing my college assignment? Answer: You can use chat GPT to write your college assignment by providing the necessary instructions and letting it generate the essay for you. 2. What is the purpose of using the website writer.com? Answer: The website writer.com is used to detect AI-generated content and check for plagiarism in the text you have copied. 3. How does the paraphrasing tool by quillboard.com work? Answer: The paraphrasing tool by quillboard.com rephrases the text you copied from chat GPT. It provides an alternative version of the text to help you avoid plagiarism. 4. Why is it important to check for AI detection and plagiarism in college assignments? Answer: Checking for AI detection and plagiarism in college assignments ensures that the content is original and not copied from other sources. It helps maintain academic integrity and avoids penalties for plagiarism. 5. How can I achieve a better score and avoid plagiarism using chat GPT? Answer: By using the paraphrasing tool to rephrase your essay and testing it again on writer.com, you can achieve a better score in terms of AI detection and minimize the risk of plagiarism. Read the full article
0 notes
Text
Rivet AI: Free Installation Guide for Creating Advanced AI Agents Superior to Langflow and Flowise

Introducing Rivet: The IDE for Creating Complex AI Agents About Rivet Rivet is a new method of creating AI agents that focuses on creating more complex AI agents with additional toolkits and plugins. Unlike other AI development tools such as abacus.ai, Chidori, and super AGI, Rivet offers a fully open-source platform. With its visual programming environment and node-based system, Rivet simplifies the AI creation process, making it accessible for individuals with different levels of programming knowledge. Rivet's Core Strengths Rivet's core strength lies in its ability to facilitate the design and connection of notes to craft AI agents. This makes it valuable for both seasoned AI developers and beginners. Rivet shares a visual programming paradigm with Flowwise and Langflow, making it visually similar. The drag and drop interface allows users to deploy different types of agents by combining applications. Unique Features of Rivet Rivet stands out from other AI development tools due to its remote debugability, ease of embedding in a host application, and TypeScript compatibility. These features enhance its functionality and provide a more customizable way to create AI agents. Installation To install Rivet, you can use the one-click installer or install it from the source. The one-click installer is recommended for ease of use. However, if you choose to install it from the source, ensure that you have the necessary prerequisites such as Rust, Node 20+, Yarn, and Git. Follow the provided instructions to install Rivet on your desktop. Why Choose Rivet? Rivet offers a unique and invaluable feature set. Its visual programming environment allows users to visualize and build AI agents using its user-friendly interface. Remote debugging enables users to observe the execution of prompt chains in real-time, making bug identification and resolution more efficient. Rivet also promotes collaboration within teams by representing different graphs in YAML files and supporting version control. Creating AI Agents with Rivet To create an AI agent with Rivet, start by clicking on "New Graph" and create folders within it to organize your graphs. Use the provided nodes to build your AI agent. For example, the "AI Chat" node utilizes the GPT-3.5 Turbo model. You can customize the node's title, description, and prompt to suit your needs. Rivet also offers various configurations and outputs, including data storage, export options, and plugins. Getting Started Once you have installed Rivet, set your OpenAI API key in the settings tab. You can also select different themes and set the executor to browser or node. Rivet allows you to run and test your AI agent locally using a remote debugger. An Example: Creating a Chatbot Let's create a chatbot that responds as a chemist when given a prompt to identify the stability of different compounds. You can define the context and prompt in a JSON file and extract it in your AI agent. Use the available nodes and models to generate responses in the desired format. Rivet offers extensive documentation and tutorials for a more in-depth understanding of its functionalities. Conclusion Rivet is a powerful IDE for creating complex AI agents. Its unique features, such as a visual programming environment, remote debugging, and collaboration support, set it apart from other AI development tools. With Rivet, you can unleash your creativity and build innovative AI applications. Check out the links in the description to explore Rivet further. Thank you for watching, and have a great day! Thank you for taking the time to read this article! If you enjoyed it and would like to stay updated with similar content, we invite you to follow our blog. You can receive notifications directly in your inbox by subscribing to our email list. Alternatively, you can also join our Facebook fanpage, where we share more articles, news, and updates. Lastly, for those who prefer video content, we have a YouTube channel that you can subscribe to as well. Thank you again for your support, and we look forward to keeping you engaged and informed! Frequently Asked Questions 1. What is Rivet and how is it different from other AI development tools? Rivet is an IDE for creating complex AI agents with a focus on additional toolkit and plugins. It is fully open source and has a visual programming environment. Unlike other apps like abacus.ai and Chidori, Rivet is designed for creating more complex AI agents. 2. What are the core strengths of Rivet? Rivet's core strengths lie in its ability to facilitate the design and connection of nodes to craft AI agents. It simplifies the AI creation process and ensures accessibility for individuals with different levels of programming knowledge. Rivet also offers remote debuggability, ease of embedding in a host application, and TypeScript compatibility. 3. How can I install Rivet on my desktop? There are two ways to install Rivet: using the one-click installer or building from the source. The recommended method is to use the one-click installer, which is available for different operating systems. Detailed installation instructions can be found in the article. 4. What are the main features of Rivet? Rivet offers a visual programming environment, remote debugging capabilities, and collaboration features. It allows you to visualize and build AI agents using its UI, debug prompt chains in real time, and collaborate with your team by representing graphs in YAML files. 5. Can I create complex AI agents with Rivet? Yes, Rivet is designed to create complex AI agents. It offers a range of toolkits and plugins that allow for the customization and design of AI agents. The application provides a versatile platform for seasoned AI developers as well as individuals new to working with AI. Read the full article
0 notes
Text
Produce Stunning Images in a Matter of Seconds with Leonardo Ai
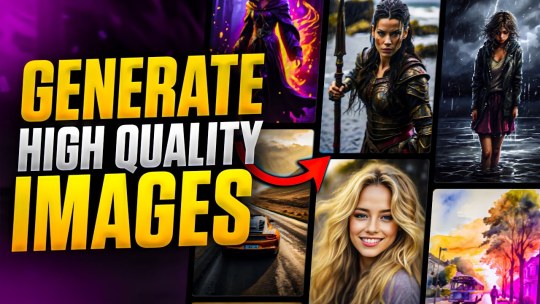
Introducing the Wonderful World of Leonardo AI: A Tool for Creating Images By Ben Mellor H2: How to Create an Account on Leonardo AI H3: Step 1: Visit the Leonardo AI Homepage To access the amazing features of Leonardo AI, start by visiting their homepage. Scroll down to discover the stunning images that can be generated using this AI tool. It's incredible to think that you can create these types of images for free. Make sure to watch this tutorial in its entirety to learn how. H3: Step 2: Creating Your Account Creating an account on Leonardo AI is a breeze and there's no need for a credit card. Simply click on "Create an Account." You have the option to sign up using your Gmail or Microsoft account, or you can sign up with your email. For the purposes of this tutorial, we will use a Gmail account. Click on "Google" and check your email for further instructions. Once you've completed the account creation process, you will be redirected to the homepage. H2: Exploring the Features of Leonardo AI H3: Recent Creations Upon arriving at the homepage, you will notice a section featuring some recent creations. These images are truly amazing and showcase the capabilities of Leonardo AI. Click on any image to explore the prompt used to generate it, as well as details such as resolution, response time, and the model that was utilized. You can even copy the prompt and generate more images using a different model. H3: Trading on Leonardo AI Discover some of the top images generated by others in the trading section. These images are incredibly cool and serve as a great source of inspiration. H3: Image Generation One of the fantastic features of Leonardo AI is the ability to generate images. Click on "Image Generation" to access a collection of images that you have generated in the past. As a user of the free plan, you are granted 150 credits per day, allowing you to generate up to 150 images daily. This is an incredible amount of images to have at your disposal. Additionally, you can remove backgrounds from images using this tool. So, what are you waiting for? Let's dive in and explore this feature further. H4: Setting the Parameters Before generating an image, there are a few parameters you can set. The first is the prompt itself. You can paste or type your prompt into the designated field. Next, you have the option to choose from several models, such as "Leonardo Diffusion XL" or "Leonardo Vision XL." Each model offers unique results, so feel free to experiment and see what works best for your desired image. Additionally, you can select a style for your image, or opt for no style at all. You can even add negative prompts if there are specific elements you do not want in your generated images. On the left side of the screen, you can specify how many images you want to generate. Please note that with the free plan, you can generate up to four images. Finally, you can adjust the dimensions of your images by setting the width and height according to your preferences. If you're happy with the default settings, you can proceed to generate your image. H4: Generating the Image To generate an image, you will need to allocate a certain number of tokens. The token requirement varies depending on the selected model. For instance, using the "Leonardo Diffusion XL" model will cost you 11 tokens. However, if you switch to the "Leonardo Vision XL" model, the cost will be four tokens. It's essential to manage your tokens wisely to maximize your usage. Once you've set your parameters and allocated the necessary tokens, simply click on "Generate" and wait for your image to be created. The process typically takes less than a minute. H3: Real-Time Canvas Another exciting feature offered by Leonardo AI is the real-time canvas. Here, you can type in your desired image concept, and the AI tool will generate images in real-time as you type. For example, if you type "jungle cartoon style playing cricket in the morning," the tool will generate images based on your input. You can also select different models, such as "Dynamic," "Anim," "Cinematic," "Vibrant," or "Fantasy Art." Each model produces unique results, allowing you to explore various styles. H4: Sketching and Editing Using the real-time canvas, you can sketch and edit your images. For instance, if you want to sketch something on a specific part of the image, you can do so. Similarly, if you want to remove a certain element, that is also possible. Simply use the sketching and editing tools provided, and let your creativity shine. This feature is entirely free to use and offers endless possibilities for customization. H2: Conclusion Leonardo AI is a remarkable tool for generating images in a quick and intuitive manner. With its various models, prompt customization options, and free plan offering 150 daily credits, it's an accessible tool for both beginners and advanced users. Whether you're looking to create stunning visuals for personal use or professional projects, Leonardo AI has you covered. Join the countless users who are already experiencing the magic of this AI tool. If you encounter any issues, feel free to reach out in the comments section. Don't forget to subscribe for more amazing AI tools and tutorials. Thank you for taking the time to read the article! If you enjoyed it and would like to stay updated with our latest content, we invite you to follow our blog via email subscription or our Facebook fan page. You can also find us on YouTube for more engaging and informative videos. Your support means a lot to us, and we look forward to sharing more valuable content with you in the future. **Frequently Asked Questions:** 1. How can I create an account on Leonardo AI? - Answer: To create an account on Leonardo AI, you can click on "Create an account" on the homepage and sign up using your Gmail, Microsoft account, or email. 2. Are there any charges or credit card requirements for creating an account on Leonardo AI? - Answer: No, there are no charges or credit card requirements for creating an account on Leonardo AI. It is free to create an account. 3. How many images can I generate per day using Leonardo AI? - Answer: On the free plan, you can generate up to 150 images per day using Leonardo AI. 4. Can I remove backgrounds from images using Leonardo AI? - Answer: Yes, you can remove backgrounds from images using Leonardo AI. It is one of the available features of the tool. 5. Are there different models available for generating images on Leonardo AI? - Answer: Yes, there are multiple models available on Leonardo AI, such as Leonardo diffusion XL and Leonardo Vision XL, to generate different types of images. Read the full article
0 notes
Text
How to Create a Coloring Book in CANVA | Earn $2000 Monthly by Creating Coloring Books with CANVA
**HTML Headings** In today's tutorial: Creating a Heat Coloring Book in 3 Simple Steps and Earning $2,000 to $5,000 per Month Step 1: Creating the Image for the Coloring Book Using Leonardo AI First, we'll start by creating the image for the coloring book. I'll be using Leonardo AI, a free software. To access the dashboard, go to the Leonard website (link provided in the description) and create an account using your Gmail or email account. Once you've created an account, click on the "Launch App" button to access the dashboard. On the left-hand side of the dashboard, you'll find the "Image Generation" option. I have tried different prompts, but the best result came from a specific prompt that I'll include in the description. You'll need to keep the entire prompt the same, except for the main character. Feel free to change it to anything you want. Leave the negative prompt unchanged. After making the necessary changes, go to the "Finetuned Model" section. Among the different finetuned models, I found that Leonardo Diffusion Excel gave me the best results. On the left-hand side, you can choose up to four images. I'm choosing two here. Make sure "Alchemy Dogle" is turned on and select an aspect ratio of 3:4. Finally, click on the "Generate" button. If you're satisfied with any of the generated images, you can use the "Smooth Upscaling" option to enhance the image quality. Note that this option requires 5 to 8 tokens. Once the image is upscaled, you can download it by clicking on the "Download Image" option. Step 2: Creating the Coloring Page Using Leonardo AI Next, we'll move on to creating the black and white sketch for the coloring page. Again, I have tried multiple prompts, but the best result came from a specific prompt that I'll provide in the description. Paste the chosen prompt and make sure the aspect ratio remains the same (3:4). Out of the different results obtained from trying various prompts, select the image that looks most satisfactory to you. You can upscale the image from the Leonardo AI platform and download it according to the instructions provided earlier. Step 3: Designing the Book Cover and Interior Illustrations Using Canva Now, we'll design the book cover and interior illustrations. To begin, we need to register with Amazon KDP, so click on the provided link and create a KDP account using your name, email ID, and password. After agreeing to the terms and conditions, navigate to the "Help" section and select "Format Your Paperback." In the "Cover Template" option, choose "Paperback," "Black and White," and "White Paper." Set the dimensions to 8.5 inches for width and 11 inches for trim height. Enter a minimum of 24 pages, but it can be more if you prefer. Click on "Calculate" and download the template. To create the book cover, we'll use Canva. If you don't have a Canva Pro subscription, use the link provided in the description to get a free 30-day trial. Once you're on Canva's website, go to "Custom Size" and enter the dimensions 17.43 by 11.25 inches for the cover. Upload the template file that you downloaded from Amazon KDP. In the "Elements" section, select a shape and place it on the cover to frame the design. Adjust the shape's position to cover the desired area. To enhance the image, go to the "Edit" section and apply a filter or make further adjustments using the available options. To add text to the cover, go to the "Text" section and choose a suitable font. You can either use the provided Carson Script font or explore free Disney fonts available on fonts.com. If necessary, upload a font by selecting the "Upload Font" option. To add a Disney princess or other relevant illustrations, use the "Edit Photo" and "Magic Grab" features, if available. Adjust the position of the illustrations and use the "Color" section to modify their appearance. You can also add additional elements to enhance the design. Once the cover design is complete, save the file as a PDF by going to the "Share" option, selecting "Download," and choosing the PDF print format. Now, let's move on to creating the interior illustrations. For the interior illustrations, set the custom size to 8.625 by 11.25 inches and create a new design. Import the previously created designs and position them on the pages. Apply filters and adjustments, if desired, to improve the quality of the illustrations. Save the interior illustrations as a PDF by following the same steps as before. Congratulations! The design process for the heating coloring book is now complete. To publish the book on Amazon KDP, please refer to the official Amazon website for a detailed step-by-step guide. Publishing a book on Amazon KDP involves a series of simple five processes that you need to complete. Now, let's explore an additional way to monetize your skills and earn more from creating coloring books. Many companies outsource the creation of coloring books because they lack the time and resources to do it themselves. By creating coloring books for other companies, you can generate income that can be further used to promote your own books on Amazon KDP. Platforms like Fiverr offer opportunities to sell your services as a book cover or interior illustration designer. Many sellers on Fiverr charge different prices based on the complexity of the designs and the number of pages required. By utilizing this trick, you can earn $2,000 to $5,000 per month by designing coloring books for other companies while also promoting your own books on Amazon KDP. If you're interested in learning about different AI models and tools, visit our website ww.wacpmedia.in. We offer a comprehensive course that covers various AI tools and techniques, and we currently have an early bird offer available. If you enjoyed this tutorial, please consider subscribing to my channel and giving this video a like. I would greatly appreciate it if you shared my content with your friends and family, helping me reach a wider audience. Stay tuned for future tutorials and stay safe. Thank you for your support! Thank you so much for taking the time to read this article. I genuinely appreciate your interest and support. If you enjoyed reading this article and would like to stay updated with similar content, I kindly request you to follow our blog. You can do so by subscribing to our email list, joining our Facebook fanpage, or subscribing to our YouTube channel. By doing so, you will never miss out on any valuable information, updates, or new articles that we share. Thank you again for your time, and I hope to connect with you through our blog's email list, Facebook fanpage, or YouTube channel. **Frequently Asked Questions:** **1. How can I create a Heats coloring book for free?** To create a Heats coloring book for free, you can follow the tutorial mentioned in the passage. It provides step-by-step instructions on using Leonardo AI and Canva to create the book. **2. How can I earn $2 to $5,000 per month using this trick?** The passage mentions that there are two different ways to earn money with this trick. One way is by publishing your own book on Amazon KDP and earning royalties from sales. The other way is by designing coloring books for other companies and charging a fee for your services. **3. Where can I find the necessary tools for creating a coloring book?** For image generation, you can use Leonardo AI, which is a free software. Canva can be used for designing the cover and interior illustrations. Links to these tools are provided in the description of the passage. **4. Do I need to have a paid license for using Canva commercially?** Yes, a paid license (Canva Pro) is required for using Canva commercially. However, the passage provides a link that offers a 30-day free trial of Canva Pro. **5. What are the steps to publish a book on Amazon KDP?** The passage mentions that publishing a book on Amazon KDP involves several steps. However, due to time constraints, the steps are not provided in the passage. Instead, a link to Amazon's official website is provided where you can find the step-by-step process for publishing a book on Amazon KDP. Read the full article
0 notes
Text
How to Create a Coloring Book in CANVA | Earn $2000 Monthly by Creating Coloring Books with CANVA

**HTML Headings** In today's tutorial: Creating a Heat Coloring Book in 3 Simple Steps and Earning $2,000 to $5,000 per Month Step 1: Creating the Image for the Coloring Book Using Leonardo AI First, we'll start by creating the image for the coloring book. I'll be using Leonardo AI, a free software. To access the dashboard, go to the Leonard website (link provided in the description) and create an account using your Gmail or email account. Once you've created an account, click on the "Launch App" button to access the dashboard. On the left-hand side of the dashboard, you'll find the "Image Generation" option. I have tried different prompts, but the best result came from a specific prompt that I'll include in the description. You'll need to keep the entire prompt the same, except for the main character. Feel free to change it to anything you want. Leave the negative prompt unchanged. After making the necessary changes, go to the "Finetuned Model" section. Among the different finetuned models, I found that Leonardo Diffusion Excel gave me the best results. On the left-hand side, you can choose up to four images. I'm choosing two here. Make sure "Alchemy Dogle" is turned on and select an aspect ratio of 3:4. Finally, click on the "Generate" button. If you're satisfied with any of the generated images, you can use the "Smooth Upscaling" option to enhance the image quality. Note that this option requires 5 to 8 tokens. Once the image is upscaled, you can download it by clicking on the "Download Image" option. Step 2: Creating the Coloring Page Using Leonardo AI Next, we'll move on to creating the black and white sketch for the coloring page. Again, I have tried multiple prompts, but the best result came from a specific prompt that I'll provide in the description. Paste the chosen prompt and make sure the aspect ratio remains the same (3:4). Out of the different results obtained from trying various prompts, select the image that looks most satisfactory to you. You can upscale the image from the Leonardo AI platform and download it according to the instructions provided earlier. Step 3: Designing the Book Cover and Interior Illustrations Using Canva Now, we'll design the book cover and interior illustrations. To begin, we need to register with Amazon KDP, so click on the provided link and create a KDP account using your name, email ID, and password. After agreeing to the terms and conditions, navigate to the "Help" section and select "Format Your Paperback." In the "Cover Template" option, choose "Paperback," "Black and White," and "White Paper." Set the dimensions to 8.5 inches for width and 11 inches for trim height. Enter a minimum of 24 pages, but it can be more if you prefer. Click on "Calculate" and download the template. To create the book cover, we'll use Canva. If you don't have a Canva Pro subscription, use the link provided in the description to get a free 30-day trial. Once you're on Canva's website, go to "Custom Size" and enter the dimensions 17.43 by 11.25 inches for the cover. Upload the template file that you downloaded from Amazon KDP. In the "Elements" section, select a shape and place it on the cover to frame the design. Adjust the shape's position to cover the desired area. To enhance the image, go to the "Edit" section and apply a filter or make further adjustments using the available options. To add text to the cover, go to the "Text" section and choose a suitable font. You can either use the provided Carson Script font or explore free Disney fonts available on fonts.com. If necessary, upload a font by selecting the "Upload Font" option. To add a Disney princess or other relevant illustrations, use the "Edit Photo" and "Magic Grab" features, if available. Adjust the position of the illustrations and use the "Color" section to modify their appearance. You can also add additional elements to enhance the design. Once the cover design is complete, save the file as a PDF by going to the "Share" option, selecting "Download," and choosing the PDF print format. Now, let's move on to creating the interior illustrations. For the interior illustrations, set the custom size to 8.625 by 11.25 inches and create a new design. Import the previously created designs and position them on the pages. Apply filters and adjustments, if desired, to improve the quality of the illustrations. Save the interior illustrations as a PDF by following the same steps as before. Congratulations! The design process for the heating coloring book is now complete. To publish the book on Amazon KDP, please refer to the official Amazon website for a detailed step-by-step guide. Publishing a book on Amazon KDP involves a series of simple five processes that you need to complete. Now, let's explore an additional way to monetize your skills and earn more from creating coloring books. Many companies outsource the creation of coloring books because they lack the time and resources to do it themselves. By creating coloring books for other companies, you can generate income that can be further used to promote your own books on Amazon KDP. Platforms like Fiverr offer opportunities to sell your services as a book cover or interior illustration designer. Many sellers on Fiverr charge different prices based on the complexity of the designs and the number of pages required. By utilizing this trick, you can earn $2,000 to $5,000 per month by designing coloring books for other companies while also promoting your own books on Amazon KDP. If you're interested in learning about different AI models and tools, visit our website ww.wacpmedia.in. We offer a comprehensive course that covers various AI tools and techniques, and we currently have an early bird offer available. If you enjoyed this tutorial, please consider subscribing to my channel and giving this video a like. I would greatly appreciate it if you shared my content with your friends and family, helping me reach a wider audience. Stay tuned for future tutorials and stay safe. Thank you for your support! Thank you so much for taking the time to read this article. I genuinely appreciate your interest and support. If you enjoyed reading this article and would like to stay updated with similar content, I kindly request you to follow our blog. You can do so by subscribing to our email list, joining our Facebook fanpage, or subscribing to our YouTube channel. By doing so, you will never miss out on any valuable information, updates, or new articles that we share. Thank you again for your time, and I hope to connect with you through our blog's email list, Facebook fanpage, or YouTube channel. **Frequently Asked Questions:** **1. How can I create a Heats coloring book for free?** To create a Heats coloring book for free, you can follow the tutorial mentioned in the passage. It provides step-by-step instructions on using Leonardo AI and Canva to create the book. **2. How can I earn $2 to $5,000 per month using this trick?** The passage mentions that there are two different ways to earn money with this trick. One way is by publishing your own book on Amazon KDP and earning royalties from sales. The other way is by designing coloring books for other companies and charging a fee for your services. **3. Where can I find the necessary tools for creating a coloring book?** For image generation, you can use Leonardo AI, which is a free software. Canva can be used for designing the cover and interior illustrations. Links to these tools are provided in the description of the passage. **4. Do I need to have a paid license for using Canva commercially?** Yes, a paid license (Canva Pro) is required for using Canva commercially. However, the passage provides a link that offers a 30-day free trial of Canva Pro. **5. What are the steps to publish a book on Amazon KDP?** The passage mentions that publishing a book on Amazon KDP involves several steps. However, due to time constraints, the steps are not provided in the passage. Instead, a link to Amazon's official website is provided where you can find the step-by-step process for publishing a book on Amazon KDP. Read the full article
0 notes
Text
How to Change Your Discord Tag Without Nitro in 2023 (Free Method)

Hey everyone, it's Ben Mellor here and I'm excited to share a useful trick with all of you today. In this article, I will show you a simple method to change your Discord tag without needing to have Nitro. It's incredible how easy it is, so let's dive right into it. To begin, open the Discord app on your device. Once the app is launched, you'll need to navigate to the user settings. You can find this option by clicking on the icon that represents the user, usually located at the top-right corner of your screen. Once you have accessed the user settings, you'll notice a section called "My Account". In the past, there used to be an option under this section that allowed you to change your username and tag, but it required you to have a Nitro subscription and pay a fee. However, things have changed, and Discord has implemented a new feature. Now, instead of the old method, there is a username option available to you. It's quite simple to use. Just click on the edit button, and you'll be able to enter any username you desire. The best part is, you don't need Discord Nitro to do this. It's absolutely mind-blowing, right? Don't just take my word for it, give it a try. To change your username, simply type in your desired username and your password. Once you have done that, click on the "Done" button. You'll notice that it won't ask you for any Nitro subscription. You see, by implementing this new feature, Discord has made it much more convenient for users to change their usernames. In case you're wondering, if you leave the "username" field empty and only enter your password before clicking "Done," it won't change your username. However, if you enter a new username and then provide your password, it will proceed to change your username accordingly. That's all there is to it, folks! I hope you found this article helpful. Feel free to check out the accompanying video for a visual demonstration. If you found value in this trick, be sure to like the video and subscribe to our channel for more helpful content. Let us know in the comments if this method worked for you. Thanks for reading, and see you in the next article! Thank you for taking the time to read this article! If you enjoyed what you read and would like to stay updated with our latest content, we kindly invite you to follow our blog via email subscription or through our Facebook fanpage and YouTube channel. By doing so, you'll never miss any of our future posts or videos. We greatly appreciate your support! Frequently Asked Questions 1. How can I change my Discord tag without using Nitro in 2023? To change your Discord tag without using Nitro, you need to open the Discord app and go to user settings. From there, click on "my account" and then on the "edit" button next to the username option. You can then add any username you want without needing Discord Nitro. 2. Do I need to pay a subscription fee on Nitro to change my tag? No, you do not need to pay a subscription fee on Nitro to change your Discord tag anymore. Discord has implemented a new option where you can change your username without needing Nitro. Simply follow the instructions mentioned in question 1. 3. Will it ask for my password to change the username? Yes, if you write your password when changing the username, Discord will ask you to confirm it. However, if you don't write anything else in the password section, it will not ask you for a password and simply change your username. 4. Can I change my tag multiple times without Nitro? Yes, you can change your username multiple times without needing Discord Nitro. As long as you follow the steps mentioned in question 1, you can freely change your tag according to your preference. 5. Will changing my tag affect my subscription or account settings? No, changing your tag will not affect your subscription or account settings on Discord. It only changes your username and does not alter any other aspects of your account. Read the full article
0 notes
Text
Crazy AI News of the Week: GPT-5 Goes Official, Nvidia's AI Chip, Global Illumination, and AI Cars!

Introducing GPT Bot: Open AI's Specialized Program Enhancing AI Capabilities with Up-to-Date Information GPT Bot is an exciting development by Open AI that allows users to gather information from the entire Internet. Unlike Chat GBT, which has a knowledge cut-off date, GPT Bot delivers real-time data and information as users generate content. Open AI has many upcoming models, including GPT 5, and they continue to evolve their existing models like GBT4. The special programming of GPT Bot ensures it avoids infringing on privacy issues or accessing content behind paywalls. This ensures the appropriate and accessible use of the program for training purposes. Open AI Acquires Global Illumination: Enhancing Immersive Experiences Realistic Lighting and Visual Effects in Virtual Environments Open AI's recent acquisition of Global Illumination is a significant move towards enhancing the virtual realism and immersive experience of AI applications. Global Illumination is well-known for its expertise in creating realistic lighting and visual effects, particularly in virtual environments like video games. In fact, they have already developed an impressive open-source clone of Minecraft, showcasing their capabilities. By incorporating this new company and their technology, Open AI aims to create a more engaging virtual world for AI applications. This can greatly improve the effectiveness of AI models in learning from diverse and complex scenarios, particularly in virtual training environments. Nvidia Partners with Hugging Face: Empowering Developers Generative AI Supercomputing for Advanced Applications Nvidia's partnership with Hugging Face brings their dgx Cloud product into the ecosystem, empowering millions of developers with generative AI supercomputing technology. One of the biggest challenges for developers is the lack of graphic cards and their high cost. However, with this integration, developers can now access Nvidia's dgx Cloud AI supercomputing within the Hugging Face platform, making it easier and more efficient to develop AI applications and larger models. This collaboration aims to supercharge the adoption of generative AI in various industries, including intelligent chat bots, search, and summarization. SIGGRAPH Conference: Nvidia Introduces Groundbreaking AI Products Gh-200 Chip for Handling Terabyte-Class Models Nvidia's presence at the SIGGRAPH conference brought exciting announcements and innovations to the world of AI. One product that stood out is the release of their new chip, the Gh-200. This chip is specifically designed to handle terabyte-class models, offering an astounding 144 terabytes of shared memory. Its linear scalability makes it ideal for giant AI projects and models. These advancements in technology showcase the continuous growth and innovation in the field of AI. Cruise: Self-Driving Vehicles for Autonomous Transportation A Step Forward in Advancing Self-Driving Technology Cruise, a company dedicated to autonomous transportation, has officially introduced its self-driving vehicles. This significant step forward in autonomous transportation aligns with Cruise's larger objective of extending a robo-taxi service to various cities. They have already started testing these vehicles in Atlanta and have plans for data gathering and testing efforts across the nation. Cruise is committed to advancing the development and deployment of their self-driving technology. Stability AI Introduces Stable Code for Coding Needs A Language Model Designed to Assist Programmers Stability AI has made an exciting announcement with the introduction of Stable Code, their first large language model generative AI product designed specifically for coding needs. This product aims to assist programmers with their daily work while also serving as a learning tool for new developers. According to Open AI's human evaluation benchmark, Stable Code outperforms other coding language models like StarCoder Base and ReplicCoder. This benchmark showcases the reliability and effectiveness of Stable Code for coding tasks. Alibaba's Open Source Language Model: Quinn A Competitor to Chat GBT Alibaba recently open-sourced their own large language model called Quinn, positioning themselves as a competitor to Chat GBT. By making Quinn accessible to third-party developers, Alibaba enables them to build their own AI applications without the need to train their systems from scratch. This strategic move puts Alibaba in direct competition with Meta and poses a challenge to Chat GBT. Developers can access more information about Quinn in a video by Ben Mellor, which covers the model, datasets, and accessing methods. Join the AI Community and Stay Updated Subscribe, Follow, and Engage If you want to stay up-to-date with the latest AI trends, make sure to follow the World of AI on Twitter and subscribe to their YouTube channel. Turning on notifications will ensure you never miss new videos. Additionally, joining their Patreon community provides access to a vibrant Discord community, where you can engage with like-minded individuals, get the latest partnership and networking opportunities, and stay informed about the latest AI news. Sharing the content and subscribing to the channel helps support the World of AI and allows them to continue creating valuable and informative videos. Conclusion These recent developments in the world of AI are truly exciting and groundbreaking. From Open AI's GPT Bot bringing real-time information to users, to Nvidia's partnership with Hugging Face empowering developers with generative AI supercomputing technology, and Stability AI's introduction of Stable Code for coding needs, the AI landscape continues to evolve and innovate. Cruise's self-driving vehicles and Alibaba's open-source language model Quinn further contribute to the advancement of autonomous transportation and the accessibility of AI applications. The future of AI looks promising, and staying connected with the AI community ensures you stay at the forefront of these transformative advancements. Thank you for taking the time to read this article! If you found it interesting and would like to stay updated with more content, we would love for you to follow our blog. You can do so by subscribing to our email newsletter, liking our Facebook fan page, or subscribing to our YouTube channel. By doing this, you'll be the first to know about our latest articles, videos, and other exciting updates. We appreciate your support and hope to see you there! Frequently Asked Questions 1. What is the GPT bot introduced by Open AI? The GPT bot is a specialized program by Open AI that gathers up-to-date information from the entire Internet, providing real-time data and information when generating text or content using chat GBT. 2. How does the acquisition of Global illumination by Open AI impact AI applications? The acquisition of Global illumination by Open AI aims to enhance the virtual realism and immersive experience of AI applications, potentially improving realism for virtual training environments and making AI models more effective at learning from diverse and complex scenarios. 3. What is the partnership between Nvidia and hugging face about? Nvidia's dgx Cloud product is being implemented into the hugging face ecosystem, empowering developers with generative AI supercomputing technology for larger models and advanced AI applications. This partnership allows developers easier and more efficient development of AI apps and larger models on hugging face. 4. What is the gh200 chip released by Nvidia? The gh200 chip is designed to handle terabyte-class models for generative AI, offering 144 terabytes of shared memory with linear scalability. This chip contributes to the innovation and growth in the world of AI. 5. What is Stable Code by Stability AI? Stable Code is Stability AI's first large language model generative AI product specifically designed for coding needs. It assists programmers in their daily work and provides a learning tool for new developers. Stable Code has been benchmarked to outperform other coding language models in terms of coding needs. Read the full article
0 notes
Text
How To Make Money On Printify and Etsy in 2024 (For Beginners)
Are you looking for a way to make money online? Have you heard of Printify and Etsy but don't know how to utilize them to generate income? Look no further, as this article will guide you through the top 11 ways to increase your earnings on Printify and Etsy. By the end of this article, you will have a clear understanding of how these platforms work and how you can use them to your advantage. How Printify Works? Printify is a print-on-demand service that allows business owners to create custom designs to be placed on various products such as t-shirts, hoodies, and more. Founded by James Berdigans, Artis Kehris, and Gatis Dukurs, Printify operates as a B2B marketplace connecting manufacturers with eCommerce stores. This platform takes care of mundane tasks like fulfilling orders, billing, manufacturing requests, and shipping, allowing store owners to focus on building their brands. Choice of Products One of the key features of Printify is the wide range of products available for customization. From clothes and accessories to stationery and home décor options, there is something for every niche and target audience. This variety allows business owners to cater to different markets and expand their product offerings. To get started, simply choose the product you want to customize and select the provider you wish to work with. Printify has a list of trusted providers that offer high-quality and affordable printing services. You can also compare prices and reviews to find the best fit for your business. Creating a Design Once you have chosen your product and provider, it's time to get creative and design your product. Printify offers a user-friendly design tool that allows you to upload your own designs, logos, art, or photos. You can also choose from a library of pre-made designs and templates to save time and effort. It's important to create unique and eye-catching designs that will appeal to your target audience. This will help you stand out in a competitive market and attract potential customers. Don't be afraid to experiment with different designs and styles to find what works best for your brand. Deciding the Provider As mentioned earlier, Printify has a list of trusted providers that offer printing services. It's crucial to choose the right provider for your business as they will be responsible for manufacturing and shipping your products. Consider factors such as pricing, quality, and shipping times when making your decision. It's also recommended to order samples from different providers to ensure the quality meets your standards. This will also give you an idea of the shipping times and customer service of each provider. Placing the Product on an Ecommerce Site Once your product is designed and ready to be sold, it's time to place it on an eCommerce site. Printify integrates with popular platforms such as Etsy, Shopify, and WooCommerce, making it easy to add your products to your online store. Etsy is a popular marketplace for handmade and unique products, making it the perfect platform for Printify products. By integrating Printify with Etsy, you can reach a larger audience and potentially increase your sales. Making the Sale Now that your product is live on your eCommerce site, it's time to make the sale. It's important to market your products effectively to attract potential customers. Utilize social media platforms, email marketing, and collaborations with influencers to promote your products. It's also essential to provide excellent customer service and maintain a positive reputation to encourage repeat purchases and word-of-mouth referrals. With Printify handling the fulfillment process, you can focus on providing a great shopping experience for your customers. How to Generate Income From Printify? Now that you have a better understanding of how Printify works, let's dive into the top 11 ways to increase your earnings on Printify and Etsy. Create a Website Having your own website is crucial for any business, including those utilizing Printify and Etsy. It allows you to have full control over your brand and products, and it also gives you the opportunity to showcase your products in a unique way. You can use your website to promote your products, share your brand story, and provide a seamless shopping experience for your customers. With Printify's integration with popular eCommerce platforms, it's easy to add your products to your website and manage orders. Expand Ecommerce Footprint In addition to having your own website, it's essential to expand your eCommerce footprint by selling on multiple platforms. This will help you reach a larger audience and potentially increase your sales. Aside from Etsy, Printify also integrates with other popular platforms such as Amazon, eBay, and Redbubble. By diversifying your sales channels, you can tap into different markets and attract new customers. Monetize YouTube If you're passionate about creating videos and have a YouTube channel, you can monetize it by promoting your Printify products. You can create product review videos, tutorials, or even vlogs showcasing your products. YouTube has a large audience, and by leveraging it, you can reach potential customers who may not have come across your products otherwise. You can also collaborate with other YouTubers or influencers to expand your reach and attract more viewers. Begin Blogging Blogging is another effective way to promote your Printify products and drive traffic to your website. You can write about your products, share behind-the-scenes content, or even offer tips and advice related to your niche. By consistently creating valuable content, you can establish yourself as an authority in your niche and attract potential customers. You can also monetize your blog by incorporating affiliate marketing or sponsored posts. Online Coaching If you have a specific skill or expertise related to your Printify products, you can offer online coaching services. For example, if you design custom t-shirts, you can offer design consultations or workshops to teach others how to create their own designs. Online coaching is a great way to generate income while also sharing your knowledge and skills with others. You can promote your coaching services through your website, social media platforms, or collaborations with other businesses. Designing Unique Graphics Aside from selling your own products, you can also generate income by designing unique graphics for other businesses. Many businesses are in need of custom designs for their marketing materials, and you can offer your services through platforms like Fiverr or Upwork. You can also reach out to small businesses in your niche and offer your design services. This not only generates additional income but also helps you establish connections and potentially attract new customers. Conclusion In conclusion, Printify and Etsy are powerful platforms that can help you generate income online. By utilizing the top 11 ways mentioned in this article, you can increase your earnings and build a successful business. Remember to continuously improve your product offerings, provide excellent customer service, and market your products effectively to maximize your potential on these platforms. With determination and hard work, you can achieve success on Printify and Etsy in 2024 and beyond. Read the full article
0 notes
Text
How To Make Money On Printify and Etsy in 2024 (For Beginners)

Are you looking for a way to make money online? Have you heard of Printify and Etsy but don't know how to utilize them to generate income? Look no further, as this article will guide you through the top 11 ways to increase your earnings on Printify and Etsy. By the end of this article, you will have a clear understanding of how these platforms work and how you can use them to your advantage. How Printify Works? Printify is a print-on-demand service that allows business owners to create custom designs to be placed on various products such as t-shirts, hoodies, and more. Founded by James Berdigans, Artis Kehris, and Gatis Dukurs, Printify operates as a B2B marketplace connecting manufacturers with eCommerce stores. This platform takes care of mundane tasks like fulfilling orders, billing, manufacturing requests, and shipping, allowing store owners to focus on building their brands. Choice of Products One of the key features of Printify is the wide range of products available for customization. From clothes and accessories to stationery and home décor options, there is something for every niche and target audience. This variety allows business owners to cater to different markets and expand their product offerings. To get started, simply choose the product you want to customize and select the provider you wish to work with. Printify has a list of trusted providers that offer high-quality and affordable printing services. You can also compare prices and reviews to find the best fit for your business. Creating a Design Once you have chosen your product and provider, it's time to get creative and design your product. Printify offers a user-friendly design tool that allows you to upload your own designs, logos, art, or photos. You can also choose from a library of pre-made designs and templates to save time and effort. It's important to create unique and eye-catching designs that will appeal to your target audience. This will help you stand out in a competitive market and attract potential customers. Don't be afraid to experiment with different designs and styles to find what works best for your brand. Deciding the Provider As mentioned earlier, Printify has a list of trusted providers that offer printing services. It's crucial to choose the right provider for your business as they will be responsible for manufacturing and shipping your products. Consider factors such as pricing, quality, and shipping times when making your decision. It's also recommended to order samples from different providers to ensure the quality meets your standards. This will also give you an idea of the shipping times and customer service of each provider. Placing the Product on an Ecommerce Site Once your product is designed and ready to be sold, it's time to place it on an eCommerce site. Printify integrates with popular platforms such as Etsy, Shopify, and WooCommerce, making it easy to add your products to your online store. Etsy is a popular marketplace for handmade and unique products, making it the perfect platform for Printify products. By integrating Printify with Etsy, you can reach a larger audience and potentially increase your sales. Making the Sale Now that your product is live on your eCommerce site, it's time to make the sale. It's important to market your products effectively to attract potential customers. Utilize social media platforms, email marketing, and collaborations with influencers to promote your products. It's also essential to provide excellent customer service and maintain a positive reputation to encourage repeat purchases and word-of-mouth referrals. With Printify handling the fulfillment process, you can focus on providing a great shopping experience for your customers. How to Generate Income From Printify? Now that you have a better understanding of how Printify works, let's dive into the top 11 ways to increase your earnings on Printify and Etsy. Create a Website Having your own website is crucial for any business, including those utilizing Printify and Etsy. It allows you to have full control over your brand and products, and it also gives you the opportunity to showcase your products in a unique way. You can use your website to promote your products, share your brand story, and provide a seamless shopping experience for your customers. With Printify's integration with popular eCommerce platforms, it's easy to add your products to your website and manage orders. Expand Ecommerce Footprint In addition to having your own website, it's essential to expand your eCommerce footprint by selling on multiple platforms. This will help you reach a larger audience and potentially increase your sales. Aside from Etsy, Printify also integrates with other popular platforms such as Amazon, eBay, and Redbubble. By diversifying your sales channels, you can tap into different markets and attract new customers. Monetize YouTube If you're passionate about creating videos and have a YouTube channel, you can monetize it by promoting your Printify products. You can create product review videos, tutorials, or even vlogs showcasing your products. YouTube has a large audience, and by leveraging it, you can reach potential customers who may not have come across your products otherwise. You can also collaborate with other YouTubers or influencers to expand your reach and attract more viewers. Begin Blogging Blogging is another effective way to promote your Printify products and drive traffic to your website. You can write about your products, share behind-the-scenes content, or even offer tips and advice related to your niche. By consistently creating valuable content, you can establish yourself as an authority in your niche and attract potential customers. You can also monetize your blog by incorporating affiliate marketing or sponsored posts. Online Coaching If you have a specific skill or expertise related to your Printify products, you can offer online coaching services. For example, if you design custom t-shirts, you can offer design consultations or workshops to teach others how to create their own designs. Online coaching is a great way to generate income while also sharing your knowledge and skills with others. You can promote your coaching services through your website, social media platforms, or collaborations with other businesses. Designing Unique Graphics Aside from selling your own products, you can also generate income by designing unique graphics for other businesses. Many businesses are in need of custom designs for their marketing materials, and you can offer your services through platforms like Fiverr or Upwork. You can also reach out to small businesses in your niche and offer your design services. This not only generates additional income but also helps you establish connections and potentially attract new customers. Conclusion In conclusion, Printify and Etsy are powerful platforms that can help you generate income online. By utilizing the top 11 ways mentioned in this article, you can increase your earnings and build a successful business. Remember to continuously improve your product offerings, provide excellent customer service, and market your products effectively to maximize your potential on these platforms. With determination and hard work, you can achieve success on Printify and Etsy in 2024 and beyond. Read the full article
0 notes