
Don't wanna be here? Send us removal request.
Statistics
We looked inside some of the posts by akhilunnikrishnan and here's what we found interesting.
Average Info
Notes Per Post
1
Likes Per Post
1
Reblog Per Post
0
Reply Per Post
0
Time Between Posts
2 days
Number of Posts By Type
Text
7
Last Seen Tumblr Blogs


Fun Fact
Tumblr.com rank in the US is 25.
Text
Using Gateway Commands to call External APIs in Magento 2

Gateway Command is a Magento payment gateway component that takes the payload required by a specific payment provider and sends, receives, and processes the provider’s response. A separate gateway command is added for each operation (authorization, capture, etc.) of a specific payment provider.

Gateway commands were introduced in Magento 2 to deal with payment gateways, but they can be used in other ways as well such as calling external APIs and processing their response in magento 2 applications.
Let’s take a look at how a Gateway Command actually works.

There are 5 main components of a Gateway command. They are as follows:
Request Builder
Transfer Factory
Gateway Client
Response Handler
Response Validator
0 notes
Text
What is x-magento-init?

Magento uses x-magento-init in numerous places to invoke a RequireJS module as a program. But, the actual potential of x-magento-init lies in its ability to create Magento Javascript components. Let me explain how.
You might have gone through some of Magento’s templates and seen a <script type="text/x-magento-init">tag. But what does it mean?
Let’s use an example to explain<script type="text/x-magento-init"> { "[data-role=tocart-form]": { "catalogAddToCart": {} } } </script>
Basically, Magento’s frontend app engine searches for all script tags with type text/x-magento-init and uses the contents of it to call out certain jQuery widgets on certain DOM elements. Let’s see how that works.
So in the above example, the contents of the script tag is a JSON string.{ "[data-role=tocart-form]": { "catalogAddToCart": {} } }
If we parse this JSON we see that it contains one element with key [data-role=tocart-form](which denotes the DOM selector) and value as a JSON object, whose value is basically the widgets which are to be initialized on that DOM element.
So the above JSON is converted to
$('[data-role=tocart-form]').catalogAddToCart({});where catalogAddToCartis the widget being called on the DOM element $('[data-role=tocart-form]')
We can use this handy way of instantiating jQuery widgets on certain DOM elements, to keep our code clean, optimized, and maintainable.
But what are jQuery widgets though, and how to create your own widget?
Click here to understand how jQuery widgets work exactly.
0 notes
Text
How to secure Magento 1.x running on PHP 5.6 with PHP 7.2?

E-commerce websites built on Magento 1.0 to Magento 1.9 will become less secure in December 2018. These Magento versions are built on PHP 5.6. And, PHP has officially announced that it is stopping security updates for PHP 5.6 and 7.0 in December 2018.
What is PHP? It is a scripting language that is mostly used for web development. It is used to build platforms like WordPress, Magento, Drupal, Joomla and more. There are multiple versions of PHP, and each version is advanced to its previous version. Once a new stable version is released, platforms like Magento are updated to make use of the latest advancements.
When are security updates ending for PHP 5.6 and 7.0?
For PHP 7.0, security updates stopped on 3rd December 2018.
For PHP 5.6, security updates will be ending on 31st December 2018. (source)
Why is security support ending for PHP 5.6 and 7.0?
Each version of PHP is supported for two years, all bugs and security issues will be fixed during this period. Once the two year period gets over, each branch of PHP is supported for another year only for critical security issues.
Once its support period is over, that particular branch of PHP will reach its end-of-life (EOL), i.e. it will not be supported any longer, even in case of critical security issues.
Since 5.6 is the final PHP 5 release, the support for this version was extended for additional four months and the critical security fix period was extended to two years, which is now coming to an end by 31st December 2018.
Kinsta has explained it clearly why PHP 5.6 and 7.0 are not good enough beyond 2018.
What happens if you fail to update PHP 5.6 or 7.0 of your Magento website?
Since PHP 5.6 and 7.0 will not be receiving any security patches, your website will be vulnerable to hacks. Once your website is hacked the following things might happen:
Admin credentials will be exposed.
Customer data like credit card details will be stolen.
A significant drop in search engine ranks which will ultimately lead to losing customers.
The database will be manipulated.
Your website will be slower compared to your competitors.
Wordfence has answered some of the most asked questions related to PHP 5.6 and 7.0.
How to check the current PHP version of my website?
Checking the PHP version of your Magento site can be easily done by logging in to your hosting control panel. If you have SSH access, you can make use of the following command to check the version.
php -v
Also, plenty of online tools are available which can show the PHP version such as WhatRuns, BuiltWith (premium feature). But, it is recommended to check yourself by directly logging into the control panel.
Another way is to call your hosting provider and ask them about the PHP version used in your site.
How to keep my site Magento 1.x secure?
There are two ways to keep your Magento 1.x site secure. The first method is to upgrade your Magento 1.x site to the latest Magento 2 version. The second method is to upgrade to PHP 7.2 and apply the patch for Magento 1.x.
1. Upgrade your Magento 1.x site to the latest Magento 2.x version
The latest Magento 2.2.6 version runs on PHP 7.1.x and therefore switching your Magento 1.x site to the latest version will keep it protected from potential attacks.
Upgrading your site to Magento 2.2.6 will not only make it highly secure but also will improve performance drastically. For instance, the checkout process has been optimized, and its loading speed is no more dependent on the number of payment/shipping methods present.
This will ultimately improve customer experience and will allow you to have an edge over your competitors. However, since Magento 2 follows a totally different architecture and codebase, it is not a one-shot upgrade. The effort of migration is almost the same as building a new Magento 2 store. Talk to our Magento consultants for more information.
2. Upgrade PHP to 7.2 and apply the latest patch for Magento 1.x
You can also upgrade to PHP 7.2 and apply the patch officially released by Magento. This patch will make your website’s core Magento compatible with PHP 7.2.
Follow the procedure mentioned below to easily install the PHP 7.2 patch on your website.
How to upgrade PHP from 5.6/7.0 to 7.2 and secure Magento 1.x?
Before starting the development of the site, a version control system like GIT is used to maintain a record of the changes made to the code. This system can recall particular versions of code later, and it is therefore used by developers in case if something goes wrong. Version control can also be used for successfully backing up your code.
Step 1 – First, backup your site
Before starting the upgrading process, the first thing that you have to do is to take a backup of your website. To perform a backup of your Magento site you can follow the steps mentioned below.
Log in to your Magento Administration Panel.
Click on the System menu and under Tools category click Backups.
Select Database Backup and enter the backup name. It is recommended to use enter date in the backup name for future reference. Check the box next to “Put store on the maintenance while backup creation” and click Ok.
Finally, the backup will be downloaded to your computer.
Step 2: Code and media backup
To backup the code and media of your Magento website follow these step by step backup process.
Step 3: Check the compatibility of extensions (CRITICAL)
It is most likely that a few extensions installed on your store will not work properly on the new PHP version 7.2. You need to upgrade these extensions to a version that supports PHP 7.2. If there is no such update from the extension vendor, you may ask your developers to customize the extension to support PHP 7.2
Alternatively, you can reach out to us by sending an email to [email protected].
Step 4 – Update your PHP version.
To update the PHP version of your Magento store, go to your web hosting control panel and upgrade the PHP version. Check out this article to understand how to upgrade to PHP 7.2 using shell commands.
Step 5 – Apply the patch.
Magento has released PHP 7.2 patch specifically for Magento 1.9 customers. This patch will make your Magento website compatible with PHP 7.2, thereby making it secure from attacks. To download the patch click here.
To apply the patch, you can make use of this detailed procedure for installing any Magento patch.
If you find this to be a difficult process, contact Codilar team for assistance.
Always consider security as a part of your SEO process.
Generally, security issues are not taken seriously in the SEO process. Connect your website to Google Search Console and get notified about security issues such as hacks, malware, crawl errors along with your website’s SEO performance.
If you are looking to upgrade PHP or migrate to Magento 2.x? Contact Codilar team to make your Magento 1.x website secure, or for any Magento related solutions.***
Previous blogs
Magento 2 PWA Studio Demo (Venia)
Everything you need to know about Magento 2.2.6 release
0 notes
Text
New Magento 2.3.1 Features Every Merchant and Developer Should Know
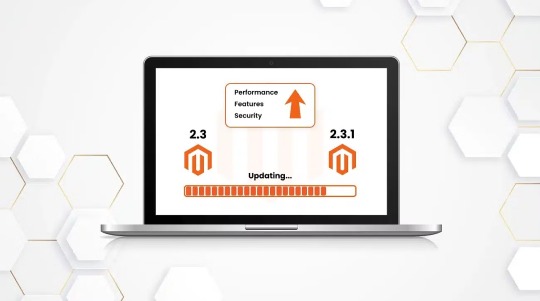
While the buzz created by Magento 2.3 is not over yet, Magento has released Magento 2.3.1 with great features, critical bug fixes, 30 security enhancements, 200 core functional fixes and 500 pull requests contributed by the community.
Before we dive into Magento 2.3.1
Before we jump into the exciting features of Magento 2.3.1, every Magento store owner and developer must be aware of the critical problems in Magento which should be taken care of immediately.
1. SQL vulnerability
There is a critical SQL injection vulnerability in pre 2.3.1 Magento code.
SQL injection is the process of sending malicious code to gain access and modify data. In this case, hackers can gain access to sensitive banking information of customers.
To protect your site from this vulnerability, download and apply the patch available here.
2. PayPal Payflow Pro active carding
The PayPal Payflow integration in Magento is being targeted by hackers for carding activity, which means these hackers check the validity of the stolen cards by making $0 transactions.
Magento has recommended using Google reCAPTCHA on the Payflow Pro checkout. For more details click here.
3. Authorize.Net support end for MD5 hash
Also, if your Magento site is using Authorize.Net MD5 hash and if you don’t plan to update to 2.3.1, then you have to follow these steps to fix Authorize.Net payment method. Otherwise, your site won’t be able to process payments via Authorize.Net from June 28, 2019.
If you need any help in any of the problems mentioned above you can get help from our Magento experts.
Now let’s focus on Magento 2.3.1 features and advantages
What merchants should know about Magento 2.3.1?
1. Creating orders in the back-end is now easy
The delays in back-end for making changes to billing and shipping addresses are eliminated. This helps to achieve a faster order creation workflow.
2. PDP images can be uploaded without downsizing and compressing
Merchants can directly upload PDP (Product Detail Page) images larger than 1920 x 1200 without being downsized and compressed by Magento. In older Magento versions when a merchant uploads a product image larger than 1920 x 1200, Magento will resize and compress the image.
3. Inventory management 1.1.0
3.1 Distance-priority algorithm (SSA)
This feature analyses the shipping destination location with the source fulfillment shipments to find the nearest fulfillment location. The best part of this feature is that the nearest fulfillment location can be determined based on distance or time for traveling. In addition to that, Pick In Store option is added.
3.2 Elasticsearch for custom stocks
Elasticsearch was only supported for Single Source mode for Default Source. With 2.3.1 it is also supported for custom stocks. In addition to that, filtering search results is also added.
Apart from these, Amazon sales channel and support for DHL are also added.
What developers should know about Magento 2.3.1?
1. Upgrade process dependency assessment automation
A composer plugin magento/composer-root-update-plugin which can automatically update all dependencies in composer.json during a Magento 2.x upgrade is introduced.
2. Enhancements
Significant improvements have been added in Progressive Web Apps (PWA) studio and GraphQL.
3. Performance improvements
The admin order creating page can now handle 3000 addresses. This is made possible by rewriting customer address handling with UI components.
Grid format has been enabled to display the list of additional customer addresses which are contained in the storefront customer address book.
Billing and shopping data will not be cleared if the customer interrupts the checkout process. Earlier, if the cart was updated by the customer, the checkout data would be deleted.
4. Advancements in infrastructure
Elasticsearch 6.0 is now supported.
Redis 5.0 is now supported.
Magento 2.3.1 is now compatible with PHP 7.2.x.
For Authorize.Net payment, Accept.js library is used.
5. Security improvements
30 security enhancements.
Protection against SQL injection.
New Authorize.Net extension is added to replace Authorize.Net Direct Post Module.
Other Enhancements
1. Amazon Pay
Multi-currency support was added for merchants in EU and U.K region. Almost 12 currencies have been added.
2. Magento Shipping
Merchants can cancel the shipment that has not been dispatched yet by accessing the shipment and clicking on Cancel Shipment.
Magento Shipping portal can be accessed using Magento using the credentials that are saved in Magento instance.
3. Cart and checkout
The special product price error is now fixed. Earlier Magento displayed the regular price when the special product price of the product was 0.00.
Infinite loading indicator used to appear in case of an error during checkout and it is fixed in this Magento version.
Clear shopping cart button only used to only reload the page and not clear the shopping cart. This problem is now solved.
Another issue fixed is the force logout of the customer when an item is added to the cart and mini-cart icon is clicked multiple times.
Configuring a product after adding it to a cart is now possible, earlier Magento caused errors.
4. Our Contributions to Magento 2.3.1
We at Codilar are a team of Magento experts, but how can we be experts if we haven’t contributed to making Magento better. Almost all Magento releases comprise fixes from our Magento developers.
This time there are two Magento 2.3.1 fixes from Codilar:
Fixed an issue with \Magento\Catalog\Model\Product::getQty() where float/double was returned instead of a string in most cases in pull request 18149.
Fixed an issue with inaccurate floating point calculations during checkout in pull request 18185.
Should I upgrade my Magento store to Magento 2.3.1?
Unlike the previous version Magento 2.3 that came with awesome features like Magento PWA, Magento 2.3.1 is mainly about performance, security and bug fixes. One mandatory reason to upgrade to Magento 2.3.1 is the SQL injection vulnerability. If exploited, it can allow hackers to access sensitive data including credit card details. Magento has recommended switching to version 2.3.1 for all Magento stores below 2.0 that are planning for an update
“Merchants who have not previously downloaded a Magento 2 release should go straight to Magento Commerce or Open Source 2.3.1.” – Magento Security Team
Let us know what you think about Magento 2.3.1 in the comment section below!
Author
Venugopal
0 notes
Text
What is KnockoutJS and how is it relevant in Magento 2?
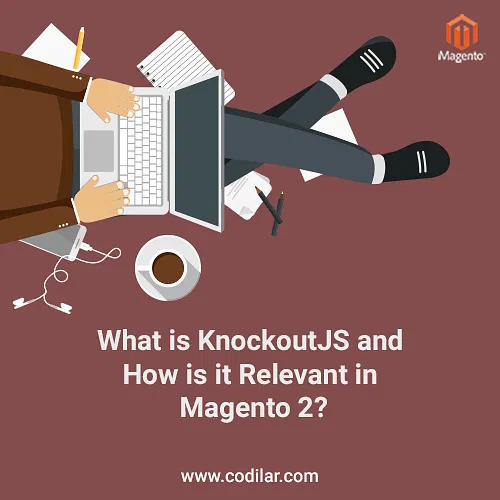
If you have just started to learn Magento or have already been doing for some time, there is a higher chance that you have not given a deeper thought about learning Knockout JS. But, it is vital to understand Knockout JS as its “data-binding” concept has been used pretty well in some crucial elements of Magento such as minicart and checkout.
So in this blog, we will be explaining about Knockout JS, and hopefully, when you reach the end of it, you’ll be making knockout apps in Magento. So sit back, relax, and let the journey begin.
Want to skip the basics and go directly to the main section? Click here
What is Knockout JS?
Knockout JS is a Javascript library which uses the MVVM pattern to bind data to certain DOM elements. Within Magento, we usually define a View-Model (which is a .js file) and a Template (which is a .html file), and the data in the template file is bound to the view-model, meaning whenever the data in the view-model changes, the template file changes too.
Why use data-binding?
Some of you might be asking “Well can’t we just use some library like jQuery to do the DOM parsing manually?“, And the answer is, of course, you can. You don’t even need jQuery. You can do all the DOM manipulations with core Javascript as well. But libraries like these are there to help us in writing standardized, maintainable, and beautiful code. Here’s a simple example, let’s say there’s a page where the number of visitors is being displayed on 3 separate sections of the page<div class="visitors"></div> <!-- Some other HTML --> <div class="visitors"></div> <!-- Some other HTML --> <div class="visitors"></div>
Now our Javascript would look something like this, which would fetch new visitor data every second<script type="text/javascript"> (function ($) { var visitors = 0; var fetchVisitorUrl = "..."; var fetchVisitors = function () { $.get(fetchVisitorUrl, function (data) { visitors = data.visitors; $('.visitors').html(visitors); setTimeout(fetchVisitors, 1000); }); }; fetchVisitors(); })(window.jQuery); </script>
See the $('.visitors').html(visitors);? That line is responsible for actually making the DOM manipulation. Without that, even when the new visitor data is fetched, it’ll not be visible on the page. Now suppose a new developer working on your project decided to implement a better way to fetch visitor data? Using sockets perhaps? Then he/she would also have to write $('.visitors').html(visitors);in his/her code. Hence the code becomes messy and redundant. Using data-binding, we change only the View-Model, and the View changes automatically.
Knockout JS and Magento 2
To make a knockout app in Magento 2, first we create a new module. Next in our template file, we write the following<?php /* @var Codilar\HelloWorld\Block\Hello $block */ ?> <div data-bind="scope: 'knockout-tutorial'"> <!-- ko template: getTemplate() --><!-- /ko --> </div> <script type="text/x-magento-init"> { "*": { "Magento_Ui/js/core/app": { "components": { "knockout-tutorial": { "component": "Codilar_HelloWorld/js/viewModel", "template" : "Codilar_HelloWorld/template" } } } } } </script>
This is basically initiating the Magento_Ui/js/core/appwidget with the components passed as options, using the text/x-magento-init tag. The data-bind="scope: 'knockout-tutorial'"says knockout to use the knockout-tutorialcomponent and template inside that DIV.
Next, we write our component file
app/code/Codilar/HelloWorld/view/frontend/web/js/viewModel.js
define([ 'uiComponent', 'ko' ], function(Component, ko) { return Component.extend({ clock: ko.observable(""), initialize: function () { this._super(); setInterval(this.reloadTime.bind(this), 1000); }, reloadTime: function () { /* Setting new time to our clock variable. DOM manipulation will happen automatically */ this.clock(Date()); }, getClock: function () { return this.clock; } }); });
The View-Models inside of a Magento 2 application, must return a Component.extendfunction call, where the Component is an object of the uiComponent, which were required here. Inside our Component.extend, we pass an object, which must contain an initialize function which will be the “constructor of our class”, so to speak.
And finally, we create our template file
app/code/Codilar/HelloWorld/view/frontend/web/template/template.html
<!-- My View-Model file is Codilar_HelloWorld/js/viewModel --> <h1 data-bind="text: getClock()"></h1>
Now if we hit the url http://mywebsite.com/helloworld/ we should see a clock which should change every second, even though we didn’t explicitly do any DOM manipulations.
That’s all about how Magento 2 uses the knockout JS bindings. Do let us know in the comment section below about what you want my next Magento tutorial blog to be about. Also, don’t forget to check our previous tutorials!
Click here to download a zip copy of the above-mentioned project
Watch the video to learn more about KnockoutJS in Magento 2 (Demo).
youtube
If you’re interested in learning more about Magento and its potential as a Progressive Web App, be sure to check out our comprehensive guide on Progressive Web Apps for 2023
Previous Tutorials
What are widgets in jQuery & how are they different from regular objects/functions?
How to create a “HELLO WORLD” module in Magento 2?
0 notes
Text
How to create a “HELLO WORLD” module in Magento 2?

In this blog post, we have explained how to easily create Hello World module in Magento 2. Take a note that the concept of local/ community/ core/ folders only existed in Magento 1 and we don’t use them in Magento 2.
Follow the below steps to create HELLO WORLD module
All of our custom modules in Magento 2 go under the app/code directory. The first step towards create module magento 2 is to create a folder inside your project directory named after the module. This will be where all the files related to the module will reside. The modules have a 2 part naming structure, i.e, Namespace/Module. This is so that the modules can be organized more efficiently. So, assuming our Namespace is “Codilar” and our first module will be called “HelloWorld”, the directory structure for our module is gonna be app/code/Codilar/HelloWorld/…
So now that we’ve established the directory structure, let’s make a simple module which will show “Hello World” on the content section of the page when we hit the URL “http://mywebsite.com/helloworld/”.
Ok first thing’s first. This is going to be our directory structure for the complete project

So lets start with the registration.php file. app/code/Codilar/HelloWorld/registration.php<?php \Magento\Framework\Component\ComponentRegistrar::register( \Magento\Framework\Component\ComponentRegistrar::MODULE, 'Codilar_HelloWorld', __DIR__ );
Every module must contain this file. This basically tells Magento “Please register my module, it’s name is Codilar_HelloWorld, which is the Namespace and the Module name underscore separated”.
Next we come to the etc/module.xml app/code/Codilar/HelloWorld/etc/module.xml<?xml version="1.0"?> <config xmlns:xsi="http://www.w3.org/2001/XMLSchema-instance" xsi:noNamespaceSchemaLocation="urn:magento:framework:Module/etc/module.xsd"> <module name="Codilar_HelloWorld" setup_version="0.0.1"/> </config>
This file just contains some basic information about the module. Like the module name and module version.
Now the basic files absolutely necessary for any module to work are created. Next we would create a frontend route inside our etc/frontend/routes.xml file which would tell Magento to “Forward the request to our module’s controller whenever the URL is {{base_url}}/helloworld/
app/code/Codilar/HelloWorld/etc/frontend/routes.xml
<?xml version="1.0"?> <config xmlns:xsi="http://www.w3.org/2001/XMLSchema-instance" xsi:noNamespaceSchemaLocation="urn:magento:framework:App/etc/routes.xsd"> <router id="standard"> <route id="helloworld" frontName="helloworld"> <module name="Codilar_HelloWorld" /> </route> </router> </config>
Now we make the actual controller where the request would be routed. app/code/Codilar/HelloWorld/Controller/Index/Index.php
<?php /** * * @package magento2 * @author Codilar Technologies * @license https://opensource.org/licenses/OSL-3.0 Open Software License v. 3.0 (OSL-3.0) * @link https://www.codilar.com/ */ namespace Codilar\HelloWorld\Controller\Index; use Magento\Framework\App\Action\Action; use Magento\Framework\App\Action\Context; use Magento\Framework\App\ResponseInterface; use Magento\Framework\View\Result\PageFactory; class Index extends Action { /** * @var PageFactory */ private $pageFactory; /** * Index constructor. * @param Context $context * @param PageFactory $pageFactory */ public function __construct( Context $context, PageFactory $pageFactory ) { parent::__construct($context); $this->pageFactory = $pageFactory; } /** * Execute action based on request and return result * * Note: Request will be added as operation argument in future * * @return \Magento\Framework\Controller\ResultInterface|ResponseInterface * @throws \Magento\Framework\Exception\NotFoundException */ public function execute() { $page = $this->pageFactory->create(); return $page; } }
Now we make our layout file to handle the request app/code/Codilar/HelloWorld/view/frontend/layout/helloworld_index_index.xml
<?xml version="1.0"?> <page xmlns:xsi="http://www.w3.org/2001/XMLSchema-instance" xsi:noNamespaceSchemaLocation="urn:magento:framework:View/Layout/etc/page_configuration.xsd"> <body> <referenceContainer name="content"> <block class="Codilar\HelloWorld\Block\Hello" name="helloworld" template="Codilar_HelloWorld::hello.phtml" /> </referenceContainer> </body> </page>
The layout file basically “references” the “content” container, and inserts our own block Codilar\HelloWorld\Block\Hellointo it. And remember, blocks and templates always come in pairs. Hence our block also uses the template Codilar_HelloWorld::hello.phtml
Now to create our block file app/code/Codilar/HelloWorld/Block/Hello.php<?php /** * * @package magento2 * @author Codilar Technologies * @license https://opensource.org/licenses/OSL-3.0 Open Software License v. 3.0 (OSL-3.0) * @link https://www.codilar.com/ */ namespace Codilar\HelloWorld\Block; use Magento\Framework\View\Element\Template; class Hello extends Template { public function getText() { return "Hello World"; } }
Notice that the block has a function getText() . The block’s function within Magento’s MVC architecture is to structure and provide data to the template which the template will then display
And now finally coming to the template file app/code/Codilar/HelloWorld/view/frontend/templates/hello.phtml<?php /* @var \Starlabs\HelloWorld\Block\Hello $block */ ?> <label><?= __("Data retrieved from Block is ") ?></label> <h1><?= $block->getText() ?></h1>
The template’s job is to fetch data from it’s relevant block (mentioned as an @var comment at the beginning of the template file) and display it accordingly. Ideally, the template should not be responsible for any logical decisions.

Well, that was all guys, on my first blog, among a series of blogs which I’m planning to release eventually which will hopefully clear all your doubts on how to work with Magento, one of the most beautiful PHP frameworks I’ve ever worked with, personally.
Thanks a lot for sticking through this guys. Do let me know in the comment section below about what you want my next Magento tutorial blog to be about. See you till next time!
Click here to download a zip copy of the above mentioned project

Next tutorial– What are widgets in jQuery & how are they different from regular objects/functions?
Do let me know in the comment section below about what you want my next tutorial blog to be about. See you till next time!
Author
Venugopal
0 notes
Text
CSS Preprocessors: Use of LESS in Magento

The front end is an integral part of a website as it is the first thing that a user notices about a website. Normally a website can be provided with styles by properly using CSS known as Cascading Style Sheets. CSS Frontend in an E-Commerce website is all about dynamic designing. The concept of dynamic design comes from the extensive requirement of customization in the user interface of the website and with these customizations comes the need for pre-processing the styles of the webpage. CSS alone is not enough for fulfilling those requirements; hence, a little advancement to CSS is required. To fulfill those advancements, LESS is used.
LESS is a CSS pre-processor that extends the capabilities and features of Cascading Style Sheets. A CSS pre-processor is essentially a scripting dialect that broadens the CSS and after that accumulates it into normal CSS. In a way, LESS works like a styling script allowing features like importing LESS files, mixins, variables, functions. We can declare variables and functions in less and reuse those variables and functions anywhere on the page. Therefore increasing code reusability and allowing us to implement the required styles using very less codes. It also allows developers to create scalable, modular and manageable CSS styles.
Less vs Sass
LESS and SASS are both effective CSS augmentations. To a greater extent, you can consider them a programming language intended to make CSS more viable, themeable, and extendable. Both LESS and SASS are in reverse compatible so you can, without much of a stretch, change over your current CSS records just by renaming the .css document augmentation to .less or .scss, respectively. LESS is JavaScript based and Sass is Ruby based.
LESS in Magento
Web browsers by default do not support .less files. Therefore less compilers are needed to convert less files to CSS files. In the case of Magento, it will look for the CSS files that you mentioned in your code, if CSS files are not found, it will look for the .less files with the same name. So how does that happen in Magento?
Well, there are two ways to compile .less files to CSS style sheet. They are:
Server-side LESS compilation
Client-side LESS compilation
Read our latest article about x-magento-init: https://www.codilar.com/x-magento-init/
Server-side LESS compilation
The default less compilation mode in Magento is the server side compilation. The setting can be found in the admin panel in Store -> Configuration -> Advanced -> Developer -> Frontend Development Workflow. This way of compilation can be used on both developer and production mode yet with some constraint. In Server-side LESS assemblage mode, the processing is performed over server utilizing LESS PHP library.
Following is the explanation of how server-side compilation of less files take place:
The LESS Php library checks for the CSS file in the directory. If it is present, then the execution is stopped, otherwise, it continues further.
If the CSS file is not found, then the library looks for the same file name but with .less extension.
If .less files are not found then execution is stopped else the library reads the .less files and looks for the @import directives.
After that, the library resolves all ways of LESS documents utilizing Magento fallback component and put LESS files under /var/view_preprocessed/less.
All source .less documents are parsed to PHP LESS compiler and after that it creates relative CSS records to pub/static/frontend///.
That was all about the main tasks performed by the server side less compiler to convert .less files to .css files. But what happens when the .less files are modified under development or production mode? The changes are not affected in the browser until you clear the directories “pub/static/frontend/<Vendor>/<theme>/<locale>/” and “var/view_preprocessed/less/” and then load the page so that the PHP less compiler will convert the .less files to .css files again. In development mode, you can see the change directly but in the production mode, you have to deploy static contents using the command “bin/magento setup:static-content:deploy”
Client-side LESS compilation
To use client-side LESS compilation, you have to change the configuration in the admin panel in Store -> Configuration -> Advanced -> Developer -> Frontend Development Workflow and select Client-Side LESS compilation mode and then save the settings by clicking on Save Config button and clear cache.
The processing of client-side compilation is the same in both development and production mode. In Client-side LESS compilation mode, the compilation is performed over client (browser) using lib/web/less/config.less.js and lib/web/less/less.min.js files. The process is not so different in client-side less compilation over server-side less compilation. In client side, the pub/static is published at last after the page is loaded. In client-side compilation also, the files are published in the same directory as the server-side compilation. In this mode, the compilation is done by javascript files. So whenever any change is made in the .less file, the effects can be seen immediately after reloading the page in web browser. The CSS file is created dynamically as you load the page. Also, there is no need to clear the directory every time you make some change in the less code unless you change any root source files that contain @import directives, and if you rename, remove or add new .less files in the project. Another technique is to use file watchers such as grunt that converts the less code into CSS stylesheet while you are editing the .less file.
So why should you add another layer of complexity to the development workflow?” As you know what you are doing with CSS, if it’s not broken, don’t fix it right? But to remove the development barriers from CSS, you should use CSS pre-processors such as LESS. It also adds some characteristics that should have been in CSS from the start such as modularity. It makes your CSS Dry that is “Don’t Repeat Yourself” instead of Wet that is “Write Everything Twice”. It will also make code management a lot easier and hence will save your time. Most importantly, you have to write less codes. That is the main reason it is called LESS.
Shantanu
Codilar Technologies
1 note
·
View note