
Don't wanna be here? Send us removal request.
Statistics
We looked inside some of the posts by alexmilledge and here's what we found interesting.
Average Info
Notes Per Post
0
Likes Per Post
0
Reblog Per Post
0
Reply Per Post
0
Time Between Posts
5 minutes
Number of Posts By Type
Text
17
Last Seen Tumblr Blogs


Fun Fact
The KCSC sent more than 20K requests to delete posts related to prostitution and porn to Tumblr from January to June 2017.
Text
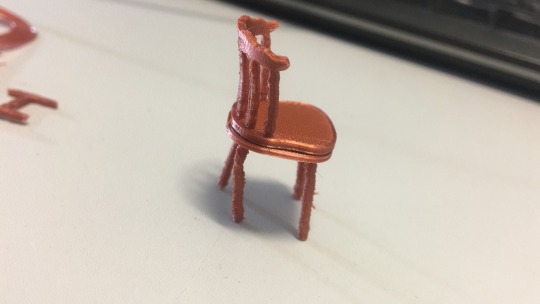
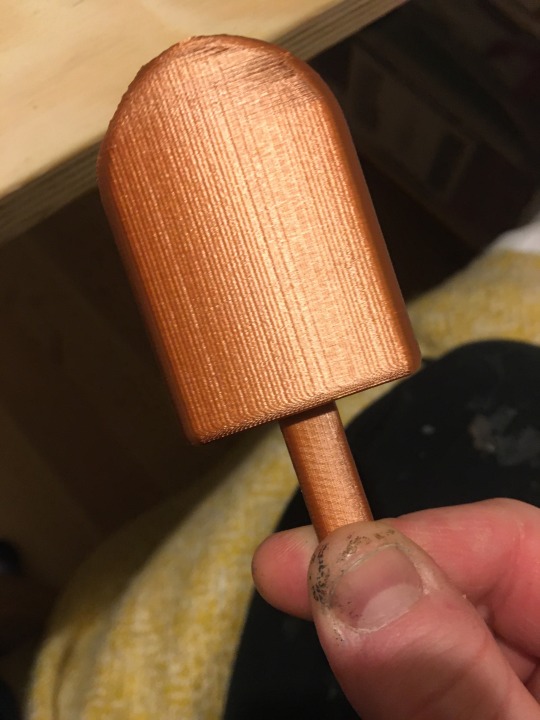
3D printing
I’ve been figuring out how to use the 3D printer and printed a chair that someone else designed to get to grips with how the machine worked.

I then used Fusion 360 and a youtube tutorial to draw the lolly below and print it using the 3D printer.

I’d like to make something a bit more complex next and I think it could be really useful to print 1:25 people for future model boxes.
0 notes
Text
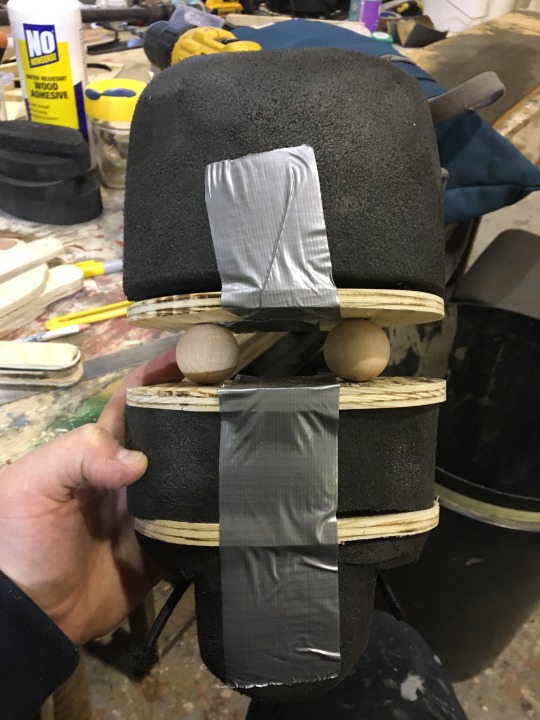
Maquette of 3 person puppet
With the maquette of the 3 person puppet at a stage where I could start playing with it I realised that it is just way too heavy and that the puppeteer on the head would be holding far too much weight to be able to effectively manipulate the puppet for more that a few minutes.
At this stage I’ve lost most of the motivation to work on this random puppet. I’ve been doing other research on how i might make it lighter. Lots of puppet makers use PVC pipe and Styrofoam to make their work lighter and this is similar materials to what I’ve used previously. I guess there is a reason lots of people use it, because it works! I might just go back to using those materials to make this puppet lighter - I have legs that didn’t get used last term that could work really well for this size maquette.
With a new puppet tutor helping next week I’m hoping to get some more tips from someone more experienced.
0 notes
Text
Head
I started playing around with clay to create a head with the intention of working to a sketch I had done whilst trying to figure out character.


I did 4/5 variations of the clay head but nothing felt right so I just went for a generic version to try and get a head on the maquette and make it functional.

I created a warbla shell of the head and then cut the clay sculpt in half to make a wooden cross section for the inside of the warbla.


I drew a random face onto the warbla to give it some character and then attached the head to the body using another string joint.

The arms are attached here with a version of the ball in socket joint i played with last term but where the wooden balls sit in the plasterzote body and are joined together using bungee cord.

0 notes
Text
Looking a bit more human
With all the limbs attached or nearly attached to the body it’s looking a bit more human.
I drafted a new foot but I still think its too heavy and so I’m looking for lighter materials to make the feet from.

0 notes
Text
Body and arm
Using scrap plasterzote I decided to carve a body shape to give myself a bit of a guide for the size of the puppet. Ordinarily I’d like to be working off a drawing of the puppet with measurements but as I’m not working with anyone on this, and I’m not making the puppet to any specific requirements for a show, I have been working with just the forward intention with a human form at the end.
I cut two of the legs and joined them for the maquette - they’re not prefect and they’re heavy but I wanted to get a shape together to see if I could start building a character instead of just working on form.

I drafted an arm pattern on CAD using the original leg shapes but with the elbow join of an arm instead of the knee hinge. And I made a hand pattern based on a similar design from a puppet I had made before. I attached the hand with a string joint which gives it flexibility in all directions.

With the plasterzote body I decided that it was too solid and so I added in a central waist bend to see if that would work. Using wooded balls to create the space but also the rounded movement and attaching all the pieces with bungee cord through the body. I made the wooden plates to hold the bungee in place as the plasterzote was too soft for the tension of the bungee. It’s taped temporarily in place in the image below so that I can take it apart and change bits if I need to.
0 notes
Text
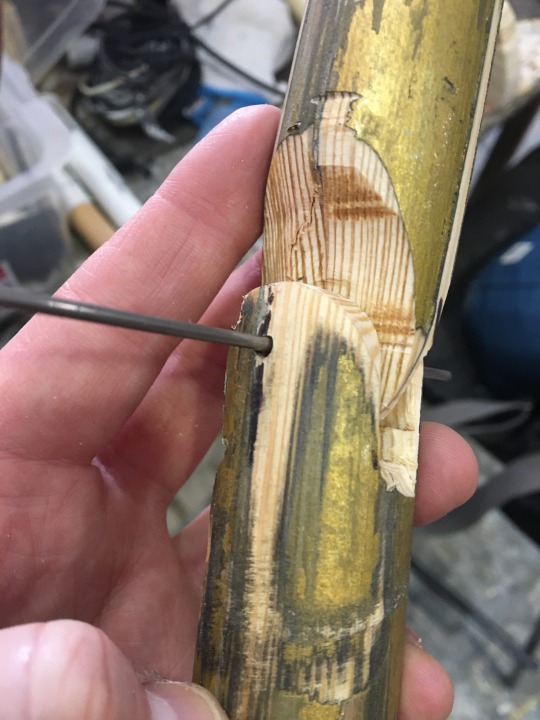
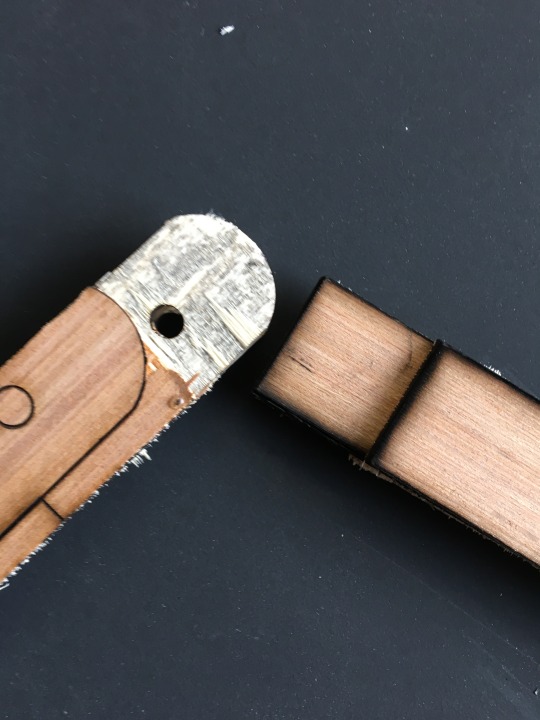
More leg work
I made a mock up of the leg I was drafting on CAD to help me visualise the flat pattern for CAD and then cut that out of the laser cutter onto ply.

Again, I had issues getting the laser to cut through the whole piece of ply so I resorted to engraving with the laser and then cutting on the bandsaw.

I joined the leg together and then drafted a foot as well and cut that with the laser as well. I sanded the foot to give it some shape but it is so heavy and the centre of gravity is off with the foot so it doesn’t hang pointing down like a human foot does. Back to the drawing for that one.

0 notes
Text
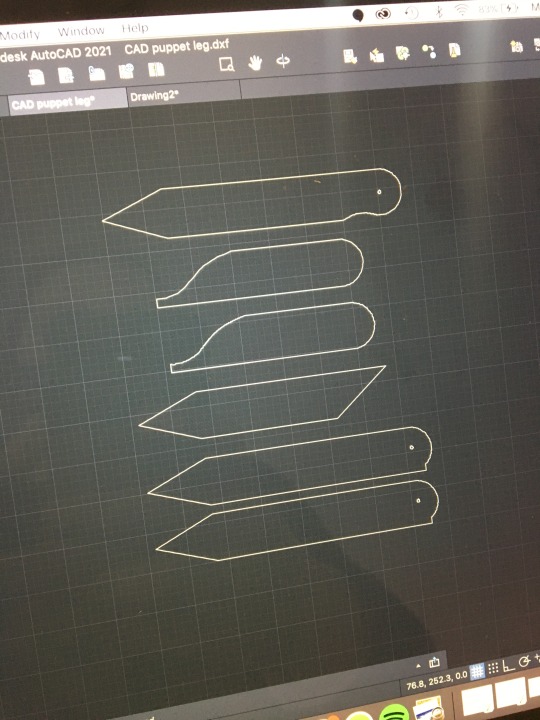
Legs
Today I decided I was going to have a go at trying some different leg joints for the puppet. I was researching different techniques and looking at my own puppets that I had made previously and I wanted to try something I hadn’t done before.
A few weeks ago we were taught how to use the laser cutter and looking at the joints for marionettes and how uniform they were, I decided to have a go at designing a leg using the laser cutter. I had carved out a type of marionette joint from some scrap wood but it seemed very similar to other joints I’d made and the laser cutter was a completely different challenge.

I drew up a simple rectangular leg design with a rounded end on the top leg and pieces to go in between.
I had to fiddle with the power a lot and still couldn't cut through what I wanted - after about a million attempts and realised that the laser wasn’t focused which was a major reason why it wasn’t cutting through.
However, even after focusing the laser again it still wouldn't cut through the 3mm ply. I tried again with a smaller design and I still had no success.
I swapped out the 3ply and replace it with 2ply to see if that helped and the new focused laser and a thinner ply was much more successful on the first cut but still didn’t leave me with loose pieces. I did have to push them from the wood and it was very blackened around the edges - its wasn’t smooth.
The original drawing had a straight edge on the bottom part of the leg joint but in order to get a smooth movement that needed to be rounded. I went home and gave that edge a curve and tried again the next day.
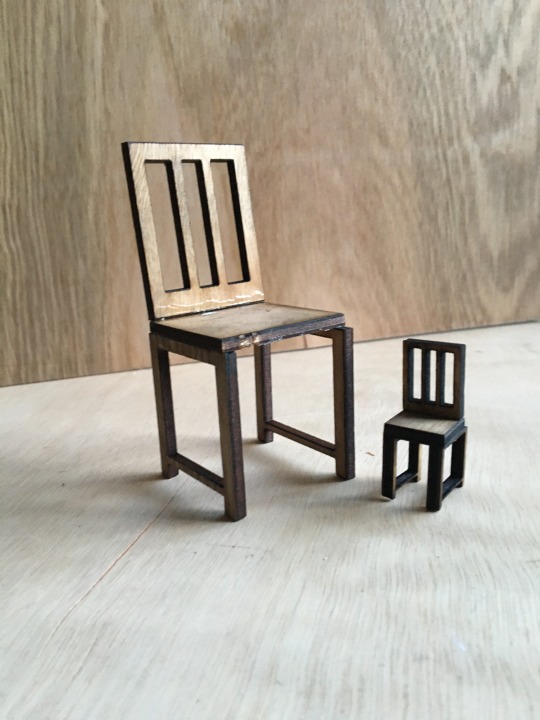
Having been working on my model making I also had a go at making a chair form the laser cutter which came out reasonable successfully!
0 notes
Text
New project
For the next 6 weeks, up until April, I’m going to be working on at least one puppet (maybe two) with the intention of increasing the finished quality of my puppets in comparison to my previous work.
I want to create something beautiful and emotive but that is also dextrous and flexible and is able to do all the necessary movements that a puppet might need. I’d love to be making a puppet that has a purpose, ie it’s going to be used for a show, but the reality of the situation is that I can’t plan for that. That case does pose an interesting method of performance devising however, in that I might be able to work on a future project that is lead by the puppet rather than lead by a story or other stimuli. I am desperate to work with other people in a rehearsal room with a puppet that was made for more than just myself so if I create a puppet with that purpose, maybe I can manifest it into existence!
I also plan to design a set for this puppet and puppet world which might not necessarily be the set that any future show uses but I want to develop my set design skills, specifically my model making skills, along side my puppet making. I want to practice some basic 3D modeling skills using Fusion for the 3D printer and I’d like to make some part of the puppet with that. I want to practice using Auto CAD and the laser cutter so I will also try to include that is some element of the puppet. I want to develop my digital rendering skills and so I plan to practice with Sketchup and photoshop for the set design. I’m confident with my making abilities and I think I can problem solve where necessary but it will take time to build the puppet and my main goal is to build something beautiful.
I think I’m loading a lot onto my plate and so I intend to structure my time over the coming weeks (which is going to take discipline - hard to muster at the moment) to allow me enough time to design the structure of the puppet, build and finish it to a high standard as well as all the other things I’ve listed above. I have high expectation of myself, but I think it’s good practice to juggle things and aim for a deadline as that’s what the real world expects. I don’t want to abandon the other skills that are important to me and that are not necessarily considered a priority in other aspects of the syllabus.
0 notes
Text
Model making - set of last show
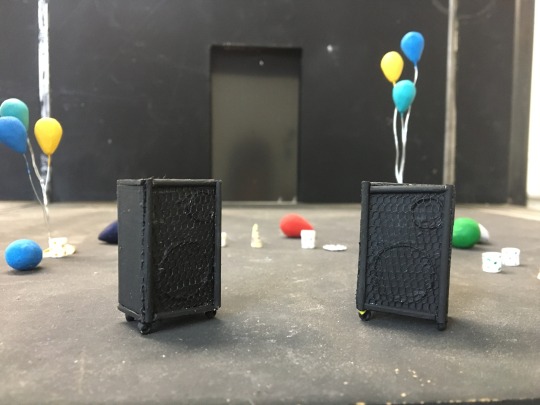
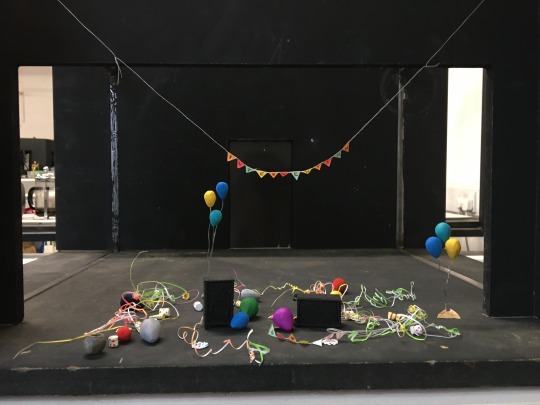
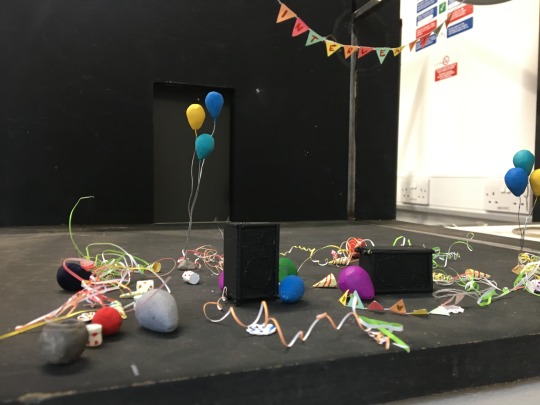
Along side the other things I’ve been making I’ve been practicing my model making skills. I find making small things kind of therapeutic and model making is one of the things I was really keen to improve this year. Since we haven’t been able to do anything in the structure of the course I’ve been doing it independently as an exercise. I’ve been using the dimensions of the actual set to make a version of it in 1:25 scale.
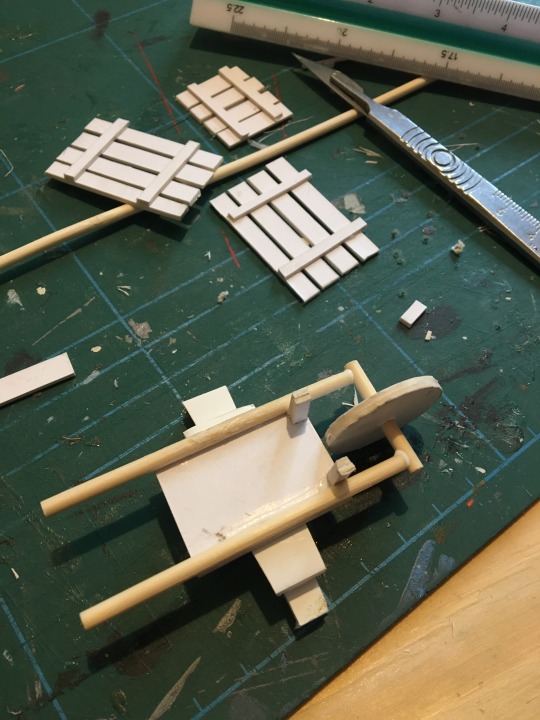

I’ve also made a 1:25 version of the set for a show I worked on last year called Gobby. The set gets progressively messier throughout the show and in act 3 gets trashed and ends up a chaotic mess of party streamers, banners torn down, the speakers knocked over and general party debree.

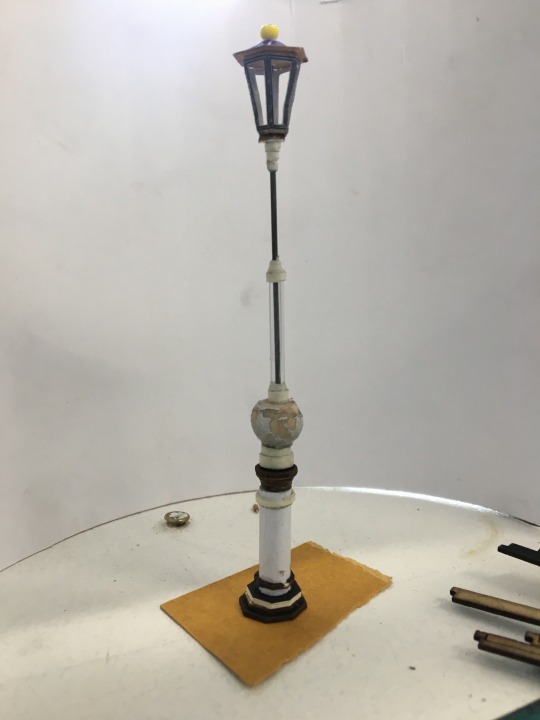
And a 1:25 lamp post with the other MA’s who were doing model making practice.
0 notes
Text
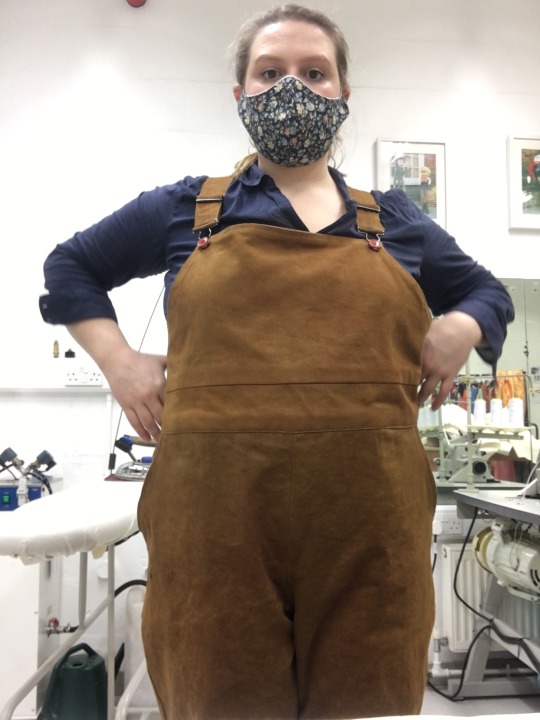
Finished costume
The finished costume also has patch pockets on the back and a front pocket which were all topstitched and strengthen with extra corner stitches.
I like the finished product and I think it works for the character. The shape is quite wide and has lots of movement room so I think they will work well for the kind of movement I need as a puppeteer.

0 notes
Text
Finishing touches - buttons, top stitching, buckles, pockets
To give the garment a nice finish I top stitched all of the seams except on the inside and outside legs because as I discovered once the whole thing was together, I should have top stitched those seams as I was going along and not at the end as the whole leg couldn’t go through the sewing machine without sewing the wrong bits together!
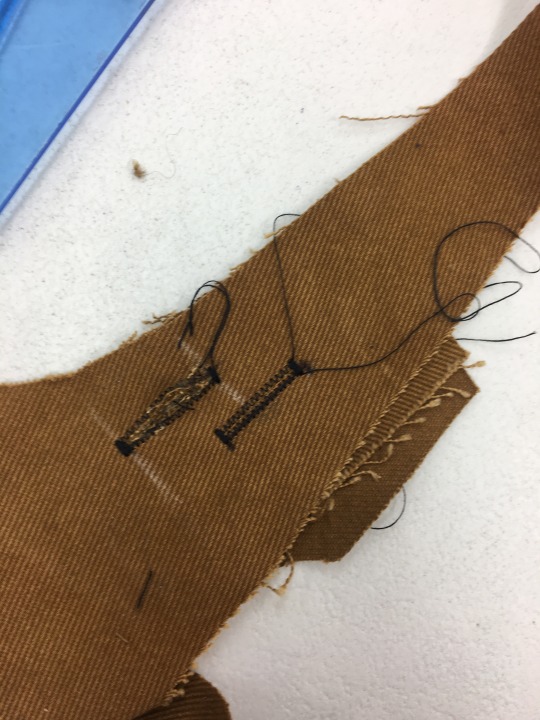
I practiced making the button holes on the sewing machine and some scrap fabric and then I applied them to my garment with the hammer buttons. I used a bit of interfacing between the fabric and the machine to strengthen the hole which I them pulled away once the hole was finished.
I made sure to measure and mark the button holes and where the buttons were going several times so that I didn’t poke holes where I shouldn’t!


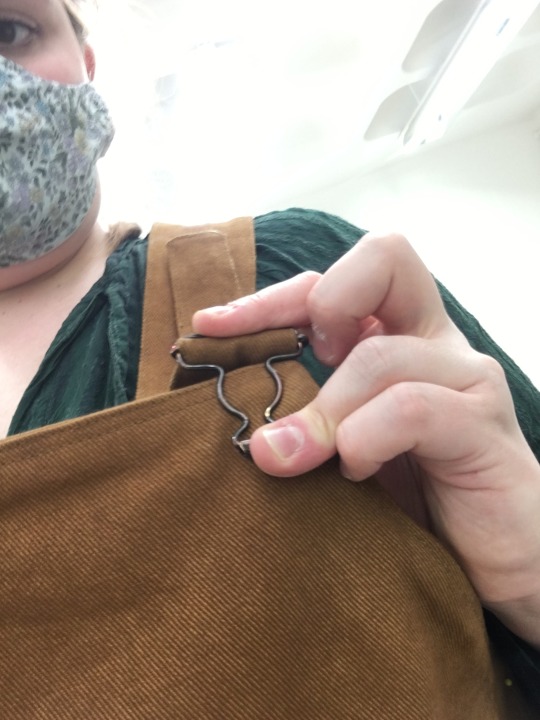
I added on the buckles to the front bib and tried the whole thing on!
0 notes
Text
Putting the top onto the bottom
I pinned the back facing pattern piece (which I had already seamed and top stitched on the bottom) to the back of the trousers, pinning it and then sewing along the seam allowance.

I then turned it the right side out and ironed it so the seams were nice and flat (adding in the snips along the seams where I needed the edges smoothly curved).I added int he straps so that when it was turned they sat the right way round.

I then sewed the front bib to the front of the trousers.

And ironed and topstitched the waistband so it was flat and had a clean finish.

I tried them on for the fit, pinning the straps where the buckles were going to go and the side seams where the buttons were to go. I noticed one side fo the side seam was longer than the other which meant tat somewhere in sewing the front bib I had probably not sewed evenly along the seam allowance and so the whole piece was off by a few millimetres and the edges didn’t match up.

To fix this issue I unpicked all the sewing and topstitching of the front bib and realigned it so that the pieces matched up properly. I then made sure that the seams on both sides were even before sewing it back onto the trousers. As annoying as it was to have to redo the front bib (and I probably could have left it and it be fine and unnoticeable to an audience) I’m glad I repositioned it as I think the garment looks more professional and for my own peace of mind I don’t notice the irregularities all the time!
0 notes
Text
Over locked some interior edges
I sewed the trousers together and overlocked the inside edges. I considered doing a french seam as most jeans have on the outside edge of the trouser but since the fabric is so thick I decided to just overlock them to save on the excessive bulk.
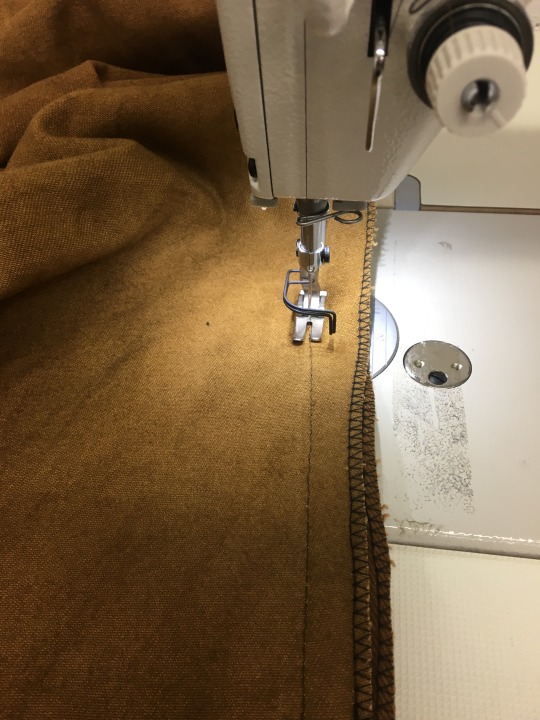
I did the same to the pocket bag and facing edges to stop them form fraying.

I ironed the seam flat and you can see below that the iron was too hot and I melted the polyester thread!
0 notes
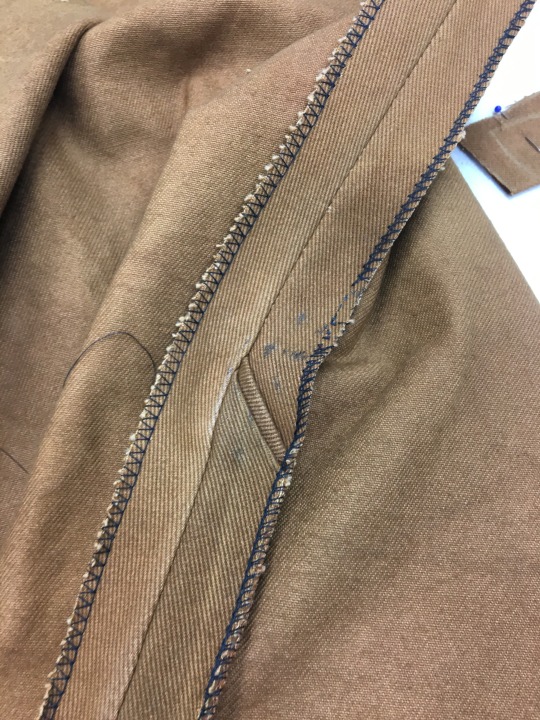
Text
Snip the round edges to make them smooth
On the front bib I sewed the seams and then snipped around the curved edges to smooth them out when it was turned the right side out.

I then turned it the right side out and pressed the whole thing so all the inside edges were flat.

0 notes
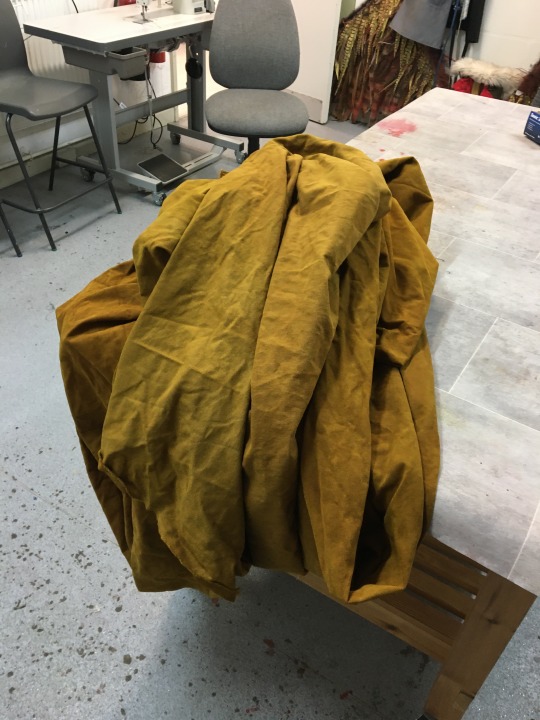
Text
Flat laying the dyed fabric
I laid the fabric out on the table and pinned the pattern pieces onto the fabric. I drew around the pattern pieces with chalk and used the transfer paper underneath to get the pattern imprinted on the underside.

I then cut the whole pattern out and pinned the pieces together using the same steps as I did for the toile starting with the front bib.

0 notes
Text
Fitted bodice toile
Whilst I was waiting fro things to dye I had a go at making the bodice block for my body. On the original bodice block the bust dart goes through the top of the shoulder but I moved it so that it was at the top of the side seam under the arm and across the bust.

I really enjoyed making this and I hope that i can find time in the future to draft my own shirt or top pattern form the bodice block.
0 notes
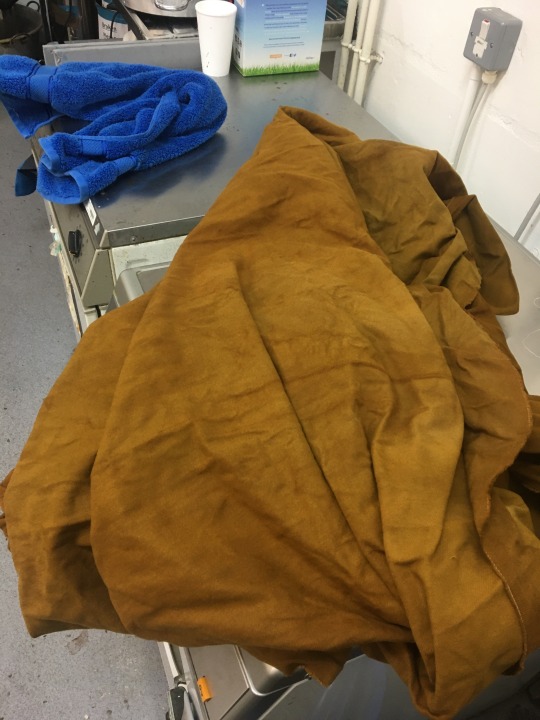
Text
Dying the fabric - three times a charm
It took three attempts dying the nearly 4 meters of fabric in the washing machine to get the colour right which meant that my measurements in my tests basically went out the window.
The dye below is the first dye attempt which came out to yellow.
Dye two was browner but still too light and yellow.
0 notes