
Don't wanna be here? Send us removal request.
Statistics
We looked inside some of the posts by amandi-mga2024mi5018 and here's what we found interesting.
Average Info
Notes Per Post
0
Likes Per Post
0
Reblog Per Post
0
Reply Per Post
0
Time Between Posts
4 days
Number of Posts By Type
Text
17
Last Seen Tumblr Blogs


Fun Fact
Tumblr Inc. is using 66 technologies for its website.
Text
Critical Analysis
One thing I really liked about the work I did in this module was my learning experience in compositing. This was rather unexpected, as I was not someone very keen on post production processes, but to my surprise, I thoroughly enjoyed compositing. It was fascinating to take flat characters and environments or assets, and bring them to life with just a few changes. I loved the process and the wide range of possibilities, such as the ability to completely change aspects like mood, atmosphere and tone with just After Effects. I found it to be quite a comprehensive and powerful tool. However, my biggest issue was time constraints; I have much to learn in the area of time management when working on a project, and I am determined to find ways of navigating this better next time. However, due to this issue, I did not get to experiment and have fun with After Effects as much as I would have liked to. I also learned how to animate in After Effects. It was a delightful experience in learning a new medium of animation and I thoroughly enjoyed it.
For my final animation, I fell short of my expectations as I was only able to do the second concept. If I had managed my time better, I could have done both concepts, which I would have liked to have done. Then, I could have explored compositing methods more deeply, from which the final product would have greatly benefitted. Also, for the second concept, I was intending to use more 3D assets and blend that in seamlessly with both live action footage and 2D animation, but again due to time constraints, I was not able to. This is another area I fell short in. Moreover, when I put the footage of both concepts together, they came up to 20-25 seconds each, so sadly, I could only choose one.
I very much enjoyed learning about different types of compositing and when best to use them. It was an important exercise in learning where to use what, and to what extent in order to optimise. I also liked learning quite a few techniques, such as how to motion-track footage with your animation, rotoscoping, colour grading, etc.
0 notes
Text
Sound Design
I used royalty free SFX of the ocean and the beach
0 notes
Text
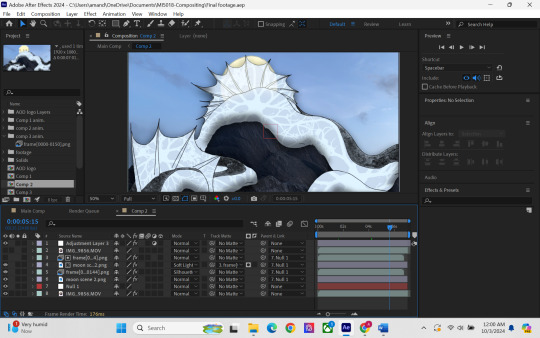
Track Matte
I used the track matte to make it look like the light from the moon was shining through the serpent’s fins.
0 notes
Text
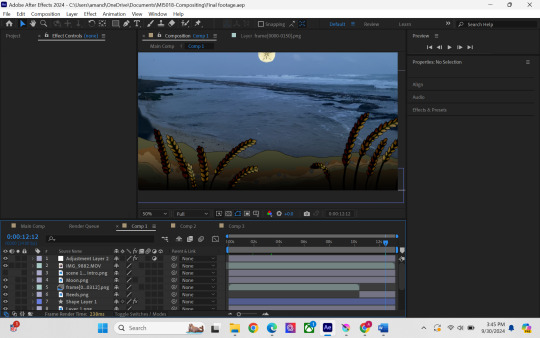
Colour Grading
I mainly used lumetric colour and levels for my colour grading.
I applied some general colour grading to make the scene look more pleasing and I also pushed the blue tone in my subject to help it furtehr belnd with the nighttime lighting of the footage.
I also made use of keyframing in the first scene to make a more dramatic colour change between the beginning of the scene and the end of the scene, thus making it look like night has fallen.


0 notes
Text
Masking
To bring certain foreground elements to the front, as certain parts of the animation are meant to be behind others, I made use of the masking tool.
In the first scene I used this to place the moon behind some clouds and in the latter scenes in used it to show that some parts of the sea serpent were bhind the rocks. I keyframed the opacity at different points and also sjudted the feathering to make it look like it was moving through real clouds.


0 notes
Text
Using layer styles, effects, and the shape tool
I used layer styles to add inner shadows and drop shadows to all of my subjects. I also used inner glow and an added luminosity effect on the moon in scenes one and two to make it glow.
I used the shape tool and adjusted the opacity and feathering in order to reflect the lighting in the first scene, whilst also creating further contrast between background and foreground elements.

0 notes
Text
Motion Tracking
I made use of the motion tracking tool in the latter two clips to make the subject track my my shaky camera footage.

0 notes
Text
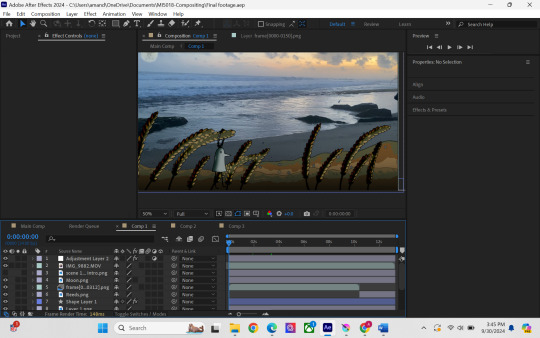
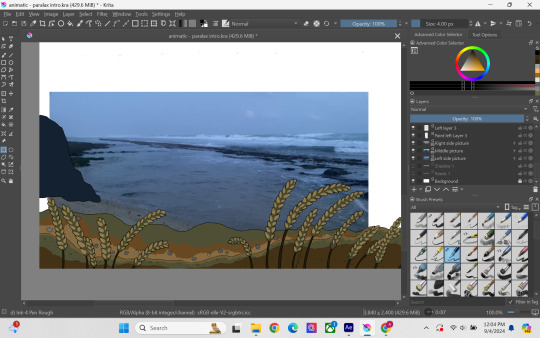
Parallax Effect
I used panoramic animations that would span from one end to another as the clip of the pan across the sea establishing shot.
I did this by arranging the keyframing and positioning of the six separate layers in different positions to make the foreground layers move faster while background appeared to move slower.


0 notes


Text
Character Design Development
Basket stars:
I wanted to use asea creature as a sort of texture for the sea serpent


Character Design:

0 notes


Text
Rotoscoping Animation
There's already a lot of moving sea life and crustaceans in my footage and I thought I could rotoscope some of the crabs in 2D to help them blend in with the other animated elements.
youtube
0 notes