Don't wanna be here? Send us removal request.
Text
Learning Outcomes
Thia module effectively pushed me out of my comfort zone and challenged me to be resourceful and creative in ways I did not anticipate I could be. It challenged me in terms of concept development as I had a hard time with conceptualising abstract experimental animation to convey a clear message. It also encouraged me to experiment and explore different art styles, materials, and structures. I enjoyed researching insects as I am naturally passionate about my chosen topic.
I learned to think outside of the box and be resourceful with my animation methods, as well as my tools. The hands-on experience in experimenting with various methods of animation was wonderful and very educational. This module was incredibly freeing as it encouraged me to enjoy the process of creating something without worrying about how the final product will turn out. There was less pressure for the final product to be perfect as these were mediums we were trying out for the first time, therefore, this emboldened me to explore mediums like paint on glass animation with which I had no previous experience. Although I am not very happy with results of my Red Hat animation, I gained a lot of invaluable experience and knowledge about a completely new medium just by trying it out myself.
0 notes
Text
Music Used
I used the instrumental of September by Sparky Deathcap for my final animation.
youtube
0 notes
Text
Free SFX - sites used
I used royalty free SFX for the full 30-second animation. I tried to be more experimental with my sound design choices, often opting to use more cartoonish sound effects as well as trying to add sound effects in areas I normally think would not require sound.
0 notes
Text
Yellow Hat Progress
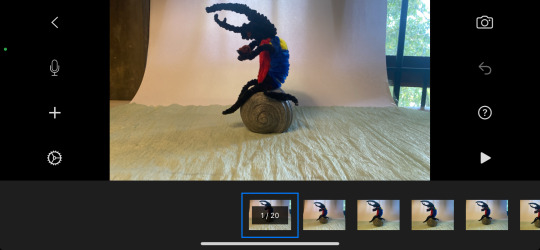
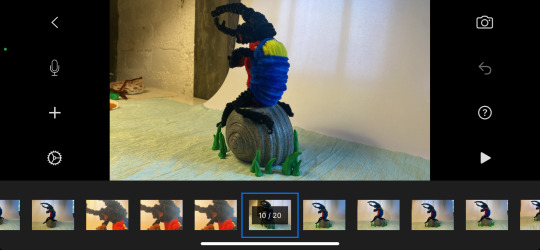
I am happy with the result, however, with the added pipe cleaner, articulation of the puppet became a bit harder, and the way I constructed the puppet did not allow for many facial expressions. Furthermore, when animating, I found it difficult to keep the puppet still. I placed some blue tack under the puppet to keep it in place, however, there was still a degree of movement present throughout the animation.
For the rest of the animation setting, I used crepe paper, clay grass, and a white paper backdrop. I subsequently replaced this backdrop in post-production with a digitally animated circle. I felt the recurring motif of a circle, especially in this Hat, was very effective. The imagery of the circle further reiterated the cyclic nature of life and natural world and emphasised the insects’ crucial role in this cycle.
In post-production, I also added some extra 2D digital elements that I believe give the piece more visual interest and increases the clarity of the concept for viewers.
Test shots:


progress work:


Part 1:
0 notes
Text
Yellow Hat - Making the puppet
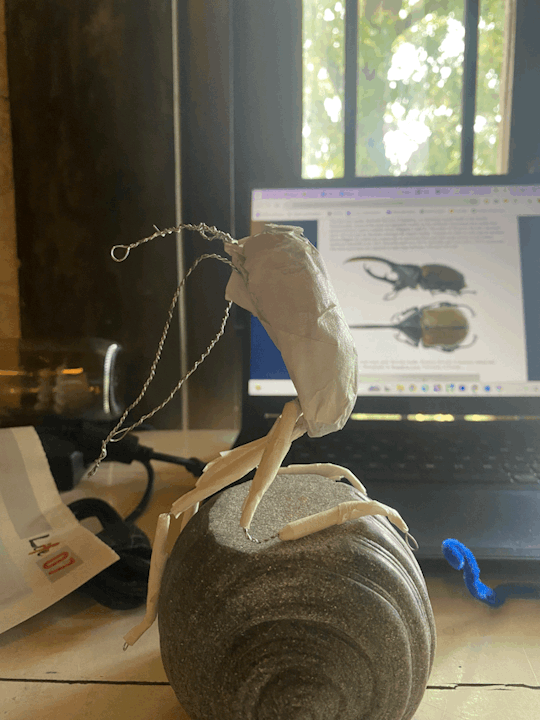
References I took when making the stop motion puppet.


Based off what I learned from the test puppet, I began constructing the puppet for my final animation. After discussing it with my lecturer and researching stop motion puppet creation, I decided to make the next puppet out of wire, newspaper, masking tape, and pipe cleaner to avoid the puppet becoming distorted and allow for much better articulation.
I began by creating a much stronger wire base, covering the wire with tape, and then going over that with colourful pipe cleaner to give my character some colour and texture. I used newspaper wrapped with masking tape to create the body. In addition, when covering the limbs and head in masking tape, I made sure to leave the wire exposed at the joints so that articulation would be much easier.


0 notes
Text
References I took whilst animating
For the white hat and the red hat:
youtube
youtube
0 notes
Text
Red Hat - Progress
I did not like how my test animation came out. I felt the use of negative space for the skull made the project too difficult for me, and spending time trying to illustrate the skull accurately and consistently for the final animation would prove a challenge. Because of this, I decided to simplify the first scene into a more stylistic art style which I believe yielded much better results.
Regarding colours, I wanted to use only black paint and have the negative space be white. By employing these two opposing colours, I wanted to further underscore the theme of life and death.


0 notes
Text
Paint on glass - Research
youtube
youtube
youtube
0 notes
Text
Red Hat Paint on glass test 1
Before my test animation, I started by researching the process of paint on glass animation as I had never attempted it before. I learned that it was important that the paint be mixed with glycerin to prevent it from drying out while animating. I encountered a few issues in this regard. Because although I diligently followed the instructions for creating a glycerin mixture and subsequently added the correct portions to my paint, it was constantly drying out between frames, which made animating much harder. For my final animation I used much more than the recommended portion, however, I still encountered some drying.


Furthermore, during my research I found useful tools for manipulating the paint. Not only could I use a paint brush, but I could also utilise my fingers and cotton swabs to move the paint around between frames.
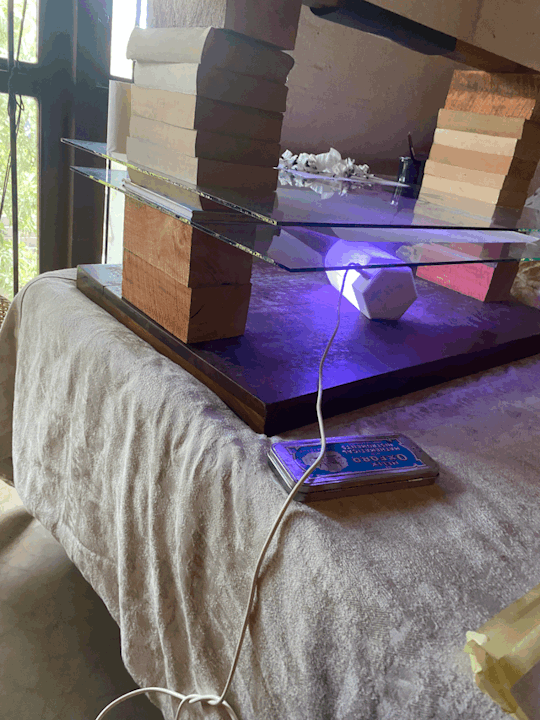
I tried several different types of lights and lighting, and eventually settled on placing an LED lamp under the glass, which I liked the effect of, so I carried this over into my final animation.


Test shots to see the lighting:


Process:


Product:
0 notes


