
animationjonesy2-blog
Jonesyy
Lisa Jones,
Year Two Animation Stuff,
University of Lincoln
155 posts
Don't wanna be here? Send us removal request.
Last Seen Blogs
augustandco
August & Co!

noahviagens-blog
NOAH Viagens

davidalleynethinksfast
Send Discowing Pics

jane974
Sans titre

lilpona
NABA
Photo
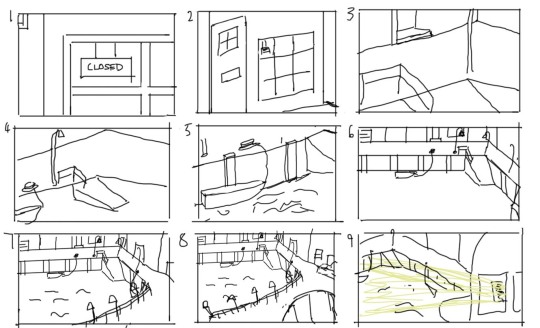
Here is my storyboard of the main few shots shown through the camera in the harbour scene, although some may slightly alter depending how the scene modelling comes together.
1 note
·
View note
Photo
Here is the image of the camera movements for my harbour scene in my showreel.
#Year Two#Term Two#Sultan Efe#Neil Housego#Harbour#Showreel#floor plans#Cameras#digital skills development
0 notes
Photo
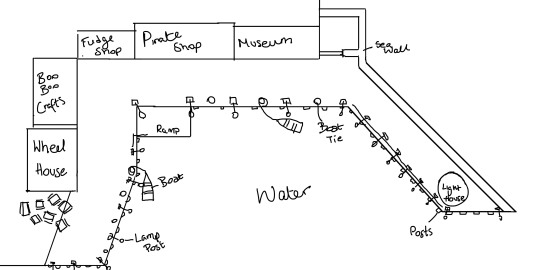
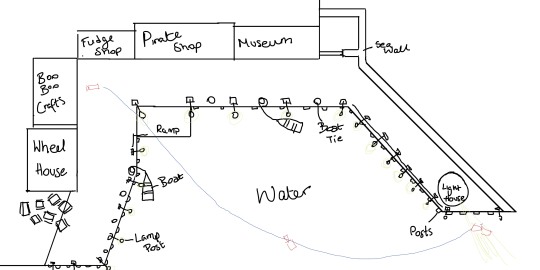
Here is my final updated Floor Plan with more detailed information on.
0 notes
Photo
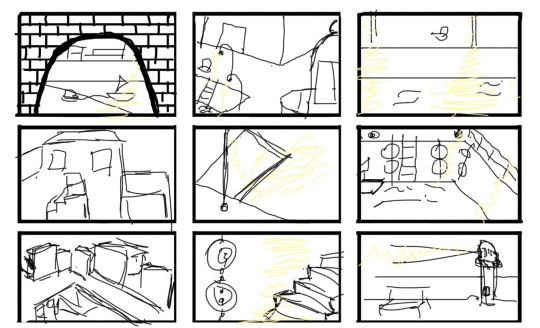
In order to get the feel of my harbour in the beginning I created a few thumbnails for myself to have some ideas to add in the designing.
0 notes
Text
The End.
I really enjoyed completing this project and like any there were ups and downs but I think it turned out very similar to what my vision was from the beginning. I think I could even work further in this one project and expand the whole harbour in the future.
0 notes
Video
vimeo
Here is my final cut of my Showreel. In the end I decided to use the Maya Software version as the style looked more like what I wanted than the Mental Ray. I am happy with the way this turned out and can't wait to move onto another project to improve this further.
0 notes
Text
Sound
For my sound in the showreel, previously I had decided to do an instrumental song from the current charts and I decided to stick with this idea. I chose Counting Stars by One Republic with the nice relaxing but happy guitar to sound through my harbour scenes and then the beat kicks in when the images show of my production work.
0 notes
Photo
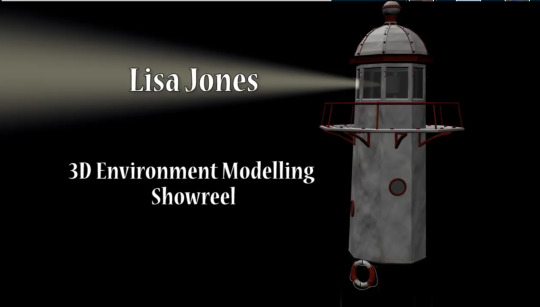
So beginning in Premiere Pro I added the lighthouse scene and added in the beginning title to start off my showreel.
0 notes
Text
Next Stage: Editing and Sound
Next I will move onto editing all my work together and adding in the effects between the scenes and also add in the sound ready for hand-in.
0 notes
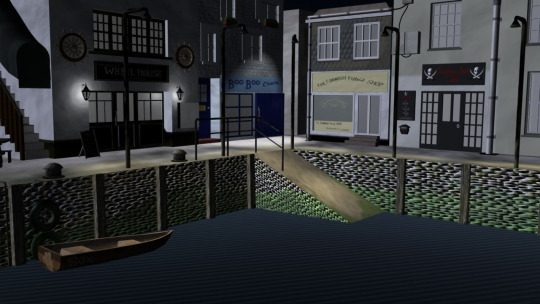
Photo

During the rendering stage I did find faults, for example:
1) It wouldn't allow me to batch render using mental ray
2) And also the procedures weren't working correctly (like the image above)
3) Plus at my fault, I forgot to pull over all the sourceimages to the new file so I could only render on the one machine without all the textures disappearing (which i need to remember for next time!)
0 notes
Photo
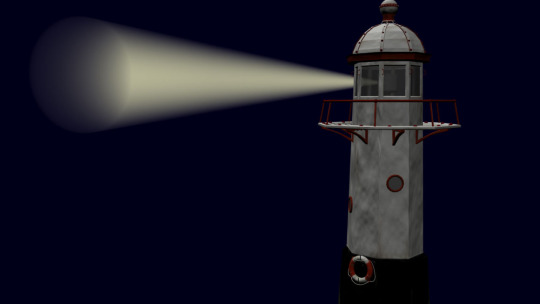
As well as choosing which version of my scene to use, I had to animate and render my lighthouse for the beginning of my showreel, which I decided to use Maya Software to do as it was quick and easy and it showed what it needed too.
0 notes
Video
vimeo
Here is the video of my scene rendered using Maya Software without ray tracing as with ray tracing the effect was worse than the mental ray version. But I had to make a decision of which version to use in my showreel as there wasn't much time left and not enough time to figure it out and re-render again.
0 notes
Video
vimeo
Here is my rendered harbour scene using mental ray, (each frame had to be individually rendered, due to batch rendering not working with mental ray). But the mental ray version clearly shows all the things wrong with it (the dots all over, the lens flare was removed and the water is too bright for a sunset time of day). Therefore as time is catching up fast I decided to render using maya software and see if that worked any better.
1 note
·
View note
Photo
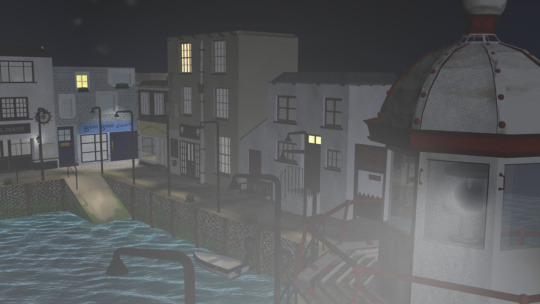
Next when I rendered with mental ray, I found some things wrong with it, as it seems like a filter is over the top of some surfaces and makes them shimmer and also the lens flare isn't showing up, so the light effects disappeared when I rendered, which didn't look right, so i had to rethink and make an artistic decision with what to do.
0 notes
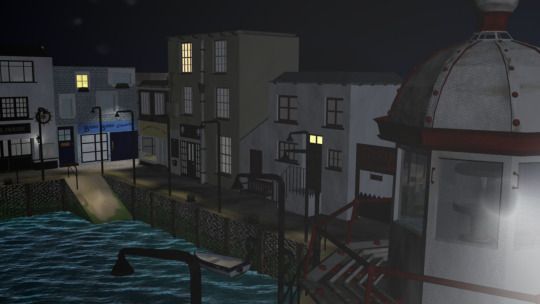
Photo
When I did my first quick render to check that everything would work, I noticed that the water didn't look right, therefore I altered the settings and added some divisions on the plane and it seemed to work and the effect worked really well in the end.
0 notes
Text
Next Stage: Rendering
Next is to render my scene and create a QuickTime Movie from it.
0 notes
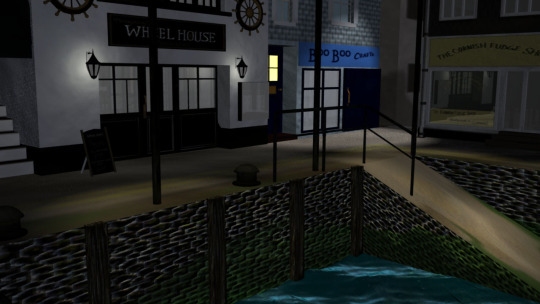
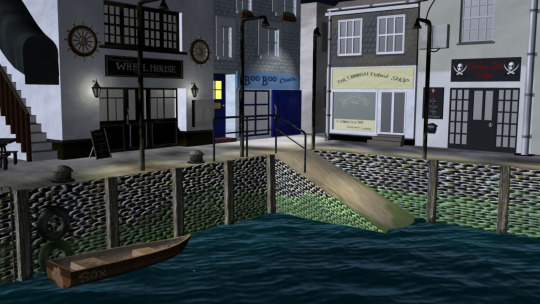
Photo
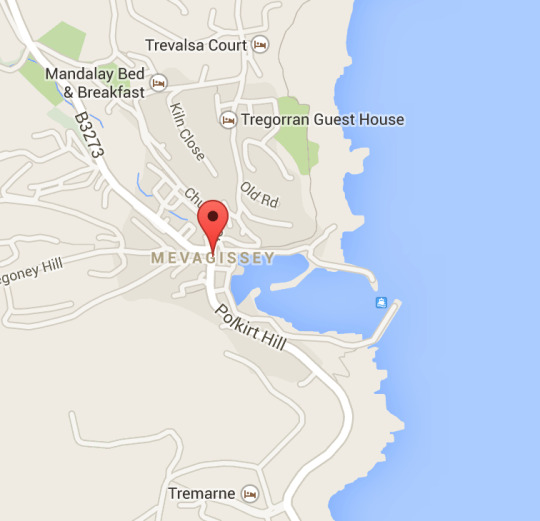
When I was lighting, I tried to make sure that it was realistic, so I looked on the map and saw which way the sun would set, so I knew where the direction of light would be coming from.
0 notes