
anomalilyxiv
Can Lilies be festive?
[] XIV Account - Multi OC & Multi AU [] OCs; Lilian Lian / Ichimori Sutomori [] Personal is ami-is-typing.tumblr.com
1250 posts
Don't wanna be here? Send us removal request.
Last Seen Blogs

exhaled-spirals
Exhaled Spirals

chitoaya
One, Two, Step!

remcslcpin
expecto patronum

arolexxxx-blog
Mais um trouxa no mundo

27ap
Senza titolo
Text

✧・"dance like the leaves on the boughs!":*☆
-- Dominant of Titania, Illya Skawi;
#ffxiv#final fantasy xiv#final fantasy 14#titania#illya skawi#lalafell#gpose#mine#Illya my one true goddess
69 notes
·
View notes
Photo

walking on clouds!
43 notes
·
View notes
Photo

my love story with kaye at lv999! ♡ - ft. @anomalilyxiv
#SWHHXIWKBFKX WUOOOAAAHHHH KAYELILEY KAYELILY KAYELIKY AAAHJJDKBCES#fucking feral for them kiwi ily and your content sm
14 notes
·
View notes
Text

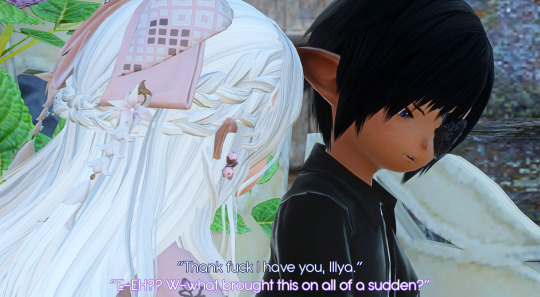
A moment of light during the siege
329K notes
·
View notes
Photo

happy 2023 heavensturn!
59 notes
·
View notes


Photo

bird queen illya skawi
20 notes
·
View notes
Text
If youve ever said something nice to me and i never replied I apologize! Unfortunately i am a neurotic prey animal and your message was nice enough to make me scurry under my leaf mold and hold still to camouflage myself until the danger passed
65K notes
·
View notes
Text
The thread that was the beginning of the Zenosfusion series i had on twitter (20220404-20220412)
please enjoy ~


2K notes
·
View notes
Photo


In the same fleeting moment, thou must live, die and know.
2K notes
·
View notes
Photo


someone help him
4K notes
·
View notes
Text
How-To: Budget Studio Mk.III
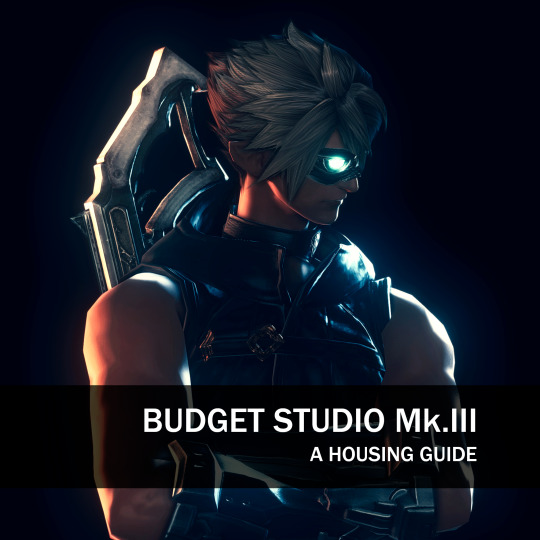
We've all been there: 50M gil burning white hot in your pocket when a set of Fallen Angel Wings pop in the market board, its siren's call luring you. Now you're utterly fashionable, but regrettably with barely half a mil Gil to your name. What to do?
Well, do not give to despair, my glamorous friend! You can actually build a perfect black background studio to show off your feathery acquisition.
You'll need:
1 x FC Room, or an Apartment
3 x White Screens
1-2 x platforms of your choice
4-5 Soot Black dyes
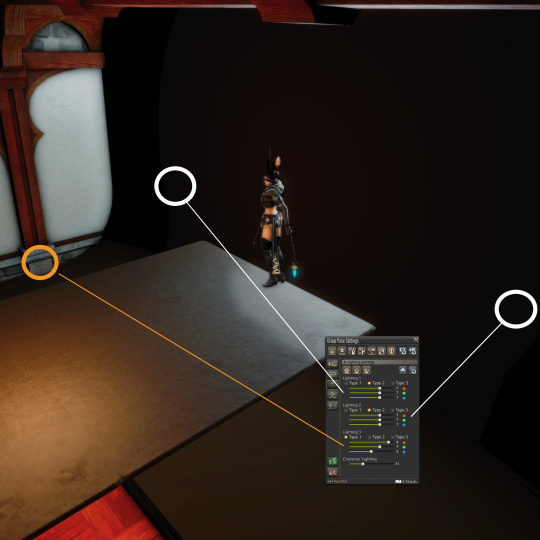
1 - Setup
Place your White Screens in parallel, in order to completely cover a wall. (This will give you some leeway with angles and point light placement.)
Make sure you leave a considerable gap, of maybe half the length of the base of a White Screen. This is important, as you'll see very soon.
Place the objects you'll use as platforms in front and center of the white panel line, making sure it overlaps with the middle panel. This is where you'll stand: In the example below I floated two Combed Wool Rugs, but any contiguous platform will do (think tables, half-partitions, etc.)
Dye all the objects with Soot Black. No need for the expensive stuff.


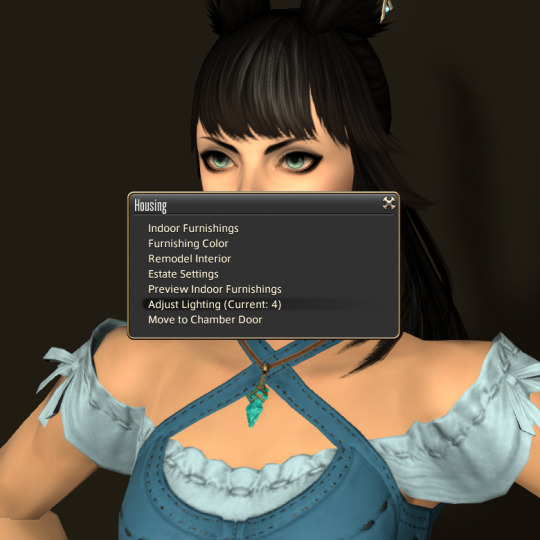
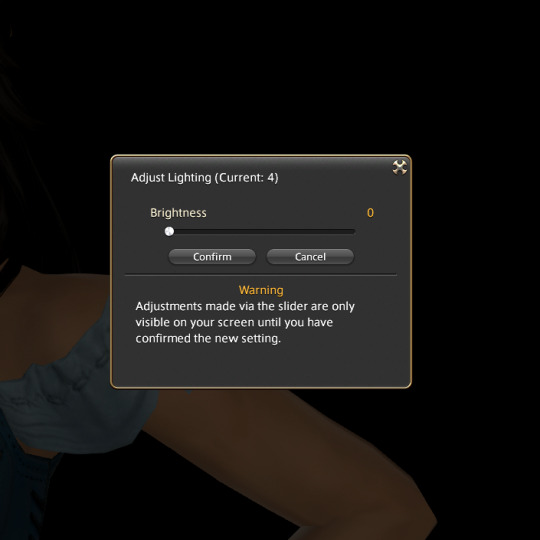
Now let's reduce the ambient light, setting it to zero; we'll use only GPose lighting for shots.
2 - What's the catch?
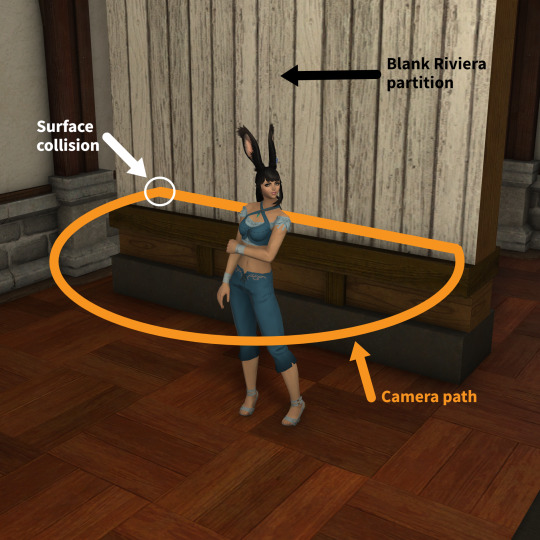
Well, you see - most partitions, like the Blank Riviera partition, have a collision box set around them. If a camera touches it, its path is altered so it doesn't go behind the partition.
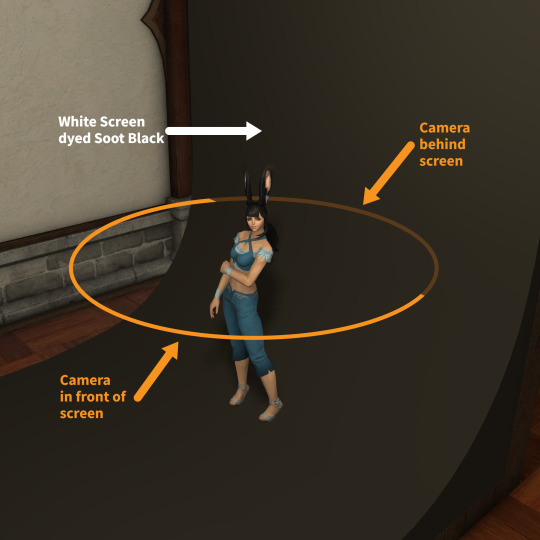
White Screens, however, do NOT have a collision box - so you can move your camera behind the partitions, and place your light sources there.
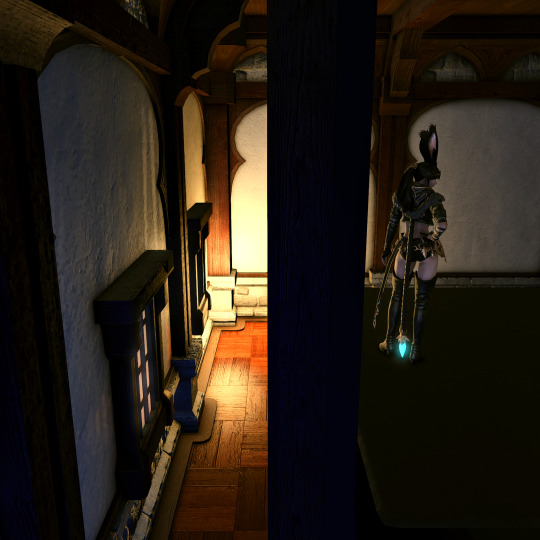
Here's how it looks in gpose - notice how the camera just goes through the partition:
Amazing, right? So the trick is to place light sources behind the panels, in the gap between the back of the panels and the wall; this way, the light won't hit the front surfaces.


The final result is a shot with a perfect pitch-black background, where rim lights can be applied with very intense results:

You can place Type-1 light points in front can offer very gentle illumination, while not hitting the background panels:
Another possible setup is to move the character away from the background, and place the light sources around it:
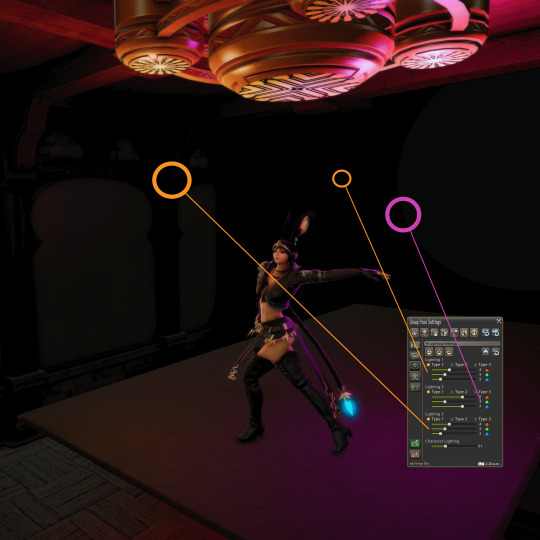
That'll result in shots like this one:
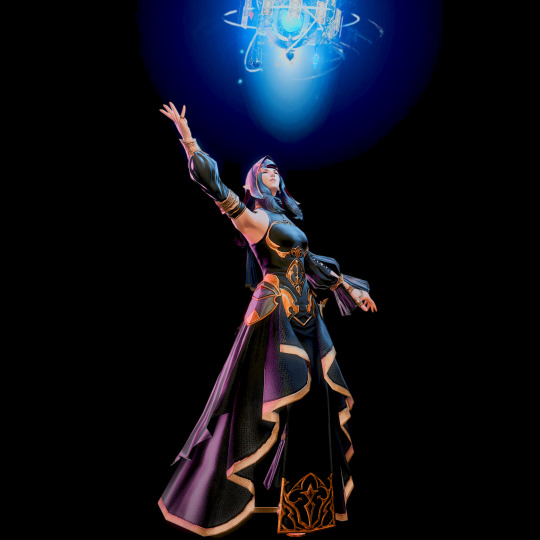
You can also place a point light between the character and the background, to create a halo effect:

You can also use the Halo effect to create ambiance:

The opportunities for dramatic lighting are endless.


Go on, give it a try!
1K notes
·
View notes
Photo

2K notes
·
View notes
Text

five of cups: regret, sadness, loss, loneliness
796 notes
·
View notes
Photo
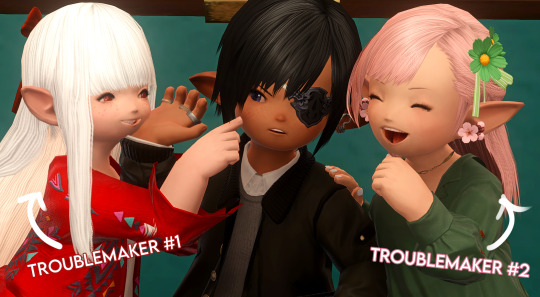


squad dynamics [ft. @anomalilyxiv & @mintdrop ]
#ichimori sutomori; total sweetheart will go to the ends of the earth to make you happy -skilled mage and fighter#but will forget how to breath if you dont remind him LOL#Its ok Big Brother Kaye has him#Lily and Mint just being a chaotic duo and Illya doesnt have to do anything but exist to keep them together and Kaye is blessed to have her#Kaye be lookin at Illya and Nanami and being like; you two youre good#-points at the others- THESE MOTHERFUCKERS ON THE OTHER HAND#Ichi is pretty harmless besides his naivity -and sending Kaye very bad jokes#kaye#Ichi#Lily#Illya#Mint#Spud Squad#FFXIV#Lalafell#GPOSE
29 notes
·
View notes
Photo


little alphinaud and alisaie with their babysitter i mean big bro i mean live in disciple of their grandpa ??? urianger
i rly need stories or scenes into moments of younger them
3K notes
·
View notes