
Don't wanna be here? Send us removal request.
Statistics
We looked inside some of the posts by ar-fmp-year-2 and here's what we found interesting.
Average Info
Notes Per Post
0
Likes Per Post
0
Reblog Per Post
0
Reply Per Post
0
Time Between Posts
20 hours
Number of Posts By Type
Text
17
Last Seen Tumblr Blogs


Fun Fact
The average Tumblr user visits about 67 pages every month.
Text
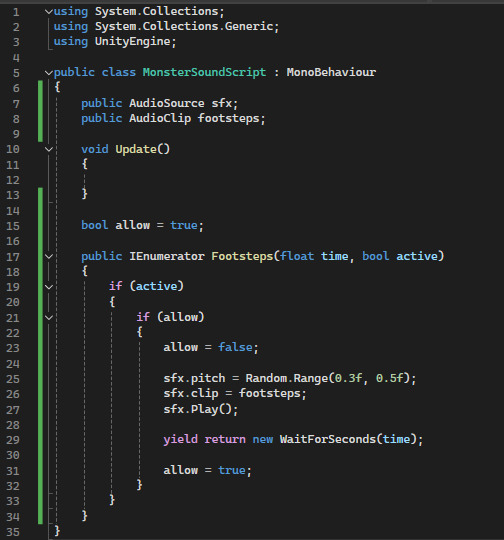
Development - 08/05
So I am adding some last minute sound effects:

Something I didn't know you could do until now, was place multiple of the same component on a single object:
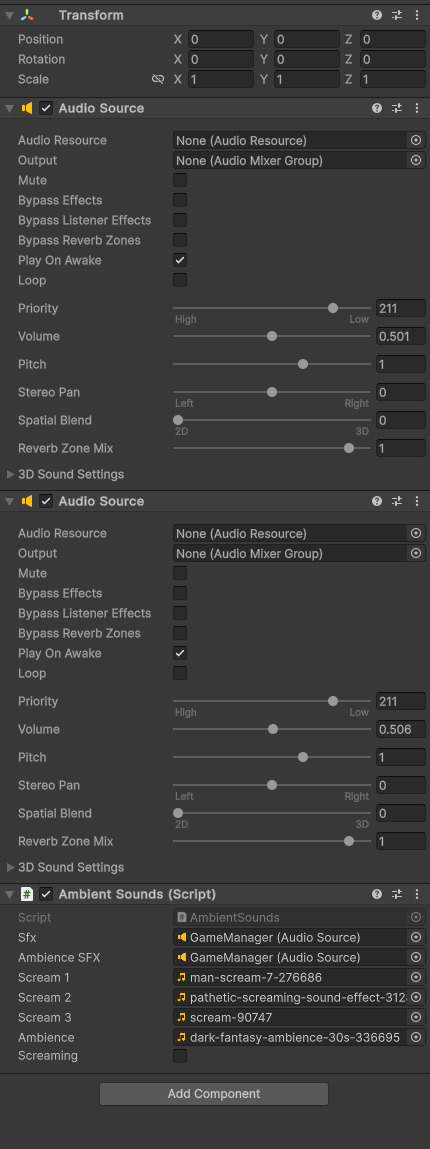
To specify which one to use, the only way (that I know of right now) is by assigning it as a public variable:

Adding some kind of sound is important to any game, as walking around in total silence would make for a pretty dull game.
Speaking of walking, I should add some footsteps to the player as well:

That's all!
(The next post will be a final game play video)
0 notes
Text
Development - Building
Today is the day I build my game. These are the settings I used to build it:

0 notes
Text
Development - 05/05
Today I am going to be focusing on the feedback I got from play testing the other day.
The first thing I did was give the door to the arena an actual model (the iron gate from the tutorial level):

Then I made it so that the chests couldn't be opened more than once by putting the contents of the Open() function within an IF statement that will close the first time it is called:

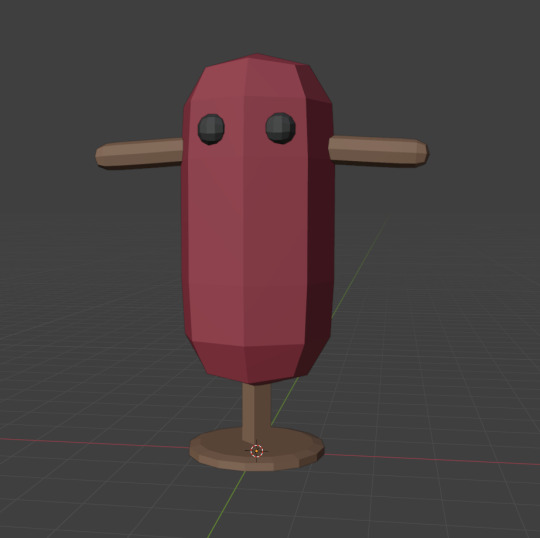
Next, I redesigned the monster. I brought over the long arms and gaping mouth ideas from the previous model, but made them float (so that I don't have to worry about footsteps) and they are holding a brazier; that's flame will be the main tell-tell sign that they are nearby:

Though I spent a lot of time on this model, and realized that I wouldn't have enough time to do anything with it... which was a HUGE waste of the little time I have.
Then I was hit with this scary thing:
This force-closed my project and would appear when I tried to open it again. After looking for and finding a solution online; it took an hour to copy the file (as I didn't have any back ups) and to reopen the project without the library.
Getting back on track, I made it so that when the player's y level is less than -100, it will reload the level. This is mainly to transition from the tutorial to the maze, but will also help for it the player somehow happens to fall out of the map:

For scripts that effect scenes, you have to mention it at the top; like you do with the UI and TextMeshPro:

Now I have added some text onto the floor that will teach the player what the different controls do:

Afterwards I make a panel that appears after you kill the monster, letting the player know that they have won:

I also made a screen for when the player dies and a way to restart:


Lastly I make it so that getting hit and successfully blocking play a sound effect:

0 notes
Text
Development - 04/04
Today, I want to get some playtesting done, though at the moment there isn't much to playtest:
So I think I will add sounds to my game and get people to playtest the pacing between the monster and exploring the dungeon.
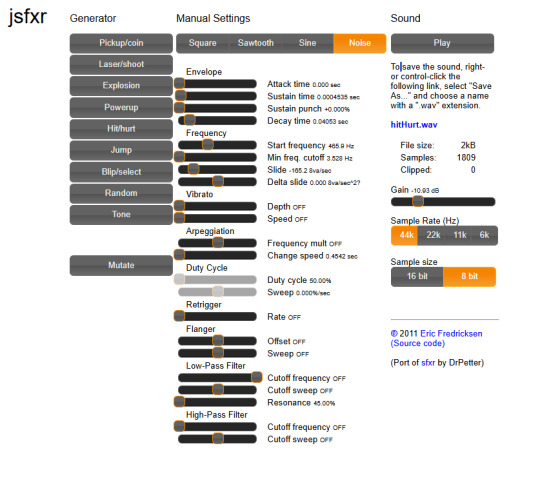
To do this, I make a couple of sounds on jsfxr and export them to Unity:
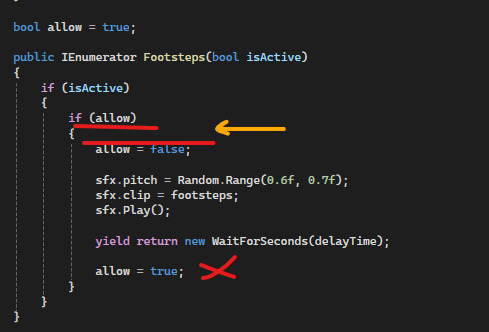
The two sounds I made are for the monster's and player's footsteps. Starting with the player footsteps, I make a new coroutine where it plays the sound on a delay depending on whether the player is sprinting or not:

For the monster, I made a new script that would receive information about how to play the footsteps from the monster script. The reason I can't just do this in the monster script is because the timers on the flee state would stop the sound from playing:
So I have link this up , but the fleeing state is giving me even more problem. Basically, this line should be triggering but isn't (even though the Debug.Log line UNDER it is triggering):

So after a while of bashing my head against the monitor attempting to workout why this won't work, I had an idea. I believe that it is resetting the timer before it can start again, though this doesn't explain why ONLY the flee state won't work:
So I try with these if statements making sure the timer can be reset:

No luck.
I think I am putting this on hold for now, as it isn't too important.
0 notes
Text
Development - Modeling the monster, again
So continuing from the last post, I will be making models of the lamp-head, and the clock-face in Blender.
I plan to use the same body for both as this will be more time efficient and they will both have a similar body design anyways.
I start with the modifiers I used before:

Then I merge all the points into one, and extrude:
Then I give him some primitive hands, feet and a neck:

Seeing that most of the monsters from the concept art are extremely underweight with their rib cage sticking out, I wanted to replicate that.
Using the skin modifier method again I made a separate object and extruded a rib cage:

And with a few tweaks to the body and rib size, I got something decent looking:

I think the scariest part of this model so far is just how well I made the hands:

I'm already getting good feelings from just adding a new cube to the scene:

Here's the lamp for the lamp-head:

And here he is with the lamp:

Now by adding some colour.. it really brings the vision to life:

Now I can rig him, this should be so much easier now that he is humanoid.
It was:

Though something I realized is that the whole antique lamp thing doesn't fit in with my medieval theme. Then I had a better idea, I could replace his head with a brazier.
I will leave this for a little later as there are still some features I should focus on.
0 notes
Text
Playtesting
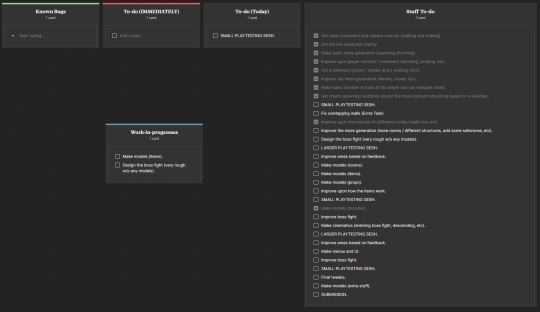
So I got some people to play test my game in its current state. Here are the results:


They all seemed to like the how my game looks, and there are only a few things I needed to touch up on that I already knew about.


The controls were effectively simple to grasp as intended, though the blocking needs some touch-ups. Mainly just making the blocking faster and adding audio (which is something I need to do generally for all parts of my game).


As for the boss itself, most said that the attacks were too fast and too unpredictable (also there was a bug where you could just stand next to it and the attacks couldn't hit you as I only put collision boxes on its hands).
As for the design, I wanted to redesign the monster as I was told prior to the play testing by a few people that it looked "more goofy than scary". I had been conceptualizing another design that is a tall humanoid figure who's head is one of the braziers and can hide itself among the braziers scattered around the maze in its flee state.
But with the comments on its appearance from my form, I might try to combine what I currently have with the new idea.


The maze itself obviously needs some work done to it. I have already fixed the bug where you can roll the same weapon twice by removing that item from the list when first rolled:

Another thing that was a bit disappointing is that the monsters time in the flee and sleep state were too long and the radius around the player that would cause the monster to flee was too large and would go through the walls. This made it so that the players wouldn't see the monster at all, which for a horror game; is quite bad...
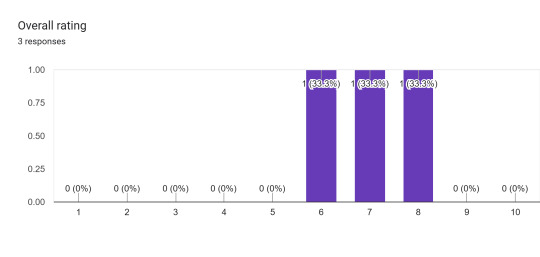

Overall, my game got an average rating of 7/10, with some positive closing thoughts! I'm sure I can make this game way better despite being close to the submission date.
0 notes
Text
Development - 02/05
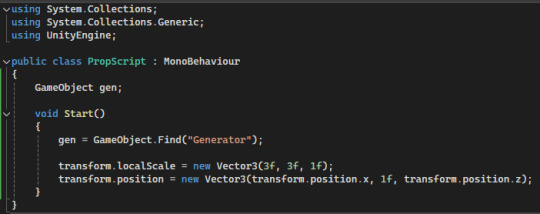
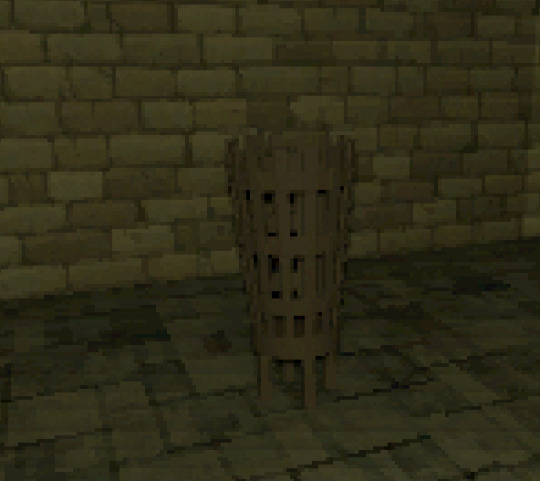
I am going to be making the props and braziers spawn randomly throughout the maze.
First attempt I tried to get the braziers to spawn like the chests do, with the cell prefabs. But they would just become stretched:
Then I remembered that the chest had a script to set it to the correct size when it spawns in. So I tweak this and they come out a fairly decent size:
Though the particle system no longer works as it is far too small for some reason:

So I'm not to sure what to do here as the particle system is a major part of it.
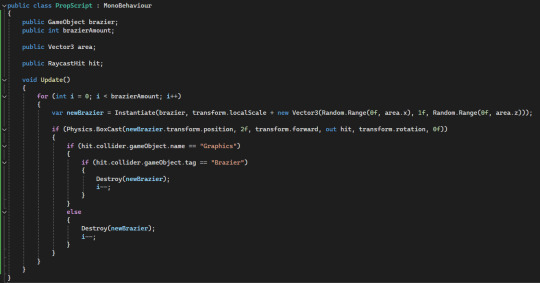
An idea I just had is that I can get an empty object, give it a script where it spawns a brazier at a random point within a certain area and if the brazier is too close to another or is too far from a wall, it'll get destroyed and replaced.
So I got this down, but have ran into a problem where I cant make the Vector3 into a transform:
Though seeing the time I have left, I'm not sure that I want to focus on this as I feel that there are more important things to focus on (E.G. sound).
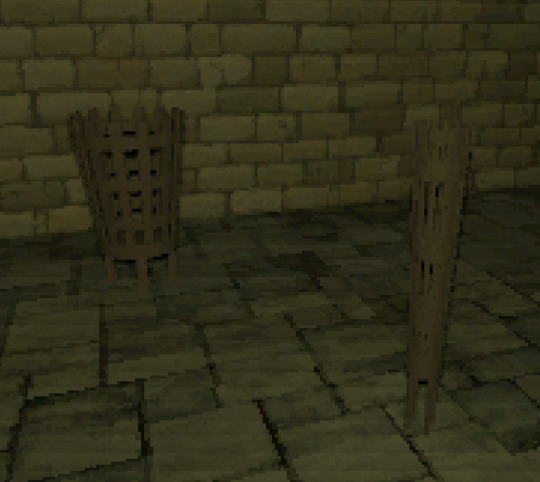
So to compensate, I'm going to place a brazier in each corner of the level so that the player can tell if they are going in circles as the boss room will always be in the center of the maze:

0 notes
Text
Development - 02/05
Today I am going to be getting some playtesting done:

In preparation for the play testers, I want to add more braziers to the level, add player animations and make a tutorial level.
Starting off with the animations, I need a animation for attacking and blocking. I designed the player to make this as easy as possible, as all the weapons are children of the game object 'Hand Socket' I can just move this to get an animation for all of the weapons:

Here's what they look like:
Next I wanted the player to lit the braziers so that they can know where they have already been, to do this I just add to the camera script like I did with the chests:

This just enables the point light that's a child of the brazier, and plays the particle system attached to the brazier.
Now for the tutorial level.
I make a new scene and name it "Tutorial" and make the player into a prefab so that I don't have to recreate the entire player in the new scene:
So I got a bit carried away making the tutorial level that I forgot to record the process. I'll do a quick run through though of what I have added.
First off I made 3 new models:

Grand Painting (I can replace the black material with an imported image). I intend to use an AI generated image with this.

Iron gate.

Table.
With these 3 models and some of the others I had made before, I had gotten this far into making the tutorial level:

Room 1: This is the room the player will spawn in, and will teach the player how to move.

Room 2: This room will teach the player how to attack and block.

Room 3: This room will teach the player how to interact with objects and items.
These rooms are very much incomplete as I need to add more props to them. Before I make anymore props, I'd like to address the lore of the castle / maze; as I feel like it would help me when creating new props or weapons:
The castle that is the tutorial level was once a thriving kingdom, where the king had an overwhelming fascination with fire; in which he would decorate his castle with many braziers that would contain the flickering of flame he adored. Though as his obsession progressed, he grew ignorant, and would soon abandon his duties to admire the flame in private. With this - his people rebelled. They trashed his palace and cast a curse on it, where the very walls wrapped together - forming an inescapable labyrinth where the king would be trapped forever.
So because of this, I feel that it is necessary that there are a lot of braziers around the level. So I made two heaps of them:


0 notes
Text
Development - 01/05
So to finish today I am going to quickly get the blocking mechanic in:

What blocking will do, is it will calculate the damage the player will take and divide it by the block rating:

Resulting in the player taking significantly less damage. Although the cool down is shared with the attacking cool down, so if you attack at the wrong time, you'll receive the full damage.
0 notes
Text
Development - 01/05
Now that everything is finished, I have some tweaking and modelling to do:
Now I want to get some more items made.
The first item I will make is a morning star.
First I add a cube and subdivide it to a low poly sphere:

Next, I grab every other vertex on this sphere and extrude them and scale down the ends to form a spike:

Then I make a new plane, subdivide it into a circle, extrude it so that it is a cylinder and extrude one end of it:

Then I combine the two:

Now I can add some materials to it:

I also made a broken version of the regular sword that the player will start with:

Next I am going to make an axe.
I start off with a plane:
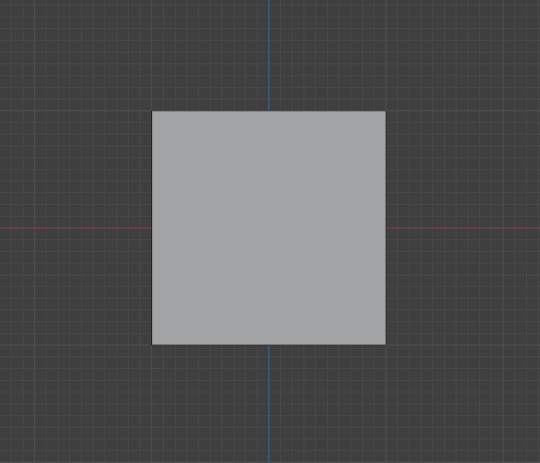
I then extrude it to look like this:

I extrude it to make it a 3d shape and start scaling some points:

Then like before I make a handle by subdividing another plane and extruding it:

Then I added some materials:
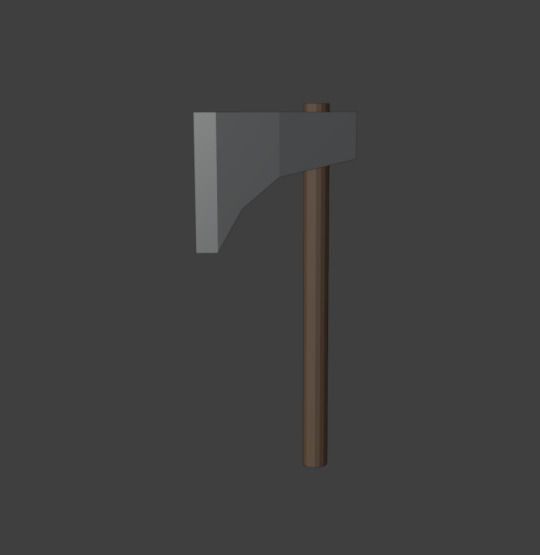
I decided this was a bit plain, so I added some straps around where you'd hold the axe:

Though I didn't like this so I went back to the previous design and curved the handle and rounded on one of the ends:

So after importing these into my game, I can make the stats for them:

Quick rundown (using the sword as reference):
Curved Sword: -Damage, -blocking, +speed.
Axe: +Damage, --blocking, =speed.
Morning Star: ++Damage, -blocking, -- speed.
Broken Sword: ---Damage, ---blocking, =speed.
After a quick break, I made a training dummy; as I needed one for the tutorial:
0 notes
Text
Development - 30/04
As this is the last week I have to work on this project, I need to get the items done. After that, it is just some modelling and some tweaking then it is complete:

So my initial plan was to use the Raycast from the the attacking mechanic to check if the player is looking at a chest, which they can then open. Though after a bit of testing, I can't seen to get the chest as a contact when hitting it with the Raycast.
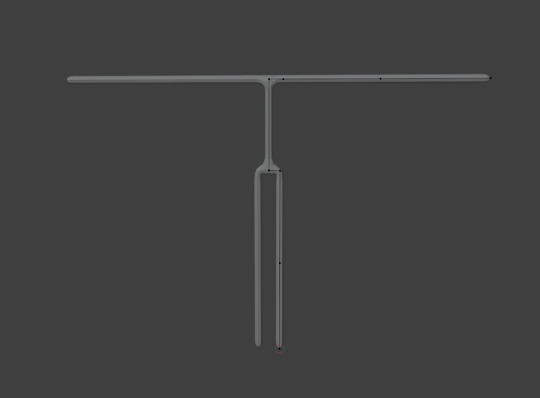
I used Debug.DrawRay to draw a ray that shows what the Raycast should be like:
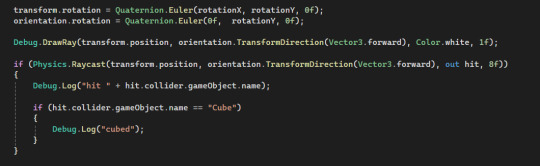
It's a bit difficult to see, but that white line is what the Raycast looks like:

Something I noticed is that the line will not move up or down, which makes it impossible to contact with things above or below (like the chests!).
After changing the direction from being the angle of the orientation object to the camera itself (I don't know why I didn't do this first) it works!

An another idea I had for if this wouldn't work, is I that could make a list that contains all the chests in the level and will constantly looks for one within a certain range of the player, in which it will open it.
Now I can just call a function in my ChestScript when the player is looking at the object and presses E:

The Open() function will pick a random item from a list of all items, and spawn it above the chest:


Now I have to make it so that the player can equip the item in front of them:

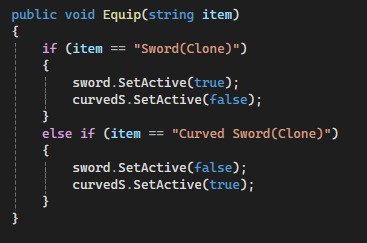
This just hides all the weapons and shows the selected weapon.
Now to give the weapons some functionality, each weapon has 3 stats: Attack Rating (a multiplier for damage), Block Rating (a multiplier for defense while blocking) and Speed Rating (a multiplier for the time between each swing):

Here - the regular sword swings slower, but deals more damage than the curved sword.
I modify the the Attack() function so that you can only attack after a short cooldown:

0 notes
Text
Development - 25/04
For now I am going to be making more items.
For items like armour, I will make a humanoid model in Blender:

Then I can duplicate certain areas and extrude them to form clothing:

With a few tweaks and some materials we can get something like this:

Then we can just start adding to it like so:

And some more detail:

0 notes
Text
Thing of Interest - Import settings
So I was playing around with the prefabs in my level, when I had clicked on to my imported brazier model and these settings appeared in the inspector:
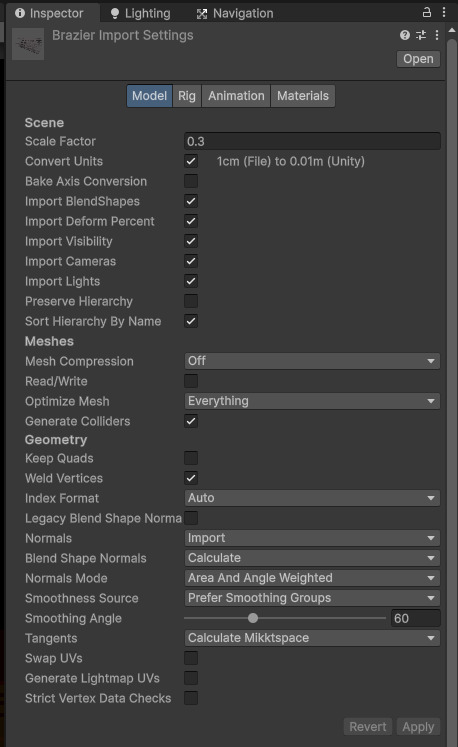
I don't know why I hadn't thought about clicking on the import itself, but something else caught my eye... the animation tab:

This could be how I finally get the animations from Blender into Unity!
0 notes
Text
Development - 25/04
Now that the walls finally have a texture, I am feeling very motivated to finish this; so I am being a little more ambitious for today:

First, I will try to fix the overlapping of the walls. I first attempt this by scaling the walls down so that the aren't overlapping, though this just opened many holes to the void that is outside the maze:

From there I thought it might work if I filled the holes with an object that wouldn't be deleted:

Although the pillars are a lighter colour for some reason, this still turned out very well and allows for naturally spawning pillars inside the maze:

And now there are no overlapping walls.
Now I want to have braziers scattered around that the player can light to prevent them from being too lost. So I start up Blender, subdivide the starting cube by 6 and scale it down on the Z axis:

It was here I forgot that LoopTools was an addon, so I looked for it and installed it in Blender Preferences:

Then I made the cube into a cylinder using LoopTools:

I extrude the rim and extrude it again to get a bowl looking shape:

I then extrude every other face on the top and scale the ends so that they resemble something of a cone. I then inset faces on to every 2 faces going down each beam:

By bridging all the new faces to each other, I have a recycling bin!
Then I extrude some little legs and it is mostly done:

Finally I add some little details and make the legs larger before adding a bronze material to it:

I plan to use the Unity particle system to make the fire inside it.
So now I import it into Unity and...
It is missing some faces:


So I searched why this was and got an answer from Stack Overflow from a post by someone facing the same problem.
In blender, I enabled backface culling to fix this as well as pressing ctrl + shift + N to recalculate the normals (they should always be facing the outside of the model).
I also decided to change the material to a iron looking colour as I feel that works better given that everything else is also grey and because the combination of the bronze and the light from the fire might be a bit overwhelming colour-wise:

Now for that particle system I mentioned. Over the last few projects, I have become quite efficient at making stuff with the particle system:

I can give it a point light for it to become more of a beacon like I had hoped:

Here's a video showing how the brazier might be useful to guide the player:
0 notes
Text
Development - 24/04
Here's the results from the previous post:
0 notes
Text
Development - 24/04
Now that I have mostly finished the gameplay, I want to make the maze look better:

First things first, I want to give the walls a texture so that they don't look so bland. I was going to create a 3d model of a brick wall that I would replace all the existing walls with, but then I remembered what happened last time I did that in Project #2; where the game became unplayable.
So I think I will result to getting a texture and adding it to the current walls, which should be quicker and more efficient to do instead.
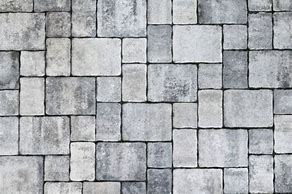
I found this model by Belén Navone on ArtStation:

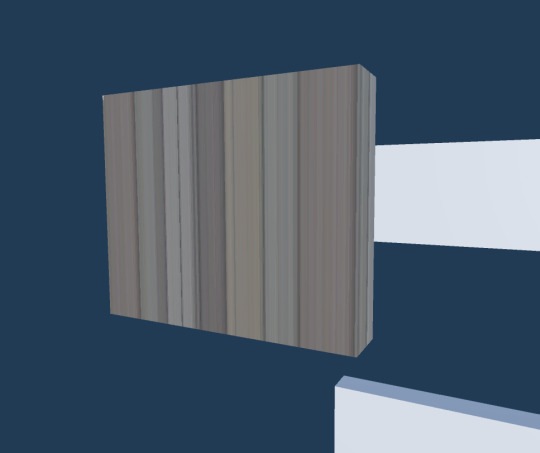
So I tried just adding the texture to the wall objects, but this scaled the texture according to the size of the object:
Now I am following a tutorial that is showing me who to make this texture able to be tiled:
youtube
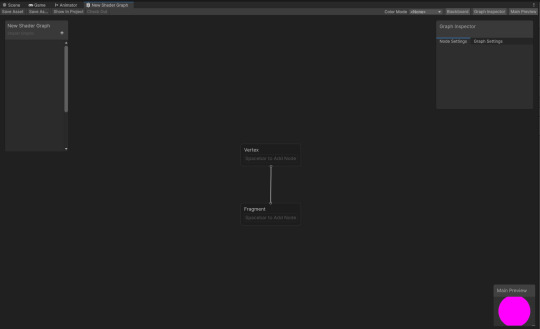
So first I have to install the shader graph package by Unity:

This is my first time doing anything with shaders, so I'm having a little play around with the different options:
After learning some basic stuff, like how to add new inputs, I continue the tutorial.
I've gotten to here with my shader:

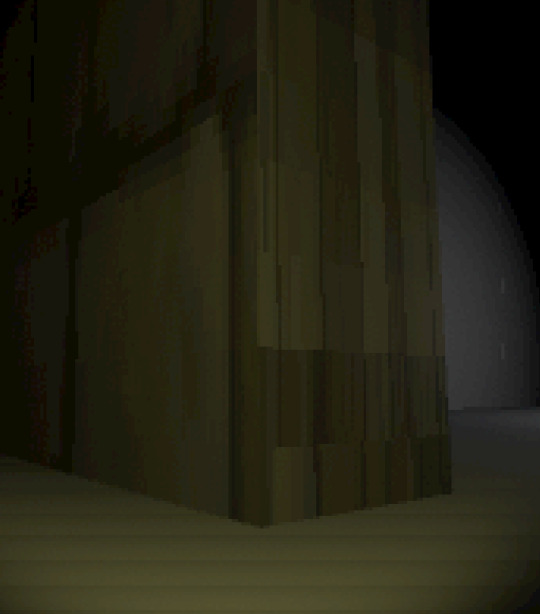
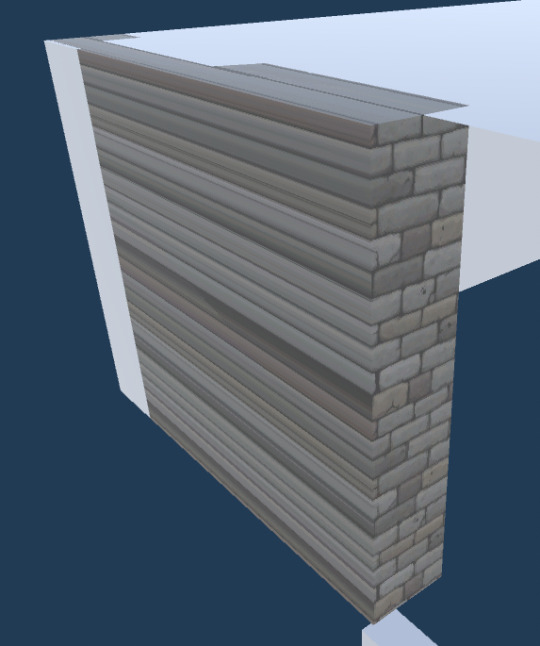
Which when added to an object along with the texture again, provides this:
The tutorial I'm following is a few years old and uses an older version of Unity so I wasn't to surprised, then I saw the top:

Don't worry about the shape seemingly being strange, that's just the ceiling clipping into the walls (which I'll have to fix some point soon).
The texture on the top is perfect as it stays in the same place, at the same scale if I move or scale the object it is on!
By copying the previous split and changing a few values:

I managed to reverse the effects of the texture:

By adding a condition that checks the position of the side with the texture on it, now we have 2/3 of the axis working:

Now adding another branch that does the same as before, but on the Z axis rather than the X, we get this:
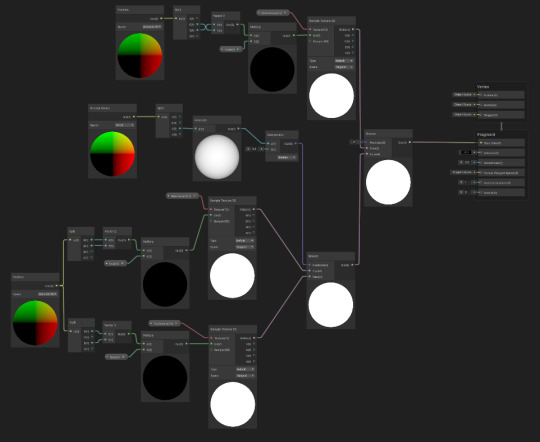
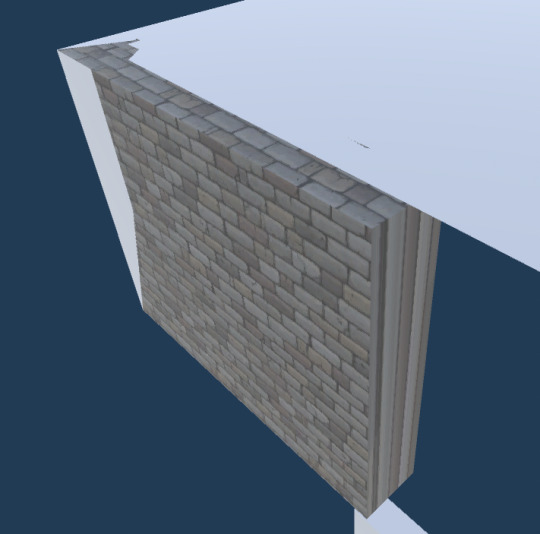
Finally with another condition, we have all 3 axis's working:

So now I got another texture for the floor (this was a stock image):
I'll post a video showing the end results in a different post as Tumblr's one video per post is annoying.
0 notes