
Don't wanna be here? Send us removal request.
Statistics
We looked inside some of the posts by assuranceelectrical and here's what we found interesting.
Average Info
Notes Per Post
0
Likes Per Post
0
Reblog Per Post
0
Reply Per Post
0
Time Between Posts
25 days
Number of Posts By Type
Text
17
Last Seen Tumblr Blogs


Fun Fact
The “We are the 99%” Tumblr blog became the slogan for the Occupy Wall Street movement.
Text
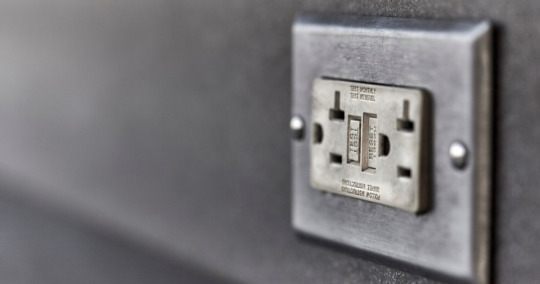
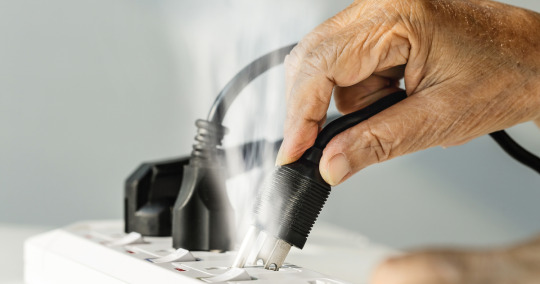
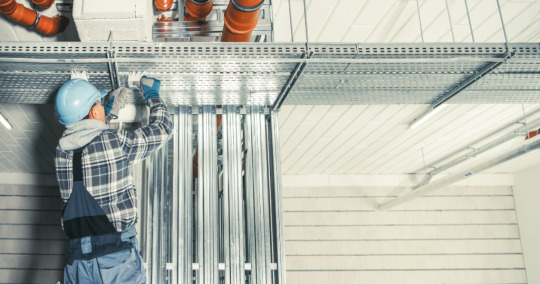
Troubleshooting Electrical Outlets: How Do Experts Do It?
Electrical outlets are the unsung heroes of our daily lives, powering everything from our smartphones to kitchen appliances. However, when these outlets fail to function, it can be a perplexing situation for homeowners.
In this guide, we’ll explore common outlet issues and learn how professional electricians work when troubleshooting electrical outlets. Keep reading below!
Troubleshooting Electrical Outlets: Common Issues and Solutions:
1. An Overloaded Circuit

Issue:
One of the common culprits for multiple outlets ceasing to work is an overloaded circuit. This happens when the demand for electricity exceeds the capacity of the circuit breaker, leading it to trip.
Warning Signs of Overloaded Circuit:
Flickering or dimming lights
Sizzling or crackling sounds from outlets
Burning smell from the receptacle
Warmth around the outlet
Electric shocks from appliances
How to Fix:
Unplug all devices from the affected outlet.
Locate the main breaker and look for a tripped switch.
Flip the switch to “off,” then back to “on” to reset the circuit.
2. Tripped GFCI Outlets
Issue:
GFCIs (Ground Fault Circuit Interrupters), common in bathrooms and kitchens, can trip if they detect an electrical imbalance.
GFCI Outlet Tripping Signs:
Moisture in the receptacle
Overloaded circuit
Electrical fault in wiring
How to Fix:
Unplug devices from the outlet.
Push the reset button on the GFCI outlet.
If the outlet won’t reset, there might be a wiring issue or a defective outlet. Your electrician will recommend potential solutions to fix your specific problem.
3. A Bad Electrical Outlet
Issue:
Outlets can burn out due to excessive electrical currents, posing a significant fire risk.
Red Flags for a Bad Outlet:
Sparks
Blackening around prongs
Warm to the touch
How to Fix:
Call a licensed electrician to replace the outlet immediately.
Avoid using outlets showing signs of burnout.
4. Loose Connection
Issue:
Normal wear and tear can lead to loose wiring connections. This can result in the outlet not functioning properly and poses a fire hazard.
Indications of Loose Connecting Wires:
Front plate of the outlet is warm
Scorch marks around the outlet
How to Fix:
Turn off power from the circuit breaker.
Remove the cover plate to check for loose connections.
If wires are loose or corroded, it’s advisable to replace the entire outlet.
5. Blown Fuse
Issue:
In homes with a fuse box, a blown fuse can cut power to a specific circuit. Check for melted metal pieces or discolored glass in the fuse box.
Signs of a Blown Fuse:
Melted metal or discolored glass in the fuse box
How to Fix:
Identify the blown fuse, unscrew it, and replace it with a new, identical fuse.
Consider upgrading to a circuit breaker box for enhanced safety.
6. Half-Hot Outlets:
Issue:
A half-hot outlet means one plug of the outlet is always powered, while the other is controlled by a switch. If you’re unaware of this setup, it may lead to confusion when troubleshooting.
Identifying Half-Hot Outlets:
One plug not working while the other is operational
Use a lamp to test for switch control
Solution:
Check for nearby switches that control the outlet.
Test with a lamp or other devices to confirm functionality.
Why Are My Outlets Not Working but the Breaker Not Tripped?
There could be several reasons why your outlets are not working even if the circuit breakers are not tripped. Some possibilities include:
Tripped GFCI Outlets: Check if any GFCI (Ground Fault Circuit Interrupter) outlets in the area have tripped. These outlets are designed to shut off power when they detect a ground fault.
Loose Connections: Wiring behind the outlet may have become loose, disrupting the electrical connection. This can happen over time due to normal wear and tear.
Bad Electrical Outlet: The outlet itself may be faulty or burned out. If there are signs of sparking, blackening, or warmth, it’s best to call a professional electrician to replace the outlet.
Half-Hot Outlets: In some cases, one part of the outlet may be controlled by a switch. Make sure to check if there’s a switch that could be affecting the functionality.
How Do You Fix a Dead Electrical Outlet?
The approach to fixing a dead electrical outlet depends on the underlying issue.
Here are general steps to troubleshoot and potentially fix dead outlets:
Check for Tripped GFCI Outlet: Look for any GFCI outlets in the area and reset them. They can impact power to other outlets in the circuit.
Inspect Circuit Breaker: Ensure that the circuit breaker panel for that particular area is not tripped. If it is, reset it by flipping the switch to the “off” position and then back to “on.”
Test with Other Devices: Plug in different devices or a lamp into the dead outlet to confirm that the issue is with the outlet itself.
Inspect for Loose Connections: Turn off power from the circuit breaker, remove the outlet cover, and check for any loose or corroded wires. If found, tighten or replace as needed.
Replace the Outlet: If the outlet is damaged, burnt, or shows signs of wear, it may need to be replaced. This is a task best performed by a licensed electrician for safety.
Get Professional Electrical Outlet Check
Troubleshooting electrical outlets may seem daunting, but with a basic understanding of common issues, homeowners can often address the problems themselves. However, if issues persist or if there are safety concerns, it’s crucial to consult with a professional electrician.
Regular checks and preventive measures can protect your home from the risk of electrical fires, ensuring a safe and functional electrical system.
Source: assuranceelectricalaz.com
0 notes
Text
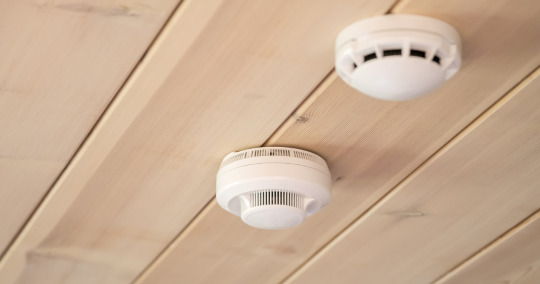
How Much Would It Cost To Install Smoke Detector?
Smoke detectors are essential in protecting your home against fire hazards.
In this blog, we will explain what smoke detectors are, why they are essential, and the fees associated with having them in your home. We will also explore factors that influence the cost to install smoke detector and answer common queries about the installation process.
Understanding Smoke Detector
A household smoke detector, also known as a smoke alarm, is a small device designed to detect the presence of smoke using either ionization or photoelectric systems.
When it detects smoke, it triggers an alarm to alert residents and, if connected, the fire department. These smoke alarms are typically installed on ceilings and can be powered by replaceable batteries or hardwired into your home’s electrical system.
Difference Between Smoke Detectors and Carbon Monoxide Detectors
Smoke detectors and carbon monoxide detectors may look alike, but their purposes differ significantly.
A smoke alarm alerts users about potential fires even while they are sleeping. Meanwhile, a carbon monoxide detector serves a valuable purpose by notifying of possible leakage of colorless, odorless gas that often comes from malfunctioning heaters or appliances.
These detectors typically work independently, though both types may sound alarms if there’s both carbon monoxide and smoke present in your home. It is wise to have both types installed to ensure complete safety for you and your family.
Why Is It Important to Install Smoke Detectors?
According to the National Fire Protection Agency (NFPA), having working smoke detectors in your home reduces your chances of dying in a fire by half. Here’s why:
Early Detection: Smoke detectors offer early warning of potential fires, giving you enough time to evacuate safely and contact help if a situation arises.
Life-saving Alerts: A loud alarm can alert you if there’s a fire while you sleep, increasing your odds of making it out safely.
Property Protection: Smoke detectors don’t just save lives — they also safeguard property by alerting you of fires before they cause extensive damage.
Cost to Install Smoke Detector
Installing a smoke alarm costs between $70 to $150 on average, nationwide. According to Fixr, most people prefer installing a hardwired smoke detector, which typically costs around $112.
The total smoke detector installation cost can vary depending on factors. Here’s what you can expect:
Basic Models: Battery-powered smoke detectors are generally the least costly option, beginning at around $44. Ionization smoke detectors tend to be cheaper, while photoelectric models may cost more.
Advanced Options: Installing a set of three hardwired smoke detectors with a new base can cost up to $398.
Labor Costs: Hiring an electrician could cost anywhere between $30 to $100 an hour. It takes approximately an hour for them to install a smoke alarm – with labor accounting for roughly $40 of total costs.
Factors Affecting the Cost of Smoke Detector Installation
Several factors can influence the cost of installing a smoke detector in your home:
Location: The location of the detector plays a significant role in determining the cost. Installing a model in a hard-to-reach spot may cost more.
Number of Detectors: The number of detectors needed to be installed in a household can affect the overall cost. Some professionals also offer discounts for installing multiple units.
Detector Model: Basic models are cheaper, while advanced ones with additional features, such as visual and voice alerts, can be pricier.
Time of Installation: Installing detectors in a new home is easier and cheaper than retrofitting them to an existing house.
Wiring Requirements: In some areas, detectors must be on a separate circuit, which can add to the installation cost.
Professional Services: Hiring a qualified electrician ensures proper installation. Their rates can vary depending on their experience and location as well as the type of electrical work required.

Can I Install a New Smoke Detector Myself?
Although installing a smoke alarm yourself may be possible, professional electricians are highly recommended as they possess extensive knowledge regarding various models available and can recommend the ideal one to meet your specific requirements.
Licensed electricians provide fast and hassle-free installations. Their knowledge of safety regulations ensures your installation meets regulatory compliance. They can also address multiple electrical issues at once in your home.
Just be sure to thoroughly verify their credentials and select a reputable electrical company with proven customer satisfaction records.
How Many Smoke Detectors Do I Need for a 2000 Square Foot House?
For a 2000-square-foot house, it’s highly advised to install one smoke alarm on each floor, inside each bedroom, and outside each sleeping area. Additionally, if there is a door to an upper floor or basement stairs, it’s recommended to install one detector on each side of the door.
Install sensors every 500 square feet if your house exceeds 1,000 square feet. For accurate counting purposes, consult an electrician before installing detectors to ensure the maximum effectiveness of each device.
Is it Difficult to Install Hardwired Smoke Detectors?
Installing hardwired smoke detectors can be more complex than installing battery-operated ones. It involves wiring and connecting the detectors to your electrical panel. However, hardwired detectors are more reliable and don’t rely on battery changes.
How Long Does it Take to Install a Wired Smoke Detector?
On average, it takes about 5 hours to install three wired smoke detectors, including tasks such as running cables, installing boxes, and connecting wires to terminals. Of course, the duration will depend upon both the complexity of installation and the electrician’s experience.
The cost of installing smoke detectors is a small price to pay for the peace of mind and safety they offer.
Smoke detectors are not only about protecting your home but also your family. It is best to hire an electrician for a safe, compliant, and hassle-free installation.
0 notes
Text
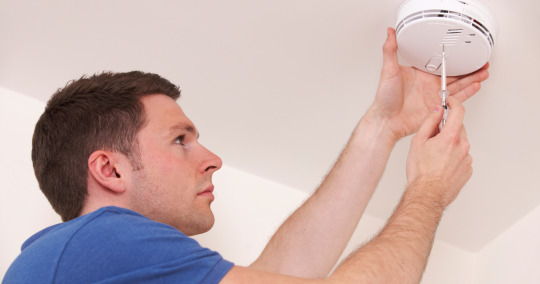
How to Install Hardwired Smoke Detector
Did you know that 96% of homes in the USA are now equipped with smoke detectors?
We understand that safety in your home should always be your top priority and one of the essential devices every household should have is a smoke detector.
A smoke detector helps you detect the presence of smoke in your home, alerting you to possible fire.
In this blog, we’ll guide you through the process of how to install a hardwired smoke detector in your home, to give you an overview of our entire procedure. Let’s get started!
Step-by-Step Process of Installing Hardwired Smoke Detectors

Hardwired smoke alarms should be installed properly to ensure their functionality. Below are the general steps on how our licensed electricians install hardwired detectors.
Step 1: Choose the Perfect Location for Your Smoke Detector
Choosing the right smoke detector location is crucial. Make sure to install smoke detectors in easily accessible locations, near an electrical outlet, and close to sleeping areas for optimal results.
Avoid placing it near vents or windows, as it can interfere with its detection capabilities. Consider installing multiple smoke detectors in different areas of your home too to improve safety.
Step 2: Shut Off Power to the Electrical Circuit
Before you begin installing your smoke detector, you need to shut off power to the electrical box in the area where you are planning to install it. This will ensure that no continuous electrical charge will run throughout the installation procedure.
Most homes that use electrical smoke detectors compared to battery-powered ones, and this installation can pose danger if not done by a professional.
Step 3: Install the Mounting Bracket
After you’ve chosen the perfect location and shut off power, install the mounting plate of the smoke alarm. Install the mounting bracket tightly onto the ceiling light fixture or the existing wall outlet using the provided screws.
The detector’s mounting plate holds the unit and hides the smoke detector cable, giving your device a sleek and professional look.
Step 4: Connect the Wiring
Connecting the wiring is always the tricky part, but don’t worry – we’ve got you covered. If you have an existing electrical connection in that location, remove the old detector and connect the new one to the wiring using wire nuts.
Thoroughly follow the manufacturer’s instructions and make sure to connect all wires accordingly. If multiple detectors are being installed, try running a 3-wire cable onto the first detector connected to each subsequent smoke detector.
After connecting the wires, tuck them back securely into the mounting plate.
Step 5: Testing Out the Smoke detector
After completing all the steps, turn the power back on and test the smoke detector. Press the test button, and if the alarms sound, congratulations! You have successfully installed a hardwired smoke detector in your home.
If it doesn’t work correctly, then we’ll check the wires and connections again. Always remember to have an electrician test your smoke detector regularly, even after installation.
What Are the Types of Hardwired Smoke Detectors?

There are several different types of hardwired smoke detectors available in the market. Here are some of them:
Ionization Smoke Detectors: These detectors use a small amount of radioactive material to ionize the air in the sensing chamber. When smoke enters the chamber, it disrupts the ionization process, triggering the alarm. Ionization smoke detectors are effective at detecting fast-flaming fires.
Photoelectric Smoke Detectors: Photoelectric smoke detectors use a light source and a light-sensitive sensor. When smoke particles enter the sensing chamber, they scatter the light, which triggers the alarm. These detectors are particularly sensitive to slow, smoldering fires.
Dual-Sensor Smoke Detectors: Dual-sensor smoke detectors combine both ionization and photoelectric technologies in one unit. They provide broader coverage and can detect a wider range of fire types, including both fast-flaming and slow-smoldering fires.
Combination Smoke and Carbon Monoxide Detectors: These detectors offer dual functionality by combining smoke detection with carbon monoxide (CO) detection. They can provide early warning for both fire and CO gas, offering enhanced safety.
Interconnected Smoke Detectors: Interconnected smoke detectors are wired together so that when one unit detects smoke, all interconnected units in the system also activate. This provides widespread notification throughout the home or building.
Have Your First Smoke Detector Installed Byr Professional Electricians!
Installing a hardwired smoke detector can be easily done by our professionals and it’s a small price to pay for your safety in your home.
Keep in mind that safety in your home starts with preventing disasters before they occur and with the addition of the hardwired smoke detector, you have made a significant safety impact on your residence.
0 notes
Text
Electrical Inspection Checklist for Residential and Commercial Buildings
Regularly checking the electrical system of a house or business is essential for ensuring its safety and reliability. An electrical inspection checklist ensures that the entire system and major appliances are thoroughly assessed for any possible hazards or deficiencies.
Today, businesses must also conduct regular inspections to ensure the safety of their customers and employees.
It is essential to hire a licensed and insured electrician to inspect your system according to safety standards and mitigate any potential risks.
This article discusses a sample safety inspection checklist that residential and commercial owners can use and follow with the help of a licensed electrician. Keep reading below.
Residential Electrical Inspection Checklist

As a homeowner, you must ensure the safety of your electrical system, before even consulting an expert for inspection purposes.
While it is best to trust in the hands of professional electricians, you can still perform basic residential electrical maintenance to identify any immediate concerns for your electrical system.
Here are the key areas to assess:
Wires and Outlets:
Are all wires properly covered to prevent exposed wiring?
Do all outlets and light switches function properly, with no buzzing/crackling noises, broken covers, or discoloration?
Do the outlets feel cool to the touch?
Are all wires free of damage, such as frayed or broken parts?
Are there any cords that could be pinched by doors, windows, or furniture?
Are the cords free of nails or staples?
Do you use surge protectors to safeguard electronic devices?
Lighting:
Do all lightbulbs have the appropriate wattage for each fixture?
Is there a safe gap between lamps/light fixtures and combustible objects?
Is there a problem with lights dimming or flickering frequently?
Have the light fixtures been replaced or upgraded as needed?
Electrical Panel:
Is the electrical panel up to date?
Is the electrical panel’s cover cool to the touch?
Are there any tripped circuits?
Is surge suppression implemented throughout the home to protect against power surges?
Appliances:
Are unused appliances unplugged to avoid wasting electricity?
Are all appliances in good functioning order?
Are major appliances (such as the refrigerator or stove) plugged directly into wall outlets?
Electrical Fires:
Is at least one multi-purpose fire extinguisher readily available inside the house?
Are all smoke detectors and carbon monoxide alarms working properly?
Are flammable goods stored away from electrical appliances and lights?
Is there an emergency plan in place in case of a fire?
Outdoors:
Are all exterior electrical outlets free of debris and obstructions, and are they appropriately secured with weatherproof safety covers?
Are cords used specifically designed for outdoor use?
If there is electrical equipment near water (e.g., swimming pool or hot tub), is it properly protected and plugged into Ground Fault Circuit Interrupter (GFCI) outlets?
Note that this checklist serves only as an initial assessment; to fully ensure the safety of your residential electrical system it is wise to seek professional services from a licensed electrician.
Commercial Electrical Inspection Checklist
Electrical inspections for commercial properties are essential in meeting the safety requirements outlined by the National Electrical Code (NEC).
Below are the main areas typically reviewed during a commercial electrical inspection:
NEC Compliance:
Are the installations up to NEC standards?
Are installation instructions followed, and are materials and equipment appropriately labeled?
Current Ratings and Openings:
Do the interrupting current and short-circuit current ratings meet acceptable levels for the installation’s conditions?
Are all vacant spaces properly closed?
Contamination and Damage:
Is there any contamination as a result of using foreign materials?
Is there anything that needs to be repaired or replaced?
Mounting and Ventilation:
Are electrical components appropriately installed and ventilated?
Terminations and Splices:
Do terminations and splices have the required temperature, usage, and electrical ratings?
Are there adequate enclosure markers and ratings in the surrounding environment?
Clearances and Directories:
Is there sufficient headroom and operating clearance around the equipment?
Are circuit directories for switchboards, panel boards, and other comparable equipment available?
In addition to these general areas, specific categories within the NEC may be included, such as:
Wiring methods and devices
Services
Feeders
Branch circuits
Grounding and bonding
Dwelling units
Special occupancies
Emergency standby systems
Fire pumps
While these questions give a general framework for commercial electrical inspections, the specifics may vary depending on local legislation and the type of electrical installation in your business. It’s always a good idea to obtain professional advice to ensure that you’re following all local codes and regulations.

FAQs About Electrical Inspection Procedure
How do you inspect electrical wiring at home?
Inspecting electrical wiring at home should be done with caution, and it is usually best to call a professional electrician for a thorough check. However, here are some general steps you can take to visually evaluate your home’s electrical wiring:
Turn off the power supply in the area you’ll be investigating to ensure your safety.
Look for exposed wires or cables that are not adequately covered.
Examine outlets and switches for damage, such as cracks or loose connections.
Inspect visible wires for fraying, cracking, or other signs of deterioration.
Check that junction boxes are properly covered and that there are no exposed cables or loose connections.
Check for hot spots by touching plugs, switches, and electrical panels.
If you see any burning odors, sparks, or electrical arcing, immediately turn off the power and consult a certified electrician.
What are the benefits of electrical safety inspections?
Regular electrical inspections conducted by licensed electricians offer several important benefits for homeowners. Here are five key advantages:
Enhanced safety
Prevention of electrical hazards and fire emergencies
Early problem detection
Compliance with national and local electrical safety codes
Peace of mind
Regular electrical inspections are an integral component of protecting both homes and businesses from electrical hazards. Using an inspection checklist enables you to easily detect potential risks quickly and address them appropriately.
Electrical inspections must be carried out by certified and insured electricians who will carefully follow a checklist to reduce potential risks.
source
https://assuranceelectricalaz.com/blog/electrical-inspection-checklist/
0 notes
Text
How to Install Whole House Surge Protector
Are your electronics and appliances protected against power surges in the coming months? Learning how to install whole house surge protector is essential for Arizona homeowners during the monsoon season.
With power grid disruptions, severe weather concerns, and aging infrastructures on the rise, the risk of facing a power surge can be inevitable.
Whole house surge protectors help ensure all electronic devices and appliances in your house remain intact. If you live in a region vulnerable to storms or simply wish to ensure their longevity, investing in one should be a top priority.
Don’t leave your electronics vulnerable — keep reading below to learn more about installing surge protection devices.
What Happens During a Power Surge?
Every electrical system can be susceptible to voltage spikes and surges. This is especially true during monsoon season in Northern Arizona when lightning and power outages contribute to more surges than usual.
However, sudden power fluctuations don’t just stem from external forces — internal issues such as tripped circuits, short circuits, and power interruptions may also lead to surges that can potentially damage electronics in your home.

Power surges can happen when…
Lightning strikes, which can potentially generate millions of volts of electrical power in a wire.
There are downed power lines due to storms or other occurrences.
The house’s electrical wiring is faulty.
There are troublesome transformers in the electrical system.
You have defective gadgets or appliances that consume more power than usual.
What Is a Whole House Surge Protector?
A whole-house surge protector is a device installed on the main electrical panel. Its primary function is to divert excessive voltage away from sensitive devices and appliances.
Imagine them as the protectors of your electrical systems at home. By diverting excess voltage to the grounding wire of your home electrical system, surge protectors help safeguard connected devices against potential damage or malfunction due to power surges.
Electrical fires can be avoided by taking measures to protect appliances and electrical devices from being damaged, such as protecting them against accidental overloading.
Why Use Surge Protection?
Protects all electronics
Provides constant protection
Reduces the risk of electrical fires
Saves money (protection and prevention are always more cost-efficient than replacing damaged electronics)
Increases the resale value of your home
How to Install Whole House Surge Protector
Before installing a whole house surge protector, hiring a licensed electrician is highly advised. It is dangerous to interfere with your primary power supply. Professional expertise is required to ensure a safe installation.
Tools needed include:
Wire strippers
Pliers
Flathead screwdrivers
Flashlight
Electrical insulation tape
Hammer and nails
Voltage detector
Drill or Driver
Insulated work boots
Safety glasses
Electrical gloves
Whole-house surge protection device
Double-pole breakers
There are three things you need to do before installing your surge protector.
Choose the right whole house surge protection: When choosing a surge protector, consider factors such as your home’s size, energy consumption rate, NEMA ratings, and whether you need an external or internal protector.
Double-pole breakers: You must add a double-pole breaker to your electrical panel when installing a surge protector. Verify that the amperage rating of your surge protector can handle any additional consumption. If necessary, speak to an electrician regarding upgrading or adding subpanels.
Review safety measures: Only professionals and electricians with proper training experience should install whole-house surge protection devices. To ensure your safety, ask for professional help. Wear safety gear and comply with electrical safety regulations.

Step-by-Step Process of Whole House Surge Protector Installation
Always follow the instructions of the manufacturer when installing a surge protector. Consult a professional electrician if you are unsure about any step of the installation process.
Shut off the power to your electrical panel by turning off the main breaker switch.
Remove the panel cover and its screws.
Use a non-contact voltage tester to verify that there is no electricity running to any of the circuit breakers in the panel.
Choose a mounting location for the surge protector and install it according to the manufacturer’s instructions.
Connect the ground and neutral wires from the surge protector to the appropriate terminals in the panel.
Install a double-pole breaker next to the main breaker in the panel.
Connect the live wires from the surge protector to the terminals of the double-pole breaker.
Use wire cutters to trim the wires to a short and straight length.
Use wire strippers and expose wires up to 5/8″ long. Check that the entire system surge protector has been exposed. Make any necessary adjustments to ensure that the wiring is even.
Reassemble the panel cover and tighten the screws.
Turn on the main breaker and the surge protector’s breaker.
Test the surge protector by flipping the surge protector’s breaker to the off position and then back on. Verify the surge protector is working correctly, usually indicated by a green light or digital display.
Once the surge protector is successfully installed and tested, replace the panel cover and secure it with screws.
Turn on the main breaker to restore power to your electrical panel.
Can I Install My Own Whole House Surge Protector?
To achieve safe and optimal results, an experienced electrician should install a surge protector for the entire house. If you have experience doing electrical work and want to install the device yourself, make sure to always follow the instructions of the manufacturer as well as the step-by-step process discussed in this article.
Where Should a Whole House Surge Protector Be Installed?
Technically, the surge protector can be installed anywhere between the main electrical panel and the electricity meter. Although it is always better to install it at the main breaker panels if you can.
Is It Worth Getting a Whole-House Surge Protector?
Installing a whole-house surge protection device is beneficial as it offers comprehensive protection to your home’s entire electrical system. It guards against power surges and extends the life of your electronic devices.
A whole home surge protector can also protect you from external surges, such as those caused by lightning. Although it is not 100% risk-free, this device reduces significant amounts of potential damage during electrical surges.
A professional electrician can assist you in determining the best surge protector solution to meet your needs.
source
https://assuranceelectricalaz.com/blog/how-to-install-whole-house-surge-protector/
0 notes
Text
How Much Does a Whole House Surge Protector Installation Cost?
Did you know lightning strikes can cause power surges and property damage? According to a report by the Insurance Information Institute, lightning strikes 20 million US homes every year, leading to over $1 billion worth of property damages annually.
These unfortunate events make having surge protectors at home even more crucial.
When it comes to protecting your home’s electrical system from power surges, a whole-house surge protector is an essential tool. We created a whole house surge protector installation cost guide to help you better understand the fees involved with owning this device. Let’s get started!
What Is a Whole House Surge Protector?
A whole house surge protector is a device that is installed at the main electrical panel of a home. It works by diverting excess voltage from electrical surges away from sensitive devices and appliances, and into the grounding wire of the home’s electrical system.
The purpose is to prevent damage to electrical devices and appliances, as well as to reduce the risk of electrical fires.
Whole House Surge Protector Installation Cost

A whole house surge protector installation cost ranges from $70 to $300, depending on certain factors that we’ll discuss below:
Labor Cost:
Usually, a professional whole house surge protector installation cost would go around $50 to $100 per hour, depending on expertise and experience. It’s always best to ask for estimates from reputable electrical companies in Arizona.
Type of Surge Protector
There are three types of surge protectors that you can install in your home:
Type 1:
This type of surge protector can provide optimum surge protection from external forces like lightning and thunder, and even low power surges. It provides the first line of defense against power surges that can enter a building through the utility power lines.
Type 2:
This type of surge protector is one of the most widely-used, typically installed at either the primary or subpanel of your electrical system. Its main purpose is to protect a single circuit within your entire panel’s electrical panel.
Type 3:
Type 3 surge protectors, also referred to as power strip surge protectors, can be installed into wall outlets in your home and connected by plugging directly into the electrical outlets for power. It usually comes with 4 to 6 additional power outlets that are great for appliances like TVs and computers.
Surge Protector Brand
The brand also plays a major role in the cost of the whole-house surge protector installation. To give you an idea, a unit may cost about $70 to $350 depending on its size and functionality.
Some popular brands that are typically more expensive are the following:
Leviton
Siemens
Eaton
Square D
Intermatic
How Long Does a Surge Protector Last?
A whole home surge protector is a one-time investment, which means that it is more commonly replaced than repaired. You can think of these devices like sponges, but instead of absorbing liquid, house surge protectors absorb the excess and unsafe power surges before it reaches your appliances.
On average, a home power surge protector can last anywhere from 3 to 5 years. With regular inspection from us, we can help ensure that the device is properly working, and has not yet run out of power.
What Are the Pros and Cons of a Whole House Surge Protector?
As an electrician, there are both advantages and drawbacks to installing whole house surge protectors for your electrical panel. Here are the key takeaways about having surge protectors installed:
Pros:
Protects all electronic devices from power surges
Provides constant whole-house surge protection
Helps reduce the risk of electrical fires and other safety hazards
Cost-effective
Increases the home’s resale value
Cons:
Can be very expensive to install
Not 100% foolproof
May require professional maintenance to check for functionality
Do Whole House Surge Protectors Really Work?
Yes, whole-house surge protectors do work to protect homes from electrical surges. As an electrician with years of experience with power strips and whole home protectors, I can attest that they actually work!
There is also one study from the National Institute of Standards and Technology stating that a surge protector can significantly reduce the risk of damage to electronic devices caused by power surges.
The mechanism behind this is that the surge protection device redirects the excess voltage away from sensitive electrical devices and appliances, and into the grounding wire of the home’s electrical system.
source
https://assuranceelectricalaz.com/blog/whole-house-surge-protector-installation-cost/
0 notes
Text
7 Steps To Solar Panel Installation
So, you’ve finally decided to go solar and bid goodbye to your electricity bills? Great choice!
You’re not only saving yourself from the high power costs but the ecosystem too!
Millions of American households now have switched to solar energy. The United States installed more solar in the first quarter of 2020 than ever before, with 1.96 GW. That’s 65% higher than the total installations in the first quarter of 2019.
If you’ve decided to be part of the increasing numbers of solar power systems, the next thing you need to do now is to know exactly what happens during the installation process of solar panels.
Take note that although you can install solar panels at home by yourself, consulting an expert is still better to ensure that the procedure is done according to safety standards.
Read on to find out the 7 steps in installing solar panels:
1. Find the Best Location in Your Property
There are guidelines when it comes to the best place to install a solar panel on a property.
The pitch and direction of your roof affect the performance of a solar system. Solar panels produce better results when installed on south-facing roofs.
Make sure also to pick a location that will give your panels the maximum sun exposure during the daytime.
2. Mount and Install Solar Panels
Set up your solar panel mounting systems to serve as the support for your solar panels. The system has to be tilted and angled at 18-36 degrees for better sunlight exposure.
Mount the panels using brackets, clamps, or bolts to secure the modules firmly on the platform.
Be extra careful on the installation process. Hire an experienced professional to do the job to avoid unwanted accidents and damages.
3. Wire the Solar Power System
The next stage in your solar panel installation is the electrical wiring process.
Get started by shutting off your home’s electricity supply. Wire your solar panels together using a fuse combiner box and ensure that the cables are well insulated to prevent problems such as power leakages and accidents.
Connect the exterior wiring to the interior control panels to allow energy flow from the disconnect to a charge controller or an inverter and battery bank.
This step is crucial and dangerous, especially for household owners with no background as a solar system installer. Hire a qualified technician with experience in solar panel installation to ensure your safety.
4. Solar Panel Earthing
Make sure to ground both the solar panels and the mounting system during the installation process.
Ground the rods at least six inches above the ground, and your control panel inside the house, too, if there’s no earthing network nearby.
This step will protect you and others against electric shock, fire, and other accidents. It will also protect your solar components against power surge and lightning.
5. Bond the Solar Inverter and Battery
Your solar inverter and battery need to be connected so you can store energy and avoid worrying about the lack of usable energy whenever the sun isn’t present.
6. Connect the Electrical Components
Connect and fit the electrical components properly. It includes your panels, charge controller, battery, and inverter.
You can direct the power from the inverter to the main control panel of your home. You can also check and monitor your solar system’s performance using a computer.
7. Test the Solar Energy System
Once you’re with your solar installation, you can switch the power on and test it. Check if everything is working correctly.
Start Your Solar Installation Now!
Installing a home solar power system can be tricky, but you’ll reap huge benefits later on. Before you start the installation, you have to keep in mind the following factors:
Your power needs (check your lighting systems and appliances)
The number of sun hours in your area (more sun hours means more energy)
Your home’s size and design (a bigger roof can accommodate more panels)
Use the steps listed above to ensure safe and proper solar installation. Hire a qualified technician to prevent unwanted damages and accidents during the process.
0 notes
Text
LED lighting for Your Home: The Pros and Cons
In recent times, there has been a big emphasis placed on the environment, so it follows that homeowners are turning to the “greenest” products they can find. A LED light, with its energy efficiency and environmental friendliness, is making it the lighting of choice. Assurance Electrical Services shares the pros and cons of LED (Light Emitting Diode) lighting for your Prescott home’s light bulbs.
When it comes to any product, there are both pros and cons. LED technology is no exception.
Advantages of LED Lighting
Energy Efficient Light Bulbs
An LED lamp offers between 80-90% energy efficiency in contrast to traditional incandescent bulbs. In other words, when the LED lamp is turned on, about 80% of the energy used to illuminate actually goes into creating the light, while the other 20% is given off as heat. This results in high efficiency both in terms of the energy used and money being spent on electricity. As a bonus, LED products emit much less heat, making them safer and long-lasting bulbs as they’re cool to the touch.
Less Electricity to Start Up the LED Light
Standard 60-watt incandescent lights will use about 525 kWh of electricity per year. However, a comparable LED lamp will only need to use about 65 kWh of electricity, so you can consider using these lights for your next project.
Long Lifespan
A standard incandescent light bulb will last anywhere from 750 to 2,000 hours. A fluorescent lamp will provide about 20,000 hours of light. However, some LED products can last for as long as 100,000 hours!
Design Flexibility
One of the best things about this lighting type (aside from the brightness it offers), is that it can be used in any way you consider appropriate. Some people, for example, like to string together several LED lights to make a shape. There are many design options when it comes to an LED fixture, so make sure to let your creativity flow.
Dimming Fixture
If you shop for an LED light for your space, you may notice that some products allow you to dim them to get less light intensity. If you dim your lights, not only do you promote energy saving, but you’re also increasing the lifespan of the lighting products.
Color Range
A remarkable thing about LED lighting, and one of the things that makes this product more appealing to a younger audience, is that LEDs can change colors without the need for gels or filters. This means you can turn your indoor or outdoor space into an amazing area for gatherings.
Disadvantages of LED Lighting
Cost
Even though over recent years, the price point for LED lamps has continued to drop, it is still a bit pricier than incandescent and fluorescent lighting. This factor could potentially make the installation of LED lighting more costly than the budgets some people can bear.
Temperature
LED lighting has also been found to be sensitive in terms of temperature. How well an LED functions can be directly related to the temperature in which it is located. If LED lights are used in a warm environment, it may cause the lamp to overdrive and fail. Because of this, LEDs generally require a heat sink to help keep them cool and operating properly.
Color Limitations in Some Cases
Overall, LED lamps generally create white light using diodes of different colors that make white light when they’re all illuminated together. In the past, this has sometimes led to the color emitted by an LED lamp being a bit too blueish or cool. Modern technology has corrected a lot of this. However, sometimes, the LEDs themselves can begin to diminish in terms of the color quality of the light produced.
Area Light Source
Most homes require a spherical light field, which is something that LEDs can’t provide since they don’t approximate a point source of light. They use a Lambertian distribution instead.
How to Choose the Best LED Lighting Fixtures
There are dozens of different products on the market, including the famous Energy Star products. However, when it comes to LEDs, you may have to dig a bit deeper to find something that appeals to your needs. The following is a list of things you should consider before choosing your next LED lighting fixtures:
List all the bulbs you’ll need: You don’t have to switch your entire home to LED lighting. Overall, all you have to do is choose the rooms you want to have. Think about the rooms you want, and then make a list of all the LED fixtures you’ll have to purchase. You’ll be surprised to know how many light bulb fixtures you have at your property, so make sure you choose an appropriate amount of LEDs to purchase.
Consider the product’s label: Most LED products come with all the information you need in their package. Some of the factors you must consider include Light Appearance, Brightness, and more. If you don’t read the label, you risk your LEDs not having the right lighting for your home.
Choose between “warm” or “cool”: In the “Light Appearance” part of the package, you’ll see the color temperature you will receive from the LED light. Table lamps or other small items may do okay with a 2,700 K to 3,000 K LED to work, whereas bigger rooms will need bulbs with at least 5,000 K for cooler lighting.
Consider enclosed fixtures: Enclosed fixtures may need different LED technology since the heat they produce could damage the electronics inside the bulb, damaging it completely. If you’re looking for LEDs for enclosed fixtures, make sure to read the product’s label to ensure it’s the right one to shop.
0 notes
Text
Pros and Cons of Whole House Surge Protector
In today’s digital world, we are constantly exposed to electronic devices like our phones, laptops, and appliances that run off electricity. While these gadgets make our lives better and more efficient, they may also cause electrical surges that could harm your home’s electrical panel.
That’s where a whole house surge protector comes in. In this blog, we will talk about the pros and cons of whole-house surge protector and everything that comes along with having one installed. Read on!
What is a whole home surge protector?
House surge protectors are devices that help protect all electronic devices from power surges that occur in an electrical system. It is designed to prevent damage to your electronics by absorbing the excess energy from a power surge and diverting it away from your home’s electrical system. This helps to prevent damage to your appliances and electronics, as well as extend their lifespan.
Why would you need whole house surge protection?
We mentioned that whole home surge protectors divert the power surge away from your home, so let’s discuss it further in simpler terms.
Here are the reasons why whole-house surge protectors are a must for your household:
Protects all electrical devices from power surges caused by lightning strikes, power grid fluctuations, and other electrical disturbances
Prevents damage to sensitive electronic equipment, such as computers, televisions, and appliances
Helps reduce the risk of electrical fires and other safety hazards that can result from power surges
Pros and Cons of Whole House Surge Protector

Now that you know the reasons why your home would benefit from surge protection devices, let’s talk about the pros and cons of these devices in your home’s entire electrical system.
Pros:
Protects all electronics: One of the biggest advantages of a house surge protector is that it protects all electronics in your home. This means that you don’t have to worry about individual devices being damaged by power surges.
Provides constant protection: A house surge protector provides constant protection to the devices in your home.
Reduces the risk of electrical fires: Whole home surge protection devices reduce the risk of electrical fires by preventing power surges from occurring in the first place.
Saves money: Replacing electronic devices that have been damaged by power surges can be expensive. By investing in a house surge protector, you can save money by avoiding the cost of replacing damaged electronics.
Increases the resale value of your home: A house surge protector is an attractive feature for potential homebuyers. Installing one can increase the resale value of your home.
Cons:
Initial cost: House surge protection devices can be expensive to install. However, when you consider the cost of replacing damaged electronics, the cost of installation may be worth it.
Maintenance: Like any other device, a house surge protector requires maintenance to ensure that it is functioning properly. This can add to the cost of owning one.
Not foolproof: House surge protectors may provide some protection from power surges, but they are not 100% reliable; there remains the possibility that an unexpected power surge could still cause irreparable harm to electronics in your home
Is it worth getting a house surge protector?
The answer is yes, especially if you live in an area that is prone to power surges. The initial cost of installation may seem high, but it is a small price to pay compared to the cost of replacing damaged electronics.
How long does a surge protector last?
The lifespan of a surge protector can vary depending on the quality of the device and the length of its exposure to power surges. On average, a house surge protector can last anywhere from 3 to 5 years. Regular inspection of your surge protector should help to ensure it is working effectively.
Does a house surge protector protect the HVAC?
A house surge protector guards the electronics in your home, including your HVAC system. HVAC systems are typically equipped with electronic components, such as circuit boards and control panels, that can be vulnerable to power surges.
source
https://assuranceelectricalaz.com/blog/pros-and-cons-of-whole-house-surge-protector/
0 notes
Text
How Much Does a Residential Electrical Inspection Cost in Arizona?
Electrical inspections are vital to keeping your home’s electrical system safe and secure for your family. As a homeowner who uses electricity 24/7, it’s necessary to keep your major appliances, electrical meter box, and entire electrical systems checked every once in a while.
So, how much does an electrical inspection cost in Arizona?
We’ll dive deeper into this topic and give you a detailed checklist of the costs of electrical inspections that may vary depending on several factors.
Let’s get started!
How Much Does a Residential Electrical Inspection Cost in Arizona?

In Arizona, an electrical inspection cost ranges anywhere from $275 to $350. But this price may increase or decrease depending on several factors such as the following:
Size and age of the property
The larger the property, the more complex the electrical system may be and the longer it will take to inspect, hence, electrical inspection cost may be pricier.
Additionally, older properties may require more time and effort to inspect, as some electrical fixtures may need an update, repair, or complete replacement.
Complexity of the electrical system
Electrical inspectors may charge more for a home electrical inspection that involves complex systems like multiple circuit breakers, generators, or solar panels. These areas require more expertise and experience, which would also cost more than regular inspections.
Accessibility of the electrical system
If you’re getting a major renovation and your home’s electrical panel is quite difficult to access, electrical contractors may charge more. The price usually increases if your electrical system is located in areas where people need to crawl and climb up like the attic.
Additional services
If the inspector identifies any issues or repairs that need to be made, the cost may increase as it would likely incur additional services, such as repairs or upgrades.
Type of inspection
The electrical inspection cost can vary based on the type of inspection required. For example, a standard inspection may cost less than a specialized inspection for a specific issue or a pre-purchase inspection from a real estate transaction.
What Happens During a Residential Electrical Inspection?
A residential electrical inspection is typically conducted by a certified electrical inspector to ensure that the electrical system in a home is safe and up to code. Here are some things electrical inspectors typically do during a residential electrical inspection:
Review the electrical plans and specifications to ensure they comply with local building codes, including the national ones.
Check the electrical service panel and breakers to ensure that they are properly sized and that there are no damaged or loose wires.
Assess all electrical outlets, switches, and fixtures to ensure they are properly grounded, wired, and installed.
Check any signs of electrical hazards such as exposed wiring, overloaded circuits, and damaged or outdated wiring.
Use specialized equipment such as an electrical circuit tester or a ground fault circuit interrupter (GFCI) tester to check for proper wiring and grounding.
Check if smoke detectors and carbon monoxide detectors are installed and functioning properly.
Take note of any code violations or deficiencies and provide the homeowner with a detailed report of their findings.
What Are the Things to Include in an Electrical Home Inspection Checklist?
An electrical home inspection checklist typically includes checking the functionality of the following:
Electrical panel
Circuit breakers
Outlets
Switches
Lighting fixtures
Wiring
Smoke detectors
Carbon monoxide detectors
Ground Fault Circuit Interrupters (GFCI) Outlets
Surge protection
Electrical hazards
What to Prepare for a Residential Electrical Inspection?

Preparing for a residential electrical inspection helps ensure a smooth process and that any necessary repairs or upgrades are identified and addressed promptly.
Here are some things you can do to prepare for a residential electrical inspection:
Make sure all electrical systems are accessible: Clear the areas around the electrical panel and any other electrical equipment, such as outlets and switches so they can be easily inspected. Remember that the inspector needs easy access to any electrical components in your home.
Label all circuits: Make sure that each circuit in your electrical panel is clearly labeled so that the inspector can easily identify them. This is a big help if you need to troubleshoot any electrical issues later on.
Provide documentation: If you made any recent upgrades or repairs to your electrical system, have the relevant documentation available for the inspector to review.
Be present: It’s a good idea to be present during the inspection so that you can answer any questions the inspector may have and provide access to any areas that need to be inspected.
It’s important to remember that the cost of an electrical inspection is a small price to pay to strengthen the safety and security of your home and loved ones. Regular inspections can help identify potential hazards and prevent electrical fires that may cause property damage and even injury or death.
source
https://assuranceelectricalaz.com/blog/electrical-inspection-cost/
0 notes
Text
What Happens During a Rough Electrical Inspection?
When your building is halfway through the construction or renovation process, you might need to schedule a rough electrical inspection (also known as rough-in inspection). This inspection is a crucial step in the construction process of any building as it ensures the compliance of an electrical system in a new or renovated building to all local and national safety standards.
In this guide, we will provide an overview of what happens during a rough-in electrical inspection and why it is important. Whether you are a homeowner, contractor, or builder, understanding this electrical inspection process will help you ensure that your building project is completed according to quality and safety standards. Let’s get started!
What Does Rough Electrical Inspection Mean?
Rough electrical inspection (also known as rough-in inspection) is a type of electrical inspection that is commonly conducted during a construction or renovation project. It is usually done before the ceilings and walls of a building are covered so electricians can focus on the installation of the electrical system and checking of the electrical circuits of the entire building structure.
What Is Rough-in Electrical Wiring?
Rough-in electrical wiring refers to the initial installation of electrical wiring and conduit in a building or structure during the construction or renovation process. This is typically performed before the walls and ceilings are finished, allowing for easier access to the electrical system for installation and inspection.
During rough-in electrical wiring, electricians install conduit, which is a type of protective casing for electrical wiring, and run electrical wire from the electrical panel to various locations in the building, such as outlets, switches, and lights.
How Do I Prepare for an Electrical Rough-in Inspection?
Here are some steps you can take to prepare for a rough-in electrical inspection:
Plan the electrical system: Together with your preferred contractor, develop a detailed plan for the electrical system, including the location of electrical panels, outlets, switches, and other components. This plan should take into account the needs of the building and the requirements of the local and national electrical codes.
Install components correctly: Make sure that all electrical components are installed correctly, including electrical panels, outlets, switches, and wiring. Use the appropriate size and type of electrical components, and follow the manufacturer’s instructions and local and national electrical codes.
Label components: Put labels on all electrical components including panels, outlets, and switches, to make it easier for you to identify and evaluate them.
Clean the work area: Make sure the work area is clean and organized so that you can easily access and evaluate the electrical components.
Review local and national electrical codes: Familiarize the local and national electrical codes that apply to your project. It’s important that you have fully reviewed the codes that the building you’re about to inspect will have to comply with before you proceed with the inspection procedures.
What Is Included in Electrical Rough-in?
Here are the components that a licensed electrician would check for an electrical rough-in inspection:
Proper electrical circuits: The electrical inspector will verify that the building has the appropriate number of circuits for the area’s electrical requirements. All appliances inside the building have to have proper circuits. Additionally, there has to be sufficient general lighting and general appliance circuits installed in each room. Every appliance that needs a dedicated circuit, including the microwave, garbage disposal, and dishwasher, must have one, especially in kitchens. Additionally, the inspector will confirm that each room has the proper number of circuits for general lighting and appliances.
Cables and wirings: There should be at least 8 inches of usable wire length extending from the electrical box. The electricians would also check for proper cable anchoring in which the cables should be secured properly to the wall studs. The wiring installation has to be detailed and in order.
Electrical boxes: Electrical inspections will also check if the electrical boxes are large enough to handle the electrical demand of a home or a building. To ensure that the cable clamps grip the sheathing of the cable and not the conducting wires themselves, the cable sheathing should protrude into the box by at least 1/4 inch at the point where the cable is attached to the box. For newly constructed buildings, spacious electrical boxes are always recommended.
AFCI Circuit Protection: AFCI circuit breakers are essential, especially to a remodeled electrical installation or newly built electrical systems. AFCI (Arc Fault Circuit Interrupters) is a type of electrical circuit protection device designed to detect and interrupt dangerous electrical arcs that can cause fires in residential electrical wirings.
Surge protection: Proper installation and presence of surge protection devices will also be inspected by an electrician. Proper sizing of surge protectors at the main electrical panel will also be checked. This includes verifying that the surge protection devices are appropriately rated for the electrical load they are protecting and that they are connected to the electrical system correctly.
How Much Does a Residential Electrical Inspection Cost in Arizona?

On average, the cost of a residential electrical inspection in Arizona can range from $275 to $350, but prices can be higher or lower depending on the size of the home, the complexity of the electrical system, and the expertise of the electrician doing the inspection.
For more information, talk to your trusted local electrician.
source
https://assuranceelectricalaz.com/blog/rough-electrical-inspection/
0 notes
Text
How Do Generators Work Without Electricity?
We all need electricity to run our daily activities and business operations, but power outages can sometimes be inevitable. Luckily, generators are here to provide us with electrical energy during the times when we need it the most.
But how do generators work without electricity? You will know all the answers right here, so keep reading!
How Does a Generator Work?
Whether you’re at home or in the office, generators are used to power everything from lights and appliances to air conditioners and refrigerators. But how exactly do they work?
Generators produce electricity by converting mechanical energy into electrical energy through the use of magnets and coils of wire. These magnets and coils work together to create an electromagnetic field between them.
The mechanical energy is usually provided by a prime mover, which can be an electric motor or steam turbine. A generator is a rotating machine that contains coils of wire that move as the magnetic field inside the generator changes direction.
As these coils move in response to changes in the magnetic field and produce electric current, they produce alternating current (AC).
There are several different types of engines used in generators, including gasoline and natural gas engines. When you’re looking at different models of generators, it helps to know what kind of fuel they require so that you can find one that will work well for your unique needs.
What Are the Parts of a Generator?
The parts of a generator can be divided into two main categories: the prime mover, which provides the mechanical energy, and the electrical components, which convert the mechanical energy into electrical energy.
The prime mover is the source of the mechanical energy that drives the generator. This can be a gasoline or diesel engine, a steam or water turbine, or any other source of mechanical energy.
The electrical components of a generator include the following:
Stator: The stator is the stationary part of the generator that consists of a set of windings or coils.
Rotor: The rotor is the rotating part of the generator that is connected to the prime mover. It contains a set of windings or coils that are positioned near the stator.
Field winding: The field winding is a set of windings or coils that are used to produce the magnetic field in the generator.
Exciter: The exciter is a small generator that is used to supply the field current to the field winding of the main generator.
Voltage regulator: The voltage regulator is a device that is used to control the output voltage of the generator. When the generator runs below its maximum operating level, the voltage regulator begins the cycle of converting AC current to AC voltage to maintain the normal operating capacity.
Bearings: The bearings are used to support the rotor and allow it to rotate smoothly.
Cooling system: The cooling system is used to keep the generator components cool during operation.
Enclosure: The enclosure is a casing that protects the generator from the environment and provides a mounting place for the various components.
Control panel: A control panel is a group of switches, gauges, and other components that are used to start, stop, and control the operation of the generator.
Battery charger: A battery charger keeps a generator ready to use if needed. It keeps the battery of the generator charged by providing float voltage.
What Are the Types of Generators?
Portable Generator
A portable generator is a small, portable unit that can be used to power a variety of electrical devices. They are typically powered by gasoline and are used for backup power or recreational purposes.
Standby Generators
Standby generators are larger units that are installed permanently in a home or business. They are typically powered by natural gas or propane and are designed to automatically turn on in case of a power outage.
Inverter Generators
Inverter generators are portable units that use an inverter to produce a stable, clean power supply that is suitable for sensitive electronic devices. They are typically smaller and produce less operating noise than other types of generators.
Diesel Generators
Diesel generators are powered by a diesel fuel system and are used for backup power or in areas where there is no access to the power grid. It comes with a fuel system that is attached to an external fuel tank to supply diesel fuel to the generator unit. They are typically larger and more powerful than other types of generators.
Gas Turbine Generators
Gas turbine generators are powered by a gas turbine and are used to produce electricity on a large scale. These generators often use natural gas, kerosene, propane, or jet fuel. They are often used in power plants and industrial settings.
Steam Turbine Generators
Steam turbine generators use steam to turn a turbine, which in turn generates electricity. They are often used in power plants and industrial settings, just like gas turbine generators.
Microgrid Generators
Microgrid generators are small-scale power generation systems that can operate independently or in conjunction with the power grid. They are often used in remote or off-grid locations to produce electricity.
How Long Do Generators Last?
The average generator’s lifespan is between five and ten years. As a rule of thumb, generators that are frequently used may require more frequent repairs or replacements, compared to those that are less frequently used.
These estimates, however, are all dependent on proper and regular generator maintenance.
source
https://assuranceelectricalaz.com/blog/how-do-generators-work/
0 notes
Text
How Long Does a Generator Last? (+ 3 Maintenance Tips)
Generators are a great way of providing backup power for many home and business owners. But how long do they typically last? Well, it depends on a variety of factors. The most important factor is the type of generator you own, as some are designed with longevity in mind while others are intended to be disposable.
They last as long as you want them to, but you have to be mindful of proper maintenance measures too. In this blog, we will help you learn more about the longevity of common generators and provide some helpful maintenance tips to help these devices last longer!
How Long Do Generators Last?
Most generators have a lifespan of around 10,000 hours or 5 to 10 years. Generators that are used more often will need to be replaced more frequently, while those that are used less often will last longer. Proper maintenance is also key to prolonging the life of a generator.
What are the Common Types of Generators?
There are two common types of generators: standby and portable generators. In this section, we will elaborate on the comparison between the two, and their life expectancy.
Portable Generators

A portable generator is small and light enough to be carried around. They can be used in a variety of situations, such as camping trips, power outages, or outdoor events.
In contrast with standby generators which need to be connected to an external power source such as the power grid or a utility line, a portable gas generator is mobile enough to be moved from place to place.
Portable generators are also significantly cheaper than stationary generators because they do not require any permanent installation work.
How Long Does it Last?
Portable generators are designed to last for a few years at a minimum. Generally, they can last up to 10 years with proper maintenance and upkeep. However, it can vary depending on the quality of the generator and how frequently it is used.
It’s always best to stay on top of maintenance and replacement parts in order to ensure the longest possible lifespan for your portable generator.
Standby Generators
A standby generator provides a more permanent backup solution to electrical outage issues. These generators are more commonly used by business, industrial, and commercial buildings that need a backup power plan for continuous operations.
Standby generators are usually used for power outages caused by man-made disasters, extreme weather conditions, or power interruptions due to the aging power grid.
A standby generator can be classified into two common types and they vary on the type of gas used to power them up. Take a look at the two classifications of a standby generator:
Natural Gas Generators
Natural gas generators are typically used to provide backup power for homes and businesses. They are also used in some industrial settings, such as oil refineries, paper mills, and chemical plants.
A natural gas generator produces electricity by burning natural gas in a combustion turbine. The heat from the burning process spins a turbine wheel, which is connected to an electric generator.
How Long Does It Last?
This type of generator has a life expectancy of 25 to 30 years, but this depends on the running hours and maintenance measures done for a natural gas generator.

Diesel Generator
A diesel generator is a type of generator that uses diesel fuel to generate electricity. It works by burning diesel fuel to power an engine, which in turn drives a generator that produces electricity.
Diesel generators are commonly used as backup power sources for businesses, homes, and other facilities in case of power outages or other emergency situations. They are also used in remote locations where electricity from the grid is not available.
How Long Does It Last?
A diesel generator’s lifespan can reach up to 30 years with proper maintenance. Additionally, this type of generator can run from a range of 15,000 to 50,000 hours before it needs to be repaired or serviced.
Maintenance Tips for Generators

Doing routine maintenance processes can help your generator run continuously, especially when you need it most. Here are some of the best tips for maintaining your generator:
1. Change Oil Regularly
Changing a generator’s oil regularly is important because it helps to ensure that the generator continues to operate efficiently and effectively. The oil acts as a lubricant for the moving parts of the generator, and over time, the oil can become contaminated with dirt and other debris.
Through this maintenance procedure, you can remove this contamination and help to keep the generator running smoothly. Additionally, changing the generator’s oil can help to extend the life of the generator by reducing wear and tear on its moving parts.
In general, it is recommended to change the oil in a generator every 100-150 hours of use, or at least once a year if the generator is not used frequently.
2. Never Use Old Gas
A lot of homeowners may think that it’s acceptable to use old remaining gas from your diesel or propane generator, but that is actually a no-no! After a generator is used, it is critical to remove the remaining oil and empty the tank.
Doing this will ensure that your generator is running clean and it can also help protect it from erosion or other damage.
3. Always Test It Out
Testing a generator is important for maintenance because it helps to ensure that the generator is capable of providing power in the event of an outage or emergency. Testing a generator involves running it through a series of tests to check its various components and systems, such as the engine, alternator, and control panel.
Although it is quite tedious, these tests can help identify any potential issues with the generator, such as low oil levels, worn or damaged parts, or electrical problems. This can help you get necessary repairs even before a power outage happens.
As we have seen, there are many factors to consider when maintaining a generator. By following the tips outlined in this article, you can extend the life of your generator and avoid costly repairs.
0 notes
Text
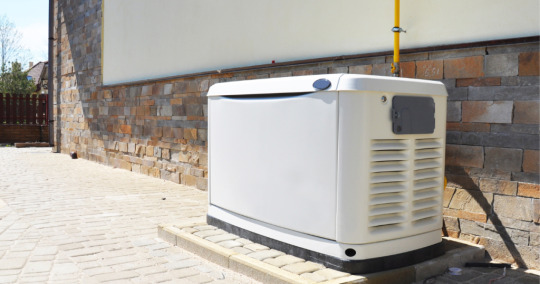
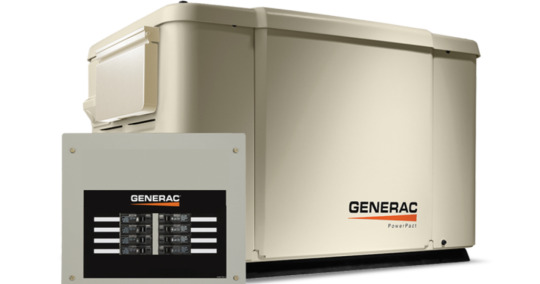
How Much Do Home Generators Cost in Arizona?
Manufacturer The value of a house generator can only be determined during a power outage. An extended power outage in Arizona can be incredibly frustrating for remote workers, costing them time and energy.
This is one of the reasons why a whole-house generator is so important for homeowners. However, not many know the price to install such a piece of equipment, making people wonder, “how much do home generators cost, anyway?”
Surprisingly, it’s not a lot. The initial generator installation costs might be high, but it’s worth it in the long run. Those seeking budget-friendlier options can opt for smaller machines instead.
What Is a Whole House Generator?
Electricity outages can last for an entire day, if not more. The issue gets worse during severe weather conditions when the electrical lines get damaged by strong winds. Situations like this can be easily avoided if your property has whole-house generators. Now, you only need one for your home; however, the size of your property can determine if a single backup generator will be enough.
A whole house generator can also be known as a standby generator, so it’s best to consider them as one tool other than two products. This tool is a stationary appliance that can be used during extended power outages across Arizona.
How Much Do Home Generators Cost?
The price of standby generators can vary from brand to brand; however, homeowners can expect most models to cost less than $20,000. You can also find alternatives that fall under $10,000 too. Here are some factors that can impact the installation cost of generators in Arizona:
Size
The tool’s size is one factor that determines how much it will cost. Solar-powered generators tend to be large, making installations time-consuming and burdensome too. On the other hand, portable generators tend to be smaller, so you can install them on your own too. As a result, such generator costs are significantly lower than solar machines.
Manufacturer
As we mentioned before, the brand is one factor determining the price of a whole-house generator. Cost and quality-wise, Generac is highly-recommended to homeowners. You can also expect Generac home backup generators to run on natural gas or liquid propane. Note that the features offered by the manufacturers will vary. There’s no guarantee that the most expensive model will have the best features, so purchase one that works for your needs.
Wattage
Another important factor that changes the cost to install a backup generator is the wattage supplied to your home’s electrical panel. A backup generator offering up to 2,000 watts can only power a single appliance, which is disappointing. At the same time, you will have to add fuel to the machine frequently to prevent burnout. On the other hand, compact generators can provide homeowners with a maximum of 6,500 watts—enough to last a single day. This range is alright if the power cut is for a short duration. Portable generators are also ideal if you lack space in your home. Owners can easily install the machine independently, but DIY-ing the process can risk short circuits. It’s always wiser to rely on trained professional contractors like us. Larger homes should opt for a standby generator that can provide at least 15 to 18 kilowatts of electricity. This range should supply energy throughout the property for more than a day. However, the installation costs for this type of generator are more than $10,000.
How Whole House Generators Work
A backup generator doesn’t require manual operation. You can expect the tool to switch to transfer mode within seconds of an outage automatically. Power is supplied to the main electrical panel, providing the entire house with backup power. You can check the amount of energy consumed by the machine on your home’s electrical system.
Some machines operate on natural gas, while others can run on propane. You can expect a natural gas generator to cost more than liquid propane generators, so consider their differences before installation. No matter which model you opt for, remember to check the gas meter on the utility grid now and then to prevent the machine from burning out.
Other Types of Generators Available on the Market
There are multiple variations to a generator, with most ranging from super expensive to cheap. Other than whole-house generators, here are two more popular variations for properties in Arizona:
Portable Generator

Homeowners on a tight budget can consider purchasing a portable model instead of an enormous alternative. Such a machine might not be able to supply power throughout your entire home, but it can provide electricity to specific outlets. On the other hand, portable generator prices are also low, making them a cost-effective substitute for a diesel generator.
Are Portable Generators Worth Installing?
Most portable generators operate on your home’s existing gas line. However, you can also find models that run on liquid propane.
While the average cost of installing a compact generator is low, other risks are associated with it. Firstly, a portable alternative can never supply backup power to your entire home, so it’s best not to install one in areas with frequent electricity outages. However, compact machines can power a sump pump and other small appliances.
On the other hand, improper usage can cause carbon monoxide poisoning inside your property. It is vital to ensure proper maintenance in your house if you want to prevent lethal carbon monoxide poisoning.
Solar Generator

This other type of generator operates on solar energy, making it an eco-friendly alternative to modern machines. There is an inverter inside the tool, which converts energy to alternating current (AC) with the flick of a transfer switch. Having solar generators permanently installed on your property can produce electricity during long-term outages. You don’t need a natural gas line connected to the machine.
Work With the Pros
Frequent power outages can drive homeowners to make hasty decisions when purchasing generators. Make sure to rely on a professional contractor to install a generator instead of doing it yourself. Hire an expert who complies with local building codes too.
source
https://assuranceelectricalaz.com/blog/how-much-do-home-generators-cost/
0 notes
Text
How to Repair Solar Panel at Home – A Comprehensive Guide
With the prospect of quickly-depleting energy resources, solar panels seem to be useful devices. These items use solar cells to transform energy into electricity suitable for residential and commercial establishments.
Like any other device, panels are also prone to suffering from damage. Noticing these issues is not complicated because it often leads to evident problems, such as less output from the installation and diminished yields.
Do you think your solar devices are underperforming? In this blog, we will provide you with tips on how to repair solar panels. Keep reading below!
Is it Possible to Repair Damaged Solar Panels?
Therefore, the short answer is ‘yes.’
Regardless of whether you have a broken solar panel, damaged parts, or issues with your panel frame, repairs could be possible. However, it all depends on the problem you’re having.
Tips to Repair Solar Panels
In some cases, leaving a broken solar panel just the way it is may sound tempting. If it’s working, why should you worry? It can probably still generate some power.
However, thinking like this is a huge mistake. Even if your panel can still transform solar energy, not addressing the breakage could lead to more problems. You may end up with electrical shortages and much worse outcomes, especially if it rains and the water gets through the cracks.
Considering that you should repair your devices as soon as possible, follow these actionable tips to avoid further issues with your residential solar panels:
Identify the Problem
If there’s something wrong with your solar panel, you’re probably experiencing other issues, for example, a change in their performance. Take note of every issue that you noticed.
Determine Potential Causes
Sometimes, external factors affect your devices. If there have been complicated weather conditions, this might be the cause behind your solar panel’s underperforming. Determine the potential reasons behind the issue before proceeding.
Try Some Solutions
You can fix some broken solar panels if you use a transparent laminating film. In these cases, you’ll only need a heat gun to stick it. Once it’s on the edges of the glass, you won’t risk the devices falling off.
Moreover, panels could sometimes have performance issues because of dirt accumulation. If this happens, you’ll be able to fix the problems by thoroughly cleaning your devices.
Contact a Solar Panel Repair Company
Unfortunately, as you’ll notice soon, most of the common issues that cause a solar panel to underperform are tricky to fix. Therefore, you’ll need specialized help if you want the best outcome.
If it looks like there’s nothing you can do yourself, you should contact experts in the field! Solar electricians know how to identify issues and offer specific solutions for each one.
What Types of Damages Can Be Repaired?
A broken panel is just one of the many issues you may encounter. Although solar panel glass breakage is common, you can find other problems as well. Some of these are the following:
Hot Spots and Micro Cracks
Cracks, hot spots, and microscopic fractures can appear on the surface of your solar panel glass. In less time than you think, these can grow and affect the cells’ effectiveness. The most frequent causes of broken glass panels are:
Wrong handling during the shipping process
Production of PV modules
Changes in the temperature or other important weather conditions
Long weather conditions can damage your solar devices’ structure, and for example, freeze solar panel frames. In these cases, the best way to keep things under control is to hire experts to perform maintenance tasks in your panels, such as inspecting them and identifying potential issues.
The process of repairing these small issues can be different depending on whether you have a roof- or ground-mounted solar panels. If it’s the former, technicians will have to dismount it all, even if the damage is only in one module.
Loose Wiring
Another issue that can affect solar panels is wires coming loose. These cables connect each PV cell to the inverters and solar batteries, so even the simplest wiring problems can damage the whole solar panel system.
Solar panel experts use different tools to measure wire performance, such as meters. These items are helpful to assess problems and come up with effective solutions in little time.
PID Effect
Also known as potential-induced degradation, this problem often happens because of voltage fluctuations between the voltage that the panel generates and the earthing of the solar panel.
When PID occurs, the discharged voltage in the main power circuit varies, which can damage different solar panel components.
Inner Module Damage
Selecting poor-quality PV components or having production difficulties can also make panels underperform or cause solar panel damage.
These issues could also lead to delamination, yellowing of the back sheets, EVA films browning, solar connectors or cell discoloration, staining of PV cells, unwanted inclusions in your PV laminates, burning out the front or back of the solar panels, and more.
Sometimes, solar installation experts will perform a solar panel inspection and remove the glass from the panels to later repair or change them.
Module Damages as a Consequence of External Factors
We briefly mentioned it before – you may need professional solar repair services due to difficult weather changes and other external factors.
External factors such as animal bites, broken branches, fires, excessive heat, or icy conditions can also damage your solar installations.
When Should You Contact Solar Panel Repair Companies?
If your solar modules start heavily malfunctioning and you notice a significant change in their performance, you should consider contacting a specialized company. Having cracked solar panels or internal damage can affect the whole system. Fortunately, professionals can help you find a proper solution.
Frequently Asked Questions
How Much Do Repairs Cost?
Repair costs can go from $300 to even thousands of dollars depending on the issue your solar panel system has. For a detailed quote, make sure to consult a licensed solar repair professional.
Is it Expensive to Repair a Single Solar Panel?
Fixing a single panel can cost approximately $300. Hire a licensed solar expert to assess your solar system and come up with a detailed estimate of repair costs.
Can You Fix All Solar System Issues?
Unfortunately, sometimes, the damage is so severe that you may need to replace all the panels.
Get Expert Solar Panel Repair
When repairing your solar panels is unavoidable, you have to consider all your options, but always keep in mind that experts are the ones prepared to help you with this situation.
Depending on what the issue is, you may need different alternatives. Handling photovoltaic module repairs is not the same as managing damaged solar plugs or bringing your panels to optimum performance.
0 notes
Text
How Much Does Solar Panel Repair Cost in Arizona?
A solar panel system (or solar system) can be one of the best ways for you to improve energy savings, reduce your environmental impact, and contribute to energy independence.
While solar panel systems are quickly becoming a must-have for several property owners in Arizona, these can also be quite complicated to maintain.
Solar panels are typically made to last a long time, but if your solar energy system ever stops working, there are some solutions you can consider today.
If you’re wondering what the average solar panel repair cost is, you will find the answer here.
Advantages of Installing Solar Panels
As mentioned before, solar energy is quickly becoming the norm in several areas of the world.
Currently, it’s impossible to harness all of the sun’s energy, but by using solar equipment, we’re now able to get a fraction of it, which is enough to start making a difference on the planet.
Here’s a list of the most common benefits you can experience as a solar panel owner in Arizona:
Low maintenance costs
Lower energy bills
Reduced environmental impact
Wide range of applications
Bigger support for technological developments
Do Solar Panels Have Low Maintenance Costs?
Yes! If the system was installed correctly, you won’t have to worry too much about getting a higher price for repairs, unless rare events (such as hail storms) compromise individual panels.
Disadvantages of Owning a Solar Panel System
As solar panels are excellent investments, they also have some cons that you may want to be aware of. While these reasons aren’t necessarily enough to remove solar panels entirely, they may get you to spend more time deciding if you truly want one.
Some disadvantages include:
Getting solar panels installed is expensive.
Solar energy storage is expensive.
Most solar system panels are weather-dependent.
Solar power panels tend to take up too much space.
Average Cost to Repair Solar Panels in Arizona
Now, let’s get to the interesting part. Whether you already have a solar provider or not, you must know how much solar panel repairs are today.
First, it’s important to note that the solar panel repair cost will ultimately depend on the company providing the service, the parts that need replacing or fixing, and other factors. If you’re going to replace cracked solar panels, for example, you may have to pay a bit more than if you were simply going to replace the solar inverter.
Consider the following factors when determining the average solar panel repair cost:
Broken Glass: These repairs are considered minor and don’t require you to replace solar panels entirely in some cases. You may pay around $20 for small parts of broken glass. On the other hand, if you have to replace the entire glass, you may have to pay around $340 or more.
Loose Connections: In case of a loose connection, you may have to pay approximately $100 per hour, although this may vary depending on the professional.
Solar Inverter Replacement: The inverter is one of the most expensive parts for replacement in a solar panel repair. Typically, you can pay up to $250 for micro inverters and up to $2,500 for string inverters. This doesn’t count the labor cost.
Cracked Solar Panels: In this case, you may pay up to $100 per hour to repair solar panels, unless the worker has to replace the entire panel; there, you may have to pay up to $400.
If you want to be 100% sure of the cost to repair your solar panel, don’t hesitate to get a solar panel inspection from a professional. You may also check if you have a solar panel warranty and what things it covers.
Can a Broken Solar Panel Be Fixed?
Overall, it depends on how broken it is. If the damage is too severe, then it may not be possible to reattach parts. In these cases, you may have to replace the entire panel.
How Much Does It Cost to Fix a Broken Solar Panel?
It depends on the problem. You can expect to pay a few hundred dollars in minor repairs and up to $2,500 in more severe cases.
Average Cost to Replace a Solar Panel System
If regular solar panel maintenance isn’t enough, you may have to replace your entire system. The price for installing new panels will depend on your property’s location, size, and system type.
You can expect to pay from $12,900 up to $15,180 for a complete installation. If you’re going for high-end machines that deliver as much power as possible at their peak performance, you may expect to pay up to $48,000.
Common Signs That You Need to Repair Your Solar Panel
Some of the most common signs that may warrant a solar panel repair include the following:
The panels have cracks or hot spots.
You have loose wiring.
There is inner module damage.
There is module damage caused by external factors.
The machine has PID (potential induced degradation).
You need to replace old parts.
Repairing solar panels isn’t the only solution to ensuring optimal performance. Sometimes, a solar panel cleaning service will take care of most problems. However, if a solar panel repair doesn’t fix the problem, you may have to look at a replacement service.
How Often Do Solar Panels Need to Be Repaired?
You need to repair your panels as soon as various components show signs of extensive damage. Otherwise, the system may lose efficiency. On the other hand, you should perform an inspection and maintenance at least once a year.
Common Signs That You Need to Replace Your Solar Panel
If you’re experiencing any of the following problems, then a solar panel repair service may not be enough for you:
The solar panel is too old.
You have inverter issues.
The panel has irregular power output.
There are too many wiring problems, which can cause problems with the power capacity.
The entire panel is broken
The machine has discoloration or burnt marks.
The machine shuts down unexpectedly.
With proper maintenance, a solar panel could last up to 25 years, which is why a solar investment is considered appropriate for many property owners in Arizona.
0 notes
Text
Pros & Cons of a Solar Air Conditioner for Home Use
The summer season in Yavapai County, AZ, can be brutal. It’s hot and you worry that your energy bills might get too high while you’re fighting the heat. Then, you also have to think about the global temperature averages rising. Overall, air conditioners are crucial for everyone.
We know that homeowners want cost-effective and efficient ways to cool their living spaces. Air conditioners make the home feel more comfortable on a hot day. However, they can be expensive to run. You’ve likely compared the price of your energy bills during moderate and hot temperatures!
Therefore, you might be focused on getting solar-powered air conditioners for your home. They use solar panels and can cool the house down using sustainable and clean energy.
Is solar air conditioning right for you? It’s time to find out about the pros and cons of using a solar air conditioner for home!
Pros of a Solar-powered Air Conditioner
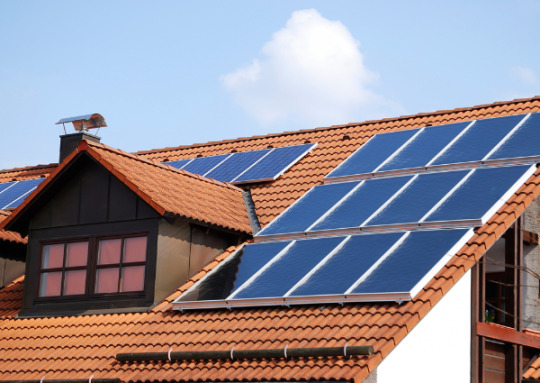
If you’re building a new home or remodeling your current one, it might be wise to invest in a solar air conditioning system. Let’s check out the benefits:
Solar-powered Air Conditioners Are Budget-Friendly
Solar-powered technology uses the sun as its energy source. Therefore, solar-powered air conditioning could save you about 50 percent on your energy bills.
While you might be skeptical about investing so much into solar PV air conditioners initially, the long-term savings you see offset that nicely.
Solar Air Conditioners Produce Clean and Sustainable Energy
Carbon dioxide levels have increased by about 100 parts per million since 1950. Your carbon footprint matters, but so does air conditioning!
Solar energy is clean and sustainable, so you can “go green” and be kind to the environment. Unlike fuel-generated ones, solar-powered air conditioners emit fewer greenhouse gasses.
Solar-powered Air Conditioners Don’t Experience Power Failure and Have Minimum Disruption
With solar air conditioners, you don’t have to worry about power outages disrupting your comfort. You still have air conditioning, even if your Wi-Fi is gone for a while!
Solar PV Air Conditioners Don’t Require as Much Maintenance
Solar panels don’t need much maintenance, and the rain washes them perfectly. While a solar-powered air conditioner might require repairs periodically, it’s rarely as much as a fuel- or electric-powered AC unit.
Solar-powered Air Conditioners Are User-Friendly
Most users report that a solar air conditioner is user-friendly. Therefore, you get air conditioning without the hassle!
Solar Air Conditioners Often Feature Financing Solutions
Many local governments are trying to motivate people to switch to solar power. Therefore, you might get incentives for doing so.
Cons of a Solar Air Conditioner for Home Use
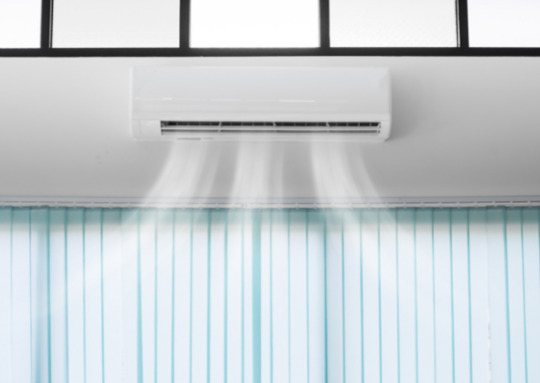
Now, it’s important to understand the disadvantages of a solar air conditioner:
High Upfront Costs for a Solar-powered Air Conditioner
Investing in solar power for an air conditioner or anything else in the home has a higher upfront cost than other options. Most of the investment focuses on batteries, inverters, and solar panels. You’re likely to need about 22 solar panels!
Solar Power Relies on the Weather
Weather conditions change all the time, and that can affect the efficiency of your solar power air conditioner. If the solar panels don’t get enough sun, you don’t get power to run the unit.
A hybrid system might work best because the AC charges your battery through the solar panels and can switch out of hybrid mode as needed.
Solar Panels Can Deteriorate
After a while, the solar panels of your solar-powered air conditioner might deteriorate or get damaged. That affects the efficiency of the solar-powered air conditioning unit.
Generally, solar panels have a lifespan of 30 years, but external factors could change that.
Slow Market Growth for Solar-powered Air Conditioners
Many people have never heard of solar thermal air conditioners or understand what they are, which leads to a disadvantage.
FAQs
How Much Does a Solar PV Air Conditioner Cost?
Compared to a conventional air conditioning unit, solar air conditioning costs a lot more. Pre-installation costs can run $2,000 or more, but installation fees ensure that you spend about $5,000.
A solar-powered AC system is a huge investment, but the payoff can be significant in the long run.
Can Solar Run an Air Conditioner?
Yes, solar power can run an air conditioner just as well as grid power in most cases. Many people look at energy savings and the minor inconveniences to determine if solar-powered air conditioning is right for them.
Overall, issues with solar power can lead to the unit not running in bad weather or at night.
How Many Solar Panels Does It Take to Run an Air Conditioner?
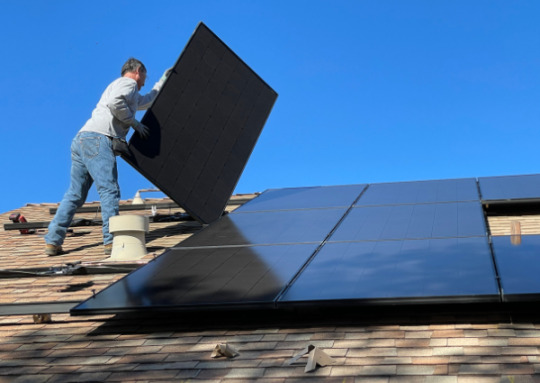
The number of solar panels you need to power the indoor unit determines how much power it has to cool the home. Typically, it depends on the exact solar-powered air conditioning unit you have.
Most AC systems use 1,200 watts to run, so that means roughly five solar panels if it’s a window unit. Those who prefer central air conditioning need between 3,000 to 5,000 watts, pushing that number to 22 or so.
What Types of Solar Air Conditioners Are There?
Your cooling system is important because you want to feel comfortable and experience the cool air in your home. Let’s focus on the types of solar AC system options you have:
DC Solar Air Conditioners
A DC solar air conditioner uses DC power produced by solar photovoltaic panels. Since the systems don’t need an inverter to change to an alternating current, they’re suitable if you have no grid power. However, a grid-solar air conditioner often needs more solar photovoltaic panels.
Solar AC Power Air Conditioners
Alternating current systems work with the home’s electrical grid power. Therefore, the DC power collected in the solar panels is converted to AC power to use in the solar AC unit.
Hybrid Solar Air Conditioners
This solar panel system uses solar power and grid electricity to reduce the cost of cooling the home. Solar energy runs the compressor.
Solar Thermal Air Conditioners
Solar thermal systems use a plate to capture the solar energy from the sun. It turns the electric generator to power the compressor within the cooling system.
Air conditioners are a requirement in a hot climate like Arizona. However, you must think about the best option for you. Since Arizona often has tons of sunshine, solar-powered air conditioners are considered a good choice.
0 notes