Auplex Kamado Grill Co., Ltd was founded in 2003. We are a chinese manufacturer and supplier who concentrates on barbecue products.We professionally manufacture all kinds of BBQ cookers, BBQ accessories and other BBQ products.China Ceramic kamado grills is our core product!After several years of constantly improvement and innovation, the kamado style cookers has been widely-admired by people from all over of the world. The market of the kamado cookers is wide and we are sincerely seeking the cooperation partners to develop the market with us together!
Don't wanna be here? Send us removal request.
Text


Auplex BBQ -Hearth Patio Barbecue Expo was a great success
We are honored to participate in Feb.13-Feb.15, 2024 Hearth Patio Barbecue Expo in Nashville of USA.
We are very willing to talk with so many excellent suppliers and customers, from product to market. This is a precious opportunity for us to communicate face to face with our customers.
Thanks to all the partners who visited our booth, we hope to have the opportunity to cooperate together in the future to create a mutually beneficial and win-win situation.
We look forward to cooperating with you in 2024!
Web: www.auplexbbq.com
0 notes
Text
Controlling the grilling time for food in a ceramic grill
Controlling the grilling time for food in a ceramic grill involves a combination of factors such as the type of food you’re cooking, the temperature you’re grilling at, and the thickness of the food. Ceramic grills, like kamado-style grills, are known for their excellent heat retention and temperature control. Here’s a step-by-step guide to help you control grilling time effectively:
1.Preheat the Grill: Start by preheating your ceramic grill to the desired cooking temperature. The time it takes to preheat will depend on the type of charcoal or fuel you’re using, as well as the outside temperature. Generally, it can take around 15-30 minutes to reach the desired temperature.
2.Use an Instant-Read Thermometer: Invest in a good quality instant-read thermometer. This will help you monitor the internal temperature of the food accurately. Different foods have different recommended internal temperatures for safe consumption. For example, poultry should be cooked to an internal temperature of 165°F (74°C).
3.Control Airflow: Ceramic grills have vents that allow you to control airflow, which in turn controls the temperature. Opening the vents allows more oxygen in and increases the heat, while closing them restricts airflow and lowers the temperature. Experiment with adjusting the vents to maintain the desired temperature.
4.Adjust Cooking Time for Thickness: Thicker cuts of meat or larger vegetables will take longer to cook. As a general rule of thumb, the thicker the food, the longer it will take to grill. You can use a cooking chart or guide to get approximate cooking times for different types of food. However, always rely on your instant-read thermometer to determine when the food is cooked to the desired internal temperature.
5.Use the Two-Zone Cooking Method: Create two cooking zones on the grill – a direct heat zone and an indirect heat zone. Sear the food over the direct heat zone to get those grill marks and initial browning, then move it to the indirect heat zone to finish cooking through without overcooking the outside.
6.Frequent Monitoring: Stay near the grill and keep a close eye on the food. Grilling times can vary due to factors like wind, outdoor temperature, and fluctuations in the grill’s temperature. Regularly check the internal temperature of the food and make adjustments as needed.
7.Practice and Experience: Like any skill, grilling takes practice. As you gain experience, you’ll become more familiar with your grill’s specific characteristics and how different foods behave on it. Keep a grilling journal to document your cooking times, techniques, and results. This can be a valuable reference for future grilling sessions.
Remember that grilling is both a science and an art. While guidelines and techniques can help, personal preferences and intuition also play a role. Over time, you’ll develop your own methods and preferences for controlling grilling time in your ceramic grill.
0 notes
Text
How hot is the surface of a ceramic grill

Ceramic roasters are known for their ability to hold heat, and one of the benefits of this feature is that the outside of ceramic cookware will not get as hot as the outside of metal cookware. Unfortunately, overzealous owners and dealers sometimes claim that the outside of their ceramic charcoal stoves is cool to the touch. This is nonsense, of course, so we thought we’d take some actual measurements in order to give you the real scoop on the subject.
First, what do the manufacturers actually say about the matter?
Auplex Kamado — “The ceramic base and lid of our grill will get very hot, but accidental touch will not cause burns.”
Imperial Kamado — “It’s safe. It can come into contact with the outer surface when cooking.”
Big Green Egg – “Innovative ceramic materials (now based on Space Age technology) make exterior surfaces much cooler than any gas grill” and “Surfaces remain cool and safer for children compared to metal grills”.
Primo — “and the outer surface is kept at a safe, warm temperature to the touch.”
Kamado — “Exterior tiles are safe to touch.”

Our tests suggest that some of these claims are exaggerated. First, we checked the surface temperature of an Auplex Kamado. We raised the temperature of the cooker to 400°F by keeping the vent fully open and then closing the vent when the cooker approached 400°F. We left the cooker at this temperature for 30 minutes and then read the surface temperature with an infrared thermometer. We found that under the lid, near the edge, the temperature was 190°F. At the top near the chimney, the temperature is at the edge, 230°F. As a reference point, most people begin to experience pain upon contact with a 115°F liquid or solid. We simply can’t put our hands on the top any time. We can only do a quick brush. We left the cooker at this temperature for a total of 2.5 hours, with the top of the lid at 245°F. Trust us. This is hot.
The next test we conducted was using the Auplex Kamado 22″ OTB refractory Cookware. This cookware is probably one of the best insulated “ceramic” cookware, as the walls consist of two layers of sandwiches, one of which is used to insulate and keep heat in the cookware. We let this cooker sit at 400°F for 2.5 hours. The surface temperature of the Arpress grill ranges from 110 degrees at the base of the dome to 160 degrees at the top near the upper vents. You can place your hand anywhere on the dome of the Arpress grill for at least a few seconds.

Obviously, the surface temperature depends on the material, thickness and structure of the cooker wall. Some of them become so hot that they are too hot to touch, while others stay so cool that you can actually touch them for a few seconds. But, needless to say, it’s best not to learn how hot your cookware is through unplanned experiments. No ceramic charcoal stove will stay “cool”.
1 note
·
View note
Text
Auplex Kamado accessories description
Electric Charcoal Starter
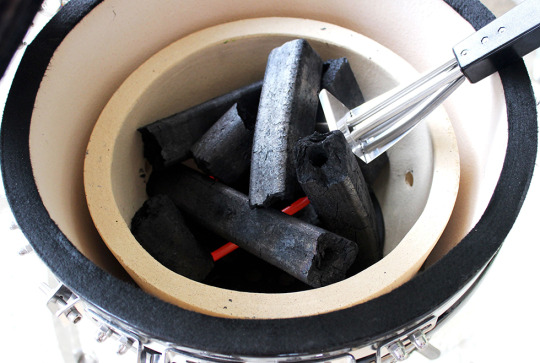
This multipurpose fire starter quickly lights your charcoal grill, wood-burning fireplace, campfire and so on. This is the best tool to have when grilling, camping or just enjoying a fire in your backyard.
Charcoal starter -Looftlighter
The Charcoal starter -Looftlighter allows you to easily light your charcoal barbecue, wood burning fireplace, campfire or fire pit in 2-3 minutes. It uses 1300 degree temperature hot air to ignite your wood or charcoal. That’s two times the temperature required to ignite wood. The built-in blower then fans the flames to the desired level of fire needed, saving more time for doing what you love. The durable heating element, motor, and switch will last you for thousands of lights.

Classic Heat Deflector
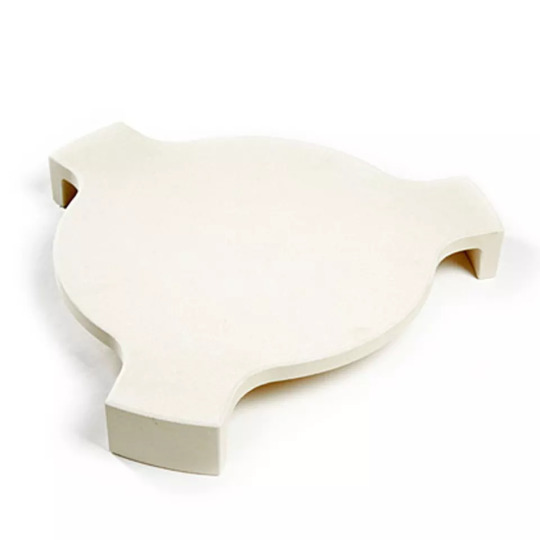
The Heat Deflector adds great flexibility to your Kamado grill. It allows you to bake, roast and smoke with indirect heat. Our Heat Deflector circulates the heat around your food to cook it slowly, which keeps it incredibly moist and tender. The Heat Deflector frame can also be used by itself to raise the cooking grate. It reduces the potential of charring tender foods like seafood and vegetables.
Versatile Elevator
The metal stand has a two-position setting for the ceramic plates, can be used together with the 2x half ceramic plates to offers simultaneous direct and indirect cooking. And also can be used separately to raise the cooking grate and reduce the charring of tender foods
Roast nets Clip
It securely clamps onto any cooking grate. Avoid the mess and potential burn hazard of moving or repositioning your cooking grate.
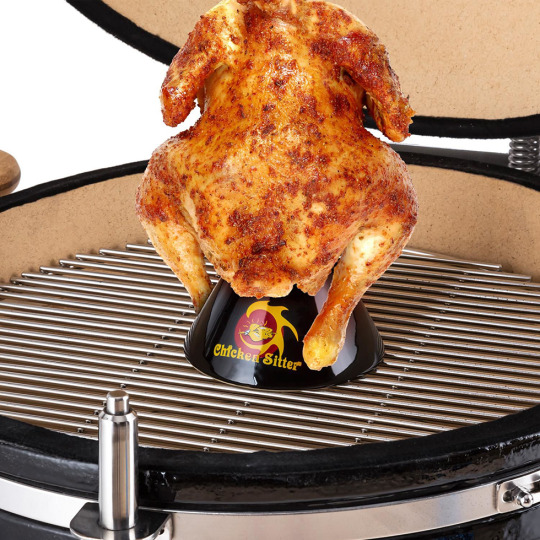
Chicken Stand
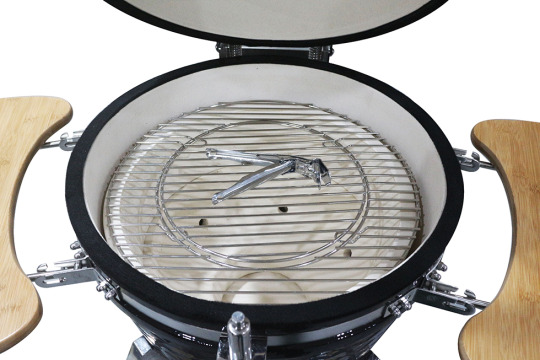
The Chicken Stand allows you to make incredibly tender chicken on all outdoor grills and indoor ovens. Make “beer can chicken” or add your favorite marinade to the Chicken Stand. The Chicken Stand is all ceramic and dishwasher safe for easy clean up and years of use.
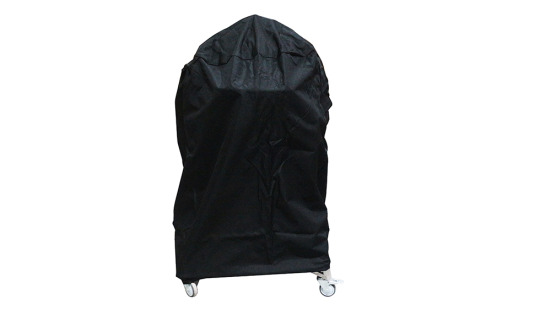
Rain Cover
Our Premium Grill Covers are made of durable vinyl for all-weather protection. Custom fit and available in black.
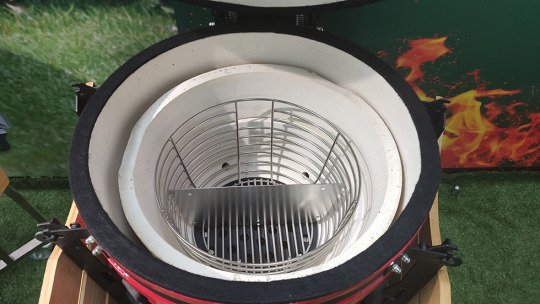
Charcoal Plate
Efficiently clean your firebox after your kamado-cook.This durable stainless steel accessory allows you to quickly separate leftover charcoal from the ashes and be ready for your next cook in seconds. Additionally, the Charcoal Basket will provide better airflow by filtering out the small particles of charcoal, resulting in a cleaner burn.
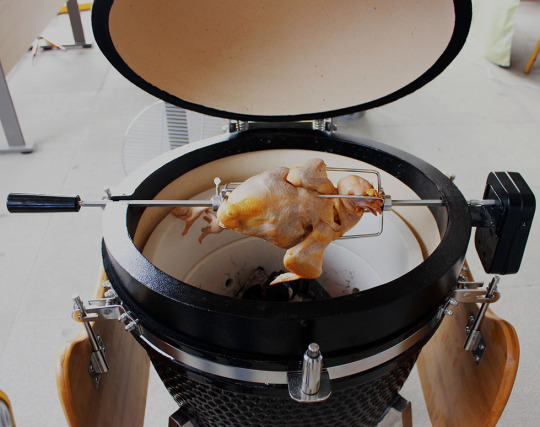
Kamado Rotisserie
Revolutionize your charcoal grilling experience and transform your Kamado Joe into a rotisserie-style grill with the Joetisserie attachment. Constructed from durable, stainless steel, the spit rods and forks allow for pristine balance and steady rotation of up to 50-pounds of beef, pork or chicken resulting in meats that are smoky, juicy, and tender . The quiet, yet powerful, motor provides a steady circulation for flawless food.
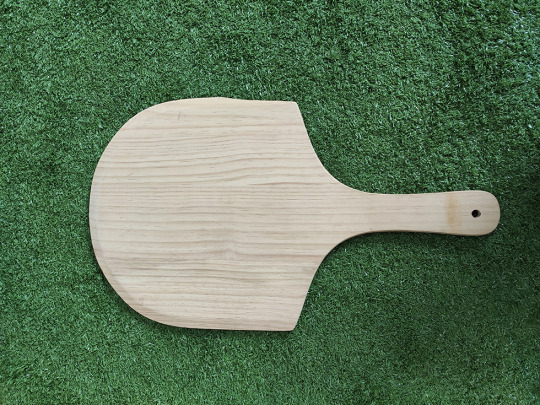
Pizza Shovel
The Pizza Shovel is the perfect lightweight serving tool for any delicious kamado-style pizza. With a wooden flat edge designed to slip underneath the pizza crust, ensure a quick-and-easy plating process from your grill.
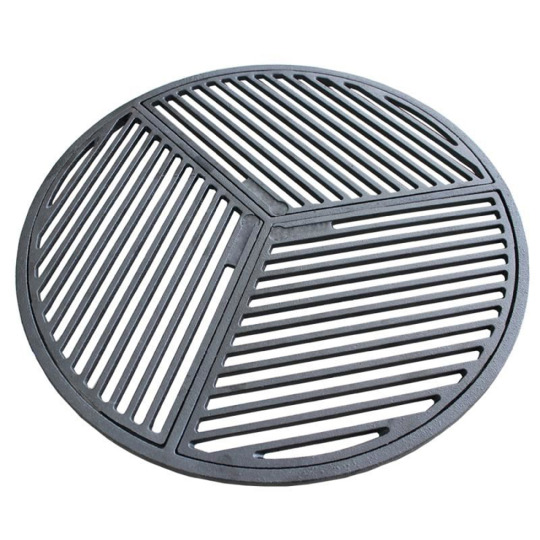
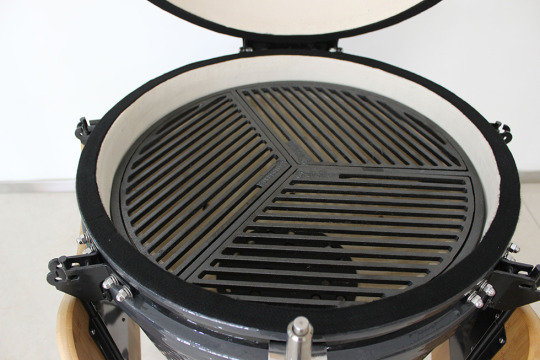
Cast Iron cooking grid
The Cast Iron cooking grid is a staple for any kamado-filled feast. Perfect for all cuts of meat, the hearty Cast Iron cooking grids are made for searing while sealing in the flavor. With excellent heat retention and long-lasting durability, the Cast Iron cooking grid will be the MVP for any backyard spread.
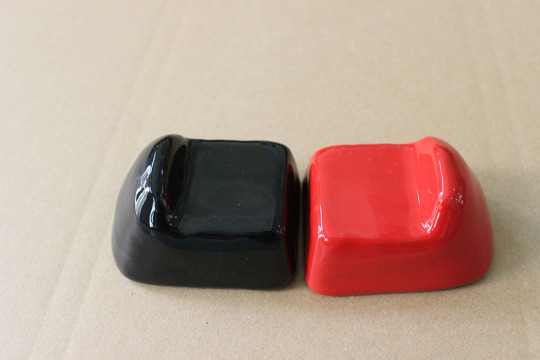
Ceramic Feet
If your Kamado grill is going on/over a wood surface or in a built-in application, the grill must be placed on these ceramic feet. The feet elevate the Kamado grill, allowing air movement directly under the grill. Air movement helps dissipate the heat.
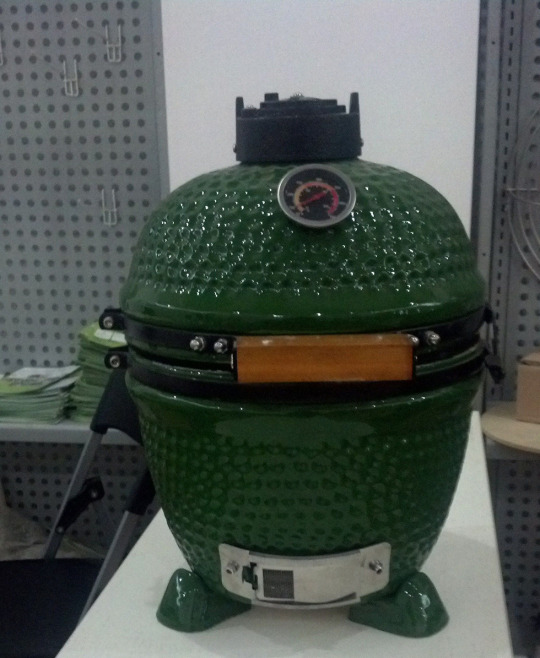
Divide & Conquer Cooking System
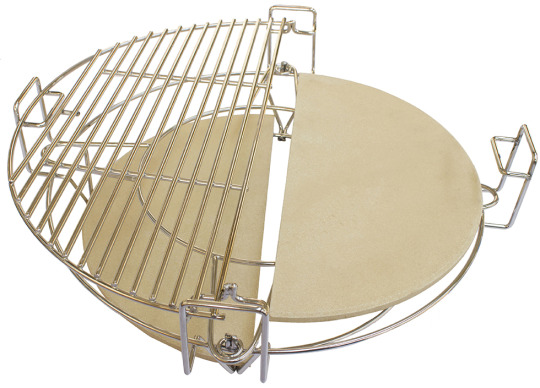
Divide & Conquer Cooking System is a combination of half pizza stone and half cooking grid,and you can adjust the locations,so there will be many combinations.It replaces the ordinary grill grate. The key is the “Half Rack Design,” the halving of all components to allow for multi-level flexibility and multi-surface versatility.

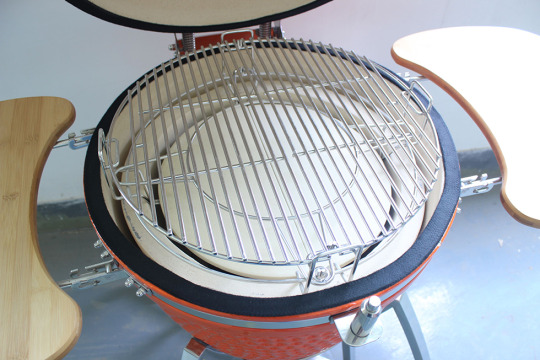
Elevator
Elevator is used for elevating the height of food,it can be used with heat deflector,cooking grid,or pizza stone.So you will have different flavors.

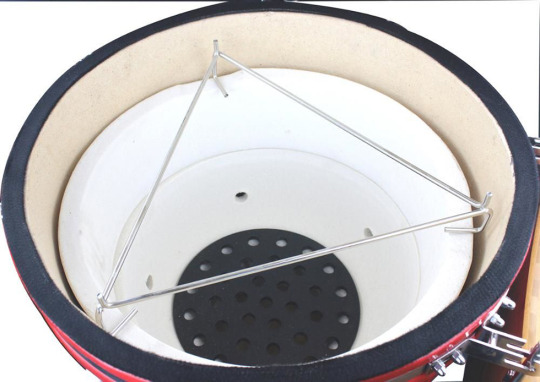
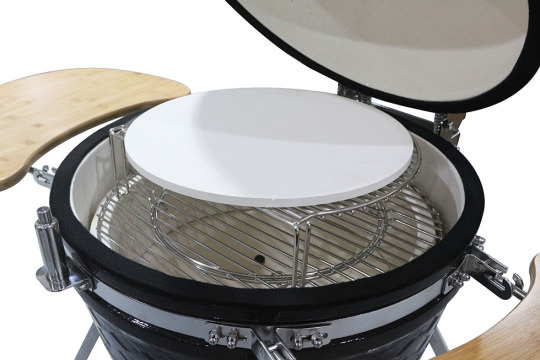
Pizza Stone
Pizza Stone is used to make pizza,and the flavour is better than the normal pizza oven.It’s one of the most hot selling accessories.
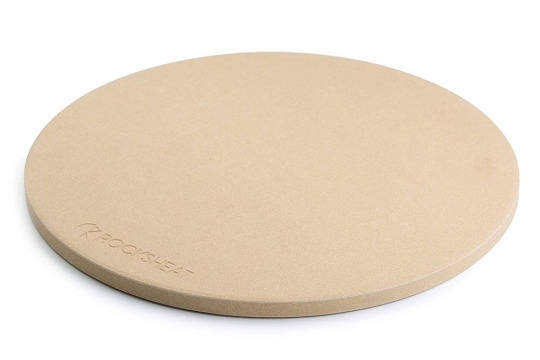
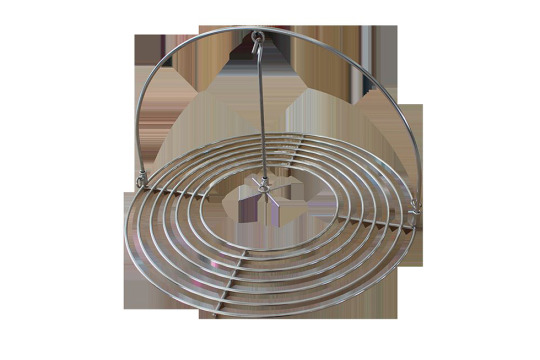
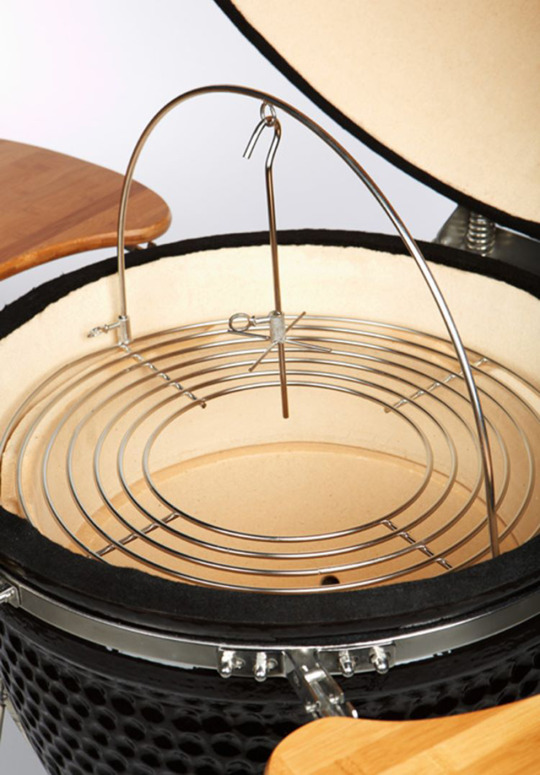
Chicken Cooking Rack
Chicken Cooking Rack,as the name and picture shows,you can hang the chicken or other kind of meat in the stick,and grilling in the grill,juicy and tasteful.
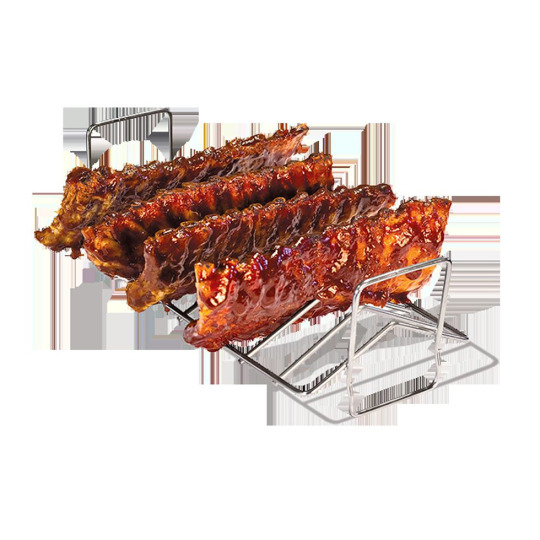
BBQ Rib Rack
Optimize your grill space with the Stainless Steel Rib Rack. This durable, high-quality stainless steel rack will ensure a precise cook by allowing large quantities of ribs to cook evenly. Additionally, the rack can even accommodate chicken legs, pork chops, and more.
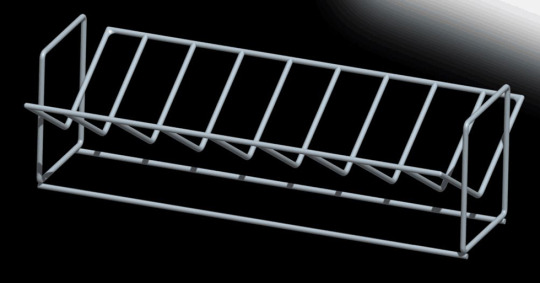
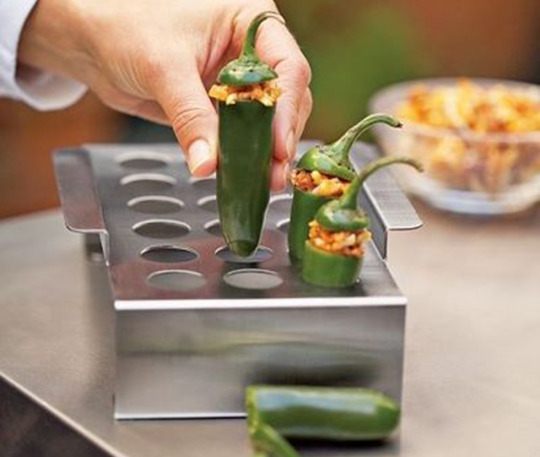
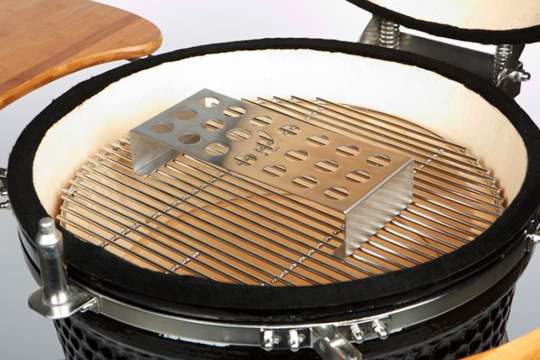
Roasted Peppers Frame
Roasted Peppers Frame is designed for pepper,but you can also put the sausage,hot dog,or other vegetables in it.
Chicken sitter
Chicken sitter,as the name says,chicken is “sitting”on the accessory.So the chicken will be roasted evenly.

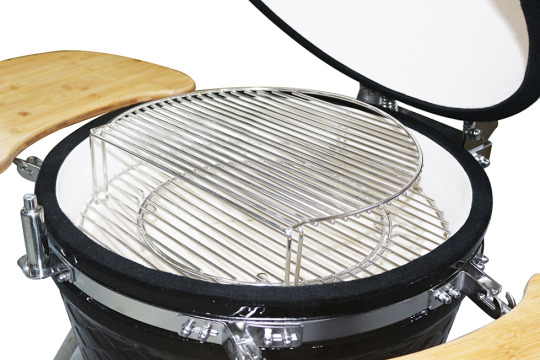
Cooking Grid Expander
Sitting directly atop the grill grate with a generous four-inch clearance, this dishwasher-safe accessory expands the cooking surface of your grill by up to 60 percent. Mix and match different surfaces to suit any need and style.
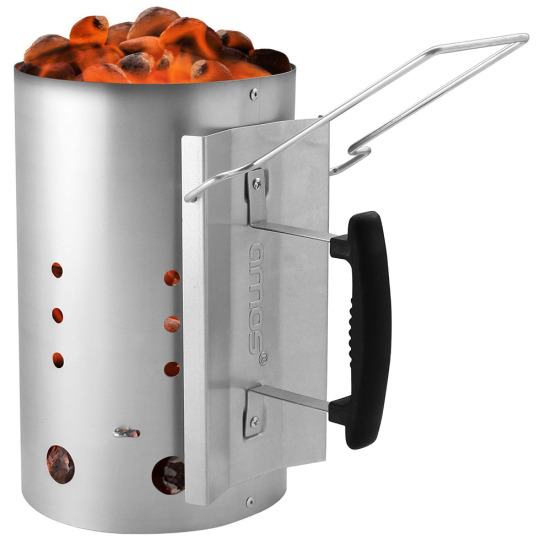
Charcoal Chimney Starter
1、The easiest, quickest & cleanest way to light charcoal for your barbecue.
2、No more waiting around for it to slowly heat. No need for lighter fluid or fire lighters.
3、 Superior air circulation for evenly burning charcoal that guarantees evenly cooked food.
4、 Side holes ensure that air circulates through all the charcoal for even burning.
1 note
·
View note
Text
Auplex Kamado Manufacturer Outdoor Kitchen Ceramic Grills Kamado Charcoal Bbq Grills
Web: https://www.auplexbbq.com/
0 notes
Text
How To Use A Kamado Grill [Setup, Temperature Control, Ignition & More]
From temperature control to seasoning and airflow, find out everything you need to know to become a master on your Kamado grill or Big Green Egg.

https://www.auplexbbq.com/
Table Of Contents
Kamado grills and Big Green Eggs are a truly unique range of grills, and offer a very different cooking experience to your run-of-the-mill charcoal or gas grill.
With their ceramic builds and heavy insulation, they’re great at producing high temperature and intense layers of smoke to infuse your meat with rich flavors.
This can make them daunting to use for beginners, and can take a while to get used to.
So here are 4 key steps to keep in mind when using your Kamado grill.
Ready to become a Kamado master?

How to Light a Kamado Grill
Auplex Kamado:https://www.auplexbbq.com/
One of the best things about Kamado grills is they allow for over-the-fire cooking.
You get to mold your coals, stack them delicately, and keep the embers going while you cook your meat.
This comes with its own challenges though, and it can be a skill learning how to keep the temperature of your fire at just the right levels for good Kamado cooking.
Just like with charcoal grilling, Kamado grilling can be done either directly over a hot fire, or as low and slow smoking.
Both are great barbecue methods that are specific to different types of cooking, but they each require very different setups. Knowing how to do both will make sure you master kamado cooking quickly.
Direct grilling is exactly what it sounds like. It’s grilling your food directly over the fire. It’s perfect for creating beautifully seared meat and grill marks, and for simple BBQ food like hamburgers and hot dogs.
The problem with direct grilling is that it’s perfect for meat that only needs short blasts of heat to cook it.
In some instances though, we need something lower and slower that cooks meat without exposing it to ridiculous temperatures.
This is where indirect grilling comes in. Often also called 2-zone cooking, it involves setting up two heat zones across your grilling surface.
The first zone sits over your fire, but with no food on it. The other zone is where you put your meat, but with no heat directly beneath it. This setup allows the heat from your fire to create ambient heat, much like you would have in an oven, which in turn cooks your meat.
What makes this different to direct grilling is that it doesn’t expose your meat to high temperatures. This allows it to retain its juices without the skin to drying out or burning.
To set up for indirect grilling, drop a generous amount of coal into the main chamber of your grill. Arrange the coals into a rough peak, and place firestarters in the pile about one-third down. Don’t use lighter fluid.
Charcoal can take a while to reach your target temperature, so place the lid on your grill and allow the coals to heat up. Usually this takes about 10-15 minutes, but measure the internal temperature of your grill with a thermometer. You also want your coals to have settled down a bit, and in the form of embers rather than raging flames.
This kind of approach to lighting is called top-down because it’s just that: Your fire is lit by starting at the top of the fire and burns downwards. The reason this works is because it tends to last for longer (sometimes for as long as 10-12 hours) before you need to start replenishing your coals. This is especially true in kamado grills because the insulation is so good.
Once the grill is ready, add your smoking stone insert (this usually comes with your kamado grill), which works by effectively diverting heat away from your heat. Don’t forget to insert your grill grate.
Allow a few more minutes for the fire to stabilize (any opening of the grill’s lid will disturb the temperature in your grill) before then adding your food to the indirect zone of your grill.
Direct grilling setup is far more straightforward, and is much the same as regular charcoal grilling.
With direct grilling it’s ok to be a bit looser with coal formation, so I tend to get them going in a charcoal chimney before then transferring to the grill chamber. No need for top-down. We just want a good amount of coal on the go as quickly as possible.
Put a generous amount of coals in the chamber and insert several firestarters across them. We want high heat quickly.
Shut the lid and allow the grill temperature to reach your target temperature before inserting your grill and placing your food on the surface.
How to Control Kamado Grill Temperature
When BBQ smoking, Kamado grilling is mostly set and forget and doesn’t require constant control or monitoring.
Your grill has an intake damper at the bottom and exhaust damper at the top. This allows air to enter the grill at the bottom, and then exit through the top. These dampers are adjustable so that you can control the flow of air through your grill. The wider they’re set, the more oxygen you’ll allow into your grill and therefore heat you’ll generate.
This can take a little getting used to it, but you’ll soon get used to how your grill reacts to changes in damper settings. Check out my guide to grill vent use here, and consider getting a temperature controller here.
Once your grill has reached target temperature, you can often tweak the top damper to be almost shut. This should maintain the temperature well, but if you notice it start to drop, then you can open it slightly to try to get things going again.
Try not to overthink it though. This can often be left alone and doesn’t need continuous tinkering – despite how tempting it might be!

How to Use a Kamado Deflector Plate
One of the essential accessories to use on your kamado grill is the deflector plate.
This circular plate-shaped tool helps shield your food from flare-ups and ensures that your meat is cooked indirectly rather than being exposed to roaring flames.
It comes in the form of an insert with hooks, that you place underneath where your grill grates go and allow the hooks to grip onto the rim of the grill chamber.
They’re particularly useful if you’re cooking pizza in your kamado, as you don’t want the flames to sear the underside of the crust.
If you’re cooking meat, I also recommend placing a drip pan on top of the deflector plate and beneath the grill grates. This will help catch any fatty runoff from the meat while it cooks, without allowing it to drop onto your coals.
How to Cool Down a Kamado Grill
When you’re finished with your grill, close the intake damper at the bottom of your grill. This will stop any more oxygen coming into the grill, therefore cutting off much of the fuel that your flames need to keep going.
You should see the temperature on the built-in temperature gauge start to drop. Once the temperature falls below 400°F close the exhaust damper at the top of your grill, but leave it open ever so slightly to help prevent any smoke buildup.
Once the dome of the grill chamber is completely cool to the touch, you can cover it or remove the grill grates for cleaning.
It will take a while for the grill to cool down because Kamado grills tend to retain heat so well, especially the Kamado Joe Classic models.
0 notes
Text
Outdoor Kitchen Garden Supplies Creative Ceramic Grill Kamado Smoker bbq grills


15" small tabletop kamado grills, young family's choice. It suits for 3-4 peoples grilling. You will be impressed with its moisture and tender taste. Using it together with different accessories, it will bring you a hearty dinner by offer not only lab, but also pizza, chicken,etc!


Kamado Feature
kamado origin
Our name comes from an ancient style of cooking that began over 3,000 years ago.The name “Kamado” is the Japanese word for “stove” and literally,it means “place for the cauldron”. It’s a simple yet highly efficient and flexible method of cooking any food – perfectly. The Auplex Kamado BBQ brings together these age old cooking techniques and blends them with today's technology. The amazing heat retention properties of ceramics enables temperatures up to 399 Celsius meaning the Auplex Kamado can be used for cooking meats, smoking fish and even baking! Once you try the Ceramic grill Kamado for yourself, you’ll be amazed by its versatility and before long it will become the envy of your friends!

Why Kamado Grill?1.Ceramic Construction: Thick ceramic construction creates a convection heat environment for even cooking and reduces charcoal usage.2.ego Shape: A tight seal which may air flkes the KAMADO GRILLS highly efficient. Besides,it also can retains the moisture of the food. 3.Wide Temperature Range: Easily sustains temperatures from 50 to over 800 degrees internally, allowing food warming, smoking and searing.4.Safety: Thick ceramic wall construction reduces heat transfer and eliminates risk of burns from exterior.5.Build To Last a Lifetime: Various bbq grills give Quality assurance, but none but Kamado can give you a 20-year guarantee.How to use?1. Open all vents.2. Place recommended number of lump charcoal into the fire box and light starter. Allow 10-15 minutes for charcoal to light.3. Put cooking grid on the top of the fire ring. Close lid and adjust top vent and draft to allow grill to reach the desired cooking temperature.4. About 10-20 minutes later, put food on the cooking grid, take care of the inside temperature of the grill, and make some adjustment according to the thermometer.5. Few minutes later, the food willbe well cooked.


Our Services
A. Professional and constructive suggestion for you!
1. OEM/ODM Service.
Our professional R&D dept. can develop different products for different target prices and different requirements.
2. Direct factory, Competitive price
We are manufacturer.Factory price, various products we can source for you.
3. Quality control
We have a strict quality control system, Professional QC team.
4. Custom packaging service
We can design as your request whatever the ineer packing or the outer carton.
B. Warranty
1. one year for the kamado Mobile Grill main body.
2. half year for the Kamado Mobile Grill accessories.
3.Technic Assurance accompanies you forever.
Company Information

Fujian Auplex Grill Co.,Ltd
Fujian Auplex Group was founded in 2009. Fujian Auplex Grill Co.,Ltd. is one subsidiary of
the Group.We are the Top1 Kamado manufacturer in China. We have many years of grill
export experience. After a dozen years, we have already formed a complete system on the
Table BBQ Grill. Rely on the professional technology and excellent service, we gain popularity
among a large amount of customers.


Why is so confident in our product?
-- Our Products need to go through three check points to test the quality before we delivery the goods to our clients.
1. After the BBQ shell was built up, our QC will inspect if the finish is good enough and also the small crack ones will be took out;
2. Once the heating is finished, we will sprinkling cold water on the ceramic part under 800 degree, if it crack under it, it is unqualified products;
3. Before package, we try to install the whole kamado Grills to check if there is any assembly problem for customers to avoid assembly problems when you received.


FAQ
1. Why choose our ceramic kamado bbq grill?
1) The most professional ceramic kamado bbq grill manufacturer.
2) Highest quality ceramic kamado bbq grills with EN1860,LFGB certificates.
3) Fast delivery time capacity.
4) Best before and after sales service.
2. Can you do the package for my own design?
A: Sure, it does. We will calculate the exact package data and the price base on your design. We can do other package to your reference.
3. What is your sample policy?
A: We can supply the sample for your test the quality, but the customers have to pay the sample cost and the shipping cost.
4. How many kinds of ceramic kamado bbq grills do you have?
A: 13"/ 14''/ 15''/ 16"/18"/ 21"/ 22''/ 23"/24" /26" /27"
5. Do you have after-sales services?
A: Of course we have consummate after-sale service and a life-long technic consultant.Feel free to contact us if you have any of question.
6. It seems like there are many cracks outside of my kamado.Why? Is it a normal appearance?
A: What you called "cracks outside " is not the real cracks on the surface actually.It is a common phenomenon, or called"nature result" of the very high temperature we used to fire our ceramics, this is unavoidable. Those "cracks" will not deflect your use at all. All you need to do is enjoy the happniess the Table Top Kamado brings to you.
0 notes
Text
Auplex Kamado accessories description
https://www.auplexbbq.com/
This multipurpose fire starter quickly lights your charcoal grill, wood-burning fireplace, campfire and so on. This is the best tool to have when grilling, camping or just enjoying a fire in your backyard.
Charcoal starter -Looftlighter
The Charcoal starter -Looftlighter allows you to easily light your charcoal barbecue, wood burning fireplace, campfire or fire pit in 2-3 minutes. It uses 1300 degree temperature hot air to ignite your wood or charcoal. That’s two times the temperature required to ignite wood. The built-in blower then fans the flames to the desired level of fire needed, saving more time for doing what you love. The durable heating element, motor, and switch will last you for thousands of lights.
Classic Heat Deflector
The Heat Deflector adds great flexibility to your Kamado grill. It allows you to bake, roast and smoke with indirect heat. Our Heat Deflector circulates the heat around your food to cook it slowly, which keeps it incredibly moist and tender. The Heat Deflector frame can also be used by itself to raise the cooking grate. It reduces the potential of charring tender foods like seafood and vegetables.
Versatile Elevator
The metal stand has a two-position setting for the ceramic plates, can be used together with the 2x half ceramic plates to offers simultaneous direct and indirect cooking. And also can be used separately to raise the cooking grate and reduce the charring of tender foods
Roast nets Clip
It securely clamps onto any cooking grate. Avoid the mess and potential burn hazard of moving or repositioning your cooking grate.
Chicken Stand
The Chicken Stand allows you to make incredibly tender chicken on all outdoor grills and indoor ovens. Make “beer can chicken” or add your favorite marinade to the Chicken Stand. The Chicken Stand is all ceramic and dishwasher safe for easy clean up and years of use.
Rain Cover
Our Premium Grill Covers are made of durable vinyl for all-weather protection. Custom fit and available in black.
Charcoal Plate
Efficiently clean your firebox after your kamado-cook.This durable stainless steel accessory allows you to quickly separate leftover charcoal from the ashes and be ready for your next cook in seconds. Additionally, the Charcoal Basket will provide better airflow by filtering out the small particles of charcoal, resulting in a cleaner burn.
Kamado Rotisserie
Revolutionize your charcoal grilling experience and transform your Kamado Joe into a rotisserie-style grill with the Joetisserie attachment. Constructed from durable, stainless steel, the spit rods and forks allow for pristine balance and steady rotation of up to 50-pounds of beef, pork or chicken resulting in meats that are smoky, juicy, and tender . The quiet, yet powerful, motor provides a steady circulation for flawless food.
Pizza Shovel
The Pizza Shovel is the perfect lightweight serving tool for any delicious kamado-style pizza. With a wooden flat edge designed to slip underneath the pizza crust, ensure a quick-and-easy plating process from your grill.
Cast Iron cooking grid
The Cast Iron cooking grid is a staple for any kamado-filled feast. Perfect for all cuts of meat, the hearty Cast Iron cooking grids are made for searing while sealing in the flavor. With excellent heat retention and long-lasting durability, the Cast Iron cooking grid will be the MVP for any backyard spread.
Ceramic Feet
If your Kamado grill is going on/over a wood surface or in a built-in application, the grill must be placed on these ceramic feet. The feet elevate the Kamado grill, allowing air movement directly under the grill. Air movement helps dissipate the heat.
Divide & Conquer Cooking System
Divide & Conquer Cooking System is a combination of half pizza stone and half cooking grid,and you can adjust the locations,so there will be many combinations.It replaces the ordinary grill grate. The key is the “Half Rack Design,” the halving of all components to allow for multi-level flexibility and multi-surface versatility.
Elevator
Elevator is used for elevating the height of food,it can be used with heat deflector,cooking grid,or pizza stone.So you will have different flavors.
Pizza Stone
Pizza Stone is used to make pizza,and the flavour is better than the normal pizza oven.It’s one of the most hot selling accessories.
Chicken Cooking Rack
Chicken Cooking Rack,as the name and picture shows,you can hang the chicken or other kind of meat in the stick,and grilling in the grill,juicy and tasteful.
BBQ Rib Rack
Optimize your grill space with the Stainless Steel Rib Rack. This durable, high-quality stainless steel rack will ensure a precise cook by allowing large quantities of ribs to cook evenly. Additionally, the rack can even accommodate chicken legs, pork chops, and more.
Roasted Peppers Frame
Roasted Peppers Frame is designed for pepper,but you can also put the sausage,hot dog,or other vegetables in it.
Chicken sitter
Chicken sitter,as the name says,chicken is “sitting”on the accessory.So the chicken will be roasted evenly.
Cooking Grid Expander
Sitting directly atop the grill grate with a generous four-inch clearance, this dishwasher-safe accessory expands the cooking surface of your grill by up to 60 percent. Mix and match different surfaces to suit any need and style.
Charcoal Chimney Starter
1、The easiest, quickest & cleanest way to light charcoal for your barbecue.
2、No more waiting around for it to slowly heat. No need for lighter fluid or fire lighters.
3、 Superior air circulation for evenly burning charcoal that guarantees evenly cooked food.
4、 Side holes ensure that air circulates through all the charcoal for even burning.
1 note
·
View note
Text
How do you cook a Turkey on an oven
Here's how to make the succulent, crunchiest Turkey for your Thanksgiving dinner with an Auplex grill.
Remove the turkey from its 12-hour brine.

Lay the brined turkey breast-side down on a cutting board and pat the backbone area dry with a paper towel. Using heavy-duty kitchen shears or purpose-built poultry shears, cut along the left and right side of the turkey backbone, removing the backbone from the bird entirely (you may encounter additional resistance when cutting through the thigh-bone connection).

Once the backbone has been removed, trim any excess skin and fat from the neck area and remove the wishbone. Turn the turkey over and arrange both legs so they are out from under the bird. Using the butt of your hand press down very firmly on the ridge of the breastbone and flatten the bird out all the way down to the cutting board. Finally, tuck the wing tips behind the breast or remove the wing tips entirely; this will prevent the wing tips from cooking too quickly.

Season the turkey liberally with dry rub and place into the refrigerator for 3-4 hours.

Set the Auplex for indirect cooking with the Auplex BBQ at 350°F. Prior to placing the turkey on the EGG, add your favorite smoking wood – we suggest pecan, cherry or apple as their milder flavors complement poultry.

Place turkey, bone-side down, on the Auplex and close, keeping the temperature steady at 350°F.

Smoke the turkey until the internal temperature reads 165°F (will likely take around 2 hours for a 14-pound bird). Remove the turkey from the EGG cover with foil. Let rest for about 30 minutes. Then slice and serve.

0 notes
Link
0 notes
Text
How to make the perfect grilled ribs with a barbecue oven
Prime rib is a cut of beef from the rib primal section, located behind the shoulder but above the lower back. A cow has 13 ribs on each side … ribs six through twelve make up the rib primal section. Because this cut of beef includes some of the tenderest muscles on the entire animal, prime rib is beautifully marbled with fat and, when cooked on the Auplex smoker grill, is naturally juicy and tender.
Prime rib can be cooked bone-in or boneless, but it’s usually roasted bone-in as an impressive centerpiece for a special occasion meal. A bone-in prime rib roast is sometimes called a standing rib roast, because you stand the roast on its rib bones to cook it.

What Size Prime Rib Will You Need?
A good rule of thumb for estimating how big a roast you’ll need is to plan to serve 2 people for every rib. If you are serving multiple side dishes in addition to the roast, three people per rib is fine. But if you want leftovers, or prefer to err on the generous side, stick with the two people per rib rule. A boneless prime rib will give you about two servings per pound.
A full rack of prime beef is seven ribs, which will easily serve 14 to 16 people (or more!). Depending on the size of your Auplex, you may need to cut the roast in half (three ribs on one roast and four ribs on the other).

How to Season a Beef Rib Roast
Prime rib roast doesn’t need a marinade or complicated preparations; the flavor of the meat speaks for itself. You can season the meat with a blend of simple seasonings and garlic cloves. Or, if you prefer, you can add extra flavors with an herb butter coating.
What’s the Best Temperature for a Prime Rib Roast?
One of the great things about a prime rib roast is that on a doneness scale, there’s usually something for everyone. The slices taken from the ends of the roast will be the most done, and the middle will be less cooked. Prime rib is traditionally served rare to medium rare.
Use a food thermometer to monitor the meat temperature. To get an accurate reading, insert the meat thermometer into the thickest part of the roast, making sure that the tip is not touching the bone. Remember, as the prime rib roast rests, the internal temperature will rise 5 to 7°, so pull the roast off of the Auplex at least 5 degrees below your ideal internal temperature.
Doneness Guide for Prime RibDonenessTemperatureDescription
Rare120-129°FRed center with pink at edges the outer
Medium Rare130-135°FPink with a slightly reddish center
Medium135-140°FUniformly colored grayish-pink interior
Well-done145°F+Gray with no pink
The USDA recommends beef roasts be cooked to 145°F and then rested for at least 3 minutes.
Your Prime Rib Cheat Sheet
Auplex
Oven
temperature
First 20 minutes at 450°F/232°C; then reduce heat to 325°F/163°C. INDIRECT
PRIME RIB TIMELINE
*COOKING TIME DEPENDS ON THE SIZE OF THE ROAST
COOKING DAY
1:00 PM
Remove the roast from the fridge and allow it to come to room temperature for 3 hours; this will allow the meat to cook more evenly.
3:30 PM
Set the Auplex Oven for indirect cooking with the Auplex at 450°F/232°C.
3:45 PM
Pat the roast dry with paper towels and sprinkle the roast all over with the seasoning. Sliver the garlic, make tiny slits in the roast and insert the garlic bits.
4:00 PM
Place the roast, fat side up, on the cooking grid (if you want to save the juices for gravy, use the Roast Rack and Drip Pan). Cook for 20 minutes – starting with a high heat will result in a beautiful dark seared crust.
4:30 PM
Reduce the Auplex temperature to 325°F/163°C and continue roasting until the internal temperature of the meat registers 125°F/52°C for rare, about 2 hours more (or until done to your liking). To approximate the total cooking time, allow about 11 to 12 minutes per pound for rare and 14 to 15 minutes per pound for medium rare.
6:30 PM
Transfer the roast to a carving board, cover loosely with foil and let rest for 10 to 15 minutes so the juices settle and reabsorb.
THE PERFECT PRIME RIBINGREDIENTS
Prime rib roast (figure about 1-lb of uncooked prime rib per person)
Big Green Auplex Classic Steakhouse Seasoning
3-4 garlic cloves
EGGCESSORIES
convEGGtor
Auplex Small Charcoal Egg Grill 16 inch Outdoor Ceramic BBQ Grill
Drip Pan
Digital Food Thermometer
COOKING TIME ESTIMATE
Approximately 15 to 20 minutes per pound

1 note
·
View note
Text
How to roast beef tenderloin in a barbecue oven

Ingredients:
1 3-pound beef tenderloin roast
1 Tbsp grapeseed or other high smoke-point oil
1 Tbsp butter
1 Tbsp chopped fresh thyme
1 Tbsp chopped fresh rosemary
3 garlic cloves, roasted garlic was used for this recipe
2 tsp salt
2 tsp pepper
Auplex Cast Iron SkilletconvEGGtorAuplex Rectangular Drip PanAuplex Rib and Roast RackButcher twine
Auplex BBQ grill

Method
One day before the cook, using the butcher twine, tie the beef tenderloin to make sure it is as uniform in shape as possible. Combine the thyme, rosemary, garlic, salt and pepper. Season the tenderloin liberally on all sides, including the edges, with the seasoning mixture. Wrap in plastic wrap and refrigerate overnight.
The next day, remove the tenderloin from the refrigerator and let the roast rest at room temperature for at least one hour.
Set the Auplex for direct cooking without the convAuplex at 550°F/288°C.
Add a Big Green Egg Cast Iron Skillet to the cooking grid; heat the oil and butter until it shimmers in the skillet. Carefully add the beef tenderloin roast, rotating often, until a golden-brown crust starts to develop on all sides, about 5 minutes total. Remove the cast iron skillet and the roast from the EGG.
Add the Auplex to set the EGG for indirect cooking at 300°F/149°C.
Place the beef tenderloin on the rib rack inside of the roasting pan and place the pan on the cooking grid. Connect the Auplex for 300°F EGG temperature and 125°F meat temperature. Roast the tenderloin until the internal temperature reaches your desired temperature; remember that the meat temperature will rise a few degrees while it rests. Disconnect the Auplex. Let the tenderloin rest for at least 15 minutes before slicing. Slice and serve with the horseradish cream sauce. Enjoy!
Horseradish Cream Sauce Ingredients1 cup sour cream½ cup store-bought or fresh horseradish1 Tbsp minced chives1 Tbsp lemon juice½ tsp salt½ tsp black pepper
Horseradish Cream Sauce Instructions
For the horseradish cream sauce, mix all the ingredients together and refrigerate overnight.
1 note
·
View note
Video
tumblr
See how the grill makes a nice juicy chicken
Web: www.auplexbbq.com
1 note
·
View note
