
Statistics
We looked inside some of the posts by autdylanye and here's what we found interesting.
Average Info
Notes Per Post
2
Likes Per Post
2
Reblog Per Post
0
Reply Per Post
0
Time Between Posts
57 minutes
Number of Posts By Type
Text
12
Last Seen Tumblr Blogs


Fun Fact
Tumblr Inc. is using 66 technologies for its website.
Text
Week 14
The home stretch!
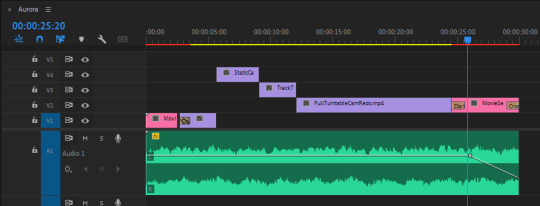

After this I went back to my Movie Sequence in Premiere Pro and added some very slow paced music that fit it my sequence(royalty free music). Adjusted/played with some of the volume settings.
As you can see I added some effects as well to my sequence. Added Dip to White at the beginning for a transition from my actor to my effects, then another one near the end, and to cut off I added an easy Cross Dissolve to close my Movie Sequence.
I used FOUR out of FIVE of my rendered cameras. Them being, CameraAim, StaticCamera, TrackTurntableCamera, and FullTurntableCamera, for my movie sequence. I also had FOUR actor scenes, however, I chose to show only two of them.
Along with this, I also finalized my Work-in Progress video.
0 notes
Text
Week 11-13(continued)
I wanted to add some VFX to my movie sequence, very simple VFX, so that the main focus was still the mocap movements, effects, etc.
After laying out my base movie sequence on Premiere Pro, I used Replace With After Effects Composition.
This was for my lens flare/star in the sky VFX. I messed around a lot with the settings and settled with this.

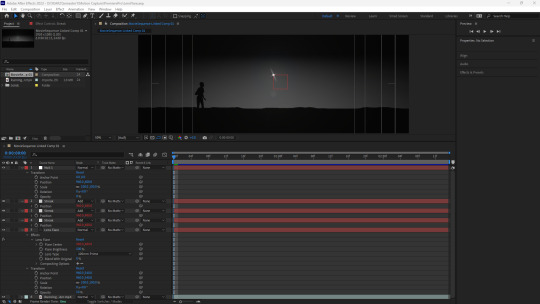
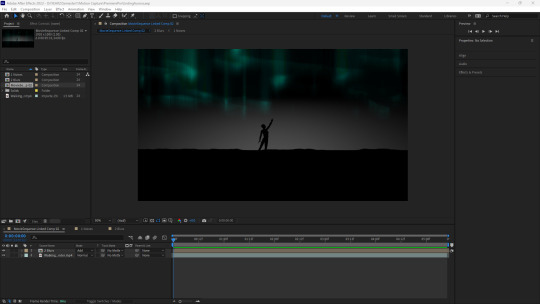
For this After Effects I tried to create an aurora borealis type VFX for the ending scene(this is my work in progress), after the smoke fluid effect dancing movements, we would see the actor walk off after it.
Experimented with many of the settings to get the desired look.
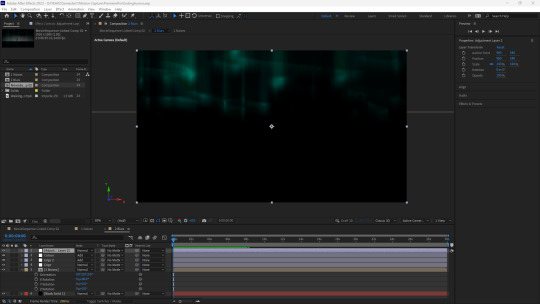


The final stages of my aurora borealis VFX.
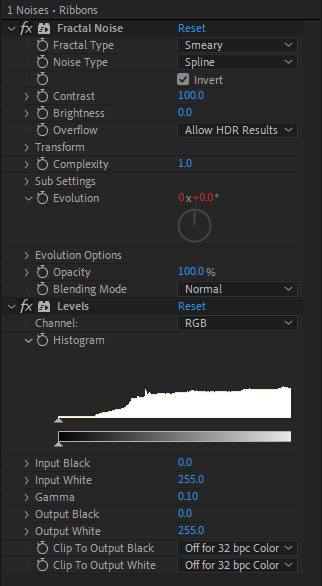
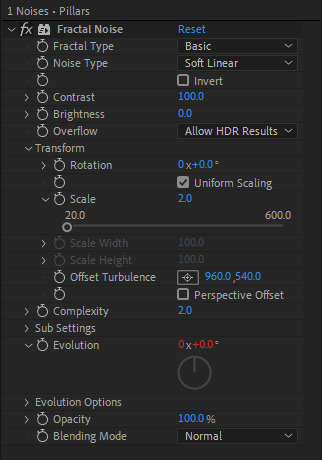
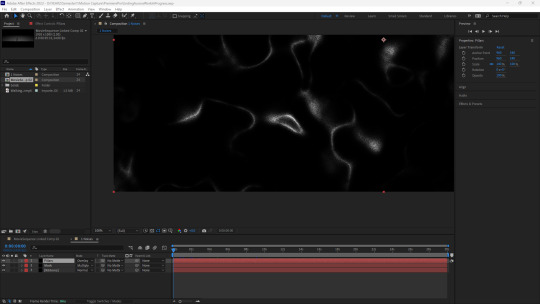
I used Fractal Noise, CC Radial Blur and other settings to create this VFX. Tinkered with the colours and effect controls.
0 notes
Text
Week 11-13

Not much to say other than what has been said in this image. However, I did come across some complications with my rendering at times, while I did it at AUT. It would pause after some time, or have an error, so I was suggested to change my PC settings to have it never turn off, and for more insurance, play a long video as well, so that the PC stays on.
0 notes
Text
Week 8-10
After Week 5-7 it was time to delve into with Maya, my effects, essentially my post-production.

I created my character via Autodesk Character Generator and created a control rig for her. I had no complications with my rigging at all. I wanted to have smoke in my effects, so I needed to add some mesh to my locators.

Here are some of my documentation on my effects.
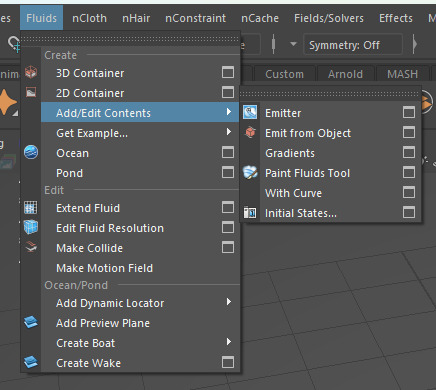

For my fluid smokes to emit from my sphere mesh, I selected my fluid and mesh, then went to the FX hub and went to Fluids -> Add/Edit Contents -> Emit from Object.
And for my nParticles, I just went to either the Animation or Rigging hub, selected my locator and emitter, and did Constrain -> Point.
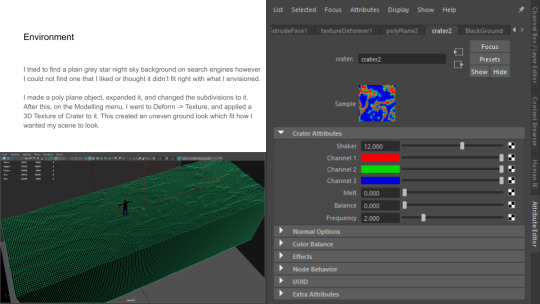
My simple 3D digital environment.

Experimented with many cameras and settings, as well as lighting.
I experimented with skydome light, ambient, etc, however, I soon settled with the Area Light as it gave my background of the sky a bit of gradient in the actor files. It lit up the effects, creating a glowy look to it, making it look more like an aurora.
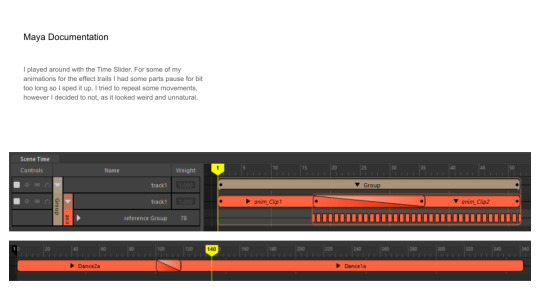
Touched upon the TimeSlider in Maya.
0 notes
Text
Week 5-7
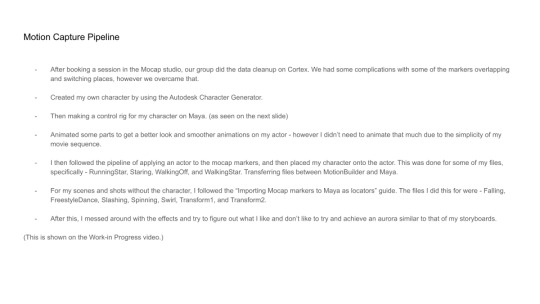
The weeks between 5-7 were a mix of Cortex, MotionBuilder, and Maya. The image above is of the rough pipeline of my process.
(This is shown on the Work-in Progress video.)
0 notes
Text
Week 4
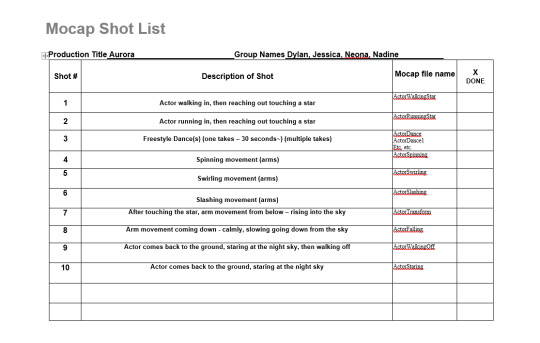
I decided on Concept 2 as the one I wanted to carry out for this assignment.
This week was making preparations for the mocap studio session. Here is my mocap shot list - wanted it to keep track. I also wanted a variety of shots, and multiple shots just in case I wanted to use different shots/frames.
0 notes
Text
Week 3(continued)


For my third formative(and carrying over from my research), I came up with these storyboards.
0 notes

Text
Week 2
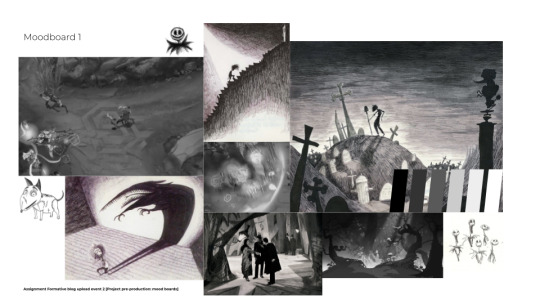

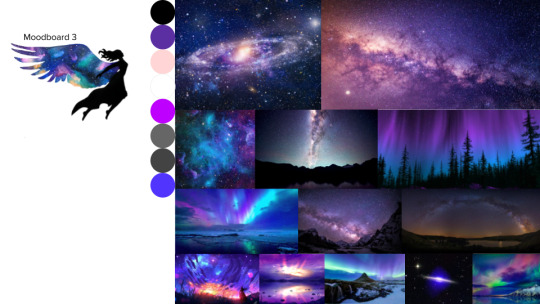

For my second formative, I made four moodboards to expand and explore my possibilities, keeping my options open, since I had lots of ideas.
0 notes
Text
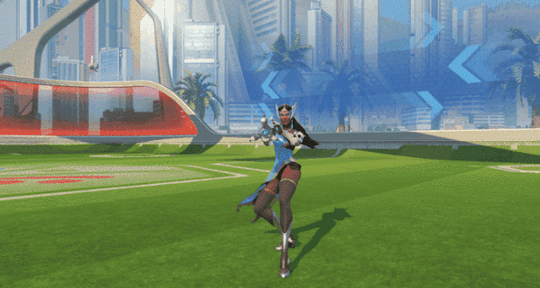
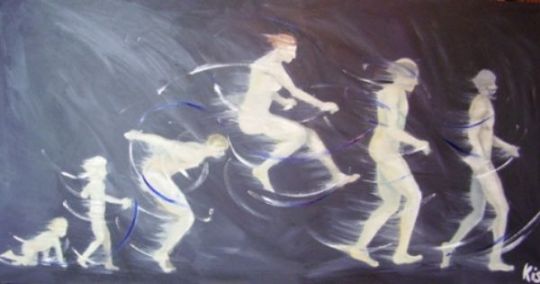
Week 1
For my formative, I did lots of research on the flow and movements of the body, arms, etc. Not only did I look at videos, but images and gif's as well. Looked at a wide range of areas. So here are some of what I looked at:
youtube

youtube
youtube
youtube
youtube
youtube
youtube
youtube
2 notes
·
View notes