
Don't wanna be here? Send us removal request.
Statistics
We looked inside some of the posts by automaticrain00 and here's what we found interesting.
Average Info
Notes Per Post
0
Likes Per Post
0
Reblog Per Post
0
Reply Per Post
0
Time Between Posts
14 days
Number of Posts By Type
Text
17
Last Seen Tumblr Blogs


Fun Fact
The “We are the 99%” Tumblr blog became the slogan for the Occupy Wall Street movement.
Text
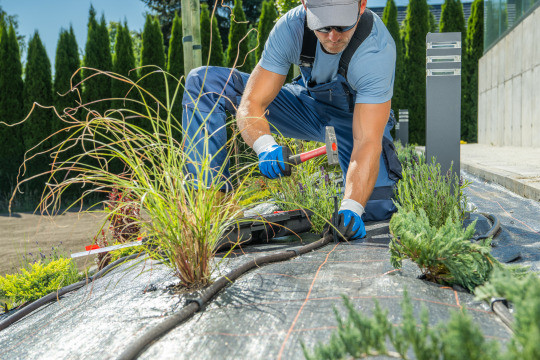
How to Keep Weeds Out of Your Garden: Proven Weed Control Tips
Discover proven weed control tips to keep weeds out of your garden. Learn the best prevention methods, natural solutions, and long-term strategies for a healthy, weed-free garden

Weeds can be a major nuisance in gardens, competing with plants for nutrients, water, and sunlight. If left unchecked, they can quickly take over, making it difficult for flowers, vegetables, and other plants to thrive.
Effective weed control is essential for maintaining a healthy, beautiful garden. By using the right strategies, you can prevent weeds from growing and keep your garden space clean and productive.
This guide covers the best ways to stop weeds before they start and remove any that have already taken root.
Why Weeds Invade Your Garden
Understanding why weeds appear in your garden can help you take proactive steps to prevent them.
Common Causes of Weed Growth – Weeds spread through seeds carried by wind, animals, and human activity.
Environmental Factors – Soil quality, moisture levels, and sunlight play a major role in weed growth.
Nutrient Competition – Weeds steal nutrients from your plants, leading to poor growth and lower yields.
Preventive Measures to Keep Weeds Out of Your Garden
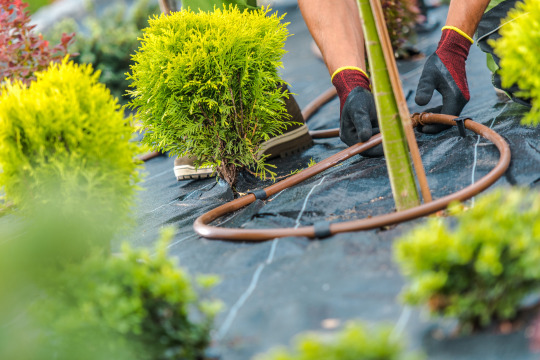
a) Use Mulch to Block Weed Growth
Mulch is one of the most effective ways to prevent weeds from taking over your garden.
How It Works – Mulch blocks sunlight, preventing weed seeds from germinating.
Best Types of Mulch – Organic options like wood chips, straw, and grass clippings enrich the soil, while inorganic options like landscape fabric and gravel provide long-term weed control.
b) Apply Landscape Fabric or Weed Barriers
Using landscape fabric is a great way to create a physical barrier against weeds.
How It Works – It prevents weeds from reaching the surface while still allowing water and nutrients to penetrate the soil.
Installation Steps – Lay the fabric over garden beds and secure it with mulch or stones to keep it in place.

c) Plant Densely to Crowd Out Weeds
Dense planting minimizes open soil areas where weeds can grow.
How It Helps – When plants grow close together, they naturally shade the ground, making it harder for weeds to get sunlight.
Best Ground Cover Plants – Clover, creeping thyme, and low-growing perennials can suppress weed growth naturally.
d) Use Pre-Emergent Herbicides
Pre-emergent herbicides stop weed seeds from germinating before they become a problem.
How It Works – It creates a chemical barrier that prevents new weed seeds from sprouting.
Best Time to Apply – Apply in early spring and fall for the best weed control results.
3. Effective Ways to Remove Existing Weeds
a) Manual Weeding Techniques
Hand-pulling weeds is an effective method, especially for small gardens.
Best Tools for Weeding – Use a hand weeder, hoe, or fork to remove weeds efficiently.
How to Remove Weeds Without Damaging Plants – Pull weeds when the soil is moist to ensure you remove the entire root.
b) Use Organic and Natural Weed Killers
If you prefer chemical-free weed control, consider these natural solutions.
Vinegar Solution – Spraying high-concentration vinegar directly onto weeds can kill them.
Boiling Water – Pouring boiling water on weeds scorches them and destroys their roots.
DIY Weed Killer – Mix vinegar, salt, and dish soap for an effective homemade weed-killing solution.
c) Apply Post-Emergent Herbicides
For stubborn weeds, post-emergent herbicides can help.
Selective vs. Non-Selective Herbicides – Selective herbicides kill only weeds, while non-selective herbicides eliminate all plants in their path.
Safe Application Tips – Apply herbicides on a calm day to prevent drift and avoid damaging desirable plants.

4. Long-Term Garden Weed Control Strategies
a) Improve Soil Health
Healthy soil supports strong plants that outcompete weeds.
How It Helps – Well-nourished plants grow more vigorously, leaving less room for weeds.
Best Soil Amendments – Compost, organic fertilizers, and soil conditioners improve soil structure and plant health.
b) Regular Maintenance and Weeding
Frequent weeding prevents small weeds from becoming a bigger problem.
How Often to Weed – Check your garden weekly and remove weeds before they spread.
Seasonal Weed Control Tips – Adjust your weed control strategy depending on the season to keep your garden weed-free year-round.
c) Proper Watering Techniques
Watering strategically can discourage weed growth.
Targeted Watering – Use drip irrigation or soaker hoses to water plant roots while minimizing moisture for weeds.
Why It Works – When water is directed only to your plants, weeds receive less moisture and struggle to grow.
Conclusion Of weed control
Keeping weeds out of your garden requires a combination of preventive measures, regular maintenance, and effective weed control techniques.
By using mulch, dense planting, and proper soil management, you can prevent weeds from taking over.
Removing existing weeds through manual weeding or natural weed killers will further help maintain a clean, healthy garden.
Stay consistent with these weed control strategies, and you’ll enjoy a beautiful, weed-free garden all season long!
FAQs Of weed control
1. What is the best way to keep weeds out of a garden naturally?
The best natural way to prevent weeds is by using mulch, planting densely, and improving soil health. Organic mulches like straw or wood chips help block sunlight and suppress weed growth.
2. How often should I weed my garden for effective weed control?
It’s best to check your garden for weeds at least once a week. Regular weeding prevents small weeds from spreading and becoming harder to remove.
3. Can I use vinegar as a weed killer in my garden?
Yes, vinegar can be an effective natural weed killer. However, it should be applied carefully, as it can also harm desirable plants. Spot-treat weeds using a spray bottle for the best results.
0 notes
Text
What Are Grubs? Understanding Lawn Pests and Grub Control Methods
Learn what grubs are, how they damage your lawn, and the best grub control methods to protect your grass from infestation.

What Are Grubs? A Complete Guide to Grub Control
Grubs are one of the most common lawn pests, capable of causing significant damage if left untreated. These larvae feed on grassroots, leading to weak, brown, and unhealthy lawns. Implementing the right grub control methods is crucial to maintaining a lush and thriving yard.
What Are Grubs?
Grubs are the larvae of various beetles, including Japanese beetles, June bugs, and chafer beetles. They live in the soil and primarily feed on grassroots, causing lawn deterioration. Their life cycle consists of four stages:
Egg: Beetles lay eggs in the soil during summer.
Larva (Grub Stage): The most damaging stage, where they feed on roots.
Pupa: The transition phase before adulthood.
Adult Beetle: Mature beetles emerge to lay eggs, restarting the cycle.
How Grubs Affect Your Lawn
Grubs can cause severe lawn damage by weakening the root system. Signs of infestation include:
Brown patches of dead or dying grass.
Turf that feels spongy and lifts easily from the soil.
Increased presence of predators like birds, moles, and raccoons digging in the yard.

How to Identify a Grub Infestation
To check for grubs, follow these steps:
Inspect the Lawn: Look for irregular dead patches.
Perform a Soil Test: Dig up a small section (about 1 square foot) and count the number of white, C-shaped grubs.
Monitor Seasonal Activity: Grubs are most active in late summer and early fall.
Grub Control Methods to Protect Your Lawn
Natural Grub Control Solutions
For eco-friendly lawn care, consider these natural methods:
Beneficial Nematodes: These microscopic worms target and kill grubs without harming beneficial insects.
Milky Spore Treatment: A natural bacterium that gradually eliminates Japanese beetle larvae over time.
Encouraging Natural Predators: Attract birds, toads, and beneficial insects that feed on grubs.
Lawn Care Techniques: Proper watering, aeration, and dethatching help prevent infestations.
Chemical Grub Control Solutions
For severe infestations, chemical treatments can be effective:
Preventive Insecticides: Products containing imidacloprid or chlorantraniliprole prevent grubs before they hatch.
Curative Insecticides: For active grubs, use carbaryl or trichlorfon to eliminate them quickly.
Application Tips: The best time to apply grub killers is late summer to early fall when grubs are actively feeding.
Safety Precautions: Always follow label instructions and wear protective gear when using chemicals.

Preventing Grub Infestations in the Future
Preventing grubs is easier than eliminating them. Use these proactive measures:
Maintain a well-aerated, properly watered lawn.
Plant grub-resistant grass varieties like fescue and ryegrass.
Apply preventive insecticides before beetle eggs hatch.
When to Seek Professional Grub Control Services
If DIY methods fail, consider professional help when:
Lawn damage is widespread and worsening.
Multiple treatment attempts have been ineffective.
You want expert assessment and long-term solutions.
Conclusion Of Grub Control
Grubs are a serious threat to lawn health, but effective grub control can prevent and eliminate infestations. Whether using natural remedies or chemical treatments, taking proactive steps ensures a lush, green lawn free from pests.
FAQs Of Grub Control
What do grubs turn into? Grubs mature into beetles, such as Japanese beetles and June bugs, which restart the infestation cycle.
Are grubs harmful to humans or pets? Grubs are not directly harmful, but their presence can attract pests like raccoons and moles.
How long does it take for grub control treatments to work? Natural methods take several weeks to months, while chemical treatments can kill grubs within a few days.
0 notes
Text
How to Keep Mosquitoes Away: Effective Mosquito Control Tips
Learn the best ways to keep mosquitoes away and enjoy a mosquito-free environment. Discover effective mosquito control methods to protect your home and yard.

Mosquitoes are not just annoying—they can also carry dangerous diseases like malaria, dengue, and the Zika virus.
Their bites cause itching and discomfort, making outdoor activities unpleasant.
Effective mosquito control is essential to prevent infestations and reduce health risks. In this article, we’ll explore proven methods to keep mosquitoes away from your home and yard.
Understanding Why Mosquitoes Are Attracted to You
To keep mosquitoes away, it’s important to understand what attracts them in the first place.
Body Heat & Carbon Dioxide: Mosquitoes are drawn to human body heat and the carbon dioxide we exhale.
Sweat & Body Odor: Certain chemicals in sweat attract mosquitoes.
Standing Water: Mosquitoes lay eggs in stagnant water, making it a prime breeding ground.
Natural Ways to Keep Mosquitoes Away
Using natural methods is a safe and eco-friendly way to repel mosquitoes.
Mosquito-Repelling Plants: Citronella, lavender, marigolds, basil, and mint can help deter mosquitoes.
Essential Oils: Eucalyptus, peppermint, and tea tree oil work as natural mosquito repellents.
Mosquito Screens: Install screens on doors and windows to prevent mosquitoes from entering your home.

Effective Home Mosquito Control Methods
Taking simple preventive measures indoors can significantly reduce mosquito populations.
Eliminate Standing Water: Empty plant pots, birdbaths, and clogged drains to prevent breeding.
Keep Your Home Clean: Mosquitoes hide in dark, damp areas, so keep your home dry and clutter-free.
Use Electric Mosquito Zappers & Traps: These devices attract and kill mosquitoes effectively.
Outdoor Mosquito Control for Yards and Gardens
Keeping your outdoor areas mosquito-free ensures a more comfortable environment.
Maintain a Well-Trimmed Lawn: Mosquitoes hide in tall grass and dense vegetation.
Use Outdoor Mosquito-Repellent Candles & Torches: Citronella candles and torches can keep mosquitoes away.
Install Fans on Patios & Decks: Mosquitoes are weak fliers, so using fans can prevent them from hovering around.
Chemical Solutions for Mosquito Control
For severe mosquito problems, chemical solutions may be necessary.
Mosquito Sprays & Repellents: Use DEET-based or natural sprays on skin and clothing.
Apply Larvicides: Treat stagnant water with larvicides to stop mosquito breeding.
Consider Fogging Treatments: For large infestations, fogging can provide long-term mosquito control.
When to Call Professional Mosquito Control Services
If home remedies and DIY solutions aren’t enough, it may be time to call the experts.
Signs You Need Professional Help: If mosquito populations persist despite preventive efforts.
Benefits of Hiring Pest Control Experts: They use advanced techniques like fogging and larvicides to eliminate mosquitoes effectively.

Conclusion Of Mosquito Control
By implementing these methods, you can effectively keep mosquitoes away and create a comfortable, mosquito-free environment.
Regular mosquito control is essential to prevent infestations and protect against mosquito-borne diseases. Take proactive steps today to enjoy your home and yard without the constant annoyance of mosquitoes!
FAQs Of Mosquito Control
Q1: What is the best natural way to keep mosquitoes away?
A: Using mosquito-repelling plants, and essential oils, and eliminating stagnant water are effective natural methods.
Q2: How can I keep mosquitoes out of my house?
A: Install mosquito screens, use repellents, and keep doors/windows closed during peak mosquito hours.
Q3: Is professional mosquito control necessary?
A: If DIY methods fail, professional mosquito control services provide long-term solutions to eliminate mosquitoes effectively.
0 notes
Text
How to Install In-Ground Spotlights (With YouTube Guide)
Learn how to install in-ground spotlights with this step-by-step guide. Discover the benefits of pathway lighting, essential tools, wiring tips, and YouTube tutorials for easy installation.

In-ground spotlights are an excellent addition to any outdoor space, providing stylish and functional lighting for walkways, gardens, and driveways.
Proper installation is crucial for safety, aesthetics, and durability. This guide walks you through a step-by-step process to install in-ground spotlights effectively.
We’ve also included YouTube video tutorials for visual guidance, ensuring you achieve the best results. Pathway lighting not only enhances your outdoor ambiance but also improves security by illuminating dark areas.
Benefits of In-Ground Spotlights for Pathway Lighting
Improves Safety & Visibility: Well-placed lights reduce the risk of trips and falls along walkways and driveways.
Enhances Landscaping: Highlights trees, plants, and architectural features for a stunning nighttime effect.
Sleek & Space-Saving Design: In-ground spotlights blend seamlessly into the ground, creating a modern and clutter-free look.
Tools and Materials Needed
Essential Tools: Shovel, drill, wiring connectors, voltage tester, waterproof casing, and conduit.
Spotlight Types: Choose from LED, low-voltage, or solar-powered in-ground spotlights based on your needs.
Safety Gear: Insulated gloves, safety glasses, and weatherproofing materials for electrical components.

Step-by-Step Guide to Installing In-Ground Spotlights
1. Plan the Lighting Layout
Determine the best placement for spotlights to achieve balanced illumination.
Consider spacing and angles for optimal pathway lighting coverage.
2. Dig and Prepare the Installation Area
Mark installation spots and dig holes deep enough for proper fixture placement.
Ensure proper drainage to prevent water damage to the lights.
3. Wiring and Power Connection
Run underground cables using a conduit to protect them from moisture and damage.
Connect the spotlights to a low-voltage transformer for energy-efficient operation.
Use a voltage tester to ensure a safe and working power connection.
4. Install and Secure the Spotlights
Position the spotlights securely in the ground.
Cover the wiring with soil or gravel to maintain a clean and professional look.
5. Test and Adjust the Lights
Turn on the system and check if all lights are functioning correctly.
Adjust angles and positioning to achieve the best lighting effect on pathways and landscaping.
YouTube Tutorials for Installing In-Ground Spotlights
Visual learning makes installation much easier. Here are some recommended YouTube videos:
“Step-by-Step Guide to Installing In-Ground Spotlights” – A beginner-friendly tutorial covering planning, wiring, and installation.
“How to Wire Low-Voltage Landscape Lighting” – Demonstrates safe and efficient wiring techniques.
“Best Outdoor Lighting Ideas & Installation Tips” – Showcases creative ways to enhance your outdoor space with pathway lighting.
Maintenance Tips for Long-Lasting Pathway Lighting
Regular Cleaning: Wipe light covers to remove dirt and debris for maximum brightness.
Inspect for Damage: Check bulbs, wiring, and waterproofing to prevent electrical issues.
Ensure Waterproofing: After heavy rains, inspect and secure all electrical components.

Common Installation Mistakes and How to Avoid Them
Incorrect Wiring: Always double-check connections to avoid power failures.
Poor Placement: Uneven lighting can reduce effectiveness; adjust angles accordingly.
Lack of Waterproofing: Use weatherproof materials to protect electrical components from water damage.
Conclusion
Installing in-ground spotlights is a great way to enhance safety, security, and aesthetics in outdoor spaces. By following these steps, you can create a well-lit pathway with professional-quality results. Don’t forget to check out our recommended YouTube tutorials for additional guidance!
FAQs
1. How far apart should I place in-ground spotlights for pathway lighting?
Spacing depends on the brightness of your lights. Typically, place spotlights 6 to 8 feet apart for even illumination.
2. Can I install in-ground spotlights without an electrician?
Yes, if using low-voltage or solar-powered lights. However, for high-voltage installations, consulting an electrician is recommended.
3. What is the best type of in-ground spotlight for outdoor pathways?
LED in-ground spotlights are energy-efficient and long-lasting, making them the best choice for pathway lighting.

0 notes
Text
How to Install In-Ground Spotlights: A DIY Guide with Video Tutorials
Learn how to install in-ground spotlights with this step-by-step guide. Watch YouTube tutorials for an easy DIY installation and enhance your landscape lighting.

In-ground spotlights are a fantastic addition to landscape lighting, offering a sleek and modern way to highlight walkways, trees, driveways, and architectural features. These low-profile lights provide subtle yet powerful illumination, enhancing both the beauty and safety of your outdoor space.
The good news? Installing in-ground spotlights is a DIY-friendly project, and you can follow along with YouTube video tutorials to make the process even easier. Whether you're a beginner or an experienced DIYer, this guide will walk you through everything you need to know.
2. Why Use In-Ground Spotlights for Landscape Lighting?
Enhances Outdoor Aesthetics
Creates dramatic uplighting effects for trees, statues, and architectural elements.
Adds a polished and elegant look to outdoor spaces.
Provides Unobtrusive Lighting
Unlike bulky fixtures, in-ground lights sit flush with the ground, maintaining a seamless landscape design.
Perfect for pathways, driveways, and garden beds without being a tripping hazard.
Increases Safety and Security
Illuminates walkways to prevent trips and falls.
Brightens dark areas to deter intruders and improve home security.
Tools and Materials Needed
Essential Tools:
Shovel – to dig holes for the lights.
Drill – for mounting the transformer if needed.
Voltage tester – to check the electrical connections.
Wire strippers – for connecting the low-voltage wiring.
Screwdriver – to secure wiring and fixtures.
Materials Required:
In-ground spotlights (solar or low-voltage).
Transformer – if using wired low-voltage lights.
Low-voltage wiring and waterproof connectors.
Gravel or sand – to ensure proper drainage around the lights.

Watch Before You Install: YouTube Tutorials for In-Ground Spotlights
Before starting, it's a great idea to watch YouTube tutorials that provide a visual guide to the installation process.
Recommended YouTube Channels:
This Old House – Offers expert advice on landscape lighting.
Lighting Doctor – Specializes in DIY outdoor lighting.
Garden Light LED – Provides professional insights on placement and installation.
💡 Tip: Watching a step-by-step video will help you avoid common mistakes and get a clear understanding of the process before you start.
Step-by-Step Guide: How to Install In-Ground Spotlights
Step 1: Plan Your Landscape Lighting Layout
Identify key areas you want to illuminate, such as:
Pathways and driveways for safe navigation.
Trees or shrubs to create dramatic lighting effects.
Architectural features like walls, columns, or statues.
Determine proper spacing (typically 6–10 feet apart for uniform lighting).
Step 2: Choose the Right In-Ground Spotlights
Solar vs. Low-Voltage Spotlights:
Solar: Easy to install, no wiring needed, but may not provide consistent brightness.
Low-voltage: More reliable and powerful, but requires a transformer and wiring.
Select weather-resistant spotlights designed to withstand rain, snow, and dirt.
Step 3: Prepare the Installation Site
Dig holes at each marked location, ensuring the depth matches the fixture size.
Add gravel or sand at the bottom to improve drainage and prevent water buildup.
Step 4: Run and Connect the Wiring
Lay out the low-voltage wiring along your planned lighting route.
Use waterproof connectors to join the wires, protecting them from moisture and corrosion.
Keep wires hidden or buried to maintain a clean look.

Step 5: Install and Position the Spotlights
Place each spotlight into its designated hole and ensure it's flush with the ground.
Adjust the tilt and direction to achieve the best lighting effect.
Step 6: Connect to Power and Test
Attach the wiring to the transformer (for low-voltage systems).
Turn on the power and check if all lights are functioning correctly.
Make final adjustments to the light angles for the best illumination effect.
Common Installation Mistakes to Avoid
Placing lights too close together – Can create harsh, overlapping lighting.
Not using waterproof connectors – May cause wiring to fail due to moisture.
Skipping a test run before finalizing – Always check before securing wires permanently.
Maintenance Tips for Long-Lasting In-Ground Spotlights
Regularly clean the lenses to remove dirt, dust, and debris.
Check wiring connections after heavy rains or landscaping work.
Replace bulbs or fixtures as needed to maintain optimal brightness.
Conclusion Of Landscape Lighting
Installing in-ground spotlights is a simple yet effective way to enhance your landscape lighting.
By following this step-by-step guide and watching YouTube tutorials, you can achieve professional-looking results without hiring an expert.

FAQs Of Landscape Lighting
1. How deep should I install in-ground spotlights?
In-ground spotlights should be installed at a depth of 4 to 6 inches, ensuring they are flush with the ground while allowing proper drainage to prevent water damage.
2. Can I install in-ground spotlights without an electrician?
Yes! Solar-powered spotlights require no wiring, while low-voltage spotlights are DIY-friendly with simple plug-in transformers. However, if you are unsure about electrical work, consult an expert.
3. Do in-ground spotlights require a lot of maintenance?
Not much! Simply clean the lenses, check wiring connections, and replace bulbs as needed to ensure your landscape lighting remains bright and efficient.
0 notes
Text
Deck Step Lighting: Best Ideas to Brighten Up Your Outdoor Space
Enhance safety and style with deck step lighting. Discover the best deck and patio lighting solutions to illuminate stairs, pathways, and outdoor spaces with energy-efficient and stylish designs.

Deck step lighting is an essential addition to any outdoor space, providing both functional and aesthetic benefits.
Proper deck and patio lighting ensures safety by preventing trips and falls while enhancing the ambiance of your outdoor area.
Well-placed lighting on stairs not only makes your deck more usable at night but also creates a sophisticated, modern look.
Whether you prefer a subtle glow or a bright, energy-efficient option, there are plenty of lighting solutions to match your style.
Benefits of Deck Step Lighting
Improved Safety
Prevents accidents by illuminating steps and pathways.
Reduces the risk of falls, especially in low-light conditions.
Enhances visibility for guests navigating the deck at night.
Aesthetic Appeal
Highlights architectural details of your deck and patio.
Creates a warm, inviting atmosphere.
Available in various styles, from modern recessed lights to decorative side-mounted fixtures.
Extended Outdoor Use
Allows you to enjoy your deck and patio during the evening.
Provides functional lighting for outdoor dining, entertaining, or relaxing.
Increases property value by enhancing curb appeal.

Best Deck Step Lighting Ideas
Recessed Step Lights
Installed directly into stair risers for a sleek, modern look.
Provides subtle yet effective illumination without glare.
Ideal for creating a seamless, professional finish.
LED Strip Lighting for Steps
Mounted underneath stair treads for a continuous, soft glow.
Energy-efficient, long-lasting, and available in multiple colors.
Works well for both traditional and contemporary deck and patio lighting.
Solar-Powered Step Lights
A cost-effective and eco-friendly solution.
Requires no wiring—charges during the day and lights up automatically at night.
Perfect for decks where electrical wiring is challenging to install.
Motion Sensor Step Lights
Activates only when movement is detected, conserving energy.
Enhances security by deterring intruders.
Ideal for homes with children or elderly family members who need extra visibility at night.
Side-Mounted Stair Lights
Installed along stair edges or walls for a decorative glow.
Adds both safety and ambiance without overpowering the space.
Works well with modern, rustic, or classic deck designs.

Smart Deck Step Lighting
Controlled via smartphone apps, allowing you to adjust brightness and color.
Can be programmed to turn on/off automatically.
Integrates with home automation systems for added convenience.
How to Choose the Right Deck and Patio Step Lighting
When selecting deck step lighting, consider the following factors
Brightness & Color Temperature: Warm white lighting creates a cozy atmosphere, while cool white enhances visibility.
Durability & Weather Resistance: Choose waterproof, rust-proof fixtures for long-term outdoor use.
Power Source: Decide between hardwired, solar-powered, or battery-operated lights based on your deck’s setup.
Style & Design: Ensure the lighting complements your deck and patio aesthetics while providing the right amount of illumination.
Installation Tips for Deck Step Lighting
Plan the layout carefully to avoid dark spots or overly bright areas.
Space out the lights evenly for balanced illumination without harsh shadows.
Ensure proper wiring and transformer setup for low-voltage LED options.
Position solar-powered lights in direct sunlight for optimal charging.
Use weatherproof connectors and casings to protect electrical components from moisture and dirt.
Maintenance and Care for Outdoor Step Lighting
To keep your deck and patio lighting in excellent condition:
Clean light fixtures regularly to remove dirt and debris that can block illumination.
Check for loose wiring or corrosion and make necessary adjustments.
Replace batteries in solar and battery-operated lights to ensure consistent performance.
Protect fixtures from harsh weather conditions by choosing high-quality, weather-resistant materials.

Conclusion Of Deck and Patio Lighting
By incorporating these deck step lighting ideas, you can enhance both the safety and beauty of your outdoor space. Whether you opt for recessed fixtures, motion sensor lights, or smart LED solutions, choosing the right deck and patio lighting ensures a well-lit, stylish, and functional deck.
FAQs Of Deck and Patio Lighting
Q1: What is the best way to light deck steps?
A: The best deck step lighting options include recessed step lights, LED strips, and solar-powered fixtures. Motion sensor lights are also great for added security and energy efficiency.
Q2: Are solar step lights bright enough?
A: Yes! High-quality solar deck and patio lighting provides sufficient brightness for safe navigation while being energy-efficient and maintenance-free.
Q3: How do I install deck step lights without wiring?
A: You can use battery-operated or solar-powered lights for easy, wire-free installation. Simply mount them onto the steps or stair risers for instant illumination.
0 notes
Text
What Is Light in Architecture? Understanding Its Role in Architectural Lighting

Discover what light in architecture is and how it influences aesthetics, functionality, and ambiance. Learn how architectural lighting enhances modern spaces with precision and efficiency.
Light is one of the most crucial elements in architecture, shaping how spaces look, feel, and function. It defines the ambiance, highlights architectural details, and enhances the overall experience of a building.
Whether it's natural or artificial, architectural lighting plays a key role in ensuring that spaces are not just illuminated but also aesthetically pleasing and energy-efficient.
What Is Light in Architecture?
Light in architecture refers to the strategic use of natural and artificial light to enhance the design, functionality, and atmosphere of a space. It is not just about illumination but about creating depth, contrast, and a sense of harmony.
Architectural lighting integrates light sources with architectural elements to create visually engaging environments that complement the structure and purpose of the space.
Key Benefits of Light in Architecture
Enhancing Aesthetics and Ambiance
Light adds depth, texture, and drama to spaces.
It highlights architectural details, materials, and design features.
Improving Functionality and Visibility
Proper lighting ensures usability and comfort in residential, commercial, and public spaces.
Task lighting enhances productivity by providing focused illumination for activities.

Energy Efficiency and Sustainability
Maximizing natural lighting reduces electricity consumption.
Modern architectural lighting solutions, such as LED technology and smart controls, optimize energy use.
Types of Architectural Lighting
Ambient Lighting – Provides overall illumination to a space.
Task Lighting – Focused light for specific activities such as reading or cooking.
Accent Lighting – Highlights architectural features, artwork, or focal points.
Decorative Lighting – Enhances aesthetics with stylish fixtures and designs.
Best Practices for Implementing Architectural Lighting
Choosing the Right Fixtures and Technology: LED lighting and smart control systems improve efficiency and adaptability.
Balancing Natural and Artificial Light: Using daylight strategically reduces energy costs while maintaining comfort.
Optimizing Placement for Maximum Impact: Positioning lights correctly enhances the spatial experience and visual appeal.
Top Trends in Architectural Lighting
Smart Lighting Systems and Automation – Adaptive lighting solutions that respond to occupancy and daylight changes.
LED Innovations for Energy Efficiency – Sustainable lighting that lasts longer and consumes less power.
Sustainable and Eco-Friendly Designs – Integration of green building strategies for lower environmental impact.

Conclusion Of Architectural Lighting
Light is an essential element in architecture, influencing the way spaces are perceived and experienced. Whether through natural lighting or innovative architectural lighting solutions, the right approach can enhance aesthetics, improve functionality, and contribute to energy efficiency.
FAQs Of Architectural Lighting
1. What is the difference between natural light and architectural lighting?
Natural light comes from the sun, while architectural lighting includes both natural and artificial lighting to enhance a space's design and functionality.
2. How does architectural lighting improve energy efficiency?
Architectural lighting utilizes LED technology, smart sensors, and optimized designs to minimize energy waste and maximize performance.
3. What are the best lighting techniques for modern buildings?
Layered lighting, automated controls, and LED solutions are ideal for achieving a balanced and visually appealing architectural lighting setup.

0 notes
Text
How to Test a Backflow Preventer: A Step-by-Step Guide
Learn how to test a backflow preventer with this step-by-step guide. Ensure clean water with proper backflow testing and prevent contamination risks.

A backflow preventer plays a crucial role in maintaining a clean water supply by preventing contaminated water from flowing back into the system. Backflow testing is essential to ensure that these devices function correctly and comply with local water safety regulations.
Although certified professionals typically perform backflow testing, understanding the process helps property owners stay informed about their irrigation or plumbing system’s safety.
What is a Backflow Preventer?
A backflow preventer is a mechanical device installed in plumbing and irrigation systems to prevent contaminated water from reversing into the clean water supply. Backflow can occur due to backpressure or backsiphonage, posing a risk to public health.
Types of Backflow Preventers:
Reduced Pressure Zone (RPZ) Devices – Common in high-risk applications, providing maximum protection.
Double Check Valve Assemblies (DCVA) – Used in moderate-risk situations, such as irrigation systems.
Pressure Vacuum Breakers (PVB) – Installed in residential sprinkler systems to prevent backflow.
Why is Backflow Testing Important?
Regular backflow testing is necessary for:
Ensuring safe drinking water – A faulty backflow preventer can allow contaminants like fertilizers, chemicals, and bacteria to enter the clean water supply.
Meeting legal requirements – Many municipalities mandate annual backflow testing for commercial and residential properties.
Preventing costly damage – A malfunctioning preventer can lead to expensive repairs and water contamination issues.

Tools Needed for Backflow Testing
To perform a backflow test, professionals use specialized equipment, including:
Backflow test kit – Includes pressure gauges and hoses for measuring differential pressure.
Pressure gauges – Used to check pressure levels in the preventer.
Screwdrivers and wrenches – Required for adjusting valves and connections.
Hose connections – Helps attach the test kit to the preventer’s test cocks.
How to Test a Backflow Preventer (Step-by-Step Guide)
Step 1: Shut Off the Water Supply
Before testing, turn off the water supply to prevent unexpected pressure changes or leaks.
Step 2: Connect the Test Kit
Locate the test cocks on the backflow preventer.
Attach the backflow test kit hoses to the test cocks.
Step 3: Check for Leaks and Pressure Readings
Open and close the valves in sequence while observing pressure changes on the gauge.
Verify that the differential pressure meets the manufacturer’s specifications (usually above 1.0 PSI).
Step 4: Verify Valve Functionality
Test each check valve to ensure it closes properly.
Measure pressure drop across valves to confirm they are functioning correctly.

Step 5: Record the Results and Report Findings
Document the pressure readings and overall performance of the backflow preventer.
If the preventer fails, schedule repairs and conduct a retest after fixing any issues.
How Often Should You Test a Backflow Preventer?
Most local water authorities require annual backflow testing to maintain compliance and ensure system safety. However, testing frequency may increase for:
High-risk properties, such as hospitals or industrial facilities.
Older systems prone to wear and tear.
Areas with frequent water pressure fluctuations.
Common Issues Found During Backflow Testing
During backflow testing, professionals may identify several problems, including:
Leaking check valves – Can cause water to backflow into the clean water supply.
Low differential pressure – Indicates a failing preventer that needs repair.
Debris blocking valves – Prevents proper sealing and function.
Worn-out seals and springs – Reduce the effectiveness of the device.
Conclusion Of Backflow Testing
Regular backflow testing is essential for protecting water quality and ensuring compliance with local regulations. A properly functioning backflow preventer prevents contamination, protects public health, and helps avoid costly penalties.

FAQs Of Backflow Testing
1. Can I test my backflow preventer myself?
While you can learn the process, most states require a certified professional to conduct official backflow testing for legal compliance.
2. How much does professional backflow testing cost?
The cost of backflow testing typically ranges from $50 to $200, depending on location, property type, and system complexity.
3. What happens if my backflow preventer fails the test?
If a backflow preventer fails, it must be repaired or replaced before it can be recertified for safe use. Some areas require retesting after repairs to ensure compliance.
0 notes
Text
How to Install Drip Irrigation: A Step-by-Step Guide for Efficient Watering
Learn how to install drip irrigation with this easy step-by-step guide. Discover the benefits of irrigation installation and tips for an efficient watering system.

Drip irrigation is an efficient and cost-effective way to water plants, ensuring minimal water wastage and promoting healthier plant growth.
Whether you are a home gardener or a professional landscaper, proper irrigation installation is essential for maintaining a reliable and effective watering system.
This guide provides a step-by-step approach to installing a drip irrigation system successfully.
Step 1: Plan Your Drip Irrigation System
Before starting the installation, consider the following:
Identify the areas that need watering and measure the space.
Determine plant placement, water flow, and soil type.
Choose between different types of drip irrigation components, such as emitters, micro-sprayers, and soaker hoses.
Step 2: Gather the Necessary Materials
To ensure a smooth irrigation installation, collect the following items:
Drip tubing (½ inch or ¼ inch)
Drip emitters (1 GPH, 2 GPH, or adjustable)
Filter and pressure regulator
Connectors, fittings, and stakes
Hole punch tool
Timer (optional for automation)
Step 3: Connect to the Water Source
Attach the system to an outdoor faucet, a garden hose, or a dedicated irrigation valve.
Install a filter to prevent clogging from debris.
Use a pressure regulator to maintain consistent water flow and prevent damage to the system.
Step 4: Lay Out the Drip Tubing
Unroll the drip tubing along the designated planting areas.
Secure the tubing with stakes to keep it in place and prevent movement.
Cut the tubing to fit your garden layout, ensuring all plants receive adequate water.
Step 5: Install Drip Emitters
Use a hole punch tool to create small holes in the drip tubing.
Insert drip emitters near the base of each plant to provide targeted watering.
Select the appropriate flow rate (1, 2, or 4 gallons per hour) based on plant water requirements.
Step 6: Secure and Test the System
Cap off the tubing ends to prevent leaks.
Turn on the water supply and check for any leaks or uneven watering.
Adjust the emitter placement if necessary to ensure efficient irrigation.

Step 7: Set Up a Timer for Automated Watering (Optional)
Installing a drip irrigation timer automates watering and ensures plants receive consistent hydration.
Set the timer based on your plant’s watering needs, typically early morning or late evening for optimal absorption.
Conclusion Of How to Install Drip Irrigation
Drip irrigation is a practical and environmentally friendly irrigation installation method that provides plants with a steady water supply while minimizing water waste.
By following these steps, you can create an efficient system tailored to your garden’s requirements. Regular maintenance and occasional adjustments will ensure the drip irrigation system functions effectively for years.
FAQs Of How to Install Drip Irrigation
1. How deep should drip irrigation tubing be buried?
Drip tubing can be buried 2-6 inches deep or left on the surface. Shallow burial helps protect the tubing from damage while maintaining accessibility for adjustments.
2. How often should I run my drip irrigation system?
The frequency of operation depends on factors such as soil type and plant needs. Typically, running the system two to three times per week for 30-60 minutes is sufficient.
3. Can I install a drip irrigation system myself?
Yes, drip irrigation installation is a straightforward process that requires minimal tools and setup time. It is an ideal choice for homeowners and gardeners looking to improve their watering efficiency.
0 notes
Text
How to Repair an Irrigation Pipe: A Complete Irrigation Repair Guide
Learn how to repair an irrigation pipe with this step-by-step irrigation repair guide. Fix leaks, cracks, or broken pipes efficiently to keep your system running smoothly and prevent water waste.

A well-functioning irrigation system is essential for maintaining a healthy lawn, garden, or agricultural field.
However, over time, irrigation pipes can develop issues such as leaks, cracks, or blockages due to factors like wear and tear, shifting soil, root intrusion, and extreme weather conditions.
Damaged irrigation pipes can lead to uneven water distribution, higher water bills, and potential landscape damage.
Understanding how to properly repair an irrigation pipe is crucial for maintaining system efficiency and preventing further complications.
This comprehensive irrigation repair guide will walk you through identifying damage, gathering necessary tools, and completing a step-by-step repair to restore your system’s functionality.
Common Signs of a Damaged Irrigation Pipe
Recognizing the early symptoms of irrigation pipe damage can prevent costly repairs and water waste. Look for these key warning signs:
Low or Uneven Water Pressure: If certain zones of your irrigation system are receiving less water than usual, there may be a leak or blockage.
Water Pooling or Wet Spots: Unexplained soggy areas in your yard may indicate an underground pipe leak.
Hissing or Bubbling Sounds: If you hear hissing or bubbling noises from the ground when the system is running, air may be escaping from a cracked pipe.
Increased Water Bills: A sudden rise in water consumption without changes in usage patterns could indicate a hidden leak.
Detecting these issues early can help prevent excessive water waste and ensure your irrigation system operates efficiently.
Tools & Materials Needed for Irrigation Repair
To successfully repair an irrigation pipe, you will need the following tools and materials:
Pipe Cutter or Hacksaw – Essential for cutting out damaged pipe sections.
Replacement Pipe – Choose PVC, polyethylene, or drip tubing, depending on your existing system.
Pipe Fittings and Couplings – Used to connect the new pipe section securely.
PVC Glue or Compression Clamps – Ensures a watertight seal.
Teflon Tape – Used to seal threaded pipe connections and prevent leaks.
Shovel and Gloves – Necessary for safely excavating the damaged pipe area.
Having the right tools on hand will make the irrigation repair process smoother and more effective.

Also Read Our Another Blog On - How To Repair Irrigation Line
Step-by-Step Guide: How to Repair an Irrigation Pipe
1. Locate the Leak or Damage
Turn on your irrigation system and observe the affected area. Look for water pooling, weak water flow, or unusual sounds.
If the leak is not visible, use a pressure test to detect hidden cracks.
2. Turn Off the Water Supply
Before starting repairs, shut off the main water supply to prevent further damage and water loss.
If your system has a valve for individual zones, turn off only the affected section.
3. Dig to Expose the Broken Pipe
Carefully excavate around the damaged irrigation pipe, ensuring you do not cause additional harm to the surrounding system.
Dig at least six inches beyond the leak on either side to allow space for repairs.

4. Cut Out the Damaged Section
Use a pipe cutter or hacksaw to remove the broken section.
Ensure the cuts are straight and clean to allow a secure connection for the replacement pipe.
5. Install the New Pipe Section
Measure and cut a replacement pipe of the same material and size as the existing one.
Use couplings and fittings to attach the new section.
Apply PVC glue for PVC pipes or use compression clamps for polyethylene pipes to create a watertight seal.
6. Test the System Before Covering
Slowly turn the water supply back on and observe the repaired area.
Check for leaks, ensure proper water pressure, and confirm that all zones are receiving even water distribution.
7. Refill the Hole and Restore Landscaping
If the repair is successful, carefully backfill the hole with soil, ensuring the pipe is properly covered and secured.
Restore any displaced grass or landscaping materials.
Following these steps ensures a long-lasting, leak-free irrigation repair, keeping your system in optimal condition.

Preventative Maintenance for Irrigation Systems
Routine maintenance can significantly reduce the need for irrigation pipe repairs. Consider these best practices:
Regular System Inspections: Periodically check for leaks, cracks, and water pressure inconsistencies.
Clean Filters and Flush the System: Prevent clogs by keeping filters clean and periodically flushing the system.
Winterize the System: In colder climates, drain and insulate pipes to prevent freezing and cracking.
Monitor Tree Roots: Tree and shrub roots can grow into pipes, causing blockages and leaks over time.
Implementing these maintenance strategies can prolong the lifespan of your irrigation system and prevent costly repairs.
When to Call a Professional for Irrigation Repair
While minor repairs can often be done independently, some situations require professional expertise:
Multiple Leaks or System-Wide Issues: If multiple areas of your system are experiencing leaks, it may indicate a more significant problem.
Electrical or Control System Malfunctions: Automated irrigation systems with wiring or valve issues should be assessed by an irrigation specialist.
Extensive Pipe Damage or System Overhaul: If the entire system is outdated or heavily damaged, a professional may be needed for a full system replacement.
Consulting a professional for complex repairs ensures the longevity and efficiency of your irrigation system.

Conclusion Of Irrigation Repair
Repairing an irrigation pipe is essential for maintaining an efficient watering system and preventing unnecessary water loss.
By following this step-by-step irrigation repair guide, you can effectively diagnose, repair, and restore your irrigation system with confidence.
Regular maintenance and inspections can help reduce future repairs and extend the system’s lifespan. For complex irrigation repairs or large-scale issues, consulting a professional may be the best option.
Ensuring a well-maintained irrigation system not only conserves water but also promotes healthier landscapes and gardens.
FAQs Of Irrigation Repair
How can I tell if my underground irrigation pipe is leaking?
Look for unexplained wet patches, sinking soil, or uneven watering in your landscape. Conducting a pressure test can also help identify leaks by detecting drops in water pressure.
How long does it take to repair an irrigation pipe?
Most minor irrigation repairs take between 30 minutes to two hours, depending on the extent of the damage and ease of access. Complex repairs may require additional time or professional assistance.
Can I use different types of pipes in my irrigation system?
It is recommended to use the same material as the existing system. Mixing PVC, polyethylene, or drip tubing can cause compatibility issues and may lead to leaks or reduced system efficiency.

0 notes
Text
How to Winterize Your Irrigation System: A Complete Irrigation Winterization Guide
Learn how to winterize your irrigation system properly to prevent freezing and damage. Follow this step-by-step irrigation winterization guide to protect your sprinklers during the winter months.

Winterizing your irrigation system is essential to prevent damage from freezing temperatures. Proper irrigation winterization protects pipes, sprinklers, and valves from costly repairs, ensuring a smooth startup in spring.
When to Winterize Your Irrigation System
The best time to start winterization is before the first frost.
Factors affecting winterization timing include climate, location, and seasonal temperature patterns.
Step-by-Step Guide on How to Winterize Your Irrigation System
Step 1: Shut Off the Main Water Supply
Locate and close the irrigation system’s main valve to stop water flow.
Step 2: Drain the Water from the System
Manual Drain Method: Open designated drain valves to release water.
Automatic Drain Method: Utilize self-draining valves if your system has them.
Blowout Method: Use compressed air to force out remaining water (recommended for complete drainage).
Step 3: Turn Off and Protect the Irrigation Controller
Set your irrigation controller to "winter" or "off" mode.
Remove batteries if applicable to prevent corrosion.
Step 4: Insulate Exposed Pipes and Backflow Preventers
Wrap exposed pipes, valves, and backflow preventers with foam insulation or specialized covers to protect against freezing temperatures.
Also Check-Out Our Another Blog On, How to Winterize Irrigation?

Step 5: Final Inspection and System Check
Ensure all water is completely removed to prevent ice buildup.
Check for leaks, cracks, or damage before winter fully sets in.
Common Mistakes to Avoid During Irrigation Winterization
Not shutting off the water properly: Leaving the valve open allows water to remain in the system.
Leaving water in the pipes: Residual water can freeze, expand, and cause cracks or bursts.
Forgetting to protect above-ground components: Exposed parts are the most vulnerable to freezing damage.
Spring Startup Tips After Winterization
Inspect the system for leaks or damage before turning it back on.
Slowly reopen the main valve to prevent pressure surges.
Test each irrigation zone to ensure proper water flow and coverage.
Conclusion Of How To Winterize Your Irrigation System?
irrigation winterization is an essential practice to ensure the longevity and efficiency of your irrigation system during the cold months.
By following this comprehensive guide, you can protect your system from the damaging effects of freezing temperatures and avoid costly repairs.
Proper winterization not only safeguards your equipment but also ensures that your landscape remains healthy and well-maintained year after year.

FAQs Of How To Winterize Your Irrigation System?
Q1: How do I know if my irrigation system needs winterization? A: If you live in an area with freezing temperatures, winterizing your system before the first frost is necessary to prevent damage.
Q2: Can I winterize my irrigation system without a blowout?A: Yes, but using the blowout method with compressed air is the most effective way to remove all water and prevent freezing.
Q3: How much does professional irrigation winterization cost?A: Costs vary by location, but professional winterization typically ranges from $50 to $150, depending on system size and complexity.
0 notes
Text
How Do I Winterize a Sprinkler System? Complete Guide for a Safe Irrigation Startup Next Season
Learn how to winterize a sprinkler system properly to prevent freeze damage. Follow this step-by-step guide to ensure a smooth irrigation startup in spring.

Winterizing your sprinkler system is an essential process to protect pipes, valves, and other irrigation components from freezing temperatures. If not properly winterized, residual water in the system can expand, leading to cracked pipes, damaged valves, and costly repairs.
A well-executed winterization process ensures that your irrigation startup in spring is smooth, free from leaks, and fully operational. This guide covers step-by-step instructions to help you safely prepare your sprinkler system for winter.
Methods for Winterizing a Sprinkler System
There are three primary methods to winterize a sprinkler system:
Manual Drain Method – Physically releasing water from the system.
Automatic Drain Method – Allowing self-draining systems to remove excess water.
Blowout Method – Using compressed air to force remaining water out of the pipes.
Step 1: Turn Off the Water Supply
The first and most critical step is shutting off the water supply to prevent any additional water from entering the system.
How to Turn Off the Water Supply
Locate the main shut-off valve for your irrigation system (usually found in the basement, crawlspace, or valve box).
Turn the valve completely off to stop water from flowing into the system.
Why This Step Is Essential
Prevents water from refilling the pipes during freezing conditions.
Ensures a safe irrigation startup when spring arrives.
Also Read Our Another Blog On, How To Turn On Sprinkler System?
Step 2: Drain the Sprinkler System
Removing all remaining water from the sprinkler system is essential to prevent pipe bursts due to frozen water expansion.
Three Methods for Draining a Sprinkler System
1. Manual Drain Method
Locate the drain valves at the lowest points of the system.
Open the valves to allow water to drain completely from the pipes.
Close the valves once all water has been released.
2. Automatic Drain Method
Some modern sprinkler systems have an automatic draining feature.
Shut off the main water supply, and the system will self-drain.
Manually check for any remaining water in pipes or sprinkler heads.
3. Blowout Method (Recommended for Complete Winterization)
Attach an air compressor to the system’s blowout port.
Use compressed air to force out remaining water from the pipes.
Cycle through each irrigation zone until all water is expelled.

Caution:
Always use the correct air pressure (50-80 PSI) to prevent pipe damage.
If unsure, consult a professional irrigation specialist.
Step 3: Protect the Backflow Preventer & Valves
The backflow preventer and exposed valves are vulnerable to freezing and should be insulated.
How to Protect These Components
Wrap the backflow preventer with insulation covers or foam pipe insulation.
Ensure all above-ground pipes are protected with insulating materials.
Avoid using plastic bags, as they trap moisture and may accelerate freezing.
Why This Step Matters
Prevents costly damage to valves and backflow preventers.
Ensures a smooth irrigation startup without leaks in spring.
Step 4: Remove and Store Sprinkler System Components
Certain removable parts of the sprinkler system should be stored indoors to prevent damage.
What to Remove & Store
Detach garden hoses and sprinkler heads (if applicable).
Store sprinkler nozzles, filters, and small parts in a dry location.
If using drip irrigation components, drain and store them to avoid cracking.
Proper storage of irrigation parts extends their lifespan and ensures they function properly during the next irrigation startup.

Step 5: Shut Down and Prepare the Sprinkler Controller
The sprinkler controller should be adjusted for winter conditions to prevent unnecessary activation.
How to Adjust the Controller
Switch the controller to "Winter Mode" or turn it completely off.
If your system does not have a winter mode, unplug it to avoid accidental activation.
Check battery backup systems to ensure proper functionality for next season.
Benefits of This Step
Prevents wasted energy and water use.
Ensures proper settings are maintained for an efficient irrigation startup in spring.
Common Mistakes to Avoid When Winterizing a Sprinkler System
Failing to Drain All Water from the Pipes
Even small amounts of residual water can freeze and cause pipe cracks.
Forgetting to Insulate Above-Ground Components
Exposed pipes, valves, and backflow preventers are highly susceptible to freeze damage.
Using Incorrect Air Pressure During the Blowout Method
Excessive air pressure can damage sprinkler heads and valves.
How Winterizing Helps with a Smooth Irrigation Startup
Why Proper Winterization is Essential
Prevents frozen pipes, reducing the need for expensive repairs.
Ensures sprinkler heads and valves function correctly in spring.
Helps maintain water pressure consistency for effective irrigation.
By taking proactive steps before winter, homeowners can avoid irrigation startup complications when reactivating their systems in warmer months.
Conclusion Of How Do I Winterize A Sprinkler System
Properly winterizing a sprinkler system is crucial to protect your irrigation system from freezing temperatures and potential damage. By following these step-by-step instructions, you can ensure a stress-free irrigation startup in the spring without encountering leaks, broken pipes, or pressure issues.

Key Takeaways
Turn off the main water supply before freezing temperatures arrive.
Drain all remaining water using manual, automatic, or blowout methods.
Protect exposed components like backflow preventers and valves.
Store removable parts and shut down the sprinkler controller.
For homeowners unfamiliar with the blowout method or uncertain about proper winterization techniques, consulting a professional irrigation specialist is highly recommended.
FAQs Of How Do I Winterize A Sprinkler System
Q.1. When should I winterize my sprinkler system?
Winterization should be performed before the first hard freeze, typically in late fall (October or November), depending on your location.
Q.2. What happens if I don’t winterize my irrigation system?
Failure to winterize can result in frozen pipes, cracked sprinkler heads, and damaged valves, leading to costly repairs before your next irrigation startup.
Q.3. Can I winterize my sprinkler system without an air compressor?
Yes, but using the manual or automatic drain method may not completely remove water, increasing the risk of freeze damage.
Q.4. How does winterization affect my irrigation startup in spring?
Proper winterization ensures that your sprinkler system remains intact, allowing for a smooth, hassle-free irrigation startup when temperatures rise.
0 notes
Text
Farming Fertilization Process: Optimizing Soil and Crop Performance
Fertilization is an essential practice in agriculture that enriches the soil with nutrients, ensuring healthy plant growth and optimal crop yields. By providing the necessary elements that plants need to thrive, the fertilization process forms the backbone of modern farming, supporting food security and sustainable practices.
What is Fertilization in Farming?
Fertilization in farming refers to the application of nutrients to the soil or crops to replenish lost fertility and support plant development. These nutrients are crucial for growth stages like root formation, flowering, and fruiting. Fertilizers can be organic, derived from natural materials, or inorganic, synthesized for targeted nutrient delivery.
Steps in the Farming Fertilization Process
Soil Analysis A comprehensive soil test is the first step in the fertilization process. It identifies nutrient deficiencies, soil pH, and texture, helping farmers determine the specific fertilizer requirements for their crops.
Selecting the Right Fertilizer Based on the soil test results, farmers choose from:
Organic Fertilizers: Compost, manure, and plant residues improve soil structure and provide long-term fertility.
Inorganic Fertilizers: Chemical products like urea, ammonium sulfate, or potassium nitrate deliver precise and immediate nutrient boosts.
Determining Nutrient Ratios Fertilizers are applied based on the NPK (Nitrogen, Phosphorus, Potassium) ratio, tailored to the specific needs of the crop and its growth stage.
Fertilizer Application Various techniques are used to apply fertilizers effectively:
Broadcasting: Spreading fertilizer evenly across the soil.
Drilling/Banding: Placing fertilizer close to the seed or root zone.
Foliar Feeding: Spraying liquid fertilizers directly onto leaves for rapid absorption.
Fertigation: Delivering nutrients through irrigation systems for precision targeting.
Timing the Application Fertilizer application is timed according to the crop’s growth phases to ensure maximum efficiency:
Pre-planting: Nutrients are added to prepare the soil.
Topdressing: Applied during growth to sustain development.
Side Dressing: Placed alongside growing plants during critical stages like flowering or fruiting.
Monitoring and Adjustment Post-application monitoring helps assess crop health and soil nutrient levels. Adjustments are made to address deficiencies or reduce excesses.
Essential Nutrients in Fertilization
Macronutrients
Nitrogen (N): Encourages leafy growth and chlorophyll production.
Phosphorus (P): Supports root development and energy storage.
Potassium (K): Strengthens plant cells, improves drought resistance, and enhances fruit quality.
Secondary Nutrients
Calcium, magnesium, and sulfur are needed for structural support and enzyme activation.
Micronutrients
Zinc, iron, copper, manganese, and boron, though required in small quantities, are crucial for enzyme function and metabolic processes.
Types of Fertilization in Farming
Chemical Fertilization Synthetic fertilizers offer precise nutrient control and quick results but require careful management to prevent overuse.
Organic Fertilization Natural fertilizers improve soil structure, increase microbial activity, and promote long-term fertility while being eco-friendly.
Integrated Fertilization A balanced approach combines organic and inorganic methods to enhance soil health while meeting crop nutrient demands.
Sustainable Fertilization Practices
Precision Agriculture Technology like GPS and sensors ensures fertilizers are applied only where needed, reducing waste and environmental impact.
Crop Rotation and Cover Crops Rotating crops and using cover plants like legumes naturally replenish soil nutrients, reducing the need for synthetic fertilizers.
Composting Farm waste is converted into organic matter that enriches soil fertility and reduces reliance on external inputs.
Reduced Fertilizer Use Applying only the required amount of fertilizer prevents nutrient runoff and protects water sources from pollution.
Challenges in Fertilization
Over-fertilization Excessive fertilizer use can lead to nutrient leaching, soil degradation, and water contamination.
Cost Barriers High prices of chemical fertilizers can limit access for small-scale farmers.
Environmental Impact Runoff from fields contributes to eutrophication in water bodies, harming aquatic ecosystems.
Climate Variability Changing weather patterns affect nutrient availability and uptake, complicating fertilization strategies.
Conclusion
The fertilization process is essential for enhancing crop production and maintaining soil health. By tailoring fertilization methods to specific soil and crop needs, farmers can achieve sustainable agricultural success. Modern innovations, such as precision farming and integrated nutrient management, are paving the way for more efficient and environmentally friendly practices.
With a balanced approach, fertilization ensures robust harvests today while safeguarding the land for future generations.
0 notes
Text
Essential Guide to Effective Irrigation Repair: Maintaining Your System for Optimal Performance
An efficiently functioning irrigation system is the backbone of a healthy and thriving landscape. It ensures your plants, lawns, and gardens receive consistent and adequate water, essential for their growth and vitality. However, like any mechanical system, irrigation systems are susceptible to issues that can disrupt their performance. This is where irrigation repair becomes crucial. Regular maintenance and timely repairs not only preserve the integrity of your irrigation system but also prevent water wastage, reduce utility bills, and ensure the longevity of your investment.
In this guide, we’ll explore the significance of irrigation repair, common issues you might face, effective repair techniques, and tips for maintaining your system in top condition.
The Importance of Irrigation Repair
An irrigation system is designed to distribute water evenly across your landscape, providing essential hydration to your plants and lawn. However, various factors can lead to malfunctions and inefficiencies in the system. Here's why addressing these issues through irrigation repair is vital:
Conserves Water:
Efficient irrigation systems minimize water waste by ensuring that every drop is used effectively. Leaks, broken sprinkler heads, and clogged nozzles can lead to significant water loss. Prompt repairs help conserve water, which is crucial for environmental sustainability and reduces your overall water consumption.
Enhances Plant Health:
Proper watering is key to plant health. An irrigation system that’s not functioning correctly can result in uneven watering, leading to overwatered or dry spots. This imbalance can stress plants and hinder their growth. Regular maintenance ensures that your plants receive consistent and adequate hydration.
Reduces Costs:
Repairing minor issues before they escalate can save you money on more extensive repairs and replacements. Additionally, fixing leaks and improving system efficiency can lower your water bills, making your irrigation system more cost-effective in the long run.
Extends System Lifespan:
Regular repairs and maintenance extend the life of your irrigation system. Addressing issues early on prevents them from causing more significant damage and reduces the need for a complete system overhaul.
Common Irrigation Issues and How to Repair Them
Understanding common irrigation problems and knowing how to address them is essential for maintaining an efficient system. Here’s a look at some frequent issues and their solutions:
Sprinkler Head Issues
Problem: Sprinkler heads can become damaged or misaligned, leading to uneven water distribution and potential water waste.
Solution: Inspect sprinkler heads for cracks, clogs, or misalignment. To repair a cracked head, replace it with a new one. For misalignment, adjust the head so that it points in the correct direction. Clean any debris or dirt from the nozzle to ensure proper water flow.
Leaking Pipes
Problem: Leaks in pipes can result from damage, corrosion, or joint failure, leading to water loss and system inefficiency.
Solution: Locate the leak by looking for wet spots or reduced water pressure. Once identified, turn off the water supply and excavate the area around the pipe. Cut out the damaged section and replace it with a new pipe segment, using appropriate connectors and ensuring all joints are secure.
Clogged Filters and Nozzles
Problem: Filters and nozzles can become clogged with debris, sediment, or mineral deposits, affecting water flow and distribution.
Solution: Remove the nozzle or filter and clean it thoroughly with water or a small brush. For mineral deposits, soak the parts in vinegar to dissolve the buildup. Reassemble the system and test it to ensure proper function.
Faulty Valves
Problem: Valves regulate water flow to different zones in your irrigation system. Faulty valves can cause inconsistent watering or complete system failure.
Solution: Check for visible signs of wear or damage on the valve. Replace any damaged diaphragms or solenoids. If the valve is beyond repair, replace it with a new one, ensuring proper installation and adjustment.
Low Water Pressure
Problem: Low water pressure can reduce the effectiveness of your irrigation system, leading to inadequate coverage and uneven watering.
Solution: Check for leaks or blockages in the system that may be causing the drop in pressure. Ensure that the main water supply valve is fully open. If the issue persists, consider installing a pressure booster pump to enhance water flow.
Controller Issues
Problem: The irrigation controller manages the timing and duration of watering cycles. Malfunctions or programming errors can lead to incorrect watering schedules.
Solution: Check the controller for programming errors or faulty settings. Reset the controller to factory settings and reprogram it according to your irrigation needs. If the controller is damaged, consider replacing it with a new, programmable model.
When to DIY and When to Call a Professional
Deciding whether to handle irrigation repairs yourself or call a professional depends on the complexity of the issue and your level of expertise. Here’s a guide to help you make the decision:
DIY Irrigation Repair
Pros: Many common repairs, such as replacing sprinkler heads or cleaning nozzles, are straightforward and can be done with basic tools. DIY repairs can save you money and provide a sense of accomplishment.
Cons: DIY repairs can be time-consuming, especially if you’re unfamiliar with the system. Improper repairs can lead to further damage or inefficiencies.
Professional Irrigation Repair
Pros: Professionals have the expertise and experience to handle more complex issues, such as major leaks, electrical problems, or system upgrades. They can diagnose problems accurately and perform repairs efficiently, ensuring optimal system performance.
Cons: Hiring a professional can be more expensive than DIY repairs. However, the cost is often justified by the quality of the work and the long-term benefits of preventing further issues.
For major repairs, complex system issues, or if you’re unsure about handling a specific problem, it’s best to consult a professional. They can provide expert advice, perform thorough repairs, and help you maintain your irrigation system effectively.
Tips for Effective Irrigation Maintenance
Preventive maintenance is key to keeping your irrigation system in good working order and minimizing the need for repairs. Here are some tips to help you maintain your system:
Regular Inspections:
Conduct regular inspections of your irrigation system to check for leaks, damaged components, and other issues. Early detection can prevent minor problems from escalating into major repairs.
Seasonal Adjustments:
Adjust your irrigation system’s settings according to seasonal changes. During hot, dry periods, you may need to increase watering frequency, while in cooler months, you can reduce it.
Clean Nozzles and Filters:
Regularly clean nozzles and filters to prevent clogs and ensure efficient water flow. This simple maintenance task can improve system performance and reduce the risk of issues.
Winterization:
In regions with freezing temperatures, winterize your irrigation system to prevent freeze damage. Drain the system, blow out the lines, and insulate exposed components to protect them from cold weather.
Professional Check-Ups:
Schedule an annual check-up with a professional irrigation technician. They can perform a comprehensive inspection, identify potential issues, and make necessary repairs or adjustments.
Conclusion
Effective irrigation repair is essential for maintaining a healthy and beautiful landscape. By understanding common irrigation problems, knowing how to address them, and performing regular maintenance, you can keep your system running smoothly and efficiently. Whether you choose to tackle repairs yourself or enlist the help of a professional, timely action and preventive care will ensure that your irrigation system continues to provide optimal performance for years to come.
0 notes
Text

Maintaining a lush, healthy lawn or a thriving garden requires a well-functioning irrigation system. Over time, however, these systems can develop issues that require timely repair to ensure optimal performance. This guide will help you understand common irrigation problems, how to identify them, and the steps to take for effective irrigation repair.
0 notes
Text

0 notes
Text

Preparing your irrigation system for winter is a critical task that can save you time and money in the long run. This step-by-step guide to irrigation winterization covers everything you need to know to protect your system from freezing temperatures. From shutting off the water supply and draining the pipes to blowing out the lines and insulating exposed components, each step is explained in detail to ensure you can complete the process with confidence. Whether you're a DIY enthusiast or prefer hiring a professional, this guide offers valuable insights and practical tips to make the winterization process smooth and effective. Don't wait until it's too late – follow these steps to keep your irrigation system safe and ready for the spring thaw.
0 notes