
Statistics
We looked inside some of the posts by bakingneoriche and here's what we found interesting.
Average Info
Notes Per Post
19
Likes Per Post
10
Reblog Per Post
9
Reply Per Post
0
Time Between Posts
5 days
Number of Posts By Type
Text
9
Last Seen Tumblr Blogs


Fun Fact
Tumblr was created by web developers David Karp and Marco Arment.
Text
heres some charcuterie in case you get hungry

In episode two of Neo Yokio Kaz takes on a job doing security for the black and white ball, and during his surveylance he's offered some charcuterie, in case he gets hungry, by the museums proprietor. Unfortuneanly it's never eaten, since he throws a pair on binoculars on it. But the instant before they hit, i managed to catch a still frame of the plate. Here's my recreation.
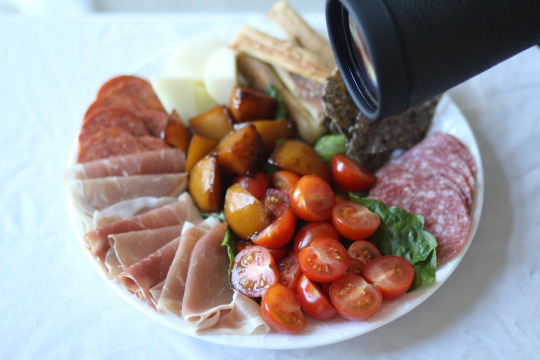
This stupid plate of meat caused my a lot of agony. None of it makes sense together and there were multiple components that were unrecognizable. For one, that's a lot of tomatoes, and for another, what the hell are the brown and gray things? I've also never seen salami that neon, but at least I can tell its salami. I'm also pretty sure the sticks next to the gray thing are pretzel rods, but why would you be putting those on a charcuterie platter for the elite. anyways, what I've used for everything is in clock order:
at 10 - sliced chorizo
at 8 - prosciutto
at 5 - tomatoes
at 4 - salami
just left of 12 - pear
just right of 12 - balsamic parmesan breadsticks
at 2 - chia seed crackers
at clock center - braised potatoes
all of this is just a guess at what the animator was going for, and more likely the animator was just trying to make things on a plate that resemble food, so no paths are bound.
3 notes
·
View notes
Text
korean braized potatoes/ grain free / dairy free


note: the pan does not need to be non stick, the potatoes will release on their own once they have enough of a crust. To check, prod at them with a butter knife or spatula and see if you can pry them off.


the sugar can actually be sprinkled anywhere, doesn't have to be the center. The goal is just for the sugar to caramelize. It is easy to burn, to really watch it. As soon as the sugar starts to turn amber pour the liquid in. It doesn't have to be fully melted or have color all around.


Braize the potatoes until they are just barely done. You should be able to stick a butter knife in them, but not yet a fork when you pull them from the heat. Store them in the sauce and eat them cold.


2 notes
·
View notes
Text
Balsamic parmesan 'pretzel sticks'

These aren't very good, but they're better than any other attempt I've had.


Yeah thats it. Dont make these
2 notes
·
View notes
Text
Grain free / dairy free chia seed crackers

I made this recipe to be used as the 'gray thing' shown in the charcuterie scene of Neo Yokio, but they are just generally really good and easy to make.
This recipe takes advantage of how chia seeds gel to form a dough. I have included sesame seeds in this recipe but they are mostly for taste and can be left out, however I don't recommend this as chia seeds give it a bitter flavor without the sesame.

It starts with combining all the dry ingredients. This recipe calls for ground chia seeds and ground white sesame seeds. Both of these I make myself. Just pulse your chia seeds and sesame seeds in a coffee grinder. Do be careful when you do the sesame seeds to only pulse a few times or else they will turn into paste.

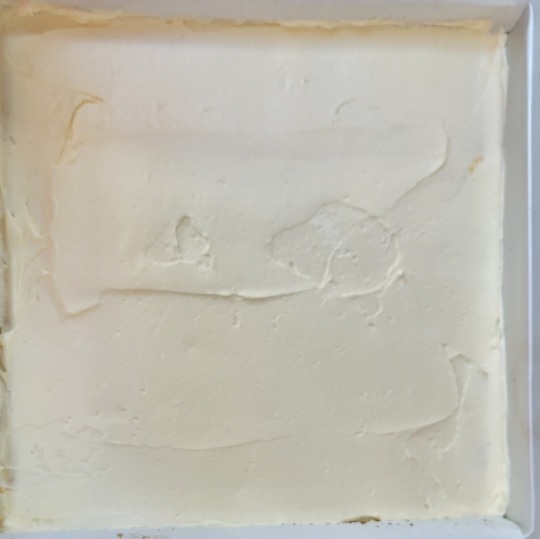
After your dry ingredients have been thoroughly mixed add in the water and stir well to combine.

Let this sit for a few minutes to gel. Since I use chia seed powder this happens much faster than normal. It should look like the picture above.

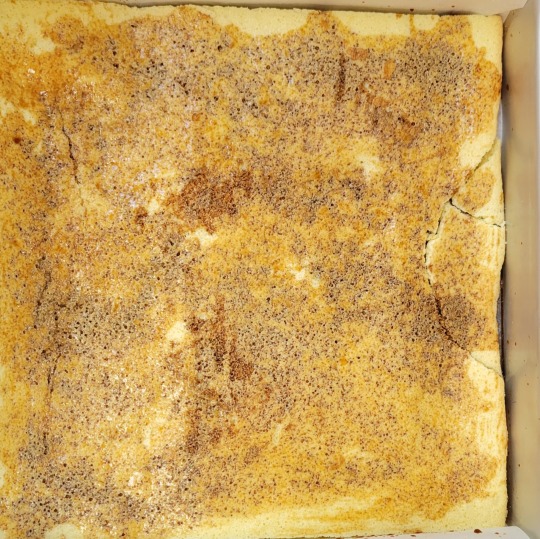
Then spread this mixture between two silicone baking mats until it is about the thickness of a sesame seed. This is as thin as you will be able to get it without it tearing or creating holes.

Bake the sheet of dough between the two silpats for 10min at 200F, then take it out and carefully peel off the top silicone baking mat. If it sticks at all, just give it a few more minutes in the oven.

Bake this 5 min longer without the top silpat or until you can peel off the whole cracker sheet without it sticking to the mat. Then cut the sheet into cracker sized pieces. Continue to bake until you can snap a cracker between your fingers. If it bends at all it isn't ready yet. Once they are crunchy, take then out to cool completely. Store in an airtight container to best retain their crunch.
Feel free to use these on a charcuterie platter, especially if its Neo Yokio themed.

2 notes
·
View notes
Text
Kaz I gotta go, snacks are ready // Onigiri

While on a phone call in episode 2 Kaz is cutoff by Mr. Saint Tessoro due to 'snacks being ready', which immediately cuts to a clear frame of what is obviously onigiri. Wonderfully for me, I already know how to make these. The fillings are not shown or said so I have to guess. These rice balls can be filled with anything anything, but with this being a townhouse in the sea beneath 14th St., they're probably posh, but not indubitably elegant. I'm thinking roe, not caviar. But I think fish roe with nothing else is gonna be pretty boring to make, so I've chosen three fillings (for the three onigiri shown in the shot) that I really like. These were Sardine mayo, peanut sesame, and marinated eggs with bonito.

The base of any rice ball is the rice. For this use a short grain rice. I rinsed it once in the pot giving it a good massage, then drained it and added water according to my rice cooker. Once it was done I left it in the cooker until I was done making my fillings. you need the rice to be warm to form these, so I only take it out and season it when I'm about to start making them. When it was time, I spread it on a baking sheet. Then to half of it I added rice seasoning according the the recipe above. I only did this on half because I'll only be using the seasoned rice for the peanut ones. For the other two fillings I want the rice to be plain. The rice does not have to be seasoned to make rice balls, it just has to be warm.

Here's my recipe for the sardine mayo filling


To take the spine out of canned sardines I split the fish in half on the bottom by gently pressing on it. It breaks in half very easily. Then I lift the spine out. I don't worry about any other bones. none of them are big enough to matter. You could also leave the spine in if its soft enough.
The mayo is heavy on the egg yolk and light on the oil. A normal mayo would have 1-2 cups of oil per egg yolk. I wanted my sardines to have a richer feel and taste, so I used barely any oil. Since it's so little oil, it isn't necessary to use a typical mayo method, you can just combine all ingredients and whisk the shit out of it until its homogenized.


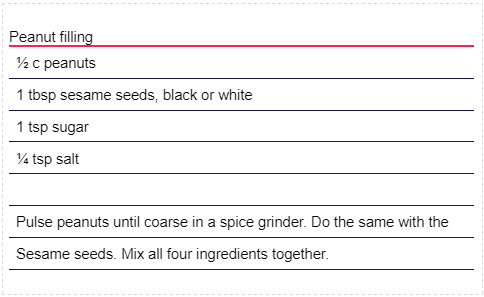
The peanut filling doesn't have much to it. The only tricky part is not over-mixing the peanuts or sesame. If you do, it turns into peanut butter and sesame paste. Stick to 2 or 3 seconds of blending. It also really helps if you shake your spice grinder while mixing to get a much more even blend.


This recipe is really just a ratio. The marinade is half soy sauce and half black tea. You can make your eggs however you want. As for the size of egg, you can do any, but if you use large eggs then your rice ball might be massive. Small chicken eggs are the ideal size, but if you can't get them then quail eggs are a good enough substitute. If you can't find raw quail eggs, you can use canned, they just won't be soft boiled. The benefit to them though is that you don't have to peel them.

Since my marinate it so plain I also roll the finished eggs in bonito flakes,


I think anyone else could do a better job explaining how to form onigiri than me, so I highly recommend looking for a different video or blog post. but here is my rudimentary explanation.
get hands wet with salt water
make rice with hollow

put the fillings . i used plain rice for fish and egg. seasoned for peanut


put more rice over filling
do claw hands and squish until shape is shape
put some nori
done

Here's me eating the egg one.
2 notes
·
View notes
Text
Homemade Ladyfingers

Ladyfingers are never entirely necessary to make yourself. Store bought really ain't that bad, but if you buy your flour in bulk and love whipping eggs as much as me then you might choose to make your own.
Everything I can make from scratch I do make from scratch, especially when it presents the opportunity to a. create more work for myself and b. make it as intolerance friendly as I can.
Ladyfingers work with almost any kind of flour since the eggs do all the heavy lifting. Below I use all purpose in the first recipe, and a mixture of potato flours and even more egg white in the second variation.


If you've ever made a chiffon cake these are remarkably similar.
I started by separating 6 eggs, putting the whites in one bowl and the yolks in another. Be careful to not get any yolk in the egg white, but if you do just add a little cream of tartar and they'll still whip enough.
I measured out my sugar and pour roughly half of it in the egg white and the rest in the yolk. Both of these need some serious air, so I set my egg whites in my stand mixer on medium and beat my yolks with a handheld electric mixer.
No Machines: I have before done both of these by hand and you totally can if you want your forearms to be ripped. Start with the whites then move to the yolks.
Only a stand mixer: beat the egg whites with it and do the yolks by hand.
Only a handheld mixer: start with the whites, and when they're at stiff peaks set them aside and do the yolks.
The egg whites need to be at stiff peaks and the yolks need to be very pale and ribbon down from the beaters. The images below were from my first iteration of this recipe and I did not beat the yolks long enough. They turned out totally fine, but if you want yours to be better, get your yolks to be lighter.
Afterwards, pour your yolks into your whites and sift the flour on top. Then, fold all three together. In my images, I first fold my yolks into my whites, then fold the flour in, but after doing these a few more times I realized that you can just do them both at the same time.


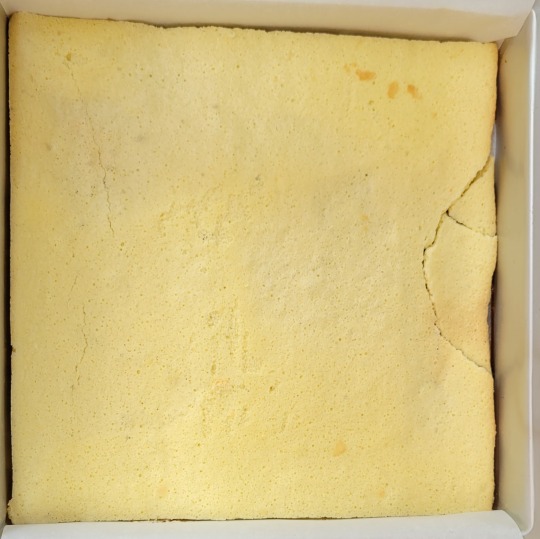
Afterwards you can either pipe them to make classic ladyfingers or if you're making something like tiramisu then you can just spread the batter onto parchment paper or a silicone baking mat.

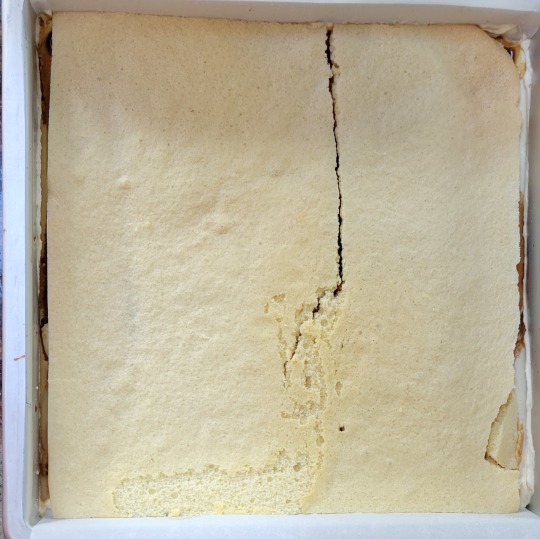
Bake these immediately. When I piped them I baked them at 350F for 20-25 ish min. If after the time allotted they are not hard to the touch, cool them in the oven. To do this turn the oven off and prop the oven door open with a wooden spoon or towel so it stays ajar. I baked the spread batter at 250F until it was hard to the touch all over. For me this took an hour. Don't worry about the time, at 250 it'll be hard to burn them.


Here are the spread ladyfingers after they've been cooled and cut to fit the pan that I was going to be using for the tiramisu. This recipe makes exactly enough for an 8x8 tiramisu.
2 notes
·
View notes
Text
Homemade Mascarpone // half the cost, half the ingredients

At my local supermarket Mascarpone cheese, used for tiramisu and other recipes, costs $7-8 per 8oz. and typically has a few preservatives that may alter the taste, so I don't ever use it, especially when making it at home is ridiculously easy.
It takes 10.min of active time, and 14 hours of inactive time (2 hours + overnight in the fridge).
This recipe can be modified to not include any special materials, however an instant read thermometer is absolutely required.
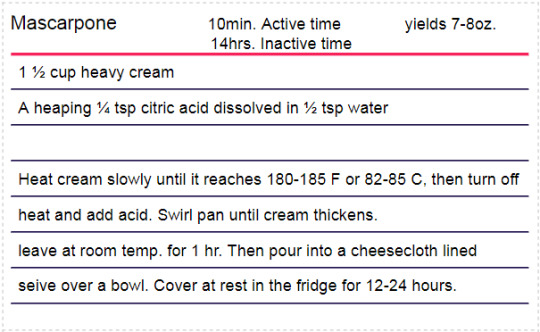
This was my setup. I have a thermometer that beeps when it hits the temp its set at so I set the temp to 85 C and turned my burner on the lowest setting. Then I walked away from it. With how low I set it, it took about an hour. If you are impatient, I have also done this recipe using an instant read thermometer with the stove on high by constantly stirring and very frequently checking the temperature, then removing from heat when it reaches 82 C or 180F instead of the higher end of allowed temperatures just in case it raises a few more degrees due to the heat of the pan.

Then I poured in my acid and swirled the pan hard just until the cream got thick and coagulated. Then I set my pan aside to rest at room temp. for an hour.
I always use citric acid because it's acidity is always consistent, but traditionally it's made with lemon juice. You could substitute the citric acid with 1-2tsp lemon juice, but you may need to add more if your cream doesn't coagulate.

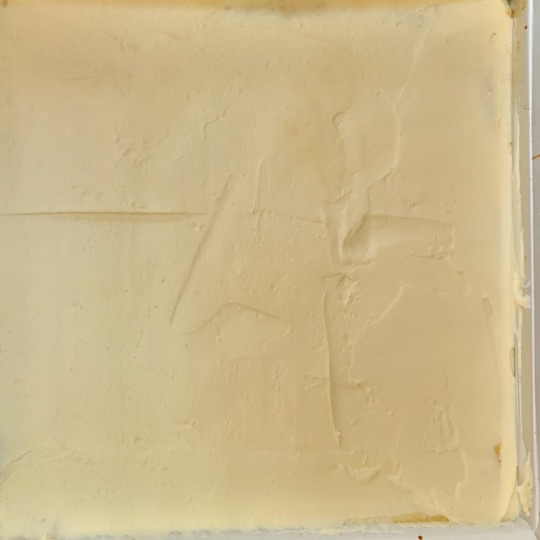
After the hour, I poured my mascarpone into a sieve lined with a fine towel. Cheesecloth works just as well. I put the sieve into a bowl to catch any whey that drains off of it, then covered with plastic wrap and put it in the fridge.

After 12-24 hours it'll be ready. The longer it's in the fridge the firmer it will get, however if you want yours to be really firm add a little bit more acid than normal.
This recipe makes exactly enough mascarpone for my tiramisu recipe.
2 notes
·
View notes
Text
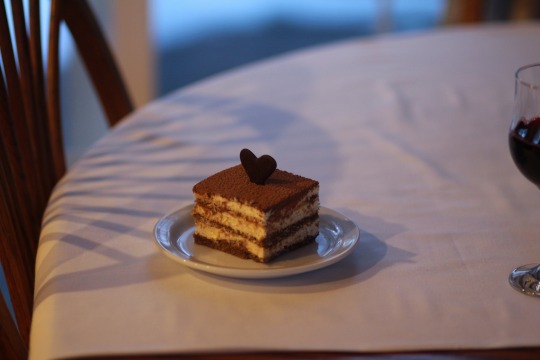
Now Eat Your Tiramisu
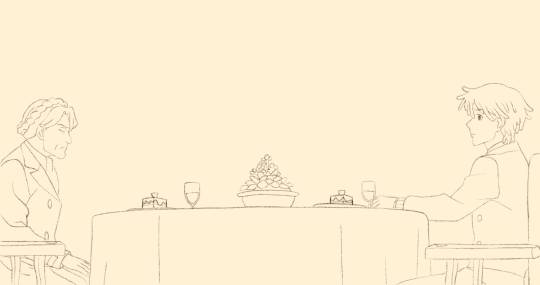
In episode one of Neo Yokio Kaz has a meeting with Aunt Agatha at what will be a recurring Italian restaurant and the first thing we see them eat there is tiramisu.
Luckily for me, tiramisu is a rather easy dessert. Unluckily for me, this means I need to find a way to make it take way longer than it needs to.
Its a dessert comprised of ladyfingers soaked in espresso layered with a mascarpone cream. Typically the mascarpone and ladyfingers are bought, so in this recipe they're homemade.

I started with the mascarpone the day before I planned on assembling the tiramisu since it need at least 12 hours to drain. I could have done this up to 2 weeks before I needed it.
Once I had my mascarpone draining, I made my ladyfingers. These also store well as long as they are out of humidity so they could have also been made well in advance
The next morning, on the day of tiramisu assembly I made my coffee mixture. I think this is traditionally just espresso and coffee liqueur, but I don't like how strong this is, so instead I add 2 shots of espresso into an 6 oz. cup of coffee with one or two spoonful of sugar. If I can't source the espresso, I have also added a packet of instant to a cup of coffee and used that. Then I put this into a bowl to cool down while I made my mascarpone cream.
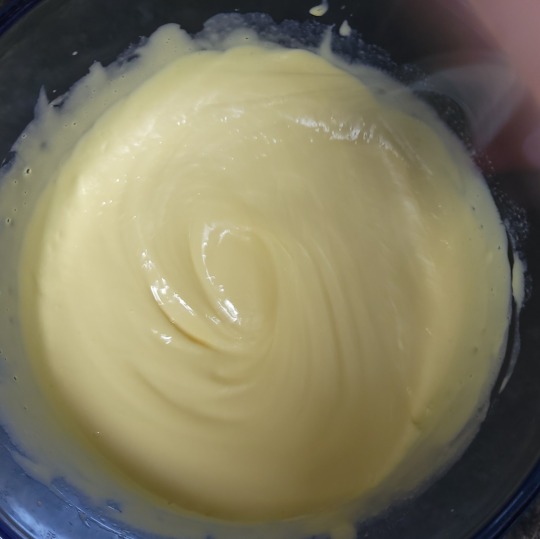
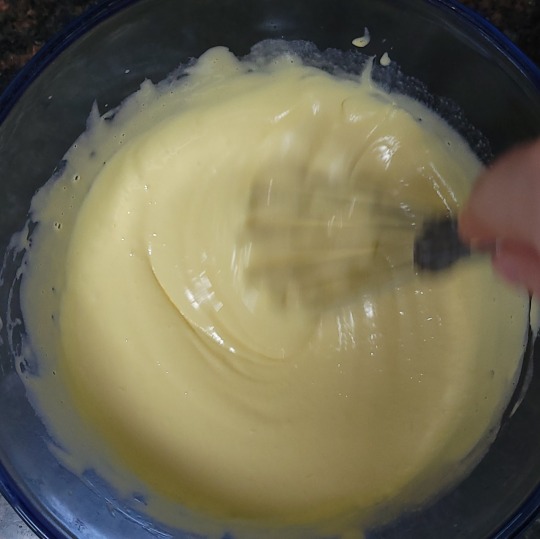
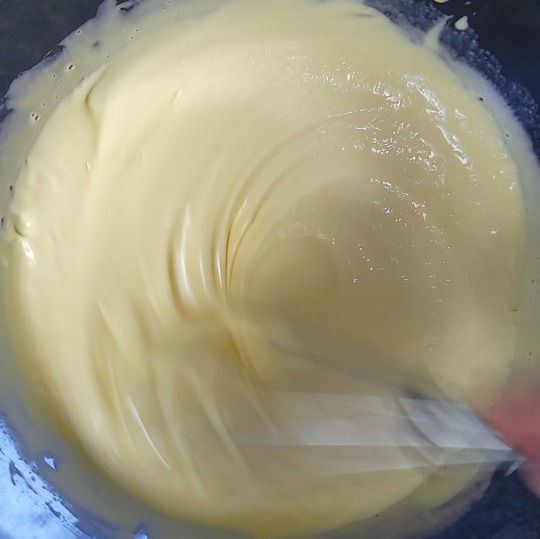
My recipe has egg yolks in it, and I put my entire quantity of sugar into it so I put mine over a double boiler to whip (enjoy the photos below). I stirred them until they were very light and fluffy and I couldn't feel many grains of sugar left when I rubbed some between my fingers. Then I set this outside (in winter) to cool down so that the mascarpone wouldn't melt as soon as I put it in.


After my egg yolks cooled I beat in my mascarpone, which is one full recipe from my blog. It can be anywhere between 8 and 12 oz. and still work, so I never actually weigh how much it is.

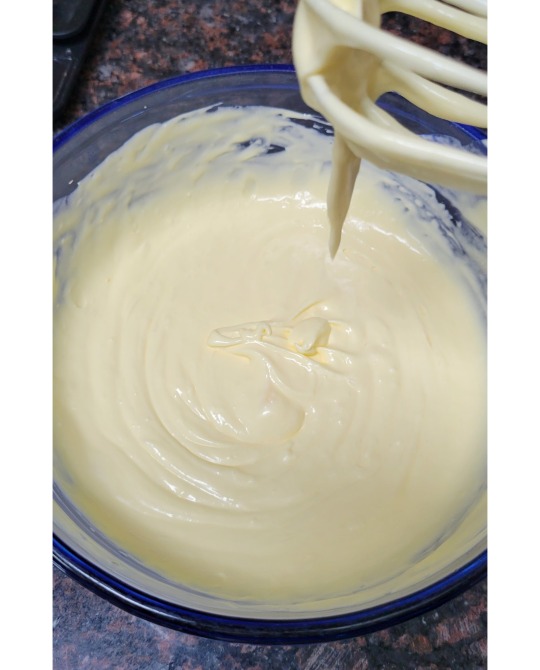
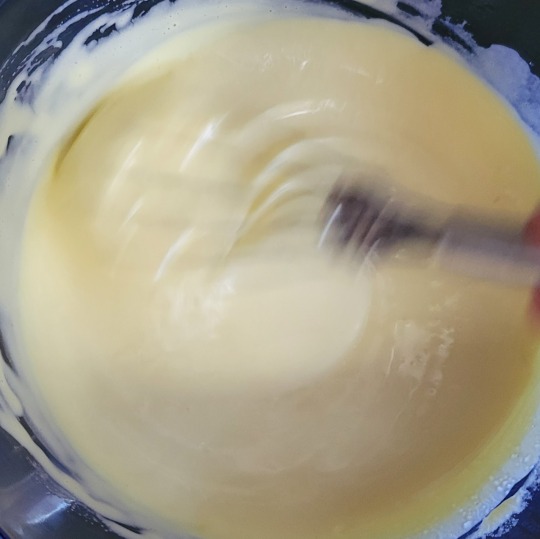
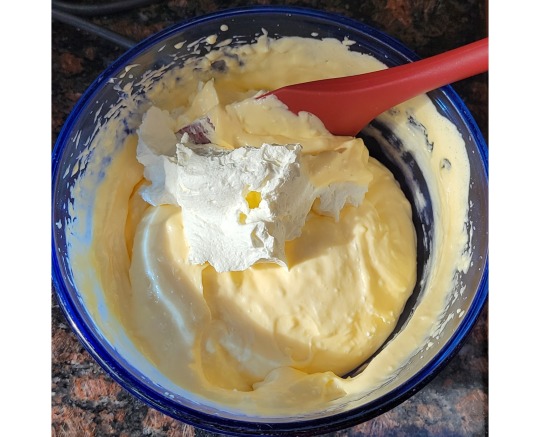
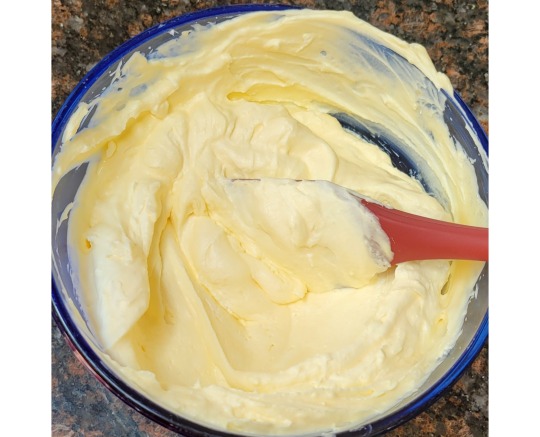
Once my egg yolks and cheese are smooth, I fold in very stiffly whipped cream, starting with a small amount of it. The first photo below is my first addition of cream, and the second photo is of the finished cream.
Once the cream is done, my coffee has cooled, and I have my ladyfingers on standby, assembly can begin.
In an 8x8 casserole dish or cake pan, line a strip of parchment with the ends hanging over the sides. These ends act as handles so the dessert can be lifted out to slice.
To assemble I either drizzle coffee into the pan, add a layer of ladyfinger, then drizzle more coffee, or I break the sheet of ladyfinger and dip them into the coffee. If I'm dipping them, I only dip them on one side since the homemade ladyfingers absorb the coffee quicker.
Then I add a third of the cream and spread it very evenly and as level as I can. An offset spatula helps a lot with this. Then I repeated this two more times. Below shows the first two layers.


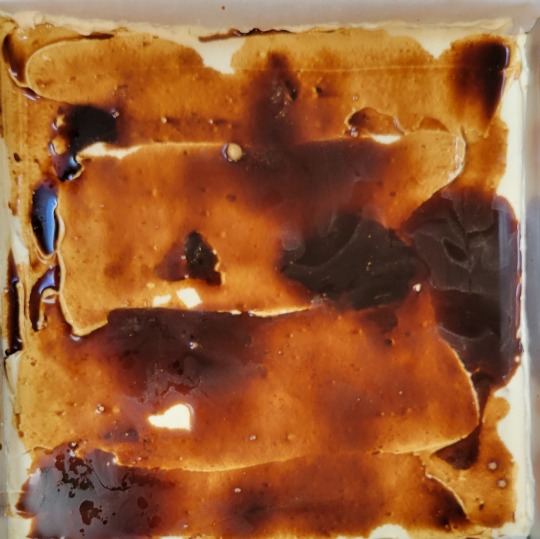

Then once I had my final layer of cream as smooth as I could I dusted the top with cocoa powder. Some people are adamantly against the cocoa powder top, and I think this is only really when there's a thick layer of powder, so I just do mine really lightly. However, many people use chocolate shavings instead, so that's an option.

This needs to go into the fridge to set , or if its winter, you can put it in your garage for 6 hours minimum. Just make sure you cover it, or you may be as unfortunate as I and have a mouse walk on it. Pictured below are the tiny adorable disgusting little mouse footprints. IF you are unfortunate enough to have this happen, all is not lost. using a kitchen torch burn the affected cocoa powder and scrape it off very well, the torch the now exposed layer of cream to 'sanitize' it and re-dust it. But maybe don't serve it to strangers if this happens.

The tiramisu in Neo Yokio has a chocolate heart in the top, so I made some out of tempered chocolate by printing out hearts, then layering a sheet of acetate on top and piping hearts, then adding stems to them so they could be stuck in a slice of tiramisu.

Finally, once it had set, I lifted the whole thing out of the pan by the parchment paper and sliced it into squares. Each square got a heart.
2 notes
·
View notes
Text
The Hellish Vortex between Breakfast and Dinner // Chocolate Croissants

On episode one of Neo Yokio Kaz Khan finds himself on the rooftop tennis court lamenting his relationship with Cathy when in comes Lexy and Gottlieb holding pastries and expressos (however its possible that these are americanos as Aunt Agatha says later in the episode, "You can't just drink americanos and watch tennis all day.") There are a couple different things these pastries could be as they never specifically say what they are. The inside of them looks much lighter which to me says that they have a custard filling, like Torsade au Chocolate or pain au Raisins do, but the shape of them is identical to Pain au chocolates, so that's what I'll be making.
Pain au chocolate, or chocolate croissants are a classic french pastry made with croissant dough or pâte levée feuilletée. Suposedly, this should be easy for me as I went to french pastry school, but, I just so happened to be sick on the day I was supposed to make them in school. I do still have my school's recipe and instructions, so that is the base I will be using.

Note: The instructions included with my school's recipe were sparse, so I used what I already knew to make the dough.
I combined the milk and butter and microwaved them unit the butter was melted, then I waited until the temperature had come down to 110F so that I could add the yeast and sugar. (yeast dies above 110F). I let this sit for 10min. to make sure the yeast was alive. If the yeast is alive after 10min. the mixture will be frothy and ever so slightly thicker. Mine was, so I continued. I combined the flours and the salt, made a well in the middle, poured the liquids in and mixed it together. I kneaded it for 5 min. until the dough was smooth and elastic.
I set this to prove for the first time underneath a heated blanket for 30 min. then turned it. To do this I picked the dough up, folded it once like a birthday card, then set it back in the bowl and re-covered it. After another 15 min. I did this again, then let it proof for the last 15 min. at room temperature before putting it in the fridge for the night (at least 12 hours).
After the cold prove I rolled it out to approx. a 10in by 6in. Then I took two sticks of butter (250g) out of the fridge and sliced them thinly and arranged the slices onto parchment to be slightly smaller than 6in by 4in. I folded the parchement over the butter slices then beat it with a rolling pin to adhere the slices together so that it was one slab of butter.


I then completed the first turn by placing the butter in the middle (image 1 above) then folding the dough over itself and pinching it together to seal it (image 2 above). I turned the rectangle 90 degrees and rolled it long ways (image 3 above) until it was almost double its length.

Then I folded it in thirds like a letter (image 4 above). I chilled it for 20 min in the fridge to prevent the butter from getting too soft.
While the dough was chilling I melted semi-sweet chocolate and spread it out onto a sil-pat to around a 3mm thickness. After it had hardened I cut chocolate bars 1cm by 8cm bars

After the dough had chilled, I completed the double turn. To do this I rolled it out to double its size (not shown) then folded a quarter of the dough on each side in to meet in the middle (image 1 below). Finally, I folded the folds together (image 2 below) and rolled the whole thing out to a 3mm thickness (image 3 below).


My recipe then said to cut 13x8cm rectangles, but I did not follow it. I wanted a smaller, fatter pain au chocolat to hopefully match the reference photo better, however, I wouldn't do this again. I would instead cut the original dimensions in half rather than changing the proportions. (You'll see why later). Regardless, to roll them, place one bar of chocoalte on the very end and roll the dough over to envelope the bar, then place your second chocolate bar against the roll (image 1 below) and continue rolling until you get to the end.


I made two different lengths, but the same width of these as seen on the left and right. I let them prove for 2 hours under a heated blanket to simulate 80 degree weather since it's winter here.

Then I baked at 400 degrees F for 20 min after brushing on an egg wash. As you can see in the below photos, the croissants fell over and spread out instead of up, and you can see it happened much worse with the ones on the left. I believe this is because the rectangles i rolled were too long and not wide enough. They also got much darker than I would have wanted, so I would also bake them at a lower temperature.

I still got some that were ok, and these were the ones that I took pictures with.

There were a couple things I would change, and I may update this post with those changes, but for now I'm leaving them Neo Riche.

2 notes
·
View notes