Don't wanna be here? Send us removal request.
Video
tumblr
This is a demonstration video of the fruit piano.
To make it look good, I hid the breadboard in the box.

0 notes
Text
Fruit Piano Electronic Show---Reflection
The shortcomings of this project I think lies in the background of music visualization. Although I have made corresponding changes, it may still be a bit boring, the visual effects are weak, and it is not as strange and interesting as the fruit piano. This is where I need to reflect. If there is a need in the future, I can remove the part of sound visualization. During the research process, I found that there is a software that allows Arduino fruit piano to make a real piano sound. This will be the goal of my future research. Through this work, I learned how to look at the circuit board and simple Arduino programming, and I learned a lot.
0 notes
Text
Fruit Piano Electronic Show---Making
Fruit piano:
I think the tutorial is very detailed, but there is a simpler way to install it. Just connect the jumper directly to the resistor, and at the same time learn by myself, I also simplified the code.
1. Components Required:
Arduino Uno R3 *1
Breadboard *1
Resistor * 6
jumper wires * 16
buzzer * 1
fruit * 6
2. Wiring

3. Coding
void setup() {
pinMode(8, OUTPUT);
}
void loop() {
if (analogRead(A0) < 1000) {
tone(8, 261, 200);
delay(10);
}
if (analogRead(A1) < 1000) {
tone(8, 277, 200);
delay(10);
}
if (analogRead(A2) < 1000) {
tone(8, 294, 200);
delay(10);
}
if (analogRead(A3) < 1000) {
tone(8, 311, 200);
delay(10);
}
if (analogRead(A4) < 1000) {
tone(8, 330, 200);
delay(10);
}
if (analogRead(A5) < 1000) {
tone(8, 349, 200);
delay(10);
}
}
This is my simplified code.
Processing sound visualization:
1. Use the library sound
2.Use Amplitude in the sound library for audio data analysis, and get the audio data value through Amplitude.analyze ()
3. The red circle in the inner circle is presented through the corresponding calculation of the diameter and length of the audio data, and the purple circle in the outer circle is presented through the corresponding calculation of the audio data.
4. Set the color of each line and each circle.
0 notes
Text
Fruit Piano Electronic Show---Research
1.Youtube.com. (2019). YouTube. [online] Available at: https://www.youtube.com/watch?v=sqQzIN7G6Oc&t=76s [Accessed 27 Dec. 2019].
This tutorial is the most detailed tutorial I have ever seen, and each step is very clear.

(image from web)
Here is code of tutorial:
#include <CapacitiveSensor.h>#define buzzer 11 // Set the Send Pin & Receive Pin.CapacitiveSensor cs_12_3 = CapacitiveSensor(12,3); CapacitiveSensor cs_12_4 = CapacitiveSensor(12,4); CapacitiveSensor cs_12_5 = CapacitiveSensor(12,5); CapacitiveSensor cs_12_6 = CapacitiveSensor(12,6); CapacitiveSensor cs_12_7 = CapacitiveSensor(12,7); CapacitiveSensor cs_12_8 = CapacitiveSensor(12,8); CapacitiveSensor cs_12_9 = CapacitiveSensor(12,9); CapacitiveSensor cs_12_10 = CapacitiveSensor(12,10);
void setup() { // turn off autocalibrate on channel 1 - just as an example cs_12_3.set_CS_AutocaL_Millis(0xFFFFFFFF); cs_12_4.set_CS_AutocaL_Millis(0xFFFFFFFF); cs_12_5.set_CS_AutocaL_Millis(0xFFFFFFFF); cs_12_6.set_CS_AutocaL_Millis(0xFFFFFFFF); cs_12_7.set_CS_AutocaL_Millis(0xFFFFFFFF); cs_12_8.set_CS_AutocaL_Millis(0xFFFFFFFF); cs_12_9.set_CS_AutocaL_Millis(0xFFFFFFFF); cs_12_10.set_CS_AutocaL_Millis(0xFFFFFFFF); }
void loop() { // Set the sensitivity of the sensors. long touch1 = cs_12_3.capacitiveSensor(1000); long touch2 = cs_12_4.capacitiveSensor(1000); long touch3 = cs_12_5.capacitiveSensor(1000); long touch4 = cs_12_6.capacitiveSensor(1000); long touch5 = cs_12_7.capacitiveSensor(1000); long touch6 = cs_12_8.capacitiveSensor(1000); long touch7 = cs_12_9.capacitiveSensor(1000); long touch8 = cs_12_10.capacitiveSensor(1000); // When we touched the sensor, the buzzer will produce a tone. if (touch1 > 1000){ tone(buzzer,400); } if (touch2 > 1000){ tone(buzzer,270); } if (touch3 > 1000){ tone(buzzer,650); } if (touch4 > 1000) { tone(buzzer,900); } if (touch5 > 1000){ tone(buzzer,1100); } if (touch6 > 1000){ tone(buzzer,1300); } if (touch7 > 1000){ tone(buzzer,1670); } if (touch8 > 1000){ tone(buzzer,2000); }
// When we didn’t touch it, no tone is produced. if (touch1<=1000 & touch2<=1000 & touch3<=1000 & touch4<=1000 & touch5<=1000 & touch6<=1000 & touch7<=1000 & touch8<=1000) noTone(buzzer); delay(10); }
0 notes
Text
AR Eliminate the virus---Reflection
Through this project, I know how to make markerless augmented reality in Unity 3D game engine .; Use of Plan; Use of Cube; Use of Canvas; Add Script and a simple understanding of C ++.
During this production process, I tried to watch as few tutorials as possible and did it myself. I encountered many problems in the middle. For example, when I exported the game to Android, I found that the direction of the game was reverse. But the end result was satisfactory. In addition to my C ++ language's over-reliance on the tutorial, at present I can only add it to the tutorial code, but I can't completely modify it, which I need to improve. I can only add the number of enemies in this game.
For games, in the future, I plan to increase the user interface, instead of entering the game like this now; at the same time, I can also increase our physical strength, such as being hurt by a virus; I can also add a countdown to increase the game ’s Adversarial. These three points are the main goals of my future research on this project.
0 notes
Text
AR Eliminate the virus---Making
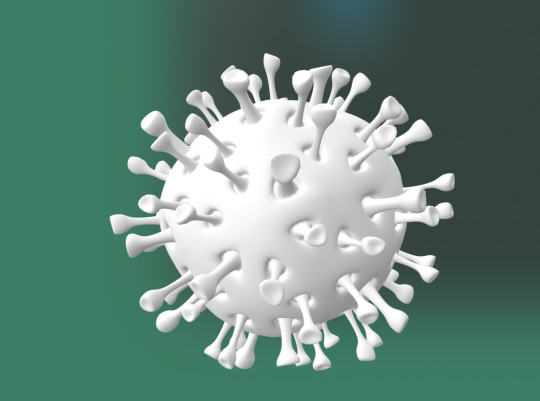
Actually, I refer to the tutorial spaceship shooting, but my instructor said that the spaceship has nothing to do with our real life, this is not make sense. So I changed the enemy from a spaceship to a virus. Because tiny viruses exist in our real world, I changed some details in the tutorial, how to cockpit details, models, number of enemies, etc.
1. Make a Markerless AR Camera, create a plan in front of the camera, then add a component create webcam Script, and connect to the main camera after simple programming. 2. Adjust the plan size 3. Import a virus model, create a cube, and create a new script to make the virus move repeatedly in the specified space 4. Add canvas, add UI, import cockpit picture for the first time, add board 5. Add Spheres, make bullets, adjust the size of the bullets, convert them into material, connect the bullets to the trigger, and trigger the launch 6.Plan enemy trigger range, bullets disappear

Number of enemies


These things are some in-game material.(Download from internet)
0 notes
Text
AR Eliminate the virus---Research
1.Youtube.com. (2017). YouTube. [online] Available at: https://www.youtube.com/watch?v=m9yRnG0YvbE [Accessed 2 Jan. 2020].
This is a demo video of an AR design game. The game requires an AR shooting gun to play, which is very interesting and very exciting.
2.Youtube.com. (2019). YouTube. [online] Available at: https://www.youtube.com/watch?v=0L2ApNvuH2E [Accessed 1 Jan. 2020].
It is a tutorial of Setup Markerless AR Camera Unity,it is easy than Vuforia.
3. Youtube.com. (2016). YouTube. [online] Available at: https://www.youtube.com/watch?v=T6bd_MQ2ass&t=337s [Accessed 26 Dec. 2019].
This is a tutorial for my AR game.
0 notes
Text
Two further development projects
1. Fruit Piano Electronic Show
Arduino + processing sound visualization.
Make a fruit piano with Arduino, play the sound, and the background is a sound visualization device. The combination is like a simple fruit piano electronic concert.
2.AR Eliminate the virus
Through the way of AR games, players can be reduced to the size of a virus, driving a miniature spacecraft, and shuttle through the real world to destroy the virus. Players can complete this game anywhere in the world, it is full of fun.
0 notes
Text
Project 7: Reflection
Understand the randomness of generative art and processing, and the basic flow of writing code. You can write simple code and add keyboard control to the code. But this is not enough, and further study of code is needed. For example, the field of game production also requires code. Through this project I found the interesting of processing.
0 notes
Text
Project 7: Making
First confirm the work I want to make. And spend a lot of time watching the tutorial.


This is my work. Processing randomly generates some line patterns. By studying I added keyboard control to this set of code. Each time you press “R”, it will load a different effect.
0 notes
Text
Project 7: Research
1. Boden, M. and Edmonds, E. (2009). What is generative art?. Digital Creativity, 20(1-2), pp.21-46.
Through this article I learned what is generative art.
2.

(image from web)
Youtube.com. (2016). YouTube. [online] Available at: https://www.youtube.com/watch?v=SX0UzmSa1Mc [Accessed 27 Nov. 2019].
3. Processing Tutorial:

4.Processing Blog:
Blog.csdn.net. (2019). [online] Available at: https://blog.csdn.net/weiming8517/article/details/50753277 [Accessed 27 Nov. 2019].
0 notes
Text
Project 7 - Generative Media-Happy Accidents
It is also need use Processing to make some works.Randomly generate some unexpected effects through code.

(image from web)
0 notes
Text
Project 6: Reflection
I know how to use the Sound and Minim functions in processing. This work is currently a bit simple and boring, because it is just lines, without strong visual effects, and you need to learn more interesting code later.
0 notes
Text
Project 6: Making
1.Confirm production content
2.Learn the tutorial…
3.Start writing code

At the same time, go to some processing forum website to ask questions
0 notes