
becoolinary
138 posts
Don't wanna be here? Send us removal request.
Statistics
We looked inside some of the posts by becoolinary and here's what we found interesting.
Average Info
Notes Per Post
7
Likes Per Post
7
Reblog Per Post
0
Reply Per Post
0
Time Between Posts
13 days
Number of Posts By Type
Text
16
Photo
1
Last Seen Tumblr Blogs


Fun Fact
In Q3 of 2020, 31% of US users access the Tumblr app daily.
Text
an egg-scuse for an egg-regious absence

It is time to regroup, folks. Be Coolinary is taking a brief hiatus to make some essential changes to the blog and web design in order to ramp up and be far more coolinary for years to come. In the meantime, eat food, drink drinks, and be cool.
1 note
·
View note

Text
i haven't been ignoring you, i've just been busy eating
It's true. It has been a while since I have posted anything here. Fifteen days in fact. I think that might be a new record. My sincerest apologies to my three readers. The truth is that I have just been too busy eating...
It all started when I realized I needed to cook the last pumpkin I still had laying around from my Halloween pumpkin excursion. And after eating plenty of pumpkin bread and pumpkin soup from the initial pumpkin sacrifice, I thought I would change it up a little and make a pumpkin curry. Turns out, pumpkin curry is very good.


Then, I got invited to check out Dandelion Chocolate's new space on Valencia Street in the Mission neighborhood. They are a pretty spectacular bean to bar chocolate company in San Francisco and I have had the opportunity to write a thing or two about them here and there for the SF Weekly, which means they consider me "press", which means I got to celebrate their opening with a glass of champagne and a bunch of free chocolate. That is a win-win if you ask me.


Then, my Seattle pals Mark and Kira came to town and we drove up Highway 1 to Tomales Bay to eat oysters at Hog Island Oyster Company.


Curiously, there is neither a hog nor an island to speak of at this place, but it is awesome and a must-see if you live near San Francisco. You get to sit outside, right on Tomales Bay, and can either order oysters pre-shucked and ready to slurp or whole oysters that you shuck yourself and barbecue right there at your table if you so choose. We opted for the low maintenance/lazier option and ordered ourselves some raw, already-shucked-by-the-cute-sailor-looking-guy oysters, barbecued oysters, and local bread and cheese. And, to make the outdoor oyster-shucking experience that much more Sunset magazine, they also have a well curated selection of bubbly, white and red wine, and local beers that pair perfectly with their shellfish.

The barbecued oysters were cooked with butter, bourbon, brown sugar, and hot sauce and were incredibly delicious, but at $3 a pop, one for each of us had to suffice.

And the bread and cheese wasn't too shabby either. Cowgirl Creamery makes amazing cheese and are located just a few miles south on Highway 1 in Point Reyes Station.

Then, the next day, Kira, Mark, and I ate at Contigo, a Spanish and Catalan restaurant in Noe Valley. There we ate some amazing patatas braves (spicy potatoes), lengua (beef tongue!), and albondigas (meat balls). I also learned that the Catalan word for flan is flam, so even though you might be positive a menu item is misspelled, maybe just keep it to yourself.
Then, it was my roommate's 25th birthday so of course we had to go to NOPA for a cava toast, pappardelle dinner, and birthday sopaipillas with burnt orange caramel for dessert. So far, I think this spot is the most dependable and easily accessible restaurant in the city for a solid and delicious meal on a special occasion. Happy Birthday Zoe!
Then, it was the food day of all food days: Thanksgiving. This year I traveled south to see my family in Santa Cruz where we enjoyed a barbecued turkey from el Salchichero among many other tasty side dishes, none of which I took any pictures of (sometimes you just gotta enjoy the darn stuff, ya know?!). My contributions to our meal were a savory version of Rose Levy Berenbaum's Monkey Bread, a riff off of Cook's Illustrated No Bake Pumpkin Pie (but with a gingersnap crust instead of graham cracker), and a classic fruit galette, this year with poached pears and candied ginger.

And a first for me: we ate Thanksgiving dinner outside, with sunglasses on, like a bunch of cool Californians.

Off topic but worthy sidenote: Also in attendance at this year's Thanksgiving was my uncle's dog Riley, who is quite possibly the best border collie in the history of the world. Just thought you should know.

So that is what I have been doing the past fifteen days. Not blogging but just eating a whole bunch of good food with friends, family, and amazing border collies named Riley. It's a tough life, I know, but somebody's got to do it.
0 notes
Text
if an awkward fifth grader can make pasta...
It's funny what you might find rummaging through your childhood bedroom...

In addition to a drawer full of troll dolls, you might find a funny photo or two. I am guessing this gem is from the mid-1990s. My braces, CYO basketball sweatshirt, and horrible haircut suggest my pal Jenny (left) and I are in the midst of some truly awkward adolescent times. I am going to say we are in fifth grade just because we look far too accomplished and confident for two piddly fourth graders and it doesn't appear that the oppression of being sixth grade underdogs in a sea of seventh and eight grade tormentors has destroyed our souls yet. My old boombox (a hand-me-down from my sisters) is on the kitchen counter and it appears we thought the top of said boombox was a great place to set some drying pasta that we had just made. We were probably listening to En Vogue, Counting Crows, or the Eurythmics (we both thought Annie Lennox was the coolest). I imagine that this photo has conveniently neglected to capture the huge mess we most surely left in the kitchen. I think I might actually remember this day, making pasta from scratch with Jenny. I think I remember this one task taking us the entire day, or what felt like the entire day, or maybe everything felt like that when you were young. But perhaps the funniest part about this picture is that I definitely don't remember eating the pasta, if it was any good, or if my family felt brave and partook in my homemade contribution to dinner that night. Obviously modeling with the pasta was more important to me than eating it at the time...
I recently made pasta from scratch and even without Jenny or Annie Lennox's help, it did not take me all day. With the aid of a food processor, I actually made it for dinner after work and was still able to watch a movie and go to bed at a reasonable hour.

However, this time around I forwent posing with it, can recall eating it, and can assure you that it tasted delicious. And my kitchen was only somewhat of a mess afterwards.

FRESH PASTA WITH BROWN BUTTER TOMATO SAUCE
this recipe is adapted from a Cook's Illustrated recipe I once found online but is now nowhere to be found...
If you think you need some sort of special powers to make pasta from scratch, think again. This recipe requires just a few household ingredients and a bit of patience but is entirely worth the effort. And I did it when I was in fifth grade so stop whining.
Serves 2 to 3 (or one rambunctious fifth grade girl)
I N G R E D I E N T S
For the pasta:
1 cup (5 ounces) all-purpose flour
1 large egg and 3 egg yolks
1 tablespoon olive oil
1 tablespoon salt
For the sauce:
1 3/4 cup (14 fluid ounces) canned crushed tomatoes (this is half a standard 28 ounce can)
2 tablespoons unsalted butter, divided
1 clove of garlic, minced
1/2 teaspoon sugar
salt and pepper
2 tablespoons chopped fresh basil
grated parmesan cheese
D I R E C T I O N S
First, make the pasta.

Add the flour, eggs, yolks, and olive oil to a food processor fitted with a blade attachment. Pulse until a cohesive dough is formed, less than one minute.

Turn the dough out on to a clean surface and knead it together to form a ball. Roll the dough ball into a cylinder, wrap it in plastic wrap, and let it sit at room temperature for 1 hour or up to 4 hours.

While the pasta rests, make the sauce by pureeing the crushed tomatoes in a food processor or blender until smooth. Set aside.

Melt 1 tablespoon of butter in a large skillet over medium heat and continue cooking, watching carefully until the butter has browned slightly and smells nutty. Stir in the garlic and remove from heat.


Stir in the tomato puree, sugar, and a heavy pinch of salt. Return to the heat and bring sauce to a simmer for about 5 to 8 minutes to evaporate some of the excess liquid.

Stir in the basil and remaining 1 tablespoon of butter and remove from heat. Cover to keep warm until you are ready to serve.

To finish the pasta, divide the dough into four equal pieces.

Working with one piece of dough at a time, on a lightly floured surface press the dough into a small square. Then using a rolling pin, roll the square into a long rectangle. Move the dough around your work surface often and use a small amount of flour to keep the dough from sticking. Roll the dough until it is thin enough to see your fingers through the other side. Transfer the pasta sheet on to a kitchen towel while you roll the rest of the dough.


After you have rolled out all four sheets of pasta and they begin to feel firm around the edges (about 15 minutes), starting at one end carefully fold them at 2-inch intervals until you have folded the entire sheet into a rectangle.


Using a sharp knife, carefully cut the pasta into strips about 1/4 of an inch thick.


Unfold the pasta strips and transfer them to a cookie sheet.

Bring 1 gallon of water to a boil and add the 1 tablespoon of salt. Add the pasta and cook until al dente, about three minutes.

Strain the pasta reserving 1/3 cup of the cooking liquid. Pour the reserved liquid into the tomato sauce and return the sauce to a bare simmer. Add salt and freshly ground pepper to taste and gently toss the pasta noodles into the tomato sauce. Serve with a generous grating of parmesan cheese.

1 note
·
View note
Text
mexicomida
I went to Mexico last week! My pal Jen got married in Tulum so clearly I had to attend and celebrate her nuptials. I was traveling with other awesome Seattle friends and we had a great time swimming, exploring Mayan ruins, trying to speak Spanish without sounding like a bunch of gringos, and most importantly: eating. So. Much. Eating. We ate tacos, sopes, quesadillas, tortas, aqua frescas, salbutes, helados, conchinita pibil, camarones, flan, galletas, tamales, mole, totopos con salsa y guacamole, and many other delicious Mexican things. Here are some photos of our Mexican culinary adventures or aventuras culinario Mexicana.

raw sugar cane at the super market

fresh chayote
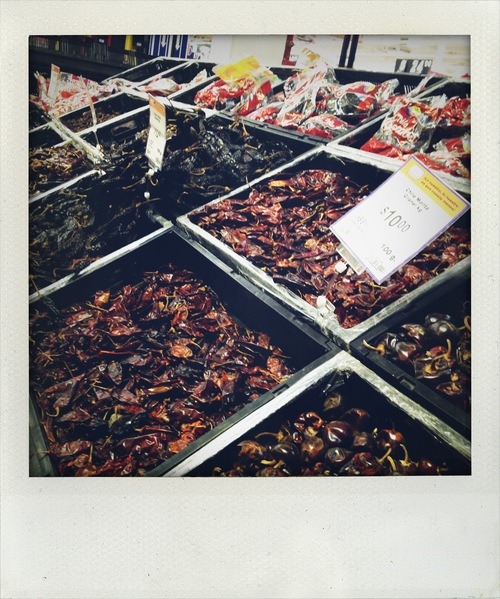
so many chilies!

chicharrones (fried pig skin)

Bimbo white bread with Leo Messi on the packaging

what the heck is bubu lubu?

they also sell motor bikes at the super market...

prune flavored drinkable yogurt—it was actually really tasty!

this restaurant was our favorite—so cheap and so good!

tacos de pollo y asada—this whole plate was about $4

we cooked up desayuno con chorizo, papas, huevos, queso, y tortillas

sustenance for a full day of swimming, beach lounging, and Mayan exploration

an adorable chef on the streets of Tulum

paletas!

another breakfast on the beach

teresa cooked us dinner in our beach villa

heating up tortillas on the griddle

teresa finishing up some fajitas on our last night

It was such a great time and I can't wait to go back! ¡Hasta leugo amigos!
0 notes
Text
it's pumpkininny!
Last week my roommate and I went on a fall excursion to Arata Pumpkin Farm and Bob's Pumpkin Patch in Half Moon Bay.

We rented a Zipcar and drove 50 minutes out of town, through the thick Pacifica fog to apprehend a few pumpkins to carve whilst sipping apple cider and watching Twin Peaks on Netflix.


It was a successful mission as we both arrived home, our arms tired and full of fall goodies.

I was most excited about this guy: my hand-selected hubbard pumpkin.

Its skin is greyish-green with pronounced ridges, its flesh bright canary yellow, and they can vary in shape from round and squat to tear drop-shaped. I was told along with the sugar pie pumpkin the hubbard was a good pumpkin to cook so I bought it. Then, I cooked the flesh, roasted the seeds, and turned most of it into pumpkin soup for dinner. But the tastiest thing I did with my hubbard was turn it into this dessert...

That is ginger pumpkin bread my friends! And even after I cooked all of that pumpkininny stuff, I still had more pumpkin meat leftover, which means I will be eating pumpkin soup, roasted pumpkin, and pumpkin bread again very soon. But more importantly, as a fan of David Cross and Bob Odenkirk, cooking with pumpkin might forever remind me of Josh Fenderman and Freddie P Cheesewinkle's pumpkin pizza...
Ginger Pumpkin Bread
makes two loaves
This recipe is a simple quick bread and can be served as dessert with a dollop of whipped cream or alongside a scoop of ice cream with a drizzle of chocolate sauce. Pleasantly enough it's also not overly sweet so it's perfect with a cup of coffee in the morning, or just by itself as a snack. Who cares how you eat it, just eat it!
I N G R E D I E N T S
15 ounces cooked pumpkin (hubbard and sugar pie pumpkins recommended) you can use canned pumpkin puree here if your not feeling the DIY vibe of roasting your own
2 1/2 cups (12 1/2 ounces) all-purpose flour
2 teaspoons baking powder
2 teaspoons ground ginger
1 teaspoon salt
2 tablespoons freshly grated ginger, about 2 inches of fresh ginger root
1 cup brown sugar
1 cup white sugar
3 eggs
3/4 cup and 1 tablespoon (6 1/2 ounces) unsalted butter, melted
D I R E C T I O N S
If you are using fresh pumpkin, first you must cook the pumpkin flesh. Preheat the oven to 450°F. Prepare the pumpkin by carefully cutting it into manageable sized chunks and remove its inner strings and seeds. Arrange the pieces of pumpkin on a lightly oiled baking sheet. Cook the pumpkin until it is tender and pierces easily with a fork, rotating the baking sheet and flipping over each piece halfway, about 40-45 minutes.


While the pumpkin is cooking, prepare two loaf pans by brushing them generously with butter and dusting them lightly with flour.

Combine the flour, baking powder, ground ginger, and salt in a medium bowl and set aside.

When the pumpkins have finished cooking, let them cool thoroughly before handling them. Lower the oven temperature to 375°F.

When the pumpkin is cool enough to handle, remove the skin with a pairing knife. And while you peeling the pumpkin, peel the ginger root too. If you are having trouble using the pairing knife on the ginger, use a spoon or the back of the knife to scrape the skin off.


Place the cooked pumpkin into a large bowl and add the freshly grated ginger root.

Using a fork or a large potato masher, mash the ginger and the pumpkin flesh together until they are combined and no large pieces of pumpkin remain.

Whisk the sugars, eggs, and butter into the pumpkin mixture. Then fold in the dry ingredients with a rubber spatula.


Pour the batter into the two prepared pans and bake in the preheated oven for about 25-30 minutes or until a toothpick inserted into the middle comes out clean.


Let the bread cool slightly before removing it from the loaf pans and slicing with a serrated knife. It's pumpkininny!

0 notes
Text
i guess i like these apples
Yesterday I came to a disappointing realization: it's the middle of apple season and I no longer live in Washington State. Just when I thought I had finally become one of them, I upped and moved south to The Golden State. All is not lost however as California certainly has its own apple harvest, I just feel way less special eating California apples. Somethings—like Nirvana and Frasier—are just better enjoyed in their home state.

One day, as I was going about my business trying to assimilate to California life (What is this giant, flaming ball in the sky? What are flip flops again?), I came across a cute young lady named Jolie Devoto manning her family's farm stand at my local farmers market. She represents Devoto Gardens in Sebastopol and with stacks of empty boxes behind her, had already sold a ridiculous quantity of apples that morning. We chatted a bit, or mostly I told her how impressive her apple offerings were and she gave me a run down of her family's operation. Devoto Gardens is a certified organic, dry apple farm that "collects trees like stamps" making for quite an extensive offering of heirloom and antique apple varieties. There were only three kinds left by the time I got there (winesap, sierra beauty, and mutsu) so I bought a few of each and headed home to enjoy them.

A year ago I would've just eaten each apple fresh, maybe for dessert after a brown-bag lunch at work. But, unfortunately, now that I am almost thirty, apparently this is where I start falling apart. Just earlier this year I have developed an allergy to fresh apples that makes eating them a bit risky (same with celery, peaches, cherries, and cabbage). The allergy is a bit complicated, but basically I have learned through trial and error (now with an Epi-Pen handy, of course) that cooked apples are not a problem and fresh apples can be a big problem. Even though this is a bit of a bummer after getting to eat apples without issue for 29 years, I can't be that upset seeing as how there are still plenty of delicious apple dishes to be savored despite this stupid allergy: apple pie, apple galettes, apple butter, dried apples, baked apples, and, yes, even my parent's favorite, no-fun dessert, microwaved apples. But most importantly, apple tart tatin is still perfectly safe to eat, giving me good reason to whip one up with my bounty of fresh California apples.

California Apple Tart Tatin
this recipe was adapted from the Cook's Illustrated Cookbook
Serves one (unless you, like, want to share it)
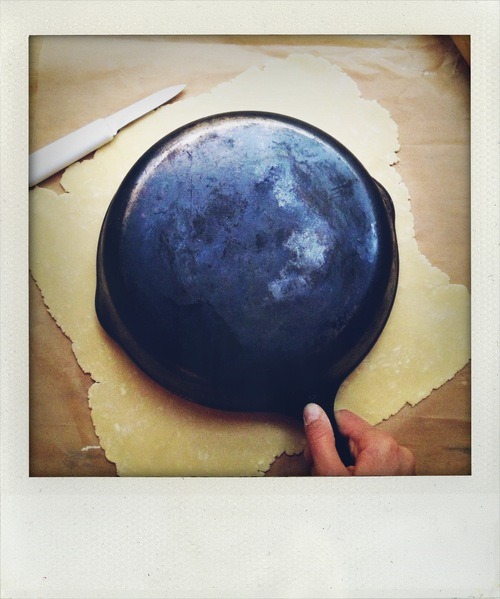
A tart tatin is basically a caramelized, upside-down apple tart. It is one of my most favorite desserts and it can also be made with peaches, pears, or quince if you feel so inclined. Typically this dessert is made with Granny Smith or Golden Delicious apples, but after visiting the Devoto Gardens farm stand, I was more than happy to use the Winesaps, Sierra Beauties, and Mutsus I bought. Granny Smiths aren't in season quite yet and Jolie had sold out of her Golden Delicious apples but this dessert could be great with many different apple varieties. In fact, I liked the variation the three kinds of apples contributed to the flavor and the appearance of my tart tatin so don't be afraid to mix it up. Traditionally, puff pastry is used as the crust in a tart tatin, but I used a basic short dough which is easier to make from scratch and less temperamental to work with. Also, this recipe also necessitates either a well-seasoned cast iron skillet or a large, non-stick, oven-safe saucepan.
I N G R E D I E N T S
For the crust:
1 1/3 cups all-purpose flour
1/3 cup powdered sugar
1/2 teaspoon salt
1/2 cup (4 ounces or 1 stick) unsalted butter, chilled and cut into small pieces
1 egg
1 teaspoon vanilla extract
For the apples:
1 1/2 pounds fresh apples (about 4-5 medium to small apples)
1 lemon
1/2 cup (4 ounces or 1 stick) unsalted butter
3/4 granulated sugar
a pinch of salt
D I R E C T I O N S
Begin by making the crust because it will need to chill for at least an hour.

Add the flour, powdered sugar, and salt to a food processor fitted with a blade. Pulse the dry ingredients together a few times until they are combined.

Beat the egg and the vanilla together in a bowl and set aside. Sprinkle the chilled pieces of butter into the flour mixture and pulse again a few times, just until the mixture resembles coarse meal and the biggest pieces of butter are about the size of peas.

Then, with the machine running, pour the egg and vanilla into the food processor and process until a dough begins to form, but do not over mix.


Turn the dough out onto a flat surface covered with a piece of parchment or plastic wrap.

Pat the dough into a flat disk, wrap it well with plastic wrap or parchment, and refrigerate it until needed or better yet, overnight.

While your dough is chilling, prep the apples by peeling and coring them.

Cut the lemon in half and after you have peeled and cored an apple, rub the apple flesh thoroughly with the lemon so as to reduce browning.

Cut each apple into quarters, and then eighths, again rubbing each new exposed surface with lemon. If you use various kinds and sizes of apples like me, try to make them roughly the same size so they will cook more evenly.

Once your apples are prepped, transfer them to a bowl, squeeze any remaining lemon juice over them, and toss to coat. The apples can remain uncovered at room temperature until the dough is ready.

Once the dough has rested in the fridge for at least an hour, place it on a lightly floured surface or sheet of parchment and using a rolling pin, roll it into roughly a 12-inch circle.

Using a cast iron skillet or non-stick, oven-safe saucepan as a guide, carefully cut the dough, leaving an extra inch or two around the entire circumference.

Cover the rolled dough with plastic wrap and keep it in the fridge until needed.
To make the apple component, begin by preheating your oven to 425°F. Melt the butter in a cast-iron skillet over medium heat.

Using a wooden spoon, carefully sprinkle in the sugar and stir just to combine.
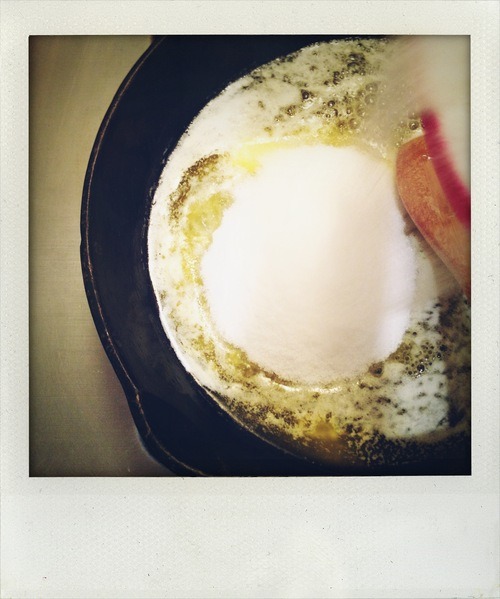
Bring butter and sugar to a boil and watch carefully as just when the caramel appears to turn slightly darker in color, remove it from the heat. It is really important to not burn the caramel at this point so watch it very carefully. It will also continue to cook once you have removed it from the heat so catching it early is imperative.

With the skillet off the heat, begin to arrange the apples in the caramel, cut side down, around the outer edge of the skillet. Once the outer edge is full, arrange apples in the middle.


Once the skillet is full of apples, sprinkle in the pinch of salt, return it to the stove, and bring it to a simmer over medium high heat. Baste the apples with the caramel and after a four or five minutes of cooking on one side, carefully turn each apple slice over to caramelize evenly.

Continue cooking, basting, and rotating apples until the caramel is a rich, medium shade of brown.

Remove the skillet from the heat and transfer the chilled, rolled dough snuggly over the top of the apples and into the skillet. Work quickly but carefully as the apples will be extremely hot and the dough very prone to melting.

Tuck any extra dough back or up the sides of the skillet. Remember, this will be the bottom of the tart so don't be too overly concerned with how it looks.


Place the skillet in the preheated oven and bake until the top of the crust is light golden brown, about 20 minutes, rotating the skillet halfway through. Remove it from the oven and let it set at room temperature for about 30 minutes.


Once the skillet is cool enough to handle and the tart set, run a butter knife or offset spatula around the edge of the crust to loosen the tart. Place the serving platter or plate you wish to use right on top of the tart.

Using two hands, carefully flip the skillet over and gently remove it to reveal your finished tart tatin.
Serve immediately and give yourself a high-five for making a tart tatin any Washington apple would envy!


0 notes
Text
be coolinary food news, aka real news
I know there was a presidential debate tonight and the Oakland A's won the AL West Championship a few hours ago, but let's get to some real news shall we?
I knew Trader Joe's was too good to be true. TJ's recalls their own brand of peanut butter.
Attention friends in Kentucky! Don't go to this restaurant!
Attention baby-stroller-havers in Berlin! You can't go to this cafe!
Finally, a glass accessory for hipsters! They will go swimmingly with my skinny jeans.
Shocker: Guy Fieri's Time's Square restaurant blows, but this review certainly doesn't.
I still think Canadian's are awesome: Cheese smugglers caught smuggling cheese!
Canadians are awesome and British people are jerks: Some Brits stand accused of eating too much at an all you can eat buffet and some other Brit uses the word muck.
OMG! What I would pay to be a tasty morsel on his dinner plate, AMIRITE LADIES?! Justin Timberlake to play a restaurant critic in upcoming film. SQUEAL!
Speaking of movies... someone made a not so good one about people who carve things out of butter.
Sorry my blog has nothing to do with ManBQue-ing. Actually, I am not sorry at all.
0 notes
Text
fall is here! cavities await!
Sad news everyone: summer is over and as of Saturday fall has officially begun. I am at peace with this bittersweet transition as along with tomatoes, swimming, and blueberries, I also adore crisp mornings, leaves changing, and, most importantly, all the food and flavors that compliment the fall season. Of course there are the obvious perks like Halloween candy and Thanksgiving dinner, as well as tasty beverages like pumpkin beer and hot apple cider. And, there are also more humble, Pilgrim-approved things to be enjoyed like pears, cranberries, butternut squash, chanterelle mushrooms, and quince. However, I think my latest autumnal obsession is DIY caramel corn.

Caramel Corn
yields one big ol' bowl of caramel corn
With only a few ingredients, this recipe is very simple and a guaranteed crowd pleaser. Who doesn't like handfuls of sweet, buttery, crunchy, nutty caramel corn?! But please note, cooking the caramel can be tricky if you haven't ever done it before. It can burn you very badly if you are not careful so maybe read up on it first to make sure you feel comfortable giving it a shot in this recipe. I promise you can do it though because you are awesome, you just need to be careful. Also, if you do burn yourself a little bit, know that at least you will have tasty nuggets of caramel corn to eat while you nurse your wound!

I N G R E D I E N T S
2 tablespoons vegetable oil
1/2 cup popcorn kernels
1 1/2 teaspoons salt, divided
1 cup toasted and salted mixed nuts, like peanuts and almonds (optional)
1/2 cup or one stick (4 ounces) unsalted butter
1 1/2 cups white granulated sugar
1/2 cup brown sugar
1/2 cup (4 fluid ounces) non-gmo corn syrup
1/2 teaspoon baking soda
D I R E C T I O N S
Add the vegetable oil to a large stock pot or Dutch oven that has a lid and place it over medium-high heat. Add the popcorn kernels and cover the pot with the lid.

Keeping the pot over the heat, swirl and shake it with the lid on. Continue shaking and swirling the pot and as soon as you begin to hear the kernels popping, let a bit of the steam escape by just barely sliding the lid off the pot only about 1/4 inch (otherwise you're bound to get some hot popcorn bullets to the face). Continue shaking and swirling, letting steam escape periodically until you don't hear any more popcorn popping. Remove the pot from the heat, sprinkle in 1 teaspoon of salt, and transfer popcorn to a cookie sheet lined with buttered parchment or a silpat.


If you are making nutty caramel corn, sprinkle the nuts on the sheet pan with the popcorn and set aside.

To make the caramel, begin by making sure you have all your ingredients out, measured, and ready to go. Add the butter to a medium saucepan.

Add both the sugars and corn syrup to the butter.

Without stirring too much, bring the mixture to a boil.

Cook the caramel until it reaches 298°F to 310°F on a candy thermometer or passes the hard crack test. To test it, dip a spoon in the hot caramel and drop a few drops into a cup of cold water. After a few seconds, remove the caramel from the cup. If it feels brittle and hard, it is done cooking. If it is still malleable, stretchy, or chewy, it must continue cooking a bit longer to evaporate more liquid. When the caramel is ready, swiftly and carefully remove it from the heat and whisk in the baking soda and remaining 1/2 teaspoon salt.

Still working quite quickly, but very carefully, pour all of the caramel over the popcorn. Using a heat-proof rubber spatula, toss the popcorn with the caramel to coat evenly. Be careful here because even though the caramel is no longer on the heat it will still be very, very hot.


Set the caramel corn aside to cool completely before breaking it up and serving. That is, if your pals can keep from snacking it all away straight off the baking sheet...

0 notes
Text
look mom and dad! i am eating oats and fruit!
What do you get when you combine the last of the season's nectarines,

with some equally as seasonally-waning raspberries,

and some old-fashioned rolled oats?

Well, the crispiest and most crisp-tastic raspberry nectarine crisp, of course! Now that the last days of summer are upon us, it seemed only appropriate to spend these final moments basking in all her sunny glory, making a simple, two-bowl dessert to commend her accomplishments and to see her off until next year. Additionally, if I learned anything from my ex-hippie parents it's that oats and fruit are in fact quite healthy (and therefore mandatory), so there is a good chance that this seasonally inspired dessert may even be hippie-approved. Whatever the case, I do know that it's exceptionally delicious, even if you have short hair and happen to accept the mores of conventional society.

Raspberry Nectarine Crisp
adapted from my brain
yields 4 individual servings
This recipe can be duplicated with almost any other combination of fruit you can imagine. For best results the rule is to combine a soft fruit with a more firm one. Blackberry peach, apple fig, strawberry rhubarb, and pear with candied ginger would all be amazing pairings for a crisp like this. The other rule is to use fresh fruit that is in season and therefore tastes the best. If you happen to be a lucky cook that just recently moved to California and has never seen so much beautiful produce for so many weeks in a row in her whole entire life, this should not be too difficult.
I N G R E D I E N T S
for the filling:
3 ripe nectarines, peel on, sliced into 1/4" wedges
one heaping cup (about 6 oz) fresh raspberries
1/4 to 1/3 cup sugar, depending on how ripe your fruit is (this means you will need to taste it!)
the zest and juice of 1 lemon
1 teaspoon vanilla extract
for the topping:
5 tablespoons (2 1/2 ounces) unsalted butter
1/4 cup plus 2 tablespoons (2 ounces) all-purpose flour
1/3 cup (1 1/2 ounces) old-fashioned rolled oats
1/4 cup (1 3/4 ounces) packed brown sugar
2 tablespoons (1 ounce) granulated sugar
1/2 teaspoon Kosher salt
1/4 cup almonds, walnuts, or pecans, chopped fine (optional)
D I R E C T I O N S
Preheat your oven to 350°F.
Gently toss together nectarine slices, raspberries, sugar, lemon juice, lemon zest, and vanilla extract in a large bowl.


Set fruit aside for thirty minutes or so to macerate at room temperature and release its juices.
Meanwhile, melt the butter in a saucepan over medium heat. If you are feeling racy, go ahead and brown it a bit (but don't burn it).

Pour the melted and/or browned butter in a heat-safe container and set aside.

In another medium bowl combine the flour, oats, sugars, salt, and nuts (optional).

Slowly pour the butter into the oat mixture and stir to combine.

Stir just until all the butter has been incorporated into the dry ingredients and no flour or oat pockets remain. Set topping mixture aside.

After thirty minutes of macerating, place the fruit mixture over a strainer or sieve and let the juices drain into a separate bowl or saucepan.

Place the juices in a saucepan and cook over medium-high heat, simmering gently.


After the liquid has reduced by about one third and appears more dense and syrupy, remove it from the heat and mix it back into the fruit. All you are doing here is concentrating the flavors and evaporating some of the water in the fruit juice so that you don't end up with a soupy crisp.

Gather four small ramekins or oven-safe serving cups or bowls (or your ex-hippie parents' old ceramic Stonehenge Midwinter saucers) and divide the fruit evenly between them. You could also use a square 9X9 or 8x8 baking dish.

Be aware that the fruit will fall significantly once it begins to cook, so gently pack the serving dishes almost completely full with the fruit.

Place the fruit dishes on a baking sheet and spoon 1/4 cup or so of crisp topping on top.


Bake the crisp in the preheated oven for about 30 to 40 minutes or until the juices start to bubble around the sides.

Remove from the oven and let the crisp sit for about ten minutes or so to cool slightly. Serve warm with a dollop of freshly whipped cream or vanilla ice cream. Then call your ex-hippie parents and tell them you are thankful for all they have taught you and that you had oats and fruit for dessert!

0 notes
Text
it gave me a lickin', all that chicken...
Since moving to San Francisco, I have started contributing little bits here and there to the SF Weekly's food blog called SFoodie. It has been fun, slightly lucrative, and a really cool way for me to get to know this completely food-crazed city. I have been so enthusiastic about contributing to SFoodie that recently my editor let me know that if I wanted, I could pitch a "Top Ten ______ of San Francisco" story. Thrilled at this prospect, I suggested a few top ten ideas I thought San Franciscans might be interested in (places to eat before a Giants game, sourdough bread, etc) in addition to a few things that I just really wanted to get paid to eat (chocolate chip cookies, fried chicken, local cheese, barbecue). Lo and behold her favorite of my ideas was fried chicken.

What caused me to suggest doing a Top Ten Places in San Franciso for Fried Chicken feature for the SFoodie blog is simple: I wanted to get paid to eat fried chicken because I am inexperienced in this type of food journalism and there is a fat kid that lives inside me. Had I actually envisioned what it would entail to sit down to more than ten meals of fried chicken in a week, I most certainly wouldn't have suggested it. I went to a total of fourteen spots, from the Mission to the Tenderloin, Hayes Valley to North Beach. One day I walked to Bayview to go here simply because I didn't have anything better to do—and now I know where I don't want to live, ever. I rode my bike to the Richmond, took Muni to the Dogpatch, and roped friends into helping me eat fried chicken at every opportunity (Thank you Brian, Leo, Devin, Anna, Zoe, Joe, Jon, and Molly).

I even had to create a rigorous fried chicken-eating schedule in order to get around to all the spots on my list and it had me at two, or even three different restaurants on some days. In order to not turn into something resembling Jabba the Hut, I made sure to walk to as many spots as possible and I promise I did not eat each dish in its entirety (that's what pals are for). Despite that, it still took everything I could muster to even taste all that chicken, especially towards the end.

Fortunately during this gout-inducing endeavor, I found some delicious spots that I will most definitely return to (like here and here) and I discovered what may be San Francisco's answer to my favorite fried chicken in Seattle at San Tung Chinese in the Sunset. I also ate some chicken that was tasteless and greasy and weirdly, some that tasted like hot dogs (seriously, hot dogs). But to really get the full picture of what I thought about my fried chicken adventure in San Francisco, you should probably just read the article. Then, pop a Tums and walk it off.

0 notes
Text
what i learned today
I just finished watching El Bulli: Cooking in Progress, you know, the documentary about Ferran Adria and his fantastically famous restaurant in Spain, El Bulli. While the movie was entertaining, it wasn't very informative in that there were no interviews, many images and conversations were left unexplained, and as far as chef-based documentaries are concerned, it has a ways to go to be as good as my current favorite Jiro Dreams of Sushi. I did learn a bit about what goes into making one of the most famous restaurants in the world work and how the chefs plan their absurd avant garde menus. But, I think the most important thing I learned from watching this film is that if Dave Matthews (yes, that Dave Matthews) had a love child with my old boss Thierry Rautureau (The Chef in the Hat)...
...it would probably look a lot like Ferran Adria.
That is what I learned today.
0 notes
Text
be coolinary news
Good morning friends! Let me distract you from your desk job with some most entertaining food news:
I knew it! Even aliens have sweet teeth! Sugar has been found in SPACE!
I'll see you at da club! Oh wait, I mean Applebees. Oh good, they are the same now.
I'm with Chipotle on this one: I hate pennies too.
But I was really looking forward to eating at San Francisco's hottest new restaurants Distilled Moustache and Reclaimed Wood & Subway Tiles!
Because why drink coffee in the morning when you can drink waffle-flavored vodka?
ATTENTION MOM! Apparently black licorice is not only totally gross, but can totally kill you.
Soft-serve beer. It exists.
Just my luck. Right after I move away from Seattle, this happens.
And in case you missed it, the best of the latest footage of real actors reading real Yelp reviews:
0 notes
Text
dutch baby, baby!
Has it been a while since you have had something warm from the oven for breakfast? Do you have some eggs, half and half, and flour in your kitchen? Do you have an oven? Do you like eating yummy things with your baby (your literal or figurative baby) while you sip coffee and browse your Instagram feed from the night before? If you answered yes to any of these questions then, boy, do I have the thing for you! It's called a Dutch baby and it's the perfect way to enjoy the morning with your literal or figurative baby!

Dutch Baby, Baby!
serves 2 (you and your baby) with leftovers, or 3 if you're into that kind of thing...
A Dutch baby is basically a thick, egg-tastic pancake. This recipe is adapted from a recipe in Molly Wizenburg's book A Homemade Life. If you haven't heard of Molly, read her blog, or read this book, you are missing out. She is kind of a big deal (she writes for Bon Appetit and has her fingers in this, this, and most recently this). I really admire her writing, recipes, and cooking style, so much so that I gave each of my sisters her book last Christmas. Her recipes are unpretentious, simple, and easy to adapt to ones liking or dietary preferences. This recipe can be served quite simply, like with a sprinkling of lemon juice and sugar, or with some fresh fruit, or with jam. Or, you could omit the last three ingredients I have listed and make a savory version by adding some grated cheese, parsley, and sausage to the batter if you want to get crazy with your Dutch baby, baby!
I N G R E D I E N T S
2 tablespoons butter
4 eggs
1/2 cup (4 fluid ounces) half and half
1/2 cup all-purpose flour
a pinch of salt (increase to 1/2 a teaspoon if you are going the savory route)
1 tablespoon sugar
one lemon
powdered sugar
D I R E C T I O N S
Preheat the oven to 425° F. Melt the butter in an 8-inch cast iron skillet over very low heat on the stove. Coat the pan with the melted butter using a pastry brush or paper towel. If you don't have a cast-iron skillet, you can use an 8-inch cake pan.

While the pan is preheating, crack the eggs into a blender or large measuring cup. Add the half and half, flour, salt, and sugar to the eggs.


If you happen to have vanilla sugar, this is a great opportunity to use it (Babies love vanilla sugar).

Blend until the batter is smooth and completely combined.

Pour the batter into the preheated skillet (or cake pan) and place it into the oven to bake for 20 minutes or so.

The Dutch baby is ready when the edges have poofed up significantly and are a light golden brown. The center should be set and will not look wet or liquid at all.

Remove the Dutch baby from the oven and as per Molly's instructions, douse the top with fresh-squeezed lemon juice.

And, as per my instructions, generously cover the surface with a good layer of powdered sugar.

Then, serve your literal or figurative baby some Dutch baby and enjoy!

2 notes
·
View notes
Text
candy flavor horoscope!
My idols over at The Stranger have created a Candy Flavor Horoscope and now I am mostly illegally posting it on my blog for you all to see (print publications can't afford lawyers these days, right?). I have decided it is 100% accurate based solely on the fact that my mother is a black licorice lover and fed me microwaved apples as "dessert" when I was a child. Enjoy!

0 notes
Text
happy birthday julia!
Today marks what would have been Julia Child's 100th birthday! And it seems quite obvious that to celebrate her legacy we should all treat ourselves to some delicious French food, preferably something whipped up from one of her cookbooks. I went ahead and made two of her trademark dishes from Mastering the Art of French Cooking: vichyssoise and boeuf bourguignon.


So pop open your favorite bottle of French wine and read more to see how you can celebrate Julia and her unparalleled contribution to American cuisine. Or skip the recipes and just watch this amazing remix instead. Bon appetit!
Vichyssoise or Chilled Potato Leek Soup
This recipe is adapted from Mastering the Art of French Cooking by Julia Child, Louisette Berthole, and Simone Beck.
Serves 6-8 people
This soup is very satisfying yet light, and as Julia says, quite "uncomplicated to make". You can make it well ahead of time and serve it as a first course before something hearty, like boeuf bourguignon. Try substituting creme fraiche instead of cream for a more modern take on the classic soup.
I N G R E D I E N T S
3 cups sliced leeks (one large leek or 2 small ones)
3 cups sliced potatoes (about 2 smaller potatoes)
1 1/2 quarts chicken or vegetable stock
3/4 cup heavy cream
minced chives
salt to taste
D I R E C T I O N S
Prepare your sliced leeks by slicing off the tip with the roots, then slicing it in half lengthwise. The cut thin slices all the down the white of the leek until you reach the tough, green, fibrous leaves. Some of the green will be tender enough to use but certainly not the entire leek. Then place the sliced leek into a large bowl of cold water. This will ensure any bits of sand or dirt are washed out as they will sink and the leeks will float. Set leeks aside.


Then peel and cut the potatoes in a similar fashion, lengthwise first then in half-circles down the length.

Place the potatoes and leeks in a large pot and cover with the stock.

Cover the pot, bring the liquid to a boil, and then reduce to a simmer. Simmer until the potatoes are cooked all the way through, about 30-40 minutes depending on how thick you slice the potatoes. When the potatoes are completely cooked, carefully transfer the soup to blender or use a hand blender and thoroughly puree the mixture.

Then using a fine mesh sieve, strain the liquid into a bowl.

Whisk in the cream and then add a dash of salt to taste. Julia says to "season to taste, oversalting very slightly as salt loses savor in a cold dish." Thank you, Julia.

Chill the soup completely before serving. To serve, mince some fresh chives and serve in chilled soup bowls.

Bouef Bourguignon or Braised Beef Stew
This recipe is also adapted from Mastering the Art of French Cooking by Julia Child, Louisette Berthole, and Simone Beck.
Serves 3-4 people
This is the one of the most classic braised beef dishes ever. It is traditionally served with boiled potatoes but Julia says you can also substitute rice or buttered noodles, so I served mine with pappardelle. She also suggests enjoying this dish with a "fairly full-bodied young red wine like Beaujolais, Cotes du Rhone, Bordeaus-St. Emilion, or Burgundy."
I N G R E D I E N T S
3 ounces of bacon, cut into one inch pieces
1 tablespoon vegetable oil
1 1/2 pounds lean stewing beef, cut into 2-inch cubes, patted dry with paper towels
1 small onion, diced
1 small carrot, diced
1 teaspoon Kosher salt
1/2 teaspoon freshly ground pepper
1 tablespoon flour
1 1/2 cups red wine
1 to 2 cups beef stock
1/2 tablespoon tomato paste
2 cloves garlic, crushed
1/2 teaspoon fresh thyme, minced
1 bay leaf
D I R E C T I O N S
Start by preheating the oven to 425°F. Heat the oil in a dutch oven or stock pot over high heat. Add the bacon and cook until it is slightly brown.


Remove the bacon using a slotted spoon and set it aside. Using the same pot, brown the beef in the bacon fat over hight heat, working with a few pieces at a time.

When the chunks of beef have been browned, set them aside with the bacon. Then, add the carrots and onion to the pot and brown them in the fat.


Turn off the heat and If you have any excess fat in the pot after you have browned the vegetables, discard it. Otherwise, add the bacon and the beef back into the pot and add the salt, pepper, and flour, tossing gently to coat. Place the pot in the oven, uncovered, for 4 minutes. Toss the mixture around and return it to the oven for another 4 minutes. Julia says "this browns the flour and covers the meat with a light crust."

Remove the dutch oven from the oven and reduce the heat to 325°F. Pour the red wine into the meat and then add enough beef stock to just cover the beef. Stir in the tomato paste, garlic, thyme, and bay leaf and bring to a simmer on the stove.


Cover the Dutch oven with a lid and place it in the oven for 2 1/2 to 3 hours, until the meat is extremely tender and a fork pierces is very easily. While the stew is cooking, check it periodically to make sure it is cooking at a simmer. If it is not, raise the heat to 350°F. If it is boiling rapidly, reduce the heat to 300°F.
Meanwhile, Julia suggests serving this stew with her braised onions and sauteed mushrooms, both of which can be whipped up while the stew is cooking. Also, this is a great time to cook the potatoes, rice, or pasta you wish to serve with the beef. Or, better yet, this is also a great time to sit down and enjoy a glass of wine whilst reading more recipes...

When the beef is super tender, remove the pot from the oven. Carefully pour the hot stew through a strainer, catching all the liquid in a large saucepan or bowl. Reduce the liquid just slightly to thicken, simmering it for about 5 or 6 minutes in a saucepan.

Meanwhile, wash out the Dutch oven, remove the pieces of beef and bacon from the strainer, and add them back to the Dutch oven. This step is tedious and annoying but it's how Julia would want it!

Then, when the sauce is reduced enough to coat the back of a spoon lightly, add it back into the Dutch oven with the meat and stir to combine.

This, my dears is boeuf bourguignon, courtesy of Julia Child. Ladle the beef over some buttered noodles and serve with sauteed mushrooms, braised onions, and of course, a nice glass of red wine. Thank you Julia and Happy Birthday!

0 notes
Text
i like cookin'
There is a store down the street from my apartment that I recently discovered. I have walked by it approximately 600 billion times but had never checked it out until last Friday. It's called Cookin' and it's a used kitchenware shop owned by a peculiar, although spectacular, woman named Judith Kaminsky.

In operation for over 25 years, she clearly is doing something right but apparently has received mixed reviews from customers about her inventory and peculiar approach to customer service. This article describes a bit about what you'll encounter at her shop and this article goes on further to describe her mixed reviews. When I showed up to her store, I got a firsthand glimpse of her curious idiosyncrasies, but left her company a believer.

As I walked through the shop, all I could think about was 1) how excited I was to finally be there, and 2) the show Hoarders. She has piles and piles of inventory, mostly organized, covering every square inch of the floor except for the narrow corridor she wishes you to walk. Piles of books, towers of glass cake pedestals, stacks of old enamel dutch ovens, and layers of copper cookware protrude from every corner and surface. She really has an impressive amount of inventory, and high quality inventory at that. I overhear her chatting to someone who appears to be another neighborhood business owner about bike lanes and parking spaces.

As soon as he leaves, her attention drifts toward me. Now she wants to talk to me about the bike lanes, so being new to the area and a bike rider myself, I listen. Then she wants to show me the handicapped parking spaces outside her shop that are allegedly being used illegally by non-handicapped people. "People that buy cast iron come here in cars, not on bikes," she tells me. I silently disagree as I have been car-less for many, many years and wouldn't bat an eye at carrying some cast iron in a pannier, but perhaps I am the minority.

She keeps talking about the bike lanes, and the foot traffic, and the truck traffic, and the one-ways. I acknowledge her words at appropriate intervals, hoping that my facial expression doesn't give my total cluelessness away. After five minutes I realize that she will continue talking to me about whatever suits her even if I am not acknowledging her so I quit trying. We move on to talking about her customer base, then she walks me through her trials and tribulations making a gingerbread recipe from the Tartine Cookbook, then she tells me that she is good friends with David Lebovitz, THE David Lebovitz. This is a game changer.

I start paying closer attention again, start making my acknowledgement noises once more, and decide that I must befriend this cranky old woman. I tell her I am a pastry chef and a baker and her demeanor warms from ice cold to just cold. I tell her I follow David's Instagram and blog and think he is great. Then, with zero hesitation she says "Why do you like David so much?" immediately making me insecure in my admiration of Mr. Lebovitz. I tell her I like him because he is a pastry chef and I think it's quite brave to move out the country. She abruptly changes the subject. She tells me her friend makes the best macarons she has ever had. Then she tells me to join The Bakers Dozen, a non-profit devoted to baking professionals and enthusiasts. I feel like I am barely winning her over and then thank her for the suggestion.

Then I meet her golden Lhasa named Tank and give him a pet. I tell her he is cute.

Customers come and go. Some apologize for interrupting but need help finding something in Kaminsky's chaotic maze of equipment. She jumps to help them, asking what they are making, baking, or using this or that for. She lets them know if she approves or how to do it better, otherwise known as how she would do it. Some people smile politely, clearly hoping to just get out the door as quickly as possible. Others engage, bouncing their culinary ideas off of her hard exterior shell. It becomes clear that those are the types of customers she likes and perhaps why she started her business in the first place.

I immediately realize if I don't create a segue to remove myself from another conversation, she will talk to me until she closes her shop in three hours. I tell her I am going to go home to sign up for The Baker's Dozen and that I will most likely see her again soon since I live around here now. She tells me I should go to the Divisadero Merchants Association meeting so I can get in on addressing the new bike lanes. I tell her I will try to make it knowing full well that I won't attend seeing as how I am not a Divisadero merchant or in the association and therefore won't be welcome. I still don't mention that I ride a bike. She waves goodbye and I head toward the door. Exiting, I squint as my eyes readjust to the beautiful sunny day I have been absent from for an entire hour. As I walk the four minutes back to my apartment, I decide I will bake something next week. Probably something I may not have all the equipment for and might need to acquire secondhand, probably somewhere close by...
2 notes
·
View notes