
Last Seen Blogs
estastone
ESTA STONE-Granite,Marble,Quartz Manufactuers

baekhyuns-jiggly-cheeks
aesthetic prince

flashandignite-blog
flash&ignite
lxnxly-bxy
All for you.

3am-cheerios
for whom the gurdy hurds
Text
Best of March 2020 on Picfair.com

One of my photos has been selected as one of the best photos uploaded to PicFair.com for March 2020!
My photo of a buddhist monk beating a dharma drum was selected as one of the best of February, which was a surprise and for me an incredible achievement, so to be selected a second time is just mind blowing!
PicFair has a very strong community of photographers, the quality of images available on PicFair is amazing, and it really shows in the regular talent showcases they publish on their blog.
Out of all the websites that allow photographers to sell their work PicFair seem to offer the fairest terms for photographers. Flexible licenses, the freedom to sell your work elsewhere, and also the biggest cut of the profits! I’ve sold photos on websites previously where I’ve effectively made loose change while the website takes a large cut of the profit. Considering the amount of money I’ve spent on gear and travel I’ve never really considered this to be reasonable. Especially in light of the time and effort I’ve put into learning photography as a craft.
What I really like about PicFair however is the way they engage with their community and promote people’s work. It’s not only benefited me personally as a photographer, but it’s also nice to see what pother talented photographers are doing and get inspired by their work and vision.
I’ve had a love hate relationship with several photography platforms in the past. Most of them seem to prioritise successful marketing rather than photography, and the people who are able to game the system with hashtags and by following and then unfollowing others are the ones who succeed, regardless of the quality of their work. I’ve always hated the way people will follow and then unfollow someone, just to increase their own audience. It feels dishonest and really cynical, like that person only cares about themselves and doesn’t really care for the person they’ve followed or their work. It’s disheartening too, especially if you’re starting out and trying to get feedback and recognition for your work. A lot of photography platforms are just another status competition rather than a platform that cares about photography.
Don’t get me wrong, I’ve seen some great photographers on platforms like Instagram and 500px who seem to market themselves in cynical ways and get a level of success from it. Fair play to those people, they work hard at what they do. I’ve also seen some not so good photographers do the same thing. Ultimately these are in my opinion marketing platforms, not photography platforms.
I’m not particularly strong with marketing, it’s not something I enjoy, and I can’t bring myself to follow someone and then unfollow them just for my own personal gain. I know it’s annoying and it can be disheartening, and I’m not built like that. I really enjoy taking photos however, and I love looking at other great photos too. What I love about PicFair is regardless of how big your follower count or how many “likes” you get, if they think your work is good they will promote it. For me it’s great to finally have a platform that genuinely appreciates photography, rather than competing for social status and gaming the system.
If I were to recommend any website for photographers to sell their work on, right now it would be PicFair. I’ve seen some hostility to PicFair in the past, but they offer free accounts and they foster a great community, and their premium accounts are attractive considering the margins they offer.
Huge thanks to the PicFair team for creating a great website for photographers!
https://brenm.picfair.com/
https://www.picfair.com
0 notes
Text
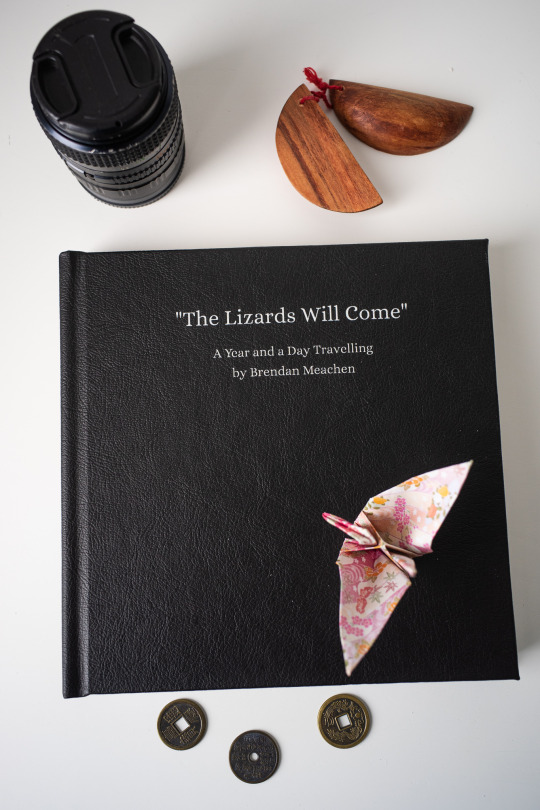
Product review: Saal Digital Printing
I was lucky to get the opportunity to test a new product line from Saal Digital, the Professional Line Photobook. I designed a PhotoBook using their software and was delivered a high quality printed book. Below is a review of their Professional Line Photobook product and the service I received from Saal Digital.
Disclaimer: Saal Digital paid for my Photobook, and I paid the cost of shipping. I've endeavoured to keep this review objective, but at the same time I value honesty and transparency.
The printed product
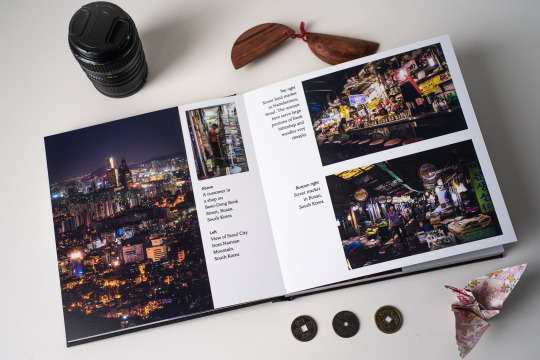
Saal Digital sent me a wonderful printed product. I was honestly highly impressed with the quality of the prints, the paper, and overall finish of the product.
Saal Digital offer a variety of options for print quality and paper quality, as well as a variety of cover options. I chose a Leather finish for my cover, with some simple custom text printed on it, they offer acrylic covers which allow you to print a photo on your cover. I also used matte photo paper. Glossy paper, high end matte paper, and art paper are also available.
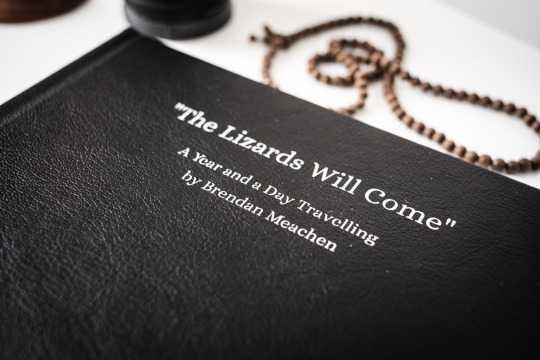
The PhotoBook I recieved was beautifully presented, and well bound. The leather cover has a very ncie finish and the text I used for the title of the book printed very nicely.
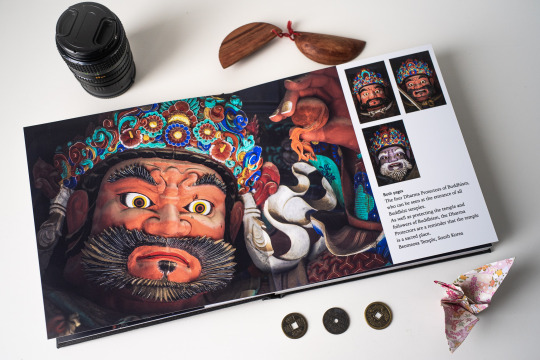
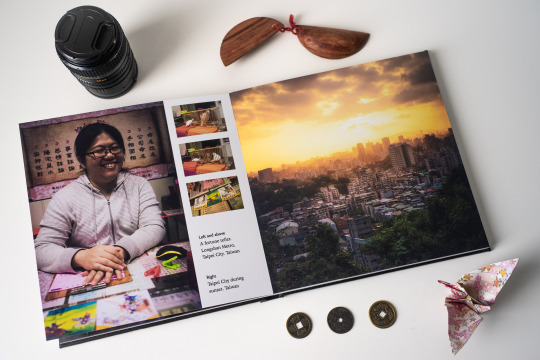
The quality of the photographic prints inside the book was outstanding. I've worked as a print graphic design, so I can be very fussy about print resolution and colour reproduction as well as paper quality. I process all of my photos in Adobe Lightroom and do some limited colour-grading to get my images looking exactly how I want them to. The photo book I received reproduced my images perfectly, they printed at high resolution and looked sharp, and the colour was perfect. The tonal range of my images was very well preserved and I didn't loose any detail in my shadows, while overall contrast of my images was maintained. Basically what I got on a calibrated screen was what I got in print.
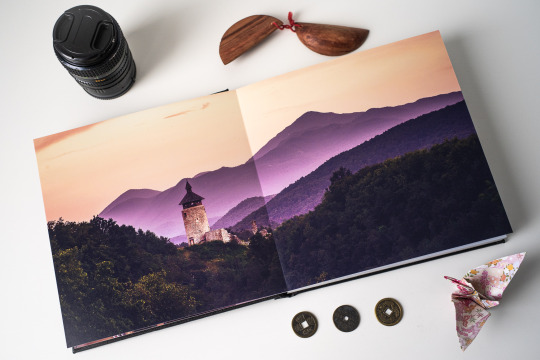
I printed an 84 page book, and many of my photographs were designed to be double page spreads. I was expecting to loose some of my images to the biding of the book, where the pages join in the middle. I was delighted to find that the book opens flat, and none of the image is lost on a double page spread. Given the already impressive print quality this made for some impactful prints and really set the standard of quality for the product very high.
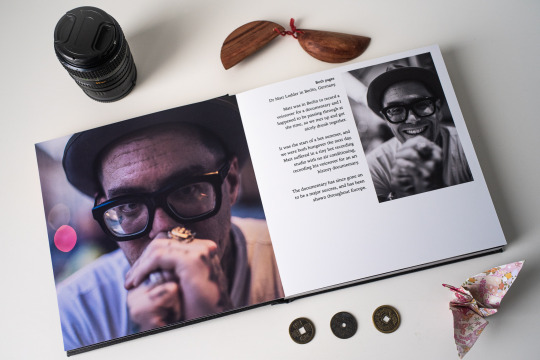
Everything was printed on high quality thick paper, with a slight texture. While the paper is matte it does have a glossy feel to it, but without any shine. I've browsed through my book several times and despite my best efforts I've left no finger marks on any of my images.

Overall the quality of the Professional Line PhotoBook was fantastic. This is a beautiful product and very reasonably priced. I'd be happy printing a few more of these. They would make a great gift for family and friends, and I can definitely see these being used commercially by wedding and event photographers. Saal Digital have an option to purchase a gift box with your book, which again would make these perfect for weddings.
The software
Saal Digital offer their own bespoke software for designing and typesetting a book. Given past experiences I was prejudiced towards the software, and I really wasn't expecting much from it. However overall it was relatively easy to use and had a small learning curve.
The software is limited, professional designers or serious commercial photographers may want to use professional software like Adobe InDesign or Affinity Publisher... however those kind of users are probably going to use that kind of software anyway. Personally I'm highly familiar with InDesign, however I was surprised to find that the software provided by Saal Digital wasn't as limited as I expected. I could do everything I wanted, in particular the typographic controls were more advanced than I expected. The software allows the typographic leading to be customised. The software comes with a limited selection of fonts which aren't (in my opinion) great quality. I used my own fonts, which I enabled in the settings. I did experience an issue where my own fonts weren't available untile I restarted the app two or three times which was a small bugber, however once I had them they were fine and the fonts printed as I expected. The software comes with a spellcheck which for me was essential.
The grid options are limited but good enough for basic design tasks. Snap to grid didn't always work consistently, and I would have to zoom in quite far to ensure objects are aligned properly.
While the design tools are a bit basic, for a personal photobook they are more than good enough and very simple to use
Print guides such as page bleeds are clearly marked, and the software will warn you if an image or text is too close to a bleed line.
There is an option to export as a PDF, but you get a low resolution PDF with a giant "preview" watermark on all pages. Not really a useful feature.
Pro's might want to consider their own DTP apps, but most probably will anyway. The website has plenty of information and support on how to set up your own documents and submit print ready files with the right colour profiles. As someone who has worked as a graphic designer in the past however I was happy with the result I got from the SAAL software. I really wanted my book to focus on the photography and for any text to be nicely set out and clean and minimal, which I achieved easily.
The ordering process in the software was easy and quick. I had to change to my browser to make a payment via paypal but this was easy and I was prompted. The ordering process was painless.
Service
The book was delivered by DHL, during the coronavirus pandemic just as the UK Governmnet annouced it's policies of self-isolation. Despite this the finished book was delivered earlier than expected. I received an email from Saal Digital when the book was printed and ready for shipping, as well as emails and SMS messages from DHL regarding delivery. I received the finished book about a week after ordering.
You can order your own PhotoBook on the Saal Digital website - https://www.saal-digital.co.uk. I’d highly recommend them, the Professional Line PhotoBook is an amazing product which I feel earns the title of Professional. Saal Digital also offer a range of other products, including posters and fine art prints.
0 notes
Text
Astrophotography

Astrophotography is a lot of fun and very rewarding, but requires some patience. Depending on ambient light you may be able to just make out the milky way as a dense silvery strip of faint stars in the sky, often pointing the camera in the sky and getting the right composition requires some guesswork and trial and error, as your view is going to be limited, especially if you’re using as digital view finder.
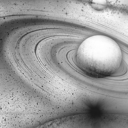
I really enjoy Astrophotography, and I consider myself lucky to have had a few opportunities to shoot the milkyway in dark spots at high altitude. This photo was taken at around 4000 metres above sea level in Guatemala.
I personally use the Laowa 15mm f2 zero d lens, a Sony A7ii. I set the aperture to f2.8, as I find f2 is a bit too soft but f2.8 lets in enough light to really capture the stars. Most lenses tend to loose sharpness wide open, and the Laowa 15mm is no exception, although I find I get decent images at f2.8.
I focus manually. The Laowa 15mm f2 is a manual focus lens anyway, but I would recommend focussing manually at night as auto-focus will struggle in such low light. I use the focus magnifier to make sure I get the stars in focus, using a particularly bright star to make sure it’s right. Make sure you don’t just focus all the way to infinity and shoot. I find infinity on most lenses isn’t sharp. Inifinity distance is infinite, and the ways while lightyears away from us aren’t quite infinitely away from us.
Make sure you don’t just focus all the way to inifinity and shoot. Focus on manual and use trial and error to get the focus right if you need to.
I’ll keep my ISO between 16000 and 32000, depending on the amount of ambient light available. With the Laowa 15mm I found I could still get some stars at ISO 800, but I got the best results at ISO 16000. It’ll really depend on the lens you’re using, your camera, and the amount of ambient light in the area.

You’ll need to use a slow shutter on your camera to get enough light to capture the stars. This can be tricky. For a very wide angle lens 15 seconds is probably the optimum, for longer focal lengths you’ll need to reduce that. The stars will rotate in the sky as the earth rotates on its axis, so at longer shutter speeds you’ll see star trails, or the stars rendered as little curved lines. This will get more pronounced at longer focal lengths. A tripod is absolutely essential.
This particular shot was captured with a 15 second shutter speed, on f2.8, at ISO 16000.
I recommend shooting in RAW format so you can process your image afterwards, using software such as Lightroom, Affinity Photo, or CaptureOne. Processing your image will allow you to adjust the amount of detail, the colour, and the amount of stars visible in your photo. I may outline my editing process for this shot in my next blog post.
If you’re at high altitudes, then stay safe! Altitudes above 3000 metres can induce altitude sickness due to the smaller volume of oxygen in the air, which can be very dangerous. Always make sure someone knows where you’re going and when you expect to return. I personally did suffer mild altitude sickness while taking these photos. While I was more or less ok, I did trip on a rock and completely loose my balance, nearly trashing my camera and lens in the process! Luckily I came away with just a few cuts and bruises.
Both photos taken at Volcan Tajumulco, Guatemala. Christmas 2019
2 notes
·
View notes