
This is a blog for a class on creating digital environment, to document my progress on each project.
Don't wanna be here? Send us removal request.
Statistics
We looked inside some of the posts by bri3denvironments and here's what we found interesting.
Average Info
Notes Per Post
0
Likes Per Post
0
Reblog Per Post
0
Reply Per Post
0
Number of Posts By Type
Text
1
Last Seen Tumblr Blogs


Fun Fact
Tumblr was the first site to host the blog for President Barack Obama in 2011.
Text
Project 1: Live Action Set
Part 1: Planning
The guidelines for this assignment are to recreate a set from a film from prior to 1950 through combining a 3D model with a photo. After some research, I have chosen the following still from Dracula:

The part that will be modeled is the walls and staircase, and the photograph will be the ground and couch. For this project I decided to use Houdini to model, for its procedural capabilities. However, since I am learning a completely new program, it has proved to be very time consuming, but I do believe learning Houdini will benefit me in the long run.
So I gathered some photos to use for the project and eventually chose to use this one:

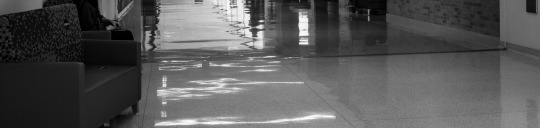
I made sure to use a tripod for my camera, however, I do have some tilt because I had to hold the camera up myself to get the desired height. Of course, some photo editing will help fix this. The final cropped image I will be using in my scene file will be this:
Part 2: Modeling
The next part of the project was going to be a challenge, but I was up for it. I started with the staircase. The first step was obvious; make a box.
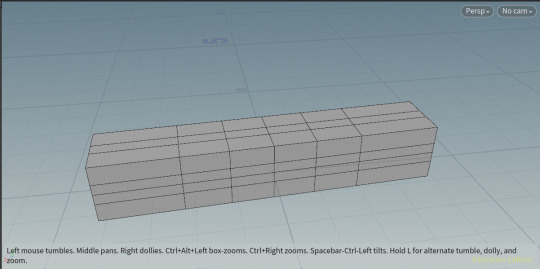
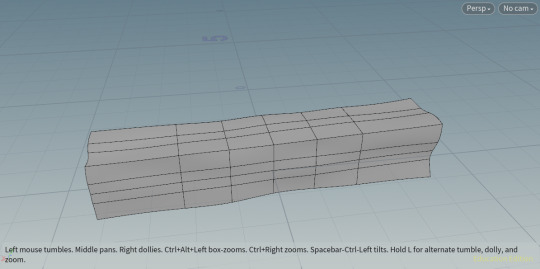
To make it look more organic and worn, I added a mountain node to create some slight variation. This can be done since I used NURBS to model.
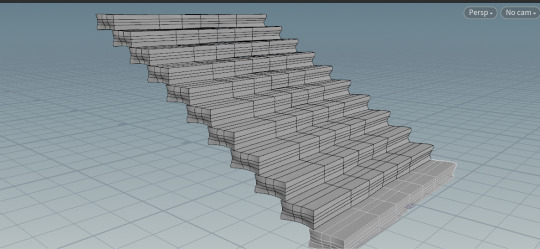
Once I transformed and sculpted it to the shape I wanted, I used the copy stamp node to make a set of stairs, with some point jitter so each step is slightly different.
Since I am still learning Houdini, in another file, I tried experimenting with modeling using curves. In a different file, I created both the post and the column using NURBS curves and the revolve node.
Once I brought those into the scene, I scaled the objects to their proportional sizes.
The biggest challenge in this project was modeling the rails, but eventually, I was able to figure it out by creating a line that follows the angle of the staircase using relative reference.
For the walls, I used a curve and a sweep node.
Once I finished modeling, I moved on to lining up my model with the live action plate. This would prove to be quite difficult, because the perspective needed to make sense. Unfortunately, the picture I took did not fit my lighting and composition too well, but I was able to match up the perspective.
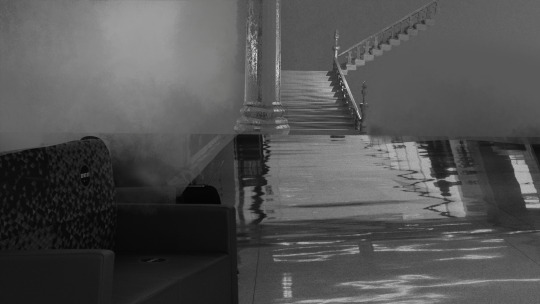
Step 3: Surfacing and Lighting
Once it was lined up, I started the process of lighting and surfacing. I used UV nodes to lay out the UV’s and imported textures into the Material Palette. I downloaded some texture maps from a free-to-use website, and applied them to their respective objects.
All that was left after that was lighting. I created sky lights to give an ambient light to the scene as well as some highlights to light up a couple of spots on the model. So with all of that, here is the rendered image without compositing:
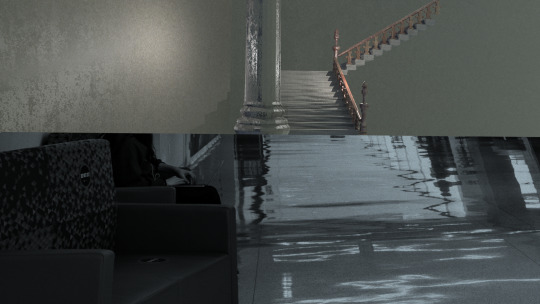
The final step is compositing and adjustments. Once I adjusted the saturation and made some edits to help the two components blend together, this is the final image:
For what it’s worth, even if this final product isn’t exactly what I want, I definitely learned a lot from this project. I still have a long way to go with my skills in Houdini, but it was a great learning experience for me.
0 notes