
Statistics
We looked inside some of the posts by calliecod and here's what we found interesting.
Average Info
Notes Per Post
3
Likes Per Post
1
Reblog Per Post
2
Reply Per Post
0
Time Between Posts
5 days
Number of Posts By Type
Text
11
Last Seen Tumblr Blogs


Fun Fact
Mobile US users spent an average of 115.8 minutes on Tumblr app monthly.
Text
Reference to new future blogs (will be updated when applicable)
2 notes
·
View notes
Text
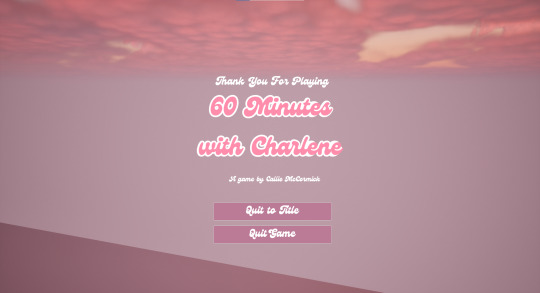
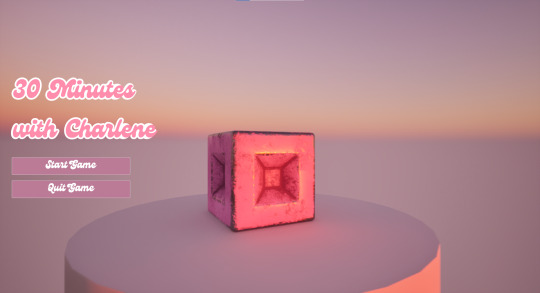
30 Minutes with Charlene - a short puzzle platformer experience.
0 notes
Text
finishing level 2, adding secrets, building level 3, and THE TWIST
I'll start the documentation for this last week by going into the last level I ended up making to cap off level 2: the maze. The maze is pretty self explanatory, except that it has two exit points, one for the player and one for Charlene, with a button at Charlene's that opens the Player's exit, which lets them release Charlene from the other side. I'm actually very happy with this puzzle, it's a great addition to the second level. Before moving on to the third level, I also adjusted the speeds on the platforms for puzzle 2-2, and gave the first person player more air control in the backend to help with harder jumps.
Next, we move on to 30 Minutes with Charlene's 3rd and final level, which introduces a new mechanic right from the jump: Large Boxes. these can be moved around in a limited capacity and can press buttons, which is shown in this basic first puzzle which requires the box to be released onto the button to proceed.

these mechanics are expanded on further in the second puzzle, which involves moving Charlene and several boxes with platforms to activate other platforms the player can use to proceed. Once the other side is reached, the player then has to push a box themselves onto a button to activate a platform allowing the player to collect Charlene. From there, the player uses Charlene to proceed through the door, then has to bring a platform up from below Charlene to bring her in line with a hole that can be used to grab her through. This is probably the most intensive puzzle in this level, apart from perhaps the next one, as from this point the story is meant to be driving the player forward over gameplay.
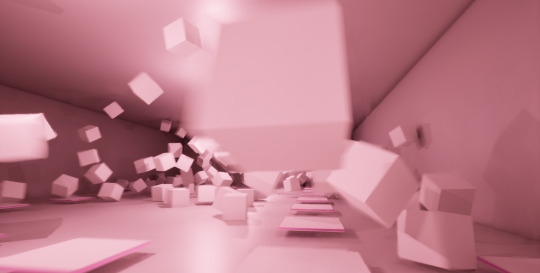
This third puzzle is probably the most unique puzzle I have made, if not perhaps all that hard, and I have lovingly dubbed it "the mosh pit" for reasons that should quickly become obvious. The player sends Charlene down a chute at the bottom of which is a button that lets the player follow her down a second chute, which automatically flings Charlene into the chaos of constantly moving boxes shown below. The only objective is to find Charlene and leave the puzzle room with her, which tends to get more difficult the longer you stay in the room. this puzzle is a little short and easy, but it's quite fun and provides a necessary release of intellectual focus for a little while. After leaving, the player has to retrieve Charlene again by pushing aside some boxes that are in the way of a hole. This is a very silly puzzle but perhaps one of my favourites (although it can get janky if Charlene gets flung through a wall and has to respawn).
The next puzzle is deliberately not very hard, and serves mainly as something to keep the player moving through the level, with the only real challenge being using a platform to maneuver Charlene around a door from the other side. This gameplay section mainly exists as a vehicle for the story, and is meant to lull the player into a false sense of security before THE TWIST.

Previously, I had a different Puzzle in the 3-4 slot which involved the player and Charlene each using a platform with buttons that controlled each others platforms along the way to move each other along. If this sounds vaguely familiar, that's because it's actually an evolution on the scrapped 2-3 puzzle I mentioned at the end of last week and never mentioned again because it didn't work, which got replaced entirely by the maze. Unfortunately, although this version worked better, it still only worked around 30% of the time and wasn't worth spending more time to fix, so it got replaced with the simpler puzzle shown above.

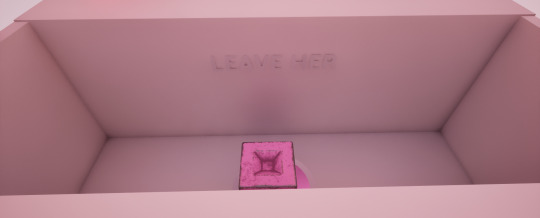
At this point we arrive at THE TWIST. At the end of this fourth puzzle, the player is presented with a pit with a button at the bottom that opens the only door to proceed forward. The player has no option except to drop Charlene into the pit and deliberately abandon her to progress through the door, with the mysterious text that has been appearing on walls to help solve puzzles since 2-2 heavily encouraging this action.
When the player proceeds into the next puzzle without her, several dialogue box widgets pop up as the player gets further and further from Charlene, as she speaks for the first time, begging the player to come back and help her (which is actually impossible without the secret double-jump powerup or getting yourself soft-locked in the pit) until she can no longer be heard in the distance. these are all activated with blueprint trigger volumes that bring up each widget the further you get from Charlene.

The mysterious text then thanks you, and the player then has to solve a repeat of the first puzzle in level 3 to activate a platform, which sends them over to an area where the puzzle appears to be falling apart from a combination of Charlene being missing, and mysterious outside interference.

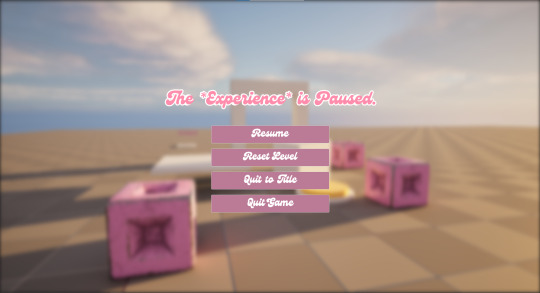
The text claims you can now leave and receive a reward, and directs you to jump to a lower platform and land on a checkpoint. This is then revealed to be a ruse intended to trap the player on this small piece of floor, which the text wanted for unknown reasons. You are then left to ponder this and attempt to leap off the platform for the next 30 seconds, until an ending slide plays. You have failed both yourself and Charlene, and this is now your fate seemingly for the rest of eternity. (note this ending slide's title was incorrect and displays an alternate title in this screenshot which is fixed in the final version.)
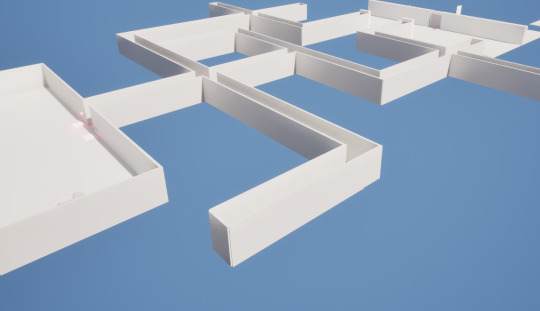
Overall, level 3 has an interesting combination of new mechanics and interesting if over-the-top story drama along with a nice sky background change that makes for a unique if unchallenging final level.
At this point I went around each level, and around the start of each I added a secret double-jump power-up in a hidden hard to reach location to make second playthroughs fun. These are fun to use but largely ruin the gameplay so I don't recommend collecting them at all on a first playthrough. Since they are meant to be hidden I won't tell you where they are, go find them yourself on repeat playthroughs if you wish! The next post will probably be the Itch.io link for 30 Minutes with Charlene, so stay tuned!
0 notes
Text
A couple of additional features, and building most of Level 2
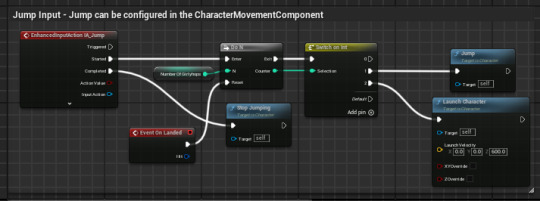
First I'll cover the new additions we coded this week before moving into discussing the puzzles I made for level 2. the first of these we made was a double jump mechanic that could be distributed through an item pickup to serve as a power up. We achieved this by altering the jump feature in the first person code to be able to launch the player again after the initial jump, and then tying the number that determined whether you could to the code for picking up the power up. (apologies if this is poorly explained it's Friday and I'm tired)
after this we went back into the pause screen's code to add functionality for the Reset level button to save the current name of the level being played and then using that to decide which level to load.

with the new features out of the way, it's time to move on to what I've created for Level 2 so far.

The first puzzle in level 2 is a simple variation of the door opening puzzle from the tutorial, where instead of pulling Charlene through after you, you drop Charlene over a hole in the wall for her to land on the button to let the player come through. This is the beginning of variations on getting around the door, and I'm hoping to come up with some even smarter ideas on how this could be done.
The second puzzle is a bit of a change up, as it is for the most part solely a platforming section focused on jumping between moving platforms with Charlene being largely secondary. Because the platforming in this section requires a lot of focus, and Charlene takes up quite a lot of the screen, for this puzzle I added an alternate side platform for the player to send Charlene to wait for you at the end of the puzzle. In case someone did want to try it without that, I did make sure to add a checkpoint for Charlene part way through the puzzle for those insane enough to attempt it with her in the way. Charlene is quite necessary for the end of the room, however, as although it seems there is no way through, there is a hidden tip on the wall that lets the player know to reach Charlene around the wall to put her on a button hidden on the other side that lets the player through.

My idea for the third puzzle is not finished yet, but I plan for it to involve the player and Charlene using buttons to allow each other to progress through simultaneous tunnels opposite each other.
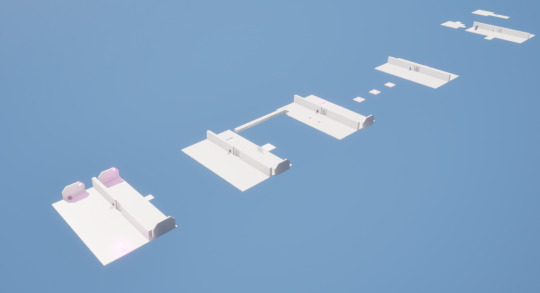
There is currently nothing yet for the fourth puzzle, but the Fifth and final puzzle is pretty much fully completed. I had originally intended for it to be the second puzzle, but playtester feedback said it was a little hard and it should probably go back further. This puzzle comes in two main sections, one for Charlene and the other for the player. For Charlene's segment, the player has to control a platform via a button to move her onto a series of moving platforms that eventually move her into a chute that deposits her onto a button that opens the door at the end. Meanwhile, after controlling the platform, the player must then navigate a series of jump pads, and then some smaller manual jumps to make it across to the other side. The difficulty in this puzzle mainly comes from Charlene's segment being quite finnicky, and the objective being quite unclear at first, but it all works quite well.

unfortunately I am a little behind on finishing level 2 as the fifth puzzle took me way too long to fine-tune, but hopefully I can get things back on track next week.
0 notes
Text
making the tutorial level, explaining the actual concept of the game, CubeDocks (TM) and the design overhaul

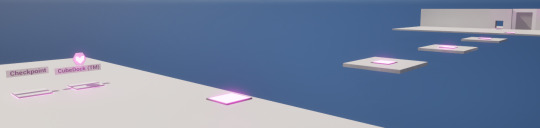
Before I go into making the tutorial, I should probably explain some more specifics of how my game and its puzzles work. The main deviation from the portal-esque (with no portals) puzzle platformer I'm making is that you only get one cube (the titular Charlene) with which to solve puzzles, and a great deal of the gameplay revolves around figuring out how to keep bringing her with you as you both progress through the level. Due to this style of gameplay, having a single spawn-point for Charlene at the start of the level became very inconvenient, and thus both to expand the gameplay and add more ease of use, I had to create checkpoints for Charlene, which I have dubbed "CubeDocks (TM)".
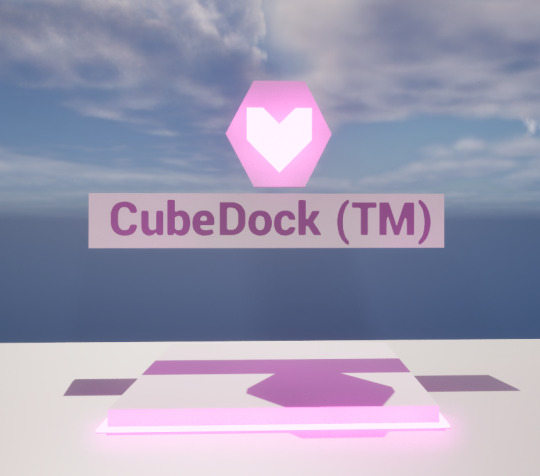
These work just like regular checkpoints, except they only work for Charlene. I was at one point thinking of having the original Player-only checkpoints work for both the player and Charlene, but I decided to keep them separate as splitting up both checkpoints in a puzzle every now and then could lead to much more interesting gameplay opportunities. With this out of the way, we can now move on to explaining the tutorial level I created.
The first puzzle gives you a basic introduction to Charlene and you use her to open a door. To introduce the idea of bringing her with you, I created a hole in the wall with the modelling tools which you can grab her through. This is a staple in the tutorial level, but in later levels there will be more complex ways to do this.

The second puzzle gives an tutorial on Checkpoints and CubeDocks (TM), and a brief intro to platforms, which you can cross the gap with to get to the door, which uses the same puzzle again. I am worried there's slightly too much reading in the tutorial, especially for this puzzle, but I'll have to live with it.

The next puzzle properly introduces using buttons to activate platforms, as well as vertical and sideways platforms. this is the first real difficulty spike as the puzzle is a bit more complex. You have to use Charlene to activate a platform to move you across, then you wait for the platform to move back, then activate the sideways platform to push Charlene onto the first platform and use another button to move her over to you so you can use the door to move on. This had some potential for softlocking the plyer, which required adding a one way walkway back across to fix.
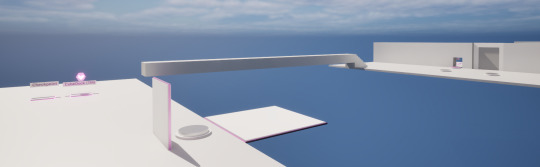
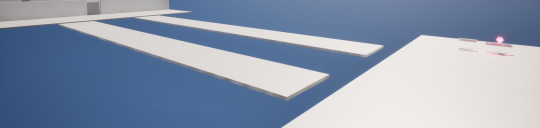
After this is an introduction to Jump pads, which you need to use a series of to cross the gap safely. This Puzzle would be simple, but the jump pads are a little finnicky, so it may need some tuning.
The last puzzle of the tutorial brings all the mechanics so far together into one larger complex puzzle. The Player has to use jump pads to reach a higher area where most of the puzzle is located. Once there, Charlene needs to be positioned on an automatic platform that pushes her against a button which regularly activates another platform for the player to use. once across the gap, the player has to time a thinner platform to slide between Charlene and her platform to scoop her up and bring her to the player, finishing up with a risky jump down to the door to the exit area. I'm quite proud of this puzzle, but I'm not a big fan of the necessary existence of the thin platform, and I'm currently trying to find alternate ways to move Charlene besides gravity and platforms to use in later levels. There is unfortunately 1 or 2 ways to softlock yourself on this puzzle still, but that could easily be fixed.

with discussing the bulk of my work on the tutorial out of the way, it's also worth going over the design overhaul I gave to most of the complex blueprints and objects around this point to make them more obvious and interesting to look at.

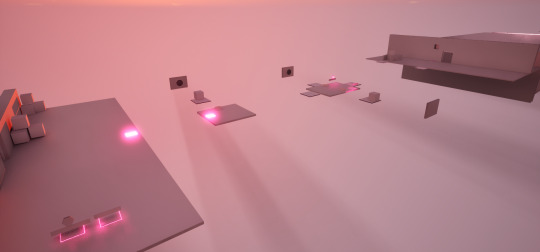
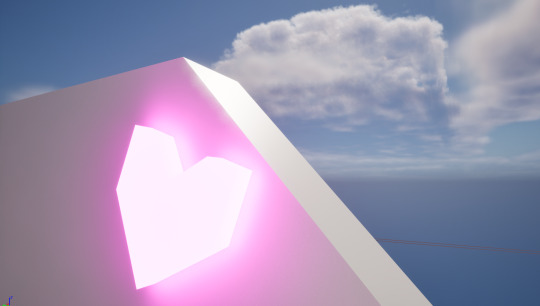
The most important changes that affect gameplay beyond aesthetics are the buttons now being colour-coded (pink is for doors, silver is for platforms), CubeDocks (TM) having the heart icon with a hex to distinguish from Checkpoints and the Platforms now having a pink bevel to single them out from the walls and floor. overall I'm really quite proud of my first proper puzzle gameplay section I've made in Unreal, and very excited to keep moving foward to Level 2!
0 notes
Text
All the things we did before the tutorial
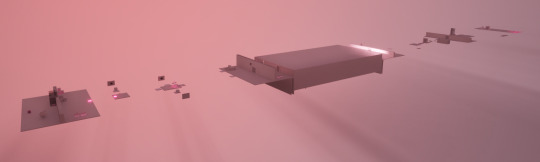
I am unfortunately writing this after the creation of the entire opening tutorial level so my memory may be fuzzy so I'll quickly list off the major additions and changes we made before moving to the tutorial. Our first addition of these were jump-pads, shown here in their current state after the design overhaul I'll go into in my next post.

these take the players direction and along with an equation, use a node to add impulse, which can give the player height and momentum, which can be manually adjusted for each pad in the editor for level design convenience.

Next up was the load next level point, which is also shown in it's current post-overhaul state.

This is much simpler and just loads a specified level when stepped on. You may notice some of the shapes used for the overhauled versions are a little more complex than I have previously achieved. This is due to that at this point, we began some relatively simple experiments with UE5's modelling mode. using this, we were able to create and adjust specific shapes, extrude our own shapes, and mess around with a number of other tools, allowing us to cut, bend, mold, and further adjust them to our needs and liking, with a good example being the 3D geometric Heart Icon I started using as a motif in levels.
around this point we also created some temporary code for the reset level button in the pause menu which allowed us to reset the tutorial level specifically, with a readjustment to come later. The rest of my progress this week will be work on the tutorial.
0 notes
Text
Title Screens, and backtracking to Raycasting and the Pause menu (and some audio that I almost forgot about)
Last week we created anew level to serve as our title screen, with integrated cinematic camera-work, and a menu widget (which I'll go into proper detail about with the Pause Screen as they're essentially exactly the same widget), and I have to say I'm quite proud of the results. The font I used for both menus is called "Genty" and I found it on the free font website Dafont and integrated it into my project. (also yes this is the title I'm going with right now)
After setting this beauty up, I got back to work catching up on the rather complex work on raycasting and widgets I missed on Tuesday. First I used raycasting to be able to track where my mouse was clicking and drawing a line from there as a debug measure. shown below is me testing this. The little squares are the line hitting the object and after that the line is green to signal this.

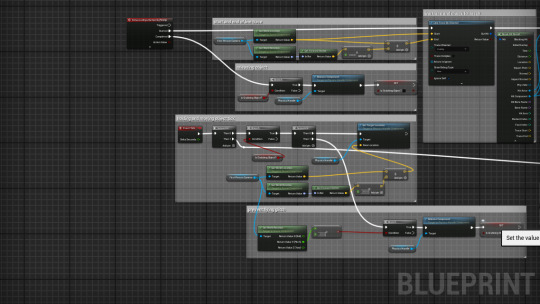
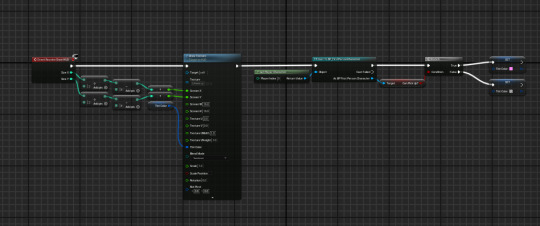
after this we added a new keyboard/mouse input into the first person folder to allow us to use the left mouse button to pick things up after this is some rather complex code that essentially traces a line to the object in question (in this case Charlene) and after casting to it and checking it is the right object, it attaches a variable called a physics handle to it that allows us to drag the object around with us until we release the LMB and the handle is deleted, letting the object go. In addition to this, we added some some extra code that prevents the player from picking up the cube below a certain angle, as otherwise a quirk with the physics handle allows the player to use it to fly. to go with these, we also created a new "HUD" object with a reticle that only appears when an object is in range to pick up and hold, and integrated that with the larger code block. Shown below is a far view of this code, with a zoomed in pair of pictures after to show the code itself, and lastly the seperate code for the HUD reticle.


After all that, we can finally pick up and manually move Charlene.

To go with this monumental effort, we also added some audio files we downloaded from a free Star Trek sound website of all places, which we then repurposed for button presses and doors.

This morning, I picked back up again on things I missed, this time working with the pause menu, which we made using a kind of object called a widget that can display UI elements. After creating the text and buttons, and adjusting them to my preferences (with colours, fonts, and a background blur), we had to hook the buttons all up to event nodes to give them all functions, and add a new keyboard input to allow us to open the pause screen. Shown below is the code for the inputs (with both quit options being pretty much the same as are used in the title screen), and the code for the keyboard input in the character blueprint. (the rest level button does not work yet)


with this, we now have a lovely pause menu!
with most if not all major features added, next is level design and finding the fun in gameplay. This should be interesting!
1 note
·
View note
Text
intro to Camera-Pans and Cutscenes
unfortunately, I've been ill and am now behind on raycasting and widgets, which were intended to be worked on yesterday, but I have to catch up on those later, not now (which is greatly annoying). Instead, today we were introduced to cinematic cameras and cutscenes.

cutscenes are objects filmed by the cinematic camera object (shown above), both of which are invisible in standard gameplay. we edit cutscenes in the sequencing menu to control things like simple camera pans from one keyframe to another. after that, we program the triggers for the cutscene in the level blueprint.

this script removes control from the player for the duration of the cutscene while showing the cutscene to the player (take a shot every time I use the word cutscene if you want liver poisoning), after which control is restored. This particular cutscene triggers automatically when the level opens, but we also set one up with a trigger volume in the level that the player can walk into to activate, that uses the "do once" node to ensure the cutscene doesn't repeat. After this, we took multiple camera shots, and used the sequencing tool to stich them together into one continuous cutscene with multiple pan angles.

we then replaced our old intro cutscene with this to add flavour. it's also worth noting the only adjustment we made to the cine-camera's default settings were to change the focal length to 12 and turning off the "constrain aspect ratio" setting to make transition to a cutscene less jarring. Apart from that, basic cutscenes are mercifully easy to implement, so messing around with them should not prove much trouble.
0 notes
Text
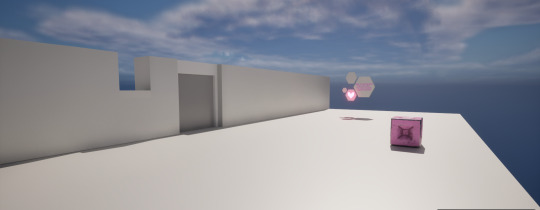
Boxes, Deathplanes and Checkpoints galore!
Yesterday we modelled a detailed cube for solving puzzles in 3DS max, and then imported it to Adobe 3D Substance painter to create a weathered texture for it.
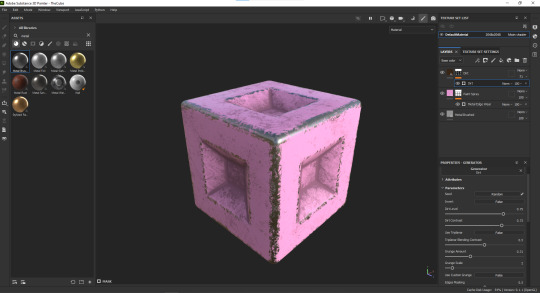
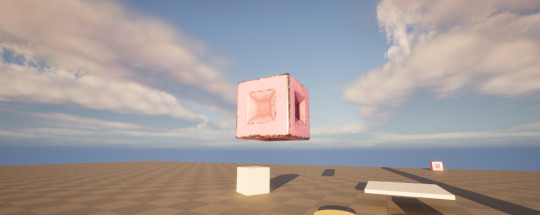
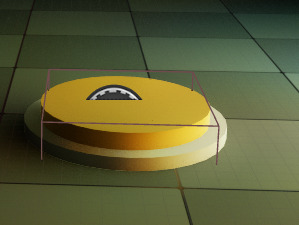
after working with settings to create dirt and metal edgewear, we imported the cube into our project in Unreal Engine, and turned it into a master blueprint we could create instances of in it the world, and of course I immediately personified the cube at this point. Say hi to Charlene everyone!

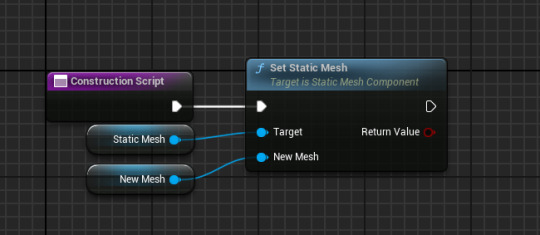
shown below is the code in the Master Blueprint for Charlene that allows us to change the static mesh to anything we want while still keeping the other properties of the blueprint I'm about to introduce.
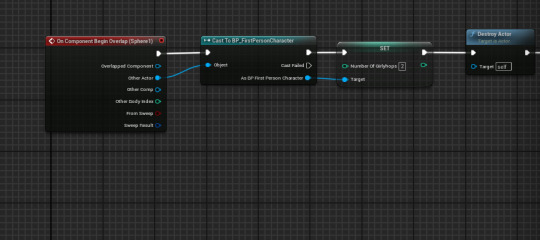
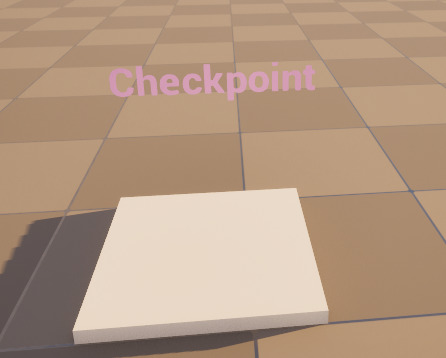
first we enabled physics simulation and overlap events to allow Charlene to be moved and press buttons. After that we added respawn functionality to both the cube master blueprint and the first person player package in case either falls of the map. To facilitate this we created a blueprint consisting of a trigger volume to serve as a deathplane that would activate the respawn.

To go with this system we created a checkpoint blueprint that would set new respawn point when interacted with instead of always respawning at our player start object. These aren't finished yet as they could use their design being touched up, but everything is coming together pretty well so far.
0 notes
Text
movable platforms and more on buttons
Today we continued development on our puzzle platformer by creating moving platforms!

these work on a similar principle to the doors with timeline nodes, except when activated we set them up to move back and forth constantly as well as with some additional variables and some Boolean variables combined with branch nodes that added functions including choice between horizontal and vertical movement, and the distance and speed at which the platform would travel.

after this, we combined these with the button functionality we created yesterday, to allow buttons to switch from activating either doors or platforms, and allowing platforms to either operate automatically or require a button.

this should give us a solid groundwork from which to begin constructing puzzles. Next things up are interactable cube models and a deathplane to put below the map.
0 notes
Text
Getting Started on the next unit
after a short icebreaking activity about counting algorithms, we got set into discussing our goals for this unit, to create a short puzzle platforming game. first we started out by making a blueprint featuring a "Trigger Volume", which is a volume that can activate a script when entered, similar to the post processing volumes we used last time.
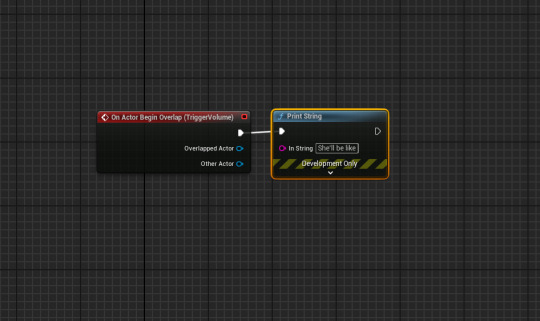
this simple code made the volume print a string of text when entered for an example.

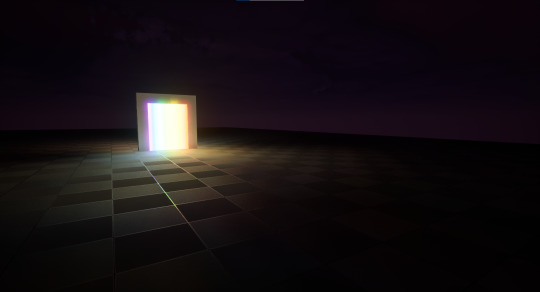
here is a less relevant picture of the blueprint housing the volume in-engine. after this brief demo we began to create the first major interactive blueprint we'd need for our game: a button.
this combines some basic cylinder models with a trigger volume that pushes down the model for the button as well as triggering anything else added into its script. Next to go with the button we made a door, from some cubes, and attached another script using a new node called a timeline which gave it a gradual opening process, that we then connected to the button using a variable and ticking some boxes in the details panel. after this I messed around with some materials and found this very lovely glowing rainbow material which looks great at night. here's to more progress soon!
0 notes