
Cliona Croke- Postgraduate Web Authoring Student-305683
Don't wanna be here? Send us removal request.
Statistics
We looked inside some of the posts by ccrokewebauthoringappreciation and here's what we found interesting.
Average Info
Notes Per Post
0
Likes Per Post
0
Reblog Per Post
0
Reply Per Post
0
Time Between Posts
7 days
Number of Posts By Type
Text
10
Photo
7
Last Seen Tumblr Blogs


Fun Fact
The most popular pages on Tumblr are about Minecraft, GIFs, and David J. Peterson.
Text
My First Sketch
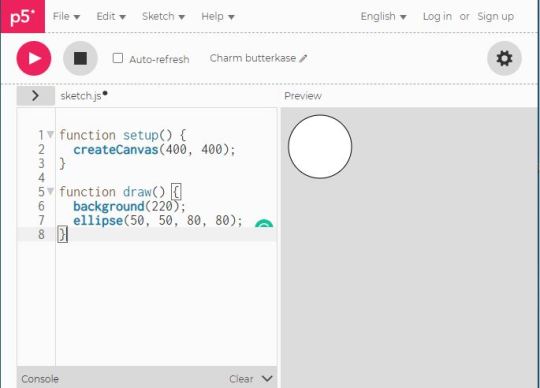
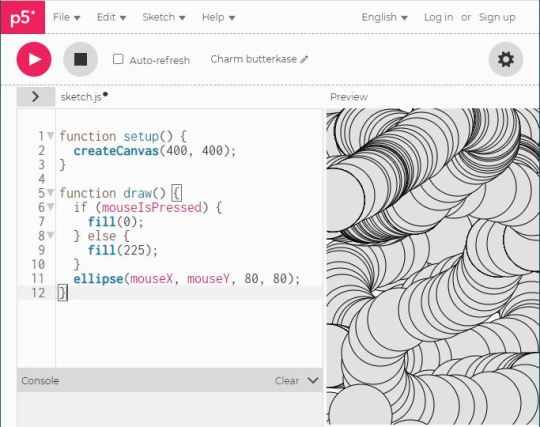
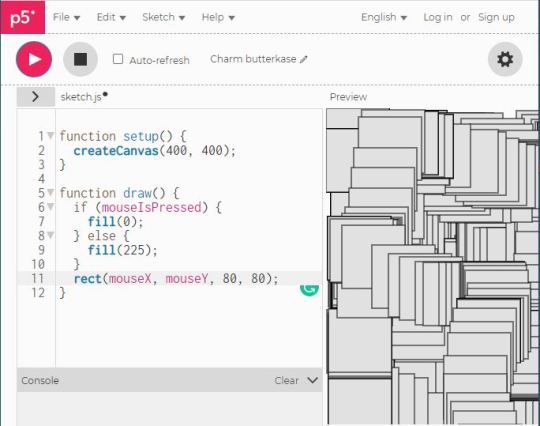
P5.js Editor:
First three made using P5.js editor. The first is a circle created using the ellipse tag, and the defining its size and position. (50, 50, 80, 80) The 50s show its distance from the top and bottom, and centring it. Then the 80s define its width and height. The second creates a black circle every time the mouse is pressed and move passed the screen. The last example I found on the P5.js website, I played with it last week and found it really interesting. Looking really forward to creating my own sketches through programming! :)
0 notes
Text
Wireframe Design
After researching it will be time to draw that wireframe layout for my website.
You don't need fancy programs, It is good to start with pen and paper. I found this website that goes into great detail about how to create your first wireframe design. Once you have all of the bits layed out, you can start your html. This is fool proof way to endure you do not make any mistakes when writing your block and inline element.,
https://careerfoundry.com/en/blog/ux-design/how-to-create-your-first-wireframe/#1-what-is-a-wireframe-and-why-do-ux-designers-use-them

0 notes
Text
Books and Website Research
When researching the best way to create a user friendly, responsive website, Imp first looking to the greats. First is Don Norman -the design of everyday things. Don is the OG ux-er. UX team of one, steal like an artist, with seductive interaction design.

The UX Designer Toolkit: 26 Methods, Tutorials and Free templates
https://blog.usejournal.com/the-ux-designers-toolkit-26-methods-tutorials-and-free-templates-8dc3487111a3
16 must-read articles for the UX newbie
https://www.usertesting.com/blog/16-must-read-articles-for-the-ux-newbie
A Beginner's Guide to Getting Started in UX Research
https://www.notion.so/A-Beginner-s-Guide-to-Getting-Started-in-UX-Research-1e3e0567b4944c938ae8d1a4f0a21c56
Every UX research project should start with a plan
https://uxdesign.cc/every-ux-research-project-should-start-with-a-plan-edc808305207
I was also lucky that a friend linked me to some interesting design posdcasts. He works in UX design and stresses the importance of always staying up to date with design trends
Podcasts
Jake & Jonathan
awkward silences
Design life
Aurelius
New Layer
Design Details
Opacity
UX Like us
D.MBA
Design Better
Become Inspired
UX by rustyorpaul
0 notes
Text
Planning a website (UX Planning)
When designing a website, you follow certain steps. these are :
Research
Concept
Wireframe
Visual
Layout
Document
Develop
User Testing
The first step is to research other websites like ours. Mine is going to be about my hero John Oliver. Oliver has been the host of the HBO series Last Week Tonight with John Oliver. He has received widespread critical and popular recognition for his work on the series, whose influence over US culture, legislation, and policymaking has been dubbed the "John Oliver effect".

When researching the design of your website, you must consider your users, clients and competitiors!
0 notes
Text
WebAssembly
youtube
The demand for dynamic content is as old as the Internet itself. In 1995, when Netscape Navigator Version 2.02 made the language Live Script available to the public. It later became to be known as JavaScript, the foundation of the Internet we know today. JavaScript was not without its restrictions. First notably were its issues with application size, the download capacity, and network bandwidth. Secondly, its runtime environment, which came with unwanted warm-up phases of applications. WebAssembly does things differently. Compared to some of the earlier attempts at implementing native-speed applications on the Web, WASM helps improve speed without compromising security. The Web is the largest and still growing platform in most aspects of today's industries, and 95% of websites use JavaScript as their front-end language. Today's web sites can include a range of computer-intensive programs such as 3D visualization, audio-, video editing, and 3D video games. As JavaScript does not or is supposed to handle these programs, developers tirelessly worked to develop a technology that could run on the Web and manage these applications. In March 2017, WebAssembly appeared on the scene, with the capabilities to work alongside JavaScript in the browser. It was then declared a web standard. So, WebAssembly is an excellent candidate for your technical architecture if creating computation-intensive and high-performance web apps. :)
0 notes
Text
Finished WordPress Site
vimeo
Tadaaa. An overall enjoyable experience.
1. Installing a basic theme:
The theme I decided to choose for my WordPress blog was Twenty-Seventeen. It was like Twenty-Twenty, but it had a built in aside, so I chose that one.
2. Installing a Plug In:
I had a big of fun with Plugins. I stalled Google Fonts, Sticky Menu, Guttenberg block editor. I used Google fonts to change my fonts from default to Courier-New and Helvetica-Neu.
3. Using a custom Menu:
I used the plugin Sticky menu, so my menu would travel down with you as you scrolled on both desktop and mobile versions (mobile had burger menu). I Made a menu for the top which had links to my about page and my contact page and homepage.
4. Using combination of pages and posts:
I have a total of 3 pages and 6 posts. I have a homepage/blog, a page about myself and a page with contact information.
5. Populating installed Blog:
A homepage/Blog with posts from Assignment 2 in chronological order. I also included a travel post to experiment with layout Using Child Theme:
6. Design editions:
I- Editing Theme: I edited the theme using a combination of built-in theme edit features and I also used the custom CSS to change the font size of my Page heading and Description, Menu, and welcome message in my aside block. I changed the colours of the theme from light to dark to match my cover photo. I then changed the font colours to teal.
II- Typography I change the typography using the Google Fonts plugin. I also edited the CSS font sizes for my Site heading and description, my Top Menu, and my homepage welcome in my aside block
III- Colour I changed the colour of the theme background in the theme editor as well as the font colours. I change the font colours of the Main page headings, and I change the body font to white to contrast against the black background.
IV- Layout I changed the layout of my theme by adding widgets to the aside, including featured photos. I also added a calendar widget to the footer along with a menu of links to my social media. I decided to play with the Guttenberg block editor in the most recent post about travel. Here I was able to manipulate blocks with much more creativity and ease.
V- Using Child Theme With my Twenty-Seventeen-child theme installed, I was able to go in and edit the CSS. I did this because my theme allowed certain fonts to be changed, bu not the site heading and description.
Evaluation of WordPress Platform:
WordPress, I found to be straight forward. The wordpress.org site is very easy to navigate. Searching for themes and plugins could not have been easier. Along with the info of each feature, you also get demos explaining how to utilise them. I also found it handy to lookup what plugins or widgets worked well with your chosen theme. Overall, I had a great experience working with WordPress. I enjoyed being able to use some of my CSS skills that I had learned for previous assignments. If I were to improve upon the platform, I would like to see more drag and drop options, where you can play with the layout of your site with better ease. Resizing images and blocks through a cropping, resizing tool perhaps.Challenges/problems I encountered:Although I found the whole experience straight forward, I found Plugins and Widgets tricky to navigate at first. I found some were very straight forward, for example ‘Google Fonts’, and loved the Guttenberg block editor. Page Builder by Site Origen and Max Mega Menu I found difficult to use. I’m sure its theme by theme how well they work and trial and error.Within the Twenty-Seventeen theme, I was able to change fonts using my Font Plugin, but I found there was a lot of text that needed to be manually edited through CSS. Fir example, my Main Title, Menu and Aside, did not look harmonious so needed some TLC. Also found I must also edit the colours through CSS, as the options within the theme were very limited.When checking my websites responsiveness, I noticed my changes to font size were not visually appealing when viewed on a mobile device, so I had to adjust to suit. Also I noticed my site is more attractive in Fire Fox than in Chrome.I found block editing difficult when trying to be creative until I installed the Guttenberg Plugin. Other then that I found this assignment nice and easy to navigate. I look forward to the next assignment and improving upon the skills I have learned.
0 notes
Photo


WordPress Assignment
Ok so I have successfully installed a Plugin, one that was recommended to be compatible with my theme Twenty-twenty, but I'm yet to figure out how to make it work,
I did it the same way I installed the theme. I went to WordPress.org/Plugins, and installed the plugin onto my desktop. I then exported it and opened FileZilla. under Wp-Config, under themes there is a folder named ‘Plugins’. I just dragged the whole folder in there. It appeared in my plugins on my WordPress dashboard, and I activated it. Not entirely sure how to make it work, but I will post when i do
0 notes
Text
Introduction to Wordpress
A reflection of what I learned.
First we had to connect to a server. We are using our college server ‘Knuth’. Due to some security reasons we don’t have complete access so we downloaded a FTP (file transfer protocol) program to help us connect to Knuth.
We then had to enter four things to login and connect. in the site manager, we entered:
Server name, Username, Password, Port
Then we were able to see the file folders we had on the server. We then downloaded wordpres, extracted the folder and then dragged it into our puvlic.html folder. We then logged into wordpress, and were given a new php file, which we then went back and edited the one we downloaded in the wordpress folder. We did this in or editors ( I use Atom) by deleting the existing php text and replaced it with the wordpress code. We were then able to login and see our dummy post and dashboard
Due to the security settings on our server we had to edit the files in our filezilla programme and make them writable, so we would be able to upload our own themes to wordpress. We downloaded themes from the wordpress.org server. I l downloaded one called ‘bloglite’, and then after extracting the file, I dragged it into my themes folder under contents. My theme is now ready to use.

So all in all I found the setup easy to figure out once you entered the correct passwords/ usernames etc, and after multiple fails, I now know it all off by heart. Some reading I’m doing in preparation for the next class
0 notes
Text
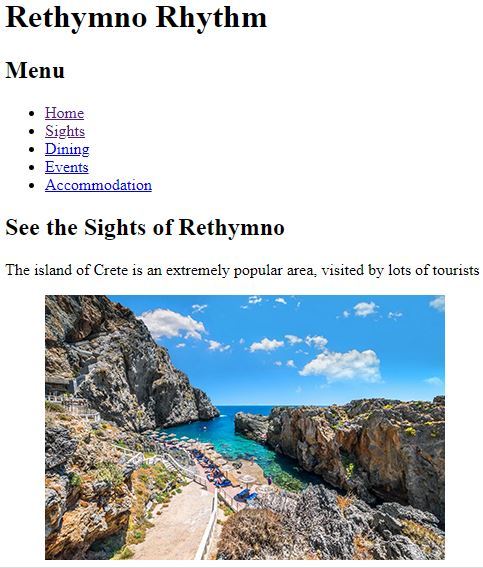
Assignment 1: Personal Profile Site
I just submitted my first assignment for Web Authoring. We were to create 2 html web pages wtih a css stylesheet. It was definitely challenging, and hard to get your head around sometimes. Once you start thinking of things as ‘blocks’ it becomes much easier.


I found padding quite easy once you play around using the inspector addon on Firefox. I also enjoyed adding other styles for example to the links. I was abe to get rid of the default purple/blue link color and then create a different color for when you are hovering over the links. Also directing the link to open in a new window. This we learned in class, as its not got practice to steer people away from your website.
really enjoyed this task. Hope I enjoy javascript too
0 notes
Text
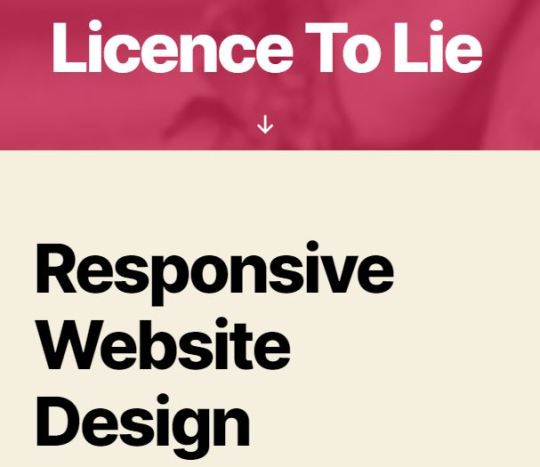
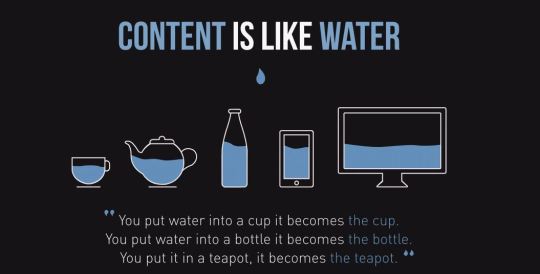
Responsive Website Design
In todays class we leant about Responsive website Design (RWD) or also known as Adaptive website design (AWD). So how this works is, when you have your html verified, in the inspector tool bar there is a option to view other screen sizes, such as phone/ tablet. To check f your website is responsive to other screens you can drag the size of it, and see if the content adapts or breaks, making the website look ugly. To create a better user experience.

Design a wire frame image made up of blocks that adapt and change when using a mobile device and a computer.
Then You have to go into you CSS style sheet, and tell the browser, that when a page changes to a particular size, the content changes too. Up until now I was mainly usig pixel measurements, which are not flexible. So to make a website size flexible, you change pixels to ems and percentages.
As you can see in the image above, I was able to adjust my images so that the respond to the change of screen size.
3 tips for Responsive Website Design:
Write Clean and Lean HTML and CSS
Keep Images to a minimum
Try use min/max width and height attributes instead of static width/height
We also learned about ‘Media Queries’. These allow you to write CSS that targets particualr Media types (screen, print, etc) and sizes.
An enjoybale picture that sums up todays lesson:
0 notes
Text
Assignment 2 progress
Getting there..
Page one of website assignment down. I think. On to page two. What really confuses me is why I keep getting scrolls on my webpage.
“ When you code CSS, you’re writing abstract rules to take unknown content and organize it in an unknown medium. – Keith J. Grant
I think I understand when to use a DIV and when to use a class. I use a Div for the main content, one off rules. As in I use class, if I want to use a rule in multiple cases.
Watch this space and I will edit when I figure out wthell I am doing wrong.
EDIT****
I figured it out. I had my font-size set to 1em which is the default font size of the browser which is equivalent to 16px ( and 2em is equivalent to 32px). I played around with it for a bit and found the perfect font size for my style,
Few small touch ups and review and I think we are done!!


0 notes
Photo


Website Appreciation II
I always search for websites that are different. I love coming across sites or portfolios that are interactive and fun to use, but mostly, showcase the designers talents and abilities from the first click. This designer Irene DemetriI, is a great example of that. Her online portfolio is super user friendly and fun and there isn't a question what you will be getting when looking to her for her services. (services include HTML/CSS/Brand Design etc).
Through this course I hope to lean to do this myself. I want to translate my artistic abilities into a beautiful online interactive portfolio. Everyday I learn and understand a bit more and edge closer to my dream.
Check Irenes beautiful website out for yourself:
https://www.youandigraphics.com/what-i-do-web-design-branding.html
0 notes
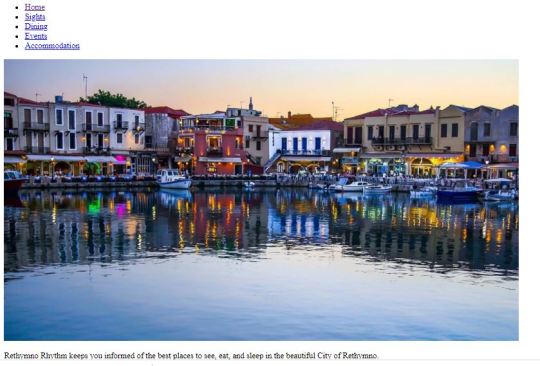
Photo
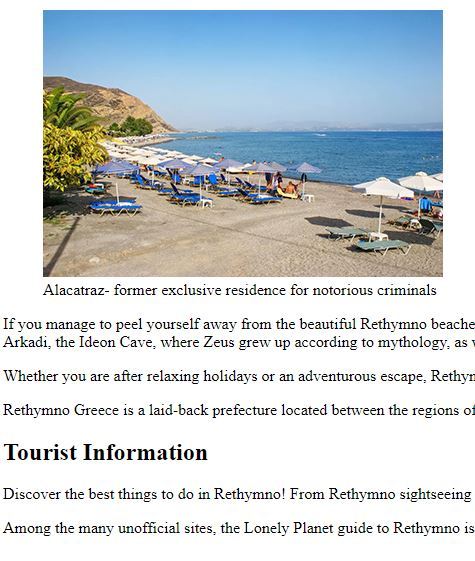
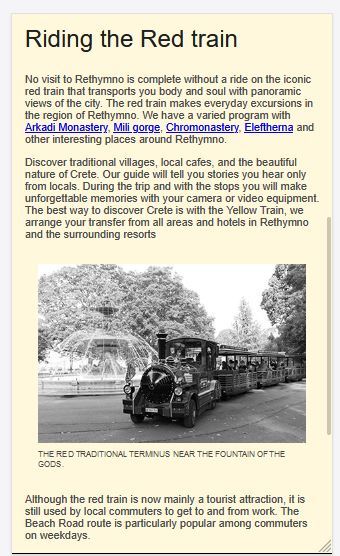
Rethymno Rythm, & a reflection on HTML..so far.
Although I know I have alot more practice to go to fully understand and improve fluency with HTML, I have learnt al ot so far. To mention a few things:
Correct folder layout ( and how to navigate between them (../ etc). it is important to have a nice clean layout which includes a folder for CSS, SCRIPTS and IMAGES and LINKS.
The layout, or the family tree of code, each nesting information within each other. (Learning to copy and paste
Images and Links, how to add them and the importance of adding ‘alts’ for better search engine optimization.
Speaking of SEOs we learned about semantic language. How when the HTML5 standard was updated , we now write code that is accessible to everyone (eg the visually impaired). So instead of using < .b.> for bold, (we leave that styling for CSS) we use for words that have a certain urgency to them, for example WARNING. We still use but not for italics, but to tell the computer that it may be reading something in a different language etc. We use if a word or sentence needs to be emphasized to the listener.
Forms- From a combination of homework and using ‘freecodecamp.org’ I learned how to make forms that tic boxes, sometimes allowing the option to select a few, or just one, or submit an answer to a question.
This is but a few things I learned. The most interesting to me the semantic language. its definitely food for thought when coding, trying to make sure your site is user friendly. I also learned a little bit about the sneaky world of the google bot and al its mysteries.
For our assignment brief we have to create a website with a combination of HTML and CSS. I feeel definitely ready and able in the HTML department. Lets see how I get on with styling :) :)
(The Art of Blogging does help a bit to build confidence writing online :P)
0 notes
Photo


CSS READY!!!
Last weeks Lab assignment. creating html files that we will apply CSS styling to next week. I found this relatively okay, until my images were broken. I then remembered my good ole friend ‘../’. My images directory folder was above my script folder and my computer couldn't locate my file in the directory. My first frustration so far and I survived. Roll on styling :)
Oh also, shout out to this blog for some help. The art of googling for help never fails when it comes to HTML:
https://blog.teamtreehouse.com/how-to-fix-a-broken-image
0 notes
Photo

Very handy tool that I am reading in hopes of improving my blogging skills. Rather shy when it comes to posting content, but I have to figure out my ‘Why?’ and the quality, appropriate content will follow.
Find the free downloadable PDF: https://artofblogging.net/
0 notes
Photo
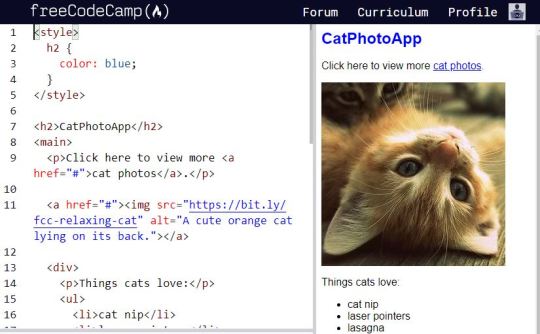
CSS
Practicing CSS on free code camp in preparation for nest weeks lecture and lap. CSS is the magic part so I'm very excited to learn more about it!
0 notes
Photo


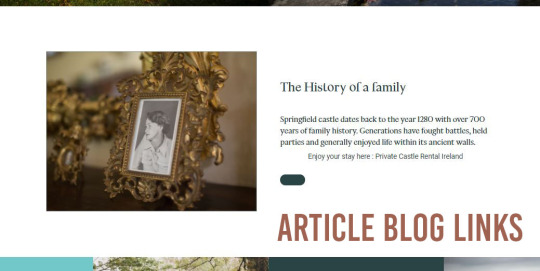


Springfield Castle Website
I found this website included alot of the elements that we did in class the last few weeks. Today we looked at ‘article’ element and how it could be used to link to blogposts. It also showed effective footer information, and picture links. Beautiful layout,
https://www.springfieldcastle.com/
0 notes