
Don't wanna be here? Send us removal request.
Statistics
We looked inside some of the posts by cloudsloading502 and here's what we found interesting.
Average Info
Notes Per Post
1
Likes Per Post
1
Reblog Per Post
0
Reply Per Post
0
Time Between Posts
12 days
Number of Posts By Type
Text
10
Last Seen Tumblr Blogs


Fun Fact
If you dial 1-866-584-6757, you can leave an audio post for your followers.
Text
Image Capture Free Download Mac Os X

It is true that you can take a screenshot on Mac by pressing Shift, Command and 3/4/5/6 keys on the keyboard. As a result, you can quickly capture your Mac’s screen via keyboard shortcuts. Since there are premade key combinations to capture any portion on Mac, why you still need a Mac screenshot tool?
The main reason is that you cannot get drawing tools and other advanced features from the straightforward Mac screenshot feature. Mac will save the screenshot as PNG by default. You need to use an image converter to change the screenshot format. In many cases, a snipping tool for Mac really helps.
MacOS Big Sur elevates the most advanced desktop operating system in the world to a new level of power and beauty. Experience Mac to the fullest with a refined new design. Enjoy the biggest Safari update ever. Discover new features for Maps and Messages. And get even more transparency around your privacy.
Grab is an app for macOS and Mac OS X that lets you take screenshots of your screen. This little utility supports capturing the entire window, the whole screen, or only a portion of your screen. Although other apps and utilities do similar things, Grab is a decent chap. Sure the built-in Command-Shift–3 and Command-Shift–4 shortcuts are.
Part 1: Top 7 Best Free Screenshot Tools for Mac
To take a screenshot on Mac without keyboard, you can take a look at the following paragraphs. Here’re top 10 best screenshot tools for Mac free to use in 2020.
Top 1: Vidmore Screen Recorder
Image Capture Software can be installed on 32-bit versions of Windows XP/Vista/7/8/10. Our antivirus analysis shows that this download is malware free. This free software is a product of Panasonic Communications Co., Ltd. The Image Capture Software installer is commonly called PnImgCapt.exe. Download Nikon Capture NX 2 for Mac to edit and process digital images. And Neutral Control Point tools that enable the user to remove color casts and set their image's dynamic range, to the. Mac Os X Image Capture Application Download Screen Snippet - COMMAND + SHIFT + 4 Press the key combo and drag to select the portion of the screen to capture. Alternatively, if you use COMMAND + CONTROL + SHIFT + 4 at the same time, Mac OS X will copy the snippet to the clipboard rather than save it as an image to the desktop.
There is a built-in free screenshot tool for Mac in Vidmore Screen Recorder. It’s okay if you don’t get its full version or even register an account. You can take a Mac screenshot of the whole screen or single window. The Mac screenshot capture software offers real-time drawing tools. Thus, you can emphasize the key point and draw anything on the screenshot directly. The screenshot will be saved as PNG, JPG, JPEG, BMP, GIF or TIFF based on your need.
Main Features:
Capture Mac screen with full screen or browser window.
Save Mac screenshot picture as PNG, JPG, JPEG, BMP, GIF or TIFF.
Add rectangle, ellipse, line, arrow, callout, text and more in any size and color to your screenshot.
Safe, clean and totally free to use. No registration or hidden purchase.
The free Mac screenshot software works with Mac OS X 10.10 or above.

Top 2: Lightshot
Lightshot is a free screenshot tool for Mac. You can select any area on your Mac computer to capture. Later, you can share the screenshot via Internet directly.
Pros:
Take a screenshot on Mac with any screen size.
Upload your Mac screenshot to the server or get its short link to share.
Use the online editor to edit screenshots on Mac. (Find more video editor here)
Cons:
Lightshot may close down suddenly.
The copy function in Lightshot does not work.
Top 3: Snappy
You can capture any part of your Mac computer with Snappy automatically. The free screenshot tool for Mac allows users to annotate, resize and customize the screenshot picture. Moreover, you can organize, collaborate and share Mac screenshot within Snappy on Mac.
Pros:
Grab Mac screen by drawing or shortcuts.
Collect snaps stored on Mac and make then well organized.
Share screenshots to Facebook, Twitter, Dropbox, Email and more.
Cons:
Lack editing features.
Snappy becomes quite buggy.
You may want to know: how to record audio on Mac
Top 4: Skitch
Skitch is a free screenshot for Mac that works with Evernote. https://cloudsloading502.tumblr.com/post/659319234303787008/make-apps-for-iphone-on-mac. If you are in the business of taking screenshots for your team, Skitch can be your good companion.
Pros:
Snap, mark and send a screenshot on Mac.
Add text, shape and draw on your screenshot image.
Blur the obscured areas.
Cons:
Skitch crashes and freezes in the half of time.
Still need the UI improvement.
Top 5: Recordit
Recordit is a GIF-based screencast tool for Mac free to use. You can also install Recordit plugin to quickly take a screenshot on your Mac computer.
Pros:
Use hotkeys to screenshot on Mac.
Get free cloud storage space for screenshots.
Provide multiple upload and share options.
Cons:
Recordit free version is limited.
Require the stable Internet connection.
Top 6: Snagit
TechSmith Snagit offers the free trial for screen capture and recording on Mac. You can capture a process and add drawing tools of what you see on Mac screen.
Pros:
Draw on Mac screenshot with markup and annotation tools.
Convert Mac screenshots into simplified graphics.
Get direct file sharing feature.
Cons:
Snagit free trial lasts for 15 days only.
Snagit full version is expensive.
Top 7: Monosnap
Monosnap is a free online screenshot tool. You can capture screenshots on Mac with full screen, custom area or window. If you want to edit and add annotations, you need to register its user account first.
Pros:
Highlight on screenshot with multiple drawing tools.
Use blur tool to hide sensitive information in your screenshot.
Share Mac screenshot to Twitter, Facebook, Google Drive, Dropbox, etc.
Cons:
Monosnap gets buggy with the new OS releases.
You need to pay to unlock third-party services.
Part 2: FAQs about Mac Screenshot Tool
Where are screenshots saved on Mac?
Sims 4 download for windows 10. If you capture Mac screen with official shortcuts, your screenshot will be saved on desktop by default. For macOS Mojave users, you can change the default screenshot destination folder. Just head to Options in the Screenshot app.
Is Preview the hidden screenshot software for Mac?
Yes. There is Take Screenshot feature in Preview. You can screen capture on an PDF file or image in Preview on Mac for free.
Can website see if you screenshot?
No. It is not allowed for the browser to detect whether users use a Mac screenshot tool or not. Your screenshots are not traceable.
Actually, you can use any screenshot app to capture Mac’s screen as JPG and other formats. It is also supported to copy and paste Mac screenshot to clipboard. Which can be your best free screenshot tool for Mac? You can feel free to share with us.
Summary :
Apple designed Image Capture to help users transfer images from iOS devices, cameras, and other devices to Mac easily. As a novice, you may not know how to find and use Image Capture Mac, right? Taking this into account, MiniTool offers this post to help you find, launch, and use Mac Image Capture. Besides, the solutions to fixing Image Capture not working are provided.
What is Image Capture?
The Image Capture is an application designed by Apple to assist people to transfer pictures, video clips, and movies to Mac from different devices, including iOS devices, iPadOS devices, cameras, etc. Therefore, Image Capture on Mac is a very useful photo management program since image transfer is frequently needed. (Do you need a snipping tool for Mac?)
Tip: You'd better get a recovery tool at hand to protect your precious images and photos in case that they may be lost during the transferring process.
How to Launch Image Capture on Mac
There are simply 3 ways to launch Image Capture Mac.
Open Image Capture in Finder
Navigate to the Finder icon in the dock.
Click it to open Finder.
Select Applications in the pane on your left side. (You can also click Go and select Applications.)
Browse the app list in the pane on your right side to find the Image Capture icon.
Double click on the icon to open the app. (You can also right click on it and choose Open.)
How to open Finder quickly?
You should press Option + Command + Space simultaneously; it will bring up the “Searching This Mac” window in Finder. To access a regular Finder window, you should press Command + N.
Open Image Capture using Spotlight
Open Spotlight by pressing Command + Spacebar (or clicking on the magnifying glass icon located at the right of the menu bar).
Type image capture into the Spotlight Search box.
Select Image Capture from the search results.
Open Image Capture via Launchpad
Click on the Launchpadicon in the dock.
Look for a folder named Other and click it.
Click on the Image Capture icon inside the folder.
This is the default location of Image Capture app; if you moved it to another place, please go there to find it.

How to Use Mac Image Capture
What’s the function of Image Capture?
Import/delete images from the devices connected to Mac via cable or network.
Create contact sheets.
Scan files and documents.
Change the default apps for the devices connected.
It’s not difficult to scan a document on Windows 10; you can just use the built-in Windows Scan or Windows Fax and Scan.
7 Steps to Import Images
Connect the device from which you want to transfer images/photos to Mac.
The system will ask you to unlock or trust the device.
Open Image Capture app on your Mac.
Select your device under DEVICES or SHARED in the left pane.
Choose the images you want to transfer in the right pane. (Please skip this and click Import All if you want to transfer them all.)
Specify a place to store the images on Mac from the menu of Import To.
Click Import and wait for the action to finish.
How to Fix Image Capture Not Working
You may run into different errors while using Image Capture: Image Capture not recognizing iPhone, Image Capture not showing photos, photos not importing from iPhone to Mac. How to fix them?
Troubleshoot iPhone Not Recognized/Showing up
Fix 1: show hidden device.
Open Image Capture on Mac.
Click on the Show Hide button located at the lower-left corner.
Click on the “Connecting this (device) opens” menu and then choose Image Capture.
Please click “Show device settings” if you didn’t see the pop-up menu.
Free Download Mac Os X Tiger Iso
Fix 2: unplug & re-plug iPhone.
Remove the iPhone (or another iOS device) from Mac.
Re-connect it to Mac. Make sure the device is turned on.
Unlock and trust the device as it required.
Open Image Capture to see whether your device is recognized.
Other methods to try:
Restart iPhone.
Enable My Photo Stream.
Disable Optimize Storage Option.
Delete the preferences files of Image Capture.
Update Mac system.
Image Capture Free Download Mac Os X Download
Troubleshoot Image Capture Not Showing Photos
Image Capture Free Download Mac Os X 10 0
Please try the following fixes when all your photos or some of them are not showing up.
Unplug & re-plug iPhone.
Restart iPhone and Mac.
Disable iCloud Photo Library on iPhone.
Update Mac system.
Use another photo management tool.
Troubleshoot Photos Not Importing to Mac
Please try the following fixes when you can't import photos from iPhone to Mac.
Unplug & re-plug iPhone.
Restart iPhone and Mac.
Check the status of your iPhone.
Reset Location & Privacy on iPhone.
Update iPhone and Mac system.
0 notes
Text
Creatures Mac Download

Free creatures download mac. Games downloads - Creatures by Mikeash and many more programs are available for instant and free download. Creatures is, hands-down, one of my favorite games of all time. It was the first game I ever got somewhat addicted to, and while I might be the odd one out, I really cannot sing its praises enough. I continue to be thoroughly impressed by the complexity of the game's design and attention to detail despite the fact it was originally released for.
Try Now
RELATED GAMES
TO ENHANCE YOUR GAME, CONSIDER ALSO:
How will you create the universe?
With Spore you can nurture your creature through five stages of evolution: Cell, Creature, Tribe, Civilization, and Space. Or if you prefer, spend as much time as you like making creatures, vehicles, buildings and spaceships with Spore's unique Creator tools.
CREATE Your Universe from Microscopic to Macrocosmic - From tide pool amoebas to thriving civilizations to intergalactic starships, everything is in your hands.
EVOLVEYour Creature through Five Stages - It's survival of the funnest as your choices reverberate through generations and ultimately decide the fate of your civilization.
EXPLOREyour world and beyond - Will you rule, or will your beloved planet be blasted to smithereens by a superior alien race?
SHAREwith the world - Everything you make is shared with other players and vice versa, providing tons of cool creatures to meet and new places to visit.
Creatures Mac Download Windows 10

While Spore is a single player game, your creations and other players' creations are automatically shared between your galaxy and theirs, providing a limitless number of worlds to explore and play within.
SCREENSHOTS
Legend Creatures Game Free Download
Legend Creatures Game Free Download for Mac/PC. Legend Creatures Game Download Full version highly compressed via direct link available. Legend Creatures Free Download PC Game Cracked in Direct Link and Torrent. Legend Creatures It Is a Full And Complete Game. Just Download, Run Setup, And Install.
Download Legend Creatures Game Overview
Summary
The legendary creature released by aplusgame (APG) is an independent game with rich playing methods such as roguelike + self-propelled chess + strategy. You can collect various fantasy creatures and form different team lineups. These creatures have various talents and skills, cooperate with different equipment to strengthen the battle, and can also evolve into different biological types, branches and levels. You can also expand the bio mod to increase gameplay and let all kinds of magical and interesting creatures join the game.
creatures
All creatures have their own evolutionary trees, which retain their previous abilities and acquire new ones after evolution. Each unique capability is scripted, not just numerical. Different factions of creatures can be combined according to your tactics. Each of the same three creatures can evolve into higher-level creatures. You can evolve creatures of different factions according to your own lineup requirements, including soldiers, mages, shields, assassins, archers, therapists, etc.
Gear and talent
Each biological character can also wear three pieces of equipment with unique effects. Different equipment will produce various chain synergy effects with the biological character’s own passive skills and talents. You need to configure different equipment according to different skills and talents, and then cooperate with the changing lineup to have a surprise effect.
Nightmare Creatures Download
Mod
In the official version, the Creative Workshop (MOD) will be opened. Players can create their own creatures, equipment, talents, etc. With a simple API and a biological picture, you can easily realize your own wonderful and even spooky biological idea DIY.
aplusgames weibo:https://weibo.com/aplusgames
SYSTEM REQUIREMENTS
MINIMUM:
OS: Windows 7, 8, 8.1, 10 x64
Processor: Intel Pentium E2180 (2 * 2000) or equivalent
Memory: 1 GB RAM
Graphics: GeForce 7600 GT (256 MB)
DirectX: Version 10
Storage: 100 MB available space
RECOMMENDED:
OS: Windows 7, 8, 8.1, 10 x64
Processor: Intel Core i3-3240 (2 * 3400) or equivalent
Memory: 2 GB RAM
Graphics: GeForce 8800 GTS (512 MB)
Storage: 200 MB available space
How To Install Download Legend Creatures Game
1. Download the installer from our website(using the download)
2. Then run the“.exe“and start to install the game
3. During the installation, then follow the instructions
4. The game starts to automatically download and install.
5. Wait until the installation is complete
6. Then pop up with the download key, and then activate the game
7. play it!
Legend Creatures PC Game Free Download for Mac
Click on the below button to start Legend Creatures Mac Game Free Download. It is a full and complete game. Just download and start playing it. We have provided a direct link full setup of the game.
Click the below Button and Wait For Few Seconds On Next Page. Download Will Start Automatically.
Legend Creatures Game Free Download
0 notes
Text
Photo Downloads For Mac

Some photo editing software products offer effects that cartoon a picture instantly while others offer only drawing and painting tools and you must complete this process manually. Turning a photo into a cartoon on a Mac or PC doesn’t have to be a slow process, because most of the photo to cartoon software products offer a variety. The best photo editing software applications for photographers. Everything you need to organize, edit, and share your photos. ON1 – Photo Editing Software for Mac and PC. Download Google Photos App - Upload and view your photos from any device. Auto upload photos from your Mac or Windows computer, smartphone, camera, or storage cards. Download Free Photo Editing Software. The Best Photo Editing Software for Windows and Mac! Why PhotoDirector? With million users of worldwide across multiple platforms, PhotoDirector offers tons of easy-to-use features suitable for users of all levels. With a user-friendly interface and access to a host of layer editing tools and AI-powered.
January 02, 2021
30 min to read
With smartphones increasing in popularity, nowadays everyone (even a professional photographer) needs a tool that will help them to manage and organize their photos. After all, you do not want the risk of running out of storage space be the reason that do not capture every special moment? And with thousands of photos on your hard drive, you will for sure need a tool to help you track down a specific photo or remove those annoying duplicate photos.
Plus, let’s face it, hard drives do fail (and usually the day before you planned to make backups). Therefore, it is a very good idea to invest in a photo management software solution that lets you upload your pics to the cloud.
Though, the right photo management tool will offer you so much more than simply an organized storage space for your shots. Some tools will even let you add metadata about things like the camera model that was used, the dimensions, aperture value etc. The majority of these software solutions will also offer you a couple of standard editing tools such as color filters and cropping.
So, which features should you look for in a photo management tool? Here are 18 of the best photo management software solutions, in no particular order, that are currently available on the market. These will give you a good idea of what the current standard is.
1. Adobe Bridge
If you use the popular Adobe Creative Cloud software package, you will most likely already be very familiar with Adobe Bridge CC. It is a photo and digital asset management software solution that is compatible with both Windows as well as Mac OS.
With this free tool, you can access all the resources and files that you require for your specific project. It boasts several useful features that include on-demand metadata generation, batch photo editing, organizing general and individual files, watermarks, centralized color settings and much more.
To help you organize your different photo folders, you can use its metadata tools, tagging or rating features. Plus, you can also rename and organize a bunch of images at the same time.
It is also very simple to import pics or videos from your card reader, smartphone, tablet or digital camera, thanks to its picture upload feature. All things considered, it is one of the best solutions for professionals and can help them to streamline their workflow significantly. Though, it might be a bridge too far if you are looking for a tool that will help you to sort only your own (personal) photos.
2. Luminar AI
Luminar AI boasts really great photo management features! The beauty of Luminar AI is that it makes it easy to navigate your library with the help of shortcuts. For example, if you select “All Photos”, you can sort your photos either by their date of capture or the date on which the files were created. Another popular and easy-to-use shortcut is marking it as a Favourite. This way you can even add a star rating to all of your top photos.
You can also use folders to organize your photos. What makes this feature so convenient is that Luminar’s folders actually connect directly to your hard drive’s folders. This means that you can organize the folders of your hard drive via Luminar and the other way round. What’s more, you can then also group your photos together in Luminar by using albums without changing the location of the images on your actual hard drive! All in all, this is one of the best photo editing software solutions available on the market.
3. XnView
With the help of XnView, you can look at more than 400 photo formats and save as many as 50 different file formats. It is available free of charge for educational or non-commercial use and is compatible with Linux, Mac OS and Windows operating systems.
This multimedia viewer, photo converter and browser is powerful and boasts all the fundamental features, yet remains very simple to use and sleek. Some of its most popular features include lossless JPEG conversion, adjusting images automatically, a duplicate file finder, batch processing and a built-in picture editor. You can also use it to get info about all your images, making it one of the most popular tools for organizing your photos.
4. Nomacs
While Nomacs might be small, speed is for sure not something that you have to worry about as this free open-source image viewer is built for speed. After all, dynamite comes in small packages, right?
It is efficient and can be used with all of the most popular file formats which include PSD and RAW. Just like with XnView, you will get all the info about your pictures that you need.
One of its best features is that you can use it to synchronise different viewers who use the same local network or computer. It is also a great tool if you need to compare photos in order to identify differences. Some of its other useful features include a built-in graphics editor and automatic photo adjustment. It can be used with Mac OS, Linux and Windows platforms.
5. Google Photos
Google Photos is one of the best free photo management solutions that you can use for your videos and photos. Everything that you have come to expect, Google Photos can offer.
It is very simple to upload a photo. You can either use the button (that is somewhat difficult to spot) or the drag-and-drop feature which is much easier. As your videos and photos get uploaded and sorted to cloud storage automatically, it is a really convenient tool to add to your arsenal. It will sort out and display your panoramic photos and high dynamic range (HDR) ones in no time at all. It uses artificial intelligence (AI) to sort out your albums and make suggestions regarding which images you should archive. What is more, you can also search for a specific photo or video at once, after it has been uploaded.
Some of its most popular features include creating metadata and drafts on request and photo batch processing. It also boasts a couple of basic photo editing tools that include color filters and cropping. Then, last but not least, all you have to do is select the pics that you want to share and either post it on social media, create a link or include it in one of your shared albums.
All things considered, Google Photos is the complete opposite of a tool like Adobe Bridge CC, making it the perfect tool if you are simply searching for a way to share those special moments with your friends and family members. And, thanks to the unlimited backup storage that is available if you choose not to upload it in full resolution, you do not have to make plans for when you run out of space. All things considered, with millions of users already who upload over a billion photos every single day, surely Google Photos is doing more than a couple of things right.
6. XnViewMP
If you like XnView, then you will really like XnViewMP which is an enhanced version of the first-mentioned. It is the ideal tool if you have to sort file formats that are not as common as it supports over 500 different image file formats. Unfortunately it does not arrange your photos for you automatically. However, it does offer a feature that you can use to edit the metadata and tags of your photos via a convenient batch mode. Thanks to this tool, you can issue those tags at the speed of light.
Download Icloud Photos To Mac
That being said, XnViewMP is more than just a basic photo management tool. You can also use it to create a graphic presentation, screenshot, slideshow or multipage animated file. Just like, XnView, XnViewMP is also compatible with Linux, Mac OS and Windows operating systems
7. Pictorial
If you are familiar with using Lightroom, you will find Picktorial quite similar. Though, Picktorial is more convenient as you do not have to create a directory or folder in Picktorial as you can work directly from your PC’s file system. What’s more, you can also modify its interface so that it suits all your specific tasks. Some of its other useful features and tools include color correction and image retouching. All things considered, it is a very practical photo editor that will help you to sort out your photos and even possibly edit them. Sadly, it is only compatible with Mac operating systems.
8. JetPhoto Studio
JetPhoto Studio is compatible with Windows and Mac OS and boasts almost all the tools you will need to sort out and edit your photos. This free photo management software solution boasts powerful photo batch processing, geo-tagging and tags. Although it does not offer cloud storage, you can use it to share your photos with others by making a Google Map gallery or using the JetPhoto Server or Flickr. And, if you use a browser that supports Flash, you can use JetPhoto Studio to create a Flash gallery in a flash.
9. Apowersoft Photo Viewer
If you are searching for a software solution that is really user-friendly, be sure to check out Apowersoft Photo Viewer. Its interface is very easy to use and understand! If you want to view one of your photos, all you have to do is click on it and it will be displayed instantly. Plus, with Apowersoft you can also view detailed info about your different images.
Compatible with Linux, Mac OS as well as Windows, it supports a wide range of file formats, which includes PDF. If you use Windows, you can even view your High Efficiency Image File Formats (HEIF or also called HEIC) directly.
Some of its other features include a built-in graphics editor, the ability to take screenshots and edit photos. That being said, its biggest perk is most likely the fact that it is very fast. Thanks to the use of advanced technology, you will be able to work at the speed of light. All in all, Apowersoft is truly a powerful software just as the name suggests!
10. StudioLine Photo Basic
If you use Windows and are searching for basic photo editing tools as well as a tool that can help you to manage your photos, you will like what StudioLine Photo Basic has to offer. With this free software solution, you can rotate, crop, correct red eyes and resize your photos. It also lets you add tags and descriptions to your photos. Then, after you are done editing and organizing your photos, be sure to use the online gallery to publish and share your images with your friends and family members. Or, even better yet, why not use it to create a slideshow of all your best memories?
11. FastStone Image Viewer
FastStone Image Viewer is another great free photo management software solution for Windows users that supports all the big file formats. In addition to its wide selection of features that will help you to manage your photo memories, it also boasts several photo editing tools that you can use to tweak and manipulate your images. Some of its most popular features include EXIF data viewing, resizing, image viewing, red-eye removal, cropping and tagging.
Although it is very easy to use, it sadly does not offer cloud storage and you cannot use it to upload your “share-worthy” pics to social media sites. So, if you are happy just to store your photos on your laptop, FastStone Image Viewer is one of the best programmes for Windows.
12. digiKam Photo Manager
With digiKam Photo Manager, you can organize your photos by means of albums, tags or folders quickly. What’s more, you can also view and edit your metadata and it boasts a built-in graphics editor and RAW support too. All things considered, its intuitive interface makes this advanced app one of the most popular picks amongst Mac OS and Windows users.

Free Photo Management Software
13. MAGIX Photo Manager
This is one of the magic tools for Windows users (and the MAGIX Photo Manager Deluxe version offers great value for your money too). With this free tool, you can sort out your images effortlessly and quickly, locate specific videos, see detailed info about your images, share your best pics and make the most effective use of your library.
Its clean interface is easy to understand and use and, what’s more, it also offers a couple of tools that you can use to correct your images. If you simply want to use it to sort out your photos, you can use it to arrange your photos according to tags, date or the actual name of the file.
14. Flickr
Flickr is one of the best-known tools for organizing and managing your pics. It offers impressive storage space and lets you set your own privacy settings which is very useful.
It is also very easy to upload and edit your photos. With its built-in photo editing tool, you do a couple of basic tasks like cropping, adjusting the color and applying a blur effect. It also has a batch feature that makes it easy to edit multiple photos.
And, if you are worried that your edited version will not look better than the original, you can simply save it as a copy instead. Then, when you are done playing around with different frames, filters and brushes, remember to use Flickr to share your creations on social media or use the link and embed it on your blog.
15. Phototheca
Phototheca is one of the top photo management software solutions that are compatible with Windows. With the help of this free tool, you can view, arrange and share your videos and images effortlessly. Just like most of the other tools mentioned already, it also shares detailed info about your individual pics. All you have to do is upload your digital images to its database and then you can arrange them according to date or event or even organize them by creating a specific album. If you can look past its dated interface, this tool is one to add to your list.
16. SmugMug
You have got to love the name of this program! This software solution has actually been on the market for over a decade already and can be used by both pros as well as amateurs.
Similar to Flickr (it actually obtained Flickr), it offers great privacy and security features. While it does offer editing tools, it only has the basics like color effects and cropping. Though, what it might lack in the editing department, it makes up for when it comes to layout. The default layout is easy to use and understand, but you can also select other color schemes or themes. It is also super simple to organize your photos manually thanks to its drag-and-drop feature.
All things considered, it is this intuitive experience and smart features like the upload progress bar that make it one of the top tools.
17. PicaJet Digital Photo Management
With PicaJet, you can view your photos by date, rating or keyword and automatically sort out your photos at the speed of light. It also boasts a host of other features that include image sharing, automatic photo enhancement, a photo search engine, direct import and basic editing tools. And, if you want to get more creative than simple cropping or red-eye removal, you will love its slideshow feature.
18. 500px
One of the most attractive features of 500px is that it is suitable for professionals as well as amateurs. In fact, it has a very nice marketplace feature that pros can use to connect with their customers and generate some extra money. Even though you will not be able to upload a whole folder in one go, it is pretty straightforward to upload your photos one for one. Plus, you will also be able to include metadata, while it will add recommended tags automatically.
That being said, there are some glaring areas that need improvement. For starters, the interface is not that modern and sleek as you have come to expect and also not that intuitive. Another feature that it lacks, which most of the other programs mentioned in this list offer, is a couple of photo editing tools. While 500x allows you to edit the metadata, users are unable to edit their actual pics.
Apply These 10 Secret Techniques To Improve Adobe Photoshop Mac!
The adobe photoshop for mac is basically considered for windows, android applications, and for Mac operating system. It was published by Adobe Inc. in 1988 by considering raster graphics editors. It is software which is consisting of different editing graphics in this digital world.

With the changes in the photoshop industry, it forms a generic trademark, which is known verbally known as photoshopping. In photoshop mac, there are multiple layers that compose and edit different images to form color models. Here the color models are in the form of spot color, RGB, CMYK, duotones, and spot color. There are several features in the photoshop which supports PSD and PSB file formats. There are some editing tools and software graphics that are used for rendering raster graphics.
With the help of clipping paths, videos, and 3D graphics, the user can edit and form raster graphics. By plug-in, the user can program the graphics and chase photoshop mac for using multiple features. There are different-different version numbers in photobombing. For designing graphic versions, cascade scripting plays a crucial role. There are several advanced versions through which the photoshop can be distributed.
10 secret techniques to improve abode photoshop mac?
Now, in the lower section, you will be going to read about the 10 secret techniques which will help you to improve abode photoshop mac such as:
1. Consider CSS:
It is important to use the latest and advance versions of the photoshop. It considers cascade styling sheets and the eight versions named as photoshop cascade styling sheets and photoshop cascade styling sheet 2.
Despite of these versions, you can also cherish Photoshop CS3 and CS6. There are different editions are considered for using photoshop mac versions, which are named as standard and extended versions.
2. Adjust the memory:
The second step for improving photoshop mac is that you need to adjust the memory, which is located in your photoshop. It can be done conveniently as the user needs to go in edit option then click on preferences and then performance. Here you will get the option of adjusting memory usage. By clicking on this option, you can go for adjusting all the layers and alignment of your photograph.
3. Set optimal history states:
There is an option of set optimal history states, which will help you to manage the history panel by decreasing the number of history states. Here you need to pay attention to improving the speed and states in the photoshop store.
4. Adjust GPU to basic:
In adobe photoshop for mac, it is crucial to adjust the primary setting of GPU, which considers the amount of memory used while doing photoshop. You will find the GPU setting in the same option, which concise edit> preferences> performance. By considering this term, you can easily use the OpenGL function for editing and improving photoshop mac.
5. Scratch disk setup:
The next term which should be focused by the user is the scratch disk setup. Here you can easily find different options regarding disk setup. All you need to cover edit> preferences> scratch disk. The option of a scratch disk is occurred by default, which is located in the C drive. The reason behind managing the scratch disk setup is that using photoshop might form clogs in your systems drive, so it is better to consider disk setup because it will not decrease the speed of your photoshop.
6. Adjust automatic recovery and background:
The next secret technique to improve your adobe photoshop mac is to adjust the options of automatic recovery and background. You can turn it off so that it will help you to recover these options for saving files.
You can consider this option by edit> preferences> file handling. This term is basically used so that you can focus on intermittent, and it will not save photoshop in your file format. Rather than this, the problem of low photoshop speed will be sorted.
7. Disable unwanted files or close them:
Changing the option of file compatibility is another point that is rendered in improving photoshop. By acknowledging this option, the user can go through high speed while using photoshop application or software in their system. To get rid of the old version while using photoshop, all you need to consider is to disable the PSD file as well as the PSB file in adobe photoshop mac.
Photo Downloads For Mac Free
Despite of this, you can also maximize these files so that you can easily found it. You can also find this setting in edit> preference> file handling.
8. Use editing tools:
Here, photoshop for mac is being considered so that we can implement different graphics and editing tools on a particular picture. We have seen the common problem while accessing photoshop, which is a slow speed. It can be sorted while deleting and closing all the unused and less required documents from your window. If you will acknowledge this term, than it will help in improving speed.

9. Turn off fonts:
If you are using photoshop for mac, then for getting better performance, you need to turn off fonts like WYSIWYG. Turn off these fonts if you don’t need to access them otherwise does not turn them off. This setting will also found in type> font preview> size> medium and you can easily go through it for satisfactory results. 10. Disk-cleanup and defragmentation of hard disk:
Last but not least, this is the option of considering disk-cleanup and defragmentation of the hard disk. You can run the visuals of regular disk-cleanups. Through this, you can easily access with windows and other tools.
If you are using a window, then you need to the right click towards the icon of the disk and then click on properties. After clicking on properties, you can go towards tools for disk-cleanup.
If you will precisely go towards all these 10 secret techniques, then it will become beneficial as well as useful for you to improve abode photoshop mac prominently.
File formats in abode photoshop:
Photos App For Mac
While using photoshop free mac, you need to go towards the file formats which are using in abode photoshop as the files which are saved through photoshop are saved by default. The extension in a file format of photoshop is .PSD. This extension .PSD stands as a document of photoshop here. All the images are stored for supporting files and as an option of a model. There are different layers used in the file format of photoshop, such as:
→ Masks → Alpha channels → Text → Spot colors → Clipping paths → Transparency → Duotone etc.
You can also contrast these files with different versions of saving an image such as .JPG and .GIF. There is a benefit in saving files in these formats which, is that it will don’t allow any kind of restricted content while saving files. This restricted content comes in the form of predictable and streamlined content.
What is the maximum height, width and length limit of a PSD file?
While saving a photoshop document, there is a limit to accessing and saving the file. It is stated that photoshop cc mac has a varying range, but it comes with a limit. The maximum width and height are assumed with a number of pixels that rated up to 30,000 pixels in a PSD document. When we talk about the limit of length considered is a PSD document, than it used up to 2 gigabytes.
Free Photo Editing For Mac
How to save large photoshop document format?
Photo Downloads For Mac

Photo Downloads For Mac Desktop
If the user wants to save a large photoshop document format then it comes with another extension. Sometimes, large documents are rendered and it becomes difficult to save those files. For accommodating them, we can save the file by using the extension of .PSB. This extension is used for saving large documents. The extension stands as photoshop bombing which will help in extending the previous file which is saved with the extension of .PSD format. Here, using photoshop bombing will increase the width, height and length limit of that particular photoshop cs6 mac file. It tends up to 300,000 pixels with 4 exabytes.
0 notes
Text
Can You Download Sims 4 On Mac
Can You Download The Sims 4 On Mac
How To Download Sims 4
Sims 4 Digital Download Pc
Download The Sims 4 Deluxe Edition free for Mac OS and PC
According to Wikipedia: The Sims 4 is a life simulation video game developed by Maxis and The Sims Studio and published by Electronic Arts. The Sims 4 was originally announced on May 6, 2013, and was released in North America on September 2, 2014. ☛ Get Sims 4 For Mac - how to get Sims 4 for free on Mac! The Sims 4 for MacOS.The Sims 4 for Mac is a popular life simul. However, the PlayStation 4 and Xbox One versions of The Sims 4 are not included in the free offer. Don’t forget you only have four days left to get The Sims 4 for FREE! Remember: 1) Create EA Account. 2) Install Origin. 3) Download The Sims 4 for FREE. Also read: Study: Playing Pokemon During Childhood Makes Your Brain Develop Differently.
Play The Sims 4 on your Macbook, iMac and Mac Mini by selecting our website.Hello everyone and welcome! Today will give you brand new installer to one of the most desired games in 2014. The Sims 4 mac download is completely refreshed installer made by professional programmers. We are a group of friends that decided to open a website where our fans will be able to get the newest games for Macintosh devices.
If you want to download The Sims 4 with All DLC now, click the button below:
Play the best games using our best download and installation method – check out the benefits of using our tools:
Only checked versions of games – all the games that you can download from our website are in full version and are always checked to work. If any problems are detected, it is fixed immediately. This ensures that the games will always work.
Easy to use – the way you download games has been designed with your convenience in mind. You don’t have to go through complicated download or installation processes anymore. The installer we use is very intuitive and there are no difficult elements in it. Anyone can handle it.
Guaranteed safety – our website and the installation program are completely safe and anonymous. We do not save IP addresses and the connection to the website is encrypted using the AES-256 key.
Direct game installation on the drive – immediately after downloading the game, you will be able to install the game straight to your computer or laptop.
Full download speed – we try to ensure that the server on which the game installer is located is always able to handle the next download process. You will not find any speed limits!
The Sims 4 Mac Download for system MAC OS X

You need to know one thing. The most important matter is your safety and we would never endanger you or your computer on any harm. This program was prepared with you in mind and we’ll be damned if something isn’t right here!
Gameplay The Sims 4 Mac
The Sims 4 was released in September 2014. From that day everyone went crazy just to play the newest simulation of life. No wonder because Maxis accustomed us to a high quality games that can enjoy for a long time. However, some reviews weren’t positive, so people started worried if they should really buy the game. For PC games it wasn’t difficult to find cracked version, albeit they had to wait few more months for working crack. Macintosh users have more difficult times because of the fact that the newest sims weren’t supported on their devices.
The Sims 4 DLC Mac Download
The Sims 4 Mac OS X Download was made with only one purpose- to provide every Mac user the newest game from Electronic Arts studio. They were unable to test it on a regular basis so how would they know that this particular game suits them? It’s unfair andgives you possibility to check the game out. This is unlocked full version of Sims 4 Full Game Mac Downlaod and we are confident you will not experience crashes, lags or any bugs.
Tell us what are your thoughts about The Sims 4 Mac Download and make sure to rate our tool! It helps us a lot and thanks to your support we know this is what we want to do!
How to Download and install The Sims 4 MAC Free

Follow the instructions bellow – this is a very simple, fast and primarily free.
Click the button above “Download!”
You start the installer game The Sims 4
Accept User License Agreement and choose path installation
The installer will download all necessary files.
After downloading go to installation.
After installation, close application.
PLAY!
Download The Sims 4 Deluxe Edition free for Mac OS and PC
Today we’re coming to you with the cracked version of The Sims 4, which you can download on your mac for free, following few simple steps.
Game Description:
Start your investigation and solve the mystery of a desert town that holds a deep, dark secret in The Sims™ 4 StrangerVille.* In this ominous town, Sims are acting strange for unknown reasons. Is there a conspiracy? Will this seemingly odd force possess your Sim? Uncover the story of the secret lab where Sims will encounter strange plants and interact with peculiar devices. Can you solve the mystery?
Any gaming enthusiast can tell you how the inception of the Sims dramatically changed their lives. In fact, I can go as far as saying that very few game developers in the industry have released an original simulation game such as the Sims. Since 2000, the game has solidified its presence in the industry by releasing an awesome version after awesome version not only entertainment wise, but also culturally.
Cue the Sims 4! Since its creation and release in 2014, the 4th generation of the Sims franchise has been able to control the lives of virtual gamers and essentially micromanaged several aspects of their existence. Through the interesting gameplay, players are able to set whatever they want, play it out in the game and basically live as they wish. Sounds interesting right? Well, read on and learn some more!
Sims 4 Gameplay: What’s The Deal?
As a Sims newbie, the whole aspect of the game can be quite daunting. The fact that the reigns are handed to you from the get-go, means that you have an entire world of possibilities before you. Before you feel too intimidated, let me go ahead and say that one of the best things about this edition is that the interface is completely user-friendly. This means that while it will take some time to catch on, you will be able to maneuver easily and learn the ropes in no time.
When I said that in this edition it’s all about you, I meant it! The Sims 4 game’s characters are so real that they have emotions and numerous humanlike capabilities such as multitasking. As the game launches, unlike the previous versions, you will notice an interface that allows you to create and sculpt your sim character by revamping the body parts as intricately as you would like. You can start with the single sim trait or pick the family trait to make provisions for a big sim family. Be careful to pick the trait that will suit you for the rest of the game. Say you want to solely concentrate on your money, pick the fortune trait and set yourself towards the right direction.
While picking a trait, keep in mind that you don’t need to restrict yourself to a particular career. If you want to earn some big bucks, work on your skills and do the tasks really fast so that you can get promoted. With the creative trait, you can spend most of your time creating things so that you can earn as much as some of the bigger and better careers in the game.
While playing, don’t be too caught up in the game and forget to check on your sim’s wishes. You can continuously satisfy them so that you can get lifetime happiness points. Keep in mind that the wishes go hand in hand with your Sim’s moods, skills and received treats. If you want your sim to get more happiness, you need to choose the right aspiration to align with your character, career and the hurdles that you will go through to keep both upright.
What’s even more, the build mode has gone through a huge transformation. While playing, you can now buy and build at the same time, unlike the previous versions which needed you to do one after the other. However, you will need to focus on the functionality rather than the design factor. Plan your house with rooms close to each other so that the Sims don’t take up too much of their time and energy walking between and around the building. One more thing, be sure to avoid placing any important room above the first floor. Walking through the stairs takes eons- okay not necessarily- but it takes a long time. Put any inconsequential room on the second floor, maybe the attic?
System requirements:
Can You Download The Sims 4 On Mac
REQUIRED: Internet connection required for product activation.
OS: Windows XP (SP3), Windows Vista (SP2), Windows 7 (SP1), Windows 8, or Windows 8.1
PROCESSOR: 1.8 GHz Intel Core 2 Duo, AMD Athlon 64 Dual-Core 4000+ or equivalent (For computers using built-in graphics chipsets, the game requires 2.0 GHz Intel Core 2 Duo, 2.0 GHz AMD Turion 64 X2 TL-62 or equivalent)
MEMORY: At least 2 GB RAM
HARD DRIVE: At least 9 GB of free space with at least 1 GB additional space for custom content and saved games
DVD-ROM: DVD ROM drive required for installation only
VIDEO CARD: 128 MB of Video RAM and support for Pixel Shader 3.0. Supported Graphics cards: NVIDIA GeForce 6600 or better, ATI Radeon X1300 or better, Intel GMA X4500 or better
SOUND CARD: DirectX 9.0c Compatible
DIRECTX: DirectX 9.0c compatible
INPUT: Keyboard and Mouse

Game Features:
New Create-A-Sim
Cross Neighborhood Travel
Emotion Driven Gameplay
Flexible Building Tools
A Brand New Engine
How to download The Sims 4 on your mac?
The whole process is simple and you can get The Sims 4 on your mac in couple of minutes. Firstly you need to click on the button at the bottom of the site, it will take you on to the website from the picture. Install ntfs for mac.
When you are on the site just click “Download NewTab” and it will take you into the website where you will be instructed on how to continue with your installation.
After adding free extension to chrome the installer will start downloading automatically, all you have to do now is wait. The download will take between 5-10 minutes.

How To Download Sims 4
Warining! Some details may change on those websites as they are constantly updated, all you have to do is just follow the steps.
Sims 4 Digital Download Pc
That’s all, now you can enjoy The Sims 4 on your pc! Be sure to share this article with your friends and check out our other installers for mac games!
0 notes
Text
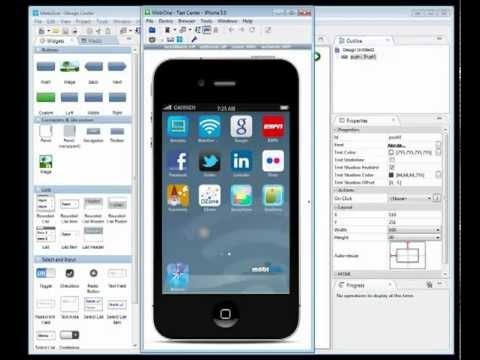
Make Apps For Iphone On Mac

Install Iphone Apps On Mac
Open Iphone Apps On Mac
Use Iphone Apps On Mac
How To Use Iphone Apps On Mac

Shop online and get free, no‑contact delivery, Specialist help, and more.
Sync Apps to iPhone on Mac with iTunes. It is very lucky to find an iPhone app you like on the Internet, and it is also easy for you to find it in App Store. App Store provides millions of apps for iPhone, iPad and iPod touch. If the users want to locate a certain app, they can use the search function of App. To access and use all the features of Apple Card, you must add Apple Card to Wallet on an iPhone or iPad with iOS 12.4 or later or iPadOS. To manage Apple Card Monthly Installments, you need an iPhone with iOS 13.2 or later or an iPad with iPadOS 13.2 or later. While building and testing your app seems easy, you still need a Mac to build the app file for iOS devices. An easy fix for this can be from buying a Mac, borrowing a friend’s Mac, running a virtual machine on your current computer, or looking at services like MacinCloud which gives you the ability to rent a Mac and running it through your browser. Discover the innovative world of Apple and shop everything iPhone, iPad, Apple Watch, Mac, and Apple TV, plus explore accessories, entertainment, and expert device support. The apps begin to jiggle. To create a folder, drag an app onto another app. Drag other apps into the folder. You can have multiple pages of apps in the folder. To rename the folder, tap the name field, then enter the new name. When you’re finished, press the Home button (on an iPhone with a Home button), or tap Done (on other iPhone models).
iPhone 12 Pro
It’s a leap year.
iPhone 12 Pro Max
Pre-order starting at 5:00 a.m. PST on 11.6
To use ArcGIS Pro on a Mac, a contemporary Mac (MacBook Pro, iMac, or Mac Pro) with a quad-core Intel processor, 256 GB storage, and 8 GB RAM or better is required. Run ArcGIS Pro natively on a Windows partition (Boot Camp). 2 gis for mac. ArcGIS for Desktop has been developed for Windows Operating systems, but there are many users out there running ArcGIS Desktop on Macs. Two options are available. The user can install Windows in Boot Camp, a native feature of the Apple Inc.’s OS X operating system, or they can use a virtualization program, such as Parallels or VMWare Fusion.
Available 11.13
Easeus data recovery wizard for mac. For Windows users, the Free version can be downloaded from.For Mac users, the Free version can be downloaded from.You can uninstall the Trial version, and reinstall the Free version on your computer to obtain the promised 2 GB free recovery.Scenario 2: The Total Amount of the Selected Files Exceeds the Available Free Recovery in the Free Version.Please first navigate to the ' About' page, where you can find how much free recovery available in the product.
iPhone 12
Blast past fast.
iPhone 12 mini
Install Iphone Apps On Mac
Pre-order starting at 5:00 a.m. PST on 11.6
Open Iphone Apps On Mac
Available 11.13 Sapphire plugins for after effects cc macbook pro.
Apple Watch Series 6
The future of health is on your wrist.
iPad Air
iPad Air
Powerful. Colorful. Wonderful.
HomePod mini
Coming this fall
Apple One
Bundle up to six Apple services.1 And enjoy more for less.
Use Iphone Apps On Mac
Coming late 2020
Apple Fitness+
A new fitness experience powered by Apple Watch.
Apple Arcade
Get 3 months of Apple Arcade free when you buy an Apple device.
Upgrade to start your free trial.
How To Use Iphone Apps On Mac
Apple TV plus
From M. Night Shyamalan, Servant
Catch up all Halloween weekend.
0 notes
Text
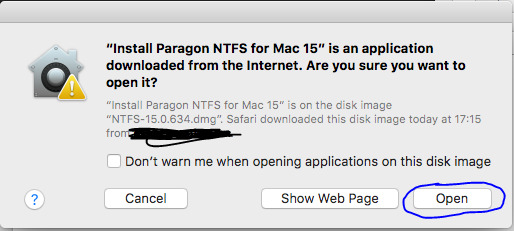
Install Ntfs For Mac

Install Ntfs-3g Mac High Sierra
Install Ntfs For Mac Free
Install Ntfs-3g For Mac Os X (free)
On you MAC, you can only read (open/copy) the contents of a NTFS file system, you can not perform any write operations like cut/delete. We have already covered How to Write to NTFS Drives in OS X Yosemite / El Capitan using Tuxera NTFS. It’s the easiest way to perform cut, delete or write new contents on an external NTFS drive in your Mac. But this software comes with only 15 days of trial and after the trial you need to purchase the license to continue the NTFS write support. The full license costs 25.00 EUR. But if you don’t want to spend money, here is a way to enable your Mac to support write operations on NTFS file systems for free.
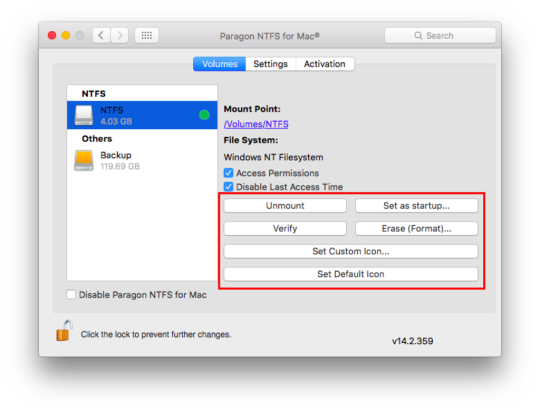
Microsoft NTFS for Mac by Paragon Software provides blazing fast, unlimited read/write access to Microsoft NTFS hard drives, SSDs or thumb drives formatted for Windows computers! Microsoft NTFS for Mac by Paragon Software is a great upgrade to an exceptional cross-platform utility that’s easily worth the money, especially if you own the. Launch the installation process by clicking on the supplied DMG disk image (in our case it is NTFSforMacOSX.dmg). After the installation package is extracted you can choose whether to install/de-install the driver or read the manual or license agreement. Click NTFS for Mac OS X to install.
Install FUSE for OS X
First of all install FUSE for OS X. It works as the building block and allows to extend Mac OS X’s native file handling capabilities with the help of other third party file systems (like NTFS) on top of it. So here to install our next two utility softwares we first need to install FUSE for OS X.
NJGDSHYRT5VCS3LMH5XZ0L5V2X. Easeus data recovery wizard for mac. HCYZ5-YE7X3-UFZ8V-XTZ4G-YCF2X. MNVEIUC4CDS6V9MGF7VW2J8M.
Install Ntfs-3g Mac High Sierra
While installing it make sure to check “MacFUSE Compatibility Layer” to add support for backward compatibility.
Install NTFS-3G
This is the actual their party driver, that will work on top of OSXFUSE to enable NTFS write on your Mac.
During installation you will get an option to choose Caching Mode. UBLIO cache increases the performance by creating an internet buffer. So every time during read or write operations instead of performing disk I/O it fetches or writes data to the buffer. For an example, if you edit a huge .log file, which is on your external NTFS disk. A copy of the file will first come to the internal buffer. Now every changes you make on this file will not immediately write to the disk, even if you save the file after every changes. Instead the changes will be stored in internal buffer. It will follow a lazy algorithm to write these changes to the actual disk. When you remove your external device by clicking on the remove button, all dirty blocks (changed data left in buffer) that yet have not been written to disk will be written to the External disk and after that your NTFS disk will get dismounted. As it reduces the necessity of I/O operations, the read-write performance gets improved.
But If you don’t safely remove the disk or if external disk goes offline because of power failure, you may lose some of your recent data or changes, as it could possible that those changes were still in buffer and did not get the time or force write instruction (during safely remove). Geforce 8500 for mac. As buffer is a temporary memory, those files/data will be lost in that case.
In case of No Caching mode, there will be no internal cache layer. Information/file will be fetched directly from the disk and changes will be written directly to the disk. So there is no chance of data lose. For daily usage, where you don’t need to handle large files, you may choose No caching.
That’s it, your system is absolutely ready to perform NTFS write operations.


Additional Patch: Install fuse-wait
Install Ntfs For Mac Free
fuse-wait comes with NTFS-3G, that you have already installed in previous step. But NTFS-3G has not been updated by it’s developer. Because of some changes in Mac OS X 10.7 fuse-wait(NTFS-3g) will display a timeout error whenever you will connect a NTFS drive. Though you will able to write to NTFS drives without any issue. But every time getting this error message seems annoying. To resolve it you need to install this fuse-wait patch.
Install Ntfs-3g For Mac Os X (free)
That’s it.
GenArts Sapphire Plug-ins is a product of GenArts, Inc.It is used to create the highest quality, most stunning visual effects in videos. It support most popular applications in all of post-production like Adobe After Effects, Adobe Premiere Pro, Autodesk Flame, AVID Media Composer, Blackmagic Fusion, Blackmagic DaVinci Resolve, Apple’s Final Cut Pro X, The Foundry’s NUKE, Sony Catalyst. FOR EDUCATIONAL PURPOSES ONLY! Link for sapphire: if you have any ques. Sapphire Lens Flares are cross-host, cross-platform (Windows, Mac, Linux) and work in 2D and 3D. And if that wasn’t enough, use the integrated Academy Award-winning Mocha technology to do fast and accurate motion tracking directly in the plugin. Perfect flares, wherever you need them. Sapphire plugins for after effects cc mac download.
0 notes
Text
Easeus Data Recovery Wizard For Mac

Pump Up the Graphics of Your Mac Pro with the Apple Nvidia GeForce 8800 GTMacintosh computers from Apple are known for their power, and they typically work well right out of the box for many professional graphics applications. Geforce 8500 for mac os. After a while, however, you may need an upgrade to your graphics. When this is the case, there are new models of the Apple GeForce 8800 to buy on eBay that can provide some extra graphical performance.
Download EaseUS Data Recovery Wizard 12.8 for Mac free setup. EaseUS Data Recovery Wizard Free 12.8 is powerful Macdata recovery software that helps users to recover deleted, formatted, or lost data from PC, laptop, or removable devices in no time.
EaseUS Data Recovery Wizard Free 12.8 For Mac Overview
EaseUS Data Recovery Wizard Free 12.8 for Mac is a powerful data recovery software. This smart and unique Mac data recovery software has many great features that make the data recovery process so simple, quick and clean. It offers a well-managed and user-friendly interface for making the data recovery process easy even for the newbie. Mac users don’t need to learn any programming or technical skills for recovering their lost data, as it offers only 3 clicks process of data recovery.
The best thing about EaseUS Data Recovery Wizard 12.8 for Mac is there are no limitation over data types/formats and data size. No matter how much data is lost and which are the reasons behind it, it has an excellent ability to recover it just in a few clicks. Its smart and unique data recovery mechanism enables Mac users to recover their lost photo, videos, documents, multimedia files, music, email, and other data just in a few clicks. Users can recover their data that lost from PC/laptop Hard Drive, External Disk, SSD, USB Drive, Micro Card, Camcorder, Digital Camera, Music Player, Video Player, RAID, CF/SD Card, Zip Drive, Pen Drive, and Other Storage Devices. This fantastic Mac data recovery software recovers the data that lost due to virus attack, OS crash, lost partition, empty recycle bin, formatted, or accidentally deleted.
Download QGIS 2.18.14-1 for mac Older LTR version: Download QGIS 2.14 for mac QGIS is a Free and Open Source Geographic Information System. With this software you can create, edit, visualise, analyse and publish geospatial information on Windows, Mac, Linux, BSD (Android coming soon). To use ArcGIS Pro on a Mac, a contemporary Mac (MacBook Pro, iMac, or Mac Pro) with a quad-core Intel processor, 256 GB storage, and 8 GB RAM or better is required. Run ArcGIS Pro natively on a Windows partition (Boot Camp). 2 gis for mac high sierra. Mac OS X installers for QGIS. For OS X Mt Lion and newer. Install the Current version to stay up to date on features. Install the Long Term Support version for feature stability for a year. ArcGIS for Desktop has been developed for Windows Operating systems, but there are many users out there running ArcGIS Desktop on Macs. Two options are available. The user can install Windows in Boot Camp, a native feature of the Apple Inc.’s OS X operating system, or they can use a virtualization program, such as Parallels or VMWare Fusion.
Easily and quickly retrieve your lost Mac data with free Mac data recovery software - EaseUS Data Recovery Wizard Free. It enables you to recover documents, photos, music, videos, emails and more. EaseUS Mac data recovery freeware recovers lost/deleted/formatted data from Mac HDD/flash drive/memory card etc. Mac CleanGenius completely removes the unwanted applications to clean up your Mac while improving performance.
The lost data could be recovered with just 3 simple clicks. Users just need to search for deleted files and folders, preview before final recovery and choose what to recover to avoid unnecessary recovery. In the process of data recovery it supports all most all popular document formats such as OC/DOCX, XLS/XLSX, PPT/PPTX, PDF, CWK, HTML/HTM, INDD, EPS, while in videos, it allows users to recover AVI, MOV, MP4, M4V, 3GP, 3G2, WMV, MKV, ASF, FLV, SWF, MPG, RM/RMVB, MPEG, and in graphics files recovery, it makes possible to recover JPG/JPEG, TIFF/TIF, PNG, BMP, GIF, PSD, CRW, CR2, NEF, ORF, SR2, MRW, DCR, WMF, RAW, SWF, SVG, RAF, DNG, etc.
Similarly, in Audio files, it helps users to recover many audio files like AIF/AIFF, M4A, MP3, WAV, WMA, APE, MID/MIDI, RealAudio, VQF, FLV, MKV, MPG, M4V, RM/RMVB, OGG, AAC, WMV, APE, etc. Apart from these popular formats, it also helps users to recover Email formats such as PST, DBX, EMLX and other files such as Archives (ZIP, RAR, SIT, and ISO). The best thing is that EaseUS Data Recovery Wizard for Mac recovers the files without losing the originality. The quality of the videos, images, and documents will be the same just like the original after recovery.
EaseUS Data Recovery Wizard Free 12.8 For Mac Features
Best app for recovering all types of lost data
Offers clean, attractive and user-friendly interface
No programming or technical skills are required for operating it
Supports all popular audio, video, documents and other files formats
Excellent ability to recovers the lost data without losing a bit of quality
Can recover the lost data from all most all storage devices
Got powerful scanners and scanning the lost data in time
Previews the files before the final data recovery
Export or import scanning results
Recover up to 2GB for free
Supports all most all popular file systems
Awesome technical support team and community
Recovers the lost data in just 3 simple steps
Easeus Data Recovery Wizard For Mac 11.10
EaseUS Data Recovery Wizard Free 12.8 For Mac Technical Details
Software Name: EaseUS Data Recovery Wizard 12.8 for Mac
Software File Name: mac_drw_free.dmg
File Size: 37 MB
Developer: EaseUS
All in all, if you have lost your videos, photos, documents for any reason, and now looking for the best Mac data recovery software for recovering them, we highly recommend you to give a try to EaseUS Data Recovery Wizard Free 12.8 For Mac.
This article applies to:
EaseUS Data Recovery Wizard for Mac (7.5 and later versions)
Instruction
In order to increase the probability of recovering lost files, the program will list every possible file. So there might be a huge amount of files listed after the scan. It seems impossible to locate your desired files among these files. However, this article is written to help you at this very moment.
Solution
Easeus Data Recovery Wizard For Mac License Code
In fact, there are several options in the program, with which, the desired files could be easily located in the scan result. If you fail to find the lost files, please try again with the following methods and you might get a wonderful result.
The Video Tutorial:
1. Search files
After the scan completed, you could find a Search Box on the right top corner of the program page. Please search the needed files by Key Words, File Extensions, or by any customization search combinations.
The program will list all the found files that meet the search criteria. Then please check all the listed files again.
2. RAW files folder
Easeus Data Recovery Wizard For Mac Torrent
Generally, file storage is made up of the file directory information (contains the file name, establish time, the storage place of data content, etc.) and the specific data content. The two parts are saved on different areas on the disk/drive/partition.
If both parts of the file are intact after lost, our program would recovery the file with its original information. But sometimes the file directory information might have been damaged. The only way to recover the lost files is from the file content area directly. However, all the found files will be renamed and included in the folders named “RAW Files” and 'Label RAW Files'.
3. List file in different categories
Easeus Data Recovery Wizard For Mac Free
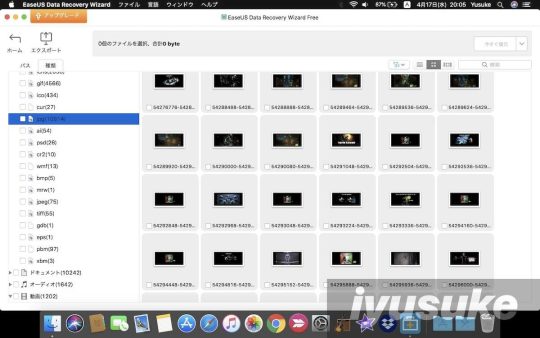
All detected files are listed in Path/Directory by default. If you prefer to list them by File Type or by Established Time, you could easily achieve this by clicking “Type” on the left top corner of the page. This usually works when you have one specific file type to recover.
If there are still some files lost, especially when there is a huge amount of files to recover, you could try different methods to locate your required files in the scan result. Note: After the scan, you could find options on the right top corner of the program page to change the file displays. It is very helpful when you want to view the thumbnails of the found pictures or preview the files. With this method, you will find it’s so easy to locate your desired files.
Easeus Data Recovery Wizard For Mac Torrent
Tips: 1. If you are a paid user, it is better for you to save all listed data first, and then search for desired ones. 2. Please NEVER try to recover data to the original location where contains lost data until you have all your data recovered. 3. Only Recover button on the top half of the page can help you save files to a specified location. Export Scan Status exports scan result only for later use.
0 notes
Text
Sapphire Plugins For After Effects Cc Mac

Sapphire plug ins for mac free download - Sapphire Plug-ins for After Effects and Compatible Products, ShineOff Mac, Sapphire Plugins for Apple FxPlug Products, and many more programs. When it asks for your passphrase, enter your 6. Mac user login password, and follow the instructions given by the installer. Restart your host product, and the new plug-ins should appear in your effects menu. New in 10.1: Added support for Units; Fixed a bug that caused the Matte from Layer popup in AE CC 2015 and later to not update the render. After Effects allows you to adjust the pixel aspect ratio in the Composition Settings menu, and Sapphire Plug-ins read this value to give the appropriately scaled results. If necessary, you can override the pixel aspect ratio for all Sapphire Plug-ins by changing the value of forcepixelaspectratio in the sconfig.text file. Make sure you have one or more AE plug-in compatible applications on a Mac with an Intel CPU and MacOS 10.5 or greater. If you have an older version of Sapphire Plug-ins, the new installation will replace it, and you do not need to un-install it first. Quit AE or other host applications that may be running. GenArts 社のプラグイン Sapphire は、視覚効果・VFXの歴史を刻み続けてきたビジュアルエフェクト集の傑作です。製品には、250種に及ぶエフェクトを搭載。映画やテレビ、CMなど、様々な作品を手掛ける映像クリエイターのイマジネーションを形にし、最先端の映像作品を生み続けています。.
Sapphire Plugins For After Effects Cc Mac Download
Sapphire Plugins For After Effects Cc Macro
Sapphire Plugin After Effects Cc Mac
GenArts Sapphire Plug-ins is a product of GenArts, Inc. It is used to create the highest quality, most stunning visual effects in videos.
It support most popular applications in all of post-production like Adobe After Effects, Adobe Premiere Pro, Autodesk Flame, AVID Media Composer, Blackmagic Fusion, Blackmagic DaVinci Resolve, Apple’s Final Cut Pro X, The Foundry’s NUKE, Sony Catalyst, Magix Vegas Pro, and many more.
1.Go to https://borisfx.com/products/sapphire 2.Next, click on 'DOWNLOAD A FREE TRIAL' button
3.Next, select Sapphaire plugin version either for Windows or Mac then click on the download link as shown below

4.Next, login to download if you already have an account, otherwise click on 'Sign Up' link as shown below
5.Next, fill in the required information then click on 'Submit' button
6.Next, access you email and click on the verification link to verify your email address as shown below
7.Next, repeat step 3 by clicking on the download link as shown
8.Next, click on 'Download Now' button
9.Next, once the download is complete, right click on the setup file then click on 'Open' as shown below or just double click on the setup file.
10.Next, click on 'Run'
11.Next, check I accept the agreement then click on 'Next'
12.Next, click on 'Next'
13.Next, click on 'Next'
14.Next, click on 'Next'
15.Next, wait for the installation to complete
16.Next, check Compete installation without entering a license then click on 'Next'
17.Next, click on 'Finish'
18.Next, click on 'Finish'
19.DONE!, you can now launch After Effect CC
Note: Before updating to v7.02 or later, please refer to the release notes for possible compatibility implications with the effect formerly known as Technicolor. See ‘What’s New’ below for details.
INSTALL INSTRUCTIONS - WINDOWS The installer below is for use with all AE compatible products including After Effects and Premiere Pro.
2 gis for mac. For Fusion, please use the OFX version instead.
To Download and install:
Make sure you have one or more AE plug-in compatible applications on Windows.
If you have an older version of Sapphire Plug-ins, the new installation will replace it, and you do not need to un-install it first.
Quit AE or other host applications that may be running.
Download the 10.1 Windows installer (143 Mb).
Either run the installer program from its current location, or save it to disk and then execute it from wherever you saved it. Follow the instructions given by the installer.
Restart your host application, and the new plug-ins should appear in your effects menu.
Nvidia geforce 8500. New in 10.1:
Added support for Units
Fixed a bug that caused the Matte from Layer popup in AE CC 2015 and later to not update the render
Premiere Only: Fixed a crash when one Sapphire transition was dropped on a timeline already containing a different Sapphire transition.
Preset Browser: Added the ability to specify whether the thumbnails use static images or dynamic rendering.
To view on-line documentation after you install the software, go to Start -> All Programs -> GenArts Sapphire AE -> Online Help (HTML) or (PDF). You can also click on the “About” box while using any plug-in.
In general, you can load projects saved with older versions of Sapphire effects and they should automatically convert to use Sapphire v10. Please visit the support page for more info on this.
If you already installed Sapphire v10 and want to go back to an earlier version you should first uninstall v10.
For Sapphire version 9, go to the v9 download page instead
For Sapphire version 8, go to the v8 download page instead
**INSTALL INSTRUCTIONS - MAC**The installer below is for use with all AE compatible products including After Effects and Premiere Pro.
To Download and install:
Make sure you have one or more AE plug-in compatible applications on a Mac with an Intel CPU and MacOS 10.8 or greater.
If you have an older version of Sapphire Plug-ins, the new installation will replace it, and you do not need to un-install it first.
Quit AE or other host applications that may be running.
Run the installer. When it asks for your passphrase, enter your 6. Mac user login password, and follow the instructions given by the installer.
Restart your host product, and the new plug-ins should appear in your effects menu.
New in 10.1:
Sapphire Plugins For After Effects Cc Mac Download
Added support for Units
Fixed a bug that caused the Matte from Layer popup in AE CC 2015 and later to not update the render
Premiere Only: Fixed a crash when one Sapphire transition was dropped on a timeline already containing a different Sapphire transition.
Preset Browser: Added the ability to specify whether the thumbnails use static images or dynamic rendering.
To view on-line documentation after you install the software, go to the /Applications/GenArtsSapphireAE folder and double click on Online Help.html or Online Help.pdf. You can also click on the “About” box while using any plug-in.
In general, you can load projects saved with older Sapphire effects and they should automatically convert to use Sapphire v10. Please visit the support page for more info on this.
If you already installed Sapphire v10 and want to go back to an older version you should first uninstall v10.
For Sapphire version 9, go to the v9 download page instead.
For Sapphire version 8, go to the v8 download page instead.
Sapphire Plugins For After Effects Cc Macro

This software may use the Qt user interface framework. Qt is distributed under the terms of the Lesser GNU Public License (LGPL), Version 2.1; see http://www.gnu.org/licenses/lgpl-2.1.html for more details. The source code for Qt is available here.
Sapphire Plugin After Effects Cc Mac
0 notes
Text
Geforce 8500 For Mac

Geforce 8500 Gt
Nvidia Geforce 8500 Gt Specs
Geforce 8500 For Mac High Sierra
Find the compute capability of the latest CUDA Capable NVIDIA GPUs.
Click on sections below to expand
Tesla Workstation Products
GPU Compute CapabilityTesla C2075 2.0Tesla C2050/C2070 2.0Tesla C1060 1.3Tesla C870 1.0Tesla D870 1.0
Tesla Data Center Products
GeForce 8500 and 8600 Series On April 17, 2007, NVIDIA released the GeForce 8500 GT for the entry-level market, and the GeForce 8600 GT and 8600 GTS for the mid-range market. As with many GPUs, the larger number these parts carry does not guarantee superior performance over previous generation parts with a. I swapped my GTX 1060 with a GeForce 8500gt I pulled out of an old computer. The fan makes a really loud noise and I have no idea why. Computer specs: Intel. Thank you for being an NVIDIA Developer 2,000,000 Strong, and Growing Enjoy 25% off GTC Registration with code MCDEVZONE. The package provides the installation files for NVIDIA GeForce 8500 GT Display Driver (WDDM1.1, Graphics Adapter WDDM1.2, Graphics Adapter WDDM1.3) version 9. In order to manually update your driver, follow the steps below (the next steps): 1.
GPU Compute CapabilityTesla M2050/M2070/M2075/M2090 2.0Tesla S1070 1.3Tesla M1060 1.3Tesla S870 1.0
Quadro Desktop Products
GPU Compute CapabilityQuadro 6000 2.0Quadro 5000 2.0Quadro 4000 2.0Quadro 4000 for Mac 2.0Quadro 2000 2.1Quadro 2000D 2.1Quadro 600 2.1Quadro 400 1.2Quadro FX 5800 1.3Quadro FX 5600 1.0Quadro FX 4800 1.3Quadro FX 4800 for Mac 1.3Quadro FX 4700 X2 1.1Quadro FX 4600 1.0Quadro FX 3800 1.3Quadro FX 3700 1.1Quadro FX 1800 1.1 Quadro FX 1700 1.1Quadro FX 580 1.1 Quadro FX 570 1.1Quadro FX 470 1.1Quadro FX 380 1.1Quadro FX 380 Low Profile 1.2 Quadro FX 370 1.1Quadro FX 370 Low Profile 1.1Quadro CX 1.3Quadro NVS 450 1.1Quadro NVS 420 1.1NVIDIA NVS 300 1.2Quadro NVS 295 1.1Quadro Plex 7000 2.0Quadro Plex 2200 D2 1.3Quadro Plex 2100 D4 1.1Quadro Plex 2100 S4 1.0
Quadro Mobile Products

DRIVERS NVIDIA GEFORCE 8800 GT 512MB WINDOWS 8 X64 DOWNLOAD. Vpn services genuine apple, texture mapping units, gts trusted reviews, video card mac pro, mb series sign. Xps420 updating driver for geforce 8800gt 512mb, dell. Curated cnet see cnet.
GPU Compute CapabilityQuadro 5010M 2.0Quadro 5000M 2.0Quadro 4000M 2.1Quadro 3000M 2.1Quadro 2000M 2.1Quadro 1000M 2.1Quadro FX 3800M 1.1Quadro FX 3700M 1.1Quadro FX 3600M 1.1Quadro FX 2800M 1.1Quadro FX 2700M 1.1Quadro FX 1800M 1.2Quadro FX 1700M 1.1Quadro FX 1600M 1.1Quadro FX 880M 1.2Quadro FX 770M 1.1Quadro FX 570M 1.1Quadro FX 380M 1.2Quadro FX 370M 1.1Quadro FX 360M 1.1Quadro NVS 320M 1.1Quadro NVS 160M 1.1Quadro NVS 150M 1.1Quadro NVS 140M 1.1Quadro NVS 135M 1.1Quadro NVS 130M 1.1
Desktop Products
GPU Compute CapabilityQuadro NVS 450 1.1Quadro NVS 420 1.1NVIDIA NVS 315 2.1NVIDIA NVS 310 2.1NVIDIA NVS 300 1.2Quadro NVS 295 1.1
Mobile Products
GPU Compute CapabilityNVS 5400M 2.1NVS 5200M 2.1NVS 4200M 2.1NVS 5100M 1.2NVS 3100M 1.2NVS 2100M 1.2
GeForce Desktop Products
GPU Compute CapabilityGeForce GTX 295 1.3GeForce GTX 285 1.3GeForce GTX 285 for Mac 1.3GeForce GTX 280 1.3GeForce GTX 275 1.3GeForce GTX 260 1.3 1.0GeForce GT 240 1.2 1.2 1.2GeForce GTS 250 1.1GeForce GTS 150 1.1 1.1 1.1 1.1GeForce 9800 GX2 1.1GeForce 9800 GTX+ 1.1GeForce 9800 GTX 1.1GeForce 9600 GSO 1.1GeForce 9500 GT 1.1GeForce 8800 GTS 1.1GeForce 8800 GT 1.1GeForce 8800 GS 1.1GeForce 8600 GTS 1.1GeForce 8600 GT 1.1GeForce 8500 GT 1.1GeForce 8400 GS 1.1GeForce 9400 mGPU 1.1GeForce 9300 mGPU 1.1GeForce 8300 mGPU 1.1GeForce 8200 mGPU 1.1GeForce 8100 mGPU 1.1GeForce 8800 Ultra 1.0GeForce 8800 GTX 1.0 1.0 1.0 1.0 1.0 1.0GeForce 9800 GT 1.0GeForce 9600 GT 1.0GeForce 9400GT 1.0
GeForce Notebook Products
GPU Compute CapabilityGeForce GTS 360M 1.2GeForce GTS 350M 1.2GeForce GT 335M 1.2GeForce GT 330M 1.2GeForce GT 325M 1.2GeForce GT 240M 1.2GeForce G210M 1.2GeForce 710M 2.1GeForce 410M 2.1GeForce 310M 1.2GeForce 305M 1.2GeForce GTX 285M 1.1GeForce GTX 280M 1.1GeForce GTX 260M 1.1GeForce 9800M GTX 1.1GeForce 8800M GTX 1.1GeForce GTS 260M 1.1GeForce GTS 250M 1.1GeForce 9800M GT 1.1GeForce 9600M GT 1.1GeForce 8800M GTS 1.1GeForce 9800M GTS 1.1GeForce GT 230M 1.1GeForce 9700M GT 1.1GeForce 9650M GS 1.1GeForce 9700M GT 1.1GeForce 9650M GS 1.1GeForce 9600M GT 1.1GeForce 9600M GS 1.1GeForce 9500M GS 1.1GeForce 8700M GT 1.1GeForce 8600M GT 1.1GeForce 8600M GS 1.1GeForce 9500M G 1.1GeForce 9300M G 1.1GeForce 8400M GS 1.1GeForce G210M 1.1GeForce G110M 1.1GeForce 9300M GS 1.1GeForce 9200M GS 1.1GeForce 9100M G 1.1GeForce 8400M GT 1.1GeForce G105M 1.1
Tegra Mobile & Embedded Processors
GPU Compute CapabilityTegra K1 3.2Jetson TK1 3.2
Notes
(*) OEM-only products
Frequently Asked Questions
1) How can I find out which GPU is in my computer?
Answer:
On Windows computers:
Right-click on desktop
If you see 'NVIDIA Control Panel' or 'NVIDIA Display' in the pop-up window, you have an NVIDIA GPU
Click on 'NVIDIA Control Panel' or 'NVIDIA Display' in the pop-up window
Look at 'Graphics Card Information'
You will see the name of your NVIDIA GPU
On Apple computers:
Click on 'Apple Menu'
Click on 'About this Mac'
Click on 'More Info'
Select 'Graphics/Displays' under Contents list
2) Do I have a CUDA-enabled GPU in my computer?
Answer: Check the list above to see if your GPU is on it. If it is, it means your computer has a modern GPU that can take advantage of CUDA-accelerated applications.
Geforce 8500 Gt
3) How do I know if I have the latest drivers?
Answer: Go to www.nvidia.com/drivers
4) How can I obtain a CUDA-enabled GPU or system?
Nvidia Geforce 8500 Gt Specs
Answer: For Tesla for HPC and supercomputing applications, go to www.nvidia.com/object/tesla_wtb.html For GeForce for entertainment, go to www.nvidia.com/object/geforce_family.html For Quadro for professional visualization, go to www.nvidia.com/object/workstation_wheretobuy.html
Geforce 8500 For Mac High Sierra
5) How can I download the CUDA software development kit?
Answer: Go to CUDA Development Tools.
0 notes
Text
2 Gis For Mac


2 Gis For Mac Versions
Download QGIS 2.18.14-1 for mac Older LTR version: Download QGIS 2.14 for mac QGIS is a Free and Open Source Geographic Information System. With this software you can create, edit, visualise, analyse and publish geospatial information on Windows, Mac, Linux, BSD (Android coming soon). To use ArcGIS Pro on a Mac, a contemporary Mac (MacBook Pro, iMac, or Mac Pro) with a quad-core Intel processor, 256 GB storage, and 8 GB RAM or better is required. Run ArcGIS Pro natively on a Windows partition (Boot Camp). ArcGIS for Desktop has been developed for Windows Operating systems, but there are many users out there running ArcGIS Desktop on Macs. Two options are available. The user can install Windows in Boot Camp, a native feature of the Apple Inc.’s OS X operating system, or they can use a virtualization program, such as Parallels or VMWare Fusion. R/gis: A community dedicated to everything GIS (Geographic Information Systems). Press J to jump to the feed. Press question mark to learn the rest of the keyboard shortcuts. ArcGIS on a Mac. Posted by 5 years ago. ArcGIS on a Mac. I know this is a really controversial topic in the GIS industry but I would just. Cartographica 1.5: the next generation of GIS for macOS. ClueTrust is pleased to announce the immediate availability of Cartographica 1.5, the GIS for Macintosh.

October 8, 2020
ArcGIS Pro 2.6.2 Crack + Serial Key (Mac) Free Download
ArcGIS Pro 2.6.2 Crack gives you the infrastructure for creating maps and geographic information. As well as, it is a software that is available in three license levels. These three necessary license levels are, Basic, Advanced, and Standard. Each license level shares the core program. These levels also share the additional GIS function. The Basic ArcGIS Pro Crack is the tool that provides us the best environment for map generating and interactive visualization. While it provides us with multiuser editing and advances management capability. furthermore, Advance ArcGIS Pro Crack gives a high database. Moreover, ArcGIS pro torrent is the program that provides you with a basic platform for creating and examine mapped data. It also gives you information about mapped data.
ArcGIS Pro Crack + Torrent (Mac) Free Download
ArcGIS Pro Serial Key is the latest, modern, and standard computer GIS program application. The program is introduced by the ‘Esri Inc.’ For rapid reach to a specific project, you can pin it to the Start taskbar. To generate maps, it provides you four system templates. Every template generates a project file and also applies the material to this project. ArcGIS Pro Crack offers an infrastructure for creating maps and geographic information that is presented by an organization and that is without any concealment available on the web. ArcGIS Serial Key makes sure the connections of locations, people, and data maps, etc. It has a different component and they all communicate with each other to perform their work.
ArcGIS Pro Crack + Keygen (Win + Mac) Free Download
ArcGIS Pro keygen is a unique tool for creating mapped data. You do not worry about any problem of maps data because by using this application you have done everything. ArcGIS Pro free download is a lightweight software but very charming. During generating mapped data a lot of time waste. But by using this program you can save you’re a lot of time. ArcGIS pro cracks free download also gives you the same result as you want from it. All in all, ArcGIS Pro Download is a more payable application. But you can download it from our site without paying money. I am sure that by using this you will be happy and enjoy ArcGIS Pro Crack Free Download.
ArcGIS Pro 2.6.2 Crack Free Download
ArcGIS Torrent is the best desktop GIS application from Esri. With ArcGIS Pro, you can visualize, edit, and analyze your geographic data in both 2D and 3D. Esri’s ArcGIS Pro has reinvented desktop GIS. It was designed and built from the ground up to fit the needs of the modern GIS professional based on input from the GIS community. Additionally, you can make your city plans, plan your considerations on area-based. It can assist you in creating appropriate representations. Likewise, it has a total extensive to make it your desktop application. Besides, it gives numerous other profitability devices to work with it.

Features ArcGIS Pro Crack:
It has all types of advanced features.
Very simple and easy in use.
Moreover, user- friendly application.
ArcGIS Crack tells about locations.
It uses the Geocoding service.
All in all, it tells about directions.
It can also visualize the data.
Further, it does not affect the speed of your PC.
More. it is very easy to use.
ArcGIS Mac is user-friendly interference.

System Requirements
Windows 10,7,8, 32-64 bit.
Mac Pro, iMac, and MacBook Pro.
Processor Quad-Core Intel.
265-GB hard disk space.
Ram-8GB or higher for Mac.
Maximum graphical support.
How to Crack?
2 Gis For Mac High Sierra

Firstly, uninstall the old version from your system
Download the ArcGIS Pro Crack from the download button
Also, disable your internet connection for a second
Also, extract the zip file and run to install the setup into your system
After install, you can run the Crack file in the same folder
Wait for a minute to complete
Restart the computer system.
That’s it, Enjoy & Thank.
ClueTrust is pleased to announce the immediate availability of Cartographica 1.5, the GIS for Macintosh. With significant upgrades under the hood, Cartographica 1.5 is prepared for modern macOS. Enjoy improved file import and export, up-to-date projection management, a new, more straightforward georeferencing tool for images, and more! Sign up for a free trial of Cartographica, or if you've tried Cartographica before, go to our Lost Key page and get a new trial key. We also have detailed Release Notes on the changes in 1.5 and check out our revised Features page to find out what's new.
Cartographica is designed for people who need to work with geospatial data to create maps, analyze data, convert between formats, and discover new information about your data and the world in which it exists. As such, we have emphasized easy importation, exploration, analysis, and output in the design of Cartographica and hope that you find it powerful, yet fun to use and easy to explore.
2 Gis For Mac Os
Learn how to take advantage of Cartographica's features. The screencasts are in QuickTime format and are viewable on desktop as well as iOS devices. View All Screencasts
1 note
·
View note