
Don't wanna be here? Send us removal request.
Statistics
We looked inside some of the posts by coddocumentation and here's what we found interesting.
Average Info
Notes Per Post
0
Likes Per Post
0
Reblog Per Post
0
Reply Per Post
0
Time Between Posts
1 day
Number of Posts By Type
Text
17
Last Seen Tumblr Blogs


Fun Fact
Average visit duration of Tumblr.com is 10 mins and 25 secs.
Text
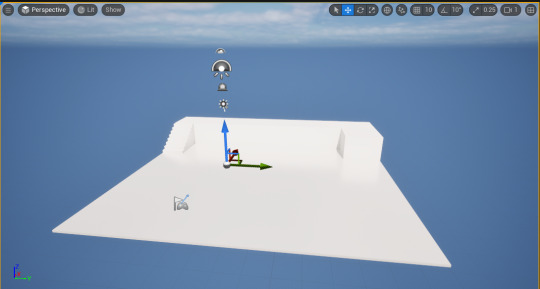
Making Level 02
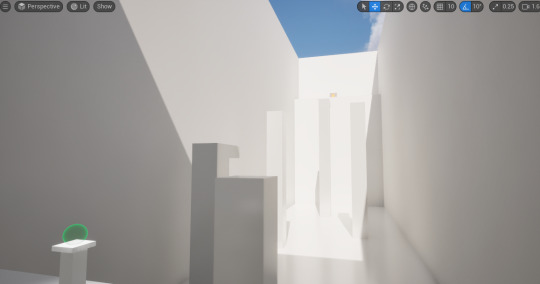
started with this long platforming area and another double jump orb

I wanted to incorporate more jump pads so there are some on the pillars, and you also have to double jump to make it across the pads

next part is this platform room with moving floors you have to time and jump onto. near the end is a cube you have to make 2 jumps while holding to place on a button that will open the exit door of the game

incase the player drops the cube or falls, I set up the planes so that it spawns a new cube at its own spawn point using my spawner logic I made before, and I placed a player death plane below it so that the cube hits the cube laser before the player death plane. I had to make it this way because the regular death plane still applies to the cube.
0 notes
Text
Making Level 01
I decided while making this level to make it facility themed, very portal inspired but with no portals lol


added hallway
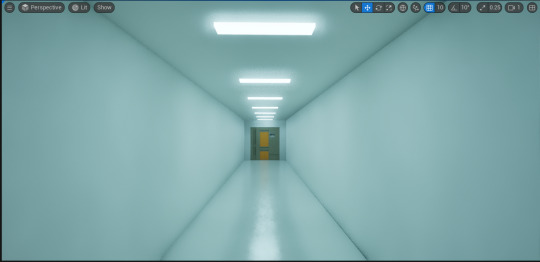
hallway eerie lights

at 2.2, testing how fast the wall should go to push the cube over an obstacle

wallzz

making a giant pit with cubegrid
made the pit with lights and a platform that activates when stood on

I duplicated the platform bp and replaced the custom events with an overlap node of a collision box

player will have to use a button the the other side of the pit to turn on the platform to transport the cube to the other side. the main door is going to block cubes from entering

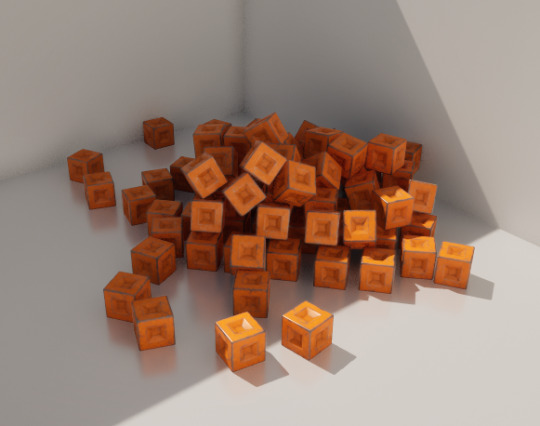
for detail, I am making a pile of cubes as a single static mesh in a separate level, using simulate and pressing 'k', and then converting the selected objects into a blueprint

cool !
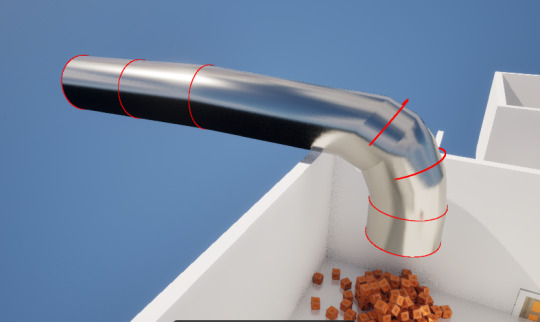
making a pipe using a cylinder, warping, then beveling the edges

this tiny platform will move and make it look like it fell out of the pipe when the button is pushed


replaced the platform with a spinning fan, there was an issue with the player activated platform, if you fell off while riding it, it would be stuck so I thought of this as a replacement.

to make it I duplicated the platform, replaced the static mesh, and changed the top node to a rotation node and set the plugin to Z

I also had to make the timeline graph look like this and set the rotation to 360 (degrees) so that it has a smooth endless rotate
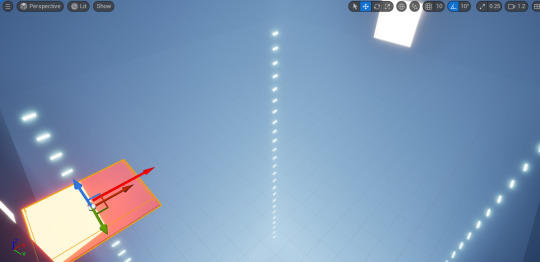
made a laser anti cube thingy

I had to make a new event, and build the code so that when it detects the cube, it destroys it and creates a new one at a spawn point I made. there was an issue where it wouldnt destroy the cube it would just teleport it and would cause weird flying cube bugs

this is the maths for the spawner/spawn point that the death plane is calling. fairly simple

on advice I placed rectangle light sources to get better lighting in the hallways. looks much better I feel

for the cube transport, I had to make a new platform so that the cube doesn't fly off. of course it was more complicated than that. I had to make a duplicate button that held info of THIS platform instead of the normal one

the screenshots got lost sadly, but I made a platforming part using the double jump. I originally had the posts thinner but it was too difficult for this early on so I made it much simpler/easier.

this is the set up for getting double jump, I placed a spotlight over the orb hoping it would draw more attention to it and imply it is important to the player
that is level 1 (excluding the tut lvl) finished !
0 notes
Text
Making a ladder

made a blueprint with this static mesh

box collision

Make a beginning and end overlap node from the box
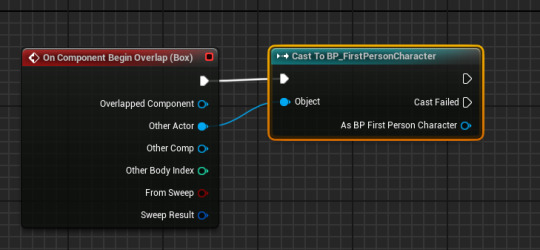
cast to character

in the fpc graph, add a ladder boolean

now going back, set ladder (tick)

duplicate for end overlap

add notonladder custom event to the fpc graph

call the event in the ladder graph

this part is editing the movement of the fpc so it knows how we move when on and off the ladder, bring in the ladder boolean and a branch
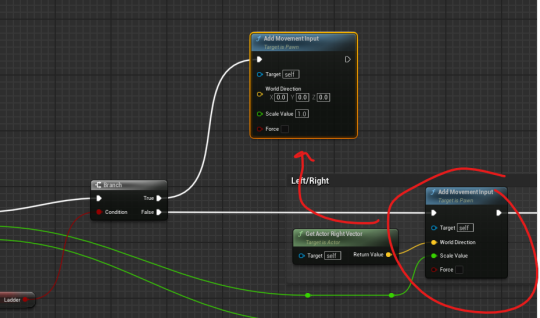
ctrl+D the movement node, plugin to true
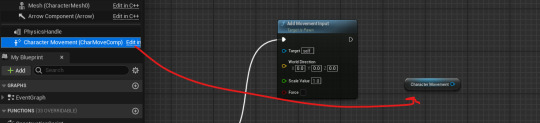
bring in character movement

set the movement mode to flying, we will constrain it
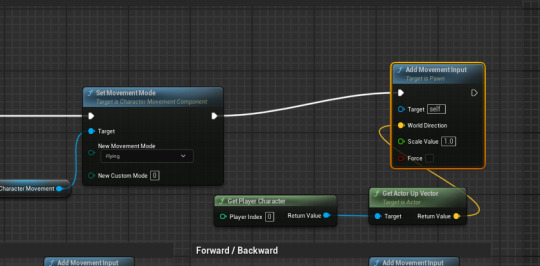
now I will get the player character and its up vector, and plug that into a new movement node

now to scale it ill plug it into the Y axis of the character movement

lastly, going back to the notonladder event I made, set the movement back to walking
Done

I wanted a longer ladder, so I put two ladder meshes together and just stretched the collision box to fit the new extended ladder
0 notes
Text
Making a titlescreen

set up the format and the buttons
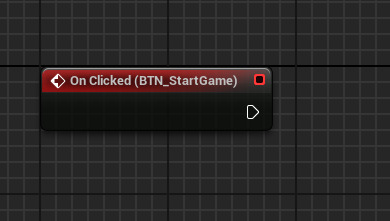
start with a start game event on clicked node
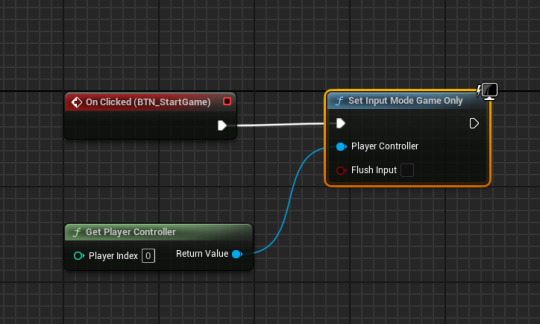
get player controller and set input mode game only

finish with open level by object reference
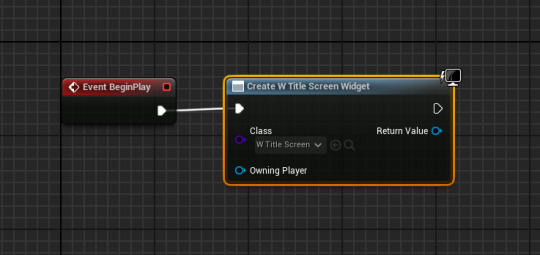
open the LEVEL blueprint and create title screen widget
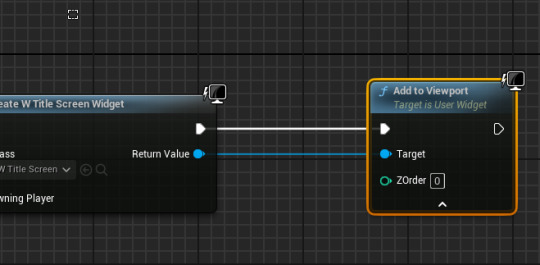
add to viewport
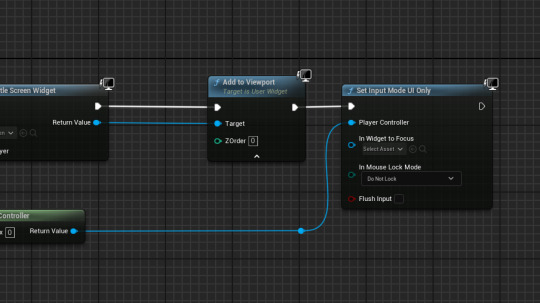
set input mode UI only
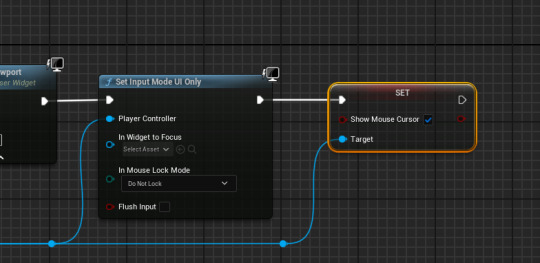
show mouse cursor

done !
0 notes
Text
Making Tutorial Level
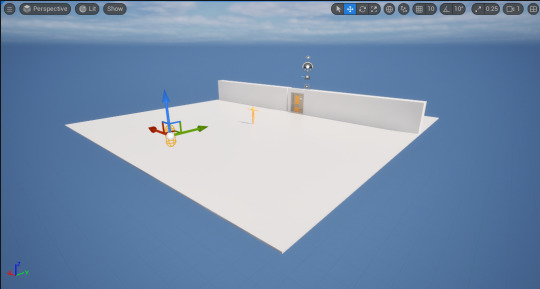
new level, make a basic space with a door
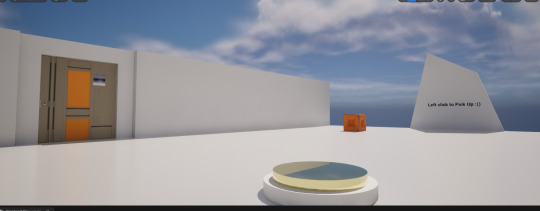
button, cube, and sign for controls

made death plane

section 2

added stairs and a auto platform

section three

tweaked it a bit, toggle platform on top, door button is below

stage four

ending
0 notes
Text
Light model work
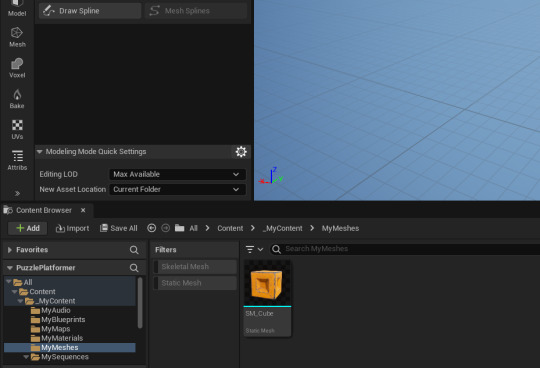
with MyMeshes open, set the new asset location to current folder

subdivisions are good for bending objects. if its flat, keep at 1

messing with stairs and its properties

extrude polygons

edit made meshes with polygroup edit
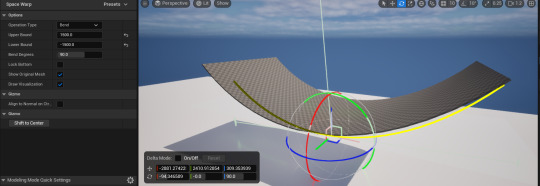
bending a plane with vertices using the warp tool
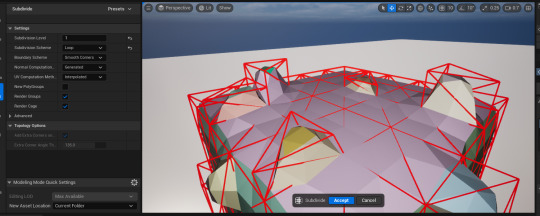
using subdivide on meshes to change the poly amount
0 notes
Text
customizable blueprints
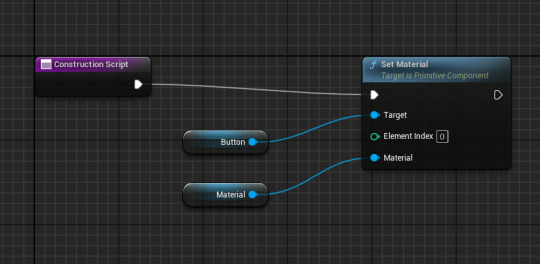
in the construction script, bring in what part you want to color, and set material. promote material to a variable. if you want to edit multiple, just use a sequence node
0 notes
Text
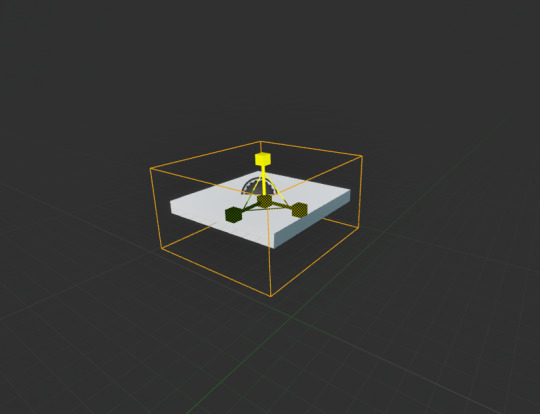
Making a jump pad

start with a new BP, a cube, and a trigger

on overlap, add impulse

Get character, and get character movement, plugin to target

Get capsule movement and get forward vector. split
(get add impulse from character movement so it works)

make a height float variable

set

Multiply by 100, plugin to Z
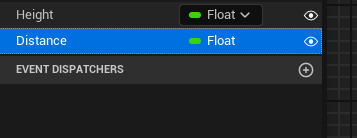
make a distance float variable

Get distance, set to 10, multiply by 20, multiply and plugin to x

repeat for Y and plugin all
0 notes
Text
Making a load level thing

make a new Bp
make a basic pad with a trigger volume
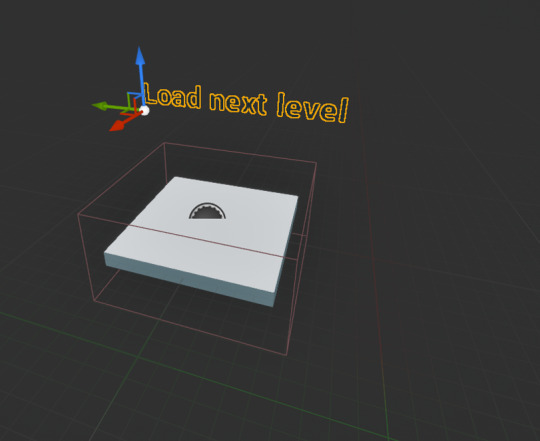
text
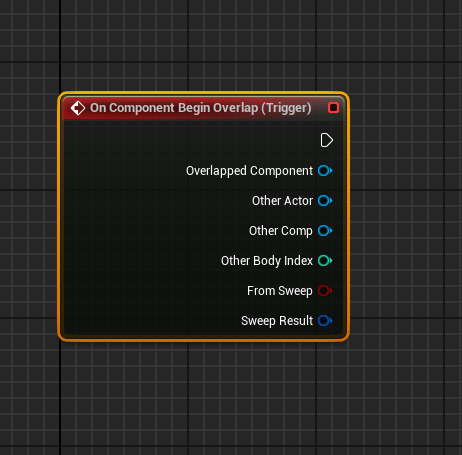
begin overlap on trigger
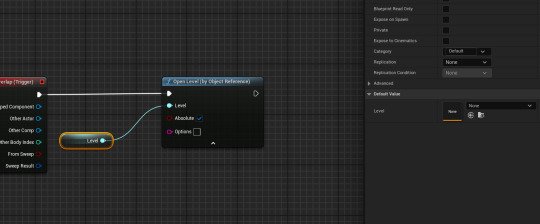
open level by object reference, and promote level to variable. now we can set it to any level we want
0 notes
Text
Making a multi pan cutscene

start with a new sequence
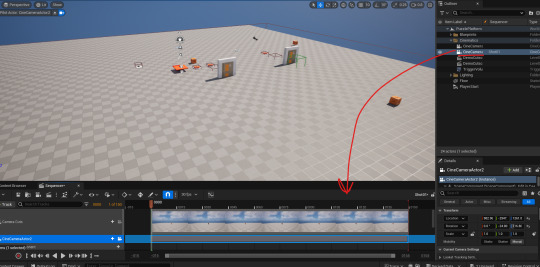
drag and existing camera into the sequence, and make a desired shot, then save

do this two more times using different angles
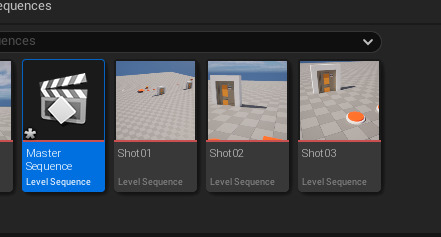
make a master sequence

drag in our three sequences

organize how you like

drag in sequence to level, and replace the demo shot with this master sequence
0 notes
Text
Making a cutscene trigger when entering a door/room

at a now POI and an object focus in mind, make a trigger volume
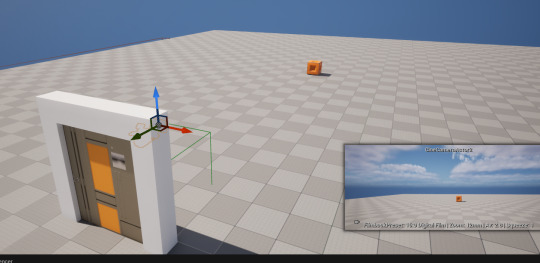
add a new camera, fix the settings and place it where you want the sequence to start
create a new sequence
drag in the new camera to the sequence

make new keyframes and move the camera to where you want it to focus. shorten the length as well to however long

with the sequence made and put into the world, reference the sequence in the level graph
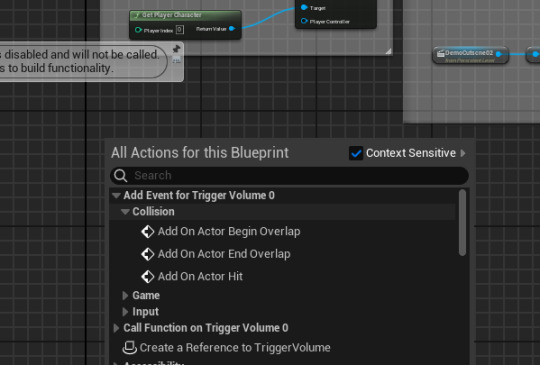
with the trigger volume selected, add event begin overlap

copy and paste the first logic, but replace the event node and the cutscene with the trigger volume and our seconds cutscene
Done!
0 notes
Text
Cutscene

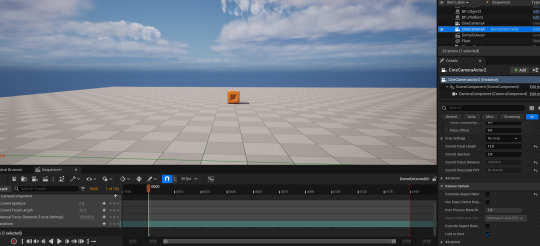
bring a cinematic camera actor into the game, set the focal length to 12 and untick the constrain aspect ratio setting

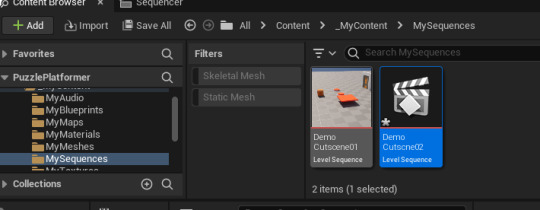
in our MySequences folder create a cinematic Level sequence

drag our camera into the sequence

add keyframes

repeat for the end of the timeline and move the camera to the desired location

with the cutscene made, drag it into the game, then open the level blueprint

bring in the cutscene we made (with cutscene selected)

to start, get player character, and disable input

then out of our sequence, play
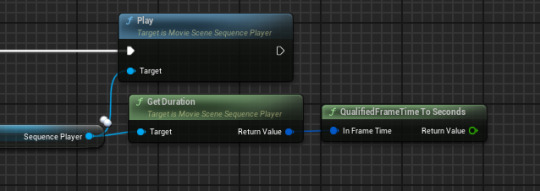
then get duration, and delay the frame time to seconds

add a delay

then out of player enable input
0 notes
Text
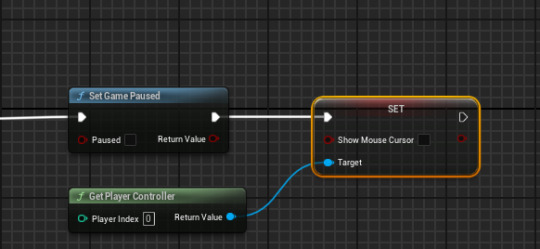
Making a Pause Menu (Pt 2)

in the first person graph, bring in the Enhanced action events, Pause

from started, add create widget node and set the class to our pause screen

add to viewport

get player controller, and set show mouse cursor

set input mode UI, and finally set game paused

done!
0 notes
Text
Making a Pause Menu (Pt 1)
In our MyWidget folder, create a new Widget BP
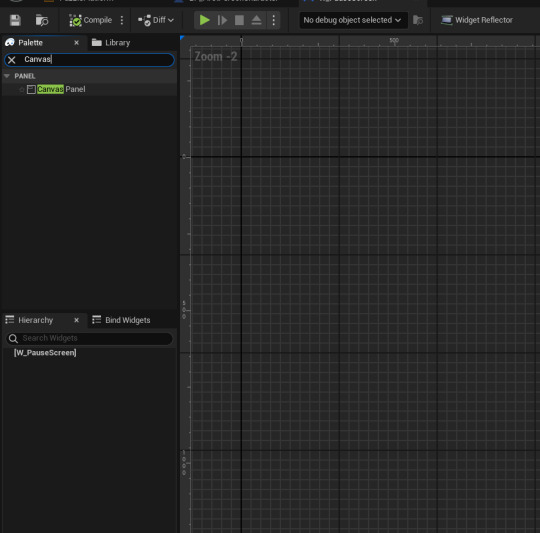
in pallet, search for Canvas and drag it to the pause screen in the Hierarchy

next, search background blur and drag it onto the canvas

set blur to 5 or whatever you want really

Bring in a text box and drag it to the Canvas
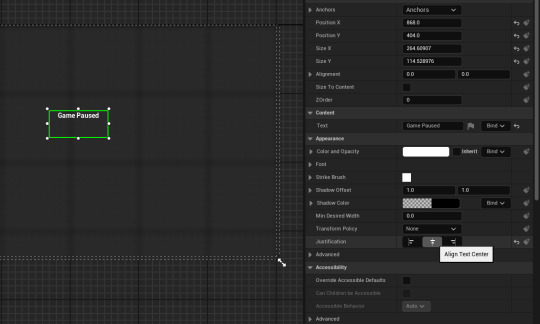
Make the text game paused and center on screen

set anchor to top middle

set text size

Bring a vertical box to the canvas and anchor to center

bring in a button to the vertical box

put a text into the button

name it resume game, repeat steps and make another button named quit game
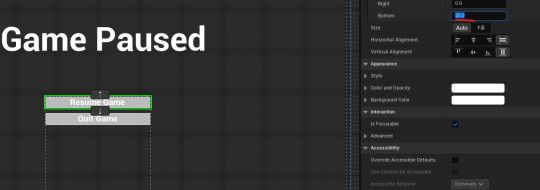
Use padding set to 20 to put space between the buttons
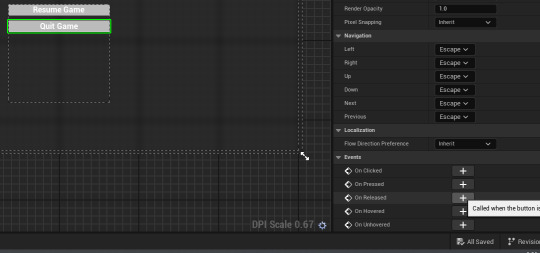
click the plus on released event

self explanitory

do the same for the resume button

Get Player controller
set mouse cursor, hides the mouse when clicked

Set input mode GAME ONLY

and lastly add the remove from parent node

Going back to the input files, duplicate the pickup input and name it Pause
Then go to IMC default file

Make a new mapping, select the Pause, then bind the key to whichever desired
0 notes
Text
Making a reticle

in the first person folder made a new BP class and search for HUD

Import the custom reticle texture in MyTextures

open the gamemode bp

set the HUD class to our custom HUD

open our custum hud graph and make a "Event Draw Hud" node

make a draw texture node

set texture to our reticle

set these values to 16. its the size of the texture file

Make a divide node, and make the value 2, then a subtract node and set it to 8, which is half of the texture size

repeat for size Y. plug into screen x and y. this centers the reticle on our screen

Promote tint color to a variable and change it to green

Now, we go back to the first person graph and make a sequence node and put it here

coming out of Then 1, make a line trace by channel node

copy this logic and bring it over the the line trae node

connect like so

from 'out hit' make a break hit result node, and out of hit actor, make a cast to Bp_MasterObject
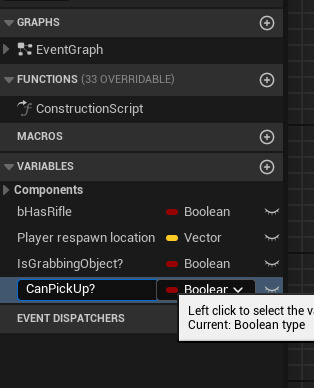
make a new boolean titled 'CanPickUp?

make two sets and set to true and false
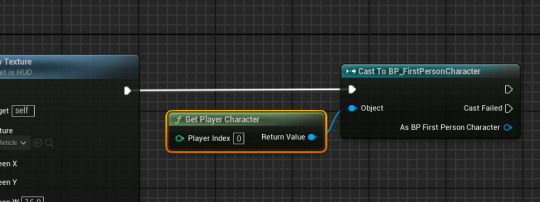
going back to our HUD graph, cast to fpcharacter, and a get player character node as the object

from the object, get CanPickUp? boolean

make a branhc, plug the boolean into the condition, and bring in the set tint color variable if true

finally, if false set to transparent

DONE!
0 notes
Text
Fixing pivot point on cube
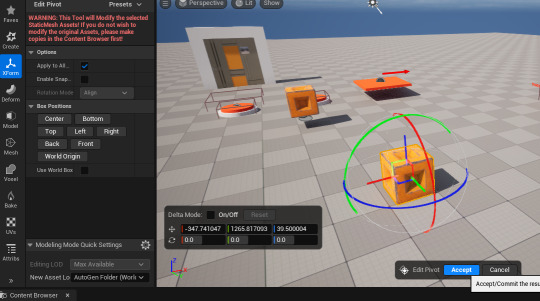
Bring mesh of cube into world, and change from selection mode to modeling. from there go to XForm and click center. Thats It!
0 notes
Text
create a pickup mechanic (Pt2)
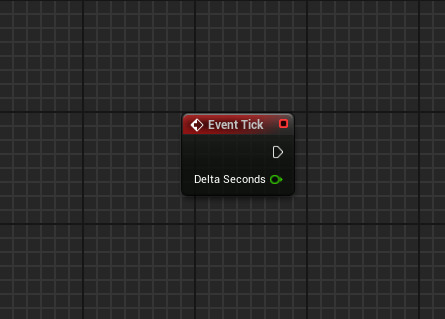
start with an event tick node
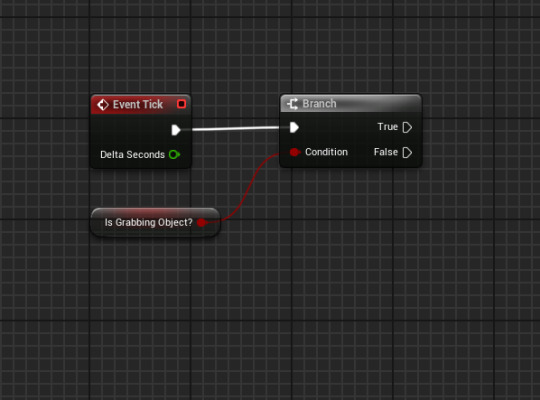
bring in a branch and the boolean
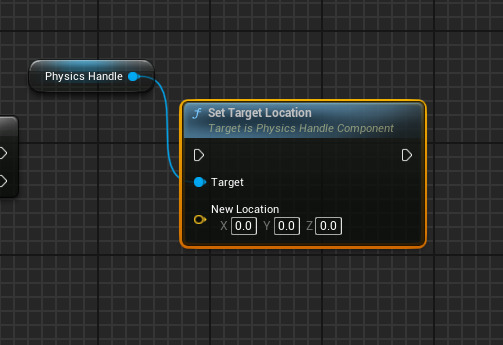
then drag in the handle component and a set target location node

we can then copy and paste our maths again to plug in the end point
BUGFIX

Replace the location with location AND rotation

fixed
Release logic:
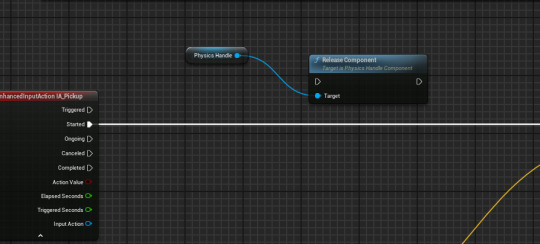
bring out physics handle and RELEASE component node
bring in Get boolean, and a branch, and finally a Set boolean and leave at false. now we can drop the box when released
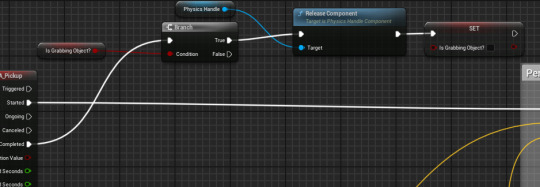
BUG FIX: flying cube

add a sequence node after the branch

add a get world rotation and split the values

add a branch and a "Less" node

set to -51

then drag in our handle, the release component, and the Set boolean.
DONE!
0 notes