
Don't wanna be here? Send us removal request.
Statistics
We looked inside some of the posts by coding-for-creative-practise and here's what we found interesting.
Average Info
Notes Per Post
1
Likes Per Post
1
Reblog Per Post
0
Reply Per Post
0
Time Between Posts
9 hours
Number of Posts By Type
Photo
17
Last Seen Tumblr Blogs


Fun Fact
12.7% of mobile users access Tumblr.
Photo


Process of final output:
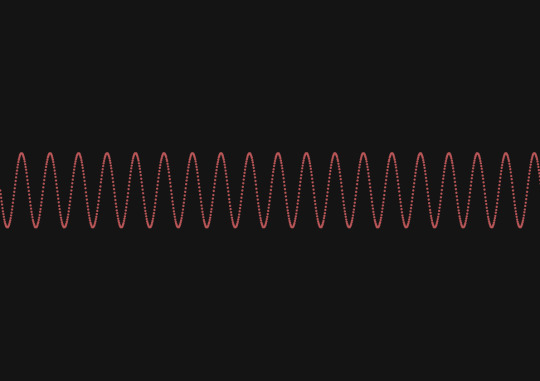
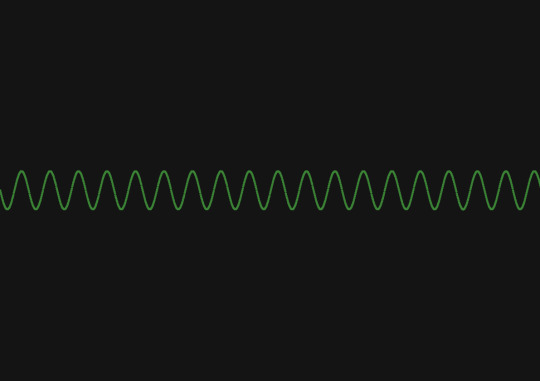
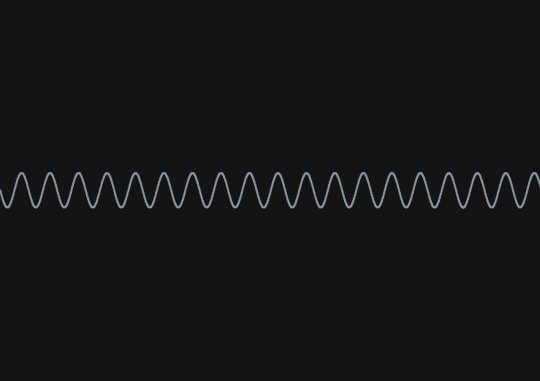
To start off I went into overwatch and copied out into a spread sheet my play time for each character I played. I then screen shot this data as well as each character has a bar that shows the play time as well with a specific colour assigned to it. I then opened this screen shot up in photoshop and used the eye drop tool to get the hex code for each of these colours which was then put into the spread sheet. Next I copied the data set into an array in processing. The hours played was used to determine the amplitude of the oscillating dots and the colour simply effected the colour of the dots. I only played around with one axis as it started to get a little too maths based for me and I was happy with the result I was getting as a base to take into photoshop. One problem I ran into that I couldn’t fix was since I needed to get individual images of each character I needed to run the code multiple times each time changing the three values I have left bold in the code below. This took time as the code itself draws the occulting dots over time. On top of this since it was time based and required bits outside of the draw function I couldn’t use the simple beginRecord endRecord so I had to save a png instead. This was ok as I kept the final output small and just duplicated the image to increase it’s length when in photoshop however it did reduce the options I had when in photoshop. When I did get to photoshop I simply created one vertical and one horizontal line of each of my top 5 most played characters as I quickly found that doing all 32 was too much and I wanted to simplify the posters. Also the top 5 most played had the most visually interesting outputs in my opinion. I then played around with the layering order of these oscillating dots until I was happy. I chose not to get rid of the backgrounds as I wanted to avoid the clutter this would introduce to the poster. I then added another visual representation in the form of circles this time also accompanied by the actual value of hours played of each character. I could have done this with code but decided that there wasn’t much point as I could do it way quicker in photoshop and it would allow for easier layout iteration. I also added the names of the characters again to add just a bit more information and to balance out the layout. I also included the date of when I got the data which I kept simply to OCT 2021 as I found that the best balance between what looked good and gave enough information. Lastly I added two horizontal lines to add some more balance to the composition and to create these columns where the information sits.
For the printing I originally planed to print A3 until it was pointed out to me that if I wanted this to be like other posters it should be A2 at the least. I tried to print if A2 after this however I ended up not having time as I had planed when the photoshop part of the process would be done around the assumption that I would be printing it myself which requires less time. I did however make sure to use above average GSM paper to give it a more quality feel and look.
Code:
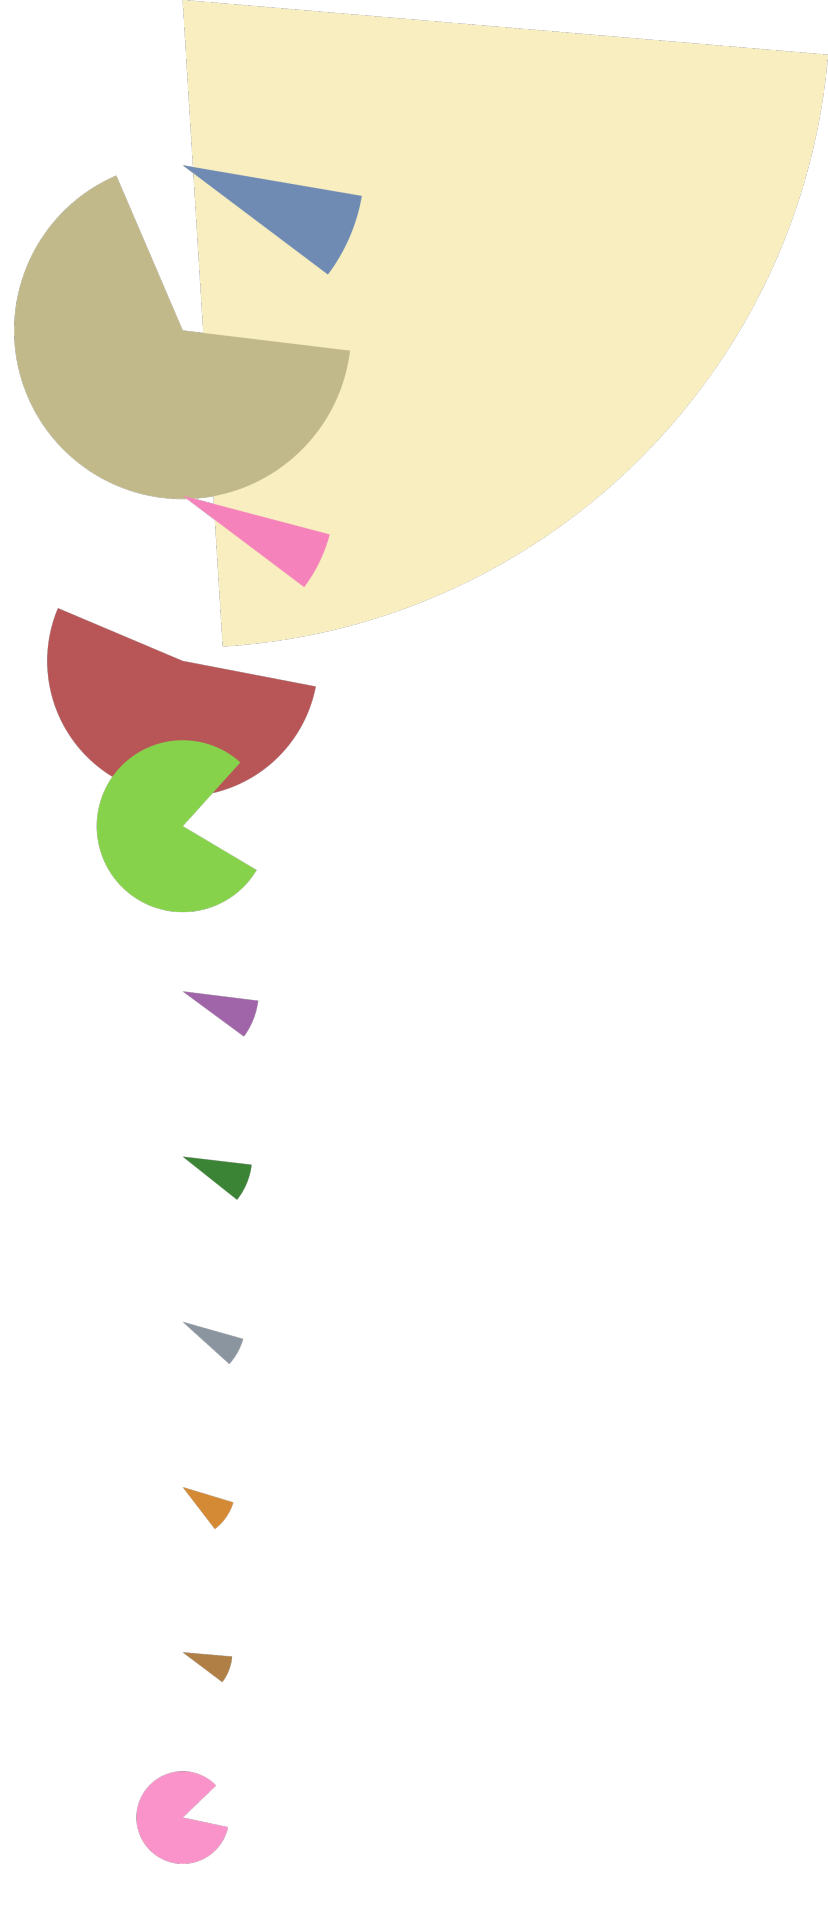
int[] hours = {196, 55, 51, 46, 41, 26, 23, 21, 19, 16, 15, 14, 12, 11, 8, 8, 7, 6, 6, 5, 5, 4, 3, 3, 3, 2, 2, 2, 2, 2, 1, 1}; color[] shade = {#f8eebf, #6f8bb4, #c1b989, #f582ba, #b85557, #87d24b, #a064a8, #3b8435, #8a95a0, #d48934, #af7f45, #f993ca, #3878ca, #faee7e, #f6c24b, #905e56, #9bf73a, #697293, #9f9fbb, #93c5f8, #47aaca, #b86564, #7c8f75, #874d43, #6eaff3, #686766, #93c4d5, #80364a, #966be9, #6b4ab8, #d88834, #8a96a1};
float t;
void setup() {
size(1191, 841);
background(20);
}
void draw() {
for(int i = 0; i < hours.length; i = i+1){
stroke(shade[0]);
}
strokeWeight(5);
translate(0, height/2);
point(x(t), y(t));
t++;
}
void keyPressed() {
saveFrame("OW_equation_0.png");
}
float x(float t) {
return t;
}
float y(float t) {
return sin(t / 10) * (hours[0]*2);
}
1 note
·
View note


Photo


These were the two finals I was picking between so I made another entourage to see them in context and found the one on the left to be my favourite so it will be the final that I print. I don’t think I will do any more tweaking but I will play around with the stacking order of the background to see if I find another option I like better.
0 notes
Photo


These were my poster designs that I initially played around with and informed the final two I picked from. I decided to try and show some more specific details on the poster such as when I got the data as it changes the more I play and the actual play time data. I quickly found that it was hard to represent every character as there is so many of them so I decided to focus on the top 5 as they are the ones I most actively play. Quick note for the date I played around with having more detail to it and found that simply putting OCT 2021 was the nicest visually and gave me enough information to be satisfied with.
0 notes
Photo


This time I wanted to create something entirely different from what I already had done and realised I hadn’t really pulled much inspiration from the examples I found at the start of this process. So I pulled inspiration and these are what I came up with. Each one represents a different character with the colour assigned with the amplitude being determined by play time. I couldn’t use a for loop to make all of these in the same document due to parts of the code needing to be outside of the draw function however I think this was a good thing in the grand scheme of things as it allows me some more freedom with them all seperate and looking at them laid out like this right now it looks pretty interesting so I might play around with something similar in photoshop.
0 notes
Photo

Updated work flow at the current moment. This also is the final workflow as nothing needed to be changed about it after this point.
0 notes
Photo


These were quick arcs I did with no randomness introduced and one being black and white. I did these because I thought they might be helpful to draw on later when working in photoshop
0 notes
Photo


This was the interim exhibition and feedback I got along with it being brought up that I should do some manipulation after I had the coded outcome, play with translucency, maybe change colors, and look at cropping interesting moments. These were all good suggestions I definitely plan to play around with photoshop I just hadn’t gotten to that point when we did these and I was still trying so see if I could get most of it done using code which I have realised now won’t be possible.
0 notes
Photo

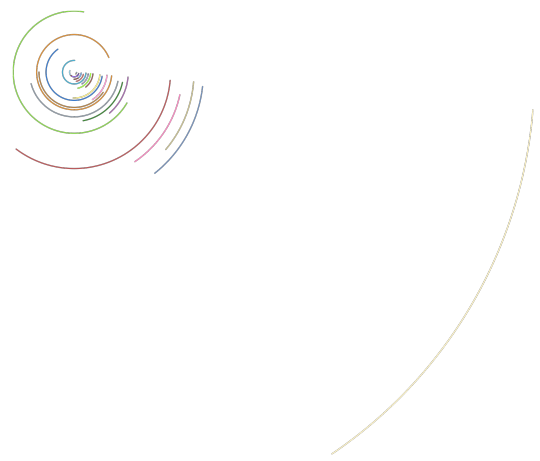
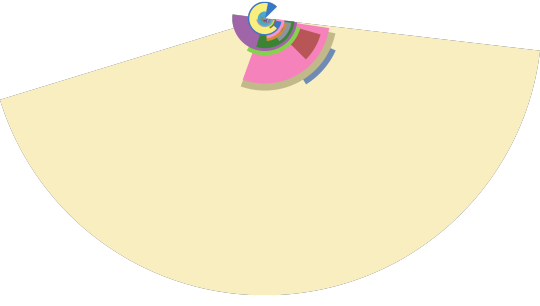
Entourage of the arcs which I find way more interesting than the pervious outcomes. This is definitely heading more towards something I’d want on my wall.
0 notes
Photo


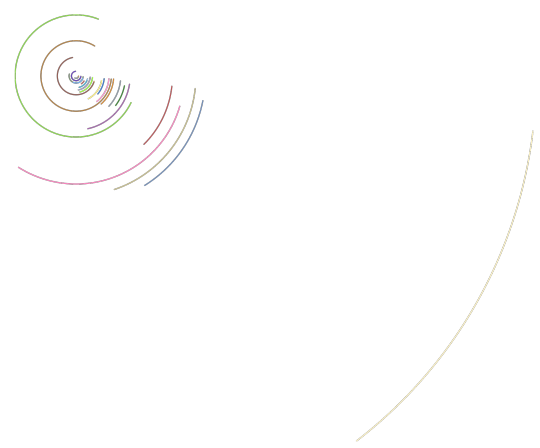


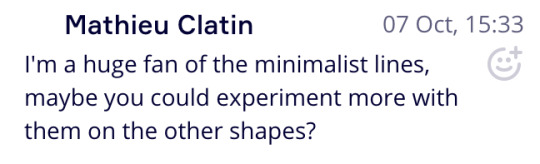
This was an exploration of the arcs but this time only using a stroke instead of a fill. These look very interesting to me and I want to see what I might be able to do with them when combined with some other outputs when I get to photoshop.
0 notes
Photo
I also tried doing the different origin point thing I had done before this time by a set amount however it didn’t give me a result I liked so I quickly stoped exploring this route.
0 notes
Photo

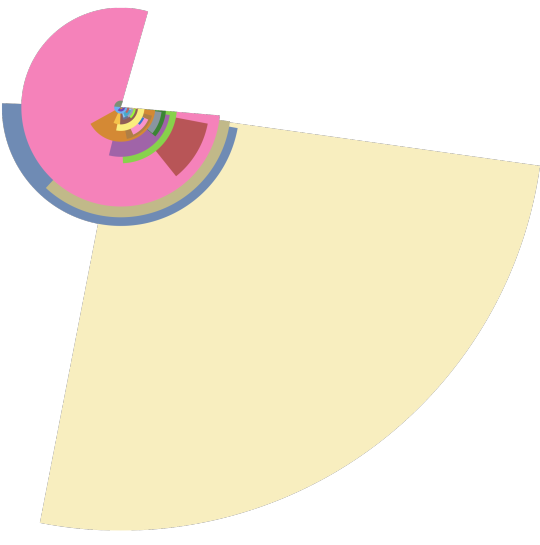


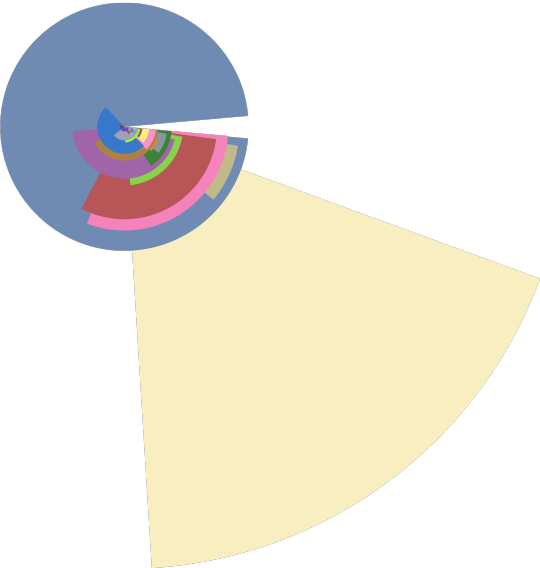
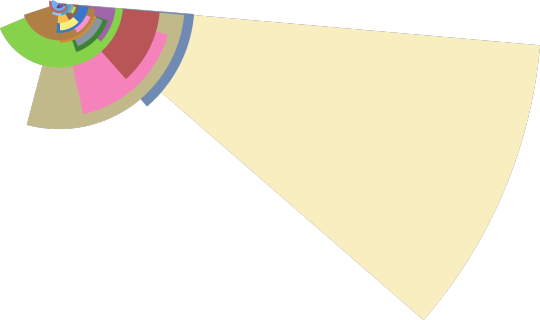
This time I used an arc instead of an ellipse so I could keep the same origin point but still see every character. The width and height are again determined by play time and they all have the same central origin point. I then semi randomised how big each arc would be by using QUARTER_PI / random(1, 10) and TWO_PI / random(1, 10). I attempted to take out the randomisation and replace it with other data such as the first one being determined by damage done and the other being determined by healing done but I couldn’t manage to get it work. I would assume this was due to there being decimals which I overlooked at the time.
0 notes
Photo


Entourage - Quick mockups using what I have already produced. The first two are if the outcome was a sticker/decal. The other is if they were posters using a mock up I downloaded. I’m defiantly more inclined towards the poster format after see these. This isn’t due to quality of the entourages themselves but just that the sticker/decal would be hidden away due to where my computer is and I think this should be proudly on display.
0 notes
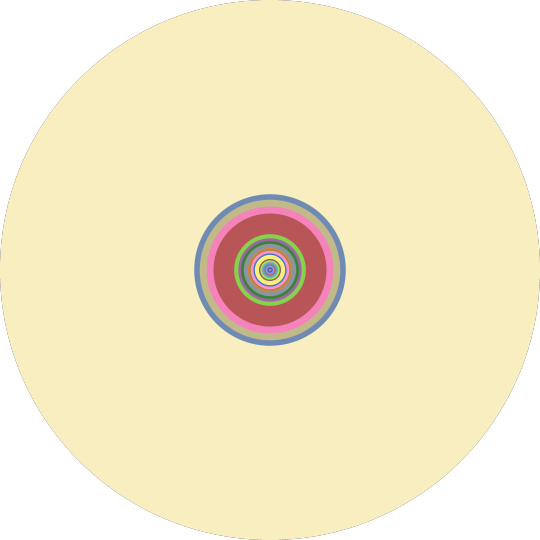
Photo

This was another idea I had where I used the time played to determine the location of the origin point for the ellipse. This effect interests me more that the random ones as I like the controlled nature of it. I would like to see what other variation I can get breaking out of the idea of the circle so that I could keep the origin point the same and still see everything as when two characters have the same play time and the same origin point some of them will get covered which this outcome avoids.
0 notes
Photo
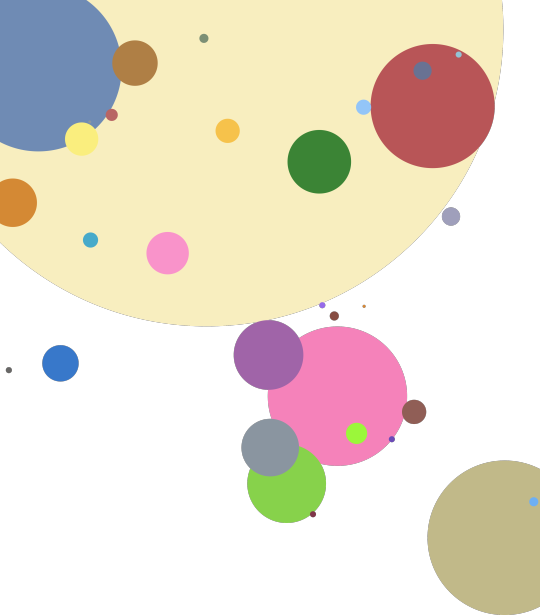
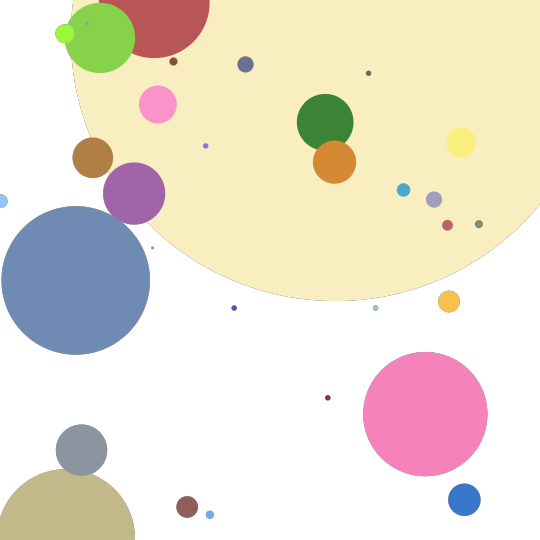


These were my first outcomes where I used time played data to effect the width and height of each ellipse representing different characters and used the color associated with each character. For the first example I kept all the central points of the ellipses the same so you could easily see the difference between. Then I went into randomising the origin point which gave me some interesting outcomes. Lastly I blended the two examples together so there is two ellipses for each character. One ellipse having a central origin point while the other has a random origin point.
0 notes
Photo

First idea of work flow - I’m still very undecided on how this will end up looking however I’m set on using time played of individual characters on my main overwatch account as the main source of data. I’m also pretty set on doing a poster as I have a lot of them in my room even three proudly above my computer where I play games so it would be fitting to show this data using this format. The other outcome that does interest me would be a sticker/decal that I could put on my pc as it taps into the idea of showing off these stats as I am proud of them.
0 notes
Photo

Researching workflows - This put into perspective just how many steps the process could be and that I need to figure out what it is I will be doing and get to work quickly. It also showed me an interesting process and I’m interested in bringing the coding output into photoshop and playing around with it however I still want to try and make the majority of the work come from code.
0 notes