
'Self-directed enquiry through experiment with some of these more familiar skills and with some more novel creative technologies in the pursuit of innovative, playful, perhaps even profound digital media artefacts'
Don't wanna be here? Send us removal request.
Statistics
We looked inside some of the posts by creativemediapractice and here's what we found interesting.
Average Info
Notes Per Post
0
Likes Per Post
0
Reblog Per Post
0
Reply Per Post
0
Time Between Posts
10 days
Number of Posts By Type
Text
8
Last Seen Tumblr Blogs


Fun Fact
The “We are the 99%” Tumblr blog became the slogan for the Occupy Wall Street movement.
Text
Practical Project Evaluation
Successes, Shortcomings and Thoughts On Further Development.
Overall, my final project of Social Media Story and Split Screen came together well. I used Instagram for the social media platform app because It is easy to go onto and fun to use, perfect to interact with your audience also to which I was able to.
My whole plan was to do a project where it would interact with the audience and be able to do a social media story which would involve some split screen that would be entertaining to watch and want to see more of. I always love watching cooking recipes on other social media platforms so I did something similar yet with more content for an Instagram page dedicated to my assignment.
Instagram link to final project: https://www.instagram.com/creativemediapractice/

Successes
Due to my topic being based around cooking/baking recipes and facts, there was no stress with my research on what I could do that would be fun and appetising, there are food . I was capable of using my phone and DSLR camera for filming at home and using premiere pro and after effects afterwards to edit my work.
I watched a lot of Tiktok videos on how to do things with food and most of the recipes I used for my video content but I also added in my own ingredients to things instead of ‘copying’ the original videos. Tiktok was a perfect example to use for research as all the content on there is easy to watch and clear to follow, that is what I wanted to achieve with my work to which I did. I also used Adobe Spark to create my ‘Fact of the day’ images. It was easy to use and would definitely use it again for future assignments. I used their free images on the software and the effects they provided.
For the interactivity with my audience, Instagram allows you to post ‘stories’ where everyone can see and you can do a questionnaire or polls etc. I used the questions on the story posts to interact with followers to which they did. I asked questions such as ‘What would you want to see next?’ or ‘What was your favourite cooking/baking video?’ - just to see what their reaction would be as it would then be apart of the story-telling movement.
Although with the circumstances of COVID-19 and being restricted, I was still capable to do my project and stay safe. Another point of my final project is it is a content page where people can look into it and follow as I put in the Instagram bio how you can do what I do at home in lockdown. I kept it simple but creative, especially during this time when many people cannot leave their home etc.
Shortcomings
My original idea for my final project didn’t go to plan as I wanted to involve AR and split screen, however from doing many attempts of being able to build something creative for those two topics was a fail. Although this did not stop me from moving on and thinking of something else that I would be able to push myself to do straight away.
A major problem I had to deal with would be with my footage. I struggled for a while to scale it down to the Instagram post size of 1:1 (1080x1080). I started editing in Premiere Pro and the exporting it to After Effects to scale it down to the correct ratio/post size, however this made the whole video quality look terrible and not clear. I knew I had to start all over again to make sure all my video posts were perfect. I took some screen-grabs of when I was in the middle of editing to see the progress, where I went wrong and how I could change things.
First development of film was edited on premiere pro, background was too dark and the font should’ve been white.

After finishing editing in premiere pro, this is where I went wrong when I began to put the exported videos in after effects. From editing in 1920x1080 and needing a 1:1 square sized frame, I had to squish the video to look like this. It didn’t look right and made it look unprofessional.

After going through settings on premiere pro, I finally managed to put the scale size for the sequence down to 1080x1080 and fitting in my footage in it as well as split screen. It still looked slightly off but I was happy and stuck with it.

Another thing I did that made my video posts looks better was fading out the colour matte on premiere pro so you could see more of the footage. I made sure that everything was understanding to read and clear.
Thoughts On Further Development
For improvements towards my project I would look into adding more split screen in the short videos that I created. I would want to show a more of a ‘story’ to the content I make, for example if I was to add more to the Instagram assignment page I would’ve made a ‘parody’ to it to show a more entertaining and joking side - making fun of the original content i’ve already made, for example ‘How to make a pizza’ I could’ve done something ridiculous and bought a pizza and filmed it being put it in the oven and that would be the end.
My main weakness for this project would be sticking to a strong idea. If I was to work on something like this again I would plan out more thoroughly and narrow it down to one idea, to which would attract more of an audience to. Also, if I had more time I would’ve brought AR into my project as I love the idea of using QR codes to be linked to a website. Instagram already provide the QR code for your own account in settings so it is still something I can look into doing due to the fact my assignment is on a social media platform to which I use everyday for my personal account.
All together my project was fun to do and I am pleased with the turn out of it. I will continue working on the Instagram page as I love the idea of being able to see the process of creating something. The social media platform is a visual so all my posts will tell the story as well as some help from the captions.
____________________________________________________________________
Tiktok inspiration videos links:
Brownies: https://www.tiktok.com/@bakingenvy/video/6858615715855895813?sender_device=pc&sender_web_id=6900491710502733317&is_from_webapp=v1
Cookies: https://www.tiktok.com/@fitwaffle/video/6827878576549825797?sender_device=pc&sender_web_id=6900491710502733317&is_from_webapp=v1
Background music links in videos (in order):
- Homemade soup: song used - https://youtu.be/Re91qDHjtmw
- Scrambled eggs: song used - https://youtu.be/wZGmTHtmyRw
- Iced Coffee: song used - https://youtu.be/-2KofbXvMp0
- Wrap pizza: song used - https://youtu.be/Fs2Wqh-nCb0
- Homemade brownies: song used - https://youtu.be/zvUXqq1u69Y
- Homemade cookies: song used - https://youtu.be/N_XLoAB1hbQ
- Avocado and poached eggs: song used - https://youtu.be/6me17gGZYRg
(sound effect of beeping noise for avocado and poached eggs from youtube: https://youtu.be/cyKQ2-5bT9o )
- ‘Fact of the day’ information: https://www.thefactsite.com/100-random-food-facts/
‘- Fact of the day’ images used from Adobe Spark free images: https://spark.adobe.com/sp/
0 notes
Text
My Proposal For Final Project
Split Screen and Social Media Story
For my final project I will be doing split screen and social media story together.
I plan to work on a social media platform and show simple cooking/baking recipes that you can do whilst you are home - especially during lockdown - and having an active social account to interact with followers. I want to do this because it shows a story/narrative and not just a pointless social media page, there will be content that my followers will be able to see and either ‘like, comment, share’ etc.
I will be using Instagram to create an account for the interactive platform. Instagram is a simple and fun app to use, it is a creative place to put my project on for my ‘followers’ to see. This page will have content on it that I have filmed and edited myself. Instagram itself is a visual app - straight away the whole point of the social media platform/app is with whatever you post, you are telling a story. Unlike platforms such as Facebook and Twitter where it is just mainly written posts.
The reason as to why I am doing a social media story and split screen is because the topics are exciting and interesting. It is a creative way to show the audience two sides of the ‘story’ through split screen - for example with one recipe I plan to do, I will do a before and after still image or in the middle of preparing a drink/food, joining them up to show a parallel image.
I took screenshots of what I have already made and posted. I named the page ‘CreativeMediaPractice’ due to the course module, adding ‘cooking recipes’ in the profile picture. I created the profile picture (title) on the editing app ‘Over’ on my phone.
I plan to interact with the followers by posting ‘stories’ on Instagram and doing questionnaires, this way I can show my audience that I have an active cooking page. It is a good idea to ask followers on what they would want to see for a recipe, giving them a choice.

I have looked at a lot of examples on Instagram food pages that already have content of cooking recipes and who interact with their followers. They update the pages frequently to keep the users entertained. The examples have posts that are clear and centred, they show a nice and simple theme with the layout on their pages. A method I will look into following will be going through these four Instagram food pages and writing down any recipes that appeal to me and what i think my audience/followers would like to see.

For cooking and baking recipes I will look into watching some videos on unique ideas as well as doing simple videos due to it being lockdown. Tiktok and YouTube are brilliant platforms to look on for inspiration as you can watch step by step videos. This is what I plan to do with my cooking/baking recipe videos to show a ‘narrative’ to my audience. The method would splitting the screen down the middle on my film posts; one side of being active (cooking/baking, showing ingredients) and the other side would be the ‘step-by-step’ side showing the ingredients also.
Furthermore, the layout of my Instagram page I will want to show an order of; short film, ‘fact of the day’ and a split screen image. I will film and edit on premiere pro or after effects 5-6 cooking or baking recipes, this way I will be able to provide enough content to my followers for them to take a look at. I thought of doing ‘fact of the day’ posts due to facts about food being so popular (examples above of the Instagram pages show them on their feed) which will be a good idea to catch someones eye as I will look into unique facts and not ones people tend to know, gaining a bigger audience for my page and content. The still images of split screen I will take myself and use a photo app or premiere pro/after effects to join them up together to make it symmetrical.
To conclude, my goal is to reach out to my followers/audience with my content and be able to show a ‘story’ to them and interact. The more engagement I will create, the higher the chance my followers have of seeing the posts and spread the word, eventually getting a larger audience to show my social media story and split screen content to.
Here is a rough layout plan of what I will do with my content on my assignment Instagram page.

An idea for a post dedicated to split screen would be getting two still images I’ve taken and joining them to meet halfway in the middle. Here is an example I will be using (my own images)


0 notes
Text
Session Six
Wednesday 4th November, 2020
Our last face-to-face lecture was on the topic ‘Social Media Stories - Deep Fake - Meme’ (Social Malarkey).
In the lecture we were shown examples of the ‘social nonsense’ from online sources (such as Twitter, Youtube, Facebook etc). (Barbie - https://www.youtube.com/watch?v=frg2KhXWZBA )

In this youtube video you see ‘Barbie’ using her YouTube channel (over 5 million subscribers) to speak directly to girls about believing in themselves. The youtube video has had over 3 million views. I think this is a really good idea as you get to see how Barbie interacts with her audience, just like any other you-tuber would do. With her target audience mainly being young girls, it is a perfect way to get views on her videos as with technology and social media being so popular now, the younger generation will be wanting to watch what Barbie is getting up too.
Although due to it just being a cartoon and unrealistic, this means us as the older generation won’t take notice as social media pre-occupies us with something more interesting (Instagram, Snapchat, Twitter etc).
From doing my own research online, I came across things called ‘5 minute crafts’ or craft related etc. (Facebook/Twitter) - this online company show the viewers ways to do things, however not exactly good ways. A lot of the things they show in their ‘craft’ videos tend to be absolute nonsense and don’t even work if someone from the real world tried it.

A lot of people who have watched these videos have reacted by posting online on them actually trying to do the craft. (HILARIOUS 5 MINUTE CRAFTS! - https://www.youtube.com/watch?v=Wp6HNXOUCm4 )
Even stating the fact at how stupid the makers of the craft can be.
Also, on Youtube you can now watch videos where they users have edited certain celebrities to ‘sing’ popular songs and making a joke out of them.
It is popular in the media today seeing a lot of politicians get taken the ‘mick’ out of from the public for entertainment due to the nonsense that comes out of their mouthes most of the time. This youtube video created by Maestro Ziikos has over 33.5 million views and 1.6 million likes (35,000 dislikes), he edited Billie Eilish’s song ‘Bad Guy’ and made it sound like Donald Trump was singing instead - https://www.youtube.com/watch?v=o61BiBCXMCI

If I was to do something with social media story for my final project I would do something similar to 5 minute craft page, however make it realistic and stuff people can do with actual results. I would want to be able to involve stuff that would attract an audience and make them want to be involved.
Another thing I would do if I was doing social media story for my final project was to put split screen in with it. An example I thought of was baking something or doing anything that needs instructions - one side would be filming myself baking and then the other side cuts of what to do next. Potentially doing more than two screens and involving more of a social media story that would be interactive for my audience.
0 notes
Text
Session Five
Wednesday 28th October
This fifth face-to-face lecture consumed of the topic ‘Spatial Montage & Multiscreen Narrative’.
Spatial montage and multiscreen narrative is another way to describe the term split screen. The purpose of split screen is it is used for cinema, television, or computer screen on which two (sometimes more) separate images are displayed. In the lecture we looked at a few examples from the powerpoint of spatial montage & split screen. There were a lot of ideas to take note on if we wanted to progress further with this topic for our final project.
“The split screen has many uses: it can show the same moment from two angles, or more often two scenes happening in different places but simultaneously; the most classic example of this use is the “phone call” split screen, where you have each person on the phone on a a side of the screen.“ - [Taste of Cinema – Movie Reviews and Classic Movie Lists - http://www.tasteofcinema.com/2016/the-15-best-uses-of-split-screen-in-cinema-history/#:~:text=The%20split%20screen%20has%20many,a%20a%20side%20of%20the%20screen. ]
One of the examples we looked at in the lecture was a clip from the film ‘Kill Bill’ by Quentin Tarantino (2003), the setting is in a hospital and you see the leading female character (played by Uma Thurman) laying unconscious in a hospital bed - suddenly it cuts to a mysterious woman walking into the hospital with an eyepatch on (one of the villains wanting to kill Uma’s character). The split screen starts when it goes back to the unconscious character (who is split to the left) and the woman villain (split to the right) getting changed into what seems to be a nurse costume. You see no movements on the left screen - just small cuts to the fingers, eyes and face - yet sharp active movements on the right. Then the split screen finishes when the villain is infront of the hospital room and staring at the leading character on the bed, ready to ‘kill’ her.

Doing my own research I came across a lot of split screen shots in film, however the one I already knew of for a while after watching it too many times was the ending scene of ‘Love Actually’ by Richard Curtis (2003). However it isn’t just two or three scenes that are made into a split screen, there are dozens. It goes from one screen to then four and then fading into multiple clips playing at the same time, different people (non-fiction) but the same storyline, coming home for the Christmas holidays, all hugging and being affectionate.

I like the idea of loads of stories playing at the same time as not all of them have to look a certain way. It can be a completely different background and setting. For example with the music video from Leona Lewis ‘Bleeding Love’ (2009), you see different characters in one building and different scenarios are going on, yet all link together, etc.
I decided to make a short video on premiere pro to test out split screen. Due to not being able to go out and film because of Wales lockdown, I came up with the idea to just do something in my room. As I am always at my desk doing work, I wanted to show two clips of footage of myself and me typing on the laptop. This was really easy to do as not a lot needed to be done that would make it difficult. I used my canon 1300D camera to film both shots and then edited on premiere pro, doing all of this in just 20 minutes. I really enjoyed it, despite having to do a few more takes to make sure I was following the audio to the typing (facial expressions and arm movement).
I would look into progressing further with split screen for my final project. I did enjoy filming and editing this, however if I was to do more filming for split screen I would want to include a storyline or something that links all together, this would mean for me to get out more and want to film a 24 hour scenario. Due to COVID I wont be able to do that so would have to look into filming all scenes inside.
youtube
0 notes
Text
Session Four
Wednesday 21st October
For the fourth session of the ‘Creative Media Practice’ module we were introduced to interactivity, to where we were shown the software ‘ISADORA’.
In this lecture we were learning about interactive narratives, a topic that is quite popular in the movie and gaming industry. With the first ever interactive film being released on DVD in 1992 (directed by Ben Bejan), we looked into how it became more desired to bring interactivity into films/games over the last 20+ years.
An example we were shown in lecture was of a guy mimicking an interactive part of a film or game, he acts out a ‘villain’ who goes to shoot the main character however the user behind the screen has three options to choose from that all tell a different story and could all end bad or good for the user. A lot of films and games today show the same narrative. It’s called ‘Branching narratives’ (example image below).

I have done my own research and looked at film/TV video game examples that show interactive storylines. The film/TV video game I looked into was a Netflix original called ‘Black Mirror: Bandersnatch’ (2018). I really liked this show because you got to choose bizarre but interesting paths along the way, some choices you go with result in death - you get to follow the main characters life and basically be his conscious.

If I was to use interactivity in my final project I would want to do something similar to the example I found, It would be more adventurous for my audience to be able to have a wider choice to pick from and also have more than one ending. In ‘Bandersnatch’, there is around five endings but the user will only get to see one out of five unless they repeat and watch it again to see if they can see the other four ending.
I came across this website - https://troikatronix.com/#%7B%22event%22%3A%22ready%22%7D
It shows information about isadora with theatre, education and artists. It can be interactive as you can play with effects that you can move your hand or anything from your camera roll to then play a video/keep rolling, or you can interact by using your voice with a video clip.

In the lecture we went onto the software ‘ISADORA’ - which is a proprietary graphic programming environment with emphasis on real-time manipulation of digital video. We got to play around with videos on there and see if we could involve any interactivity. Due to the software being a bit complicated, I wasn’t able to do as much to interactive with and didn’t really enjoy it as much. However I did enjoy changing the colours of the videos and being able to put two together.

It was a lot of fun to change the layout of the short video, I loved using bright and bold colours and flipping the videos to the opposite side so It would give off an illusion.
I also used my own clip (my dog) to add onto another video on the software and blend the two together so that it had a faded effect to it. There is a possibility that I may use this software towards projection mapping as I think with the creativity this involves, I would be able to produce something excited to then project for my idea.

0 notes
Text
Session Three
Wednesday 14th October
Today we were introduced to the module AR (Augmented Reality).
It is an interactive experience of a real-world environment. In AR you can take ‘real-time’ use of information in the form of text, graphics, audio, and other virtual enhancements integrated with ‘real-world’ objects.
For this we only had to use our phones and laptops/computer to produce something. The app that we downloaded on our phones was called ‘Blippar’, and by creating something from the laptop/computer on the website blippar we can then connect it to go on our phones by putting in a code.


For one of the examples we looked at a Vimeo video called ‘Hyper-Reality’ - this was very detailed and to me, quite OTT. However it did stand out in some parts of the clip, it’s about a virtual life and its shown as a POV. The only parts that stood out to me was when the character was in the supermarket and it suddenly went back to normal, in a way it glitches. It was strange seeing so many bright colours and tons of things going on glitch to a normal day life, then goes back to fake reality.
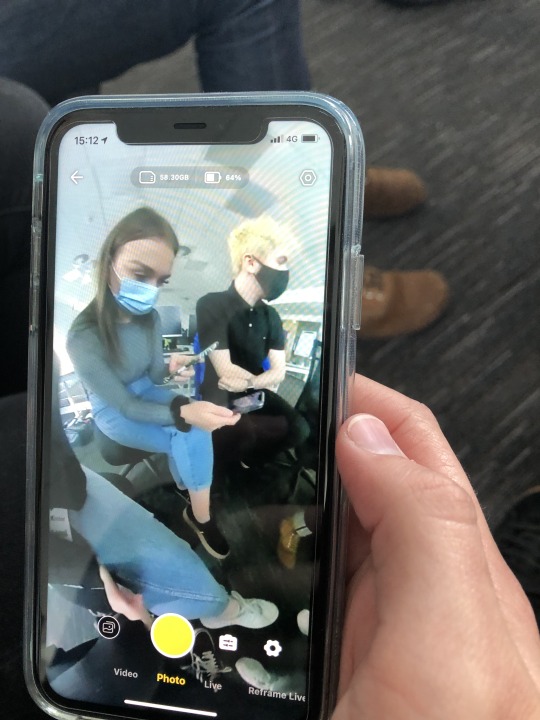
In the lecture and in groups we decided to go onto Blippar and test it out for ourselves, however we didn’t get the just of it at first so we decided to look up other AR apps. We noticed that if you type in one word (it can be an object, an animal or whatever) in google on your phones such as ‘Lion’ it comes up with an option to view it in 3D, also provides important information about whatever you’ve searched up.

It was really fun to play around with, it allowed you to adjust the sizing of whatever you viewed in 3D so you could’ve made it huge or tiny. We tested it out by a few of the group members standing next to the life sized lion. (Decided to search up dog for another animal to test out in 3D/AR)


Also I did a bit more research on my own and came across the IKEA mobile app, ‘IKEA Place’. This comes in handy due to the fact if you are looking to purchase some new furniture or accessories for your house you’re able to go onto this app and see for yourselves a 3D version of what it will look like in your house. I think it comes in handy and you can look at anything you want that IKEA sells.
For example I chose a random place in my room and just let the app guide me on how I can place something 3D in my room, showing me the size of it and whether or not it would suit the place I have put it in.

If I was to involve AR into my final project I would want to do something similar to the examples I have looked at myself. I enjoyed playing around with the google 3D viewer so I would definitely look into something like that but use blippar as the software possibly? Or i would want to look at using something more easier and reliable to use. Near the end of the lecture we quickly went onto use ‘Spark AR Studio’ which was really fun to use and we watched a youtube tutorial on the basics of it. This software would be something I would want to use if I end up using AR for my final project because it allows you to make filters/lenses to then import onto your phone and social media. (Lens Studio is another software I would use for this)

0 notes
Text
Session Two
Wednesday 7th October
For the session two lecture we got introduced to the topic of 360 and VR.
In groups again we were given a insta360 ONE R camera to where you can shoot 360-degree videos and photos. You can set the camera up on a tripod, or hold it steady in an outstretched hand but we used the tripod that came with it for more stabilised footage (although from just holding it in our hands it was already quite stable).

We loved working with the camera and being able to take all sorts of footage that showed the whole 360 view of the room.
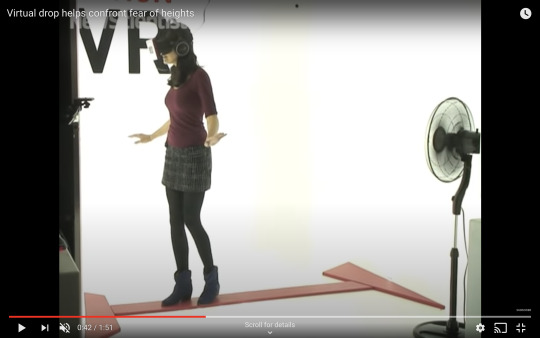
Most of the video examples in lecture had caught my eye, especially ‘360 Google Spotlight Stories: Pearl’ and ‘Virtual drop helps confront fear of heights ‘ - this is because they both are shown virtually and had so much detailed put into them, it attracted me to want to be involved in the process of it and play along with the story. It makes it feel real, especially if you’re wearing VR goggles you would be wanting to know your exact where abouts around you.
(Google Spotlight, Pearl)

(Virtual drop helps confront fear of heights)
To see live footage we needed to download the app called ‘Insta360′ onto our phones. This would allow us to film on the camera from our phones, and to see how it would look if we weren’t directly by the 360 camera.
For our task in the lecture, we made a short film (2 minute max) in our groups of what was around us etc. We decided to do a short story about the insta360 camera basically showing a mouse’s POV from the floor and gradually making its move towards a few of the group members and climbing on one of their shoulders without the person noticing. This involved holding the camera directly on the floor and building it up to ‘climb’ on the person.

From doing my own research I wanted to look into 360 VR videos that told a story, this is where I came across a youtube video called ‘Inside Teiji Furuhashi's "Lovers" in Virtual Reality (360 VR Video) | ARTIST STORIES ‘. It is an immersive, room-sized multimedia installation by Japanese artist Teiji Furuhashi, you get to listen in on a conversation between Furuhashi and MoMA curator, Barbara London.
If I was to use 360 VR for my final project I would want to base it around this video and show similar interests. I loved being able to watch the video/scrolling around the room and hearing voice overs, it made the VR video stand out even with it being a simple background. I would add more detail into the background as well as doing voice overs just so it would blend more evenly and cause a bigger attraction towards my audience.

0 notes
Text
Session One
Wednesday 30th September, 2020
Our first lecture back we were introduced to the module ‘Creative Media Practice’. It included the topic of Projection-Mapping, which we will be doing for our final individual project. The two lecturers who run the course, Mark and Daniel, showed us many examples of what is already out there and how we could potentially do something similar or to our own style. With normal video projection, where footage/content is projected onto a flat screen, projection mapping can be used to transform any 3D shape or surface into an interactive display. And the results can be remarkable. Popular ideas for projection mapping would be showing the content created up against a building or statues, etc.
The examples that were shown to us really stood out to me and kept giving me good ideas to develop more into for my final project. Even though they were professional projection mapping I still wanted to match up to the style and themes of most examples because of how outstanding the final finish looked. An example that definitely caught my attention was the Disney’s 5 head statues, something I would want to look into doing for my own project. With it being dated back to 1969, these were accomplished by filming head-shots of the singers (with 16 mm film) and then projecting this film onto busts of their faces.

(Stuck by Haunted Mansion's Singing Busts at Magic Kingdom - https://www.youtube.com/watch?v=UG5UU_ytYKc&feature=youtu.be)
Later on we got the chance to try out projection-mapping in groups of 6. For our object we used a big plain coloured balloon, to actually project our content onto the balloon we used HITACHI projector and ‘MadMapper’ for our software. On the software there were effects that you could choose from to appear onto the object, this included effects that would show a sound-wave, cloud motion, zooming light that kept sliding across, flickering squares, and more. I liked the idea of the cloud effect because it made the balloon look like a marble.
Someone from our group suggested the idea of projecting a human eye onto the balloon to make it seem more realistic as they were both circular shapes. Eventually after messing around with the software we got to present a slow video of an eye blinking. Each one of us in the group got to play around with the software and made sure to get the idea of how we would do our own thing.

If i was to use projection mapping for my final project, I would want to be able to create something similar to the Disney heads or something similar to what we played around with in lecture, with making the balloon into an eye.
From doing my own research, I came across a few youtube videos but there was two that stood out to me. The first one I watched was VANS Video Mapping Projection on 3D Surface / Intro - it amazed me with how colourful and bold the whole video was, I was so intrigued with how the projection mapping on the VANS sign collided with the music beat and the way it showed so many colours.

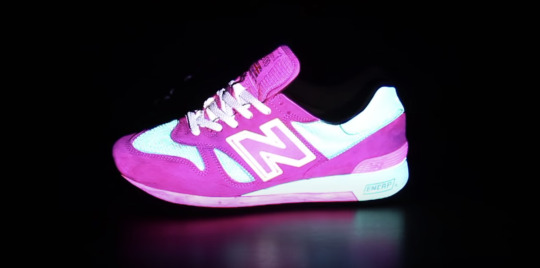
With the 2nd Youtube clip I watched of the New balance sneaker Projection mapping_01 , I instantly thought of how creative and smart that was to use a plain shoe from their brand and create a more neon and trendy style to it. Another thing I enjoyed watching from that video is that they actually projected the shoe colours on the same shoe, like they wanted you to see what other colour options looked like.
(Madmapping software on mabook)

0 notes