
Don't wanna be here? Send us removal request.
Statistics
We looked inside some of the posts by creativeprojectdevelopmet and here's what we found interesting.
Average Info
Notes Per Post
0
Likes Per Post
0
Reblog Per Post
0
Reply Per Post
0
Time Between Posts
2 days
Number of Posts By Type
Text
17
Last Seen Tumblr Blogs


Fun Fact
1,644 Tumblr posts in 1 second.
Text
Feedback on presentation
BLOG 43 19/8/2024
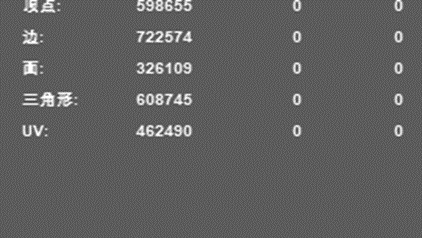
This is my previous model, and the mesh is very messy. Just a low-poly model, yet it has 300,000 faces.
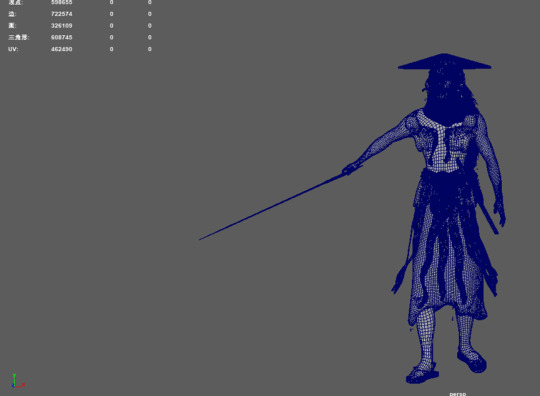
I gradually mastered the technique later on, especially in clothing design. In CLO 3D, all the clothing is made up of triangles.

I need to reduce the polygon count in ZBrush and then bring it back into Maya. The reason for the holes in the clothing in ZBrush is that in Maya, there are extra vertices that are very close together but haven't been merged into a single point. Additionally, some edges haven't been merged either.

Everything needs to be manually checked and adjusted. Through this video, I learned how to check for and fix extra vertices. However, I found that most of the issues still need to be manually repaired; shortcuts can only fix a little bit. This is what I find to be the most troublesome part of the modeling process.
youtube
After my own exploration and practice, I'm now able to keep the face count of a complex low-poly model between 30,000 and 50,000 faces.

Reference
DOT pro (2022) "fix double face in maya |cleanup tool | duplicate face removing in maya | auto extruded face in maya". [video]. fix double face in maya |cleanup tool | duplicate face removing in maya | auto extruded face in maya (youtube.com) [Accessed 23 Feb 2024]
0 notes
Text
Reflective Creative Decision-Making
BLOG 42 15/8/2024
When it comes to the application of my creative decisions, this project was heavily influenced by various sci-fi movies and games.
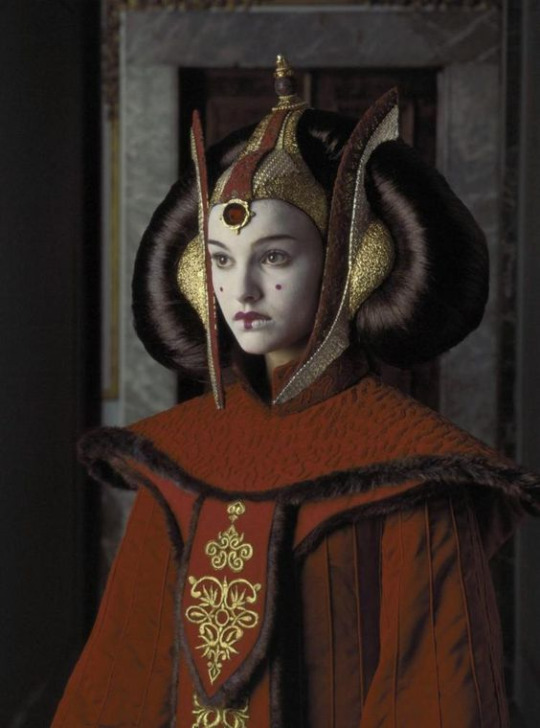
For example, in "Star Wars", the different planets each have their unique cultural and fashion characteristics, many of which are inspired by real-world ethnic traditions. Padmé Amidala's outfits, for instance, feature numerous elements from Chinese minority cultures. Similarly, the Jedi robes in the prequel trilogy, including Palpatine's attire, also incorporate a lot of minority cultural elements. These designs deeply influenced me, and I was eager to integrate similar cultural and exotic elements into my own work. The costumes from Star Wars played a significant role in guiding me to blend ethnic art into a sci-fi setting.
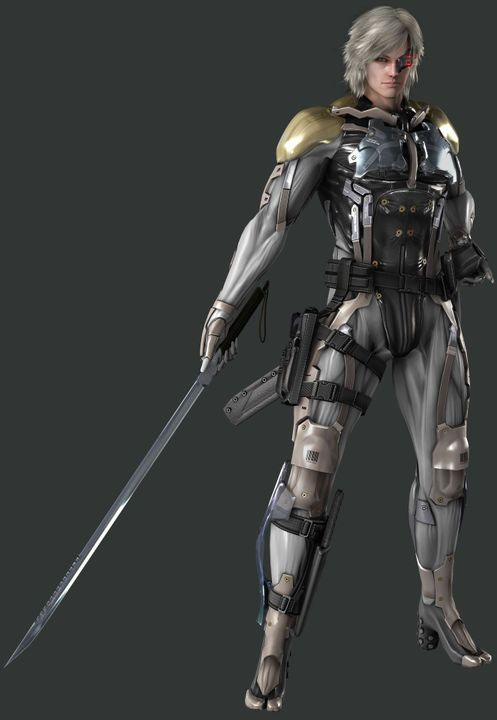
On the other hand, the design of robots in video games has also had a profound impact on me. Games not only provide a visually striking experience but also bring robot characters to life through interactivity, giving them depth and personality. For example, in the "Metal Gear" series, players can control highly realistic mechanical warriors and explore the game world through their eyes. This immersive experience made me realize that robot design requires not only intricate visual details but also a strong consideration of their functionality and user experience in a virtual environment.
In my creative exploration, I regularly browse and admire a wide range of works by other artists on ArtStation, particularly those related to robot design. These works not only showcase the artists' exceptional skills and unique perspectives but also offer me a rich source of inspiration. By observing different styles of robot designs, I can see a variety of forms, materials, and functions, ranging from realistic mechanical warriors to futuristic sci-fi creatures. Each piece reflects the creator’s distinctive understanding of future technology, artificial intelligence, and mechanical aesthetics.
This extensive visual input provides me with numerous references and ideas during my creative process. When designing my own robots, I can draw upon these innovative elements and blend them with my style to create unique and personally distinctive works. Additionally, by continuously analyzing and reflecting on the design concepts, color usage, and detail handling in these works, I have gradually developed my aesthetic standards and creative thinking.
Moreover, the community interaction on ArtStation has given me the opportunity to engage with other artists, learn about their creative processes, and understand the stories behind their work. This exchange has broadened my perspective and helped me realize that creativity is a continuous process of learning, reflection, and growth. Each time I learn and draw inspiration from others, it pushes me to break new ground and improve my work.
Through this ongoing observation and reflection, I've noticed that my creative thinking in robot design has become more flexible and diverse. I can now find innovative points within existing styles and am more willing to experiment with different design approaches, allowing me to discover new modes of expression in my work. Ultimately, this process of learning from and absorbing others' creativity has not only enriched the content of my work but also enhanced my creative abilities, propelling me forward in my artistic journey.
Reference
Star Wars (1987–present) [American epic space opera media franchise] "Lucasfilm"
Wattpad (n.d) "Hero of Blood: Jack The Ripper (long updates) - Seeing Double" [image]. https://www.pinterest.co.uk/pin/1051942425440136447/ [Accessed 19 Aug 2024]
Metal Gear (1987-2023) [Action-adventure] [Hack and slash] [Stealth] "Konami" "Microsoft Game Studios"
New, Y, D, N (n.d) "Natalie Portman left her "Star Wars" days" [image] https://www.pinterest.co.uk/pin/144678206762371872/ [Accessed 19 Aug 2024]
0 notes
Text
Reflective New Learning Over the Project
BLOG 41 14/8/2024
As my postgraduate journey in Game Art and Design in the UK draws to a close, I reflect on a period marked by challenges, innovation, and personal growth.
The course began with the fundamentals of game art and design, including pre-conceptual design, game storytelling, and teamwork. These foundational elements were crucial in establishing a strong theoretical framework that guided my subsequent practical work. As the course progressed, we delved into more specialized and technical subjects such as 3D modelling and game engine mastery. These classes not only honed my technical abilities but also expanded my perspective, allowing me to continuously improve my portfolio and share my work on platforms like Artstation.
In this final project, I learned the proper techniques for character topology, specifically starting with a T-pose and then using skeletal binding to quickly pose the character. Additionally, I significantly improved my proficiency with Unreal Engine. Previously, my use of Unreal Engine was limited to just placing objects in the scene, but now I've made substantial progress in controlling fog, lighting, and rendering.
Although I have made great progress, I realize that there is still room for improvement. Technically, although I have acquired strong 3D modeling skills, I still encounter challenges in practical application. For example, I sometimes have problems with character line layout, and I have problems when baking high-polygon and low-polygon models. In addition, due to negligence, UV mapping errors occasionally appear, such as incorrect quadrant division. These may seem like small details, but they highlight the need to continue working hard. However, a lot of progress has been made in optimization, from the previous 100,000-face low-poly to 40,000-face low-poly.

Lastly, I think that in this year of study in the University of Hertfordshire, besides maturing my technical skills, I also realized the importance of drawing. When creating characters, it’s crucial to understand the structure of the human body and the distribution of muscles to create better models. This is not only important for sculpting characters but also for understanding textures. Many textures need to be drawn out to be done well. Drawing can enhance your understanding of textures. In the past, we only required proficiency in software, but now I gradually realize that the upper limit of 3D art production is determined by one’s drawing skills.
Finally, I recognize the importance of continuously updating my knowledge to keep pace with industry developments. Game design is a rapidly evolving field, with new technologies and ideas emerging constantly. To stay competitive, I must commit to ongoing learning. Therefore, I plan to approach the future with a mindset of continuous education, remaining attuned to the latest trends and advancements in the industry.
My postgraduate experience in the UK's Game Art and Design has not only enriched me with extensive knowledge and skills but also clarified my career aspirations. I've grown into a more professional and confident game designer, and my determination to excel in this field has only strengthened. Moving forward, I am committed to further enhancing my abilities and contributing to the game design industry. Additionally, I hope to explore the intersection of game design with other fields, creating more possibilities and adding value to society.
0 notes
Text
FMP Artefact, Documentation and Presentation- Final effect of Unreal Engine 5
BLOG 40 12/8/2024
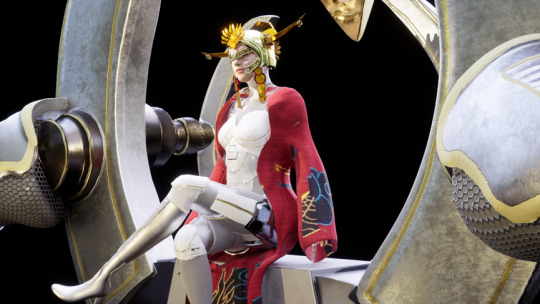
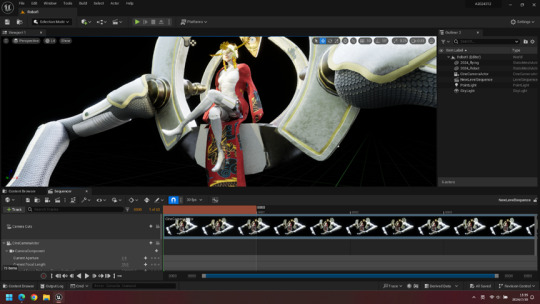
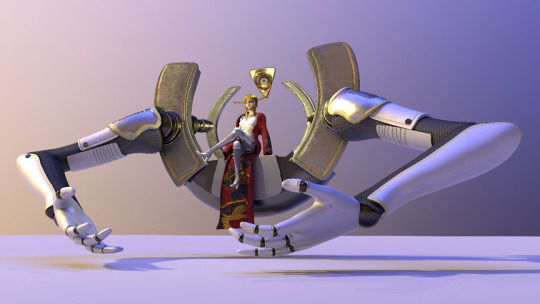
In the journey of completing the final render, each step has been filled with challenges and discoveries. This process is not just a technical operation but also a test of creativity and patience.
When the final rendered image was completed and displayed on the screen, I felt a profound sense of accomplishment. Seeing the results of my hard work manifest in high resolution with intricate details and realistic effects brought me an indescribable satisfaction. This achievement represents not only a technical success but also a recognition of creativity and effort.
I also posted my work on Artstation
0 notes
Text
FMP Artefact, Documentation and Presentation- Production Process
BLOG 39 11/8/2024
I also updated the material for the character.

Next, I started learning about rendering on YouTube.
youtube
I followed his rendering method step by step.

I understand why I couldn't render high-quality images before. It turns out I need to output them one image at a time.
Reference
J, H (2022) "Rendering Characters in Unreal Engine 5 | Tutorial" [video] https://www.youtube.com/watch?v=yqGlyhPXy5A [Accessed at 1st Aug 2024]
0 notes
Text
FMP Artefact, Documentation and Presentation- Production Process
BLOG 38 10/8/2024
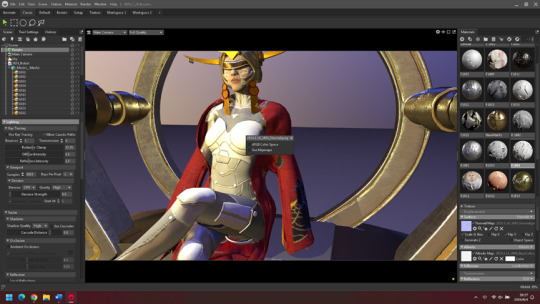
I started rendering with Unreal Engine 5 today. However, I'm encountering some issues with the materials. They are extremely bright, and I can even see the reflection of the sky.
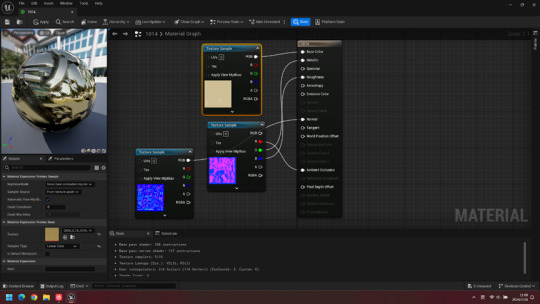

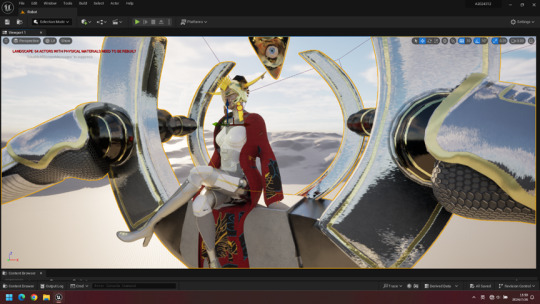
Overall, the rendering results are very poor. Additionally, I only know how to render by taking screenshots, which yields low-quality results.

I decided to try solving the problem myself and discovered that it was actually a material issue. I needed to change the material type in the material settings.
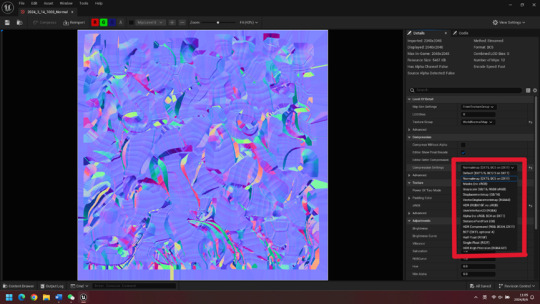
After changing the material type, I was able to enable sRGB. The model's material is finally normal and no longer reflective. It's finally fixed.
0 notes
Text
FMP Artefact, Documentation and Presentation- Learning & Reflection
BLOG 37 9/8/2024
Today, I showed my character model to my mentor. He gave me some advice regarding developments in the HDR field. A commonly used technique is to introduce some geometry behind the camera to break up overly uniform lighting. When shooting outdoor scenes, my favorite trick is to download the ugliest tree or shrub I can find online for free and place it behind the camera, between the light source and the subject. Regardless of the model's quality, this natural light diffusion can enhance the scene's effect. This method stems from the old practice of using cardboard cutouts, but nowadays, placing a few branches in front of the light source to scatter the light can achieve a similar effect.
He also suggested that I test my work with friends on Zoom to see how the video looks.
0 notes
Text
FMP Artefact, Documentation and Presentation- Final effect
BLOG 36 8/8/2024
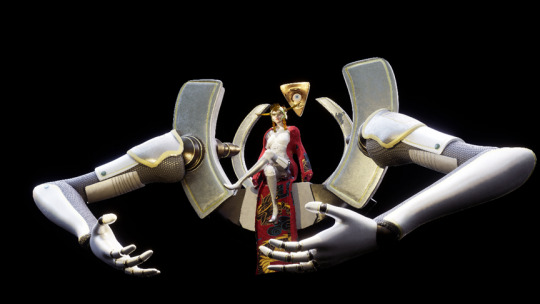
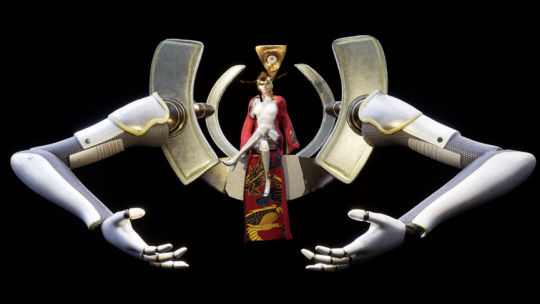
final rendered images


By meticulously adjusting the lighting, materials, background, and camera angles, and performing necessary post-processing, I aim for the final rendered images to accurately showcase the design and artistic style of the character and spacecraft. This will not only effectively present the project’s outcomes but also provide strong visual support for future displays and evaluations. I hope the final rendered images will highlight every detail, achieving the highest standards of design.
0 notes
Text
FMP Artefact, Documentation and Presentation- Production Process
BLOG 35 7/8/2024
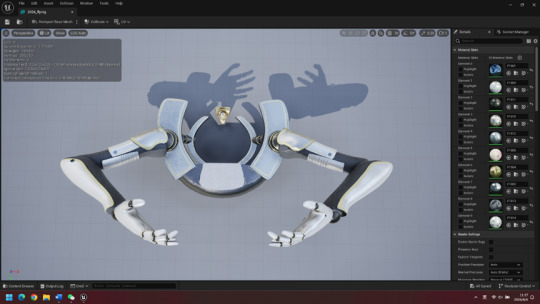
I have completed both the robot and the aircraft, so I'm ready to start rendering. I initially tried rendering with Marmoset, but it's proving quite challenging.
Firstly, the robot's material looks very odd, almost as if it's been drenched in water. The chest area, in particular, looks quite wet.
Later, I discovered that I needed to adjust the material settings myself. The chest area had significant issues.

I found that turning off sRGB fixed the issue.
Then, I started adding lighting.
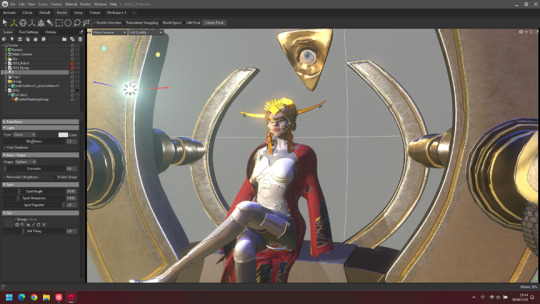
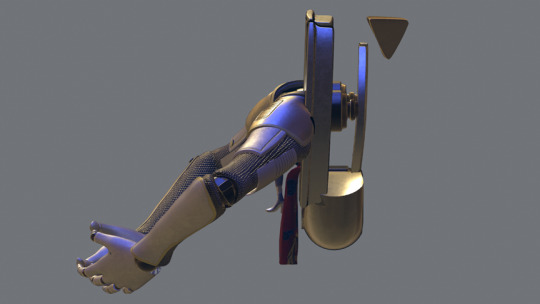
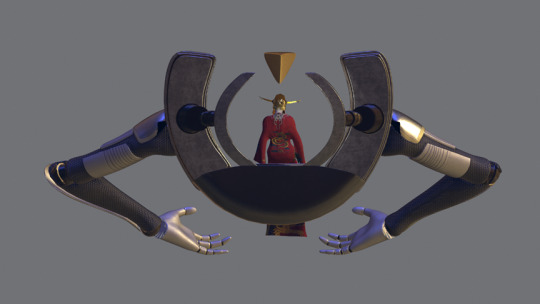
I made gradual adjustments and finally rendered the images. Here are the orthographic views:


0 notes
Text
FMP Artefact, Documentation and Presentation- Industry Forefront
BLOG 34 6/8/2024
I've been playing "Star Wars Jedi: Fallen Order" (2019) recently, and overall, the game is fantastic. One of the things I like the most is that, despite having only four large maps, the characters can acquire skills in various maps. The more skills you acquire, the more you can explore the maps. This allows me to traverse the same map countless times while playing.
My favorite part is when you first arrive at Kashyyyk. The protagonist is sitting down, and a gigantic technological beast arrives at Kashyyyk. That scene is incredibly stunning.
youtube
Reference
Star Wars Jedi: Fallen Order (2019) [Action-adventure] "Respawn Entertainment" "Electronic Arts"
MKIceAndFire (2019) "STAR WARS JEDI FALLEN ORDER Gameplay Walkthrough Part 1 FULL GAME Jedi Master - 60FPS No Commentary" [video] https://www.youtube.com/watch?v=Y1bWJhvneyI [Accessed 19th July, 2024]
0 notes
Text
FMP Artefact, Documentation and Presentation- Production Process
BLOG 33 3/8/2024
Today, I am going to start working on the aircraft. First, I will model it in Maya. I have begun by creating half of the model in Maya.


After completing the model, I will use Zbrush to make it symmetrical.
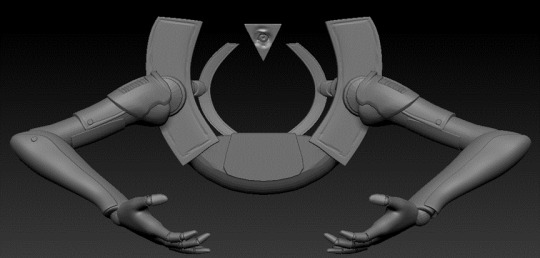
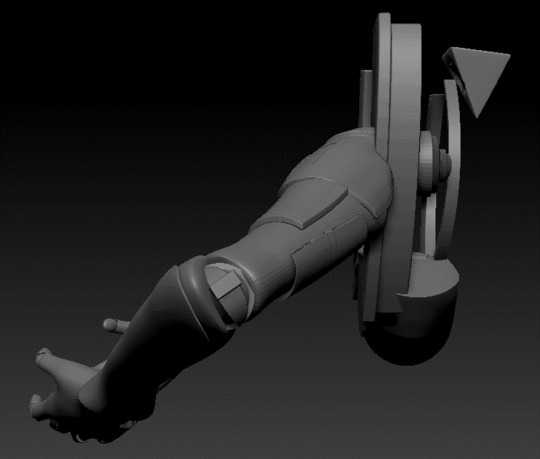
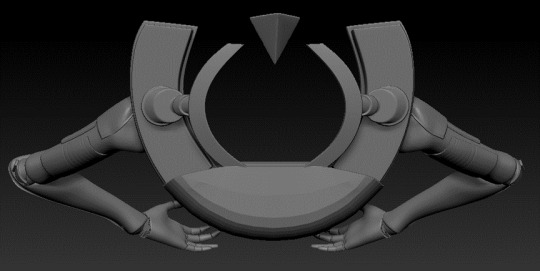
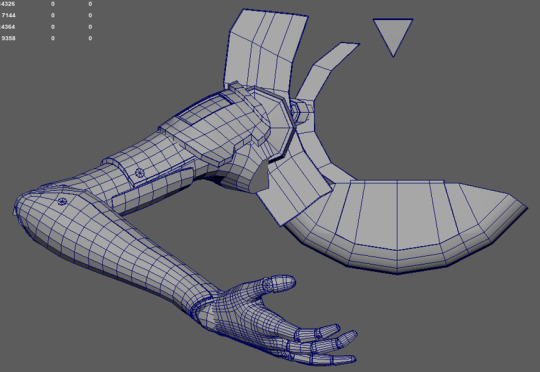
I have also finished the low-poly model.

I have unwrapped the UVs.
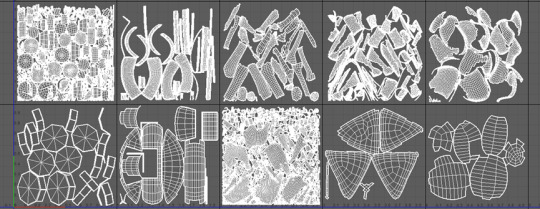
I am creating the textures in Substance Painter.

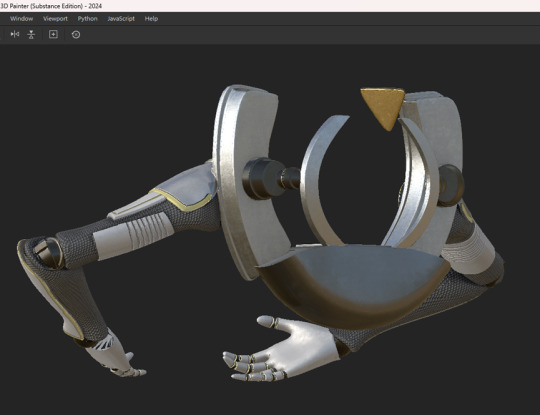
The textures are as follows:

0 notes
Text
FMP Artefact, Documentation and Presentation- Production Process
BLOG 32 29/7/2024
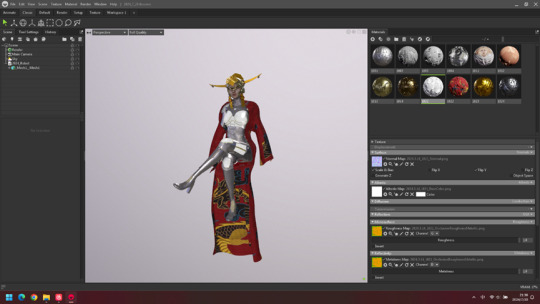
Now I am starting to create the textures.

For the character's face, I used texture assets from the following website.
I used this texture.
However, I adjusted and modified the original texture in Photoshop.


I also painted a bit myself in Substance Painter.
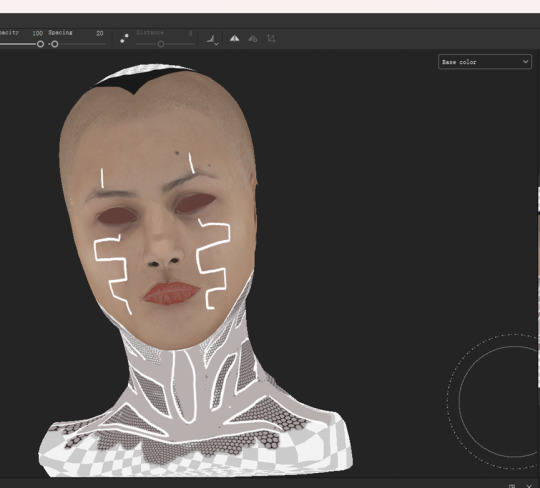
The final result.

Below are the textures for my model.
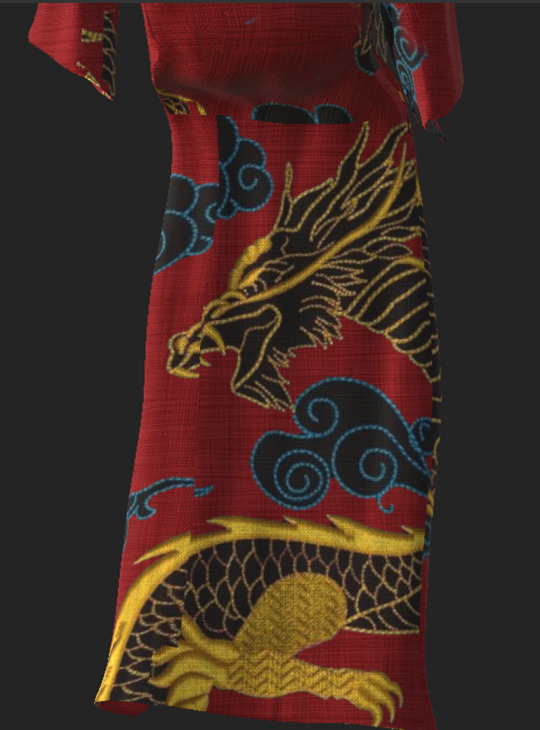
Although the design in my concept art only had the clothing in red with no decorations, I found references for fabric patterns while working in Substance Painter.
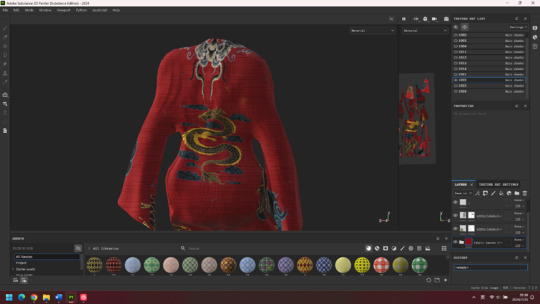
I found some patterns on Pinterest. These are the sources for the dragon texture patterns.
The design for the area near the collar on the back of my clothing comes from the following website. This site has many image resources that can be used directly.
This is the final exported texture.

Reference
3D Scan Store (n.d.) [online]. https://www.3dscanstore.com/ [Accessed at 17 July 2024]
EtsyUK (n.d) "Chinese Flying Dragon Machine Embroidery Designs" [image]. https://www.pinterest.co.uk/pin/1144055111586391861/ [Accessed at 18 July 2024]
rawpixel (n.d) "Chinese art png black decorative ornament" [image]. https://www.rawpixel.com/image/2735145/free-illustration-png-logos-png-png-ancient [Accessed at 18 July 2024]
0 notes
Text
FMP Artefact, Documentation and Presentation- Production Process, Learning & Reflection
BLOG 31 28/7/2024
After finishing the clothes, I merged them with the model. As shown in the image, I created the high-poly model.

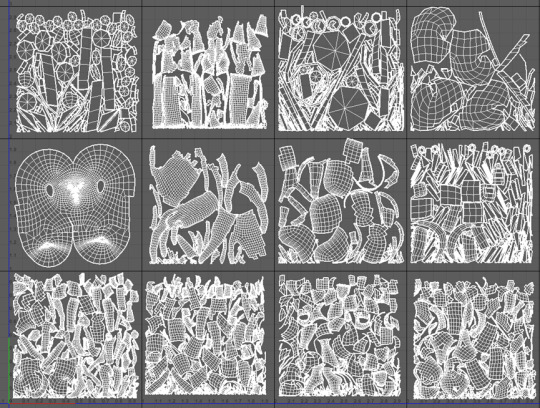
Next, I moved on to UV unwrapping the low-poly model.
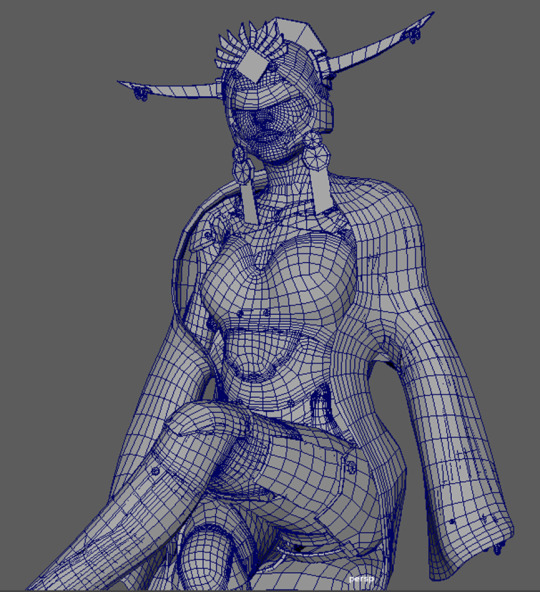
I also learned some techniques for UV unwrapping. Recently, I watched a great tutorial on YouTube about UV unwrapping, where they demonstrated the process step by step manually. It made me realize that I usually only manually unwrap UVs for faces.
youtube
Before arranging the UV layout, I used color blocks to roughly paint similar materials and color tones, grouping similar materials into one layer. This helped me better organize the UV layers.

Reference
MH, T, T, M, H (2023) "UV Mapping in Maya 2023 made EASY. My process explained" [video]. https://www.youtube.com/watch?v=217vrUjR_dU [Accessed at 17 July 2024]
0 notes
Text
FMP Artefact, Documentation and Presentation- Production Process
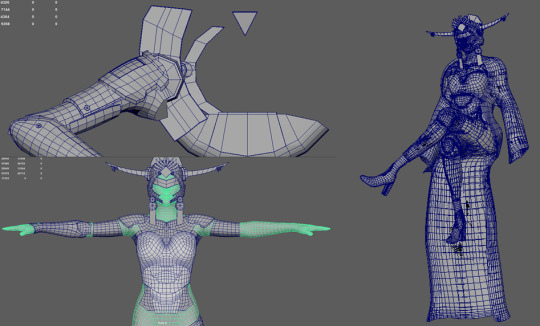
BLOG 30 27/7/2024
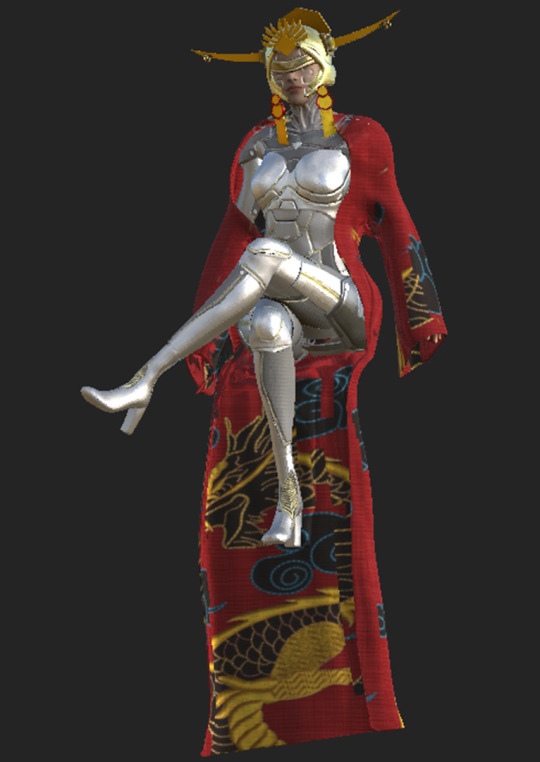
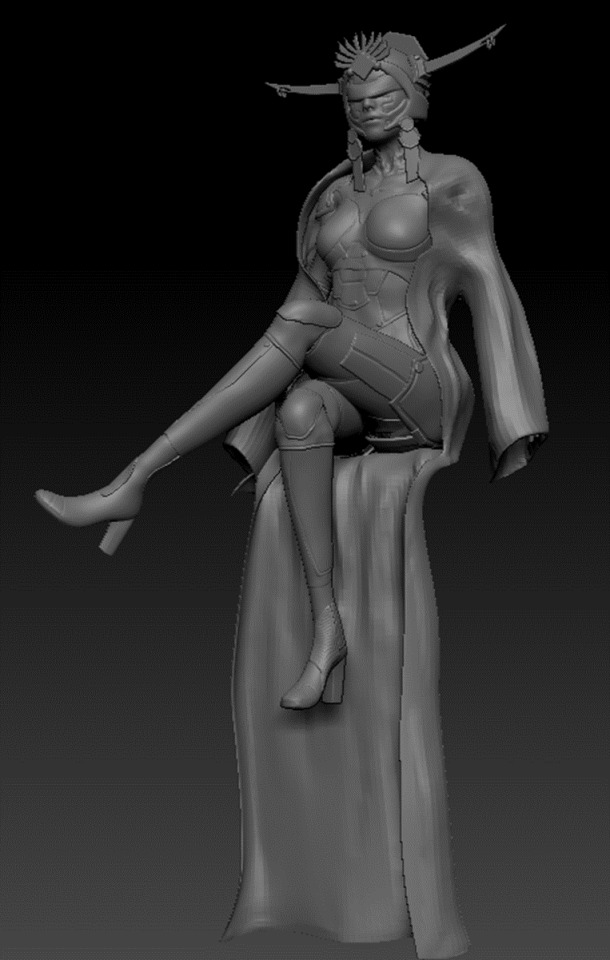
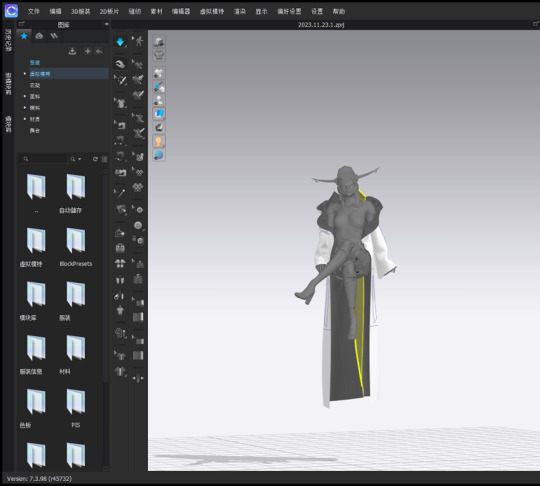
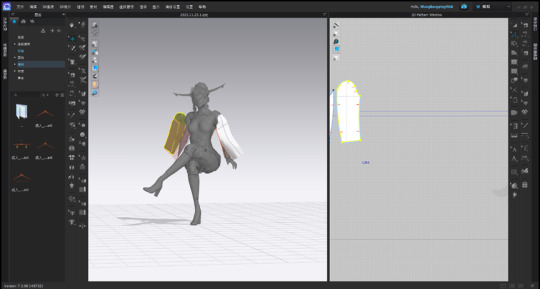
Now I've reached the stage of creating clothes. I'm using CLO 3D, and I plan to make the clothes and character as one piece.

I originally planned to make the clothes using a T-pose, but considering the complexity of the clothes, I decided to directly create the clothes on a seated low-poly model.

Close enough, the result of the clothes is as follows.

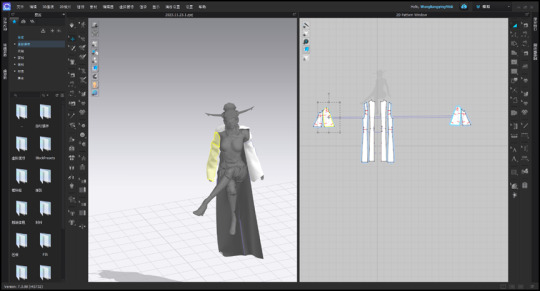
Although making clothes in CLO 3D is fast, it still needs to be adjusted in ZBrush. The mesh generated by CLO 3D is often unreasonable. When imported into ZBrush, you will see such mesh issues.

It's all triangular faces. Use ZBrush's retopology tools to first convert them to quads, and then gradually reduce the number of faces.
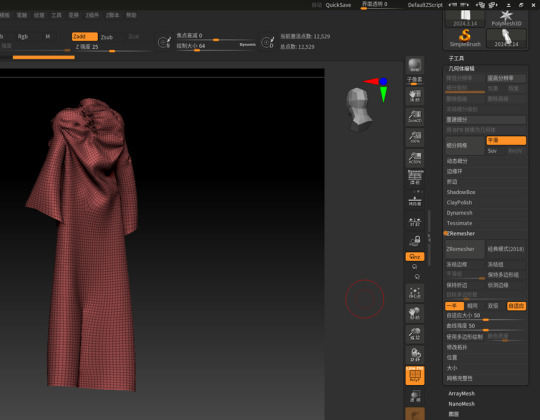
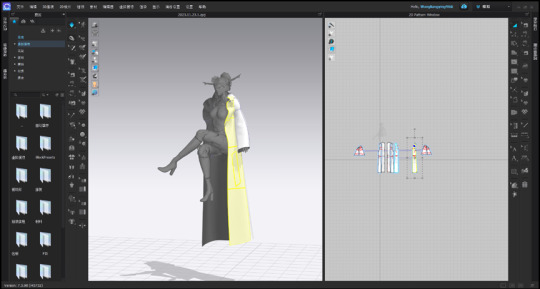
Finally, the number of faces has been reduced to this.

Then I imported it into Maya for adjustments, modifying the clothes to fit the seated pose.

I also added thickness to the clothes.

There are some bumps in the middle, but it's not a big issue. Just smooth it out in ZBrush.

0 notes
Text
FMP Artefact, Documentation and Presentation- Learning & Reflection
BLOG 29 26/7/2024
Today, I showed my work to my mentor. He pointed out that I might go through several versions when creating textures. While discussing materials with my mentor, he mentioned that people often place too much emphasis on modelling, but textures are just as important, if not more so. This is because good textures and lighting can even save a poor model. A model can be corrected with textures and lighting.
When baking the model, while making the low-poly model, you need to put the low-poly into the high-poly to see if it's done correctly. I often forget this step. This time, when baking, I indeed missed some parts of the high-poly model.
0 notes
Text
FMP Artefact, Documentation and Presentation- Production Process
BLOG 28 25/7/2024
After making some adjustments, I finally got the movements right. These are the movements for the low-poly model.

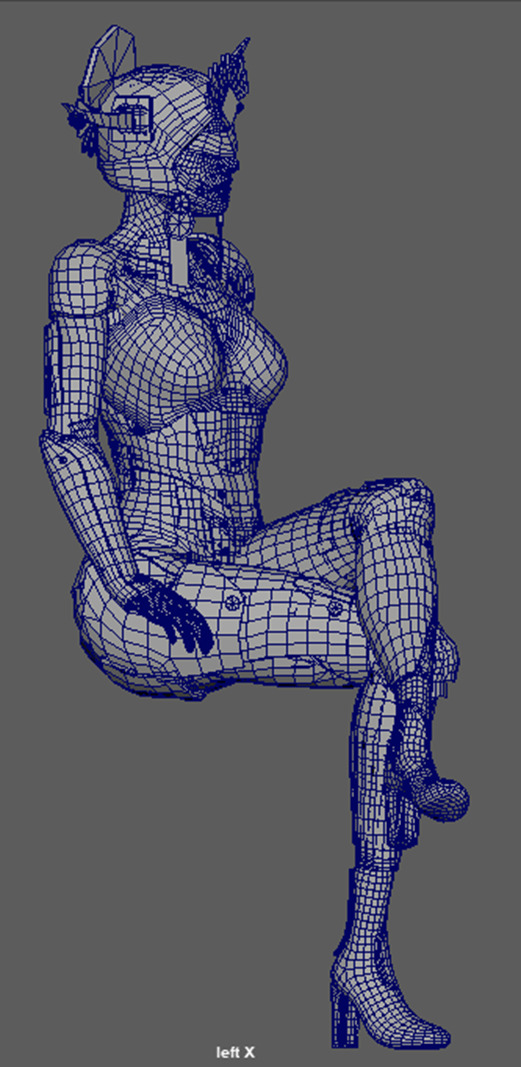
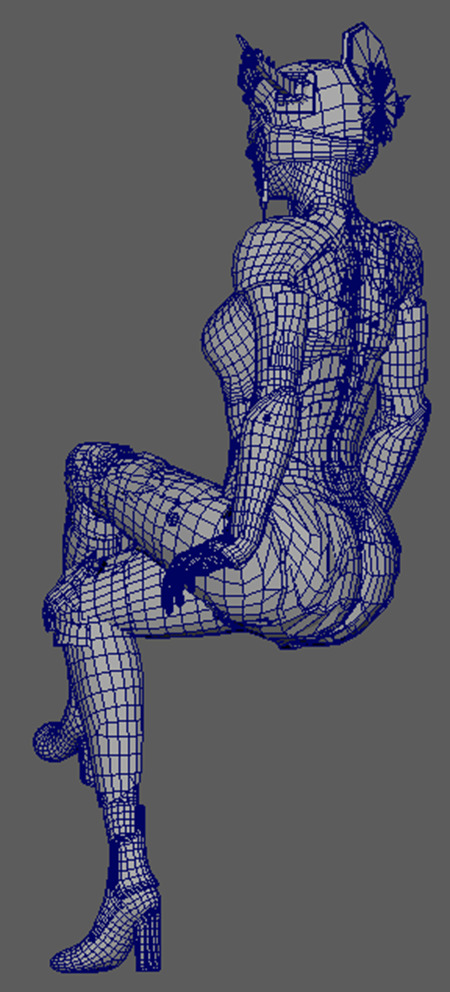
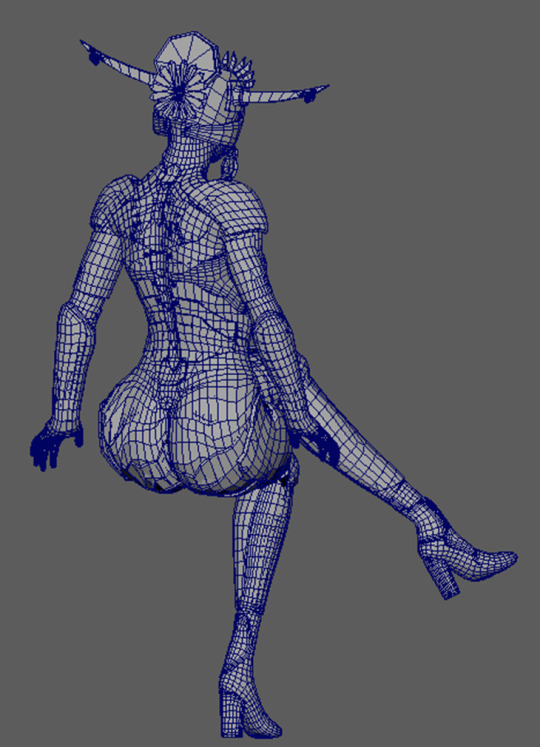
Similarly, I have also completed the high-poly model.
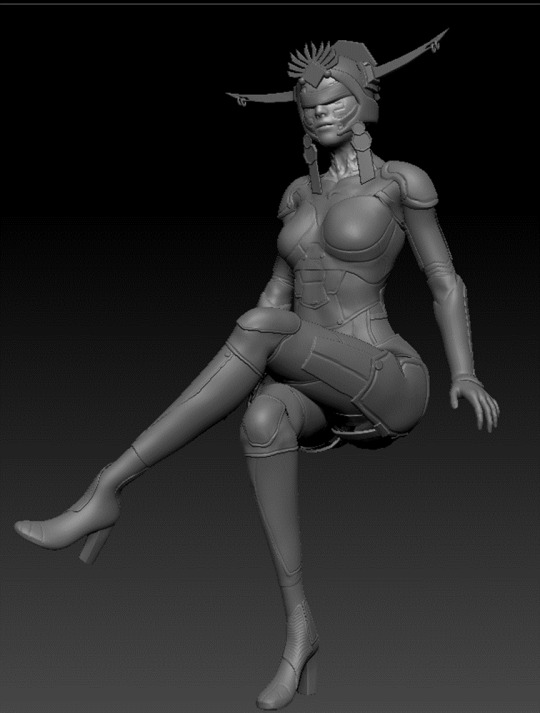
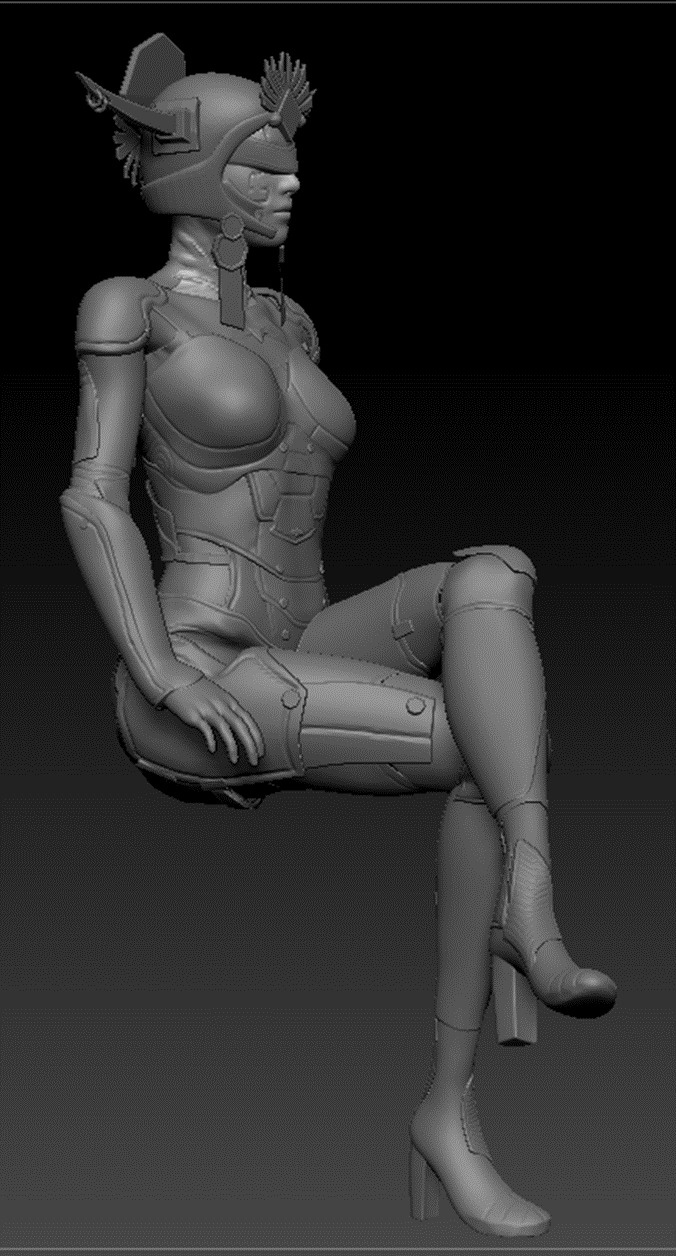
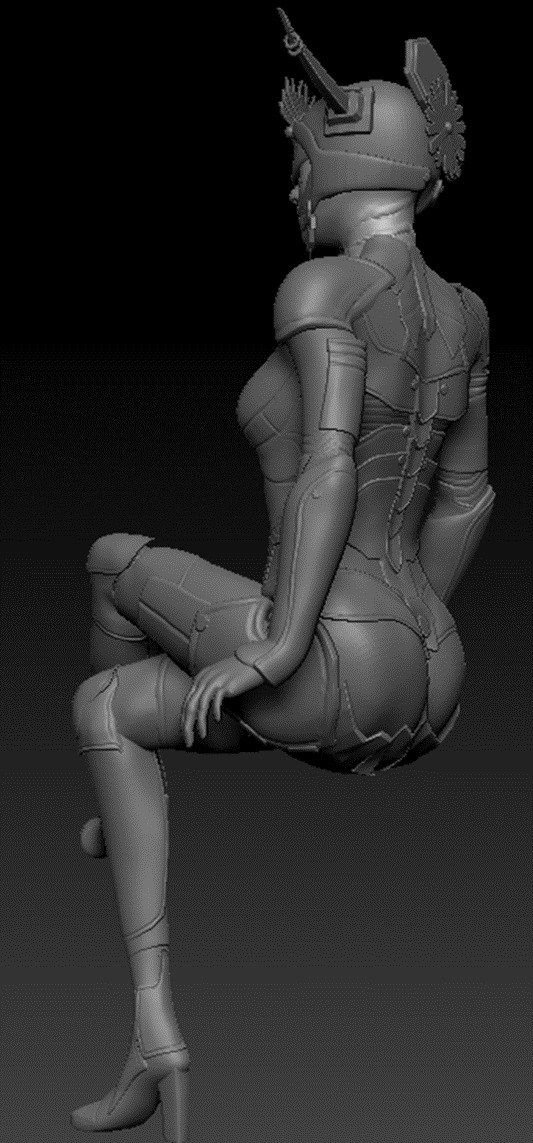
I am currently using CLO 3D to design clothes.
0 notes
Text
FMP Artefact, Documentation and Presentation- Learning & Reflection
BLOG 27 24/7/2024
I recently looked at the robots designed by TEL YUKA and realized that I have borrowed a lot from his designs in my own work. In particular, I adopted the design of the waist. I feel that his robots have more mechanical layers than mine; his robots have three layers, while mine only have two. Additionally, the level of detail in his parts design surpasses mine.
This has made me realize that in future designs, I need to further enhance the depth and level of detail in my work. TEL YUKA's designs demonstrate how incorporating additional mechanical layers and meticulous part design can enhance the complexity and realism of robot models. I plan to introduce more layered structures and carefully examine the details of each component in my upcoming projects to improve the overall sophistication and depth of my designs. Additionally, I hope to draw inspiration from TEL YUKA's work to explore different design styles and techniques, enriching my own creative methods. This will not only enhance my design skills but also help me create more unique and striking robot designs in future projects.
Reference
TEL, Y (2014) "Courir2_v00" [image]. https://www.artstation.com/artwork/3o0NJ [Accessed at 12 July 2024]
0 notes