
Don't wanna be here? Send us removal request.
Statistics
We looked inside some of the posts by dark-hare and here's what we found interesting.
Average Info
Notes Per Post
2
Likes Per Post
2
Reblog Per Post
0
Reply Per Post
0
Time Between Posts
47 minutes
Number of Posts By Type
Text
5
Last Seen Tumblr Blogs


Fun Fact
Tumblr is used by 21% of adults online aged 18-29 years.
Text
Character translation Project
Smurfs to Little Nightmares
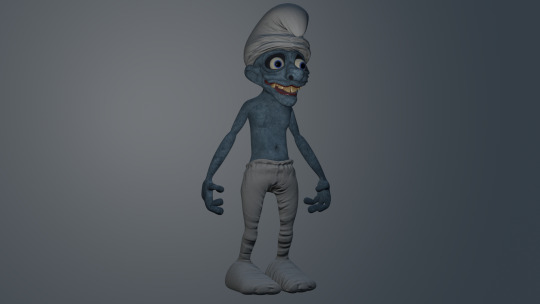
I used the skills I learned from making my own custom little Nightmares character to make this crossover character of a Smurf, the clothes were changed to be more baggy and dirty with the skin also being given a more dirty and scaley look. the wrinkles in the clothes really add to the design making good use of the Bump node to make it look as if there is extra geometry when it is really just a trick of the light.
Coraline to Bendy and the Ink machine
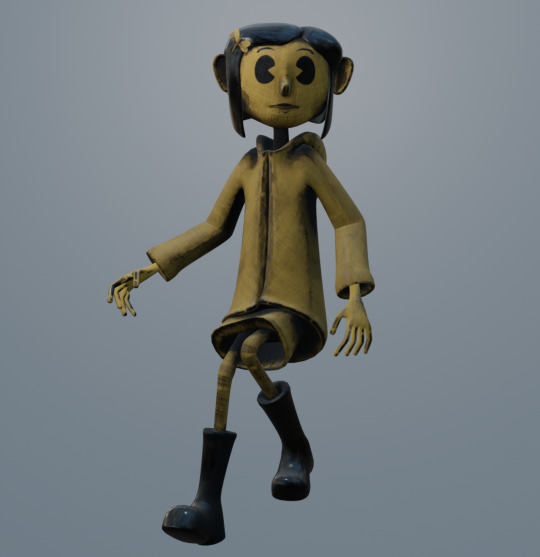
I only needed to work with two colours for this model as the Bendy and the Ink Machine only has two colours used for its texturing giving the game a unique vintage cartoon look, I used black map generators to create inky shadows using the ambient occlusion map, I am very pleased with the result as it looks as if it could fit in to the universe. even the imperfections still look ok as they work as ink splats.
Don't Hug Me I'm Scared to Little Big Planet
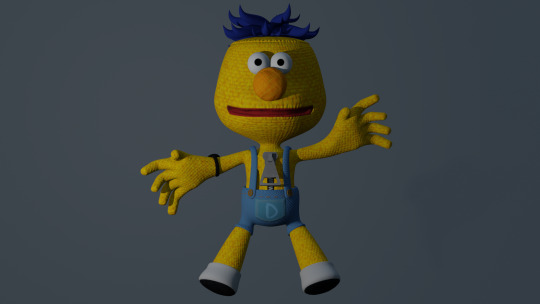
I used the pen tool for this model to create a seam line around the head and mouth to give the character more of a plush look, the base texture also works really well for this as it uses the bump node to make it look like a knitted character. I am happy with how he turned out as he looks like he's been made out of different parts to get a hand crafted look.
This project has been a lot of fun and taught me a lot about substance painter, I am not yet done learning techniques in substance painter and am excited to see what I can create throughout the year.
0 notes
Text
Expanding Substance Painter knowledge
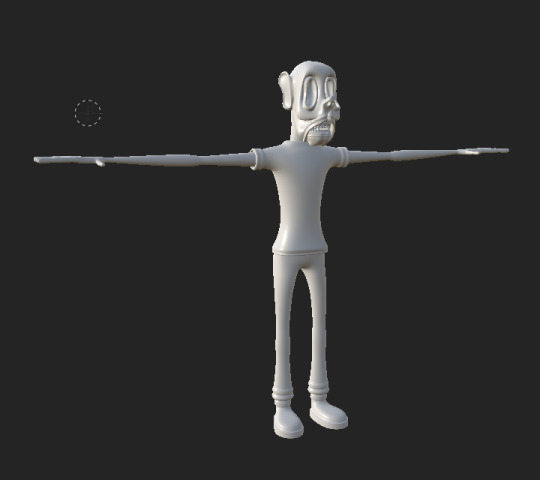
Little Nightmares Character
After modelling the table I was eager to create more textures using substance painter to continue to expand my knowledge and improve, For my character style translation project I wanted to make a little nightmares crossover character as I love the style and design of the universe and how monstrous it is, it's a style I couldn't replicate before as my texturing skills could not create anything near to the game. With substance painter that is now a possibility but first I wanted to practice to make sure it could be done, I started by modelling a new character using characteristics from little nightmares characters using unproportionate limbs and drooping skin. I modelled with substance painter in mind giving the model plenty of places for the ambient occlusion map to do its thing.
Little Nightmares II Trailer
youtube
The environments in Little Nightmares are so interesting and detailed, they definitely inspire my work in some aspects and will inspire my future projects. the way the world seems distorted and stretched is both visually beautiful and terrifying.
Character Modelling Process:
Modelling the character
I make my models with subdivision surface modifier enabled, this modifier adds more vertices to a mesh without them being visible until the modifiers are applied, they don't have to be applied unless they are being used in a game where blenders modifiers cannot be used. I was worried when I realised that the UV's may be different once the FBX was exported into substance painter, I looked at the modifier closer and found options that would prevent any stretch within Blender with the modifier on. I still didn't know if the modifier would remain when moving it over to substance painter, as it was a test I continued to Mark the seams following the method I used for other models and then exported the model as an FBX.
Model exported into substance painter
Texturing the character
after opening the file I was happy to see that the modifier did carry over into substance painter meaning I could keep the subdivision surface modifier in Blender and texture some of my own models that previously used procedural textures, after baking the model didn't seem to have any issues other then the seams being a little obvious in some places which is something I aim to fix with the more knowledge I gain using substance painter. I wanted to continue the Little Nightmares design by using zombie-like flesh for the character so I found the best material that fit and made any appropriate changes such as adding grime, changing colours and dark splat marks.
Finished Character
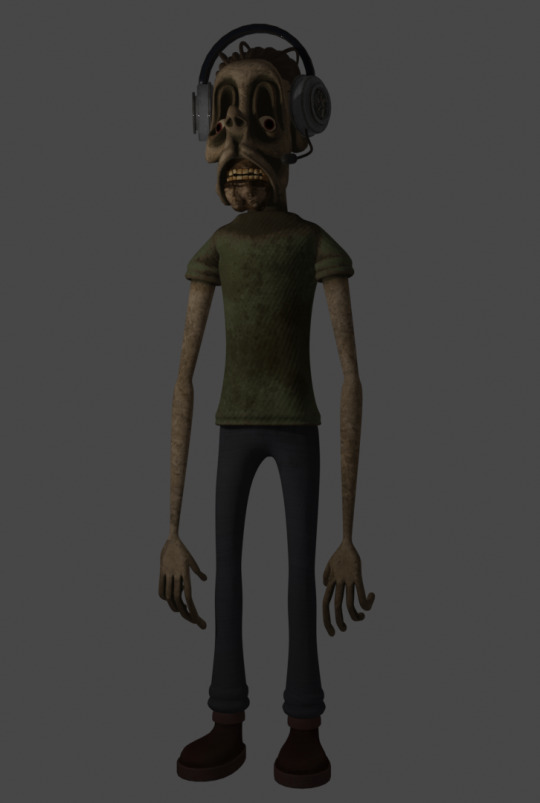
I am happy with the final design as I feel it fits in to the universe of little nightmares and shows that I can understand Substance Painter, after creating this character I feel confident that I can replicate the style in the character translation project and also know exactly how to do it to get the result I am looking for.
0 notes
Text
Introduction to Substance Painter
Discovering Substance Painter
after I learned about how to Properly UV unwrap I looked for a software that would allow me to texture my models that was better than Blender's Texture Paint, I looked around for a while before I found out about Adobe Substance Painter where UV unwrapped models could be imported as an FBX file to be baked into different maps that would allow for better texturing like adding details to crevasses and shadows. Excited to learn more I watched a few videos showcasing what substance painter was capable of, seeing how it could change a basic white shape and give it details of a real life object pushed me into getting substance painter. with my free adobe licence given by the university expiring I couldn't access substance painter, so I applied for a free trial for 30 days so that I could try it out, loading it up I was immediately overwhelmed with the controls as I have become very accustomed to Blender's and so did not know how to traverse the interface so I watched a beginners tutorial.
youtube
My first Substance Painter Object
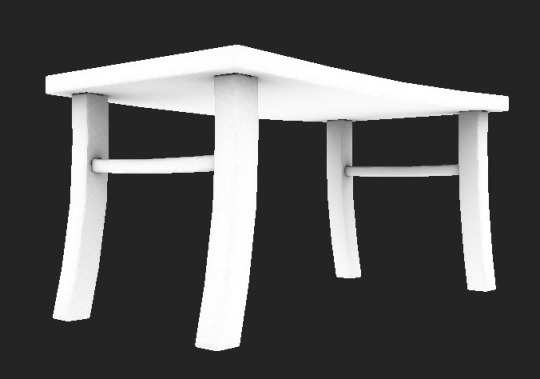
watching the tutorial amazed me on how detailed the textures are and how they adapt to the UV's once they are baked to add rusty edges and stitching lines, to follow along with the video I made a table model in blender and exported it as an FBX file.
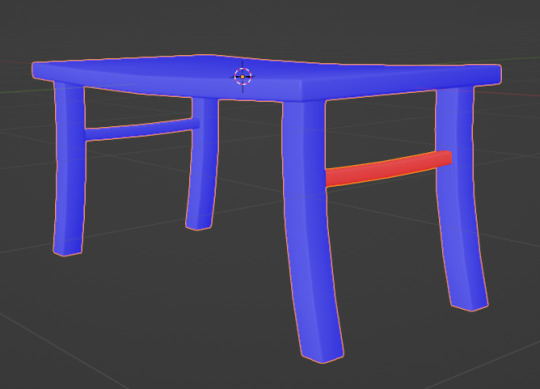
My table model in Blender
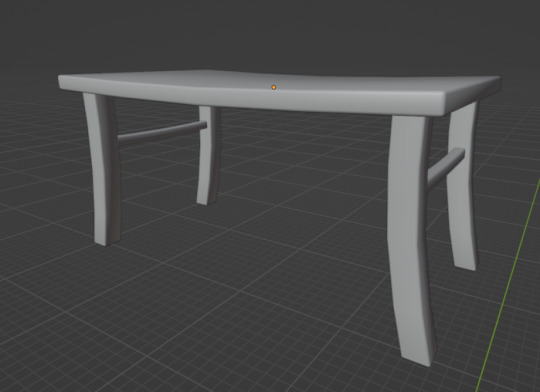
the model was made to be low poly so it would be easier to unwrap, I then exported it into Substance painter where I encountered an issue involving back face culling as the table was partially see through due to the Normals of the model were flipped the wrong way.
Part of table with wrong face orientation in substance painter
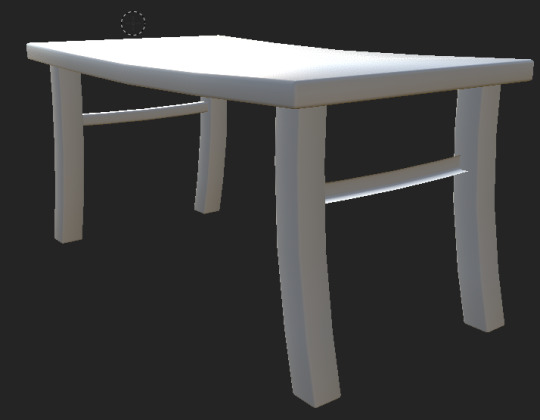
The fix was easy fortunately as all I had to do was go back to the model in blender, select those faces and flip their normals to make sure they are faces the right way. to avoid the issue happening again I started to check my models with the face orientation view in blender where faces in the correct direction appear Blue and faces in the wrong direction appear Red letting you know which faces to flip.
Face orientation view in Blender
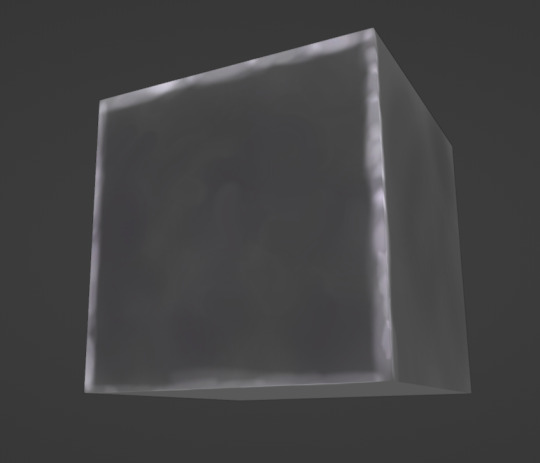
this view is a real time saver when I remember to use it which helps save me from the stress of having to go back into Blender after already exporting the model to fix something so avoidable, another way to see face orientation in Blender is by enabling back face culling in the texture settings. after fixing the simple issue I re-exported the mesh into Substance Painter where everything looked fine so I started to bake the mesh, baking the mesh creates several maps that will help when it comes to applying textures such as the Ambient Occlusion map which calculates the shadows in-between parts of the mesh, the maps can also calculate the edges of the mesh to add details like edge wear.
Ambient Occlusion map in substance painter
With everything baked I could now add textures to the model, there was a few wood textures to choose from. I went for a darker wood texture and added some darker edge wear using a Black Mask and Generator, using the the black mask you can isolate an area to texture and with the generator you can add dirt, edge wear or rust.
Textured Result
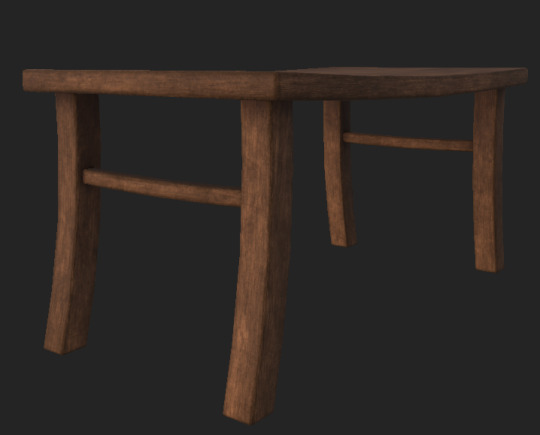
I am really pleased with the outcome of using Substance painter to texture the table as it looks professional as I wanted my textures to look from the start, the table is a very basic model though and so I wanted to try and texture something a little harder such as a character model.
0 notes
Text
UV unrwapping and Texture Paint
Trying Hand Painted Texturing
Before I heard about substance painter I tried to use blenders built in Texture Painter to create hand painted textures using a drawing tablet, the texture painter is that great making it harder to texture my mesh, to help me understand it more I watched some videos by Grant Abbitt:
youtube
Grant's tutorials are good at showing off how to hand paint and how to use texture painter, when I tried to follow the tutorials I couldn't manage to get the results I was hoping for as the brush tools aren't the best and grant makes it look easier than it is.
My attempt at hand painting in Blender
UV Unwrapping
To begin painting the mesh needs to be unwrapped so that there is area to paint on without the UV's showing the same texture, the more polygons a mesh has the harder it will be to unwrap it which means there will need to be edge seams added to the mesh that work like sewing lines in clothes, this makes it easier for the UV's to be organised. The bigger the UV islands the higher the quality of the texture in that area and vice versa, the smaller mesh parts should have smaller UV islands to avoid bigger parts of mesh having lower quality. It was hard to get used to UV unwrapping, the key to getting good results when unwrapping with seams is to mark the top, bottom and a seam connecting them down the middle
Example
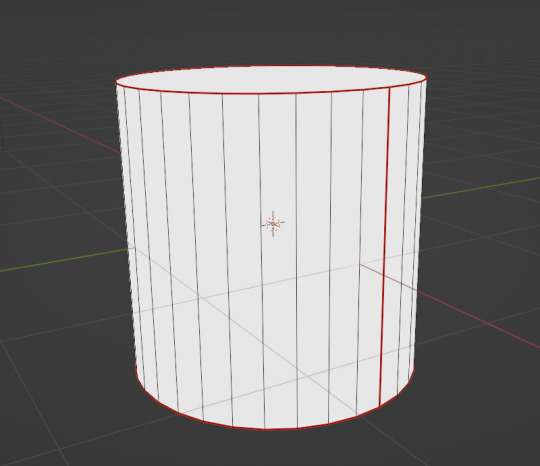
Using this method the UV's get laid out flat meaning the textures can be high quality. if the UV's aren't marked correctly then they will be crushed together when they are unwrapped making the textures appear stretched and distorted, good UV's lead to good textures.
0 notes
Text
Progression in modelling and texturing
Beginning Texturing and Modelling
Ever since I started using Blender back in 2021 I have always had a vision on what I want my models and textures to look like, at the start I created very low poly models that didn't look too good on there own but I created texture sheets in Photoshop that roughly covered each UV. The textures I made in photoshop were very basic and flat, I was trying to make the set look cartoonish but my lack of knowledge at the time caused my textures to look stretched, I also didn't know much about Blender's texture nodes and so left all the textures with specular light reflections which is painfully obvious when looking at any renders of the set...
My first set of models and textures:

Advancing knowledge
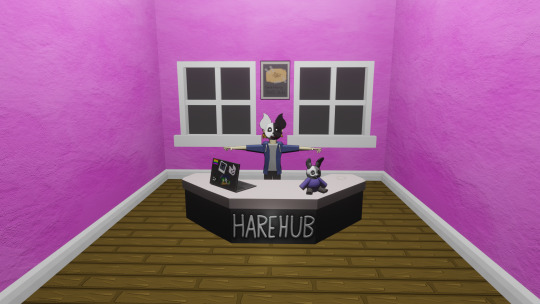
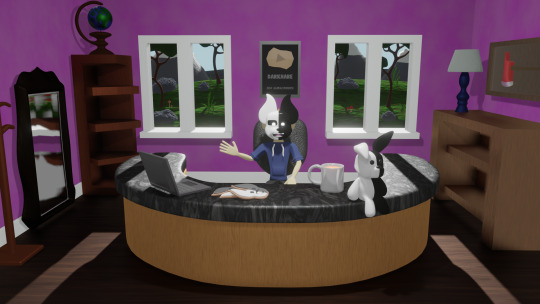
My goal is to make a show featuring the two characters pictured above, going in to Blender I thought making a good looking model with high quality textures would be easy but two years later I am still developing my skills and experimenting with different styles as there is a line between what is good enough in quality and good enough for what you have visioned, choosing a style is not easy when your mind is constantly changing and new and trendy styles are being introduced. Once I started to get a better grip on Blender I decided to remake my set and characters to better suit my progression, I also made a poor decision when I chose to keep the low poly style as I thought it looked unique, I was right as it did look interesting but only really works if its being used in a game.
Creation of the second set 01:
When making the walls for this set I first learned about the Bump node which calculates light hitting the textures differently to give the illusion that the wall has depth even if its a simple cuboid with only four vertices.
youtube
This video does a good job of explaining the basic steps to making a bump texture for users only just starting Blender, whenever I found I needed to learn something I would find a video like this and save it to my watch later list so I could easily find them and watch them back. The bump node can make textures look very realistic without having the scene take up a lot of data which is useful for making models in games that require low usage to run well.
Creation of my second set 02
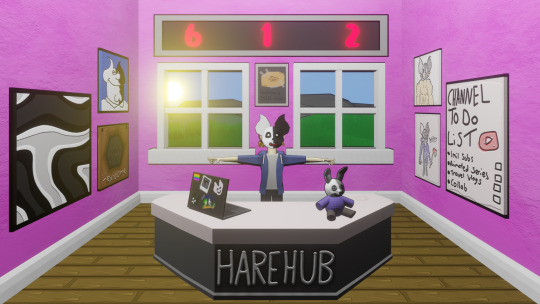
at this stage I was familiar with blenders user interface and was beginning to make my set look neat with organised UV's, I also made a new style choice by using Back-Face Culling to give my models a black outline like a cartoon character which I really liked, back-face culling is where a texture can only be seen from one side as the other side is out of view to the viewer. The outlines didn't really work on this model as the low poly design causes deformation issues.
youtube
This video explains how to create a cartoon outline for a model, the problem with this method is that it requires the mesh of the model to be duplicated which depending on how many vertices the model has could be a problem for data usage.
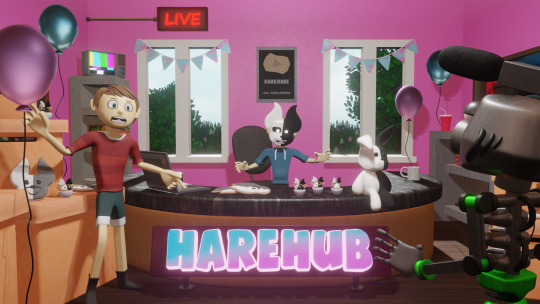
Creation of my second set 03
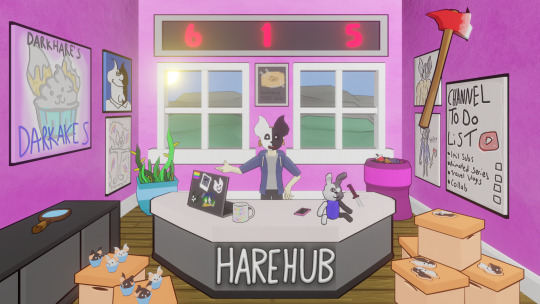
This was the final design of my second set, to some people it could be seen as finished and I could have started my show, unfortunately though I was not happy with this design by the time I finished it due to my interests shifting away from the low poly style and flat texturing making it hard to want to continue with the show in its current form. the only solution was to try again and experiment with other styles.
Procedural texturing
Blender has the capabilities to create textures in software without the use of texture files and UV mapping, to a beginner this sounds like a perfect way to make your models and sets more interesting.
youtube
This tutorial shows how procedural textures work inside Blender, it can be a somewhat long and tedious task to create a good looking texture but if it saves having to UV map an object it could be worth it.
Third set design with procedural materials 01:
Using procedural materials I was able to make my new set look a lot more detailed then the previous one, especially with the models being more high poly. Something about procedural textures is very out of place and noticeable which is not what I was looking for.
Third set design with procedural materials 02:
after a little more development the set gained more props and models with procedural textures, after seeing the final result I knew a more realistic style without using procedural materials was the best course of action. My modelling skills are good due to how many models I have been making but my texturing skills were lacking as I had only created basic flat and procedural textures, to find a solution to this problem I looked into different methods of texturing including hand drawing which I found to be difficult and time consuming. eventually I found out about substance painter and its layered texturing abilities and so I decided to look into it over the summer break.
2 notes
·
View notes