
deaminervad
3D Visualisation
Hi, I'm Dea Daniel. I'm interested in developing interior architecture model and animation that focus on organic shape. Here's my design process and inspiration
55 posts
Don't wanna be here? Send us removal request.
Last Seen Blogs
maisonmart
maisonmart™

golden-witch-of-rokkenjima-1986
Say it in red: Umineko thoughts & recreations

rawgreys
Untitled

flowerjoseph8-blog
Bojsen's Website
aridraco
Ari Draco
Text
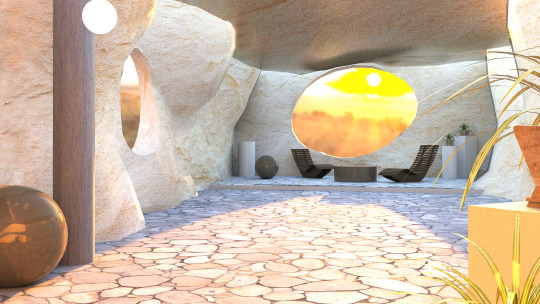
La Caverna
I called this project “La Caverna”. It is Spanish for “Cave” because the ambiance of this holiday house’s interior resembling a cave that has organic shapes in it. I simply choose Spanish because I was inspired a lot by Gaudi in developing this 3D. As a first-timer, I’m quite happy with the result because it kinda achieves the warm and intimate impression that I have in my initial idea.
0 notes
Text
Unknown error in UV Mapping
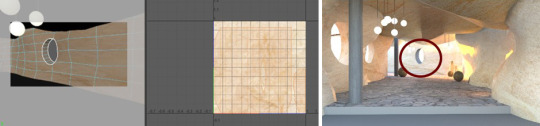
I noticed a missing texture in one of my window. Although it was shown in the UV shell, the texture is not appear in the 3D. It was one of the unknown error that I experienced so far.
0 notes
Audio
I choose this audio as my background music in the animation. It sounds soothing and relaxing, suits the walkthrough animation.
0 notes
Photo
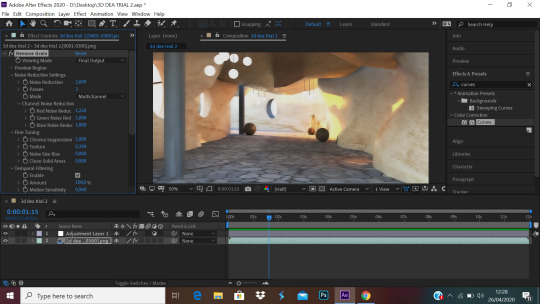
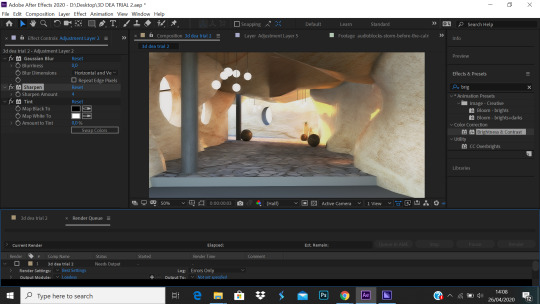
#12 Animation in After Effect
After all frames have been rendered, I combine it into an animation in After Effect and add a music as a background sound. I also did a touch up for the animation to optimise the render result such as reducing noise, adjusting the colour and saturation, etc.
0 notes
Photo
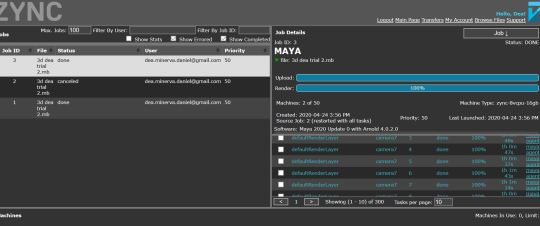
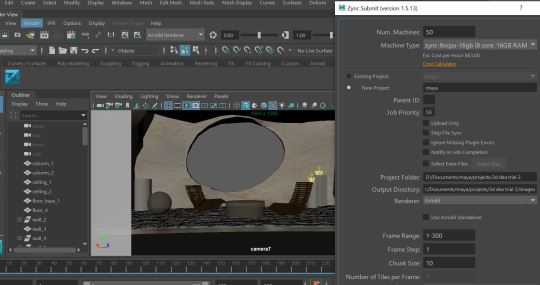
#11 Zync Render/ Google Cloud Render
I uploaded my Maya animation in Zync/ Google Cloud rendering. There are 300 frame in total and the render took about 6 hours. As a first time user, I can use up to 50 machine. This cloud rendering was really helpful comparing to normal rendering with my own machine.
0 notes
Photo
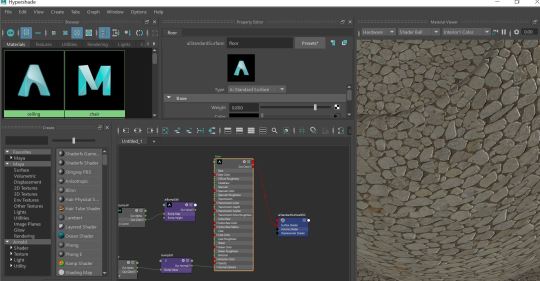
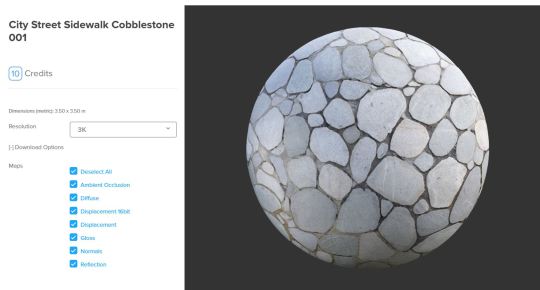
#10 Poliigon Texture
Initially, I used bump map and roughness map with a few adjustment for the floor texture. Even though it appeared in the shader ball, the stone texture on the floor was not shown enough in the render . To overcome this issue, I ended up using Poliigon Texture. Poliigon texture was really helpful because it has the hypershade texture automatically.
0 notes
Photo
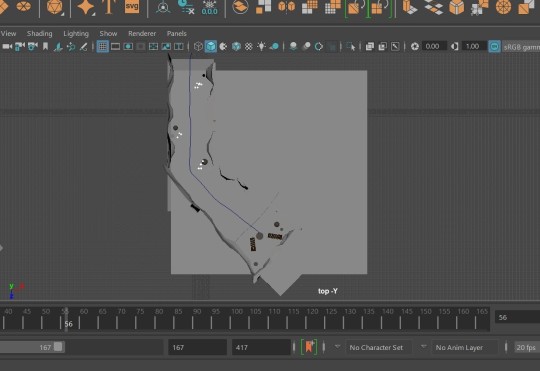
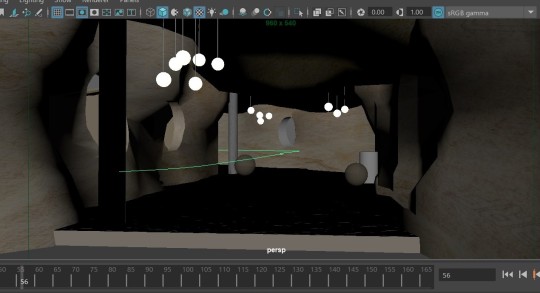
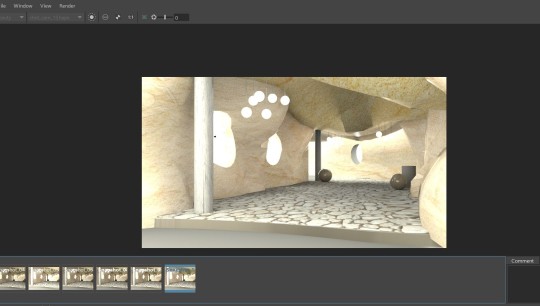
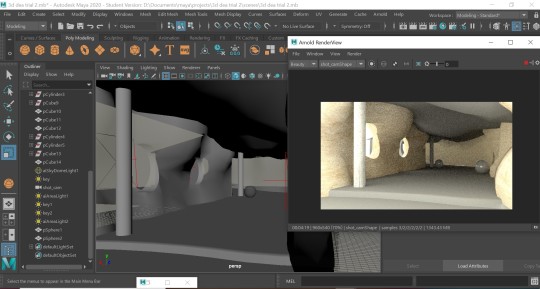
#9 Camera Movement and Playblast
I tried to adjust the camera movement by making a curve based on the walkthrough and attached the camera with the curve. It is a bit challenging to manage the camera so it will show the floor steps at the beginning of the animation and end up with a nice view facing the chairs and window. After doing several test and adjusting some settings, I create a Playblast as an overview of the animation. Overall, the camera speed is good enough and the walkthrough animation does not look too fast
0 notes
Photo
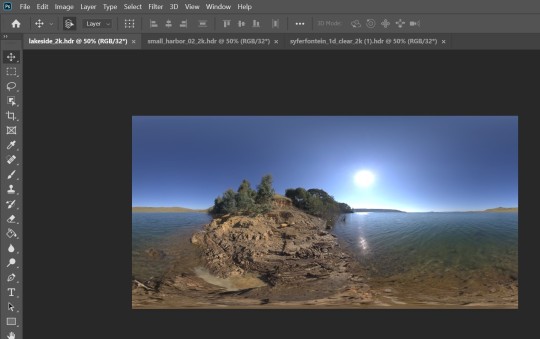
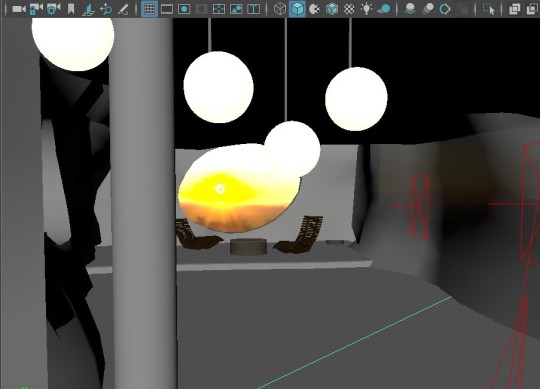
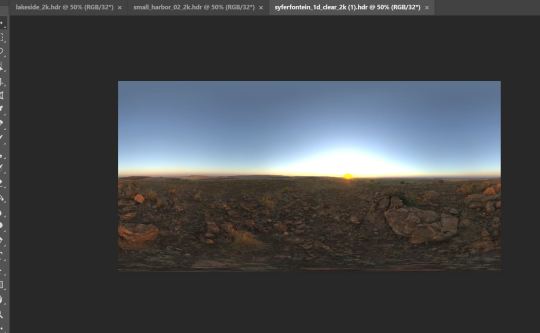

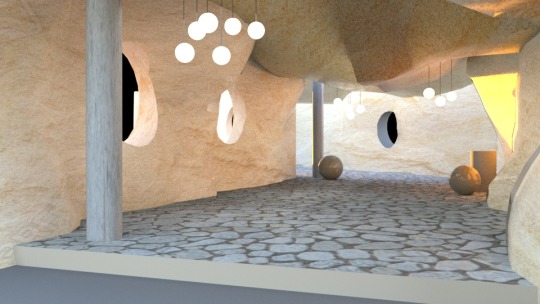
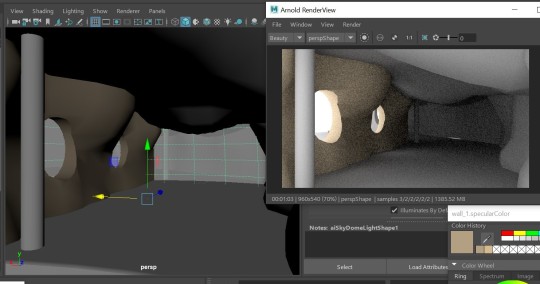
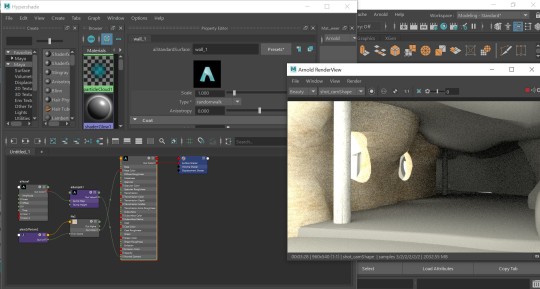
#8 Adding HDRI Image in Sky Dome light
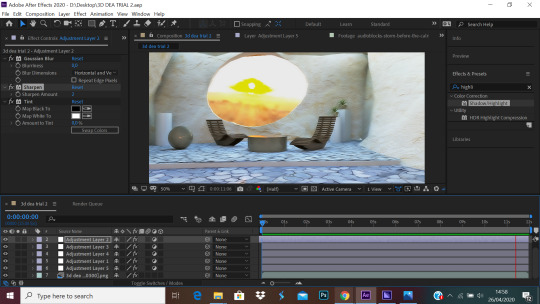
First time trying HDRI image, I got a very shocking result where my interior space became very blue! I was confused and thought that it was the effect that appeared from the HDRI image I selected. I downloaded other HDRI images and selected one HDRI image with sunset ambiance. I positioned the sunset near the window which would later appear in the final scene. Although the lighting effect is much better, the results that I get are still quite bluish. This result can be touched up later in After Effect
0 notes
Photo
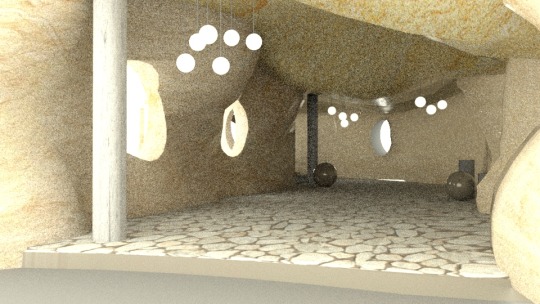
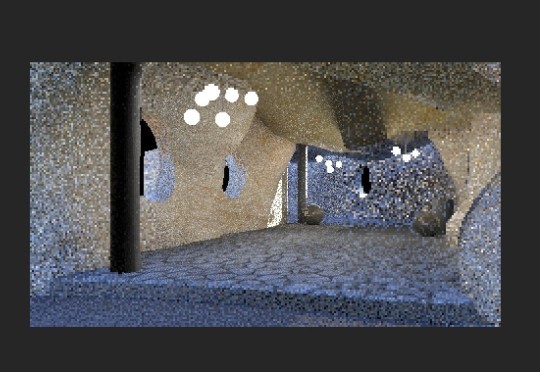
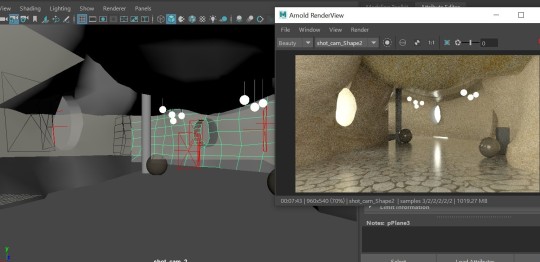
#7 Adjust the Lighting
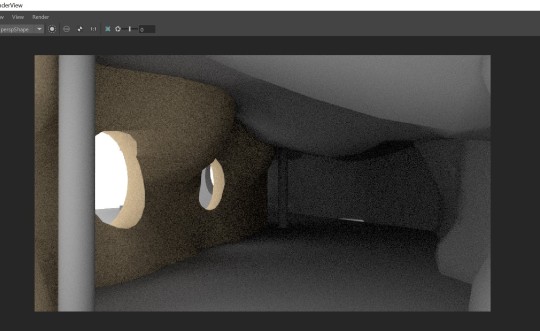
Adjusting lighting is a big challenge that I face in this project (and make me really desperate). I did a test rendering after adding Sky Dome light and Area light, however, the results that I got still had a lot of noise. I tried to play with the lighting intensity and lighting sample but it did not give a significant effect before. The imbalance lighting might be caused by the form of the organic walls that were curvy hence there are several areas that had less lighting than other areas. After discussing it, changing the sample value of the camera, diffuse, specular, transmission and SSS helped a lot and made the render quality better. Adding some Area lights in dark corners also helped this situation. However, the lighting results were not perfect and still need to be adjusted by adding HDRI images to the SkyDome light and (maybe) adjusting other settings
0 notes
Photo
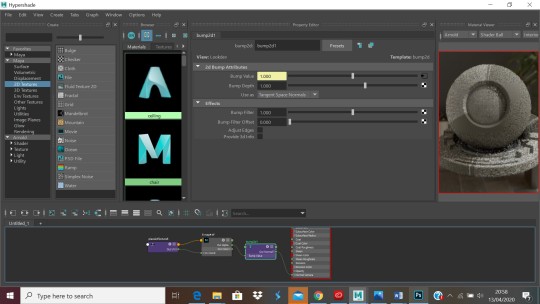

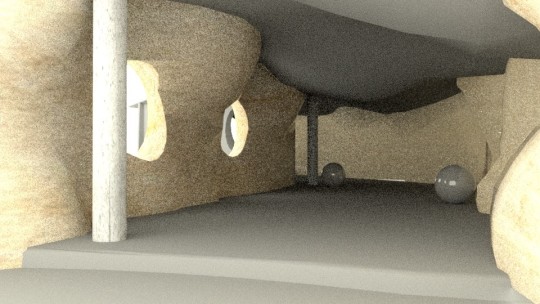
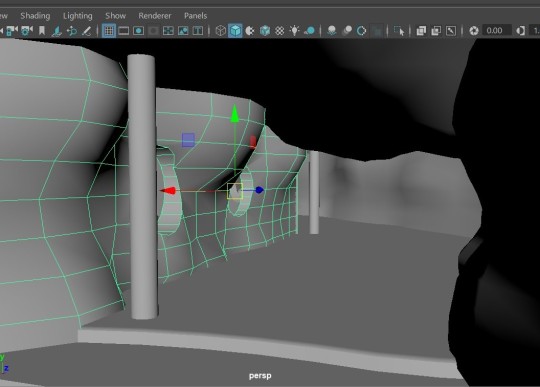
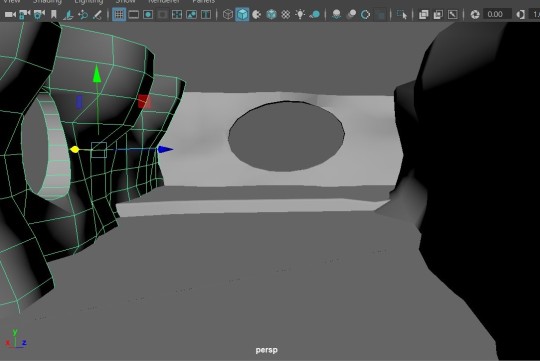
6# Applying Roughness Map and Bump Map on the Stone Floor
After modifying the 3D shape and inserting the texture, the floor was shiny and flat and did not have rough effect like a stone. I tried to apply the bump map and roughness map as in the dice and chair tutorial so it will give a texture
0 notes
Photo
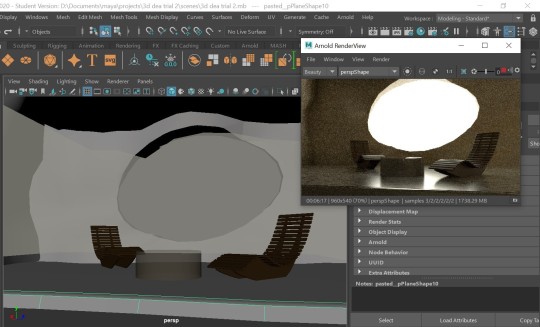
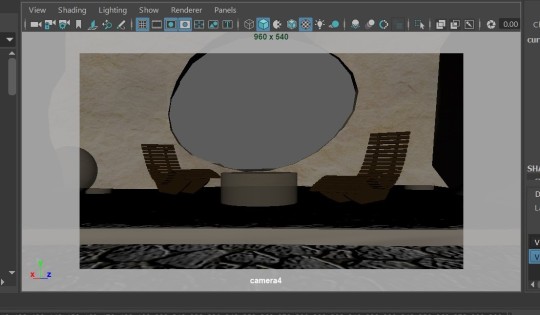
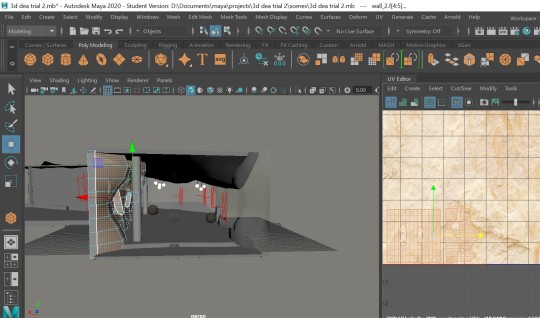
5# Finalising 3D for Final Scene
Like in the storyboard, the animation will end with a scene that became the focal point of the walk through. The final scene concept is a seating space that facing a lake view while sunset. I download a chair model from one of free 3D object websites.
0 notes
Photo
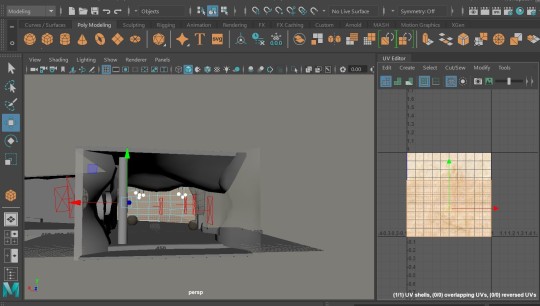

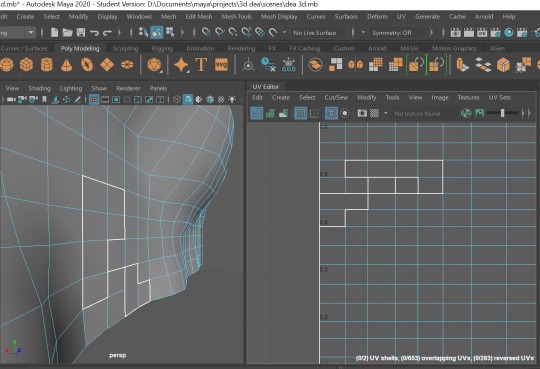
4# UV Mapping
I am glad that my UV shell is not that complicated. After watching the head tutorial couple weeks ago, I was worried that the UV shell of my 3D shape will be very complex. As my walls are mostly made of planes, it was not as difficult as I imagined. I also only include the UV shell which will be seen in the perspective of the camera later. Additionally, I did a few adjustment in the UV shell such as cut, sew, move, rotate, and scale
0 notes
Photo
3# Trying to Apply Material on the Model
After making my basic 3D shapes, I tried to insert material in the 3D shape by testing it in one of my walls. Before applying texture, I chose random colour just to see the effect of sky dome light on the material. Moreover, I tried to apply texture and adjust it in Hyper shade. Honestly, I feel very nervous because I am very new to this software and adjusting the texture in Hyper shade looks quite complicated to me. I tried to add noise and bump on the wall (like the lemon tutorial) but because the rendering result was very noise I could not see any effect.
0 notes
Photo
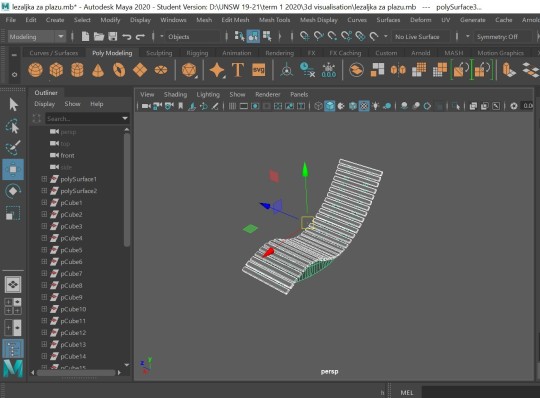
2# Weird Lines on one of UV Shells
After creating a 3D shape, I tried to check the UV shell of that shape. I found an odd lines in one wall that I made. After discussing with Anna, by using cut and sew, the UV shell can be fixed.
I continued to finish my basic 3D shapes for my model. I use Boolean to make openings on the wall hence light from the exterior can enter the interior space
0 notes