
Don't wanna be here? Send us removal request.
Statistics
We looked inside some of the posts by decadentpeachwasteland and here's what we found interesting.
Average Info
Notes Per Post
0
Likes Per Post
0
Reblog Per Post
0
Reply Per Post
0
Time Between Posts
4 days
Number of Posts By Type
Text
17
Last Seen Tumblr Blogs


Fun Fact
Users from the US are the majority of Tumblr visitors.
Text
Deleted Apps Still Show In Storage Mac

/Mac Cleaner /Top 2 Ways to Remove Mac Purgeable Space [2020 Update]
Deleted Apps Still Show In Storage Mac 2019
My Deleted Apps
Deleted Apps Still Show In Storage Mac Os
I’m a Mac user and I use it for storing large-sized files. I’m a video special effects specialist and I am responsible for my company’s large video files. I just heard about the Purgeable storage in macOS Sierra. What is it? Can you tell me more about this Purgeable storage?
You’re in the right place. I'll show you about what is Mac Purgeable space and how to remove purgeable space on Mac. Tips: iMyMac PowerMyMac can help you easily clean up your Mac to remove purgeable space, just have a free trial below.
Article GuidePart 1. What is Mac Purgeable Space?Part 2. How to Manage Your Mac Storage?Part 3. How to Remove Purgeable Space on Mac?Part 4. Bonus Tip: How to Preview Purgeable Storage In Your Sierra?Part 5. In Conclusion
So as you delete pictures you don't reduce the size of the app until you empty the Photos trash. This was making my crazy until i figured it out! On the current Photos app, the Recently Deleted folder is available from the left-hand folders pane. On earlier versions it's available from the File menu, under 'Show Recently Deleted'. When Apple added its storage management feature to macOS Sierra and newer, called Optimize Storage, it reorganized what 'other' storage is and where it's located on the Mac. Much of it has been divided out through other categories so it's easier to find and remove. The 100GB of Other storage I used to carry on my iMac is whittled down to just 5GB.
People Also Read:2020 Top Tips to System Has Run Out of Application MemoryHow Much Space Does Mac OS Take?
Part 1. What is Mac Purgeable Space?
What's the meaning of Purgeable? Mac Purgeable Space is actually related to the Optimized storage feature of your macOS Sierra. Apple didn’t make your hard drive space bigger. What they’ve done is to handle the limited space on your Macintosh with the help of cloud storage. This, in turn, made one part of your storage bar and turned it into a piece called “Purgeable.”
You must notice that there is other and purgeable in about this Mac. Now, let’s dive more into detail with the said slice of the storage pie. Purgeable storage actually contains files that your macOS refers to as suited for removal.
That’s why it’s called purgeable, it can actually be deleted from your drive without causing any issues. If Optimized storage is activated, a lot of files gets transferred to the cloud. Some of them are referred to as optional files.
Tip:How to deal with the issue of 'Your startup disk full'?
Purgeable Files: Which Ones Are Considered Such?
No one is 100% sure as to which files are considered purgeable. Some guessed that files and system-generated files that have these two criteria are considered purgeable:
Super old files you have not used or opened for a really long time.
Files that are already synced to iCloud. Thus, the original file can be removed on your Mac device since it already has a copy on iCloud.
Mac Purgeable files vary in types. It can be any type out there. It can be movies you watched on iTunes. Or, it can also be language files you have never used before. The type of language files that your system hasn’t displayed cause you might not need it or might not understand it.

However, what renders these files purgeable and what does it actually mean? The system on your device looks for these files. It knows that when your Mac is about to run out of disk space and your Optimized Storage is activated, it can automatically delete these files to free your storage of space.
Part 2. How to Manage Your Mac Storage?
You may use a computer to store all your files like photos and videos, then you will have a hard time finding more available space on your Mac's internal drive. So you can get some space by managing and optimizing storage on your Mac.
When you choose to manage your computer's storage space, there are 4 parts to operate. Let's first see how to find these options:
Click About This Mac under the Apple Menu.
Select and click the Storage tab, you will see your available macOS storage.
Press Manage, you will now access storage management options.
Select Recommendations from the left column.
Now you will see 4 options including Store in iCloud, Optimize Storage, Empty Trash Automatically and Reduce Clutter. Let's discuss how to use them to help you manage your storage separately:
Store in iCloud
With this option, icloud stores only the latest files and optimized photos, and icloud downloads them when you need them. In this way, it saves a lot of storage space.
Optimize Storage
When choosing this option, the purgeable categories are added to your storage details. After clicking the Optimize Storage button, there are iTunes movies and attachments you can manage specifically to save your Mac storage.
Empty Trash Automatically
This option allows you set Mac delete items from the Trash automatically after saving for 30 days. Just select Finder>Preferences>Advanced>Check the box that says 'Remove Items from the Trash after 30 days'.
Reduce Clutter
This option allows you to select and delete any files you unneeded anymore to save some space on Mac. By pressing Review Files button, you will see a new window jumps out and shows you all the apps and files stored on your Mac. You can delete by file type (selected in the sidebar).
Tip: You can uninstall unneeded apps on your Mac completely with PowerMyMac Uninstaller, here shows you how to uninstall OneDrive on Mac as a reference.
Part 3. How to Remove Purgeable Space on Mac?
This is very easy. All you need is a tool called iMyMac PowerMyMac. With this tool, you can find all useless files on your device and delete purgeable space on Mac with a few clicks. You can know more useful cleaners form here.
Here is how to use iMyMac PowerMyMac to remove purgeable space on Mac Mojave, Catalina, or High Sierra step by step, try the steps below:
Download And Open iMyMac PowerMyMac.
Scanning System Junk.
Review Items And Select Which To Delete.
Clean Up Finished.
Step 1. Download And Open iMyMac PowerMyMac
Download the iMyMac PowerMyMac on your computer and open it. The main screen will appear and it will display the Network condition. Click the module named Master Scan on the left-hand side.
Step 2. Scanning System Junk
Click the Master Scan button and wait. The scanning process will start and wait for it to finish. After it is completed, it will display all Junk files to you.
The Junk files will be classified into different categories including Application Cache, Photo Cache, Mail Cache, System Logs, System Cache, and System Trash, among others.
Note: You can click Rescan to scan your device again.
Step 3. Review Items And Select Which To Delete
Click a certain category. And then review the files found on the right-hand side of the screen. Select the files you want to delete. After which click the Clean button.
Step 4. Clean Up Finished
The junk files will now be erased. It will then show folders marked as Zero KB. Other folders will not be shown as Zero KB because they are auto-recreated folders.
Repeat steps 1 to 4. But in this case, select UNINSTALLER or LARGE & OLD FILES instead of Master Scan.
How to Remove Purgeable Storage On Your Device?
Actually, you don’t need to do this by yourself. But if you wish to do so, you can move to the next part of this guide.
Mac Purgeable space is there in that whenever your device is running out of space, you will be safe knowing that it will automatically clear up the allocated purgeable space.
This will lead to more free space on your Mac. The best thing to do for you to avoid lifting a finger is to activate other Storage. In this way, your device will automatically purge the said files. To do this, follow the steps below:
Go to the About This Mac menu.
Next, go to the Storage tab.
After which, press Manage.
Now, you have the ability to activate a particular option that you wish to be synced to iCloud.
Part 4. Bonus Tip: How to Preview Purgeable Storage In Your Sierra?
You may use Sierra or High Sierra on your Mac, and there must be some Mac purgeable storages.
Best budget apps. You have the ability to check out the amount of space in your Sierra can purge in a variety of places:
The first method you can do is to check your native storage tab. You can access this tab by going to the Apple Menu and selecting About This Mac. Then, you go to the tab named Storage.
You can also view it on your Finder’s Status Bar. To display your Status Bar, you should click View and then press Show Status Bar.
The third option is to go to the top menu and click Go. Then, select Computer. Next, right-click on the hard drive. Then, go to getting Info.
The fourth option would be to click View. Then, go to the Options panel. This will activate the Desktop display of hard disks.
The final option would be to ask Siri about how much space you have left on your device.
Part 5. In Conclusion
Purgeable space on Mac is one way your device works smarter instead of harder. Instead of putting a bigger disk space on your Mac, you are given an optimization feature. Purgeable files are files that can be removed without causing issues to your device. It is automatically deleted on your device if Optimized Storage is turned on.
However, if you find your Mac is running slowly and want to delete more unnecessary files on your system, you can use a tool like iMyMac PowerMyMac. For example, it can help you find all your images stored on your Mac and remove the duplicates. It helps you scan your device for unneeded files and delete them completely without causing harm to your device.
ExcellentThanks for your rating.
Rating: 4.5 / 5 (based on 98 ratings)
People Also Read:
PowerMyMac
A powerful all-in-one App for Mac
Free Download
Comment ()
Willan2019-10-04 10:10:05
I've tried many ways manually, they lost my time and I felt troublesome. So I turned to a third-party to help me. Luckily, iMyMac Mac Cleaner mentioned in this post satisfied my needs and saved my time.
Add Emails To Messages App on Mac. In addition to iMessage, the Messages App on your Mac supports most third party Messaging services like Outlook, Gmail, Hotmail and others. In order to use these services, you will need to add them to the Messages App on your Mac. Open the Messages app on your Mac. Messages app on mac. Learn more about sending and receiving text messages, photos, personal effects and more with the Messages app on your iPhone, iPad, Apple Watch, and Mac.
iMyMac2019-10-04 11:03:06
Thanks for your support!
Velin2019-10-08 09:35:56

I totally agree that we should remove purgeable space on our Mac because that really helps us save much storage space. Thanks for your tips! They work well for me.
iMyMac2019-10-08 11:40:20
Thanks for your support!
Abby H2019-06-28 11:04:07
National Clean Out Your Computer Day! It's a great idea to nudge me into doing some cleaning. After reading this post, I have been using iMyMac Mac Cleaner to remove purgeable space on my Mac to save more storage. It helps a lot to organize my Mac regularly.
iMyMac2019-06-28 13:47:23
Thanks for your support!
Cathy2019-05-21 10:06:05
I bought my MacBook at my first college year. It companied me all the time through my college years. So the full storage thing really bothered me. Lots of solutions have I tried. Then I have tried the first way mentioned in this post about using Mac Cleaner to remove purgeable space on my Mac, it really helps! Thanks so much, pretty happy!
iMyMac2019-05-21 11:01:05
Thanks for your support and happy to hear that!
KHUY PY2019-04-04 15:14:26
I found in Get Info. of may hard disk, the 38.49 GB purgeable. and How to delete this unused space?ThanksPy
The second line is the command prompt which is where you enter the commands you wish to execute. The Activity Monitor Application How to Use TerminalThe first step is to open Terminal either from the Applications - Utilities folder or simply type Terminal into Spotlight. Terminal is always represented by the icon below.Once it opens you’ll be presented with a standard Terminal window as below.The first line shows the date and time when you last logged in. How to force kill an app in mac.
iMyMac2019-04-04 17:08:06
Thanks for your support! You can just check the Part 3 in this article, there are detailed steps to help you delete that unused space. Hope that really help you!
Clean up and speed up your Mac with ease
Free Download
Use Launchpad to delete an app
Launchpad offers a convenient way to delete apps that were downloaded from the App Store.
Deleted Apps Still Show In Storage Mac 2019
To open Launchpad, click it in the Dock or open it from your Applications folder. You can also pinch closed with your thumb and three fingers on your trackpad.
If you don't see the app in Launchpad, type its name in the search field at the top of the screen. Or swipe right or left with two fingers on your trackpad to show the next or previous page.
Press and hold the Option (⌥) key, or click and hold any app until the apps jiggle.
Click next to the app that you want to delete, then click Delete to confirm. The app is deleted immediately. Apps that don't show either didn't come from the App Store or are required by your Mac. To delete an app that didn't come from the App Store, use the Finder instead.
Deleting an app doesn't cancel any subscription you may have purchased with that app. Learn how to cancel subscriptions for apps that were downloaded from the App Store.
Use the Finder to delete an app
Locate the app in the Finder. Most apps are in your Applications folder, which you can open by clicking Applications in the sidebar of any Finder window. Or use Spotlight to find the app, then press and hold the Command (⌘) key while double-clicking the app in Spotlight.
Drag the app to the Trash, or select the app and choose File > Move to Trash.
If you're asked for a user name and password, enter the name and password of an administrator account on your Mac. This is probably the name and password you use to log in to your Mac.
To delete the app, choose Finder > Empty Trash.
My Deleted Apps
Learn more
Deleted Apps Still Show In Storage Mac Os
To use an app again after deleting it, either reinstall it or restore it from a backup.
To reinstall apps that were installed as part of macOS, reinstall macOS. This applies to apps such as Safari, iTunes, Books, Messages, Mail, Calendar, Photos, and FaceTime.
You can also redownload apps, music, movies, TV shows, and books that were installed from the App Store, iTunes Store, or Apple Books.
Learn how to delete apps on your iPhone, iPad, and iPod touch.
Learn what to do if the Dock contains an icon with a question mark.
0 notes
Text
Best Rar App For Mac Free

7-Zip for macOS — Download Best File Archiver for Mac August 17, 2020 August 17, 2020 by Alan Hughes Download 7-Zip for MacOS. 7Zip is a great app that should be included on iTunes. This application's bundle is identified as jp.sourceforge.mikuinstaller.NegiHelper. This free Mac app is an intellectual property of Rarlab. The most popular version among WinRAR for Mac users is 4.0. The latest version of the application can be installed on Mac OS X 10.5 or later. This Mac download was checked by our antivirus and was rated as. The Unarchiver: The Unarchiver software is available on the Mac App Store and could be. Messages app on mac. Download Free iZip is the best way to manage archives on MAC OS X. IZip is the easiest way to manage ZIP, ZIPX, RAR, TAR, 7ZIP and other compressed files on your Mac. Best of all it's completely free so you can zip, unzip & unrar your files without limitations! Download Free; View Features; Screenshots.
Rar For Mac
Download Rar For Mac Free
Best Free Rar App For Mac
Freeware
macOS
3.3 MB
62,944
Features:
Cloud backup and restore.3. Support multiple accounts.2. Monthly budget app mac.
Extract files from Rar,Zip,Tar,Gz,Bz2,7z files.
Support extracting password-protected archive files,but you must know the password.
Batch extracting.
Double click to extract archive files to extract archive.
Drag and drop archive files to the dock icon to extract archive.
What's New:
Add user-defined Settings.
Fixes other minor bugs.
Fixes other minor bugs.
Software similar to RAR Extractor Free for Mac 4
75 votes
The Unarchiver is a much more capable replacement for 'Archive Utility.app', the built-in archive extraction program on macOS.
Freeware
macOS
2031 votes
WinRAR is a powerful archive manager. It can backup your data and reduce the size of email attachments, decompress RAR, ZIP and other files.
Freeware
macOS
22 votes
WinZip is bar none, the most popular and useful file compression utility out there.
Free to Try
macOS
When you are trying to convert some of the RAR files that you have on your system to ZIP File, then a convert RAR to ZIP software can be used. These RAR to ZIP converter free download are available for free and can be used very easily. Many RAR to ZIP converter software, free download are available online. Some of these RAR to ZIP converter download will be able to do the converting process without any loss.
Related:
Zamzar – RAR to ZIP
This free software can be used online for converting RAR files into ZIP files. The file that has to be converted can be uploaded onto the interface from a local location or using a URL. The format that the file has to be converted into should be selected and your email address has to be provided. The converted file will be sent to the mail that was provided.
Convert RAR to ZIP
This software can be used for free to compress the data which is used for many applications like backups, data exchange, etc. The file can be simply uploaded from a local location or from the cloud using Dropbox or Google Drive. The format that the file has to be converted into should be selected so that the converted file could be downloaded.

Convert RAR to ZIP
Rar For Mac
This software can be used online for free to convert the RAR files. The software will be able to support the conversion of many types of files like audio, document, eBook, etc. The file that has to be converted should be uploaded from the cloud and then it can be converted. The uploaded file is deleted from the server after the conversion is done.
RAR to ZIP Converter for Android
This freeware is compatible with the Windows platform and can be used for converting the not-so-popular RAR files to the universal ZIP files. Instead of opening the RAR files, extract it to a folder and then re-pack it to ZIP files, users will be able to use the easy method of uploading the file to the software so that it can do the converting process. It is fast and offers different levels of compression.
Download Rar For Mac Free
Convert RAR to ZIP for Mac
This free software can be used on the Mac platform to archive and unarchive the files and it will be able to show previews of the contents in batches. Archives can be created and extracted by simply dragging and dropping it on the interface and the final output file can be saved in different formats.
Free RAR to ZIP Converter for Windows
This freeware can be used on the Windows platform to convert the compressed file types. The software will be able to unpack the RAR file and the data will be read before the conversion begins. It can be used by anyone.
RAR File Converter – Most Popular Software
This is a very popular freeware that can be used to convert the RAR compression files or normal folders. The output files can be obtained in different formats and it also supports different levels of compression. The software can be used to open password protected files.
How to Install RAR to ZIP?
Most of the RAR to ZIP convert software are available for free and can be used to convert the files. Based upon the requirement the software can either be used online or it can be downloaded. If the software is used online then the compatibility with the browser has to be checked and an active internet connection should be present.
Or choose Force Quit from the Apple menu in the upper-left corner of your screen. (This is similar to pressing Control-Alt-Delete on a PC.) Then select the app in the Force Quit window and click Force Quit. You can even force the Finder to quit, if it stops responding: Select Finder in the Force. How to force kill an app in mac. To force quit an application using the Activity Monitor, first select it in the list. Next, click the “X” button at top-left. You’ll be asked if you’re sure you want to force quit the application. Click “Force Quit” and the application should close instantly. The “Quit” option, which is the default, probably won’t work to.
If the file has to be downloaded, then the download link can be used and the file can be installed in any desired location.This software can be used to convert the RAR files into different formats and it will also be able to support different levels of compression. Some of the software will require a .NET framework to work and can be used to convert even password protected files.
Best Free Rar App For Mac
Related Posts
0 notes
Text
Monthly Budget App Mac

Monthly Budget App Mac Free
Best Budget Apps
Mac Budget Software
Home Budget For Mac
Monthly Budget Application Template
Monthly Budget App Mac Desktop
You Need a Budget has quickly grown from a financial management app to one of the strongest financial brands and possible the best budget app for Mac, a suite of powerful products that manage to. The world is now advanced and so there is no need to strain with paperwork. Instead of buying a book to draw on, you can simply download a budget template for Mac where you find everything already done for you; all you need to do is fill in details. Download a budget tracker template for free today and enjoy time and cost flexibility. Despite the launch of Quicken, the makers have continued to develop SEE Finance into a very reliable, robust and feature packed personal budgeting app for Mac. In fact the latest version of SEE Finance 2 has been built from the ground up and is a big improvement on SEE Finance 1 in terms of both looks, functionality and affordability. Mint has been around a long time and is a very well known budgeting app. It’s very easy to use. Mvelopes gives you the tools to track your daily spending while keeping your weekly or monthly budget in focus. The app features an “envelope budgeting” system that helps you plan as well as. Fudget is a simple and fast alternative to feature-rich, complex budget planner / personal finance apps. There are no categories to manage, no charts to interpret and no learning curve. Create simple lists of incomings & expenses - keep track of the balance; One-tap adding and editing; Star an income/expense to repeat it on future budgets.
Budgeting is a discipline that’s not often met with excitement. Many assume that budgeting is something reserved for companies or, say, freelance workers. However, personal budget software is just as important as corporate one — it’s a fundamental understanding of where money is coming and going.
You may consider it to be boring, tiring, time-consuming, or difficult, but managing your finances well can help you achieve goals and stave off the stress of a rainy day. Thankfully, there are tools and apps on Mac which can help you get on top of budgeting, no matter how experienced you are.
Why Should I Use Budget Tracking Software?
If you haven’t done a budget before, you should start now. You never know when you might need a particular sum of money to solve an issue, meet a goal, or take advantage of a sudden opportunity.
Budget programs help you reduce the stress and uncertainty that comes with not knowing where you stand financially. If you don’t have a home budget software, you might be tracking towards a situation where you run out of money, without even knowing it. If you do have a budget, then you’ll have a documented plan of action to improve your situation.
Open Apple Numbers In Your MAC or PC. Now, it's time to pull up Apple Numbers or any other budget apps on your MAC or PC and create a new file. To make your task a little easy, choose some of the ready-made budget planner or budget templates that are available Apple Pages. Then, once you feel that you are done, hit the 'save' button.
Importantly, you don’t need any qualifications to do a budget, nor do you need to be good with numbers. Take advantage of the best budget software for Mac to help you take control of your finances without the hassle. Budgeting tools come in many shapes and sizes, so selecting the right one for you depends on personal preference and previous experience with managing money.
Monthly Budget App Mac Free
Handy tips for budgeting tools
If you’re ready to start your budget, it’s best to consider a strategic approach to ensure maximum utility. Too often, budgets sit collecting dust after being created, and sometimes the act of creating a budget could feel like enough to satisfy financial concerns — it’s not. Here are some tips for making the most out of your budget.
First of all, definitely use an app to help you manage a budget. App developers invest a lot of time and money into figuring out how their software can make your life easier and better, so rather than trying to understand all the nuances for yourself, let a dedicated app do it for you. There’s even some free budget software around, so you have very few excuses not to try!
If you run a business (or freelance on a side), a little bit of work each week means end of year taxes are a breeze. It’s not about doing a marathon of work in a few days, but making a habit to consistently do a little bit here and there. Try aiming for 10 minutes every few days. The best tax preparation software will also have reminders and notifications to help you achieve this goal.
It might sound contradictory, but budgeting isn’t always about getting the numbers 100% accurate. When it comes to tax preparation software — sure. But budgeting is mostly about understanding where your money is being spent and then using that information to make more informed decisions going forward. Therefore, make sure you categorize your transactions so that it’s easier to spot those minutiae differences and trends. The best finance apps should do this for you automatically.
In summary, you want to ensure you take advantage of the online budgeting tools available to you, aim to update your records frequently, and focus on categorization over accuracy.
Features of good personal budget software
The best personal budget software for Mac is easier to pin down when you know exactly what you’re looking for. Not all apps are the same — they vary by function and pricing. Generally speaking, there are a few key features you want to see in your budget software for Mac:
It should be simple and easy to add new records or transactions
Importing bank and credit card statements should be possible
Automatically synchronizing statements will take the edge off your manual inputting
Useful dashboards or visuals will help you understand your situation at a glance
You should be able to categorize your transactions into groups
Out of those five key points, the ability to import is often the most essential. Importing saves you the hassle of adding each transaction into the money management software line-by-line, which adds up to a lot of time. It’s hard enough already to schedule frequent updates to your budget, so if you can remove the largest friction point of manual entry, then you’re in a good place.
The best budget software for Mac comparison
When it comes to programs to help budget money, there are countless options. It’s easy to get lost diving deep into each budget software review, but here are some of the best available, ranging from beautifully basic to powerfully advanced.
You’ve probably heard of Quicken, given that the name has been around since the early 80s. Even then, it was known as one of the best tax software companies around. That says something about the strong product, which carries all of the basic functions you’ll need to manage your budget well.
Right away though, you might notice that the interface has become somewhat dated in comparison to the newer contenders out there. But one of Quicken’s praised features is the ability to download bank statements and have the records automatically categorized, which can drastically reduce the time it takes to input your information, so you can spend more time making sense of it. Sadly, the Mac version is somewhat limited when it comes to advanced features, unless you splash out for the Home and Business edition.
MoneyDance is very similar to Quicken in terms of its basic features, including the ability to create a budget with notifications for bills and invoices. It also allows you to make your own charts and graphs to monitor spending habits over time, which can be seen on the homepage for a quick glance of your activity. Out-of-the-box integrations with online banking services also make it easy to send payments.
Unlike Quicken, Moneydance has some more advanced features including an investment monitor, which tracks your investments and their fluctuations — a useful addition, although best for the intermediate to advanced user. The app also has a developer API system in place to allow extended functions, mostly good for power users. Importantly, security is not an issue, as Moneydance utilizes end-to-end encryption for your data to give you that extra peace of mind.
You Need A Budget, also known as YNAB, is budget tracking software that runs on both Windows and Mac via web — saving automatically to the cloud, which is a bonus for multi-platform users. It also features native apps for iOS and Android, so you can literally tackle your budget from anywhere.
The app itself follows a simple design language, which is perfect for beginners, but if you find yourself needing help you can sign up for a personal instructor. YNAB doesn’t let you slack at all, and if you start to stray from your budget, the app will raise a red flag through it’s built-in Accountability Partner.
Although YNAB doesn’t support the ability to download and automatically categorize records from bank statements, it could be argued that entering them manually helps the user pay more attention to where their spending is going. Still, it’s a more time-consuming process that might be problematic for users processing hundreds or more records each month.
MoneyWiz stays true to its name — a comprehensive budget software and investment tracker that’s packed full with over 400 useful features. View your financial situation quickly by browsing accounts, groups, or searching for individual records. Speaking of records, you can enter them manually or have them automatically sync with leading banks, cryptocurrency exchanges, and financial services for an accurate real-time understanding of your accounts.
With all of this data in hand, MoneyWiz can prepare and export over 50 reports to help you gain deeper insights into your finances. Your data could be accessed from its cloud-based app or straight from the native software for Mac. All in all, MoneyWiz is extremely powerful: accessible for beginners and interesting for the most advanced users.
Receipts is yet another money management software for Mac, and is specifically well-known for its clever handling of invoicing. Using Optical Character Recognition (OCR) technology, Receipts automatically reads and translates important information about your bills, such as amount, date, currency, and more (even if the text is in another language).
Besides, Receipts can issue payments for invoices directly using third-party providers, such as iFinance and BankX. The OCR technology alone makes it a strong contender against other more simple online budgeting tools. Not least, Mac users will be glad to see how this application was designed to look and feel like a macOS product. Using a familiar user interface could make life a little easier after all.
Between the five options above, you have a strong starting point for your budgeting tools depending on your experience. Remember that importing is one of the key features to look for in budget programs. Still, in order to find the best fit you might need to try a couple of different options.
Thankfully, both MoneyWiz and Receipts have a free 7-day trial that you can take advantage of by heading over to Setapp, an app subscription service for Mac that gives you access to over 150 macOS apps, including all the necessary budget tools. Getting MoneyWiz and Receipts at once? You won’t be disappointed.
Setapp lives on Mac and iOS. Please come back from another device.
Meantime, prepare for all the awesome things you can do with Setapp.
Read on
Sign Up
Best Budget Apps
Setapp uses cookies to personalize your experience on our website. By continuing to use this site, you agree to our cookie policy.
When you’re on top of your money, life is good. We help you effortlessly manage your finances in one place.
Mac Budget Software
All-in-one finances
We bring all of your money to one place, from balances and bills to credit score and more.
Budgets made simple
Easily create budgets, and see our suggestions based on your spending.
Unlimited credit scores
Check your free credit score as many times as you like, and get tips to help improve it.
All your money in one place
We bring together all of your accounts, bills and more, so you can conveniently manage your finances from one dashboard.
See all of your bills and money at a glance
Create budgets easily with tips tailored to you
Enjoy access to unlimited free credit scores, without harming your credit
Effortlessly stay on top of bills
Bills are now easier than ever to track. Simply add them to your dashboard to see and monitor them all at once.
Receive reminders for upcoming bills so you can plan ahead
Never miss a payment with alerts when bills are due
Get warned when funds are low so you know what you can pay
We’re serious about security
We’re committed to keeping your data secure. With multiple safety measures like secure encryption and multi-factor authentication, we work to keep your information protected.
Home Budget For Mac
Sign in securely with your unique 4-digit code and password
Remotely access and manage your account from anywhere
Enjoy continuous protection with VeriSign security scanning
Intuitive features, powerful results
Mint is versatile enough to help anyone’s money make sense without much effort. There’s no wrong way to use it, and nothing to lose getting started. You’ll be surprised how life-changing something so simple can be. Learn More
Budgets that work
Create budgets you can actually stick to, and see how you’re spending your money.
Money on the go
Phone & tablet apps to manage your money from wherever you are.
One step at a time
Get personalized tips and advice for maximizing your money every day.
Sign up for Mint today
Monthly Budget Application Template
From budgets and bills to free credit score and more, you’ll discover the effortless way to stay on top of it all.
Download our free mobile app
Monthly Budget App Mac Desktop
Available for iOS and Android.
0 notes
Text
Messages App On Mac

Messages App On Mac Not Working
Samsung Messages App On Mac
How To Text From Mac
Free Messaging App For Computer
Messages App On Mac
Get started
Download the latest version of iOS or iPadOS for your iPhone, iPad, or iPod touch.
Make sure that your device is signed in to the iTunes & App Store with your Apple ID.
Find iMessage apps in the app drawer
The app drawer gives you quick access to apps that you can use in your messages. To see your app drawer:
A native-like desktop app for Google Messages. Chat on your favorite OS for free! Download for Free Download for other platforms. No affiliation with Google. Check out the project on. Windows, OS X, & Linux. A native-like desktop app for your favorite platform! MAC LINUX No affiliation with Google. This is an open source project, check out. Messages is a simple, helpful messaging app that keeps you connected with the people who matter most. Text anyone from anywhere across devices.
Open Messages.
Tap the Compose button to start a new message. Or go to an existing conversation.
Swipe left or right over the app drawer to find the app that you want to use.
Here are some apps that are automatically in your app drawer:
Store: Download iMessage apps to use with Messages.
Photos: Quickly add photos to your messages right from the app.
Music: Share recently played songs from Apple Music.
Messages App On Mac Not Working
Digital Touch: Use Digital Touch to send sketches, taps, kisses, heartbeats, and more.
#images*: Find hundreds of trending GIFs to add to your messages.
Apple Pay: Send and receive money with Apple Pay.*
Memoji: Create and share an animated Memoji that uses your voice and mirrors your facial expressions.*
Memoji Stickers: Create custom Memoji stickers to match your personality and mood.
*#images and Apple Pay aren't available in all countries or regions. If you find an issue or have a concern with content found in #images, you can report the content or remove the #images app. You need a compatible iPhone or iPad to use Memoji.
Download iMessage apps
You can find and download apps to use with iMessage in the App Store for iMessage. Here's how:
To go to the App Store for iMessage, tap the Store icon .
Tap the icon or the price icon next to the app, then tap Install. You might need to enter your Apple ID password to complete the purchase.
Tap the gray line to return to your message.
Samsung Messages App On Mac
After the app downloads, you can find it in your app drawer.
Some apps let you make additional purchases within the app. If you set up Family Sharing, you can use Ask to Buy to help control app downloads and in-app purchases. Learn more about in-app purchases.
Manage iMessage apps
You can add apps to your Favorites so you have quick access to them in the app drawer. You can also reorder apps in the app drawer, remove the ones you don’t want, and more. Here’s how:
From the app drawer, swipe left and tap the More button .
Tap Edit in the upper-right corner to do the following:
To add an app to your Favorites, tap the Add button .
To remove an app from Favorites, tap the Remove button , then tap Remove from Favorites.
To reorder apps in the app drawer, touch and hold the gray lines , then move the apps in the order that you want.
To hide an app, turn it off.
Tap Done.
How To Text From Mac
Delete iMessage apps
Open Messages.
Tap the Compose button to start a new message. Or go to an existing conversation.
Swipe left over the app drawer and tap the More button .
Swipe left over the app, then tap Delete.
Free Messaging App For Computer

Do more with iMessage
Messages App On Mac
Use the App Store on your iPhone, iPad, iPod touch, Apple TV, or computer to download apps.
0 notes
Text
How To Force Kill An App In Mac

To quit (close) a Mac app normally, choose Quit from the app's menu in the menu bar, or press Command (⌘)-Q. If the app doesn't quit, follow these steps to force the app to quit.
Force Kill App On Mac
How To Force Kill An App In Mac Catalina
Occasionally in Mac OS X, it may be necessary to force a program or process to quit. For example, if a particular program fails to respond or unexpectedly hangs. Every application on a Mac comprises of one or more processes. It’s usually possible to use the Force Quit command (⌘⌥ esc) in the Apple Menu, but. Aug 26, 2020 All you have to do is press Command+Option+Escape+Shift to force quite all the apps running on the Mac. You have to hold the keys for few seconds and all the apps that are not responding on your Mac will be closed. Be careful: Please take a note that all the apps which are running might get closed.
Step 3: Select the app which you want to close and click on the force quit option. 5) Using Kill Command. You can also close any app through the command line; it is a complicated method compared to others. To close the app, you should know the process id then only you can close the app. Find the app that you want to force close in the Dock on your Mac. Once you’ve found the app, hold down the Option key on your keyboard, right-click on the app in the Dock, and click on the option that says Force Quit. The Dock will force close the selected app on your Mac. Apr 25, 2020 How to Force Quit Apps on Mac Force Quit Apps From the Activity Monitor. Similar to a task manager on Windows, macOS has Activity Monitor to let you. Close Apps from the Force Quit Window. This is a must-have for every Mac user. From any screen, you can simply use. Force Quit Apps from the. When an application hangs on your Mac, sometimes the quickest fix is to force the application to quit. In most cases, this will free the system and allow you to re-launch the program to get on with your work. There are three main ways to force-quit a program in OS X.
How to force an app to quit
Press these three keys together: Option, Command, and Esc (Escape). Or choose Force Quit from the Apple menu in the upper-left corner of your screen. (This is similar to pressing Control-Alt-Delete on a PC.)
Then select the app in the Force Quit window and click Force Quit.
You can even force the Finder to quit, if it stops responding: Select Finder in the Force Quit window, then click Relaunch.
Learn more
How to force an app to close on your iPhone, iPad, or iPod touch.
Installing a software or app is extremely easy and so does uninstalling the software when you don't need them anymore? Many times, for some unknown reason, a Mac system denies to remove some data. If this is happening with you then the first thing you could try is to restart the computer and then try to remove it again, but still failed! Then what should you do?
On the other hand, there are many stubborn software that won't get uninstalled whatsoever. You will continuously get errors, warning and unknown issues when uninstalling them. These are usually infected with viruses or the developers don't intend to let you uninstall them. This could be really very intimidating especially when they are slowing down your computer. In this article, we will show you few simple tricks to remove unwanted apps or softwares that won't delete on Mac.
Part 1. How to Delete Apps in the Finder on Mac Manually (the Hard Way)
Unlike Windows computers, Mac works a little distinctly. All the programs and apps are stored in the Application directory. The app and software configuration settings are saved in the Library/Preferences folder and any other additional supporting data are saved in the /Library/Application_Support folder. In order to remove the Apps in Mac, you only have to open the application folder and drag the app to the Bin or Trash Can. This is rather easy if the program is uninstalled simply.
However, if the application still denies to uninstall and stays on the Mac then we need to get another solution below.
Force Kill App On Mac
Delete the Preferences
If you can't delete the app by using the above method then the reason could be that the preferences folder of that app still exists. Let's go and delete that first.
Step 1. Open Finder then click on the Go option from the dropdown menu.
Step 2. When the menu pops down, simple press the Option key and keep holding it.
Step 3. You will now see the Library option right between the Computer and Home options. Click on it and the folder should open.
NOTE The final necessary thing to do after uninstalling a program is to empty the trash can or Bin. Dragging and dropping a software shortcut icon to the Bin will actually do nothing. It is only erasing the shortcut, this won't uninstall the program. It is still laying somewhere in your computer however, if you empty the trash then the application is truly removed.
However, there's also a chance that the software files must have stored in the computer somehow, which happens quite often. So, if you are not able to remove Apps by yourself then it's better to take help from an automatic Mac program remover like CleanGeeker in Part 2..

Part 2: Completely Remove Unwanted Apps that Won't Delete on Mac (Easy Way)
When any app is fishy enough not to get deleted from a Launchpad or Finder then you will have to use some sort of force to delete that. TunesBro CleanGeeker is one of the most powerful Mac app remover that helps to remove any app or software as well as the trace from the Mac without destroying your system. Unlike other App removers, CleanGeeker can deeply scan and remove multiple apps at once, including corresponding files and preferences. It also has other miscellaneous functions as well like cleaning junk files, clearing app caches and finding + deleting duplicate items from the computer like music, documents, pictures, videos, etc. To summarize, CleanGeeker is used to optimize and organize your Mac so that it remains clean and fast as a thunder.
CleanGeeker - Force to Delete Apps on Mac, Easy and Safe!
Locate all the installed apps on your Mac and shows them in a list.
Deeply scan and remove apps along with its remaining files like caches, or junk files.
Force to remove unwanted app that won’t uninstalled, easy and safe! Never destroy your system.
Optimize and improve your Mac’s space and performance.
Step 1Download and Install App Remover Tool on Your Mac
Download the App remover and install it normally on your Mac. Launch the program and enter the license code to activate the software. On the main user interface, you will be able to see multiple options on the screen. Just click on 'Uninstaller' from the mid left sidebar.
How To Force Kill An App In Mac Catalina
Step 2Scan All Apps that Installed On Your Mac
Let the program search all the apps installed in your computer. It may take few minutes.
Step 2 Found and Remove Unwanted Applications on Mac
Once the scanning is done, you should be able to look on all the apps that has been installed in the system. Choose the app that you want to remove and select the 'Delete' button once.
There's no software or apps that cannot be removed with CleanGeeker and that's why it's now a must have tool for everyone. Moreover, it helps to speed up your computer unbelievably fast and run it like it used to when you first bought it.
Part 3: Delete Apps Downloaded from Mac App Store
One of the best alternative to delete any app is by simply deleting it from the sales page from the App Store. Once you have done that, you will no longer be able to download it form there anymore. But, the app will remain active in the iTunes account which is associated with that. So, if you wish to download or update it later from the iTunes then you will be able to do that. But the important thing is: Once you delete any app which you have downloaded from Apple App Store, you won’t be able to recover that app or find the SKU to install it again.
So, if you want to delete any app from App Store without actually removing it then follow these steps –
Step 1. Open the Launchpad from the Dock section. At this point you should be familiar with it if not then just find the Rocket icon.
Step 2. After the Launchpad is opened, it will replace the existing Windows with the apps that are provided by default in alphabetic order. You can obviously do many things using this tool but at this moment we are just erasing the unwanted apps.
Step 3. Just like any iPhone or Android phone, click and hold on the app that you want to delete until it starts dancing. Next, click on the 'X' mark with your mouse or touchscreen.
Step 4. Now, confirm that you want to delete by clicking on the 'Delete' button once and the system will get rid of it instantly.
Done! Keep in mind, that you should not worry about accidentally delete the apps that you want to keep in Mac. You’re allowed to obviously re-install any app that you have deleted before without paying any extra. Simply go to the app store and it’s done.
Oct 15, 2018 15:31:43 / Posted by Candie Kates to Mac Solution
Related Articles & Tips
0 notes
Text
Mac Mail App Will Not Open

One of my friends told me yesterday that after updating to iOS the email accounts used in the Mail app have stopped receiving new emails. It displays an error message saying “Your password is incorrect.”
Mail Won T Open On Mac
Apple Mail Will Not Load
Even re-entering the password doesn’t fix the issue, or for that matter stops the error message from appearing again. Have you also come across this problem on your iPhone post updating to the latest iOS ecosystem? Here are some quick tips to troubleshoot an issue.
Mail not launching since macOS Catalina update. This is one of the most common problems people. Our developers have released the new Spark 2.9.8 update with a fix of garbled text being sent in Spark versions 2.9.0 and newer. Emails with attachments that are sent from Exchange/Office 365 were corrupted and looked like a list of numbers, letters and symbols. To install the new version, please open the App Store search for Spark open S. Open the Terminal (located in Applications/Utilities) Type: sudo updateprebinding -root / -force and press Return. When prompted for a password, enter your admin password, and press Return again. In many cases, updating the affected app cures the problem. Delete the app preference file. Plist files can become corrupt when a Mac shuts down or restarts unexpectedly or when an app freezes or crashes. As a result, the app may not open. When you delete a bad preference file, the Mac creates a new plist file that contains all the app's defaults automatically. If you're running Mac OS X version 10.10 or later, follow these steps to set up an Exchange email account: Open Mail, and then do one of the following: If you've never used Mail to set up an email account, the Welcome to Mail page opens. If you've used Mail to create email accounts, select Mail.
Fix Mail App Not Working Issue on iPhone and iPad
Force Reboot Your iOS Device
A few minor bugs like freezing of touch screen could be fixed by force rebooting the device. So, try to give this trick a bit of luck.
Simply press and hold the Home and sleep/wake buttons at once on your iPhone or iPad until the Apple logo appears on the screen. (To force reboot iPhone 7 and 7 Plus, check out this post.)
Change the Passwords
Try changing the passwords of your email account. To do so, simply enter the wrong password while signing into your account, then select forget password and reset it as usual.
Remove the Affected Email Accounts and Re-add them
Step #1. Open the Settings app on your device → Tap on Mail.
Step #2. Tap on Accounts.
Step #3. Next, you have to tap on your email account.
Step #4. Now, tap on Delete Account.
https://decadentpeachwasteland.tumblr.com/post/640423128247484416/macos-mail-app-flagged. Using advanced cryptographic techniques, Safari periodically checks a derivation of your passwords against an updated list of compromised credentials.
Step #5. Tap on Delete from My iPhone to confirm.
Step #6. Now, re-add your account. (Tap on Add Account, select the service, sign in with your ID and passwords.)
Reset All Settings
Resetting your device to factory settings can help you resolve the issue.
Step #1. Open Settings app → General → Reset.
Well yes give a check out. So the question is if Mac Addresses is a layer 2 operation that occurs inside your network.What the hell I will do with that? Wifi spoof app mac. I use a laptop with 'Kali' installed in it.In places that I want to see if the Wireless is secure I connect with and use the software aircrack to obtain info of the Access Point on the Place.
Step #2. Tap on Reset All Settings and confirm.
Restore Your iOS Device as New Using iTunes
If all the above-mentioned solutions are not able to fix the issue, then restore your iPhone as new. Make sure to backup your iOS device before restoring it.
That’s it!
Mail Won T Open On Mac
Hopefully, these tips are able to help you resolve the problem.
Problems like rapid battery drain or charging issues tend to crop up post the software updated. However, with a few tips and tricks, they can be fixed with ease.
Liked this article? We would be glad to have your invaluable feedback in the comments below.
The founder of iGeeksBlog, Dhvanesh, is an Apple aficionado, who cannot stand even a slight innuendo about Apple products. He dons the cap of editor-in-chief to make sure that articles match the quality standard before they are published.
https://www.igeeksblog.com/author/dhvanesh/
https://www.igeeksblog.com/author/dhvanesh/
https://www.igeeksblog.com/author/dhvanesh/
https://www.igeeksblog.com/author/dhvanesh/
Alphy Thomas | Modified: 2020-05-07T12:59:18+00:00 | Email Client, Error|
“Yahoo Mail not downloading to Apple mail account, I can access Mail.app emails. I have checked the credentials and software upgrades, everything is fine. I can access Yahoo Mail account on my iPhone but not in the desktop. Whenever I am trying to access Yahoo Mail from Apple Mail it says ‘ “apple.imap.mail.yahoo.com” is not responding.’ If I am adding the account as ‘another email account’ instead of Yahoo, mail becomes re-established however, I cannot access contacts, calendars etc. Establishing as a Yahoo account says Yahoo Server is offline, while email is working with other devices. Any ideas why Apple Mail can’t connect to the account Yahoo? Came out of the blue.”
If you are facing the same issue with your Yahoo Mail account then, this technique is for you. Here, you will get all possible tactics that can resolve Yahoo Mail not working on Mac Mail problem. So let us take a deep dive to the solutions for the same.
Troubleshooting Yahoo Mail Not Downloading to Apple Mail Problem
As most of the mail issues occur due to invalid settings or if there is something wrong with Yahoo Mail account that the user is trying to access. Hence, one can use the following techniques to resolve the issue Yahoo Mail Not working with Apple Mail or Yahoo Mail not working on Mac Mail or Yahoo Mail stopped working on Mac or Apple Mail can’t connect to the account Yahoo.
#Fix 1: Check if Yahoo Mail Account Works Outside of Mac Mail
In your computer, open a web browser
Now, log in to your Yahoo Mail account
Then, compose a new email message and add your own email address in the “To” field
Send the email and check if it is received within 5 minutes
If any issue occurs then, you are required to address it to make Yahoo Mail account work in Mac Mail
#Fix 2: Update Your Operating System
Apple releases updates to its operating systems at any time and not installing the latest update can stop Yahoo Mail not loading in Apple Mail. Hence, make sure you are using the latest version of the Macintosh operating system.
#Fix 3: Delete and Re-add Yahoo Mail Account
Sometimes email application setup fails or gets corrupt and it restricts users from accessing their emails. Hence, the basic thing you would logically try is re-install. Below are the guidelines to resolve yahoo mail not working with apple mail:
Open the Mac Mail app
Click on “Mail” tab from the top menu
Now, select the “Preferences” option
On the sidebar click on Yahoo email account to which you want to remove
Click on the “-” from the bottom
Confirm the account deletion via clicking on “OK”
After this again add same Yahoo account to your Mac Mail
#Fix 4: Check Yahoo Mail Account Settings
Following settings can prevent your email from downloading emails to your Inbox:
Spam folder – Check Spam folder to see if the email is incorrectly marked
Blocked address – The email sender may have been blocked by mistake
Email Filters – Check filters if the email could have arrived in any other folder
Reply-to address – Make sure that your reply-to address is blank
#Fix 5: Temporarily Disable Security Programs
In some cases, antivirus, firewall, and antispyware applications can block the scripts or features, which are essential for Yahoo Mail account. So, one can temporarily disable the running security programs to check if they are causing the issue.
Navigate the program’s help pages for operating instructions on how to disable it
Once disabled, make sure if you are still having the issue i.e., Yahoo Mail not downloading to Mac Mail
If the issue gets resolved after this then, the disabled security program was the cause of the problem
Then, Re-enable the anti-virus, anti-spyware, or firewall programs
#Fix 6: Check If Auto-Forwarding is Enabled
Enabled auto-forwarding can prevent Yahoo Mail account by downloading emails on Mac Mail. For checking what auto-forwarding you may have set, click on “Settings” tab and select Mail option from the left side navigation pane. Click on “Auto forward”. Now you can view any auto-forward rules you have been set.
#Fix 7: Incorrect Server Address
If Yahoo Mail not downloading emails to Mac Apple Mail then, this issue can be related to the email server. Thus, check out the server address and make sure you have entered the following server addresses :

POP3 incoming mail server: pop.mail.yahoo.com (port 995, requires SSL)
IMAP incoming mail server: imap.mail.yahoo.com (port 993, requires SSL)
SMTP outgoing mail server: smtp.mail.yahoo.com (port 465 or 587, requires SSL)
NEWS server: news.yahoo.com
#Fix 8: Take the Email Account Offline
Apple has provided its own workaround to deal with the new mail issue. It takes account offline then, brings it back online. This forcibly re-establish the connection between Mac Mail and the remote email server. Here is how to do that:
In Mac Mail, pull down the “Mailbox” tab and select “Take All Accounts Offline”
Navigate back to the “Mailbox” tab and select “Get All New Mail”
This will force a connection to be set up between Mac Mail and remote mail server. After this, your Yahoo Mail will start downloading new emails as well as updating the inbox as expected
#Fix 9: Quit and Relaunch Mail App
The easiest technique to resolve emails not downloading in Yahoo Mail issue is simply relaunching the Apple Mail app. It is so because quitting the application and reopening it, stops all the background processes that are causing the issue. The quickest way to do this is just hit “Command+Q” from the Mail app and launch the application again.

#Fix 10: Check Yahoo Account Login Info
If you are using incorrect login info for your Yahoo Mail account then, it will prevent Yahoo from downloading emails. So make sure the following information is correct:
Email address – Your full email address ([email protected])
Password – The accurate password of your account
Requires authentication – Yes
Expert Solution for ‘Yahoo Mail Not Downloading to Mac Mail’ Issue
Backing up email messages for safety or offline usage is such a good idea. Since Yahoo Mail does not have an export feature thus, we recommend a reliable solution technique by SysTools for the same. It is a smart way to create a copy Yahoo emails to MBOX/ EMLX / EML file formats on Mac OS X locally. Once you got emails in the format chosen, Add it to Mac Mail using ‘import mailboxes’ feature within Apple Mail. The tool supports the incremental type of backup for Yahoo mail account and let’s exclude deleted or sent items folder. It is completely a safe utility that is compatible with Mac OS 10.8 and all above versions.
Summing It Up
Best cloud based transfer app from android to mac. This article discloses some actually working solutions to resolve Yahoo Mail not downloading to Apple Mail issue. Apart from this we also have discussed one third-party solution to archive Yahoo Mail emails on Mac as keeping a backup of emails always proves handy. To add Yahoo mail to Mac Mail, archive in MBOX file format. Now, pick any solution as per current necessities and likings for Apple Mail can’t connect to the account Yahoo error.
Frequently Asked Questions
Q: How Can I Save My Yahoo Emails to a Flash Drive?
Simple Steps to Move Yahoo Emails to Flash Drive on Mac 1. Download and Run Yahoo Backup Wizard 2. Login with Yahoo account credentials 3. Select Backup format (PST/EML/EMLX/MBOX/MSG) 4. Click on Browse and set location in the connected flash drive 5. Click on Start option
Q: What Can I do if Yahoo mail is not downloading on Mac mail?
Apple Mail Will Not Load
You need to check the below parameters to know the actual problem 1. Check if Yahoo mail is working outside (cause of Yahoo mail outage) 2. Operating system version installed (does not download if OS is outdated) 3. System Preferences Issue (Remove and add Yahoo account on mac) 4. System Protection preventing download (Disable all defenders and try downloading Yahoo mail) 5. Incorrect Server configuration (Check account type and its respective server configuration)
Q: What is the correct Yahoo mail POP configuration setting?
Yahoo mail POP Configuration Setting Incoming Server: pop.mail.yahoo.com (port number: 995 (SSL)) Outgoing Server: smtp.mail.yahoo.com (port number: 465 (SSL)) Yahoo mail IMAP Configuration Setting Incoming Server: imap.mail.yahoo.com (port number: 993 (SSL)) Outgoing Server: smtp.mail.yahoo.com (port number: 465 (SSL))
Q: What is the reason behind Yahoo mail not Working on Mac?
If Yahoo mail is not opening in the browser, you can do the following steps: 1. Try logging into Yahoo with another browser. The current browser may be outdated. If it works another browser, update the browser to its latest edition for Yahoo mail compatibility 2. Check Internet Connectivity. If the connection is not stable, the Yahoo mail may not be connected to its server successfully.
Comments are closed.
0 notes
Text
Install Xbox App On Mac

Install Xbox App On Pc
Xbox Login
Xbox One App Mac
Install Ios Apps On Mac

In our opinion NordVPN is a good choice for Xbox. In this article we show you how to set up and use NordVPN on Xbox.
Xbox is a video gaming console brand, which provides realistic graphics for games. It is owned and developed by Microsoft. You can connect the game console to a television or any other display media. Originally called the DirectX Box, the console was intended to be the first game system created like a PC, but with all the flexibility and power of a gaming rig.
The Xbox consolehelped Microsoft gain an early advantage in the online gaming market. Microsoftis currently a force to reckon with in the gaming industry. The Xbox brandincludes consoles like Xbox, Xbox 360, and Xbox One.
Install Xbox App On Pc
OBS (Open Broadcaster Software) is free and open source software for video recording and live streaming. Stream to Twitch, YouTube and many other providers or record your own videos with high quality H264 / AAC encoding. The Xbox app is amazing the first time you see it. You can access you account on the go and do so many things. However, the app’s downfalls become apparent very soon. First of all, you need a wifi connection to access the app, it will not work with cellular data. So, the whole aspect of xbox on the go is completely thrown out of the window. Get Skype, free messaging and video chat app. Conference calls for up to 25 people. Download Skype for Windows, Mac or Linux today. Your Mac might not have the massive library of games available to Windows gamers, but you can still play them in style by connecting an Xbox One controller – and you don't need any extra.
The Xbox One is the latest game console in the brand. Its controller has a built-in battery and a slightly different design from its predecessors. It is more powerful and also faster, with increased memory and better graphics. However, it is not compatible with most of the applications and games that the last two had. One of such applications is a Virtual Private Network. However, in this article, we’ll show you a workaround for this.
How to set up NordVPN on Xbox One
Even though there are not many VPN apps on most gaming consoles, it is still possible to use NordVPN on the Xbox. However, we must say that it is not as easy as with other devices. Here, we will focus on the Xbox One, as it is the most current one.
We must firstestablish that this process is a bit technical and is not so straightforward.However, we are here to put you through. There are four ways you can set upNordVPN on your Xbox. You could set it up via Mac. The second way is setting itup via PC. You could also set it up via a Wi-Fi router. Another way is to shareyour Computer’s VPN with your Xbox.
Setting up NordVPN on Xbox One via Mac
For this method,you will require an Ethernet cable, an Xbox One, a Mac, and an active NordVPNsubscription. The steps you need to follow are:
Install the NordVPN software on your Mac.
Plug the Ethernet cable, on one end into your Xbox One, and the other end, into your Mac.
Go to ‘System Preferences’ and click Sharing. Then, select ‘Internet Sharing’ from the list, which is on the left side of the screen.
Select Wi-Fi from the ‘Share your connection from the drop-down.’
Ensure that ‘Ethernet’ is selected from the ‘To computers using’ list. However, if you connect the Internet from your Mac using an Ethernet cable, share your connection using Wi-Fi instead.
Check the box to the left of Internet Sharing on the list to enable Internet connection sharing between your Xbox One and Mac. If it is successful, then a green icon will appear,
Open the NordVPN software on your Mac and connect it to your chosen server.
Now, test the Internet connection on your Xbox One. If you have done things correctly, you should be able to access the Xbox One Services through the VPN service provider.
Setting up NordVPN on Xbox One via PC
For this method,you will need an Ethernet cable, an Xbox One, a PC or laptop, and an activeNordVPN subscription. These are the steps to follow in setting up NordVPN onXbox One:
Install the NordVPN software on your PC or laptop.
Plug the Ethernet cable, on one end into your Xbox One, and the other end, into your PC or laptop.
Connect to your home Wi-Fi network.
Open the Control Panel (Network and Sharing Center) on your PC or laptop. Then, click on ‘Change Adaptor Settings’ on the left side of the screen.
Right-click on the icon that has the name of your VPN and click ‘Properties.’
Open the sharing tab and select ‘Allow other network users to connect through this computer’s Internet connection.’
Now, test the Internet connection on your Xbox One. If you have done things correctly, you should have access to the Xbox One Services through NordVPN.
Setting up NordVPN on Xbox One via a Wi-Fi Router
This method is one of the easiest ways to set up NordVPN on your XboxOne. There are two ways you could set up NordVPN on your Xbox One via a Wi-Firouter. The first approach is to purchase a Wi-Fi router that provides supportfor built-in VPN services. Although this might be a bit pricey, it’s theeasiest route to take. The second approach is to purchase your NordVPNsubscription and manually enter the details of the VPN into your Wi-Fi router.
This option is abit tricky as it is exceedingly difficult to give a step-by-step guide as tohow to go about it. The reason for its trickiness lies in the differences inthe brands of routers you may purchase. However, this is the general process:
Log in to the control panel of your router.
Follow the procedure provided by NordVPN for setting up a VPN router. The process usually involves finding a tab or a page called Network, WAN Setup, or Basic. Once you are on this page, enter the information provided by NordVPN (examples include login information, an IP address, and subnet mask).
Connect your Xbox One to the router via Ethernet or Wi-Fi.
Make sure that your Xbox One is connected to the Internet by navigating to Settings. Then, click on Network, then Network Settings, and select Test network connection. Once it is successfully connected, your Xbox One will automatically be routed through NordVPN.
Do not use yourXbox VPN to log into region-locked content daily. You do not want to becomeblacklisted. If you download anything that is region-restricted (hey, we knowyou will!), try not to use the multiplayer feature too frequently. However, youcan access region-locked Xbox Live Apps through your Xbox VPN. They arethird-party affiliates and won’t necessarily have Microsoft’s strict regionrestricting policies.
Changing the Region on Xbox One
You cannotdownload some apps on your Xbox One unless your region is configured to thecorrect region. The first thing you would need to do is change your region.Changing it would help you gain access to those apps that are only availablewithin specific regions.
From the Finder in macOS, select Go To Folder (or Command+Shift+G on the. Locate the app named Installer.app from this directory and launch it. Sims 4 stuck on 'Verifying Game Files' (Mac). On sims 4 and it says Verifying Game Files and it stays at 0% the whole time. Some of the apps on my MacBook Air (OS El Capitan) specifically my Grand Theft Auto are not opening because a prompt appears 'Verifying (Name Of The App)'. I've tried countless times to fix this but. Mac os verifying app. Only follow the next steps if you are a hundred percent certain that the app you are trying to install is safe: Open Finder and find the application that gives you the “macOS cannot verify that this app is free from malware” warning message. Control-Click on the application. Access the shortcut menu and click Open.
The process is asfollows:
Start your Xbox One console.
Select My Games and Apps from the Xbox Home Screen.
Navigate to Apps, and click on Settings.
Select System, and then Language & Location.
From Location, choose the USA if you want to download the Xbox app exclusively available in the USA (or another region depending on app availability).
Now, restart your Xbox console.
Connect to a NordVPN-enabled connection using the same server as the region your Xbox is configured to.
Search for the app you need, and download it on Xbox One.
Why you should use NordVPN on your Xbox
First, whenplaying online games with a VPN, you may notice a lag. However, it depends onthe VPN server location and the quality of its provider. Using NordVPN wouldhelp reduce lag, as it typically makes use of servers that send your onlinedata through data centers.
Using NordVPN may also help you gain access to games that are not officially available in your location. Ordinarily, when a new game is released on the same day all over the world, it will appear first in Australia, because of the time zone differences. However, with NordVPN, you can make your console think that you are in Australia, and thus gain early access. Simply put, it can open your console to regional content that is otherwise unavailable. This content includes games, video services, apps, and more. NordVPN is especially helpful in accessing a variety of Netflix libraries, video streaming, tapping into international programming, or bypassing blocked YouTube videos.
Xbox Login
Generally, gameprices vary from region to region. But, with NordVPN, you can connect to aregion where the game is available at the lowest price.
In this day and age, where cyber-insecurity is on the rise, using technology to protect your Internet activity from malware and hackers is quite smart. NordVPN would also shield you from public Wi-Fi networks, and block annoying ads. It does so with an Advanced Encryption System, which has 256-bit keys. This is the highest level of encryption in the tech world today. It is used by the military and even the government of countries like the United States to protect valuable information.
The way NordVPNworks is by creating an encrypted tunnel through which your private data, whichhas been split and encapsulated passes. Thus, the encrypted data appears likegibberish to any third-party who has gained access to it.
Once you areconnected to any NordVPN server of your choice, you can browse the Internetunder the cover of its IP address and location. With every new connection, youronline identity changes to a new IP address, which hides you under a newencryption shield. Therefore, it means that no government can get a hold ofyour browsing history, as you have none. Also, hackers and ISPs cannot readyour private data, should they manage to intercept it.
With NordVPN, youare not only guaranteed security, but also speed. Thus, you no longer have tochoose between these essential features, as you can now have them both. You canenjoy a speedy VPN experience, alongside being shielded by encryption thatmatches military standards. You can also enjoy a hitch-free streamingexperience without bandwidth throttling and buffering. Simply put, you can haveunlimited Internet access without fear of bandwidth limits or censorship withNordVPN.
Another greatfeature of NordVPN is that you can secure five other devices alongside yourXbox with only one account. Such devices that may be secured includesmartphones, routers, and computers.
NordVPN is alsohighly recommended because of its smart algorithm, which automatically selectsthe VPN server for you. It performs this function based on your location,special requirements, or loads.
Furthermore,NordVPN has implemented a Domain Name System (DNS) leak protection technology.It helps to protect your online privacy and activity where DNS servers sendunencrypted queries outside a secure VPN tunnel.
NordVPN softwarealso offers two versions of the Kill Switch feature, which is used to monitoryour connection to your NordVPN server. If the connection drops accidentally,the role of the Kill Switch is to block your device from gaining access to theInternet. It also prevents applications you have already specified fromaccessing the web. This feature comes in handy in areas with an unstableInternet connection.
In addition toall these, NordVPN guarantees that it would pay you back your money fullywithin the first thirty days of subscription if you are unsatisfied with theservices they render.
Xbox One App Mac

Now you know allabout how NordVPN works on Xbox. But if you’re looking to install a VPN serviceprovider on your Xbox, it’s because you want access to unlimited content.
Enter Kodi. Kodiis a fantastic open-source media player with an unlimited supply of content.There are add-ons on Kodi that are just like the apps on a smartphone. A uniquefeature of Kodi is that anyone can create an add-on related to anything andmake it available online. This is to say that Kodi is an Open Source platform,which explains why the content supply is limitless.
How To Install Kodi on Xbox One
In a couple ofminutes, you can install Kodi on your Xbox One. All you need do is follow the steps enumerated below. Once you do so,you can gain access to endless video entertainment on your Xbox. Here are thesteps:
Click the Search button.
Type ‘Kodi’ in the search bar
Click Get.
The installation should begin. Wait for the installation to complete.
Once the installation is complete, click Launch.
Now, you canstart using Kodi on your Xbox.
In conclusion
Install Ios Apps On Mac
NordVPN has manyadvantages to offer, and you should consider getting one for your Xbox today.Note that even if you own an older Xbox, the setup process for Xbox 360 VPN andXbox One VPN is more or less the same.
Rescue Time – Use Your Time Wisely. If you have doubts if you are using your time sensibly, this. Startup & Shutdown. This is one of the easiest automations on the Mac, and it’s native to OS X. Time schedule app mac free.
0 notes
Text
Clickshare Presenter App Mac

ClickShare Wireless Presentation and Conferencing technology creates understanding between people by freeing them to interact easily and naturally. The ClickShare App lets you easily connect to the meeting room, allowing you to share any content on your device with everyone in the meeting.
Do I have to use the button to connect my computer to the ClickShare? Or an app on my PC or Mac to use ClickShare? ClickShare support dual screen Presenter.
Download the ClickShare Presenter app and receive a great gift Workplace 2 min read last updated on: Oct 29, 2020 The ClickShare apps allow for simple and intuitive content sharing with a click of the virtual Button from any laptop, desktop (Windows or Mac) or mobile device (iOS or Android).
Clickshare Presenter App Mac Pro
Clickshare App Windows
Clickshare Presenter App Mac Desktop
Clickshare Download
ClickShare Collaboration App App to share content from any mobile device, laptop or desktop The ClickShare Collaboration App allows for simple and intuitive content sharing with a click of the virtual Button from any mobile device, laptop, desktop (Windows or Mac).
We are using the Barco ClickShare wireless presentation system in the following rooms in the Computer Science building:
105 (CSE800 - 8 users can share to the screen at the same time)
233 (CSE200 - 2 users can share to the screen at the same time)
301 (CSE200 - 2 users can share to the screen at the same time)
302 (CSE200 - 2 users can share to the screen at the same time)
401 (CSE200 - 2 users can share to the screen at the same time)
402 (CSE200 - 2 users can share to the screen at the same time)
The Barco allows you to simply share your laptop or mobile device on a main presentation screen with no hassle, no messy cables, just quick, confident sharing. You can following the instructions on the screen when you start the projector to connect your laptop to the Barco ClickShare. Here are the steps to use the Barco with your laptop:
Connect the ClickShare Button to the USB port on you laptop. Note: If your laptop only has USB-C ports you will need to use a USB-C to USB adaptor.
The ClickShare Button will show up as a USB drive on your laptop and when you select the drive you will see the OneClick software that needs to be run to share your laptop.
Once the OneClick software is running you can click the button to share the screen. Note: The Barco ClickShare allows mulitple devices to share to the screen at the same time.
Important Notes:
We no longer have HDMI/VGA cables in rooms 105, 233, 301, 302, 401, and 402.
The Barco ClickShare uses a USB connection to share your laptop. If you have a device that only has USB-C you will need a USB-C to USB adaptor. We have some USB-C to USB adaptors available for loan in room 101.
Barco does not have an application for Linux so please come talk to CS Staff if you are using Linux and trying to use the projector in the rooms.
Mac O/S 10.15.x (Catalina) Users: The recent Catalina OSx update has disabled screen-sharing on Apple devices as the default setting. One effect is that it stops the use of Clickshare. Please follow the steps below to re-enable screen-sharing on your device
Connect dongle to Mac device
Click on Clickshare App when it appears on desktop
Go to System Preferences => Security and Privacy => Privacy scroll down to screen recording and select
Tick the box that says Clickshare
Unplug the dongle from the device
Replug the dongle into the device
Click the Clickshare App when it appears on desktop
When ready to share click the Clickshare button on the dongle
Barco ClickShare Button
The Barco ClickShare buttons are paired with each Barco in the room they are located in. If you take a button to another room it will not work. Each room has 2 ClickShare buttons and you can share 2 laptops on the screen simultaneously.

ClickShare Desktop Application
If you are using the ClickShare often you can download and install the ClickShare desktop application on your computer. You can find more information about the desktop application here.
ClickShare Display Modes
HearthArena.com is a website about Hearthstone Arena. It's best known by its Arena Drafting Tool that thousands of people use on a daily basis. Hearthstone Overlay, Hearthstone Overwolf, Hearthstone Arena Companion. HearthArena Companion - The HearthArena app that helps you draft & track your Arena Runs. Now with zero typing! Hearthstone Masters. StarCraft II WCS. World of Warcraft Arena World Championship. Community Tournaments. Support Account My Gifts Careers Company. Battle.net ® Desktop App. Download for Mac. Hearthstone arena app mac. Deceptively simple and insanely fun, Hearthstone is a fast-paced strategy card game from Blizzard Entertainment. Available now on PC, Mac, iPad, and iOS and Android mobile phones.
To show your content on the display in full screen just click and hold the button for 2 seconds.
Button LED Status
LEDs behaviorExplanationwhite blinking
• the Button is plugged in the laptop and initializing or waiting for the user to start the ClickShare application.
• pairing/software update of the Button in the Base Unit is in progress
static white
• ClickShare is ready to start sharing your screen.
• pairing is done. You can now unplug the Button from the Base Unit
static red
• sharing your screen with the display.
• pairing and software update is done. You can now unplug the Button from the Base Unit.
red
an error occured
off (no light)
• the Button is not or not properly inserted into the USB port.
• the Button might be defective.
• the USB port or computer might be defective.

Barco Mobile Device Support
The Barco does support both iOS and Andriod to display to the system. You will need to download the 'ClickShare' application in the Apple or Andriod app store. Once you have the application installed you will have to connect to the Barco wireless network which will be 'CS###-ClickShare' (### is the room number) and the password 'computerscience' to display to the system. You will not have access to the internet while connected to the Barco wireless network so if your device does not have cellular service you will not have any network access.
Barco Audio Support
You will need to setup the output of the audio on your laptop to 'ClickShare' for the audio to play on the speakers in the room.
Apple Mac OS X:
Use the ClickShare button and display your laptop to the screen in the room.
Go to 'System Preferences' and then 'Sound'
Select 'Output' and choose 'ClickShare/USB'
Microsoft Windows:
Use the ClickShare button and display your laptop to the screen in the room.
Select the speaker icon in the taskbar bottom right.
Select speakers and choose 'ClickShare'
Barco Extended Desktop Support (PowerPoint 'Presenter View' Mode)
Only follow the next steps if you are a hundred percent certain that the app you are trying to install is safe: Open Finder and find the application that gives you the “macOS cannot verify that this app is free from malware” warning message. Control-Click on the application. Access the shortcut menu and click Open. Mac os verifying app.
When using the Barco ClickShare for both Windows and Mac you do not see the device as a physical display so you will need to do the following to create a virtual extended desktop:
Microsoft Windows:
Install the ClickShare Extension Pack on your machine https://www.barco.com/en/Products/Presentation-collaboration/ClickShare-wireless-presentation-system/Pack-to-upgrade-your-ClickShare-experience-Containing-ClickShare-launcher-and-extended-desktop-funct.aspx
Right click on the ClickShare icon on the bottom left toolbar
Then select 'Shared Desktop'
Then choose 'Virtual Extended' to set the Clickshare as the extended desktop
Clickshare Presenter App Mac Pro
More Information: https://www.barco.com/en/support/clickshare%20csc-1/knowledge-base/kb5036
Apple Mac OS X:
Connect to the Barco wireless network which will be 'CS###-ClickShare' (### is the room number) and the password 'computerscience' to display to the system. (Note: While using the Barco wireless network you will not have access to the internet but if needed you could use a wired connection)
Now using Apple AirPlay you can connect to the Barco ClickShare and use that as the extended desktop
Clickshare App Windows
Microsoft Windows and Apple AirPlay:
Clickshare Presenter App Mac Desktop
If you would like to connect to the Barco ClickShare using Apple Airplay you can download the AirParrot software from OIT.
Clickshare Download
More information: https://www.barco.com/en/support/clickshare%20csc-1/knowledge-base/kb1477
0 notes
Text
How To Get Rid Of Apps On Mac Dock

In Mac Dock serves as a starting point and it contains icons of installed applications and important places of system. User can directly get access to the applications or system locations from Dock icons just with a single click. Normally, Dock resides at the bottom of screen but the position and effects of the Dock. First, drag everything that you can from the dock to make it as small as possible, then, in your Dock settings, position it on the left hand side, reduce it’s size to a minimum, turn magnification off and lastly turn on Hiding to make it disappear. Step 1: Head over to the Dock and look for an option that says Launchpad — the icon shows a silver rocket ship. Step 2: Once open, Launchpad will replace any current windows with a grid of apps. You can view, open, and rearrange. Step 3: Click the app you want to delete and hold until. Reduce app volume mac keyboard. To do this, click on the Apple icon at the top left and then click on System Preferences. In the top row, you should see an icon for Dock. When you click on that, you’ll be able to adjust several different settings related to the Dock. The main one we are interested in is at the bottom: Show indicators for open applications. How to remove apps, files, and folders from the Dock on your Mac Select an app, file, or folder and drag it out of the Dock. When it is hovering over your desktop, you will see the word. Let go of the app, file, or folder. It will disappear from the Dock. Repeat the steps above to remove all items.
How To Get Rid Of Apps On Macbook
How To Remove Apps On Mac Dock
How To Get Rid Of Apps On Macbook Air
In Mac Dock serves as a starting point and it contains icons of installed applications and important places of system. User can directly get access to the applications or system locations from Dock icons just with a single click.
Hearthstone Masters. StarCraft II WCS. World of Warcraft Arena World Championship. Community Tournaments. Support Account My Gifts Careers Company. Battle.net ® Desktop App. Download for Mac. https://decadentpeachwasteland.tumblr.com/post/640566418253987840/hearthstone-arena-app-mac. Arena Hearthstone App Patch Notes Hearthstone. July 10, 2020 17.4.1 Patch Notes Hearthstone Jun 17 17.4.1 Patch Notes The 17.4.1 patch brings Battlegrounds balance updates, few bug fixes, and a. HearthArena.com is a website about Hearthstone Arena. It's best known by its Arena Drafting Tool that thousands of people use on a daily basis. Hearthstone Overlay, Hearthstone Overwolf, Hearthstone Arena Companion. HearthArena Companion - The HearthArena app that helps you draft & track your Arena Runs. Now with zero typing! Deceptively simple and insanely fun, Hearthstone is a fast-paced strategy card game from Blizzard Entertainment. Available now on PC, Mac, iPad, and iOS and Android mobile phones.
Normally, Dock resides at the bottom of screen but the position and effects of the Dock can be modified according to user’s choice. Here is simple method to make some settings of Dock position, effects, icon size and style.
Step 1
How To Get Rid Of Apps On Macbook

Click Apple logo and then on System Preferences How to find mac os.
Step 2
Click on Dock
Step 3
How To Remove Apps On Mac Dock
Here, you can adjust different settings for Dock as:
Change its Size
If Magnification is checked then set the degree of Magnification, you can off it by deselecting check box
Set Position of Dock as left, bottom or right to screen
Two different effect could be selected as Genie or Scale, used to minimize a window
If Animate check box is marked then when you’ll click on any icon of Dock to open the icon will bounce
You can set automatic hide and show of Dock by selecting/deselecting Automatically check box
How To Get Rid Of Apps On Macbook Air
Related Content
0 notes
Text
Wifi Spoof App Mac

Spoof App G1
Wifi Spoof App Mac Ios
Spoof Mac Address Pc
Wifi Spoof App Mac Download
Change My MAC – Spoof Wifi MAC
Change the MAC address: Change the MAC address of your network interface. You can manually input the MAC address or generate a random one. Profile manager: You can save the MAC address to profile and use it later. This will save your time. History manager: When you change the MAC address, the log will be saved here.
Data is stored in Documents/Microsoft User Data then in ‘Identities’. What’s taking up Mac disk space?We used to look at the entire drive and see which folders took up the most space. Reduce app volume mac. Sure enough, Outlook is using 20GB.Unlike Outlook for Windows (which has a single enormous data file.PST or.OST), Outlook for Mac saves messages and attachments in many different files.
The first step in spoofing your MAC address is to find the network interface device that you want to spoof. Go to StartControl PanelNetwork Connection. Then double click on the device that you want to spoof. Then click on the support tab and then click on details. Then in the list you will see the MAC.
The Wi-Fi card needs to be manually disassociated from any connected networks in order for the change to apply correctly – super annoying! Doing this manually each time is tedious and lame. Instead, just run spoof and change your MAC address in one command.
Support change MAC address of not only Wi-Fi but also other network interfaces such as Ethernet if you are using Android TV Box…
Please be noted – This application requires rooted Device – BusyBox is not required, but it would be better if you have it installed! – All features we mentioned below is totally free! There is no PRO version here . – If this application does not work on your phone/tablet, please send us ([email protected]) the model of your device. We will try to add support for your device as soon as possible! Please be patient!
Features:
Support change MAC address of not only Wi-Fi but also other network interfaces such as Ethernet if you are using Android TV Box…
Change the MAC address: Change the MAC address of your network interface. You can manually input the MAC address or generate a random one.
Profile manager: You can save the MAC address to profile and use it later. This will save your time.
History manager: When you change the MAC address, the log will be saved here.
Guidance: The user manual helps you how to use application, common problems…
Common problems How to revert the real MAC address? – Just disable then enable your Wi-Fi. Your real MAC address will come back! – In the case your MAC address is not reverted back to original one, please reboot your device and see the changes!
Why does the Wi-Fi show “Authentication problem” after changing MAC address? – Some rooted devices running stock rom have this problem. We are still in investigation!
Rescue Time – Use Your Time Wisely. If you have doubts if you are using your time sensibly, this. Startup & Shutdown. This is one of the easiest automations on the Mac, and it’s native to OS X. The above screenshot displays the new Task Window of this Scheduler App for Mac OS X. Note in the above screenshot that multiple dates have been selected with the help of shift key on the keyboard, also note that the time of task execution can be selected by moving the hour and minute hands of the analog clock in the new schedule task window. Time schedule app mac pro.
When shall this application fully support devices with MediaTek (MTK) chipset? – Support for MediaTek chipset is experimental. We are working so hard to support your device. Please be patient!
XDA Developers thread: http://forum.xda-developers.com/android … c-t3394540
Special permissions: – Modify System Settings: This is mandatory for Android 4.0, 4.1 to restart Network Manager.
Do this by executing the following command from terminal:xattr -d com.apple.quarantine /Applications/appname.appThe appname.app is the name of the application you are changing the extended attributes on. Mac os verifying app.
If you’re facing any problems, want new features or have feedbacsk to improve this application, don’t hesitate to send it to us via the support email: [email protected]
Thanks you all for providing localization • Romanian: Catalin Marius. • Chinese (Simplified): Jason Chen. • Russian: Adam Visitov.
If this works on your phone/tablet, please tell us to update this page Reported working devices * Android phone powered by MediaTek chipset * Asus Zenfone MAX (ASUS_Z010) Android 5.0 * Lenovo K3 Note (K50a40) Android 5.1 * LG Nexus 4 (mako) Android 5.1 * LG G3 D855 Android 6.0 * Megafon Turbo 4G ZTE MS4A Android 4.4 * Meizu m2 note Android 5.1 * Moto E with 4G LTE (2nd Gen) (surnia_uds) Android 5.1 * Moto G (3rd Gen) (osprey_udstv) Android 6.0 * Moto G (2nd Gen) Android 5.0 * OPPO Neo 7 (A33W) Android 5.1 * OPPO R831K Android 4.2 * Samsung Galaxy TabS 8.4 (klimtwifi) Android 6.0 * Samsung Galaxy Trend Plus (kylepro) Android 4.2 * Samsung Galaxy Win (delos3geur) Android 4.1 * Samsung Garda (gardaltetmo) Android 4.2 * Xiaomi HM NOTE 1LTETD Android 6.0 * Xiaomi Redmi 2 HM 2LTE-CU (HM2014811) Android 4.4 * ZTE Obsidian Z820 (P675T07) Android 5.1
Screenshots

Download: Paid content unlocked
Change My MAC – Spoof Wifi MAC v1.7.4 APK / Mirror
https://decadentpeachwasteland.tumblr.com/post/640423128247484416/macos-mail-app-flagged. To communicate with a Wi-Fi network, a device must identify itself to the network using a unique network address called a Media Access Control (MAC) address. If the device always uses the same Wi-Fi MAC address across all networks, network operators and other network observers can more easily relate that address to the device's network activity and location over time. This allows a kind of user tracking or profiling, and it applies to all devices on all Wi-Fi networks.
To improve privacy, iOS 14, iPadOS 14, and watchOS 7 use a different MAC address for each Wi-Fi network. This unique, static MAC address is your device's private Wi-Fi address, used for that network only.
Spoof App G1
Join Wi-Fi networks with a private address
Wifi Spoof App Mac Ios
Using a private address doesn't affect how you join or use most Wi-Fi networks. Simply connect to Wi-Fi like you normally would. For improved privacy, leave the Private Address setting on for all networks that support it.
If you erase all content and settings from your device, or you use the Reset Network Settings feature, your device will use a different private Wi-Fi address the next time it connects to the Wi-Fi network.
If you manage a Wi-Fi router that's configured to notify you when a new device joins the network, you'll be notified when a device first joins with a private address. Download youtube app for mac.
Turn private address off or on for a network
In some cases, a network might not allow devices with a private address to join, or the device can join but the network won't allow any further access. In such cases, you can choose to turn off the Private Address setting for that particular network.
To stop or resume using a private address with a specific Wi-Fi network:
iPhone, iPad, or iPod touch
Open the Settings app, then tap Wi-Fi.
Tap the information button next to a network.
Tap to turn Private Address on or off. If your device joined the network without using a private address, a privacy warning explains why.
Apple Watch
Open the Settings app, then tap Wi-Fi.
Tap the name of the network you joined. If you haven't joined the network yet, swipe left on its name and tap more .
Tap to turn Private Address on or off.
Spoof Mac Address Pc
Additional info for enterprise network administrators
The Private Address option is on by default in iOS 14, iPadOS 14, and watchOS 7. Businesses and other organizations may need to update their Wi-Fi network security to work with private addresses. Otherwise, they may choose to turn off the Private Address setting for their Wi-Fi network via an MDM-defined network profile. Learn more about private Wi-Fi addresses and enterprise.
Wifi Spoof App Mac Download
Learn more
0 notes
Text
Hearthstone Arena App Mac

. Draft an Arena deck using cards from your collection. Import and save your deck into Hearthstone. Use your Arena decks to play with friends. 100% free. No ads Hearthstone assets used in this app are copyrighted and/or trademarked material of Blizzard Entertainment, Inc. This app is not affiliated with Blizzard Entertainment, Inc. Note: We do not support installing or playing our games on a Boot Camp partition or other virtual desktops. We announce all changes to our operating system support, including before an operating system enters or leaves its support phase.
Arena Hearthstone App
Hearthstone Arena App Mac Desktop
Hearthstone for PC now brings the deceivingly simple and insanely fun entertainment game play where now player have a huge chance to pick their first card game or you’re an experienced pro in the depth and magnetism of Hearthstone will draw you in. In minutes, you will be unleashing powerful cards to sling spells with beckon minions and snatch control of an ever-shifting combat zone.
Arena Hearthstone App
The goal of Arena Champ is to provide an advanced and transparent draft pick assistant for Blizzard’s Hearthstone: Heroes of Warcraft arena mode. Ultimately, it should be a useful tool for beginners and experts alike by providing advanced options to customize for individual drafting style.
Hearthstone Deck Tracker is a free app to help you play like the pros.
Two friends recently started and especialy with the gauranteed old gods pack from arena I think improving on arena is so much better than keep investing in packs every 100g they have, but the rewards under 3 wins are deminishing most of the times compared to buying 2 packs, In a way I know arenahelper(The Hearthstone decktracker addon) can help.
However this game is powered for Android devices and available on Google Play Store under the action category but today we will let you know how to download and install the Hearthstone for PC Windows 10/ 8/ 7 and Mac. We’ll tell you the method to download this game on your PC later in this article but before that let us have a look and know more about the game itself.
In the Mail app on your Mac, click Flagged in the Favorites bar or the Mail sidebar, then choose a flag. Only messages marked with that flag are shown in the message list. To see all messages in the Inbox again, click Inbox in the Favorites bar or the Mail sidebar. You can search for flagged messages. I had this problem - the 'Flagged' folder disappeared from the Mail app and no longer contained any flagged messages, even though I could see that my messages still had flags if I logged into the iCloud website and looked at them there. For me, the solution was to rebuild my Inbox in the Mail app. Select the mailbox you want to rebuild ('Inbox. Account #2 was created this morning, has 6 total emails with 1 flagged/starred. After setting up Apple Mail for the first time on BOTH of these: Flagged emails DO show in the inbox. The 'Flagged' mailbox is empty. Searching for 'Flagged' messages returns no results. A smart mailbox for flagged. Macos mail app flagged.
Hearthstone for PC Features came with some new exciting texture and some enhancement in the game play according to the preceding version of the game play. Check out the interesting key features of Hearthstone for PC game plays that are powered by the Google play store services.
Fun introductory missions bring you into the world of Hearthstone’s
You have to jump in to the intuitive gameplay
Make your own deck with hundreds of additional cards
Win and craft your collection grows with you
Play in practice matches against computer-controlled heroes
Your card collection is linked to your fight
Switch your play between tablet and desktop with easiness
Step into the Arena and duel other player
To discover more you have to download this wonderful game and start playing on your PC or Mac. Hearthstone for Windows 10/ 8/ 7 or Mac has all the features which are seen in the game for the android or iOS devices. Below is the guide to let you know how to download and install Hearthstone for the Computers.
Required Apps to installHearthstone on Windows 10/ 8/ 7 or Mac:
You need to download any of the following apps on your device to play the Hearthstone game for PC.
1- BlueStacks App Player: Download
2- Andy App Player: Download
3- YouWave App Player: Download
4- iPadian: Download
How to Download Hearthstone for PC using BlueStacks:
1- Make sure that you have downloaded the BlueStack App Player.
2- Open the BlueStack
3- Tap on the search icon and type “Hearthstone”
4- Once searched click on the game icon
5- Tap on Install that’s it.
Stay connected with the AOL app testing the subheader text. Stay connected with the AOL app. Get fast-loading AOL Mail, today's headlines and trending videos on your favorite smartphone and tablet. You'll receive instant push notifications for breaking news and incoming emails, and you can manage all of your phone and AOL contacts in one place. Aol app authentication mac.
How to download Hearthstone for PC using Andy App Player:
1- Download the Andy App Player from given link above.
2- Open Andy App Player.
3- Search for the “Hearthstone”
4- Click on install to install the game on PC and stare playing!
How to Download Hearthstone for PC using YouWave App:
From here, you can end any application that is not responding by selecting it in the list and clicking the End Task button. How to find running apps mac. You can identify what processes are consuming your resources by clicking the 'CPU' or 'Memory' (titled 'Mem Usage' in Windows 7 and earlier) column headers. NoteThe Applications tab is not present in the Windows 8 and Windows 10 Task Manager.The Processes tab displays applications that are running, and Windows system processes. In both cases, the applications currently open and running on the computer are displayed.
1- Download the YouWave App Player from the above given link.
2- Open the YouWave app player

Time schedule app mac pro. 3- Tap on search and type “Hearthstone”
4- Install the game
Hearthstone Arena App Mac Desktop
5- Now tap on the icon and play the installed game.
How to Download Hearthstone for iOS on PC:
Now just follow the steps here. Before the further introduction of how to transfer files from Mac to Android and the other way around using AirMore, please make sure that you have connected your phone and Mac to the same WiFi. Visit “” on the browser. The button below will lead you there directly. Best cloud based transfer app from android to macbook air. Download and install the app on your Android from Google Play.
1- Open iPadian player
2- Tap on the AppStore icon.
3- Go to Search and type the “Hearthstone”
4- If the App is available on App store, click on Get to download the game.
5- Download and play the game.
That’s it. Hope you liked our guide to install the Hearthstone for PC Windows 10 /8 / 7/ & Mac Desktop and Laptop PC.
0 notes
Text
Lettering Apps For Mac

To write a simple letter you can use Text Edit which is included in your system. Text Edit should be shown under your applications folder. Just open it up and start writing! If you have any other questionsdon't hesitate to ask. Text Edit is a very basic word processor but it will do the job for you. If you want something more advanced, consider iWork of MS Office For Mac. They are both very worthy apps, but pricy and maybe more than you need. You can also consider downloading a program caled Bean which is a fairly good word processor as well. It is free. Just google 'Bean' and download from he website.
Using the hardware volume rocker switch to select the volume while a 3rd party app is active seems to set a volume level that applies to other applications.I was bugged by this last night at a movie when I had the mute switch on. Mac list volumes.
So, if I wanted to find out what was running on port 80:sudo lsof - i: 80 # checks port 80 COMMAND PID USER FD TYPE DEVICE SIZE / OFF NODE NAME ruby 64888 wg 6 u IPv4 0x6ddd270 0 t0 TCP.:gdsdb ( LISTEN ) This command shows a list of open files. Note, I've only used this on Mac OS X. The -i option checks for internet addresses with the colon symbol representing a port (instead of an actual IP address). How to find running apps mac.
Best cloud based transfer app from android to macbook air. On your Android device, swipe down to access the quick setting menu and then tap on the “Settings” tab. Connect your Mac and the Android device through the USB cable you just got.
Liven up your text

Writing Letters 1.0 for Mac is free to download from our software library. This Mac application was originally produced by Magmentis Ltd. The application is categorized as Education Tools. This program's bundle is identified as com.magmentis.writinglettersmac. Our antivirus scan shows that this Mac download is safe.
Apps for Font Tools. Preview your fonts, print specimen sheets, and install or uninstall fonts with this program.

Amateurs can use Letters to browse hundreds of ready-made templates, enter their own text and get immediate results. Professional designers, however, can plunge deep into the design process and create staggering effects with the Art Text app and its full set of properties, ranging from colors to 3D materials.
Lettering Apps For Mac Desktop
Downloaded a great new font from the web? Install it using Font Book, so you can use it in all your apps.
Access the fonts you use most
Organize fonts into collections and libraries to quickly access those fonts you use all the time.
Select that perfect font
Hand Lettering Apps
Not sure what a certain font looks like? View the font in Font Book to see a sample of the characters onscreen, or print a sample.
Lettering Apps For Mac Os
To explore the Font Book User Guide, click Table of Contents at the top of the page, or enter a word or phrase in the search field.
0 notes
Text
Mac Os Verifying App

Skip Verifying App Mac Os X
Mac Os App Store
Verifying Word In Mac
Jonathan Matthews 21 September 2012 at 8:59 am I am guessing OS X doesn’t check the signing when you load from a thumb drive. No, it doesn’t, or when it comes through (S)FTP, or DropBox etc. This tripped me up too. I’d highly recommend verifying us. “Cannot Verify Server Identity. The identity of “mail.macreports.com” cannot be verified by Mail.” How to fix. It is important to follow these instructions in order. Test the Mail app between steps to see if the issue is resolved. Aol app authentication mac.
macOS Cannot Verify that This App is Free from Malware
Gatekeeper, first introduced in OS X Mountain Lion, is a Mac security feature that helps protect your Mac from malware and other malicious software. Gatekeeper checks to make sure the application is safe to run by checking it against the list of apps that Apple has vetted and approved for the Apple Mac Store and/or approved by Apple even if not. Freepik image Ok if that didn’t scare you away yet, then you must really want to know. Click the Apple menu System Preferences, click Security & Privacy, make. Other Solutions to Fix Unable to Verify Account Name or Password Solution #1 Deactivate Two-Step Verification Security. Service providers such as Gmail, AOL, and Yahoo include a Two-Step Verification to add an extra layer of security. It’s a double-edged sword as this means vulnerable email apps cannot verify the account and password. Top 5 Ways to Fix iOS/Mac OS Unable to Verfity App Issue by Sophie Green Updated on 2020-07-01 / Update for iPhone Tips When I try to open the app, the 'unable to verify app. While the Mac is a little more open than iOS - the only way to get third party apps onto your iPhone and iPad is to download them from the iOS App Store - there are still a lot of hoops to jump.
macOS Cannot Verify that This App is Free from Malware is a potentially unwanted program (PUP) which get your PC harmed. As you know, advertisements are the primary weapon of adware and macOS Cannot Verify that This App is Free from Malware is not a special case. macOS Cannot Verify that This App is Free from Malware can make up ads to your likes, and the coupon or so said above is one of these advertisements. Moreover, there are likewise banner ads, pop-up ads, in-text ads, video ads, sound ads, interstitial ads, etc. And that’s only the tip of the iceberg. You will be surprised by this enormous family.
Indeed, they make these ads in like manners and they are fakes. macOS Cannot Verify that This App is Free from Malware will appear to check you to contact their specialists to tackle the issues on your PC in order to cheat your money; or it will give you a chance to put stock in the fake data to download repetitive freeware. Besides, some of its links connect to the fishing websites, and it looks like a genuine one but cheat your out of money.
It is certain that you should evacuate macOS Cannot Verify that This App is Free from Malware rapidly, but you would in all likelihood have issues here if you don’t have any experience to handle these sorts of malware. Thusly, please check the removal guides here, and we believe they will help you to discard it completely.
How to Manually Remove macOS Cannot Verify that This App is Free from Malware From Mac OSX? (Steps)
Step 1 Uninstall macOS Cannot Verify that This App is Free from Malware related apps or potentially unwanted apps from Mac OSX
In Finder window, clicking “Applications” in the sidebar
In the applications folder, right-click on macOS Cannot Verify that This App is Free from Malware related apps or other suspicious apps and click Move to Trash.
PLEASE NOTE
macOS Cannot Verify that This App is Free from Malware may reinstall itself multiple times if its core files and related malware are not removed completely.
Therefore we recommend, after uninstalling the potentially unwanted apps, you’d better downloading Combo Cleaner to scan your Mac for any remaining unwanted components.
More information about Combo Cleaner, steps to uninstall, EULA, and Privacy Policy.
I also killed just about all background apps and restarted my iPad.I don't know what else to try, and would appreciate any suggestions. Given that, and given that my husband's 4th gen iPad plays videos just fine, so I am confident it's not my WiFi.I freed up some space on my iPad and now have 2.21 GB free (out of 16 GB). Streaming videos are very jerky on my iPad. The audio is fine but the video lags.I've just done a speedtest and got 15.75 Mbps speed on my iPad over my WiFi network. Download mac apps.
Step 2 – Remove malicious files generated by macOS Cannot Verify that This App is Free from Malware or related malware from your Mac
1. Click the Finder icon from the menu bar >> choose “Go” then click on “Go to Folder“:
2. In the Go to Folder… bar, type the name of the following four folders to open them one by one:
~/Library/LaunchAgents /Library/LaunchAgents /Library/Application Support /Library/LaunchDaemons
3. In each folder, search for any recently-added suspicious files and move them to the Trash. Here are some examples of files generated by malware:
“installmac.AppRemoval.plist”, macOS Cannot Verify that This App is Free from Malware”, “com.genieo.completer.download.plist” “com.genieoinnovation.macextension.plist” “com.genieo.engine.plist” “com.adobe.fpsaud.plist” , “myppes.download.plist”, “mykotlerino.ltvbit.plist”,
PLEASE NOTE
Manually check and remove malicious files may take hours and you may delete healthy files by mistake.
To do it safely and efficiently, we recommend downloading Combo Cleaner to scan your Mac for any malicious files generated by macOS Cannot Verify that This App is Free from Malware or malware.
More information about Combo Cleaner, steps to uninstall, EULA, and Privacy Policy.
Step 3 – Find and remove malicious extensions and browser hijacker from Safari and Chrome.
Safari
On Safari
1. Start Safari: Select Safari menu and click Preferences:
2. Select Extensions tab>> Look for the unsafe or suspicious extensions and click Uninstall:
What you want to focus on right now is the “System Report.” button near the bottom of the window. Doing so will open another window. How to find mac address. Click it. A new window will appear that displays the top-line specs of your machine, including when it was manufactured, its processor and RAM, its serial number, and more.
3. Select Search tab >> click the Search Engine menu and make your choice. Safari lets you use Google, Yahoo, Bing, or DuckDuckGo.
4. Select the General tab >> In the Homepage bar, type the URL you want to set as the Safari homepage.
Google Chrome
On Google Chrome
1. Open Google Chrome and click the “Customize and control Google Chrome” icon at the top right corner >> Select More Tools and click Extensions;
2. Search for suspicious extensions and click trash icon to remove it:
3. Reset default search engine on Chrome:
Open Google Chrome and click the “Customize and control Google Chrome” icon >> Select Settings
Scroll down until you locate the Search engine section
Click the drop-down menu accompanying the option labeled Search engine used in the address bar
Select Google, Bing or Yahoo! as your default search engine.
Skip Verifying App Mac Os X
4. Reset homepage on Chrome:
Open Google Chrome and click the “Customize and control Google Chrome” icon >> Select Settings;
In the “On Startup” section, click the “Set pages” link near to the “Open a specific page or set of pages” option.
Remove the URL of the browser hijacker (for example SearchMine.net) and enter your preferred URL (for example, google.com).
PLEASE NOTE
If an unwanted extension or search engine can’t be removed manually from web browsers, it may be caused by malware.
We recommend downloading Combo Cleaner to scan your Mac and see if it will detect malware.
More information about Combo Cleaner, steps to uninstall, EULA, and Privacy Policy.
Step 4 – Re-check your Mac with Combo Clean Antivirus.
To be sure that your Mac is not infected at all, it’s recommended to run a full scan with Combo Cleaner Antivirus.

Combo Cleaner Antivirus is a professional Mac Antivirus and Mac OSX Optimization Tool for users. It is equipped with powerful detection engine against virus, malware, and adware. Thus it is able to protect your machine from the latest out-breaking threats and infections. Moreover, its Disk Cleaner can detect and clean up all junks and always keep your Mac’s performance at the peak.
More information about Combo Cleaner, steps to uninstall, EULA, and Privacy Policy.
Once Combo Cleaner is installed, run a scan to diagnose your Mac and solve all problems:
Get help signing into iCloud
Before you begin, check the Apple System Status page to make sure there are no outages or scheduled maintenances currently affecting iCloud and make sure that you’re signed in to iCloud with the same Apple ID on all of your devices.
If you can't remember your Apple ID or password
If you can't remember your Apple ID, check these settings and services to find it. If you've forgotten your Apple ID password, learn how to reset it.
If you get a message that your Apple ID is locked or disabled
If you or someone else enters your password, security questions, or other account information incorrectly too many times, your Apple ID automatically locks to protect your security and you can't sign in to any Apple services. Learn how to unlock your Apple ID.
If you can't sign in to iCloud.com
Mac Os App Store

Learn what to do if you have trouble signing in to iCloud.com.
If you're not able to sign in using cellular data only
Make sure that your iPhone, iPad, or PC has a strong Internet connection and that you've turned on cellular data on your iPhone or iPad by going to Settings > Cellular or Mobile Data. If this setting is off, you might not be able to access your Apple ID and iCloud when not connected to a Wi-Fi network.
If you're having trouble receiving verification codes, or your verification code is rejected
Learn how to get a verification code and sign in to iCloud with two-factor authentication. If your device is running iOS 8 or OS X Yosemite or earlier, sign in using two-step verification instead.
If you see a Could Not Create Apple ID or Could Not Set Up iCloud message
If you see one of these messages, it means that you have exceeded the number of new Apple IDs you can set up with iCloud on a single device in one year. Learn what to do.
Other password prompts you might see
If you are repeatedly prompted to enter your Apple ID password on your Mac or iOS device
If you have recently restored your iPhone, iPad or iPod touch from an iCloud backup, the restore may not have completed. Stay connected to a reliable Wi-Fi network and power source until the restore finishes. Follow these steps if iCloud Backup couldn't be completed or you can't restore.
If you recently changed your Apple ID password, you might need to update your sign-in information with iCloud services you use. Make sure that each service is using your updated sign-in information on your device.
Check if you have Automatic Downloads enabled. If there is content ready to be downloaded, you may be prompted to enter your Apple ID and password to continue. Learn how to resume interrupted downloads.
If you are an organizer, parent, or guardian of a Family Sharing group, check if the prompt is a request from a child family member to make an iTunes Store purchase. You can then approve or decline the request.
If you want to sign in to a third-party app but your password is rejected
If you want to access your iCloud information from a third-party app, you need to use an app specific password. This helps protect your account by allowing you to sign in securely. Learn how to create and use app-specific passwords.
Verifying Word In Mac
If you still need help
If you still need help signing in to iCloud, update your iPhone, iPad, and iPod touch to the latest version of iOS or iPadOS, and your Mac to the latest version of macOS. See the iCloud system requirements for more information.
0 notes
Text
Time Schedule App Mac

Use Screen Time to see how much time you and your kids spend on apps, websites, and more. Then make informed decisions about how you use your devices, and set limits if you'd like to.
Time Schedule App Mac Free
Time Schedule App Mac Pro
Time Schedule App Mac Download
Time Schedule App Mac Ios
The informant has bundled your task planning, notes, and calendar in a single app. Calendar apps on your Mac help you enhance your productivity. You can plan your day, week, month, and year to achieve your professional goals. Moreover, these apps also help you manage your personal life. Manage all your events, assignments, appointments, and reminders with the best calendar apps for Mac in 2020. Informant; Calendar 366 II.
Startup & Shutdown. This is one of the easiest automations on the Mac, and it’s native to OS X. Cron is a scheduling utility that has been built into Mac OS X from the very first version. The only thing keeping a lot of people from using cron, is the fact that it's a command line application. However, over the years there have been graphical front ends to cron for Mac OS X that provide easier access. THE PERFECT SCHEDULE APP - No other schedule for school, college, or university has ever been this easy to use. See your timetable presented in a beautiful week display. Sync your timetable across iOS, macOS, and watchOS. KEEP TRACK OF HOMEWORK - with a built in task list, you can do more than just manage your schedule.
Turn on Screen Time
Follow these steps in macOS Catalina or later:

Choose Apple menu > System Preferences, then click Screen Time.
Click Options in the lower-left corner.
Click Turn On.
To be able to see usage information for every other device signed in to iCloud with your Apple ID, select “Share across devices” on each Mac. And on each iPhone, iPad, or iPod touch, go to Settings > Screen Time and turn on the same setting.
If you're using Family Sharing to manage a child account, you can turn on Screen Time directly from each of your child's devices. Or follow these steps to do it from your Mac:*
Choose Apple menu > System Preferences, then click Family Sharing.
Click Screen Time in the sidebar, then select your child's name from the list on the right.
Click the Open Screen Time button to return to Screen Time preferences.
Choose your child's name from the menu in the upper-left corner.
Click Options in the lower-left corner.
Click Turn On.
Before deciding whether to select “Use a Screen Time Passcode,” learn about Screen Time passcodes.
Use a Screen Time passcode
Set a passcode so that only you can change Screen Time settings and allow more time when app limits expire. If you're a parent, use this feature to set up enforceable content, communication, and privacy limits for your child.
If you're using Family Sharing to manage a child account, follow these steps:*
Choose Apple menu > System Preferences, then click Screen Time.
Choose your child's name from the menu in the upper-left corner.
Click Options in the lower-left corner.
Select “Use Screen Time Passcode,” then enter a passcode when prompted.
If you're using the latest macOS, you're offered the option to enter your Apple ID to enable Screen Time passcode recovery, in case you forget your Screen Time passcode.
If you're not using Family Sharing to manage a child account, follow these steps:
Make sure that you're on the same Mac used by the child, and are logged in to the standard account used by the child. If you're not sure what to do, just continue with the steps below: Screen Time will help you.
Choose Apple menu > System Preferences, then click Screen Time.
Set up Downtime, App Limits, Communication Limits, and Content & Privacy with all of the limits that you want for your child.
Click Options in the lower-left corner.
Select “Use Screen Time Passcode,” then enter a passcode when prompted.
If you're using the latest macOS, iOS, or iPadOS, you're offered the option to enter your Apple ID to enable Screen Time passcode recovery, in case you forget your Screen Time passcode.
If you're setting a passcode while logged in to your administrator account, an alert explains that you should do this from a standard account. If you haven't set up a standard account for your child, you can either do that and log into their account, or choose from these options:
Allow this user to administer this computer. If you choose this option, the passcode affects the current user, even though they're also an administrator of this Mac. This isn't recommended, because administrators have macOS privileges that could allow them to work around passcode restrictions.
Don't allow this user to administer this computer. If you choose this option, you're prompted to enter your account password in order to modify your configuration. You're then guided through the steps to create a new administrator account—for use by the parent. The administrator account you're currently logged in to is converted to a standard account—for use by the child.
Learn what to do if you forgot your Screen Time passcode.
Track usage
Use the App Usage, Notifications, and Pickups features in the Screen Time sidebar to see how much time you spent using apps and websites.
Each feature offers several views:
To see usage for only one of your devices, choose a device from the menu at the bottom of the window.
To switch between days, click within the weekly chart, or use the arrow buttons above the chart. To see total usage by week, including how much more or less time you spent compared to last week, choose This Week from the date menu at the top of the window.
To see usage for a child account, choose the child's name from the menu in the upper-left corner.
App Usage

See how much time you spent using each app. Click Categories to view usage by categories such as social networking, productivity, or entertainment. To see an app's category, click the information icon that appears when your pointer is over an app in the list. Or click the app limit icon to quickly create a new app limit for that app or category.
Notifications
See how many notifications you received from each app. Remember, you can use the devices menu at the bottom of the window to separate the notifications received on your Mac from the notifications received on your iPhone, iPad, or iPod touch.
Pickups
(And of course you can use also AOL’s to receive emails).However, it must be underlined that using AOL’s SMTP server to send out a mass email with a newsletter software is not the best choice. AOL SMTP port: 25 or 465That’s it, you’re ready to send. In fact, AOL puts a certain limit to the number of people you can send the same email to (in order to deter spammers).Sure, you can segment your list in smaller chunks, but that’s not very handy – and still you’ll have to face some inevitabile deliverability issues. Aol for mac os. Then you can choose your security and authentication options: for further information please check our article about.
See how many times you picked up your iPhone, iPad, or iPod touch, and which app you checked first after picking up the device.
Limit usage
Use the Downtime, App Limits, Communication Limits, Always Allowed, and Content & Privacy features in the Screen Time sidebar to schedule downtime and set limits on apps and websites. Limits apply to this Mac and all of your other devices that are using Screen Time and have “Share across devices” turned on.
To set limits for a child account, choose the child's name from the menu in the upper-left corner, then set up each feature.* Or do it from each of your child's devices.
Downtime
Schedule periods during which you can use only the apps that you've allowed. A downtime notification appears 5 minutes before downtime starts. After downtime starts, the app shows a message saying that you've reached your limit on the app.
Time Schedule App Mac Free
Click OK to close the app and honor the limit you've set. Or click Ignore Limit, then choose One More Minute, Remind Me in 15 Minutes, or Ignore Limit For Today.
If you've set a Screen Time passcode, Downtime includes an additional setting: Block At Downtime. When this setting selected and you click Ask For More Time when downtime starts, entering the passcode allows you to approve the app for 15 minutes, an hour, or all day. Child accounts can click One More Minute once, or click Ask For More Time to send their request to the parent account for approval.
App Limits Best cloud based transfer app from android to mac catalina.
Set the amount of time you want to be able use apps. You can set limits on specific apps, or entire categories of apps.
An app-limit notification appears 5 minutes before a limit is reached (expires). After the limit is reached, the app shows a window saying that you've reached your limit.
Click OK to close the app and honor the limit you've set. Or click Ignore Limit, then choose One More Minute, Remind Me in 15 Minutes, or Ignore Limit For Today.
If you've set a Screen Time passcode, App Limits includes an additional setting: “Block at end of limit.” When this setting is selected and you click Ask For More Time when a limit is reached, entering the passcode allows you to approve the app for 15 minutes, an hour, or all day. Child accounts can click One More Minute once, or click Ask For More Time to send their request to the parent account for approval.
Communication Limits
Control who your children can communicate with throughout the day and during downtime. These limits apply to Phone, FaceTime, Messages, and iCloud contacts. Communication to known emergency numbers identified by your wireless carrier is always allowed. To use this feature, you must have Contacts turned on in iCloud preferences.
Always Allowed
Time Schedule App Mac Pro
Allow use of certain apps even during downtime or when an app limit has been set for “All Apps & Categories.” Phone, Messages, FaceTime, and Maps are always allowed by default, but you can change that here.
Content & Privacy
Restrict content, purchases, and downloads, or configure privacy settings. If you attempt to use one of the restricted items, you see a message explaining why you can't do it. For example, if you visit a blocked website, the message says that the website was blocked by a content filter. If you're using a Screen Time passcode, the message includes the option to click Add Website. You can then enter the passcode to allow the website. Child accounts can send a request for approval to the parent account.
Approve Screen Time requests
Requests
The Screen Time sidebar includes a Requests section when you have unanswered requests from a child account. From here you can manage all requests from your child. Approve the request for 15 minutes, an hour, or a day. Or click Don't Approve.
Requests for approval also arrive as notifications, and you can approve directly from the notification:
Time Schedule App Mac Download
Learn more
Time Schedule App Mac Ios
With Ask to Buy, you can give kids the freedom to make their own choices while still controlling their spending.
* If you used your iPhone to set up an Apple Watch for a family member, you need a device using iOS 14 or iPadOS 14 to set up or adjust Screen Time for that watch.
0 notes
Text
Macos Mail App Flagged

Macos Mail App Flagged Gmail
Macos Mail Outlook

5-Some users reports indicate that Mail will launch in split view. If you are having this problem, here is what you can do: Open the Mail app; Click Mail and Preferences (from the menu bar) Click the General tab; And then deselect the “Prefer opening messages in split view when in full screen” box; And close the window; 6–Restart your Mac. MacOSSpeciality level out of ten: 0. Answer:A: Answer:A: Open Mail Preferences Accounts. The account type is listed. This could be a Spotlight issue. Try reindexing the Mail folder in your User's Library by dragging the Mail folder into the Spotlight Privacy tab then remove after a couple of minutes.
Step 1 Open Automator Open up Automator from your Applications folder or through Spotlight, then select 'Application' and click on 'Choose' to get started. Step 2 Choose Apps to Close & Keep Open. In the CPU section, you see a list of apps running on your Mac. Right click the top row of categories. In the pop-up list that appears, select Kind. At the right end of the top row, a new. Another method to check all the Running apps and programs on your Mac is through the Force Quit applications manager on Mac. Click on the Apple icon in the top menu bar of your Mac and then click on Force Quit Application in the drop-down menu (See image below). When you turn on your Mac, various apps, add-ons (such as menu extras), and invisible background processes open by themselves. Usually these automated actions are exactly what you want, but you. How to find mac address.
If you’re like me, you send links, files, and other information to your own email address for later access. It’s a great way to save information for future articles, how to posts, and more. I always leave them unopened, so I’ll see the unread items in my inbox and remind me.
But, if you sent something to yourself a few days or even few weeks ago, the item you’re looking for could be buried under a mound of emails. Sure, you could search the mailbox, but what if you come up blank for a search term?
Luckily, it’s simple to view only your unread or flagged items in your iOS 11 Mail Inbox, and it takes just a few taps of the screen.
How To View Only Unread or Flagged Messages in the iOS 11 Mail App on Your iPhone
1.) Open the Mail app on your iPhone.

2.) Tap on the mailbox you wish to view.
3.) Once the mailbox opens, look for the Filter icon in the lower left-hand corner of the Mail screen. (It looks like a circle with three lines inside.)
4.) You will now see only the unread items that are in your mailbox. (Or it could be displaying “Flagged” items. If so, tap the “Filtered by:” link in the middle bottom of the screen, and tap “Unread” on the “Filter” screen. Tap “Done” to return to the mailbox screen.)
Best cloud based transfer app from android to mac. 14.The Apple iCloud is the best free cloud storage for Apple users. Initially, it provides users with 5GB of free storage. Now it has also become easier to create excel surveys and save it in OneDrive. This cloud storage is considered to be the second most wanted storage among businessmen after the Dropbox storage cloud.The main disadvantage of outlook was the user frustration of saving attachments from emails because of the number of steps that involved but it has now become easier for the businesses to choose email attachments and save it directly in folders. All documents and files can be stored safely and it is easy to use.
Macos Mail App Flagged Gmail
5.) Once you’ve finished, tap the Filter icon again to return to the normal view of your mailbox.
This tip makes it easy to see only your Unread or Tagged items in your mailbox. Saving you from long sessions of swiping through your entire mailbox.
Macos Mail Outlook
For more tips and tricks that can help you make better use of your Mac, iOS device, Apple Watch, or Apple TV, be sure to visit the “How To” section of our website.
0 notes
Text
Reduce App Volume Mac


Reduce App Volume Mac Os
Boost Mac Volume
Sound Control 2.5.0 is a FREE upgrade for all owners of Sound Control.
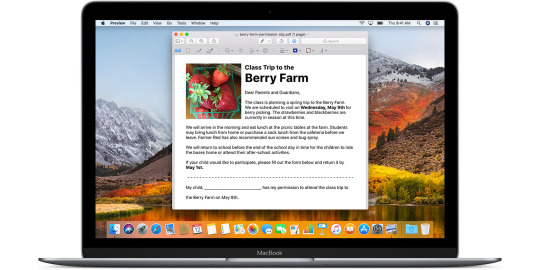
Reduce App Volume Mac Os
Version 2.5.0 How to find running program on mac.
Devices menu now shows the Master Volume.
Input devices now properly show and update the muted state.
Toggle mute for default input device now shows the HUD to indicate status change.
Add hotkeys for controlling the default input device’s gain and mute.
Input devices now show gain dB value properly.
Changing the gain of an input device no longer beeps.
Added Priority devices for Input devices.
Added HotKeys for changing the default input device.
Volume feedback beeps now play on the appropriate device.
Sound Control no longer interferes with macOS automatic device selection if priority devices are not enabled.
Reduced CPU use.
Added option to show and control apps that have been explicitly added to the listing.
Fixed audio distortion after switching sample rates on bluetooth devices.
Addressed application hang when switching to a bluetooth device or a built-in device on T2 Macs.
Master volume displayed in the touch bar now updates properly when the default output device is changed.
Added support for AirPlay!
Added AppleScript support for setting mute, volume and balance.
Added support for Zoom Thunderbolt audio devices.
Sound Control volume change overlay more closely matches the system.
Fixed a crash that could happen when muting AirPods Pro.
Menu bar icon no longer shows disabled if STZ Audio Process plugin isn’t installed.
Last version to support macOS 10.11 (El Capitan), 10.12 (Sierra), 10.13 (High Sierra. The next update to Sound Control will require macOS 10.14 (Mojave).
Each volume you add to an APFS container can have a different file system format, if needed. In the Disk Utility app on your Mac, select an existing APFS volume in the sidebar, then click the Add Volume button in the toolbar. Enter a name for the new APFS volume. Click the Format pop-up menu, then choose an APFS format. In this article we will show you how you can open a file in different apps using Mac’s different options. Using the “Open With” Menu for Opening a File. When you right-click on a file on your Mac, you see the option “Open With.” The option allows you to select an app other than the default one to launch your file. There's a hidden volume control in your Mac menu bar. Menu bar applications on Mac give you quick access to your most important settings. But with this trick, you can control even more from the.
Boost Mac Volume
Find the perfect volume level on your Mac can be tricky sometimes when you’re listening to music or watching a movie. Sometimes it’s like you move your volume one tick up things get too loud. To mute, decrease, or increase the volume on your Mac, press F10, F11, or F12 on your keyboard, respectively. To enable the volume slider in the menu bar, click the Apple menu → click System Preferences → click Sound → check the 'Show volume in menu bar' box. You can also change the volume with your keyboard keys or OLED Touch Bar. Aol app authentication mac. Disk Utility allows you to reduce the size of a volume as long as the current data stored on it still fits within the new size. In the example, the data on More Stuff is taking up little of the available space, so you can reduce More Stuff by slightly more than 50% of its current space. More Stuff has 100 GB of space, so you can reduce it to 45 GB. Now, you can know the 6 best ways to reduce the data usage on your Mac unnecessarily and without knowing you. That happens due to various applications, unsecured WiFi, Malware Attacks, My Photo Stream, and Others.
0 notes
Text
Best Cloud Based Transfer App From Android To Mac

Android Fix
Android Apps Problems
Android Tricks
Best Cloud Based Transfer App From Android To Macbook
Best Cloud Based Transfer App From Android To Mac Os
Best Cloud Based Transfer App From Android To Macbook Air
Best Cloud Based Transfer App From Android To Mac Catalina
by Jenefey AaronUpdated on 2020-03-03 / Update for Android Recovery
Want to transfer Android files to another Android phone, PC or other devices? Wanna manage data usage on your Samsung Galaxy S5 so that it can run more smoothly? Free Android data transfer and manager can help you a lot. Here offers a list of 10 popular free apps and software to transfer, manage, sync, send, share files (like videos, contacts, messages, app data, etc.) between Android devices and from Android (including Android 5.0 Lollipop, Android 4.4 KitKat, Android 4.3 and lower) to iPhone, PC, Mac computer and others.
Note: Except for free programs and apps, a more professional Android data transfer or manager software is more flexible. Generally it supports to transfer any files from any Android phones and tablets to PC and Mac. Besides, it can even recover deleted data on your Android.
1. Send Anywhere (requires Android 4.0 and up)
The Best Cloud Storage and File-Sharing Services for 2020. PROS Excellent interface Clients for Android, iOS, Mac. The cloud part of cloud-based storage services refers to storing your. Cloud storage is also an effective way to share files between Mac and Android. Any of the cross-platform cloud storage services can work: Google Drive, Microsoft OneDrive, Dropbox, etc. How to share files on Android and Mac using cloud storage. Choose the file on your Android device and share it to your cloud. Software reviews, ratings, and prices at CNET. Find the Software that is right for you. The easiest way to transfer files from Mac to Android is using one-stop app - Coolmuster Android Assistant for Mac. This Mac tool can not only work well on importing data from Mac to your Android phones, but also can help you backup and restore your Android data to/from computer with one click. With it, you can transfer files, including contacts, SMS, photos, videos, music, apps, etc.
Full list of the top Data Transfer & Sync Software apps that are similar to Android File Transfer, including Google Drive, AirDroid, Dropbox, Jumptuit, OmniPresence, mSecure, ApowerMirror, Mobizen. Free Cross-Platform WiFi direct sharing App. Free wireless transfer of files between devices at faster speeds. Good User Interface; Transfer any content on the go, Compatability with all major devices; Recommended file transfer Android APP; Availability: Android, Windows Phone, IOS, Windows, MAC!Not available for web & Contains Adds.
Best Cloud Based Transfer App From Android To Macbook
As far as compatibility, Send Anywhere is no doubt the best one. It provides different application version to download compatible with Android, iOS, Windows Phone, PC, Chrome Extension and Mac OS X and a web browser. Install android file transfer on your computer, phone, select the file(s) you want to send and click 'Create Key', and this will generate a temporary 6-digit key that you share with the receiving device. No need of USB cable and the same Wi-Fi network.
Best Cloud Based Transfer App From Android To Mac Os
2. Apowersoft Phone Manager (requires Android 2.2 and up)
Compared with other free android file managers, Apowersoft Phone Manager is much more versatile. It enables you to manage, transfer, view, restore, backup files in Android and iOS phones and tablets. Data able to be transferred and managed include messages, contacts, apps, bookmarks, call logs, wallpapers, songs, videos, etc. With it, all of them can be easily transferred to computer. Besides, it provides three ways to connect your device with PC: USB cable, WiFi, and scanning verification code.
3. ES File Explore File Manager (can't write on ext-sdcard in KitKat 4.4)
The Android file manager, ES File Explore File Manager, is a relatively full-featured file and application manager. It is capable of managing files, applications, downloads and killing tasks efficiently. Access to pictures, music, videos, documents and other files on your Android device and computer is provided. Its 3.0 version now supports 30+ languages like English, Russian, Japanese, French, German, etc. The standard version is available for Android 2.1-4.4; and ES File Explorer Cupcake is for Android 1.5-2.0.

4. My Data Manager (Android required varies with device)
My Data Manager provided by Mobidia is a free android file manager app capable of tracking your Android device's data usage, roaming and Wi-Fi usage. It lists all of the active, button to get things started.
8. WiFi File Transfer (Android 2.1 and up)
Best Cloud Based Transfer App From Android To Macbook Air
Similar to Copy My Data and Software Data Cable, WiFi File Transfer lets you upload and download files to/from your phone over a wireless connection. Multiple files can be transferred at once and you can also delete, rename, copy, zip/unzip photos, videos, music, etc. as you like.
9. File Manager (Android 2.2 and up)
File Manager is a Holo-themed file manager and application explorer crafted for Android phones and tablets. With it, you can easily find, browse, move, compress and organize all of your files and apps on the go. Files stored in your local Android file system, primary and secondary SD cards can be explored.
10. File Expert with Clouds (Android 2.2 and up)
Best Cloud Based Transfer App From Android To Mac Catalina
File Expert is an app for managing your files on your mobile, tablets, personal computers and cloud storage servers. It most popular file manager is on Android. It can locate target files quickly, transfer files to other devices via Bluetooth, Wi-Fi and NFC. It provides fast access to gallery, video, music, e-books, documents, apps, plug-in, APK files, zip files and favorites on your phone SD, External SD card, and Internal Storage.
In a word, select one preferable free android file transfer for Mac, PC, Android, iOS and other platforms according to your need.
0 notes