
Statistics
We looked inside some of the posts by derneue3-blog and here's what we found interesting.
Average Info
Notes Per Post
0
Likes Per Post
0
Reblog Per Post
0
Reply Per Post
0
Time Between Posts
12 days
Number of Posts By Type
Text
17
Last Seen Tumblr Blogs


Fun Fact
The average Tumblr user visits about 67 pages every month.
Text
Creating Beautifully Executed High-Key Photography
High Key photography is used extensively in fashion, portraiture and increasingly in product photography.
Today we're going to talk a little about what's required for creating beautifully executed high key photography.

Photo by Siyan Ren on Unsplash
What Is High Key Photography
Back in the early days of photography, film didn't have a huge range. It couldn't deal with the pure whites and heavy blacks that we can get today (At least, not in the same frame).
Because of this, photographers and film-makers would only shoot in midtones and into the high tones OR they would shoot low key images.
The way that the High Key images were lit meant that a lot of shadows were completely blown out.
This is absolutely perfect for fashion or beauty images, as shadows on the face generally make for a far less flattering image.
Now instead of film limitations, shooting High Key images is a stylistic choice and is used widely in fashion shoots and portraiture.
Over the last few years, we've seen an increase in the use of High Key photography for products, especially Apple with their gorgeous iPhones looking sleek against a pure white background.
This use of High Key really highlights the product and makes it stand out… The use of High Key as a style has also become associated with high-quality brands.
As mentioned previously, the opposite of High Key is Low Key, which involves very dark scenes, coupled with very deep shadows.

Lavi Perchik
Equipment For High Key photography.
Shooting indoors is not an easy task and shooting High Key inside is virtually impossible, without the right equipment.
You'll need a pure white background and as a bare minimum three studio lights, but preferably four.
While it is possible to achieve the High Key look with continuous lighting, it is really not the best way.
This type of lighting often doesn't have quite enough power to get the look we want to achieve and then doesn't have enough manual control to get the balance between background and subject just right.
You'll need a white background of some description, whether this is just a pure white wall or a roll of photographers background.
High Key photography is a LOT easier if you have a fair amount of space around you!

Lukasz Szmigiel
Lighting Your Background
First things first, you need to light your background. We want one light either side of where your subject is going to be, pointing directly at the background.
These lights should be at exactly the same power either side, so we get a nice evenly lit backdrop.
Make sure that the lights aren't too close to the background, or you may get hot spots, where one section of light is significantly lighter than the others.
Ensure that the lights aren't angled towards the subject, otherwise, you may get light spill, which is similar in effect to lens flare.
Great, you now have your background nicely and evenly lit.

Adam Birkett
If you want your backdrop to be pure and completely white, then you'll need it to be 2 stops brighter than the subject you're shooting.
This means if you want to shoot your subject at f5.6, you'll need to have your background at f16. We told you those continuous lighting systems weren't powerful enough!
Now, place your subject in the centre of the backdrop. If you're shooting a model you'd generally want to try and keep them around 6' away from the backdrop.
This is because the backdrop has so much light on it, that it can bleed onto the model, producing that lens flare look we spoke about earlier.
Now you position your 'key light'. This is the main light that is lighting your subject and is located to one side. This is going to be the main light for lighting your subject.
Try and make sure that the light on your subject is reasonably flat, so we aren't seeing harsh, long shadows.
The key here is that we're trying to produce flat lit, bright images, without too much contrast.
After this, you place your fill light on the opposite side of your subject. This light needs to be set at least one stop lower than your main key light.
The purpose of the fill light, as the name suggests is to 'fill in' any harsh shadows and light the opposite side of the subject.
And that is the very basics of how to set up your lighting. It is VERY unlikely you'll get it 'just right' first time out of the bag and it is always worth having some reflectors to hand, so you can experiment with how the light is falling on your subject.
Just keep tinkering until you get it perfectly lit for your tastes.
It's worth noting that using a tripod can make working in a studio SO much easier, although they're not to everyone's taste.

Alvaro Serrano
Camera Settings
For this type of photography, you will need to be shooting manual.
Your shutter speed will need to be around the 1/100th of a second and the aperture at a minimum of f5.6, ideally f8.
F8 on a 50mm lens, with focus on the eyes, will give you pleasing sharpness front to back, if you're shooting a model.
Obviously, if you're shooting a product, you may want an even higher aperture.
In terms of ISO setting, you want to be shooting at low ISO, not more than 100 if you can.
We ONLY want the flashlight and faster ISO's will start to pick up the ambient light in the studio space or even of the modelling lamps.
Of course, shooting a low ISO also means you won't have any noise on the images, just pure, crisp images…
If this is something you're going to be doing regularly, it really is worth investing in a flash meter.
Flash meters are a little old school now, but it is still the best and easiest way to work out exactly how much light is falling on each part of the subject and the background.
Honestly, if you've invested in all the studio flash, it really is worth investing a little more in the flash meter.

Martin Adams
Final Thoughts
High Key photography really isn't easy, in fact, it's probably the hardest light set up to get just right…
It is, however, the most rewarding lighting that you can set up and produces some of the most visually stunning images.
This little tutorial has given you the beginnings of how to create beautifully executed High Key images, now it's down to you to practise, tinker and work out how you want YOUR images to look.
Further Reading
Bite Size Tips: What Is High Key Lighting And How To Set It Up
How to Use High Key, Low Key and Moderate Adjustments for Creative Photographs
Creating a High Key Landscape Using Lightroom in 6 Simple Steps
16 Radiant Examples of High Key Photography
Getting Started With High Key Portraiture
Shareable Images for Pinterest


The post Creating Beautifully Executed High-Key Photography appeared first on Light Stalking.
0 notes
Text
6 Secrets for Taking Unique Photos in Tourist Hot Spots
There's more to shooting major cities than typical tourist destinations. Learn how to find the hidden corners of popular locations with tips from these six experienced travel photographers.
In the late 19th century, photographers like Francis Bedford, Solomon Nunes Carvalho, and Francis Frith showed us the world. Through their images, the public was able to see the Egyptian pyramids, the churches of Jerusalem, and the plains of the American West for the first time. In the last 100-plus years, travelers with cameras have revealed extraordinary places and shared the stories of countless people. Today, we can access faraway cities with the click of a button, and few locations remain unphotographed.
The digital era forever changed the way we travel. For professional photographers and tourists alike, photography has become an indispensable part of the way we experience new places and cultures. On Instagram, popular hashtags like #wanderlust, #instatravel, #travelstories, #travelmemories, #travelgram, and more bring up millions of photographs from people around the world.
We wanted to know exactly what it takes to find a unique point of view in 2019, so we asked six travel photographers to tell us about how they find hidden gems in big tourist cities. Below, they take us on a journey to Dubai, Venice, Russia, Prague, Munich, and the “Blue City” of Morocco, revealing unexpected street corners and out-of-the-way treasures.
1. “When I'm on location, I always ask a receptionist at the hotel for recommendations.”
Shahid Khan
Image by Shahid Khan. Gear: Nikon D750 camera, Nikon 24-120 f/4 lens. Settings: Focal length 82mm; exposure 1/640 sec; f8; ISO 400.
What's the story behind this photo?
While in Dubai, I took advantage of a day pass and used it on the metro to go from one end of the line to the other end. While passing through the downtown area, I saw the high-rise buildings on both sides of the metro line, and it looked like a scene from a sci-fi movie. I set my camera on a faster shutter speed to avoid any camera shake. The good thing about the metro in Dubai is that it's driverless, so with a little effort, I got a spot at the front and had an uninterrupted view.
Image by Shahid Khan.
Pro Tip
Obviously, the first point of contact is Google. An image search will show you the main landmarks and the popular points of view. I usually scroll down a bit to see images other than the major landmarks and note down the names of the locations that interest me. My second choice is Flickr. The good thing about Flickr is that you can get in touch with local photographers for tips, and the trick is to contact at least five photographers so you get a response from at least one or two.
When I'm on location, I always ask a receptionist at the hotel for recommendations. I've gotten great recommendations from receptionists and waiters alike. I always visit the information center, if there is one in town, and I get ahold of all the pamphlets I can. They will sometimes have information about hidden landmarks or free walks. When I am in a city for a bit longer, I always take time to roam aimlessly by foot or on public transport.
Instagram | Website
2. “I read tourist guides and blogs by locals, and I learn about how this city has been depicted by artists in the past.”
kavalenkava
Image by kavalenkava. Gear: Canon EOS 5D Mark III camera; Canon EF 70-200mm f/4L IS USM lens. Settings: Focal length 97mm; Exposure 0.3 sec; f8.0; ISO 200.
What's the story behind this photo?
This is one of my favorite Prague views, seen from one of the Prague towers, located a distance away from the usual tourist routes. There were no sightseeing groups or signs advertising this spot, and at first, it was unclear whether or not it was possible to climb the tower. After a while, we found an inconspicuous door, and it turned out that you can climb the tower for a small fee. There were few visitors, which allowed us to take photos before and after sunset and to use a tripod.
This view is much more interesting than the well-known views from Old Town Square, and it includes the most famous sites: the Church of Our Lady of Tyn and Prague Castle, as well as the rooftops of the old city. I took this photo at sunset, when the yellow and red colors of the sun combined with the illumination of the buildings. The city looked like a magic box.
Image by kavalenkava.
Pro Tip
I begin my search for “hidden gems” long before planning a trip. I follow a variety of Instagram accounts and blogs, study popular photos on Shutterstock, save interesting photos and drawings, and sort them by country and city.
I then get acquainted with the history of the city itself in order to understand what matters to its inhabitants. I read tourist guides and blogs by locals, and I learn about how this city has been depicted by artists in the past. I mark the attractions that interest me on an online map, and I look for places that offer an overhead view of the city, including bell towers in churches, shopping centers, or restaurants with panoramic terraces.
From there, I wander around the main sights. I go far from the central tourist routes because the most beautiful views can often be found at a distance. If there is a hill or a mountain in the city, I will definitely be there. Sometimes, locals will offer to show you interesting places when they find out that you are a photographer. Do not hesitate to ask tourist office staff members, hotel administrators, and even souvenir merchants for advice.
Choose a hotel room or apartment based on the view, or hop onto social networks and look for people who would be happy to take you to their balcony or roof. Also, many hotels will have restaurants with terraces on the roof; in that case, you can go have lunch and get an exclusive shot at the same time.
But my most important tip for finding real gems when traveling to new places is simple: If you see something interesting, take your photo right away. You may not get a second chance. Often, when people see an interesting place, they might say to themselves, “I am tired now. I'll rest and come back later” or “Today is only the first day, I will pass this spot a hundred times.” But the truth is that you might never get a chance to return.
Instagram
3. “Using sites like Flickr, 500px, or even Google Images will help you find new perspectives or locations.”
DaLiu
Image by DaLiu. Gear: Canon 5D Mark IV camera, Canon EF 16-35mm f/4 IS USM lens. Settings: Focal length 16mm; exposure 1/160 sec; f8; ISO 100.
What's the story behind this photo?
The first time I visited Venice, I had only half a day in the city, and it was overloaded with tourists, so last year, my wife and I decided to go in January to avoid the crowds. I started searching for iconic locations in Venice, and, of course, everything was obvious. I had the almost impossible task of finding beautiful and unknown spots, but at some point, I found a picture on 500px with a building in Venice surrounded by canals all the way around.
It was an interesting view, but, of course, the author of the photo hadn't specified the location of the building, so I started to think about how I could find it. Luckily, the old city of Venice is not big, so it took me some time, but in the end I did manage to find it on Google Maps.
DaLiu
DaLiu
DaLiu
Pictured: [1] DaLiu [2] DaLiu [3] DaLiu
Pro Tip
When I start planning a trip to a new city, I do a lot of background work beforehand. I look for photos online to see all the iconic spots, and after that, I dig deeper on the internet to find lesser-known locations. Using sites like Flickr, 500px, or even Google Images will help you find new perspectives or locations. Where possible, try Street View on Google Maps, and search for articles online about the city you're visiting.
In most cases, this kind of preparation will give you something, even if it's not totally unique. You just need to be patient and put in the time needed for scouting new shots. I usually try to find these areas before I leave for any trip. It'll save you a lot of time, and, in many cases, even the locals won't be able to help you to find exact locations.
Other than that, the best tip or trick I can give is to walk around outside of the most popular locations and explore the city. Once you find something unique and photogenic, make a plan. Check to see if it'll look best at sunset, sunrise, or even midday, and then come back at the right time for your shoot.
Instagram
4. “When you go to those famous places, talk to the locals. They always give a ton of tips about the city.”
Burak Budak
Image by Burak Budak. Gear: Nikon d7100 camera, Tokina 11-16 dxII lens. Settings: Focal length 11mm; exposure 1/250 sec; f4.5; ISO 200.
What's the story behind this photo?
When I was in Chefchaouen, Morocco, everything was all about the famous blue houses and streets. But when I started to talk with the locals, they told me that there is also an amazing natural waterfall. I rented a car and made the trip with a few friends from my hostel. It was hard to get there, but it was worth it.
Image by Burak Budak.
Pro Tip
When I travel to different countries, I always try to find a local photographer, and, if possible, we travel together in the city. They always know where to go and, of course, where to eat. Before my trips, the first thing I do is check blogs about the city. If you want to find secret places in a big city, you need to know the famous places first. When you go to those famous places, talk to the locals. They always give a ton of tips about the city.
Couchsurfing is another resource I use. I let people in the area know what I'm doing and what I'm looking for, and I ask questions. I find a lot of places that way. The most important thing to remember is that you need to walk a lot. Walking and waiting are key.
Instagram | Twitter | Website
5. “Look for movement, and either freeze it or show it with a slow shutter speed. Your creativity is what will make your photos special.”
Christophe Faugere
Image by Christophe Faugere. Gear: Canon 5D Mark II camera, 16-35mm F2.8 II lens. Settings: Exposure 13 sec; f13; ISO 50 (I used several shots to add car lights).
What's the story behind this photo?
I was walking-running, in fact-between several landmarks at the blue hour when I crossed a street near Saint Isaac's Cathedral in St Petersburg, Russia. The Cathedral was not very close, but the cars passing by had lights on, and the lights of the city matched the sky. I just stopped there and took some shots. This one has quickly become my best-seller.
Image by Christophe Faugere.
Pro Tip
My first tip is to use your feet. Before leaving for a photo trip, I try to do minimal research on Google. I don't want to miss the landmarks because those photos are what I'm going to sell. I'll usually be at those spots for sunset (or sunrise), but, apart from that, I just walk a lot. Walking from one spot to another, slowly, will enable you to find unknown places.
But honestly, nowadays, there are hundreds of thousands of photographers all around the world. It's never as easy as asking the local people to tell you where to find the perfect hidden gem. It's impossible to find a place that has not been shot before, so my second tip would just be to open your eyes. Look up and down. Look for shapes, reflections, and good light. Look for a mood-a rainy day can be great in B&W, for example. Look for movement, and either freeze it or show it with a slow shutter speed. Your creativity is what will make your photos special.
Instagram | Website
6. “Do not follow the crowd. Turn off the tourist route and stroll through the streets.”
badahos
Image by badahos. Gear: Fujifilm X-T20 camera, Fujifilm Fujinon XF 18-55mm f/2.8-4 OIS lens. Settings: Focal length 18mm; exposure 1/140 sec; f4.0; ISO 200..
What's the story behind this photo?
I took this photo in Munich. It had just rained, and people were hiding in restaurants and hotels. A big city after the rain always has a special atmosphere. I decided to walk around the small streets when suddenly, I noticed my lace was untied. I sat down to tie it, and after that, I looked up and saw the reflection of the street in a puddle. I immediately took a few photos. Then using Photoshop, I flipped and edited this photo for a more dramatic effect. You never know where a good shot awaits you.
badahos
badahos
Pictured: [1] badahos [2] badahos
Pro Tip
Always look through Google Maps before your journey. You can see the streets and find interesting places that way. Mark the spots you want to visit and things you want to see. Spend time walking around the city, and don't hurry. Stop and look around; even in the most ordinary places, you can find an interesting shot. After standing for just five minutes in one place, everything can change: the lighting, the weather, and the situation. If you find an interesting place during the day, return there at night and take another photo.
Do not follow the crowd. Turn off the tourist route and stroll through the streets. Small, non-touristic streets are always imbued with local colors, and you can find unexpected moments there. Do not carry a lot of equipment with you. It will draw attention, and you will get tired easily. Enjoy the process!
Instagram | Website
Top Image by DaLiu
The post 6 Secrets for Taking Unique Photos in Tourist Hot Spots appeared first on The Shutterstock Blog.
0 notes
Text
Heathrow airport shut down due to drone sightings
Only three weeks ago, drone sightings grounded 100,000 passengers on 760 flights on Gatwick airport. And now somebody flew a drone near Heathrow, another major airport in London. Because of this, all departures were temporarily stopped for “precautionary measures.” BBC reports that the Metropolitan Police received reports of a drone sighting near Heathrow at about […]
The post Heathrow airport shut down due to drone sightings appeared first on DIY Photography.


0 notes
Text
B&H announces second annual Depth of Field Conference
B&H has announced its second annual Depth of Field Conference, taking place Feb. 5-6, 2019. Over the course of two days, photographers looking to elevate their craft will experience the latest in gear, hands-on demonstrations, interactive experiences, portfolio reviews, inspirational and motivational speakers and more. The conference will be headlined by keynote speaker Albert Watson,…
Please support our partners:
Adobe Stock – The marketplace where videographers and photographers make money with their video footage and still photographs. Become a contributor today!
Lume Cube – Proudly known as the World's Most Versatile Light™, Lume Cube represents the future of LED Lighting.
ACDSee – Experience ultimate creative freedom with the world's first digital asset manager and RAW editor with layers. ACDSee Photo Studio Ultimate 2019 is the answer to your creative graphic and photography needs.
Illuminati Instruments – Maker of the Illuminati meter that measures flash & ambient, color temperature and chromaticity in a compact case that links to a smartphone.
B&H – B&H is a world renowned supplier of all the gear photographers, videographers, and cinematographers need and want to create their very best work.
Skylum – Your photos, more beautiful in minutes. Makers of Luminar, Aurora and Photolemur, Skylum adapts to your style and skill level. Check out the new Luminar 3, coming this December.
Perfectly Clear Complete – Built for precision. Made for beauty. Perfectly Clear has mastered the science of intelligent image correction - creating superior quality photos in record time, so you can get back to doing what you really love...in no time. Special Photofocus deal here.
V-Flat World – Lightweight and easy to transport, the Foldable V-Flat from V-Flat World makes it easy to travel, collapsing down to 40 x 40 x 2 inches. Learn more at vflatworld.com.
Adobe Creative Cloud – Creative Cloud gives you the world's best apps and services for video, design, photography and the web, whether you're a beginner or a pro! Plans start at $9.99/mo. at adobe.com.
Viewbug – Learn and improve your photography with over 500 videos. Trusted by millions around the world, join over 2 million photographers who already use Viewbug.
HDR Learning Center – Check out new ways to use High Dynamic Range photography to make compelling images. Free tutorials and posts to get results. Produced in partnership with HDRsoft.
ThinkTAP – New online education for photographers by working professionals. Be one of the first 50 people to buy our new time-lapse training for only $99 (that's 60% off); use the code TL50.

0 notes
Text
How to photograph glass like a pro
Photographing glass can seem tricky and difficult to do right. But in this video from Adorama, photographer David Bergman shows you that it's easier than you might think. In only two minutes, you'll see the lighting setups and a few tricks that will help you create different looks of your images and end up with […]
The post How to photograph glass like a pro appeared first on DIY Photography.


0 notes
Text
How to create realistic snow in Photoshop
The problem with snow added in post-production is that it looks fake more often than not. That's a shame because creating realistic snow is much easier than people would think. Listen to the Canadian girl and keep on reading to know once and for all the secret to create realistic snow in Photoshop. What's wrong with fake…
Please support our partners:
Adobe Stock – The marketplace where videographers and photographers make money with their video footage and still photographs. Become a contributor today!
Lume Cube – Proudly known as the World's Most Versatile Light™, Lume Cube represents the future of LED Lighting.
ACDSee – Experience ultimate creative freedom with the world's first digital asset manager and RAW editor with layers. ACDSee Photo Studio Ultimate 2019 is the answer to your creative graphic and photography needs.
Illuminati Instruments – Maker of the Illuminati meter that measures flash & ambient, color temperature and chromaticity in a compact case that links to a smartphone.
B&H – B&H is a world renowned supplier of all the gear photographers, videographers, and cinematographers need and want to create their very best work.
Skylum – Your photos, more beautiful in minutes. Makers of Luminar, Aurora and Photolemur, Skylum adapts to your style and skill level. Check out the new Luminar 3, coming this December.
Perfectly Clear Complete – Built for precision. Made for beauty. Perfectly Clear has mastered the science of intelligent image correction - creating superior quality photos in record time, so you can get back to doing what you really love...in no time. Special Photofocus deal here.
V-Flat World – Lightweight and easy to transport, the Foldable V-Flat from V-Flat World makes it easy to travel, collapsing down to 40 x 40 x 2 inches. Learn more at vflatworld.com.
Adobe Creative Cloud – Creative Cloud gives you the world's best apps and services for video, design, photography and the web, whether you're a beginner or a pro! Plans start at $9.99/mo. at adobe.com.
Viewbug – Learn and improve your photography with over 500 videos. Trusted by millions around the world, join over 2 million photographers who already use Viewbug.
HDR Learning Center – Check out new ways to use High Dynamic Range photography to make compelling images. Free tutorials and posts to get results. Produced in partnership with HDRsoft.
ThinkTAP – New online education for photographers by working professionals. Be one of the first 50 people to buy our new time-lapse training for only $99 (that's 60% off); use the code TL50.

0 notes
Text
Gorgeous Beauty and Lifestyle Female Portraits by Tim Davison
Marvelous female portraits by Tim Davison, a talented photographer, retoucher, and filmmaker currently based in London, England. Tim focuses mainly on portraiture and fashion photography. He shoots a lot of beauty, street style, outdoor, and lifestyle portraits. Davison has over 38.100 followers on Instagram and counting.


More info: Instagram
The post Gorgeous Beauty and Lifestyle Female Portraits by Tim Davison appeared first on Photogrist Photography Magazine.
0 notes


Text
How To Make Sure Your Subject Is The Main Point Of Interest
How to make sure your focal point draws the viewer's attention.


0 notes
Text
8 Tips and Tricks To Improve Your Food Photography
It may sound weird, but food photography is very similar to portraiture and as such thinking about a great portrait shot is a great way to improve your food photography. Why? In both cases, the photographer's task is quite straightforward – the model has to look as attractive as possible!
While portrait photographers need to know how to make their models relax in front of the camera, food photographers have things a little easier but they still have to make sure that the food looks very delicious and inviting.
The following 8 tips can help you improve your food styling and shooting in very simple and undemanding ways:
1. Don't Crowd Plates With Food
Even though you might be tempted to photograph plates piled with lots of food, an overcrowded plate usually looks tacky and not appealing at all. You should think about negative space when you shoot food – the rules of compositions can help you arrange your subject properly. Think about how you can use the empty space of the plate to frame the food in a creative way.

Photo by Atharva Tulsi on Unsplash
2. Look For Color Contrasts
There are lots of minimalist images when it comes to modern food photography. These images seem to be influenced by a clean-cut approach used for photographing products such as electronics. While it's true that this ''white on white'' style can be visually striking, it can feel very sterile as well. It feels bolder and more refreshing to look for contrasts. For instance, a pale colored food and plate with a dark background look very vibrant and visually appealing.

Photo by Sebastien Marchand on Unsplash
3. Use Simple Tableware
Decorative tableware surely looks beautiful on its own, but it can reduce the visual impact of the food. On the other hand, plain white plates and simple tableware allow the food to grab the full attention of the viewer. The exception can be made when photographing simple dishes such as soups and puddings – these two can look really interesting along with some vintage spoon.

Photo by Chinh Le Duc on Unsplash
4. Emphasize The Natural Looks Of The Food
Every piece of food comes with its own colors and textures you should emphasize and make even more beautiful. You shouldn't rely on Photoshop to make your food photography great – think about what it is that makes a particular dish look appealing. For example, a crispy skin of a well-roasted chicken looks really delicious and the same goes for the creamy green color of fresh guacamole.

Photo by Heather Schwartz on Unsplash
5. Be Mindful Of Composition
Composition always matters a lot! You can use various props or ingredients to create lines and frames in your food photography. For instance, cutlery can help you form a line and direct the viewer straight to the plate with food. You can also use the leaves of culinary herbs and spices such as basil, dill, oregano or rosemary to make a beautiful natural frame around the plate.

Photo by James Sutton on Unsplash
6. Use A Window Or A Large Softbox For Lighting
The lighting for food photography shouldn't be elaborate because complex lighting might look too awkward for this type of photo shoots. Since most people are used to eating food at a table, a way to improve your food photography is to make it look natural so use a large window as a primary source of light.
This type of natural light has the softness, direction and catch lights that look familiar and soothing. In case daylight is not available, a large rectangular softbox can make the artificial lighting appear soft and diffused.

Photo by Pooja Chaudhary on Unsplash
7. Take Photos From Various Angles
Changing up the angles will improve your food photography. You should choose angles depending on the type of dishes or drinks you shoot. Large plates of food usually look better from above (like a steak with vegetables or pizza), layered dishes with bread should be shot from the side (like sandwiches, burgers, and cakes), while drinks look best if shot at a 45-degree angle. Of course, you can always experiment and move the plate around until you find your favorite angles.

Photo by Brooke Lark on Unsplash
8. Hire a Food Stylist
Last but not least, if you feel that your food photography is lacking a punch, you should consider hiring a food stylist. Just like any other professionals, food stylists are specialized in this particular field of photography and they will work their magic to improve your shots. In fact, almost all high-end food photography represents a collaboration between chefs, food stylists, and photographers.

Photo by Jenny Dorsey on Unsplash
Even though many photographers consider food photography to be cliché, it is certainly necessary, especially on recipe blogs. At the same time, food represents cultural identity and it is also an important element of our everyday small pleasures, which means it's a vital part of our lives.
It's challenging to make excellent photographs of food because it's hard to stand out in a saturated market, but you can surely make your food photographs more remarkable by following these tips and adding your own creative input.
Further Resources
Bite Size Tips: Amazing Food Photography Primer
3 Free Food Photography Guides To Get Your Creative Juices Flowing
Make Your Macro Food Pictures Look Like a Slice of Heaven
The post 8 Tips and Tricks To Improve Your Food Photography appeared first on Light Stalking.
0 notes
Text
This Russian spy camera is cleverly disguised as – a camera
From vintage golden rings to lifelike animals, hidden cameras come in many interesting shapes, sizes and purposes. But in a recently sold collection of Russian spy cameras at Aston's Auctioneers in the UK, one of them caught my eye. It's a spy camera disguised as – a camera. Sometimes works best to hide things in […]
The post This Russian spy camera is cleverly disguised as – a camera appeared first on DIY Photography.


0 notes
Text
Canon launches PowerShot SX740 HS with 40x zoom
Canon has announced a new premium ultra-compact camera, introducing the PowerShot SX740 HS, priced at £349.99/€419.99/$399.
The post Canon launches PowerShot SX740 HS with 40x zoom appeared first on Camera Jabber.
0 notes
Text
Photo Of The Day By Riccardo Zambelloni

Riccardo Zambelloni
Today's Photo Of The Day is “On The Edge” by Riccardo Zambelloni. Location: Faroe Islands.
“There's nothing quite like the grueling weather of the Faroe Islands,” says Zambelloni. “It can be four seasons in a 30-minute span, as I experienced while shooting this picture. Despite being a classic spot, Gasadalur is probably one of the most picturesque villages I have ever seen. I just love how the houses are immersed in this raw and wild environment.”
See more of Riccardo Zambelloni's photography at rzlandscapes.com/.
Photo of the Day is chosen from various OP galleries, including Assignments, Galleries and the OP Contests. Assignments have weekly winners that are featured on the OP website homepage, Facebook, Twitter and Instagram. To get your photos in the running, all you have to do is submit them.
The post Photo Of The Day By Riccardo Zambelloni appeared first on Outdoor Photographer.
0 notes
Text
How To Get The Film Look With A Digital Camera With No Post Processing Or Presets
I'm going to start this off by pointing out that this entire article is really subjective. No scientific measures are taken, rather I'll be going by the eye alone. Also, most of my opinions about 'look and feel' are just that, opinion. They are based on me trying to think deeply about why things are the way they are.
What is that 'film look' anyway?
Before digital photography, all photographs were on film. Back then the distinctions were probably more based on the differences between film formats (frame size). Another set of distinctions would be between monochrome vs colour, or grain size and look between different film emulsions. There's also what happens after – what the photographer did in the darkroom that influences the look of the end result.
My overall point is, there was more diversity within the film universe itself than the differences between film and digital today. So today when we say 'film look', we are generalising something that is actually really diverse.
Interestingly enough, a good proportion of what gave a photo its 'film' character had nothing do with the actual film. Some of the factors include;
The Lens – Aperture, Contrast, Coating, Flare, Barrel Distortion, Sharpness, e.t.c.
The printing process / photo paper
Dust, stains, and scratches
Age / Exposure to light
Frame size
Of the above list (which is not exhaustive by any means), the two that contribute the most are the lens and frame size. We thus can get closer to that 'film look' by manipulating these two factors in the digital realm.
The Lens
As stated above, a lot of the characteristics seen in an old photo taken on film was as a result of the camera's lens. Ironically, many of these characteristics were seen as flaws or imperfections including vignetting, lens barrel distortion, lens flare and softness at certain apertures. Some were design features aimed at improving sharpness such as lens coating. Even the best lenses were limited by the technology of the time.
The first step then would be to grab a lens from the film era. A nice vintage lens, especially a prime lens is likely to have those aforementioned properties, as well as a wider aperture than its modern equivalent.
Talking of wider apertures, I have a theory about that too. In the early days of digital photography, most people had point and shoot digital cameras with lenses that didn't open past f4 (if you were lucky). Even consumer-grade DSLRs from Canon and Nikon that could accept their vintage lenses were too expensive for the masses at the time. That, as well as tiny sensors, produced photos with a large depth of field (DOF). This wasn't really ideal for photography genres such as portraiture. Photos taken with film cameras with the f1.2 lenses, however, produced extremely shallow DOF resulting in more pleasing portraits. I believe this contributed to the whole desire for the “film look” and shallow DOF being subconsciously associated with film / professional photography.
Frame Size
This is a little more straightforward. The larger the frame size, the shallower the depth of field that can be achieved with everything else remaining constant. Film frames are much larger than digital – what is known as 'full frame' in the digital realm is basically 35mm which is one of the smaller formats in film. I already mentioned the effect of shallow depth of field on how people perceive certain types of photos.
Other properties of a larger frame are higher resolution and lower noise. In the early days of digital photography, noise was a big problem due to small sensors with low ISO performance. Things are a little different now of course. Film grain, on the other hand, wasn't that bad compared to digital noise.
Getting The Look With Lens And Frame

Effectively then, what I need to achieve the “film look” I'm going for in-camera, are a camera with a large frame and a vintage lens with those properties.
If you own a full frame or medium format digital camera, you have an advantage. I don't, so I'm going to be using a Sony A6000 crop sensor mirrorless camera. The lens I've picked is the famous Helios 44-2. I also need the M42-NEX adaptor to be able to use the lens with the Sony.

There is one further step. Since this my camera is a cropped sensor camera, the image projected onto the sensor by the Helios lens will be cropped. That means I'll be losing the outer edges of the projected image. The outer edge is where all the action is though when it comes to these lenses. That is where the imperfections are most prominent – distortion, vignetting, softness, and so on.

In order to capture the edges on my crop sensor, I need what is known as a 'focal reducer'. It is basically an adapter with a lens that sits between the Helios lens and the camera's sensor. It changes the focus of the attached lens such that the projected image now fits approximately on the sensor. The overall effect is that the full characteristics of the lens can be seen on the resulting photo hence reversing the effect of the cropped sensor.
Other Tweaks
I could obviously throw one of those film emulation filters on the images after the fact, but this article is about achieving the look 'in camera'. So I applied a few tweaks to the image to give the desired impression.
I slightly reduced the contrast and saturation to create the impression of an aged photo.
I positioned the subject such that the main source of light – the window – produces lens flare and artefacts.
Images
Below are the two images. The first one was taken with the kit lens of the Sony A6000 in the default setting. The second image was taken with the Helios 44-2 lens and the focal reducer as described above.
Default

Film Look

Conclusion
Most experienced film photographers would probably laugh if I tried to pass the shot as film, especially if printed out in real life rather than views on a computer screen. Viewed on something like a phone screen though, you could probably fool most people with this. Besides we live in an era when you can take a photo with an iPhone, throw an Instagram filter on it, and call it 'film look'.
Just like I said at the beginning of the article, it's all subjective. I've seen photos that I thought were digital but were taken with a modern autoexposure film SLR and Kodak Ektar 100, so it works the other way too I suppose.
The post How To Get The Film Look With A Digital Camera With No Post Processing Or Presets appeared first on Light Stalking.
0 notes
Text
Have Fun Experimenting With Night Photography
When you've got your sunset don't think you have to pack your kit up and head home as there's still plenty to capture well after the sun has set.


0 notes
Text
7 Tips for Incorporating Texture in Your Illustrations

Looking for ways to add visual interest to your illustrations? Follow along as these pros share their favorite tips for using creative textures.
In this digital age, handcrafted imagery is a rarity, but image-buyers continue to crave designs that seem homemade and tangible. This year, Shutterstock named Digital Crafts as one of the top emerging trends in illustration. The Digital Crafts movement combines the convenience and efficiency of modern technology with the tactile, authentic mood we associate with traditional art forms like embroidery, origami, or even watercolor painting. The difference between a mediocre image and a great one can come down to one thing: the textures.
By successfully tapping into this trend, leading illustrators and vector artists produce images that seem timeless and cutting-edge at the same time. But creating two dimensional designs with a textured look is a challenge. Often, it means thinking outside the box by combining totally different methods or even inventing a whole new technique. We asked seven top illustrators from the Shutterstock collection to share the secrets behind some of their most successful images. Read on to see how they've updated fine craftsmanship for the 21st century.
1. “I add small, intentional defects and imperfections to emulate the look of manually cut elements.”
wacomka

Image by wacomka.
What's the story behind this illustration?
As a designer, I always pay attention to unique, handmade things. On my wedding day, there was a wall decorated with big, oversized, handmade paper flowers. I later decided to incorporate this feeling into my 3D graphics. Adding the paper texture was a simple and elegant way to make my botanical digital designs look like real handmade paper craft. There are a lot of 3D renders of paper flowers in my portfolio. I like to play with shapes and colors, applying textures and arranging flowers into different compositions.

Image by wacomka.
Pro Tip:
When modeling 3D elements, such as paper flowers, I prefer not to create mathematically precise or symmetrical shapes. I add small, intentional defects and imperfections to emulate the look of manually cut elements. It works perfectly with the texture of real paper.
2. “Find something that fascinates you, apart from drawing, and incorporate it into your work.”
Sopelkin

Image by Sopelkin.
What's the story behind this illustration?
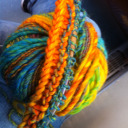
I have always been inspired by painting, and embroidery is tangible painting on fabric. It is diligent work that requires a lot of patience, and I could not allow myself to devote the time to this activity. The other day, it occurred to me to draw embroidery in vector. It was exciting, and I was satisfied with the result. I began to embroider more using Adobe Illustrator. I like that my vectors are similar to embroidered paintings or watercolor sketches; I think there is a soul in my electronic works.
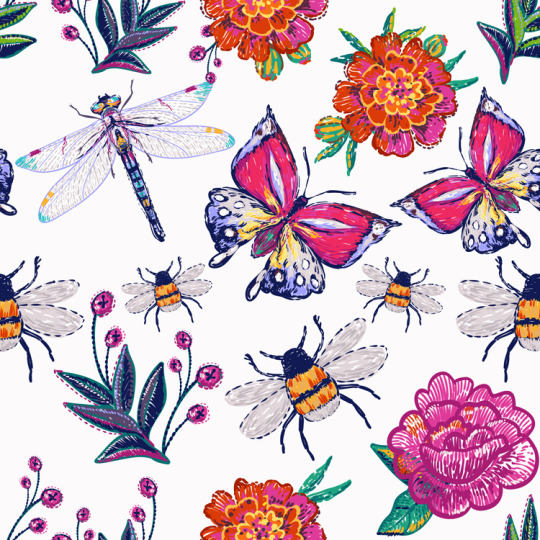
Image by Sopelkin.
Pro Tip:
Look for something that inspires you in real life. Find something that fascinates you, apart from drawing, and incorporate it into your work. The result will be twice as interesting.
Instagram
3. “My trick is drawing lots of strokes with a liner on paper and then photographing and tracing it. It is rather laborious, but I like the result.”
mamita (Marina Vorontsova)

Image by mamita (Marina Vorontsova).
What's the story behind this illustration?
This pattern was created from drawings that I initially rejected. I planned to throw them away because I didn't like them very much. This often happens. After a while, I look at them with fresh eyes. This time, I decided to revive these old works. I slightly modified them in Photoshop and created a pattern from the individual details. It turned out a little boring, but I remembered the coloring of Chinese and Japanese lacquer miniatures and decided to apply it here. With the help of gold, black, and red colors, it became more expressive. Now it is one of my bestselling works. Such stories teach us not to stop halfway but to carry everything out from beginning to end.
mamita (Marina Vorontsova).
mamita (Marina Vorontsova).
mamita (Marina Vorontsova).
Pictured: [1] mamita (Marina Vorontsova). [2] mamita (Marina Vorontsova). [3] mamita (Marina Vorontsova).
Pro Tip:
My drawings are all handmade. My trick is drawing lots of strokes with a liner on paper and then photographing and tracing it. It is rather laborious, but I like the result. In the past, I looked for a way to reduce the time needed to create an illustration. I applied readymade textures to my drawings and used scripts, but the automatic texture is poorly controlled, so I wasn't comfortable with it.
The handmade nature of my work may give the impression that I am stuck in the last century. Today, artificial intelligence writes poetry, makes music, paints, and so much more. But there is a charm to drawings made by hand on paper. There is a soul and a trace of personality. I adore the artists who use new technologies, and I admire their achievements, but the work of the old masters is more inspiring to me.
4. “When I make textured elements on paper, I usually make them larger than I expect them to be in the final image because it allows me to save more details when scanning.”
Ms Moloko (Nadezhda Shikina)
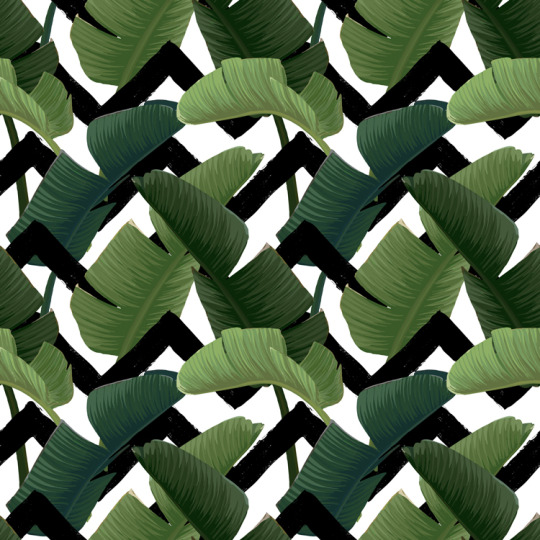
Image by Ms Moloko (Nadezhda Shikina).
What's the story behind this illustration?
In this pattern, I wanted to play with a combination of floral and geometric elements. I decided to make the geometrical elements more relaxed to give the pattern a more natural, casual look, as if somebody had drawn the stripes with a paintbrush. In order to do that, I used a handmade textured brush stroke, which I scanned and edited a little bit digitally.

Image by Ms Moloko (Nadezhda Shikina).
Pro Tip:
Often the shapes and lines of vector art are regular, perfectly precise, and clean to give the impression of a geometrically ideal image. That's great, but sometimes we want images that seem a bit more tactile and handmade. I look for ways to combine digital and traditional art in one image. When I make textured elements on paper, I usually make them larger than I expect them to be in the final image because it allows me to save more details when scanning. It's also a good idea to have a collection of simple textured shapes and strokes to use as additional elements in the future. You can use them later to make more complex objects or to create digital brushes.
5. “When you use a very dense pattern, you always run the risk of getting a rather flat and uninteresting image, so I play with the contrasts created by direct lighting, and I focus only on one area.”
Gualtiero Boffi

Image by Gualtiero Boffi.
What's the story behind this illustration?
I have always liked the different effects that carbon fiber can create. According to the lighting, the image itself can change radically. It can be opaque or extremely shiny, and it can change if you simply move the light or the observation point. It's very versatile, and in this case, I wanted to create an image that had a modern atmosphere that recalled the sci-fi style typical of video games. In this case, I could not resist the addition of the glowing light strip!
Gualtiero Boffi.
Gualtiero Boffi.
Pictured: [1] Gualtiero Boffi. [2] Gualtiero Boffi.
Pro Tip:
When you use a very dense pattern, you always run the risk of getting a rather flat and uninteresting image, so I play with the contrasts created by direct lighting, and I focus only on one area. In the image above, I created a hexagonal grid to break the homogeneity of the carbon fiber. I wanted to play with different levels of depth to accentuate the three-dimensionality.
6. “One of my favorite tools is the Blend tool, which is great if you want to create a repetitive texture (like for feathers), engraved elements, or precise hand-drawn details.”
mashakotcur

Image by mashakotcur.
What's the story behind this illustration?
This is one of my best-selling illustrations on Shutterstock. I live in a small, forested village. Near my house is a big meadow with a lot of wildflowers. Almost every summer morning, I drink coffee and go walk there with my Canon. One morning, I noticed a lot of small butterflies on the grass with wide open wings after the rain. They couldn't fly away, as their wings were still wet, so I was able to carefully shoot them on my camera. The tulips from the illustration are from my small garden. The idea was to create something pretty and fresh but at the same time nostalgic and vintage-inspired.
mashakotcur.
mashakotcur.
Pictured: [1] mashakotcur. [2] mashakotcur.
Pro Tip:
Pay attention to small details and textures for a realistic, lively look. I love to mix different textures from real source materials. One of my favorite tools is the Blend tool, which is great if you want to create a repetitive texture (like for feathers), engraved elements, or precise hand-drawn details. You can also create your own customized tools. For me, it was a bit of a problem finding good brushes for vector drawing in Adobe Illustrator, but I thought, “Hey! If I can't find what I need, why not create it?” I took real brushes, pens, and inks, and I made a few basic strokes on paper and then shot them. I edited the resulting image and traced it in vector to create my own brushes. Now I use them again and again in all kinds of different illustrations.
Instagram
7. “Textures are everywhere around us: wood, paper, fabric, leaves, grass, flowers, stones, etc. Just look around and pay attention to everything.”
Le Panda (Elena Efremova)
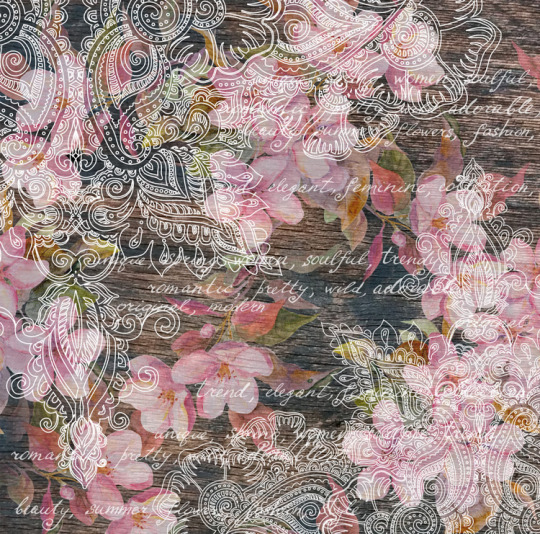
Image by Le Panda (Elena Efremova).
What's the story behind this illustration?
In this illustration, I mixed textures from different parts of the world. The texture of the tree I photographed was on an old door in Provence, France. The ornament was from the time I studied how to paint with henna in India on the island of Diu. I drew the flowers in a blooming park in Moscow in the spring. The result is a mixture of styles and textures.
Image by Le Panda (Elena Efremova).
Pro Tip:
Do not be afraid to play. Textures are everywhere around us: wood, paper, fabric, leaves, grass, flowers, stones, etc. Just look around and pay attention to everything. Mixing different textures is interesting and fun, like a game.
Instagram
Top Image by Le Panda (Elena Efremova).
The post 7 Tips for Incorporating Texture in Your Illustrations appeared first on The Shutterstock Blog.
0 notes
Text
Learn How To Capture Cracking Castle Shots
Heading off to photograph one of the many castles in the UK? Have a look at our tips first.


0 notes