
digitalusmarket
Untitled
Hey!! I am Layla Jhone and I have been writing blogs based on banking and investments. I live in United States and aside from it, I love to get into debates based on financing and banking. I love to discuss them with people who can develop or enhance my knowledge regarding these finances. And I would like to inform you that this website has many impressive and intelligent minds.
visit:Cricut.com/setup
TD Ameritrade Login
Netspend Login
Charles Schwab Login
Fidelity login
82 posts
Don't wanna be here? Send us removal request.
Last Seen Blogs

prohaus
Cain
atzarel-blog
Pencinta

strokejordan
DMenace

dinopepitah
¡¡HYAK HYAK HYAK!!

professional-yapper
🫧Avatar🫧
Text
How to Add Bitcoin Network to MetaMask Wallet
The bitcoin network cannot be unified into a Metamask wallet due to its inconsistency with the Ethereum virtual machine required for supporting smart contracts. Metamask exclusively supports Blockchain utilizing EVM-adaptable programming languages, such as BNB chain, Polygon, Optimism, avalanche, and Arbitrum.
Nonetheless, Wrapped Bitcoin ( WBTC ) can be held and purchased on a Metamask wallet. Wrapped bitcoin is an Ethereum token that represents bitcoin and has 1:1 backing. Also, it enables trading, DeFi applications, and other cases, enabling Bitcoin utilization in the Ethereum web 3.0 ecosystem.

How to Add Bitcoin Network to MetaMask Wallet
Unfortunately, users cannot add the Bitcoin Network to their MetaMask Wallet because the BTC Blockchain does not support smart contracts and the Ethereum Virtual Machine (EVM) chain. If BTC holders are looking for a secure web wallet alternative to hold their assets, we recommend Wallet of Satoshi that supports the Lightning Network.
Is it possible to hold bitcoin on a Metamask wallet?
It is possible to wrap a bitcoin version, called WBTC, on a Metamask wallet. A token represents this bitcoin version on the Ethereum Blockchain and also has a 1:1 peg to bitcoin. The tokens are redeemable for Bitcoin. The song of adding WBTC to your Metamask wallet is that it is an ERC-20 token, like USDC, USDT, ETH, and other assets that the wallet supports.
Also Read: How to Install MetaMask Wallet: A Step by Step Guide
The best way to purchase WBTC with your Metamask wallet is through trustworthy decentralized exchanges such as UniSwap. With this method, you can swap ETH, USDC, or any token for WBTC that can be held in your wallet.
Things we can do with WBTC on-chain
One of the best advantages of wrapped bitcoin over BTC is that it provides a load of DeFi yield farming opportunities across major networks such as Ethereum avalanche, polygon, and more. Using largely decentralized finance protocols, users can easily earn 10% APY interest from DeFi money market deposits and liquidity provisions.
Is wrapped bitcoin safe?
Wrapped Bitcoin (WBTC) is the largest and most liquid BTC collateralized token on Ethereum and layer 1 or layer 2 Blockchain. It is considered safe because it is held in a safe multi-signature wallet that wants 3 signatures in order for funds to be moved. The tokens are also 100% redeemable and backed 1:1 with Bitcoin so that users can exchange their wrapped bitcoin for BTC anytime. Risks are always involved with the WBTC whitepaper and researching third-party audits before making decisions.
Final Thought
Although you can’t add a bitcoin network to your Metamask wallet, you can use the WBTC token to take advantage of DeFi yield farming opportunities across some major networks like avalanche, polygon, and Ethereum. Wrapped bitcoin is 100% backed 1:1 to bitcoin, so users can redeem their tokens for bitcoin at any time.
Source:https://hariguide.com/how-to-add-bitcoin-network-to-metamask-wallet/
0 notes
Text
How to Install MetaMask Wallet: A Step by Step Guide
Metamask is the most popular browser extension that serves as a way of storing ERC-20 tokens and Ethereum. The extension is safe and free, allowing web applications to interact with the Ethereum Blockchain. The extension also injects the Ethereum web3 API into each website’s JavaScript context so that dApps can read from the Blockchain. Through Metamask, users also create and manage their identities, so when dApps wants to execute a transaction and write to the Blockchain, the users get a very secure interface to review the transaction before approving it. To start trading with MetaMask, you must first create your account through the Metamask Chrome Extension.

Instructions for installing Metamask extension
In this below guide, we will be using the Metamask wallet, which is installed as a chrome browser extension, thus allowing you self-custody of your cryptocurrency and purchase NFTs. Metamask is available as a direct install, so go to the Metamask website to get started with the installation procedure. Alternatively, you can access all browser extension stores to install the Metamask extension. Follow the below steps to start the procedure:
Chrome
Firstly, open your Chrome Browser and visit the Metamask website.
Find and click the “Download” button.
Tap the “Install Metamask for chrome” button, and you will be redirected to the chrome web store.
Click the “add to chrome” button.
Then, the pop-up message will open on your screen. On that, tap the “Add Extension” option. Within a few seconds, the extension will be added to your browser.
Firefox
Open your Mozilla Firefox browser and open the Metamask website.
Tap the “Download” button.
After that, click the “Install Metamask for Firefox” option.
On the next page, click the “Add to Firefox” option.
Tap the “Add Extension” button in the pop-up message. After a few seconds, the Metamask extension will be added to your Firefox browser.
Edge
Open the Metamask website on your browser and then tap the “download” button,
Then, click the “Install Metamask for Edge” button.
Click the “Get” and then the “Add Extension” button.
After that, the Metamask extension and the Metamask wallet will open. Also, it’s accessible in your toolbar by clicking the “jigsaw” icon: in the top right of the screen.
Click the “3 Dots” and select the “Show in Toolbar” option.
Brave
Firstly, visit the official “Metamask” website on your edge browser.
Click the “Download” button.
Tap the “Install Metamask for Chrome” option. It says “Chrome” here because the brave browser is chrome-based and shares the web store with chrome itself.
Tap the “Add to Brave” option in the chrome web store.
In the pop-up message, tap the “Add Extension” button, and then you will land on your browser page. Now Metamask will display on your browser.
How to create a new wallet on the Metamask extension
Once you download the Metamask Wallet Extension on your regular web, for example, google chrome, Firefox, edge, brave, and websites, you can easily create a wallet or import an existing one. Let’s go through the process of creating a new Metamask wallet.
Firstly, tap on the “Metamask Extension” icon on the top right side to open the Metamask wallet.
To install the latest Metamask version and be up to date, tap the “Try it Now” option.
Tap the “Continue” button.
After that, you will be prompted to create a “Password.”
Click the “Create” button.
Accept the “Terms & Conditions” and click the “Next” button.
Tap the “Reveal Secret Recovery Phrase” option, and then you will see 12 mnemonic/seed phrase words. This seed phrase is really important, so take your time and note it down on the piece of paper and store them in a safe place.
Then, select the previously generated seed phrase correctly to verify your phrase.
Click the “Confirm” button.
Now, you have created your Metamask wallet account successfully. A new ETH wallet address has just been created for you.
Guide to backup and restore your wallet using the seed recovery phrase
Suppose you want to change your computer or browser and want to connect your Metamask wallet again. Here is how to do it with these easy steps:
Firstly, tap the “Account Icon.”
Click the “Settings” option.
Find and click the “Reveal Seed Phrase” option
Enter your “Metamask Wallet” password.
After that, save the “Secret Recovery Phrase” somewhere.
Open Metamask and tap the “Import Using the Account Seed Phrase” option.
Enter your “Seed Recovery Phrase” and create a “Strong Password.”
Click the “Restore” button. And now you have successfully restored your Metamask wallet account.
Final Words
Metamask is a web browser extension and a mobile app that allows you to manage your ETH private keys. By doing so, it serves as a crypto wallet for tokens and allows you to interact with decentralized applications or dApps. So if you want to access all Metamask wallet features and start trading with it, create your account first through the official Metamask Wallet Extension or mobile app.
Source:https://hariguide.com/how-to-install-metamask-wallet/
0 notes
Text
15+ DIY Gift Card Holder Ideas
If you are looking for an attractive way to give or receive a gift card? Why not make your own? With 15+ DIY gift card holders and a free printable template, you can easily craft the best presentation that adds a personal touch. Get creative, customize your present with unique shapes and vibrant colors, or add embellishments. With the right printable template of a gift card holder, basic supplies, and little skills, you can easily create memorable and magical DIY gift card holders.

In addition, all these gift card holder ideas come with step-by-step instructions so that you of all skill levels can easily do this project.
DIY Gift Card Holder Ideas
We can relate that more than searching for the right gift is needed. Or you don’t have much time to go shopping. Explore the DIY card holder ideas below to overcome all these snags in making your dear ones feel special.
Also Read: 9 DIY Headboard Ideas for Your Bedroom
This classy collection of gift cards will resolve your head-scratchers like the perfect mother’s day or father’s day gift. Or a last-minute bridal shower present or a holiday gift for the newly-born niece or nephew. Having said that, ready to analyze a full-hand assortment of sensational DIY gift card holder ideas for your loved ones.
Handmade Taco Gift Card Holder
Looking for a cool graduation gift idea? Giving something relevant in a fun-filled DIY cardholder is going to make someone happy. So whether you are looking for a teacher appreciation gift, a graduation gift, or a birthday gift for teenagers, the taco card holder is the perfect choice for you. Visit the “The Craft Patch” website to see complete instructions to make taco gift card holders.
Handprint Turkey Place Card Holder
Thanksgiving decor is as essential as the thanksgiving meal itself! This elegant and cutest turkey place card holder will strip everyone’s heart at the thanksgiving meal. Plus, you can get your kids involved in the arrangements. For complete instructions, go to the “Blitsy” website.
How to Make Gift Card Holder
A DIY gift card holder is a much better option than a gift itself. You can easily make a beautiful customized and well-thought card holder and put in their favorite gift cards! It is wildly simple to make. Visit the “Kaleyann” website and learn the procedure of making a DIY gift card.
Gift Card Holders with Printable Template
DIY cards are turning out to be trendy these days! For several reasons, like you don’t need to worry about the present rampage to the stores! But instead, you can come up with personalized captions for DIY gift card holders! Visit “The homes I have made.”
Homemade Paper Gift Card Holder
Everybody would like to have a gift card to their favorite place! Apart from the classic gift ideas, this DIY gift card is surely going to steal everyone’s heart. You will need a Cricut cutlet bug, ribbons, white cardstock, and a few other supplies. You must visit the “It happens in blank” website for more details.
Best Gift Card Holder
Add an engaging handmade touch to your gifts with this DIY gift cardholder. All you will have to make these eye-catchy cardholders are floral cardstock; get the present card from the “Jen Woodhouse” website. A cutting board, craft knife, and silver or gold stickers add a sparkly look to the gift cardholder.
DIY Monster Gift Card Holder
Make these super cute DIY monster cardholders for the younger members of your family. These are insanely simple or easy to make and will add an entirely handmade sensation to the gift cards. Plus, this design will absolutely make your little ones happy. For a detailed guide to this idea, visit the “Polkadot Chair.”
Making Gift Card Holders with Appealing Name Tags
Make these elegant personalized DIY gift card holders with some appealing name tags. These are just not exceptionally simple to make but will bring an amazing smile to the present beholder too! All you need is a few elemental supplies of craft with pump soap. And for more details and instructions, visit the “Play dates parties” website.
Creative Gift Card Holders Made with the Cricut
If you have a concept for DIY and a spirit for creativity, make this breezy floral DIY gift card holder accusing your Cricut maker, glue dots, scrapbook paper, ribbon, and scoring wheel. Also, you can add a personalized message inside the card reversed to the cardholder slot. Check the complete instructions on the “Hello creative family” website for this design.
DIY Felt Santa Gift Card Holder
Are you all done researching the perfect Christmas gifts this year? Well, stop looking now; we have got everything covered. This super sensational and cute Santa Claus-inspired felt card holder could be your next Christmas gift. To make this, you can check the complete details about it on the “Drugstore divas” website.
Paper Folded Gift Card Holders
Minimalism can always affect everyone. If you have just entered the last-minute party arrangements and still have not got the chance to test the perfect gift option, make this the easiest DIY handmade paper gift cardholder. Visit the “Craftsy” website.
Gift Card Holder from a Toilet Paper Roll
Put the paper rolls to creative use! With these elegant DIY gift card holder ideas, you can bring a glammed-up look to your gift card, especially with the golden tag on the top side. Hit the tutorial of this project by visiting the “The country chic” website.
DIY Gift Card Holder for Father’s Day
Father’s day gift ideas are always the most challenging thing we have to face, as it feels like nothing in the world can truly make your dad happy. But as fathers are crafty and we bet your dad is going to truly love this crafty DIY gift card holder in a pocket. To do this project, hit the tutorial on the “Centsible life” website.
Make Your Own Paper Card Holders
Check out this minimal craft idea for having a handy paper card holder! It is very easy to make, and you will need a rubber or elastic band and a wavy corrugated to make it like a purse. For doing this project, check the tutorial on the “Minimal crafts” website.
Coffee Cup Gift Card Holder with Free SVG File
Looking for a perfect gift card idea for your favorite teacher? Favorite aunty or a new neighbor who just recently moved in? Well, this nod filed a cute DIY gift card in a coffee mug to a doughnut of food place is plenty two in their heart already! Check the full tutorial on the “Weekend craft” website to do this.
Make Cement Card Holders
Get your hands on a glass jar, copper wire, cement, spray paint, needle nose, pliers, paper bag, safety glasses, and painter’s tape. So let’s get to make these minimalistic cement DIY gift card holders with the help of a tutorial on the “Princess Pinky” website.
Easy DIY Gift Card Holder
Check out this cute kind of tree-like gift card holder! In order to make this craft, you will need a photo holder (Depending on how many cards you wish to gift), gift cards, and washi tape. Just wrap the washi tape on the photo holder base, and for more details on this craft, check the tutorial on the “Simple parent” website.
No-Sew Leather Card Holder for Dad
Suppose you are not an experienced crafter at sewing and searching for something meaningful and sensational to give on father’s day to your dad or your kiddos’ dad. You are surely going to cherish this no-sew DIY leather case cardholder. Even tiny hands can also try to make this easy craft. Visit the “Momtastic” website for the full instructions.
Also Read: 25 Best DIY Birthday Card Ideas
Conclusion
With several amazing ideas, there is definitely a DIY gift card holder that grabs your attention and fits the temper of the lucky recipient. With this more than 15+ DIY gift card holder idealism, you can easily choose the best way to give a gift card while customizing it for the recipient. If you still need help finding what you are looking for, we have included some free printable templates that you can use to make custom gift card holders.
Source:https://hariguide.com/diy-gift-card-holder-ideas/
0 notes
Text
15 Ways to Build DIY Climbing Wall for Kids
Looking for easy, fun activities to keep your child engaged and help them establish or develop fitness, strength, and physical health? Building a DIY climbing wall is the best way to do this! With these 15 different ways to build a DIY climbing wall in your home, you will be able to find just the correct option that suits your needs. Whether you are searching for a simple indoor rock wall, like climbing some holds onto extant walls, or going all out with concrete slabs and wooden boards to build a backyard climbing wall– there is a low-cost DIY climbing wall for everyone.
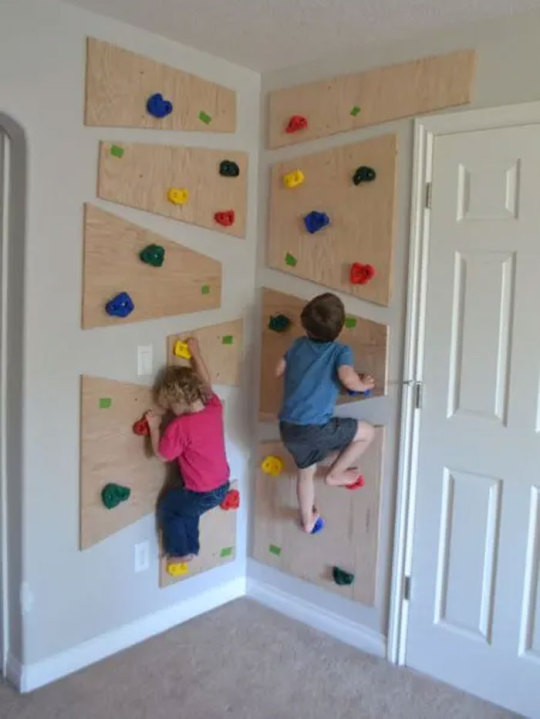
Plus, crafting each DIY climbing design will also offer learning opportunities as they see their creations come together. If you are on the exploration for some excellent kid’s activities that will get kids into physical play -why not try making a wall today?
Easy DIY Climbing Wall ideas to Build
The below list provides free climbing wall-building plans for kids and adults. There are some things to note before building a DIY climbing wall. Use the padded floor mats around the wall for the secure fall of kids. Use longer screws to fix the climbing holds. Now explore all these ideas of DIY climbing walls to see numerous fabulous designs, even a climbing wall combo, and swing set.
How to Make a Climbing Wall
Lead your child to a healthier or well lifestyle by building quick DIY climbing walls. This will be one of the best fun ways to put your kids into physical exercise. Build this simple DIY climbing wall using floor mats, climbing holds, ¾” plywood, and lag screws. For more details and a complete tutorial, visit the “The Created Home” website.
Ultimate DIY Home Climbing Wall Under $200
Boost the muscle power of your kids by building this DIY home climbing wall, which will cost you $200. To do this climbing wall project, you will need 2x4x10ft, and 2x4x12ft studs, 4′ -8″ x 3′ -8″ wood panels, and 1 lb wood screws to build the climbing wall basics. Also, this pattern is the ultimate solution that keeps your child physically fit. For full instructions, check the “Growing Slower” website.
Building an Indoor Rock Climbing Wall
Build this kid’s gym at home by investing less than $150. Kids will love to climb it with their siblings or while alone. Produce a compelling interest in physical fitness among your children by building this climbing wall. To make this, you will just need drywall screws, a case of beer, plywood, and studs. Check the full details of this climbing wall on the “Instructables” website.
Build your own climbing wall
Boost fantastic physical health among the children by building this DIY climbing wall. In order to construct this elegant climbing wall, you need zinc-plated t-nuts, flooring, carpet, and custom holds. The DIY project will cost you more than $2000, plus it’s the best way to maintain the physical health of your kids. To check the full tutorial, visit the “Climbing” website.
How to Build a Climbing Wall for Kids
Here is another climbing wall idea, which can be built using a plywood sheet and must be mounted perfectly on the wall. For making this climbing wall design, grab a 4′ x 8′ piece of plywood, 5″ screws, and a climbing hold. For more details of this pattern, check the tutorial on the “Two Feet First” website.
DIY The Hahn Climbing Wall
Update your kid’s playroom with this Hahn climbing wall, a fun activity. This fantastic climbing wall design is 20′ feet long and 8′ feet high and will create fun hours for the kids. Add the soft floor mats near the DIY climbing wall for a safe fall for kids. For more details, check the details on the “Toddthahn” website.
Homemade Kids Climbing Wall
Buying a DIY climbing wall is expensive, but DIY always gains your consideration when you need to save money. Keep your kids physically strong or achieve by building these wall decors, which will surely rock in the backyards. To start constructing this climbing wall, grab a padded gym mat that holds plywood panels and furring strips. For more details and check its complete tutorial, visit the “Oh-so-savvy Mom” website.
Rock Climbing Wall for Your Kid’s Playroom
Boost the gross motor skills of your kids by building rock climbing walls. Start updating the kid’s playroom with this wall decor, which will be super quick and easy to build. Grab some significant plywood pieces and fix the one color or colorful climbing holds on it to build this vertical kid’s gym. For more details, visit the “The Sits Girl” website.
How to Make a Rock Climbing Wall
Ensure superior physical fitness for your kids by adding this super fun gym, and the rock climbing wall also will inspire your child to rock climb. Fix the wooden supports on the wall, and add the padded mats for a safe fall for kids. Plus, heavier wood blocks have been used for this DIY project. The complete tutorial checks the details on the “Design for Mankind” website.
DIY Super Mario Themed Climbing Wall
Kida is intensely in love with the Mario game, so making the super Mario theme of climbing walls will substantially improve kids’ physical strength. Give your child an enjoyable reason to be physically active. The finished size of this wall project is 8′ x 8,’ and it will cost you $250. For the details of this wall project, go to the “And Next Comes l” website.
DIY Backyard Climbing Wall
Willing to improve the outdoor activities of your kids? Then, making this backyard climbing wall is a must. To construct this elegant backyard climbing wall, get 4 plywood sheets that have 3 ⁄ 4″ thickness and 2×4 wood slots. Plus, the last step would be to paint the wall in different fun colors so that your kids will love to be around. For the complete details, check the “Impatiently Crafty” website.
Building an Indoor Rock Climbing Wall
Here you need climbing pegs, pine wood, mod-podge, and vinyl to build this elegant rock climbing wall. Build this DIY climbing wall for both outdoor and indoor spaces. Paint the wall by keeping in mind your child’s interest; also, remember to attach a rope for rock climbing training. Check the tutorial on the “DIY Danielle” website for complete instructions.
DIY Outdoor Rock Climbing Wall
Convert the backyard into an outstanding fun place for your kids by adding this outdoor wall of rock climbing. The wooden frame supports the complete walls that come with heavy-duty wooden pillars. The Choco climbing wall also looks perfect in the wood blank pillars. Check the tutorial on the “Chase the Summit” website for the complete process of making this climbing wall.
Simple DIY Indoor Climbing Wall
Grab the 4 x 8′ sheet of plywood to build this 7′ feet high climbing wall for your kids. Grab your climbing holds and fix them thoroughly on the plywood sheet selected for the wall. Then you get your whole wall ready and install them on your wall using durable hardware. Visit the “Crafting Chicks” website and get the complete instructions for this project.
Combination Swing Set and Climbing Wall
Double up the super fun for your outdoor-loving kids by constructing this double fun station, the combination of a climbing wall and swing set. First, you have to build the wooden deck and then the set of sewing. Then, use the plywood sheet to build both sewing set sides and paint the climbing wall. Check the tutorial on the “DIY Network” website for the complete guide.
Also Read: 20+ DIY Woodworking Projects for Beginners
Conclusion
Do you want to get your kid outside and away from screens? Are you also looking to construct an indoor rock climbing wall so that your child can play and improve their skills? Look no further! All these 15 easy DIY climbing wall ideas- outdoor and indoors, step-by-step guide with rock and wood materials- are super simple for a beginner. Plus, the ideas will help you to make the best climbing wall while staying within budget.
Source:https://hariguide.com/diy-climbing-wall-for-kids/
0 notes
Text
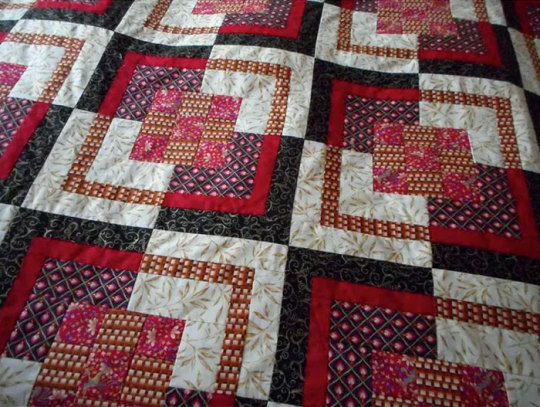
15+ Easy and Free Quilt Patterns for Beginners
If you are looking for a free and easy quilt pattern, then explore this simple project collection that is best for beginning quilters. All the patterns are well-written with detailed instructions that head you through the construction process in a step-by-step manner. The aim is to make collecting a simple task so you complete the project and get to enjoy the joy of quilting.
Whether you are searching for a weekend project or looking for your first quilt pattern, these patterns work amazingly for quilters of all skill levels. They will also show you how simple it is to make a quilt craft, even if the block pattern looks complex.
Nine-Patch Bento Box Quilt
This super easy bento box quilt is an alteration of the famous design. It features a nine-patch block as its CenterPoint and is a perfect introduction to quilting. The quilt is a piece of the strip, and the instructions help you ensure that each piece of patchwork is the right size before you move on to the next step. It’s a drinking design that is a perfect project for anyone, even if it’s your first quilt.
Dancing Nine-Patch Quilt
It’s very hard to fall in love with the slightly curved appearance of this quilt. The illusion arrives when the nine-patch quilt blocks are enveloped on two sides by a scrappy assortment of squares. These are then flip-flopped to make the layout. The dancing nine-patch quilt is the best project for lovers of scrap quilts. Also, it can be constructed using a themed approach.
Easy Hunters Star Quilt
The hunter’s star quilt pattern looks complicated at first, but in reality, the quilt is simple and easy to construct, even if you are a beginner. As with any quilt pattern, it is essential to understand some construction basics before starting and practice new skills if necessary. The pattern includes instruction on all the basics, in case you need to assign them to them before it’s time to sew.
Kaleidoscope Quilt
The kaleidoscope is another quilt pattern that looks more intricate than it truly is. The quilt blocks are sewn on-point, a craft that beginning quilters often try to fend off, but there is no need to worry about it. Once you have sewn an on-point quilt, you feel relaxed with the technique. This pattern is a good beginning point for acquiring that new skill, with many others you will learn along the way.
Star Crossing Quilt with Piano Key Borders
Star crossing is another quilt pattern that might seem problematic. However, it takes time to assemble, but the designs are really simple to put together. This pattern will help you build skills; use this quilt to learn how to sew the piano key border. It’s one you will turn to again because it looks perfect with almost any field pattern.
Easy Contemporary Baby Quilt
If you wish to start quilting on a smaller scale, then a baby-sized quilt is the best choice. The quilt blocks for this craft project are totally simple to make, so beginners can stitch this one easily. This pattern also has a wonderful contemporary pattern that is begging you to play with pops of color. The double-framed four-patch quilt pattern is just one of your layout options, so it’s a good project to test your design skills.
X’s and O’s Quilt
The version of the X’s and O’s quilt project allows the individual letters to shine. It can be done by swinging blocks into two compositions and adding sashing in between. The letters have a rather scrappy view. Yet, every quilt block is created from the same two fabrics: a focal and a background. Also, you can build this one in any size you want.
Double Four-Patch Scrap Quilt
The simple quilt blocks in this pattern finish at 8 inches square; you can easily sew the equity by using a theme and using up excess materials. The double four patches are good enough for all quilters, even if it’s your first quilt project. You can also transform the quilt patch to give it more dimension by adding sashing within every pattern. Its fun to experiment with, and you could use it to sew various quilts without any two looking alike.
Bricks & Cobblestones Quilt
This lively quilt block pattern is too much fun to create. All the fans of scrap quilts will love how much of your stash this pattern eats up, and the more dynamic and crazy the garments, the better.
Also, you will make these simple quilt blocks from tone-on-tone and brightly colored clothes printed with stripes, geometrics, dots, and small motifs. One block is a rectangle, and the other one is square- make them both and gather the quilt in a mix-and-match manner.
Simplified Puff Quilt
The puff quilts pattern is also known as the biscuit quilt. They are super comfy and ultra-plush. The trick is to sew every square with leeway so that you can easily fill each pocket with fiberfill. While this pattern may seem like a daunting task, a few tricks and tips will make the procedure much easier. The fluffy comforter-like feel is worth the creation; this is the best gift for babies.
Quick and Easy Rag Quilt
Rag quilts are cuddly and soft, so they are excellent quilts for a chilly day. A smooth rag quilt makes a perfect gift for kids and adults, but make sure to make some for yourself. Rag quilts go together immediately and free you from the sewing stress. This is a bonus pattern if you are a beginning quilter. You can finish this easy pattern in just a day or two, even if this is your first time creating a quilt project.
Easy Framed Nine-Patch Quilt
This simple quilt is made from nine patch blocks that are surrounded by frames. The dark bars really make it stand out. The adjoining blocks are then flip-flopped when you sew them into horizontal rows to make a stair-step appearance. You can also make this orientation change pop by using contrasting fabrics. Optionally, you can let it blend with fabrics of similar color value. The instructions include two different sizes, a bed quilt made with 10-inch quilt blocks of square shape and a baby quilt made with 5-inch square blocks.
Easy Rail Fence Baby Quilt
Sew this simple rail fence baby quilt in a few colors, or add a different variety of fabrics. Either way, this strip piece goes together quickly. Also, you can customize the border, and the pattern includes a narrow inner border that breaks the busier pattern, which is a very nice touch.
Simple Rail Fence Quilt
When you explore the quilts pattern, you will find lots of unique variations of the rail fence design. This bed quilt is one example that differs significantly from the baby quilt. It features a stair-step rail pattern that gives the quilt tons of action, even with muted colors. The best news is that nearly each rail fence is easy to sew, which is why all skill-level quilters love them.
Floral Snowballs Quilt
Snowball quilt blocks are simple to make, and you can convene buckets of them in no time. Just sort your floral quilting fabrics and try to make a scrappy quilt in any size you want. These quilt blocks finish at 6 inches square. The great thing about this pattern is that the options are endless. So when you are ready to take on more complex variations, then take a look at the snowball quilt pattern.
Easy Jigsaw Puzzle Quilt
Traditional H quilt blocks are used to create the most popular jigsaw puzzle quilt. The quilt blocks are very easy to gather. You will need to stand aware of fabric placement so the pieces of the puzzle emerge as they should. The pattern walks you through one step of the layout at a time. The pattern is made with 6-inch blocks, but you also find the instructions for 9 and 12-inch quilt blocks if you would like to go a bit bigger.
Endless Stairs Quilt
Endless stairs is a quilt pattern that comes with a lot of creative potential. The quilt blocks go together quickly and are simple to make, leaving you free to establish more on color and contrast than technique. As you play with the finished quilt blocks, you will discover many unique layouts. Just piece them together how you want or follow the instructions; your quilt will be best either way.
Bonnie Scotsman quilt
The bonnie Scotsman pattern is assembled with straight grain bars and squares. It’s a beginner-friendly patchwork pattern because you will have no stretchy bias edges to pledge with. Also, you will find the procedure instructions for assembling it one patch at a time, which is best for scrappy quilts. There is a strip-pricing option also for anyone who wishes to create a batch of identical blocks. Suggestions of two layouts are also included, but many more arrangements are desirable for this versatile design.
Scrappy Hearts Wall Hanging
Every quilter needs a heart-shaped pattern, and this one is best for beginning quilters. These 6-inch heart blocks are elegant, and the pattern shows you how simple they are to make. You will find the complete instructions for assembling the scrappy hearts into a wall hanging. Whether it’s a full-sized quilt or a quick weekend project, it’s a fun and very simple pattern once you get going.
Also Read: How to Make Quilted Christmas Stockings Patterns
Conclusion
If you are a beginning quilter searching for easy and free quilt patterns, check out the list of beginner patterns in the above blog. In the list, you will find a ton of ideas for simple quilts made from simple shapes or pre-cut fabric. So anyone who can learn to quilt first needs to know where to start. Most seasoned quilters agree that starting with a simple design is the greatest way to study quilting techniques.
Source:https://hariguide.com/easy-and-free-quilt-patterns-for-beginners/
2 notes
·
View notes
Text
10 Tips for Punch Needle Embroidery Beginners
Have you considered giving punch needle stitching a try? Before you go in head first, you must know full information about it and some essential tips to get started. So basically, Punch needle embroidery is a fun and fast fiber art that anyone can learn. In punch needle, you will use a punch needle tool to punch yarn loops into the fabric to fill design areas with attractive colors. It seems like a painting with yarn. So if you want to try, keep reading the tips below for punch needle embroidery beginners.

Punch Needle Embroidery Tips
Punch needle is a craft technique applicable to all ages. Even kids are also able to pick up the basics with coaching. It is the fastest type of needlework and is also satisfying. If you wish to get started with punch needle embroidery, learn how to do a punch needle first.
Also, you can get started with a punch needle right away. The needed supplies are relatively costly and small. So you don’t need to invest a lot of money, time, or space to start a punch needle. And you can get started with various punch needle patterns.
After some experimentation and instruction with punch needle basics, you can start creating objects immediately. Here are some amazing tips to help you:
Use the correct fabric for your foundation
If you punch with rug yarn, then you will want to look for a monk’s fabric. Monks cloth is 100% cotton fabric with a sturdy yet flexible weave. Use monk’s cloth for your backing fiber when you are making bags, pillows, stuffed objects, or punch needle rugs.
Monks cloth is available in different weaves. You need a monk’s cloth with a steady weave for a punch needle. Select a monk cloth with almost 12 holes per inch for a punch needle. Be careful because most of the craft stores – like Joann – bear a type of monk’s cloth with a larger weave, generally 7 holes per inch. Also, the monk’s cloth has an open weave, which means your yarn will be grasped more tightly and may slip out.
If you are punching with a needle and embroidery floss, you will want to use fabric like weaver cloth for your foundation cloth. Weaver’s cloth is a poly-cotton blend with a weave and a heavier weight. Also, you can find it online and in the bottom-weight area of craft stores like Joann.
Also Read: 15+ Cactus Embroidery Patterns
Use the right-weight yarn
Use a yarn size that is thin enough to flow through the punch needle tool yet thick enough to stay in the foundation fabric holes. For use with the punch needle of any oxford, we recommend 3-ply rug yarn or bulky-weight knitting yarn. Also, you can use 3 or 4 strands of sock-weight yarn held together or even two strands of worsted-weight yarn held together.
For using a tinier gauge needle such as ultra-punch, you can use 6 strands of embroidery floss, like DMC embroidery floss.
Use a proper frame to hold your fabric tight for punching
Generally, the Basic wooden embroidery hoops can’t hold the fabric tight for punch needle embroidery. With every stitch, your fabric will get looser, and the end is making the complete procedure really frustrating.
A few of the best frames are Q-snap PVC embroidery frames or gripper strip frames. Plus, if you would want to use a hoop, we recommend a plastic no-slip hoop like the clover or Morgan. Also, you can make a DIY carpet tack frame or use a basic gun to staple your backing fabric to a wooden frame.
Keep tight tension on your fabric
Always keep your fabric drum head tight (tight enough to bounce a coin on) so your needle can properly form stitches.
Keep loose tension on the yarn
This is a slight tip, but it can make a very big difference. So make sure that you have enough slack on the yarn ball end. Otherwise, any tension you have could drag your stitches out.
Pay attention to the direction of your needle when stitching
The open end of the needle faces the stitch direction. In other words, the opening of your needle always faces the direction that you are punching. Lead with the open side of the needle.
For even stitches and loops, punch down at a regular depth
Punch the needle down into the fabric until the wooden section of the handle is just touching the fabric. The needle length makes the depth of loops. And if you punch down to the exact place on each twitch, the loops will be constant pile height at the end.
Don’t lift the needlepoint off the surface of the fabric between stitches
Rather, barely drag the punch needle tip across the surface. If you pick up too far, then your loops will be uneven – or even bad, your loops will come out.
Start with the outlines
Use smaller stitches in the outline than the fill stitches. Also, try for 4 stitches per inch to fill in the shapes and 6 stitches per inch for the outlines.
Fixing mistakes
If you don’t like an extension, you can pull your stitches back out. Then go slow and be attentive so you don’t cut out too much.
In order to fix any lingering punch made in your monk’s cloth, run your fingernail over your fabric to close up the holes in the weaves. Then, try it one more time!
Also Read: 25 Free Cross-Stitch Patterns for Stitchers of all Skills Levels
Final Verdict
The punch needle is the trend in embroidery, which is very easy to learn. Also, it gives a quick result and creates elegant textile art. In detail above, we explained the basic tips you need to know and follow before starting the punch needle process. So keep reading our top ten tips to get started with a punch needle right away without investing a lot of time, space, or money.
Source:https://hariguide.com/tips-for-punch-needle-embroidery-beginners/
1 note
·
View note
Text
15 Free Crochet Towel Topper Patterns
Crocheting is a creative and enjoyable hobby, and free patterns of crochet towel toppers can provide the best beginner project for anyone who wishes to learn and boost their skills. So, if you want to start learning how to crochet kitchen dish towel toppers, then with these 15 crochet towel patterns with step-by-step instructions and a PDF guide, you can improve your skills. Many things in the kitchen play a significant role in our daily routine, and towels are among them. These towels are essential because they assist us with various duties, including covering, drying, and cleaning. So let’s take a look at all these towel topper pattern ideas that you can make and get yourself a colorful and textured towel topper to fix your towels in their respective areas.

Free Crochet Towel Topper Pattern for Kitchen
The pretty crochet towel toppers are just pretty enough to steal your hearts with their eye-catching designs and textures. They are perfect to crochet around the festive seasons with hues and are also used as a gift for your favorite ladies. Also, the patterns come with crochet buttons and hooks for easy fixation over the oven rods and more. Plus, they’re easy to follow for beginners.
Crochet Gingerbread Towel Topper Pattern
One of the things that people love to make around Christmas is crochet towel toppers, and there are many patterns for them. A gingerbread design has been created to shape this elegant and festive-inspired towel topper for your kitchens. Let’s check out the pattern instruction and details on the “Repeat Crafter Me” website.
Crochet Dish Towel Toppers Pattern
These colorful; crochet dish towels are summer-friendly, and you can crochet them at your home. The adorable dish towel topper has been crocheted with a hook and button on the top to make it easily hang around your spaces. Check out the pattern instruction and details on the “Posh Pooch design” website.
Easy Crochet Towel Topper Pattern
This gorgeous crochet towel topper is quick to make within a few minutes. It has a button to tie it around over your oven or the cabinets. Also, you can use it as the perfect gift for your dear and near ones. Just follow this easy pattern instruction on the “Megmade” website.
Crochet Pineapple Towel Topper Pattern
You can use various patterns to shape a lovely topper, and this pineapple topper is super cute and fun to get your hands on. The breezy pattern is quick and easy to work on, and the red color makes it chic and hot. A button tie-up makes it simply hand around your kitchen or whatever place you want. Check these free pattern details on the “Ravelry” website.
Crochet Double Layer Towel Toppers
This red, green, and white double-layer towel topper is best for Christmas to use as a perfect gift to exchange with your lovely ladies. It would look so beautiful and also would bring festive vibes to your spaces while hanging around. Check this pattern’s details on the “My Recycle Bags” website.
Crochet Summer Sundress Towel Topper Set
You are definitely going to lose your heart to this elegant and cute summer sundress towel topper. The blue dress with vibrant yellow flowers looks absolutely fun and beautiful as the towel topper. To make this design, check out this free pattern on the “Crochet Memo” website.
Crochet Hanging Ring Towel Holder
These ring-styled crochet hanging ring towel holders are quick, easy, and one of the most functional patterns to use when you need a towel topper or towel holder. Also, you can make any of the buttons and colors to use in your kitchen spaces easily. To make this, check all of the details on the “Naztazia” website.
Crochet Daisy Towel Holder Topper – Free Pattern
Here is another elegant idea for the fun-looking and gorgeous daisy holder toppers. The towel toppers have been crocheted in the ring style so that you can put them in. Moreover, the daisy flowers instead of the button make these holders look more pretty and fun. To make this, check all of the details on the “Delights Gems” website.
Bounding Towel Topper – Free Crochet Pattern
Here is another pattern for you to crochet a lovely towel topper for your kitchen. The towel pattern is bounding, so you can easily tie it up on your oven or the hanging pipes in the kitsch. Also, you can work up this chunky towel topper pattern. On the “Stitch11” website, you can check the instructions and all other details to make this pattern.
Crochet Towel Topper Pattern for Beginners
These delightful crochet towel toppers are so catchy that apart from being practical, they are absolutely going to add oodles of charm to your kitchen decor too. Plus, it’s elementary to try out beginners too. You can also use them as a perfect gift for your beloved ladies. So check out the details on the “Taylor Lynn” website to start making this pattern.
Basic Crochet Towel Ring Pattern
If you are distressed about losing your towel now and then, here is the best idea for making this easy and quick crochet basic towel topper for you. Also, it’s a very easy, simple, and quick pattern that you can make with the complete guide on the “Lemon Lane” website.
Crochet Towel Topper – Free Pattern
This is the coolest and the easiest towel topper that you can ever get. This is tiny in size, with a ring and a button to be tied up on the pipes. Also, you can quickly crochet it up, and the details of this pattern are available on the “Amanda Crochet” website.
Crochet Hanging Kitchen Towel Topper
Towel toppers should be fixed so that you can find them easily and use them during your busy hours in the kitchen. So get your towels to hang up around you using these cute and lovely toppers, which are super simple and fun to crochet with any easy pattern and in various colors. Check the details of this pattern on the “Naztazia” website.
Crochet a Towel Topper
Hang your towel over your ovens in beauty and style by crocheting this functional Crochet towel topper. Unlike the other towel toppers having one single big button, this one has two tiny buttons hanging over the road. Check the free pattern with all the important details on the “Crafting Shed” YouTube channel.
Crochet Towel Topper Beginners Pattern
Beginners should get their hands on the easy projects at the beginning of their practice, and this towel topper is the best plan to work on. All you need is your crochet hooks’ basic work to make this simple crochet towel topper. Check the details and complete instructions on YouTube to make this elegant design.
Also Read: 10+ Crochet Heart Patterns for Valentine’s Day
Conclusion
Now you know all of the different types of crochet towel toppers. It is time to select a pattern and get started. Even if you have never crochet before, these free pattern ideas are simple enough for beginners. Each one comes with a printable PDF and step-by-step instructions so you can floor along. So, select your pattern and start your crafting journey with these crochet towel toppers patterns.
Source:https://hariguide.com/free-crochet-towel-topper-patterns/
0 notes
Text
20+ DIY Woodworking Projects for Beginners
Have you ever wanted to get your DIY on and start doing your own woodworking projects? While it seems too complicated, it is actually a straightforward craft project. That’s why woodworking is one of the best projects for learners. You can create your own functional pieces and add your own flare to them, feeling proud and accomplished every time you lay your eyes on your DIY project. Also, it’s a fantastic way to stay under budget when giving gifts and decorating your home. In the long run, the price of tools and lumber is far less than the price of purchasing a new piece that would be simple to build at home.

Woodworking might be intimidating, but you can begin big with something like a center of entertainment. Start small, and once you feel comfortable, you can do big projects or work your way up.
Sofa Sleeve
If you live in a minimal space, it may not be practical to add TV trays and end tables everywhere in your area. Sofa sleeves can save the day and make it simple to lounge on the couch with a cup of tea. This complete tutorial will show you each thing you need to create your own sleeve to fit your sofa.
Wooden Wine Rack
There is nothing like an elementary, chic wine rack to liven up your space. These delightful DIYs make perfect gifts if you are not into wine. You need a few basic supplies and elbow grease to get started.
DIY Beer Caddy
This DIY wooden beer caddy is the best gift for enthusiasts in your family and friend group. In this, we can put any bottled beverage, not just beer! This is the best beginner project of woodworking, and they even come complete with a handy bottle opener.
Wooden Arrow Tutorial
By no means do wall decor items need to be convolute to look beautiful? These DIY wooden arrows explain it. Hung above the bed, in the bedroom, or next to the front door- this DIY project will look fabulous anywhere.
Wooden Doormat
Home is the place where our heart is, so you may make its doorway look good. By following the tutorial from “The Merry Thought,” you can make your own wooden doormat, a perfect way to dry off wet shoes without getting a sticky mat.
DIY Bathtub Tray
As most of you know, bath time is not only for getting clean. Add a glass of wine, a good book, and your favorite candle, and you are all set for a relaxing evening of self-care. It’s easier to bring about all of this with a handy bathtub tray. That’s where this complete tutorial and your skill in woodworking come in.
Serving Tray
Make your morning breakfast in bed even better with a customized wooden serving tray of DIY. It is the best coastal accent for home decor, which you can make with a step-by-step guide. On the official fox hollow cottage website, you will see a complete tutorial to create your one-of-a-kind piece.
Decorative Earring Holder
Instead of splurging on ornate wall art, display your jewelry to add a pop-up of color to your bedroom. Make things simple by creating this pretty wooden stand to show off your fashionable earrings, even when you are not wearing them.
DIY Lawn Dice
When the clouds clear, it is time to bear the entertainment outdoors. Family gatherings and summertime barbecues are made better with these elegant and fun-for-all lawn dice. To start making a DIY drawstring bag for holding your game piece, follow the steps from “the spruce” site; then, you can customize it with embroidery of your different variety of dice.
Cute Wooden Key Holder
Let’s face it, all of us lose our keys at one point. It’s a moment to put an end to the frantic searching with a little DIY! Use beginner woodworking skills to make this wooden key and mail holder hang in your entryway.
DIY Candle Holder
Wood pallets can be used to make various types of DIY projects, including this beautiful tea light holder. This DIY project of woodworking is so easy and simple that you only need one power tool to complete it.
Basic Cutting Board
There are so many complex cheese boards and cutting boards on the market nowadays, but you can make your own with easy and simple woodworking. A quality cutting board does not need to be convolutedly designed – follow the tutorial to see how it’s finished.
Lap Desk DIY
Studying or working in bed is a dream come true, but it can be tricky without a lap desk. Never fear; you can make one with only one wooden board. Check “The House of Wood” site For the complete tutorial that will help you to do this DIY project nicely.
DIY Mid-Century Nightstand
Add flair to your space with mid-century furniture. It might look complex, but most mid-century furniture is easy to DIY. Take this nightstand, for example, and check the tutorial from burkatron to do this project.
Wooden Photo Holders
Display your cherished photos with these creative DIY wooden photo holders. They are simple and small but pack a mighty design punch. Also, they are less expensive than purchasing fancy frames. In order to do this fun project, check out the complete guide from “Passion Shakes.”
Wooden Tic Tac Toe
This DIY project will be a blow with the kids, allowing you to take some classic tic tac toe games to higher and new levels. By gathering all the materials or supplies and following the instructions from “The Tool Belt,” you can make this project very easily.
DIY Pet Bed
If you have a furry dog, then you surely know how important their comfort is. You can make sure they are cozy and comfy in their own personalized wooden bed, complete with fluffy pillows to ensure the best night’s sleep.
Pencil Holder
If you have an electric drill, then this DIY project will be easy. Just drill a number of holes into a piece of your wood to make a unique pencil holder. This craft is not only full of styles but also serves as a helpful reminder to stay on task.
Beautiful Wood Sign
Decorative signs of wood add grace to any space, but don’t try to knock them because of the immense price tag. Say “NO” to construct a wooden sign and make your own. The procedure is much easier than you think!
Moderns Coffee Table
Thanks to furniture retailers, impaired hairpin legs are easy to come by. It’s also a perfect thing because most modern furniture utilizes them. Purchasing those unassembled makes DIY projects love this herringbone wooden coffee table an easy feat.
Wooden Address Planter
Your woodworking experience will be the first thing your friend and guests see as they come to your home if you make this DIY address number hanging. A good plant adds a multimedia touch that makes this DIY project look impressive without needing any expert DIY skills.
DIY Plant Hanger
Manufacturing plants into your home gives a calming vibe and space life. Just add plants to your home while showing off your woodworking skills with a DIY plant hanger like this one. For the tutorial on this project, visit “Bigger than the Three of Us.” Site.
Mountain Wall Hooks
Having difficulty expressing your love for nature? That’s a quick solution. Install the wooden mountain wall hooks to enjoy nature in the reliefs of your own home. Check the free tutorial from the “Ane White” site to do this elegant project.
DIY Lawn Chair
You can only have a few lawn chairs when they look as good as these do. Find the plans to make your own outdoor chairs, besides the supplies and materials, in this simple-to-follow tutorial. A quick trip to the store of hardware will take care of the rest.
Also Read: 9 DIY Headboard Ideas for Your Bedroom
Final Verdict
As a matter of fact, there are various beginner woodworking projects that we put together in the above list. Also, there are hundreds of ideas out there for do-it-yourself, like DIY plant hangers, pencil holders, coffee tables, and many more. So Strat with any project you like and work your way up to more intricate projects as you go. In this detailed blog, we have collected more than 20+ ideas of DIY woodworking crafts you can easily make at home instead of purchasing them.
Source:https://hariguide.com/diy-woodworking-projects-for-beginners/
0 notes
Text
9 DIY Headboard Ideas for Your Bedroom
There are some more poignant decor choices you can easily make in a bedroom than a statement headboard. It can work as the room’s focal point, tying together the color scheme and a fully realized aesthetic. A true headboard can be hard to originate, so deal with tacking a homemade version during your free weekend.
Many of the ideas are simple and quick, but they also allow you to customize the best headboard for your specific space and bed. Glance through these how-toss for a bedroom makeover inspiration, and remember to complete your decorating with a homemade throw pillow.

Wood Slat Headband
Transform some cheap lumber lengths into a statement-making, wall-length headboard. An oversized version is an amazing way to makeover a room. Also, it’s rental-friendly since no paint or wallpaper is needed. Try a dark stain on your lumber for a cozier vibe.
Arched Headband
A geometric, vintage-inspired homemade headboard adds comfort and warmth to your sleep space. Need more confidence with your power tool skills? Then research your options thoroughly before buying tools. After that, finish the piece using a medium wood stain.
Herringbone Headband
If your reflooring project left you with some more wooden planks, consider inserting them to use in a pretty herringbone headboard. This version gets rustic-chic, but the finished pattern is pretty enough to leave unpainted.
Light up headboard
Assimilate a conversation-starting piece in your guest room with a DIYed light-up headboard. This DIY project requires some power tools and a little patience, so enlist the help of a partner and set aside a few days to get it done but the results are worth the effort and time.
Floral Mural Headband
For those who are more artistic than builders, try a giant mural in place of a DIY headboard. An overblown, splendidly-colored flower lends a retro-tropical vibe to a kitschy bedroom. If you are not allowed to paint a rented apartment wall, then try peel-and-stick brief wallpaper trimmed to your design specifications instead.
Painted Stripe Headband
Go full-on preppy with an upcycled, painted stripe headboard. Use any flat surface like an old tabletop, desk, or extra lumber in need of a re-surface, place paint tape in long stripes, and give it a heavy coat of color. This headboard looks chic with contrasting floral bedding.
Tufted Headband
This elegant or eye-catching velvet tufted headboard works as a centerpiece in a maximalist bedroom. While this DIY project may seem intimidating, it’s truly completely no sew and accessible for novices.
Fluffy Headband
Textural contrasts are important when designing an inviting bedroom, so begin with a fuzzy headboard. Source fabric from a wholesale vendor to make this quirky headboard on a tight budget. It’s best for a tween transitioning from their bedroom to something with more personality.
Hanging Cushion Headband
Equal parts, comfortable and stylish, an up-cycled cushion headboard can easily make your bedroom cozier. While you can stitch cushion covers easily and quickly, non-sewers can easily get away with pinning a powerful fabric onto old cushions instead. This DIY headboard looks chic when paired with a minimal platform bed, so test your DIY skills by building one yourself.
Also Read: 15 Ideas for Decorative DIY Bookends
Final Verdict
A DIY headboard can add a major impact to any room decor. No matter what’s the size. In a large room, a headboard can be helpful; filling the space in a small bedroom makes the sleeping area feel more special. As for design, there are various headboard styles to choose from, and in the above section, you will find some attractive DIY headboard ideas you can create for your home.
Source:https://hariguide.com/diy-headboard-ideas-for-your-bedroom/
1 note
·
View note
Text
25 of the Best DIY Birthday Cards
If you think the birthday gift is the main event, then the birthday card is the place where the heart is. For a unique handmade touch, opt to make your birthday card rather than choosing a generic store-bought card so that your family and friends will appreciate the effort and be awestruck by your talent. So let’s check out the below 25 DIY Birthday Card ideas that range from beautiful and simple to clever and quirky.
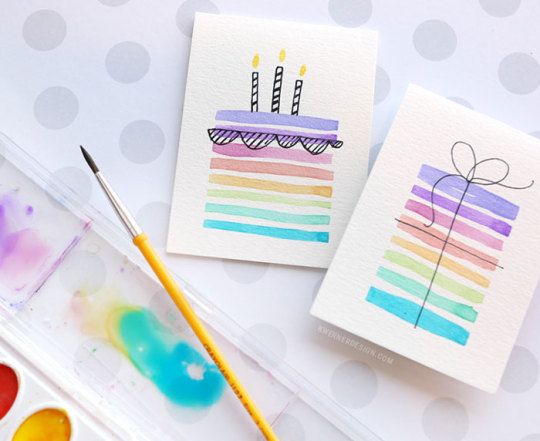
Easy Handmade Birthday Cards Using Minimal Supplies
Most of the crafters want to make birthday cards to give to their friends but need more money or time for expensive supplies. From the video tutorial from Kristina Werner’s design, you can easily start making this design, demonstrating how simple it is to make these watercolor birthday cards for pennies.
Dino Boy Birthday Card
Almost every little girl or boy goes through a “Dinosaur” phase. So make this cute and elegant dino card to celebrate their interest and special day. To start making this, you can check the tutorial from “House Built of Cards.”
Paper Balloon Happy Birthday Card
Craft a pretty birthday card that looks much more complicated to make than it is. The paper dyes give the paper balloons and lettering a skillful edge. This card craft project is one that everyone would love and appreciate receiving.
Easy Sprinkles Lollipop Card Tutorial
Want to add fun to a birthday card? Paper lollipops are wrapped with sprinkles and glued onto a matching card. Each of us has an inner child that will surely love a birthday greeting like this lollipop card.
DIY Letterboard Birthday Cards
This Letterboard card design trend is going substantial. Make a birthday card by using a sentiment that is personalized for the recipient. For complete instruction, check the tutorial from the “Design Eat Repeat”.
Mini Washi Tape Cards and Envelopes
Washi tape has got to be the best invention ever! Add cute tape to your greeting card craft, and you will have a delightful card instantly! This design is so fun and easy that anyone can instantly get amazing-looking cards and envelopes with washi tape.
Free Printable Pom Birthday Card
Celebrate a weekend with this adorable pom ice cream cone card. White House crafts provide a free printable and detailed tutorial for this birthday card project.
DIY Embroidered Cards
Add craftiness to your birthday card projects with embroidery. When you complete the embroidery, attach a few fabric tags to keep up the homemade theme. Bugaboo city provides a complete tutorial for this DIY embroidery card project.
Black Background DIy Birthday Card
Try something unique for your next DIY card project. Most of the cards are made with white paper. Use black paper for a dramatic twist. Your friends will surely appreciate your effort to give them a unique birthday card.
DIY Cute Card from Recycled Paper Scraps
Most carters have pieces and bits of leftover paper that are beautiful to throw away. Put those paper scraps to good use with this birthday candle card. From “Makers Society,” you will find a complete tutorial about making this cute card from recycled paper scraps.
Tulle Birthday Balloon Card
A shaker card comes with a transparent panel on the front, and it is filled with materials that move around when shaken. This elegant birthday card features a colorful balloon on the front that is filled with confetti and covered with tulle. The birthday recipient will reserve or treasure this keepsake card!
Butterfly Gift With Free Printable
Glue some lipstick or chapstick to the front of a free printable butterfly card, and then you will have a wonderful present as well as birthday greetings. For a complete tutorial, check the making process from a “Girl and a Glue Gun.”
Butterfly Card Colored with Prismacolor Pencils
Some people love cards that come with a vintage look. This DIY project is done with dies, stamps, and colored pencils. Colorful butterflies are stamped, then colored with Prismacolor pencil, and then attached to the card base. The final result is a pretty, feminine card that is best for the women in your life.
Black and Gold Modern Happy Birthday Card
Are you short on time but still wish to give a DIY birthday card to someone special? Let Lia Griffith do the work; she prefers this elegant look of golden and black card for download on her website. Lia has done all the work for you, so you need to print the card.
80th Birthday Card
Landmark birthdays drive some special recognition! Although this card is designed for an 80th birthday celebration, you can alter the card for any birthday. Print out the sentiments and numbers using your preferred word-processing software. After that, cut and glue to your card backing.
Happy Birthday Flower Card
Fabric flowers are attached to a white card, which looks simply amazing and lovely. By adding some of the stitches, you can finish the look of this elegant card design. To check its complete tutorial, go through the “I’m in Haven” site that shows you a step-by-step guide.
Sunflower Birthday Card
This card design is always simple. Make a beautiful sunflower card for your special friend and family member celebrating an autumn birthday. To check its complete tutorial, go through the “I’m in Haven” site that shows you a step-by-step guide.
ATM Machine DIY Birthday Card
Do you sometimes feel like an ATM machine when it comes to your kids? Add humor to their birthday with this funny ATM-style birthday card. You can check the tutorial from “Robby Gurls Creations” to make this design.
Easy Pop-UP Birthday Cake Card
Pop-up cards are always fun to create. This pop-up card for birthdays is simpler to make than it looks. The tutorial also has an easy-to-follow video that all but guarantees a win with this elegant card project.
Printable Lotto Birthday Card
A lotto card is the best small birthday present when you don’t want to spend a lot of money but wish to give someone on their birthday. So download this free printable birthday card from CRAFT and then insert a lotto ticket.
Shopping Bag Money Holder Birthday Card
Sometimes the perfect birthday gift is cold hard cash! Make a super cute card with a shopping bag on the front side, and put some money in it so that the person will love it.
Mini Birthday Album
Make a birthday card that doubles as a mini album. This birthday card design will be cherished for years to come. So if you want to make this for your loved one, check its complete tutorial from the “Unleashed Craft” site that will help you begin.
Sign Language Birthday Card
Are there any particular people in your life that love sign language? Make this card with the “I Love You” sign on the front side. This special sign language card is simple and beautiful enough to send. From “Busy Kids Happy Mom,” you can check the complete tutorial to make this cute design.
Surprise Smiling Face DIY Cards
Handmade cards are always a welcome gift because you took the effort and time to make something special for your friend. The metallic gold ink on purple cardstock is the best combination for a DIY birthday card.
Pretty Printable Floral Greeting Card
Painted flowers printed on cardstock look feminine and lovely. If you are searching for a beautiful printable that you can download, then this birthday DIY card will certainly meet your requirements.
Also Read: 10 Beautiful DIY Flower Crowns
Final Verdict
A thoughtful birthday card is the best place where the relevant sentiments go, the place where you show how much the celebrant means to you. So if you have the inclination, skill set, and all of the supplies, a greeting card is the best and unique way to go. There are numerous options available if you are creating a card at home. The ideas that are mentioned above for DIY birthday cards include a range of options for everyone on your list, from kids to adults. So whether you are looking for a birthday card that’s poignant, funny, punny, or just plain cute, these ideas will surely help you give the perfect greetings to all of your loved ones.
Source:https://hariguide.com/best-diy-birthday-cards/
0 notes
Text
10+ Crochet Heart Patterns for Valentine’s Day
Giving handmade gifts for Valentine’s Day is really a special way to show your loved one how much you care. You could be making them for a child, spouse, friend, teacher, or even as a class gift. Today I’m sharing some of the best collections of free sweet valentines crochet patterns that will help you celebrate love with your valentine. So whether you are looking for a gift idea to give your special one or crochet accessories to wear yourself, you will definitely find the best valentines crochet project below!

Crochet Patterns for Valentine’s Day
Below you will see some free and premium crochet heart patterns and projects. This heart-theme collection is perfect for making for a different variety of occasions.
Handmade Gifts for your partner or kids
Quick a present for a coworker or teacher
Classroom valentines to pass out a school
Simple valentine’s day decorations for the classroom or home
Also Read: 15+ Fun and Pretty Crochet Wreath Patterns
How to Crochet a Heart
There are various ways to crochet a heart motif. The patterns for crochet hearts make a simple solid heart that you use in all sorts of ways. And in this list below, you will find some more types of crochet hearts, including the following:
Flat solid heart shape
Lacy heart applique
Granny square heart motif
Amigurumi -style heart
Heart pattern colorwork
Heart motif blanket
10+ Crochet Heart Patterns for This Valentine’s Day
This fantastic collection of crochet patterns will provide you with more than 10+ Valentine’s Day crochet heart patterns that you will definitely want to make for your loved ones. So just check the list below and choose your pattern you want to make!
Granny Heart Coaster
This is a very lovely pattern, which can be made by using coasters or appliques. You can use them to decorate a different variety of crochet projects like baby sweaters, bags, or banners.
This pattern uses worsted-weight yarn, but you can adapt to use any weight yarn with a comparable size crochet hook. Even though this pattern is labeled intermediate, beginners will succeed following the step-by-step tutorial. Once you get going, you will surely love how fun and fast these little hearts are to make.
Granny Square Crochet Heart
Here is another unique and fun pattern for a multicolored heart motif with a 3-D texture. This sweet baby blanket is made from a rainbow of these little squares. Also, it works in continuous rounds and is designated for intermediate Crocheters.
Cute Heart Crochet Pattern
If you want crocheting Amigurumi, this sweet little heart stuffier is the best pattern to start with. If you use the same yarn listed in the pattern, then the project will measure 4″ tall. But you can use any weight yarn you like, as long as you use the crochet hook. Also, this elegant pattern comes with 13-page instructions with more than 50 pictures to instruct you through the procedure step-by-step.
Heart Granny Square Pattern
This granny square would be the best building block for a large throw for your sofa or even a baby blanket. The patterns come with a step-by-step tutorial, and you can use any weight yarn to make them. One of the five-star reviewers said, “This is an adorable granny square pattern, and I love the choices of color.”
Mini Crochet Heart Pattern
These cute little crochet hearts are imploring to be made into a Valentine’s Day garland to decorate your house. They would also create sweet crochet appliques to add bags, clothing, or other accessories.
Heart Cup Cozy Crochet Pattern
A cute cup cozy makes a gift for teachers and friends. It worked in the round and used post stitches to make a colorwork heart motif. Make these elegant patterns for a quick and simple Valentine’s Day gift or anytime!
Sweet Little Heart Crochet Pattern
I love the lacy look of this heart pattern. To give it some flair for Valentine’s Day, you can use one or two to adorn a flannel or crochet scarf. This elegant pattern is written for DK weight yarn, but like with the other patterns, you can make it with any yarn, as long as you have the corresponding size hook of crochet.
Easy Crochet Heart Amigurumi Pattern
Even if you have never created Amigurumi before, you will enjoy making this little heart squishy. When you first read the pattern instruction, it seems complex, but the detailed instructions and clear images are achievable quickly.
Hanging Hearts Valentine Crochet Pattern
This easy pattern will show you how to create granny-square-inspired crochet hearts and how you turn them into hanging pouches. Make a bunch for your friends and family, and then fill them with some candy and sweet treats. This pattern is an advanced beginner’s project since it calls for shaping and different varieties of crochet stitches. In addition, it included 3 trim options to suit a variety of tastes.
Crochet Heart Pillow
Make a squishy and soft crochet heart pillow to decorate a bed or chair. It uses super-bulky weight yarn to make. Also, this free pattern includes complete instructions for two sizes of pillows. The smaller measures 8″ wide, while the larger measures 11″ wide.
Red Heart Coasters Crochet Pattern
Even though this crochet pattern looks complex, the crafters say it is nicely suited to beginners. The pattern includes instructional images showing the stitches row by row, making it easier to work with the patterns even for complete beginners.
Heart Locket Crochet Pattern
This crochet pattern for a heart-shaped locket is an original idea! The 3-D crochet locket opens and closes, and it can hold a small surprise. The finished heart is almost 1.75″, though you can create it larger or smaller by selecting different weight yarn. Also, the pattern includes instructions for a small doll that will fit amazingly inside the locket.
Color Burst Crochet Heart Pattern
This colorful heart pattern is simple to follow and so much fun to make. Also, you will have so much fun choosing unique color combinations to try.
Since you only use a bit of each color yarn, it’s a perfect project for stash-busting. Once you start it, you won’t be able to stop yourself from making these colorful hearts.
Heart Motif Baby Blanket Crochet Pattern
Learn how to easily crochet a puff stitch heart motif square and then turn it into a smooth and squishy baby blanket. You can even add a custom name panel to personalize the blanket. Plus, it is suitable for a beginner since it uses the single crochet stitch, chain stitch, and puff stitch.
Also Read: 20+ Easy and Free Crochet Flower Patterns
Conclusion
Love is in the air, and today we are showing a few of heart valentines crochet projects! So if you want to have some fun while adding a bit of love to your project, then all the heart patterns, as mentioned earlier, are the best way to go about it. With detailed instructions and images, they are easy to follow, even if you are completely new to crocheting. So whether you are making a gift or adding a cute touch to your home decor, these are sure to be cherished for years to come.
Source:https://hariguide.com/crochet-heart-patterns-for-valentines-day/
1 note
·
View note
Text
5 Free Printable Calendars for 2023
These free printable calendars for 2023 keep you organized and add a splash of style and color to your office, kitchen, or in your home. They truly merge style and function, and you will be amazed at the calendars you can get for free. There is a variety of printable calendars for 2023 here that come with monthly calendars and whole planners to help you plan every day and every week.

Chalkboard Style 2023 Calendar
Botanical Paperworks has four different free printable calendars for 2023. Each one has a unique style. This is a chalkboard-style calendar with a stylish scheme of white and black color, and there is also an eco-tips calendar with recycling botanical images and quotes. There is also a calendar that can be colored, one that is beautifully illustrated images, and another one is boho chic. The last printable calendar for 2023 is all about tone-on-tone shades and florals.
Floral 2023 Printable Calendar and Extras
Sutton Place has a free printable calendar, with each month of 2023 having a colorful illustration on the top of the month. Besides the monthly pages, the free download includes a 2023 year-at-a-glance as a weekly planner, a faith planner, a weekly meal planner, and a few inspirational free printable. Altogether, it’s a 23-page download that will have you fixed for the rest of the year. In order to get this calendar, you will need to register for the Sutton place newsletter; also, you can unsubscribe at any time.
Vintage Wall Calendar for 2023
This wall calendar has a complete vintage feel. Vintage graphics and text are used in the header, and the paper of this calendar has an old-time feel to it. This would look perfect hung up on the wall in the office or kitchen. You will easily download this whole calendar as a PDF file format and print the whole calendar or individual pages. In case you have any CD cases in the closet back, there is a vintage calendar also that is made to fit into a CD holder. The instructions are also included on how to assemble it.
Vertical and Horizontal 2023 Printable Calendars
Simple and modern, this free printable calendars for 2023 will keep you ready for the next big thing. The minimal design means you have enough room to write on the calendar’s pages and the notes section. Also, you can use the notes section for about anything, and it is a perfect way to keep track of to-do.
A horizontal and vertical layout is available, with the calendar choice on Sunday or Monday. It also included a pretty cover sheet that you can leave white and black or any color.
Black and White Yearly Calendar for 2023
Are you searching for something minimal yet still fashionable? If yes, you will have to check out this free printable calendar for 2023. This is a white-and-black calendar that has each on a particular page. You can display it on your home or office wall or punch holes and put it in your planner to keep you organized from there. Apart from the boxes for each day, there is a note section that you use in any way you want. Also, you have a choice of Sunday and Monday starting off the week before printing the calendar.
Final Verdict
Different varieties of free printable calendars for 2023 are available, including a monthly calendar to help you plan every day and every week. In the detailed read above, you will find the top five printable calendars, such as chalkboard style, and also you will find some simple white or black and colorful calendars that are intended to inspire. So pick your favorite amazing calendar design and get it for free.
Source:https://hariguide.com/free-printable-calendars-for-2023/
0 notes
Text
15 Adorable Polymer Clay Ideas
Polymer clay is the most versatile crafting media, with endless applications and uses. From handmade jewelry to wall art, polymer clay is an easy-to-use available option. While it may take a bit of practice to sculpt using clay adroitly, the skill-building is meditative and enjoyable. No matter how you decide to start working with clay, be sure you have a craft knife or a clay cutter available, aluminum foil to make forms and molds, and that you preheat your oven before baking your clay projects to eradicate cracking. Check out the ideas below to find the best starter project for your entry into the polymer clay world.
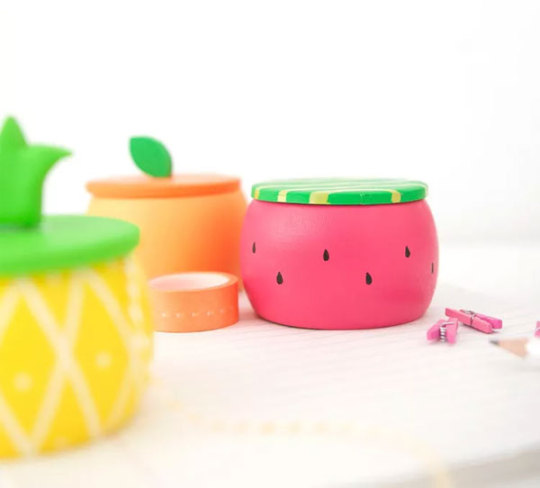
Fruit Trinket Boxes
While these elegant trinket boxes use a wooden bangle bracelet to get things started, the accents of clay really set them apart from some simple crafts. In case you are nervous about free-handing each of the fruit textures, then use a washi tape to stencil off your clay design before applying for the painted pattern work.
Modern Earrings
Add a homemade flair touch to any outfit with a pair of geometric earrings. A duo of pastel and neutral colors keeps these clay designs relatively subtle and, therefore, exactly wearable. Complete with a polymer-safe coat to add a layer, or leave them matte for a smooth effect.
Geometric Wall Hanging
For a mid-century modern-inspired decor, create a geometric wall hanging set. Peach and brass work perfectly together, but don’t hesitate to measure with silver hardware and pastel blue as well. Either way, add string tassels to complete each piece with style.
Rainbow Magnets
Brighten up your day with a set of handmade rainbow magnets for your refrigerator. Just be sure to hot glue every magnet to the baked polymer clay well before popping it on the fridge to measure their longevity.
Ice Cream Cone Wall Planters
To give your walls a little touch of life, choose sculpting planters from polymer clay and start filling them with succulents. The cone shapes of ice cream are not only whimsical but also simple to make. You need to roll a circle of polymer clay, score it with a tool of dull clay and then secure it around an aluminum foil cone before baking it into shape. It is perfect for filling these clay potters with faux plants, so they don’t stand up perfectly to daily watering.
Cactus Ring Holder
A stylish jewelry storage solution can be risky to work into your room’s decor, so opt instead for a whimsical, do-it-by-yourself display. This cactus-shaped ring holder can be created in any color, and also it holds a few of your prettiest pieces, so make some to give to your friends as well.
Standing Bud Vase
Fresh flowers can add elegant beauty to your home, and a single bud vase can stretch your bouquet to many types of spaces. Simply take your cue from “A Beautiful Mess,” and then start creating a neutral Stan vase and fill it with a single tulip.
Emoji Heart Best Friends Necklaces
Capitalize on the fame of emoji’s with this tech-inspired jewelry design. While these necklaces are simple to create, they come together with the help of a sharp craft knife and a little heart-shaped cookie cutter. Once the polymer clay is set, don’t forget to give a gift of one half of the heart pendant to your BFF.
Stamped Clay Succulent Pots
While you could use clay stamping tools to make a set of subtly-patterned planters, a piece of etched glass or strategically-edged cardboard will work well. Create three or four of these planters in the same color to display together- they look perfect in clusters.
Stamped Clay Garden Markers
You have to turn your scraps of polymer clay into stitch-shaped labels for a straightforward solution to keep your garden vegetables. In order to help these DIYed markers stay comprehensible, paint each one carefully with a weather-proof clear coat when it’s stamped and baked.
Tabletop Tic-Tac-Toe
The best way to add a pop of color to your coffee table, this handmade set is also a practical piece for entertaining. Set it out before guests reach to encourage tic-tac-toe matches or admiration of your handiwork.
Monogrammed Bookmark
Some things in life are superior, curling up with a perfect book, but adding a handmade bookmark to your story session might up the ante. Also, you can source leather-effect clay from a craft store, but adding a pebble texture to regular polymer works just as well.
Beaded Necklace
Get your feet wet with polymer clay with a simple jewelry craft. Try your hand at a pair of different bead sizes and shapes, and aim for flexibility to ensure a professional-looking clay project. Also, this is a great starter project for the kid because there are no requirements for painstaking sculpting or sharp tools.
Marble Coasters
A gold leaf edge helps these faux marble coasters pop, so you don’t need to skip that metallic finishing touch. This readable tutorial guides you through making the swirling, faux-marble clay outcome, which is simple to achieve, so don’t hesitate to get started on the project.
Clay-Covered Pens
If your office materials or supplies seem a bit tired lately, give some plain pens a renovation with a handful of plumber clay. Try rolling some complementary colors for a more finish, and be sure to erase the ink before baking each of the pens to set. A pair of these and a notepad would also create an amazing teacher’s gift.
Also Read: 10 Best Polymer Clay Kits for Earrings and More
Conclusion
Polymer clay is fun to use, and the ideas are endless for the project you can make at your home. This clay is super simple to mold and use, making it best for everyone. In this blog, you will see 15 amazing polymer clay ideas and see a large range of DIY projects you can do to amaze your friends and people all around. Also, all these ideas allow us to make lovely home decor items and gifts from magical clay.
Source:https://hariguide.com/adorable-polymer-clay-ideas/
2 notes
·
View notes
Text
How to Single Crochet for Beginners
Are you willing to start single crochet (SC)? This step-by-step guide will teach you how you can easily crochet the single crochet stitch, and also it gives you various tips for working with single crochet stitches in patterns.
What is a single crochet stitch?
The single crochet (SC) stitch is one of the 6 basic crochet stitches, which is a user-friendly stitch, especially for beginners, that is easy to learn and fun to crochet. Also, it’s so common and versatile that it’s well suited to various crochet projects like top-down beanies, pillows, and warm sweaters. You can easily work a single crochet in joined rounds, rows or spiral rounds, and various parts of the stitch for ribbing stitches. In addition, you can use it to create borders, edges, and seams.
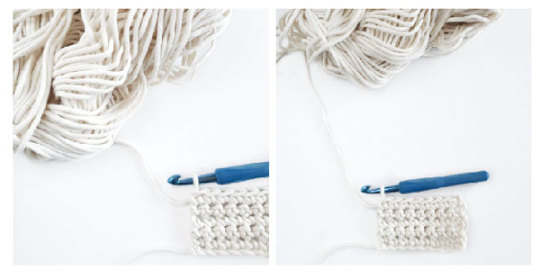
Abbreviation: In the US, it’s called abbreviated SC and single crochet. In the UK, it’s known as double crochet, and it’s abbreviated DC.
Chart symbol: in charts of crochet, you will see the single crochet (SC) represented by an “X” or a “+.”
Height: A single crochet stitch is much taller than a slip stitch and shorter than a half-double crochet stitch.
Turning chain: In order to start a new row of SC, make a turning chain of 1 chain stitch (for allusion, a turning chain is a chain stitch number you can make at the start of a row to bring the yarn up to the right height for the next stitch.) The ch-1 does not count as an ST, so you will easily make the first stitch of the new row into the final stitch of the previous row.
Fabric: All rows of single plain crochet will make an impenetrable, solid crocheted fabric without holes or gaps.
How to single crochet (SC)?
If I tell you in brief, then here is how to work a single crochet:
Step 1: insert the hook into the next stitch, yarn over, and then pull up a loop.
Step 2: After that, yarn over again and pull up both loops on the hook.
It seems very simple. But you may be searching for more details and some pictures. In the rest of this SC guide, we will talk about all forms of single crochet: what it is, when to utilize it, and how to make it. So grab your yarn and get started with the procedure:
Single crochet tutorial
First, I will show you how to make one single crochet twitch. After that, we will make a swatch of SC fabric so I can show you the following:
How to single crochet into chain stitches (CH)
How to turn single crochet
How to single crochet in rows
Steps to make a single crochet stitch
Firstly, put your hook into the next stitch and put the hook tip under both of the loops at the top of the stitch.
Then, bring your yarn over the hook, from the back to the front side, and pull a yarn loop through the stitch. Also, you now have two loops on the hook.
Again, bring the yarn over the hook and then pull the yarn through both loops on the hook. Now you will have one loop on the hook.
Steps to do a single crochet into a foundation chain
Firstly, make a slip knot and a foundation chain of 15 stitches.
To make a first SC, insert the hook into the second chain from the hook.
Yarn over and pull up a loop. Yarn over again and pull via both loops on the hook
Repeat the send and third steps to make a single crochet stitch in all the remaining 14 chains, but make sure to work in the very end chain- it can be simple to miss.
Also Read: 20+ Easy and Free Crochet Flower Patterns
Steps to do a single crochet into another row
After the first row of SC, you can turn in your work and begin the other row. To do this, you will have to work into the stitches of the previous row. So here is to do it:
Chain 1 and turn your SC work clockwise. (Keep your hook in the chain stitch so you don’t lose your place). You will now be searching at the backside of the previous row.
Then, make a single crochet stitch in the first stitch.
After that, continue the process across the row, making sure to work into the end stitch.
To begin another row, ch-1 and turn.
Fastening off:
Cut the yarn, leaving a 6-inch tail of yarn.
Lift the hook start-up and bring the yarn tail to the hook’s remaining loop.
Pull the yarn tail to narrow the last stitch and weave the ends of the yarn with a tapestry needle.
How to do a single crochet in the round
You can work single crochet (SC) in rows or rounds. As you already know, there are two ways to start working in the round: joined and continuous. In either case, a single crochet in the rounds is very similar to a single crochet in rows.
Joined rounds
To work a single crochet (Sc) in joined rounds, you will easily join the round’s final stitch to the first crochet stitch of the round with a slip stitch. Then you will chain – 1, which does not count as a stitch (St); after that, start the next round by creating a single crochet in the exact stitch as the join of the slip stitch.
Continuous or spiral rounds
Working a single crochet in continuous rounds is very simple and easy. To make a spiral round:
Stitch around the circle in a pattern of the spiral.
Then, make the first stitch of all rounds into the first stitch of the previous spiral round.
Make sure not to join the starting and end of all rounds with a slip stitch. Also, don’t chain up to the next round.
Increase and Decreases
Single crochet (SC) increase and decrease are mainly used to create shape and volume. Here is how to make them.
Single crochet increase (sc inc): First, make 2 single crochets in only one stitch. The increase will include one stitch to your stitch count. And you can make 3 or 4 SC into the same stitch if your patterns call for it.
Single crochet decrease (sc dec or sc2tog): A single crochet decrease is also very simple. For this, you have to work two neighboring stitches together to make one stitch. To make an SC decrease:
Put the hook and pull up a loop in the next two stitches.
After that, yarn over and pull through all three loops on the hook. Then there will only be one loop on the hook.
Variations: invisible SC decrease
Here is a variation on the SC decrease that makes a decrease so seamless it’s almost invisible. Most people use this decrease in amigurumi patterns. Here are the steps to make an invisible SC decrease:
Firstly, insert the hook into the front side loop of the first stitch.
Then, insert the hook into the second stitch’s front loop.
Yarn over and then pull via the first two loops on the hook.
Yarn over and pull via both loops on the hook.
Working single crochet in different loops
When you make a single crochet, you insert yarn under the two loops of the first stitch. These top loops are referred to as the front loop and back loop. Also, you can create different variations of the standard single crochet loop by working solely in the back loop, front loop, or several combinations of loops.
SC BLO
The common variation called “single crochet in the back loop only” is known as SC BLO. This stitch pattern makes a stretchy, ribbed texture that is best for hat brims and sweater cuffs. Also, it’s the same as a regular single crochet, but with one change. Instead of putting the hook under every stitch’s front and back loops, you will only insert the hook under the back loop.
SC FLO
This stitch is called a single crochet in the front loop, known as SC FLO. It produces a slightly more open, extended fabric with beautiful horizontal lines.
Single crochet ribbing
It can be referred to as different stitch patterns. In most cases, it refers to a single crochet made in the back loop when crocheting in rows. Also, it can refer to alternating rows of single crochet and slip stitches. If you are not sure which stitch of ribbing you have to use, you can refer to your specific crochet pattern.
Also Read: 15+ Fun and Pretty Crochet Wreath Patterns
Conclusion
Single crochet is the simplest stitch of crochet, and it is also a good building block for learning the double crochet stitches and the half-double crochet. If you have mastered the chain, you are ready to move on to a single crochet. But if you are a beginner, then check out this tutorial that shows you how to do single crochet quickly.
Source:https://hariguide.com/how-to-single-crochet-for-beginners/
0 notes
Text
15 Ideas for Decorative DIY Bookends
Turn your personal home library into a focal point with a set of homemade bookends. Any number of substances can be attached to scrap metal or wood and transformed into bookends, so there is clearly something out there that will coordinate with your interior design style. Try upcycling toy figurines, cardboard, or even fish tank ornaments into fashionable trinkets to hold your tomes upright. A different homemade bookend set is not only fun to create, but it can be a fantastic conversation piece or present as well. So now take a look at the ideas below to get started crafting fun pieces for your DIY bookcase.

Striped Bookends
A block of spare wood cut crosswise into two triangles is the best base for a modern bookend set. You can use masking tape to create painted stripes and tailor the colors to your internal for a wholly coordinated bookshelf.
Dinosaur Bookends
Capture a tiny piece of nostalgia by incorporating kids’ toys into your DIYs. All it takes is a pair of fierce dinosaur action figures spray-glued and painted to blocks to ass an unpredictable sense of whimsy to your bookcase. These also work ideally in a nursery kid room or playroom.
Also Read: 10 Beautiful DIY Flower Crowns
Telephone Bookends
Scour your vintage shop or local thrift for landline telephones, then snip the cords off and connect them to bits of scrap metal to protect them as bookends. You also do not need to find a matching set. By the way, this pair looks perfect, a little less planned. Check the complete “Beautiful Mess” tutorial to create your own.
Galaxy-Inspired Bookends
Turn a pair of ordinary rocks into galaxy-inspired asteroids. This easy and straightforward idea will add a touch of wonder and a color splash to your bookcase. The best thing about his project is it’s a super simple process to repaint them or make a new set whenever you want a fresh look.
Triangle Bookends
Reuse your blank cardboard shipping packages to make pyramid-look bookends. A fast coat of metallic spray paint gives your cardboard a high-end look. So now don’t hesitate to adorn with ribbon trim or stick-on crystals – this craft is best for adding your own personalization.
A to Z Bookends
Papier-Mache and Styrofoam, when coated in balanced paint, can mimic the glimpse of rough concrete, as is done here with these A to Z bookends. Bright painted stripes complete the stylish look of these alphabetical pieces. Swap the A to Z for your initials for an extra customized piece.
Coral Bookends
With this simple tutorial, the fish tank accessories get approved for the bookcase. Once each thing is coated in white paint, these faux coral bookends look modern and strong adhesive is all the hardware wanted – no tool of power required. This DIY project is a perfect option for kids, so don’t hesitate to get them connected in the making here. For detailed instructions, check the “Make Life Lovely” tutorial.
Faux Ceramic Animal Bookends
Reuse old toys to make that luxury ceramic look popular at your preferred high-end home stores. Coat animal figurines in white color paint, and adhere them to scrap wood for a set of simple homemade bookends. Create a complete set with different types of animals for a united, whimsically-styled library.
Quotation Mark Bookends
Get grammatical and semantic with your home library with these quotation mark bookends. This bookends tutorial uses plasters, but you can easily substitute wood if those media are more your forte. Just paint them to match your interior design, or leave them for a minimalist aesthetic.
Floral Bicycle Bookends
Modify a tired set of bookends using patterned paper and craft adhesive. Mix and match some colors and styles to add a fanciful look to your library, and don’t glance at the distressed painted information either. You can learn this bookends process on “Modge Podge Rocks” how this craft’s unique elements bring it together into one eye-catching art piece.
Pineapple Bookends
Foodies now have an option for keeping their cookbooks organized. A metallic spray paint coat is all it takes to sip up these pineapples. You will be left with bookends that feature the sought-after, high-end vibe folks are looking for. These DIYs look perfect on an open kitchen shelf and make for fantastic housewarming gifts.
Honey Bear Bookends
Hang on to your blank honey containers for a clever craft supply. Paint each bear monochromatically for a sleek or clean effect. For complete instructions, check the “Pretty Providence” tutorial.
Splatter-Painted Concrete Bookends
Using concrete for a small indoor project is a perfect way to practice working with this media. Just work on making these half-spheres, and after that, paint and decorate to your needs. They are best as a pair of coordinated bookends but also work amazingly as paperweights and desk accessories.
Wooden Bookends
Reuse old shelving into a set of chic, sturdy bookends. This is the best project for beginners. It doesn’t need much hardware and is entirely customizable to your aesthetic. The maker will show you how to design these minimal bookends.
Rolling Pin Bookends
These amazing-looking rolling pin bookends are another perfect option for your kitchen counter. They will easily breathe a little life into a tired cookbook set and recipe card stacks. If you are a beginner, then you might need a few more power tools, so leave this bookends tutorial from “Modge Podge Rocks” to experienced crafters.
Also Read: 10+ Paint Chip Art Projects
Final Verdict
If you enjoy reading or are a book lover, then you definitely know that bookends are essential for any library. But finding ones that you love or choose to indeed spend that kind of money on – can be limited. So instead of spending money on something that holds up your book, you can make your own. The above section lists 15 DIY bookends that look amazing and make you smile.
Source:https://hariguide.com/diy-bookends-ideas/
0 notes
Text
15 + Cactus Embroidery Patterns
What do cacti and embroideries have in common? Needles, but that’s not all. These patterns of cactus embroidery are a stronger connection between the two. One of the best things about growing a cactus is that it’s simple to take care of, but you will find that caring for embroidered succulents of all kinds is still accessible.
In the list below, you will find patterns for saguaro cacti, potted prickly pears, and blooming barrel cactus. Just as essential as the patterns themselves are the many ways you will be inspired to stitch desert-loving plants. So now choose a cactus pattern to start with, grab your needles, and start stitching and growing your own cacti family.
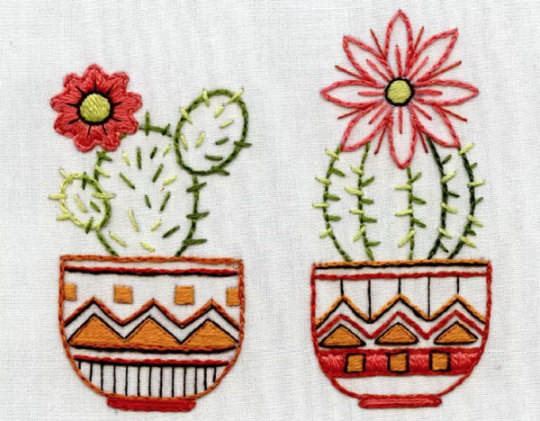
Learn To Embroider These Potted Cacti
Embroidery artist Trish Burr has various distilled patterns of needle painting, but before you get a high level of embroidery, you need to begin with the basics fundamentals. In her “how to do surface embroidery” guide download, she shows you the complete process, and you also get practice on these cute cactus patterns. Also, she has another tutorial that includes a cactus pattern in which you can easily learn the techniques of whitework.
Also Read: 10+ Sunflower Embroidery Patterns
Hand Embroider Some Colorful Cacti
Add some attractive color and playfulness to your embroidery with this fun cactus pattern. The artist, Jodie from Lova Handmade, has delightful designs that are simple to stitch. The decorative elements around and on the potted cacti make this a sweet pattern you will love making.
Stitch a Maintenance-Free Cactus
Just as there are various unique cacti, and each one is different, there are various variations on how to embroider these tricky plants. This delectable pattern uses green shades and satin stitches to show the ridges in the cactus, which mirrors the carton that the cactus is growing in. To get this free design, you will need to subscribe to sews newsletter, but that also gives you access to various free patterns.
Create an Outlined Caucus in Full Desert Boom
DMC, the creators of arguably the most regularly-used embroidery floss, has a large collection of free patterns, including this delightful cactus. The main body part of the cactus is striking when stitched in white and black with pops of color on the flowers. Just be sure to search for some other cactus patterns on the DMC website as well.
Filla Hoop with Embroidery Cacti
If you like stitching but wish to avoid transferring the pattern, try this pre-printed fabric. Your complete hoop will be filled with lovable cactus designs in a mix of shapes, sizes, and colors.
Stitch a Familiar Lyric
Did this free and easy cactus embroidery pattern cause you to start humming a song or dancing a bit immediately? It’s desirable that the song’s lyrics will be stuck in your head as you start to stitch, but you have to accept that it’s true. You can’t touch these delightfully prickly plants.
Embroider Teeny Tiny Cacti
Stitching at a very tiny size, like our tiny flower embroidery tutorial, uses only a few stitches to make the right effect. Amiee ray from “Little Dear” has detailed instructions for stitching these tiny succulents. They are not completely cacti, but a few are very similar, and also they would be great details to add some other patterns to the list.
Watch And Learn To Start Stitching Three Cactus Designs
If you love learning by watching video tutorials, you will love this cactus embroidery tutorial guide on YouTube. Also, you will learn how to stitch this project, which is useful for a few of the more complex stitches like the padded satin stitch, long bullion knots, and more. The free cactus pattern is available on the designer’s Pinterest page, but the shapes are easy enough to sketch something similar.
Make An Embroidered Cactus Patch
All these tiny cacti want is a hug. This elegant kit comes with pre-printed fabric and all the threads you want to embroider a patch. You need to know two basic stitches, so it is the best pattern for beginners.
Practice New Stitches on a Cactus Design
If you want to learn new stitches as you make a cactus embroidery pattern, then go to Sarah’s hand embroidery tutorial page and check out the “3 stitches at a time” series that offers you the best opportunity to practice stitches in a fun cactus design. This one features a chain stitch, triple Palestrina stitch, and chevron stitch.
Make Some Adorable Cactus Faces
You don’t generally think of a cactus as sweet, but this three-pattern set proves that the prickliest of plants can be captivating. Every cactus design features a cute smiling face that you will fall in love with – and the colors of pastels only add to the cuteness.
Give These Succulent Patterns Some Love
If you love cacti and succulents, then you will surely love these hearts filled with unique succulents. They are like a love letter to your favorite plants. Once you download this free pattern, you can check the global backyards embroidery kit for stitching a tiny cactus in a tomato can.
Stitch a Cactus Trio
Simple lines and great details make this trio of cacti an amazing pattern for beginners. Also, it gives you the opportunity to practice various basic embroidery stitches while leaving room for creativity.
Get Stuck On These Kawaii Cacti
Stitch a few happy cacti with this free and easy pattern collection from author Mollie Johnson at wild olive. Along with these and the pattern design in the set, the same post has a link to a matching set of printable stitching cards so that your kids can also stitch along.
Paint Pastel Cacti with Thread
Aren’t these pastel rainbow cacti lovely? They completely look like they were done in watercolors, which makes sense since they use the needle painting technique. If you have ever needed to try needle painting, this looks like a perfect way to practice blending colors.
Stitch a Happy Cactus
Meet Jolene the cactus. This easy and free paper is simple but looks super cute. The PDF includes different pattern sizes, a reversed version for various types of pattern transfer, and an ultimate guide for suggested stitches.
Add a Decorative Flair to A Cactus or Two
This simple pattern set from slow evening’s embroidery includes two unique cactus patterns that look simple at first glimpse, but once you look beyond the design outlines, you see that a tiny abstract pattern in the background makes this complete design more special. They are the difference between an art piece and basic embroidery.
Make Mini Embroidery Cacti
If you ever saw teeny small embroidery hoops used for making a necklace and thought what you had stitched in them, here is your answer. These free mini patterns of cactus, originally announced in Mollie makes, are perfect for framing in even the smallest hoops.
Show Someone You Care With Cactus Embroidery
This most elegant Valentine’s Day cactus pattern is an iron-transfer pattern, so getting it prepared to stitch is a breeze. And if you wish to stitch it as a cactus design, you can use it all year. The pattern only has to have the phrase “valentine” removed before being ironed to the fabric.
Also Read: 25 Free Cross-Stitch Patterns for Stitchers of all Skills Levels
Final Verdict
These embroidery cactus patterns are suitable for all skill levels – an easy for a beginner or learner (basic knowledge of embroidery stitches is optimal), and a more intermediate or experienced stitcher could easily make it their own. So choose any of the patterns you like and start making them with the help of tutorials and guides.
Source:https://hariguide.com/cactus-embroidery-patterns/
0 notes
Text
10+ Free Dog Sweater Knitting Patterns
Knit smoothing for your pet dog with one of these dog sweater knitting patterns! If you knit, you undoubtedly already create gifts for your loved ones, so why not for your dog?
This fantastic collection of sweater patterns includes a few basics, tricky patterns, and even some items that are not indeed sweaters but are still elegant doggy wearables. If you are comfortable with the acclimating pattern, you could get innovative and knit twin sweaters for you and your dog. We always consider rocking matching outfits – exclusively with our four-legged friends.
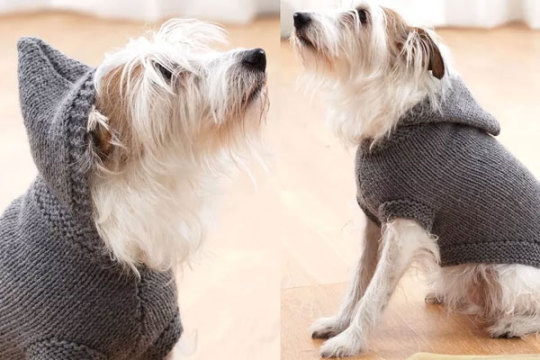
Hooded Dog Coat Knitting Pattern
Humans know that hoodies are the most comfortable pattern in the winter season, and now your pup can also experience that cozy feeling. Knit this sweater with a free pattern from Bernat yarn on the official Yarnspirations website. The whole structure is almost similar to the other patterns in this whole list, but the hood makes it cuter.
Cabled Dog Sweater Pattern
Show your pet dog how much you care with this knit that’s patterned after a cabled fisherman’s sweater. Best for intermediate knitters, the free pattern includes five different sizes. That means you can easily knit this for your wholly furry family!
Also Read: 25+ Free Loom Knitting Patterns
Dog Sweater In Four Sizes
Keep your dog warm in this simple but elegant sweater. This pattern includes four different sizes and looks perfect on any dog who wears one. However, it’s not a tricky pattern to knit; it does help to have experience working short rows, as you would when knitting socks.
The Juno Jumper Pattern
With a curled and ribbed hem and neck, this basic knit sweater keeps your sweet puppy warm and cozy. This pattern does not come in one size for all small dogs, but you can adjust the size with your dog’s measurements and some extra rows or stitches. Also, this pattern is free, but designer Alice Neal offers a reasonably priced dog sweater pattern with intricate designs.
Bunny Dog Sweater Knitting Pattern
Did you ever have some bunny pajamas as a kid? Because now your dog can have their custom-knit bunny suit. This might be embarrassing for them to wear when going outside and seeing their puppy friend, but it’s best for cold days at home or for holidays like Easter and Halloween.
Harness-Friendly Dog Sweater Knitting Pattern
Dogs generally need their sweaters when they go out for a walk, but what if your dog doesn’t wear a standard collar and leash? This pattern works with a harness, and this style is also plain cute. And if you want to make something fancier, check out the free pattern for knitting a nordic version that designer Jacqueline Cieslak shares.
Mini Dachshund Hat Knitting Pattern
Lucky fox knits design all types of knitting patterns, most of which have miniature doxies in mind. These cute patterns are whimsical and also are sure to make you giggle. Knitted hats are her masterpiece or specialty, but she offers some sweaters and customers too.
Jacks Jacket Knitting Pattern
Pamper your dog with a pretty fair-isle jacket! The style of this elegant and sweet jacket makes it look a little like your dog is all covered up in a blanket. With five attractive yarn colors, this is a good pattern to brush up on your standard knitting skills.
Fall Dog Sweater Pattern For Large Dogs
Are your dog and you big fans of Harry potter? Then you will definitely love this sweater that’s caused by Mrs. Weasley’s classic hand-knitted jumpers. This is a simple pattern for those who are advanced beginner level, and the knitting techniques you will need to know are purl, knit, increasing, and decreasing. Also, you will stitch the embroidered letter onto the back of the sweater.
Doggy Red Riding Hood Cape
While it’s true that you could easily use this knitted cape as a costume, your dog can wear this anytime in place of a coat. This easy pattern comes in sizes XS to L and is simple enough for advanced beginners.
Puppy Pullover Knitting Pattern
This easy puppy pullover knit sweater looks amazing, and the neon stripes are an amazing safety feature. However, this elegant pattern comes in only one size and includes instructions for making this for medium size dogs and dachshunds.
Hot Dog Costume Coat Knitting Pattern
Is your pet dog the hottest on the block? They will be when they wear this silly pattern but sweet hot dog coat. The side bun piece zips open and closed, so it is not only a way to keep your pooch warm and cozy but also the best way to have your dog carry a few essentials. In addition, the free pattern is available in three sizes so that all dogs can get in on the fun.
Also Read: 25 Free and Easy Knit Hat Patterns
Conclusion
Make your dog or puppy a cozy knit for the colder months that they will surely love. With these knitting pattern collections of dog sweaters, your dog will be fashionable and snuggly. This pattern has three different sizes, so you can easily make something that will fit whatever dog strain you have. So, according to your dog’s size, select any pattern you like and try to make them with the help of instructions and video tutorials that are given by some of the best-experienced designers.
Source:https://hariguide.com/dog-sweater-knitting-patterns/
0 notes