Hey! Welocme to my project blog! This is my digital scrapbook of documenting everything related to the module, "Compositing for animation"(MI5018) and my progress of the 30 second composited video
Don't wanna be here? Send us removal request.
Text
My thoughts on this project I Critical Analysis
Finally, I have reached the end of this project, a project that excited me from the beginning. Although I did not have any experience related to compositing or green screens, this module helped me reach new heights that I had never reached before. I always wondered how big studios made movies such as Avengers and Avatar and through this module, I got an in-depth look at the world of CGI and VFX and finally was able to create my own art piece using the same techniques.
As someone who is new to the world of 3D, I pushed my boundaries in this module and got out of my comfort zone. I modeled environments using 3D software, textured them, did the the lighting of the scenes, and finally blending real life and 3D imagery to create something unique and this is something that I am really proud of. After starting this module from the very basics of compositing, we tried out various techniques such as rotoscoping, green screening, and motion tracking, and step by step we built our skill level and enhanced our knowledge on this topic.
Within a short span of 4 months, I learned a lot of things related to visual effects. With the time constraints we had for this module, it was my responsibility as a student to make the maximum use of the time we had. In the beginning, even though I was quite unsure about myskill level and my potential I had to take the leap of faith and get the stuff done. For instance, I had never done anything related to Green Screen before, but when it came down to recording my own footage for the animation I had to trust my instincts and do it. With the help of my friends, I was able to set up the equipment, find an appropriate costume, figure out the camera angles and the settings, etc. If I had hesitated to take these steps at the start, I wouldn’t have been able to manage my time properly by the end of the module.
Overall, I was satisfied with my time management throughout this module but I wish I spent more time on documentation. Sometimes I found myself working on the 3d software for hours only to realize I never spent at least one second to document what I did. This is something that I have to work on in my next project.
Overall, I am really happy about the progress that I made throughout this module. This module inspired me to dive into the world of VFX and explore the depths of it. Hopefully in the future, if I plan to pursue a career in visual effects and CGI this module will be the foundation layer that started that chapter of my life. However, as an aspiring artist I will use the skills that I learned from this module for my future projects and hopefully create even better outcomes making this module a milestone in my creative journey.
0 notes
Text
Adding sounds and making the final video


Making the final video was quite easy because I had made an animatic and a blocked animation before. Using them as guides I put this video together and finalized.
0 notes
Text
Compositing the Final Scene
When compositing the scene, I added a bloom effect on Blender and also a volumetric fog to make the scene more realistic and to give more depth to it.

I added depth effect to the scene which blurred out the objects far way. I also colour graded the footage in Blender itself by increasing the warmth and the saturation of it to fit into the environment.

0 notes
Text
Texturing the final Scene
I used a HDRI for the sky. For the mountains and the skull I used the same PBR texture but with small changes. For the water I added a principle BSDF and increased transparency while reducing roughness. I also increased the metallic property of it which increased the shininess of the water.
I downloaded a stylized rock model from Sketchfab and placed it in the scene too and gave it a more realsitic cobblestone texture

Then I proceeded to create a cobblestone texture
youtube

A screenshot of the cobblestone texture that I created. I applied it to the floating rocks and this worked really well and blended together with the rest of the environment.
0 notes
Text
Compositing the Train Scene
When compositing the scene, I added a bloom effect on Blender which is the technical name for a glowing effect. It created a feathered light glowing around the area lights. Moreover I added depth effect to the scene which made the video environments in the background slightly blurred.
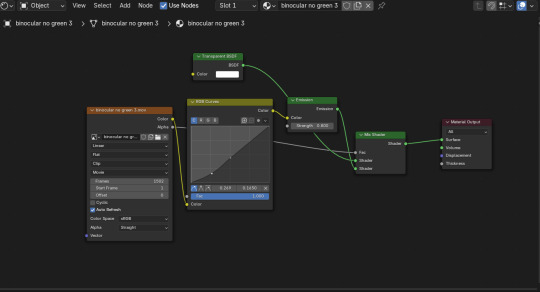
I had to adjust the keyed out footage manually so as to blend well with the rest of the environment. For this I used a RGB curve on the shader editor itself and played with the brightness and the contrast of the video.

0 notes
Text
Adding Details to the train
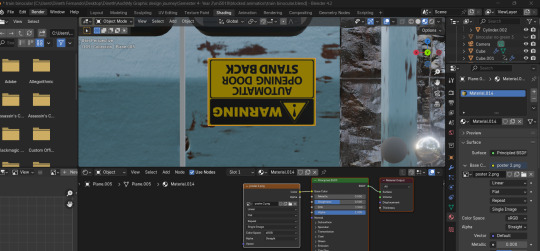
Then by using Adobe Photoshop I created a bunch of posters, maps, warning signs. This was to add extra detail to the environment and also communicate what is exactly going on in the world.


0 notes
Text
Texturing the train
I attempted texturing manually through procedural nodes first but the whole process was taking too much time. Then I exported my assets to Substance Painter and tried texturing there. It was working but the textures were quite too heavy


I sticked to using PBR textures since they gave out a more realistic look for my assets and they were quite easy to use which saved my time a lot. These are some of the textures that I used. For the lights I added area lights from the top.

0 notes
Text
Adding bubbles to the Elixir tank
I used a green screen bubble video, keyed it out, reduced the opacity and placed it on top of the Elixir tank. The initial idea was to create bubbles using a particle system on Blender, but through this method, I was able to save my time and also reduce rendering times.
youtube
0 notes
Text
Making posters to add for the laboratory
Here also I made some posters on Adobe Photoshop so as to give information about what he had been researching on.


0 notes

