
Follow us to get the latest email management tips. Read more@ emailhow.net
Don't wanna be here? Send us removal request.
Statistics
We looked inside some of the posts by emailhow-blog and here's what we found interesting.
Average Info
Notes Per Post
0
Likes Per Post
0
Reblog Per Post
0
Reply Per Post
0
Time Between Posts
6 days
Number of Posts By Type
Text
17
Last Seen Tumblr Blogs


Fun Fact
Mobile Tumblr US users spend an average of 4.04 minutes per session on the app.
Text
How To Minimize Emails Going To Spam Folders?

It can be quite frustrating to see your legitimate emails going to the Spam folders. If you are facing problem in your email account, you will need to undertake certain steps to minimize email from going to the Spam folders. Whether your incoming emails are going to the Spam folder in your email account or your outgoing emails are being delivered to spam folder of the recipient account, this guide will help you overcome this issue in most of the cases.
Tips to Avoid Emails From Going into Spam Folder
For Incoming Emails If the legitimate incoming emails are getting diverted to the Spam folder of your email account instead of Inbox folder, you can consider the following tips to resolve this issue. 1.) Mark Emails “Not Junk” One of the best ways to prevent genuine incoming emails from going to Spam folder is by simply marking them as “Not Junk’. This way your email service will move back the email to your Inbox. The next time you receive an email from the same sender, your email service will not divert it to the Spam folder. NOTE: The “Not Junk” option may be different as per the email service used by you. Also, not every email service will automatically prevent future emails from the same email address that you marked as “Not Junk” to the Inbox folder. 2.) Add The Email Address to Safe List Some email services allow the users to prevent legitimate incoming emails from going to the Spam folder by adding the sender to the safe list. So, you can simply add the sender to the safe list in your email account and see if the future emails are now getting to Inbox folder or not. NOTE: If your email service is yet to offer this option, you can simply add the sender’s email address to your contact list. This should also fix the problem. 3.) Check If Any Filter Is Affecting the Destination of Incoming Emails If you have created filters in your email account, make sure the criteria configured in such filters are not preventing your authentic incoming emails from getting into the Inbox folder. Is such is the case, you can create a separate filter for the email address and set the destination of future emails from the sender. 4.) Make Sure You Haven’t Marked the Sender’s Email as Spam in the Past If you have ever marked the email from the sender as Spam in the past, your email service may consider all the emails coming from the sender as Spam even when it is not. So, check your email account for any such action and take appropriate steps to overcome the issue. 5.) Make Sure that The Sender is Not Blocked If you have blocked the sender in your email account, there is no way the emails will be delivered to the Inbox folder of your email account. So, first make sure that you haven’t blocked the email address of the sender. If you have blocked the sender, you will need to unblock him/her from the blocked email list of your email account to receive emails to your Inbox folder. For Outgoing Emails If your outgoing emails are getting delivered to the Spam folder of the recipient’s account, you can follow the below-mentioned suggestions to fix the issue. 1.) Check Your Subject Lines Most of the recipients are known for marking an email as a spam if they find the Subject line to be suspicious or misleading. So, it is always suggested to choose your Subject line carefully. Moreover, try not to add Spam trigger words such as Billion, Cash, Dollars, Earn, Extra, Million, Money etc. Similarly, make sure the content of your email also follows the good email-sending practices. 2.) Always Have A Reliable Email Service Provider The reputation of the email service providers is based on the good reputation of their users. When an ESP has a good score on their IP address, they are less prone to be considered Spammers. So, always go for a reliable email service in order to prevent your emails from getting into the Spam folder of the recipient’s email account. 3.) Don’t Send Emails to Unsubscriber This is the most important! If you are sending multiple emails on regular basis to the recipients who have opted out from your service, your email messages are more likely to be considered as Spam by the recipient’s email service. So, try not to send emails to the people who have unsubscribed from your service. 3.) Keep Your Email List Clean at Regular Intervals As a bulk email sender, you must always make sure that you have an updated email list at regular intervals. Using an old email list for your future emails is more likely to cause similar issues. Keeping your email list clean frequently will help minimize the number of your outgoing emails from going to the Spam folder of recipients. NOTE: It is best to avoid buying email lists as it simply represents a violation of ISP’s Terms of Service. 4.) Try Not To Include Flashy Media Content Most of the email clients are not able to view rich media content, such as video embeds and Flag. So, try not to include them. If you include them and they are not appearing or working properly, the recipient may suspect them to be deceptive, which can make them mark them as Spam. However, if the media content is essential from a marketing perspective, you can add a web link to the video instead of adding the complete video in the email. 5.) Avoid Adding Attachment to the Email When you send an email with attachments like Word documents or PDFs, it alerts spam filters immediately. Also, attached files increase the size of the email which consequently makes them sluggish to load. Instead of attaching large attachment with your email, you can share it via cloud by providing a link. This way you can prevent your email from getting suspected as Spam by the recipient’s emails service. So, these are some of the ways to prevent your outgoing emails from getting into the Spam folder. In addition to these suggestions, you can also test your emails before sending them. There are certain Mail Testers that can help you evaluate your email and let you make required changes to prevent them from getting treated as Spam. And, this is how you can minimize incoming and outgoing emails from going to Spam folder. Read the full article
0 notes
Text
Top 5 Anonymous Email Service Providers (Free & Paid)

Regular free email accounts are ideal for the average users, however, if you wish to keep your emails private and secure, you would want to make use of a secure email service. Secure email services not only guarantee secure and encrypted email, they also preserve your anonymity. To help you know about such email service providers, we have provided below a list of top 5 anonymous email service providers (free and paid).
List of Best 5 Anonymous Email Service Providers
1.) HUSHMAIL Hushmail is one of the oldest email services capable of keeping your emails so secure and locked that even Hushmail can’t read your messages. Only the person with a password is allowed to get access to the message. As a Hushmail user, you can easily send secure emails to both Hushmail and non-Hushmail users such as Gmail, Outlook Mail, and other similar email clients. They offer a variety of addresses for the users such as @hushmail, @hush.me, @hush.ai, @hushmail.me etc. To sign up for a Hushmail account, go to the Hushmail sign-up page. 2.) TUTANOTA Tutanota is said to be the world’s first secure email service provider with automatic encryption. This freemium email service allows the users to communicate with other Tutanota users in the most secured manner. With Tutanota email, you not only get to keep your emails private but your contacts, subject, and attachments too. So get your Tutonata today by signing up for a free Tutanota account. 3.) PROTONMAIL ProtonMail is regarded as the largest secure email service in the world. It is an end-to-end encrypted email service which in contrast to common email services uses client-side encryption to guard email contents and user data before they are sent to the ProtonMail servers. This email service is available through a webmail client, The Tor network, and, Android and iOS applications. Available for both free and paid, you can sign-up for your ProtonMail account here. 4.) MAILFENCE Mailfence is another anonymous email service provider that allows you to send secure and encrypted emails to the recipient. An email sent from a Mailfence account is encrypted by the browser and can only be decrypted by the recipient. Neither anyone can read it including Mailfence. Although Mailfence does store your private key on their server but for them too, it’s unreadable as it is encrypted with your passphrase. So, if this is what you were looking from a secure email service, Mailefence can be an ideal choice. You can sign up for a free Mailfence account here. 5.) COUNTERMAIL Last but not the least in this list of anonymous email service provider is CounterMail. CounterMail has been designed to provide the utmost security and privacy without much complexity. No matter whether you wish to access your CounterMail account from your home or from another country, you can always be assured of your account is anonymous and encrypted. This email service is as easy to use as operating Gmail or Hotmail. If you were looking for such a flexible email service that you use from anywhere and anytime, well, sign up for your CounterMail account today. While there are a lot more email service providers that let you maintain the security and anonymity of your emails, the above-mentioned are the best ones you can sign up for. Read the full article
0 notes
Text
How To Block Emails on AOL - Check Now

Getting unwanted emails or spam messages frequently in your AOL Mail account is one of the most common and irritating issues reported by many users. Not only such unwanted emails clutter your inbox but also increase the risk of hacking. One of the best ways to avoid such emails from cluttering your inbox and minimizing the risk of hacking is to block email address of the senders from whom you receive such unwanted or spam emails in your AOL Mail account. To know how to block emails on AOL, follow the steps provided below.
Steps On How To Block Emails on AOL:
1.) Sign into your AOL Mail account and type the keyword “Mail Control” in the Search Bar located at the top of the application’s screen. Once you have typed, press Enter key on your keyboard. 2.) Now, select the circle new to option Block mail from addresses | specify. Enter the email address of the sender whom you wish to block in your AOL account. 3.) If you wish to block multiple email address, separate each email address by entering a comma in the provided field. 4.) When done adding email addresses which you want to block, click on the Save button. From there onwards, emails from the blocked email addresses will not be allowed to enter into the inbox folder of your AOL Mail account. 5.) Alternatively, if you are looking to block emails in AOL Desktop 10.1 version, start by logging into your AOL account. 6.) Next, click on the Mail icon and go to Settings and then Spam Controls. Select Edit Spam Controls to launch AOL Desktop 10.1’s mail controls option.

7.) Now, click on the circle next to Block mail from addresses | specify and enter the email address of the sender whom you wish to block in the provided field. To add multiple email addresses, separate each email address with a comma. 8.) Once done adding email addresses to block, click on the Save button. Click OK when you see message – Your changes have been saved. Again click Save to complete the process. Read the full article
0 notes
Text
How to Recall an Email In Outlook

Wanted to send the email to John, but accidentally sent it to Josh from your Outlook Mail account. No problem as Outlook offers its users an amazing feature to recall their sent email from the recipients. To know how you can recall an email in Outlook, follow the guide below. Though you can recall your delivered emails in Outlook, however, the feature is subject to following conditions: Limitations The recipient should be a non-Outlook user. The recipient is working offline and using Cached Exchange Mode. The recipient is not logged on to the email service provider. Original email has been moved from the inbox. The original email has been opened and marked as read. If the above-mentioned conditions are not applicable to your sent email, you can follow these steps to recall your email in Outlook.
Steps to Recall Emails in Outlook:
There is a different version of MS Outlook, so you can check your outlook version by clicking on help section and then about the outlook. This is a simple way to know the outlook version and then you can check the steps to recall email in outlook. Recall email in outlook 2007 1.) Go to the Sent Items folder in your Outlook 2007. 2.) Now open the email which you wish to recall. 3.) Next, click on the Actions option located on the ribbon or menu. 4.) Select the option – Recall This Message. 5.) Make sure to enable the Delete unread copies of this message option in order to recall the email. Alternatively, you can enable the option - Delete unread copies and replace with a new message to replace the email with a new one. 6.) Additionally, to get a notification about the success of the recall or replacement of email, enable the option – Tell me if recall succeeds or fails for each recipient. 7.) After that, click OK to complete the process. NOTE: If you are replacing the email with a new one, enter the new message and then send it again. Recall email in Outlook 2010 1.) In your Outlook 2010 program, go to the Sent Items folder. 2.) Now, open the email which you wish to recall. 3.) Click on the File option at the Ribbon. 4.) Under Info section, click on the Resend or Recall button and select Recall This Message option. This will open a Recall Options dialog box. You will see two options in the dialog box like these: Delete unread copies of this message Delete unread copies and replace with a new message 5.) Selecting the first option will delete the unread copy of the email, however, if you select the latter option, the original email will get opened for you to edit and resend the message. 6.) Also, if you wish to receive a notification for the status of the message for each recipient, select the checkbox next to the option - Tell me if recall succeeds or fails for each recipient. Recall email in outlook 2013 1.) Launch the Outlook 2013 program on your computer and go to the Sent Items folder. 2.) Now, open the email which you wish to recall. 3.) Click on the File option at the Ribbon. 4.) Under Info section, click on the Resend or Recall button and select Recall This Message option. This will open a Recall Options dialog box. You will see two options in the dialog box like these: Delete unread copies of this message Delete unread copies and replace with a new message 5.) Selecting the first option will delete the unread copy of the email, however, if you select the latter option, the original email will get opened for you to edit and resend the message. 6.) Also, if you wish to receive a notification for the status of the message for each recipient, select the checkbox next to the option - Tell me if recall succeeds or fails for each recipient.er 7.) After that, the email will be recalled or replaced as per your preference. Recall email in outlook 2016 1.) Launch the Outlook 2016 on your computer and go to the Sent folder. 2.) Now open the email you wish to recall and click on the More Actions option in the Actions tab. 3.) Next, select the option - “Recall This Message…”. This will open a “Recall This Message” dialog box. 4.) In the dialog box, you will see two options in the dialog box like these: Delete unread copies of this message Delete unread copies and replace with a new message 5.) If you will select the first option, the unread copy of the email will get deleted, however, selecting the latter option will open the original email which you will be allowed to edit and send again. 6.) Also, if you wish to receive a notification for the status of the message for each recipient, select the checkbox next to the option - Tell me if recall succeeds or fails for each recipient. 7.) After that, simply click on the OK button to complete the email recalling process. Recall Email in Outlook 365 1.) In Mail, go to the Folder Pane and click on the Sent Items folder. 2.) Under Sent Items section, double-click on the email you wish to recall. 3.) Next, go to the Message tab and click on the Actions option under Move group 4.) Then, click on the Recall This Message option. This will open a new message window which will show you two options: Delete unread copies of this message Delete unread copies and replace with a new message NOTE: Select the checkbox next to the option “Tell me if recall succeeds or fails for each recipient” to know the status of the email recalling. 5.) Select the appropriate options in the window and click on the OK button to complete the email recalling process. Recall Email in Outlook Web App Unfortunately, you cannot recall an email by accessing Outlook Web app (OWA). You will need to have a dedicated Outlook app installed on your computer to recall an email in Outlook. You can follow the above-mentioned steps to recall email in your Outlook email account. And this is how you will be able to recall an email in Outlook. However, if you are unable to recall an email in Outlook, the reason could be with not fulfilling the above-given conditions Read the full article
0 notes
Text
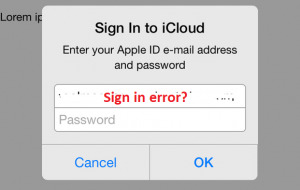
How To Fix Common iCloud Email Login Error?

If you are facing trouble signing in to your iCloud email account, you can follow the various measures provided below. However, before following the instructions provided below, make sure to consider the following points: Make sure the device (iPhone, iPad, iPod Touch, Mac, or PC) with which you are trying to log in has a strong internet network connection. Check the Apple Systems Outage page to ensure that there is no outages or scheduled maintenances causing the iCloud email login error. Make sure your device (iPhone, iPad, iPod Touch, Mac or PC) is running with the latest version of OS. Make sure that you are logged in to iCloud with the same Apple ID on all your devices. Once you have considered the above-mentioned points, you can follow the below measures to fix iCloud email login error.
Steps To Fix iCloud Email Login Error
An “Authentication Failed” error message gets displayed when trying to sign in using Apple ID during iCloud setup on iPhone, iPad, or iPad Touch. This error usually occurs due to outdated iOS. Make sure that your device is running on iOS 5 or above operating system. If not, you will first need to update your device to the latest version before trying to set up iCloud again. An “Unsupported Apple ID” error appears when trying to access iCloud from iPhone, iPad, or iPod Touch. Sometimes, you might not be able to set up your iCloud account with your current Apple ID because of the way you created your Apple ID. If your Apple ID works with App Store, iTunes Store, FaceTime, Game Center, and other Apple services, your Apple ID should work properly with iCloud. Unable to log in to iCloud on Mac because of an authentication request Make sure the macOS user account you are using to sign in to your iCloud on Mac has administrator rights. If you are logged in as a standard user (without administrator rights), you might see an authentication error such as “System Preferences is trying to modify the Directory Services configuration”. You will need to enter the name and password of the administrator in order to allow System Preferences to revise the configuration. To sign in as an administrator (for OS X Lion 10.7.5 or above) In the Apple menu, select the Log Out “Username” option. Next, click on the Log out button. Then in the login screen, select an admin user to log in. Unable to log in to iCloud on Mac because of an alert stating that email address is not verified If you are unable to log in to your iCloud account on Mac because of “Account not verified” alert, make sure to verify your account by checking your email for instructions. Close and re-launch iCloud preferences before again trying to log in to iCloud account. If the problem still persists, check your email folder for the verification email sent from Apple. If you are unable to find verification email in your mailbox (including Junk folder), you will need to click on the Resend Verification Email button in iCloud preference. An “Incorrect username or password” error appears when trying to log in at iCloud.com, in iCloud Preferences, in iCloud for Windows, or in a third-party application. Make sure you are entering your complete Apple ID and not just a part before “@”. As passwords are case sensitive, make sure that Caps Lock key is not activated. Make sure the Apple ID you are using is the one which is associated with your iCloud account. When trying to access your account on a third-party app, make sure that you have two-factor authentication and app-specific password. Moreover, if your device can’t be updated to iOS 9 or OS X EI Capitan, you can make use of two-step verification. To know whether you have two-factor verification or two-factor authentication from your iOS device, go to Settings > (Your Name) > Password & Security. You may be prompted to provide your Apple ID Password. If required, you might need to reset your Apple ID password. NOTE: If you are using the Same Apple ID for iCloud as you use for other Apple services, changing the password for your Apple ID will change the password for every associated Apple service. So, make sure to log in to such services using a new password. Moreover, make sure to generate an app-specific password when accessing your account on a third party application with your Apple ID. When signing with Apple ID, getting a prompt to enter additional information If there is any information which is not associated with your Apple ID currently, you could be asked to provide additional information. In such a case, simply enter the required information and continue. When setting up iCloud, getting a message that “iCloud is not available in your country or region” As iCloud services are not available in every country or region due to various reasons, you may see this notification. However, if you are in a country or region where iCloud is available but you are still getting this error, it is suggested to contact Apple Support. So, these are the measures that you can follow to fix common iCloud email login error. Read the full article
0 notes
Text
How to Make Yahoo My Homepage On Web Browser

A Homepage is a webpage in your browser which you see each time you open that web browser. If you like your web browser to open Yahoo Homepage whenever you launch your browser, you can set it to be your default homepage. Depending on the browser, we have provided steps on how to make Yahoo my homepage.
Steps to make Yahoo my homepage:
For Google Chrome 1.) Open Google Chrome and click on the Settings icon located on the top-right corner of your screen. Select Settings option from the menu. 2.) Under Settings window, click Open a specific page or set of pages option located under On Startup. 3.) Click on Set pages option. This will open Startup pages window. 4.) Enter www.Yahoo.com in the Add a new page section and click OK to confirm it. For Firefox 1.) Launch Firefox browser and click on the Menu icon (three horizontal lines). Select Preferences icon (Gear icon) under it. 2.) Now, under the General page, under When Firefox starts drop-down menu, click on Show my home page option. 3.) Next, under Home Page field, enter www.Yahoo.com. 4.) Yahoo will be made as your default homepage for Firefox browser. For Microsoft Edge 1.) Open Microsoft Edge browser and click on the More icon (three dotted lines) located on the upper right corner of your screen. 2.) From the drop-down menu, select Settings option. Under Settings, click A specific page or pages under Open Microsoft Edge option. 3.) Enter www.Yahoo.com by entering a URL field. Click on the Save icon. Next, click on the View advanced settings option and activate Show the home button. 4.) Then, from the drop-down menu, click on A specific page. Enter www.Yahoo.com under Enter a URL field. Finally, click on the Save icon. For Safari 1.) Click Safari and select Preferences option. 2.) Now, go to General tab and under New windows open with the field, click on the Homepage option. 3.) Next, under New tabs open with the field, click on the Homepage option. 4.) Then, enter www.Yahoo.com under Homepage field. 5.) Close the Preferences window and restart your browser to see if your homepage has been changed to Yahoo. Read the full article
0 notes
Text
How To Fix Verizon Yahoo Email Login Problems

Are you facing Verizon Yahoo Email Problem? Whether you have forgotten the password for your Verizon Yahoo email account or your account has been hacked, you can easily recover your account by resetting the password and fix your all Verizon Yahoo Email Problems. To know how you can easily reset the password for your Verizon Yahoo email account, follow the step by step instructions provided below.
Fix Verizon Yahoo Email Problems with Reset Password
NOTE: As Verizon email account has been merged with the Yahoo Mail, a Verizon email account users now needs to use Yahoo Mail in order to access their Verizon email account, which is now known as Verizon Yahoo email account. 1.) Go to the Verizon Yahoo home page via link https://verizon.yahoo.com/ and click on the Sign In button located on the top-right corner of the screen. You will be directed to the sign in page of Verizon Yahoo email. 2.) Once you are on the Sign-in page, click on the option “Trouble signing in?”. 3.) On the next page, click on the “Forgot your Info?” link. You will be directed to the “Forgot My Password” page. Enter your User ID and Zip Code in the prompted fields and click on the Continue button. 4.) After that, simply follow the on-screen instructions to complete the password reset process and regain access to your Verizon Yahoo email account. NOTE: Make sure to create a strong password for your account in order to keep it secure from hackers. Try to add a combination of numbers, alphabets and special characters in your password to make it difficult for anyone to hack your account easily. Moreover, make sure to not to share your password with anyone, and on any unreliable devices. Following all these practices will help you keep your account secure against hacking and other online threats. So, this is how you can easily fix Verizon Yahoo email problems. Read the full article
0 notes
Text
How to Open Outlook in Safe Mode

If you are facing problem accessing or operating your Outlook, it is suggested to open outlook in safe mode or use the safety switch. Although open outlook in safe mode will not load many of the customization files and add-ins, it will help in ascertaining in case the problem is one of the add-ins or customization files (If Outlook works fine in Safe Mode). If you don’t know how to open outlook in safe mode, following guide will help you.
Steps to open outlook in safe mode:
To open outlook in safe mode, you can make use of any one of the following methods to launch Outlook using a command line switch: Hold Windows key and R key, then type outlook.exe /safe in the field and hit OK. For Vista or Windows 7, use can type outlook.exe /safe in the Start Search field and press Enter. For Windows 8, the user will need to press Windows key to drop back to the Start screen and type outlook.exe /safe. If you are seeing a Run option on your start menu, click it and type outlook.exe /safe in the field and hit OK. NOTE: Mostly, you will only need to type outlook or outlook.exe, however, in rare cases, you will need to use the complete path to Outlook. Usually, the default location of Outlook is C:\Program Files\Microsoft Office\OfficeXX, (XX is being the version number). You can find it in Quick Launch shortcut by right clicking on the Outlook shortcut and select Properties. You will see that the default switch is /recycle. Replace it simply with /safe and press Apply. Then launch the Outlook by double-clicking on the shortcut (leave the dialog box open). Once Outlook opens, replace /safe back with recycle and hit OK. In case you are facing problem closing the Outlook, go to the Task Manager > Processes and check if it's running or not. List of Safe Switches Available 1.) /safe (For All Outlook Versions) Outlook opens without extensions, toolbar customization, Reading Pane. 2.) /safe:1 Outlook 2003/2007 Outlook opens with the Reading Pane off. 3.) /safe:2 (For Outlook 2003/2007 only) Outlook opens without checking mail at startup. 4.) /safe:3 (For Outlook 2003/2007) Outlook opens with extensions turned off, however, listed in the Add-In Manager. 5.) /safe:4 (For Outlook 2003/2007) Outlook opens without loading Outcmd.dat (toolbars customization) and *.fav file. Read the full article
0 notes
Text
How To Fix Common Hushmail Sign In Errors?

When having problem signing in to your Hushmail account, it can be because of different reasons such as poor internet network, incompatible/outdated web browser, faulty add-ons/plug-ins, server error, or incorrect login credentials. If you are not sure as to what could be causing the sign-in error, you can follow the step-by-step instructions provided below in this guide.
Guide to Fix Common Hushmail Sign In Errors
1.) Make sure that your computer is connected to the internet properly. Also, make sure that your internet network is working properly. For this, open a website on your web browser and see if it’s loading as usual or not. If your computer is connected via Wi-Fi, make sure your computer is in the range of the Wi-Fi connection. If this doesn’t fix the problem, go to the next step.

2.) Sometimes the problem can be on email service’s end, so it is important to first make sure that the problem is not at Hushmail’s end. If there is no problem with Hushmail service, move on to the next step. 3.) Make sure that the Web browser you are using to access your Hushmail account is compatible and up-to-date. Using an incompatible or outdated browser can result in Hushmail sign in errors. If this doesn’t fix the problem, move on to next step.

4.) Sometimes, a web browser enhancement such as an add-on or plug-in can also cause sign-in errors for Hushmail or other online websites. In such a case, it is suggested to disable such enhancements (one at a time) to check which one is exactly causing the error. 5.) If the above suggestions don’t clear the error, try accessing your Hushmail account using different internet connection, web browser, and computer. In most of the cases, following the above measures should fix the problem. However, if you are still not able to log in to your Hushmail account, it could be either because you are entering wrong login credentials or your account has been hacked. If you are sure that you have the correct username and password, you can recover your Hushmail account by resetting the password for it. Steps to Reset Hushmail Account Password In order to reset the Hushmail account password, you will need: To have access to a passphrase component To be able to access Hushtools with your administrator account. Once you have access to any of the above-mentioned options, you can follow these steps to reset your Hushmail account passphrase or password. 1.) Sign into your Hushmail account to get to your domain’s passphrase components. 2.) Next, you will need to select the Passphrase Shadows mail folder. 3.) Then, open the most recent email from the account for which you wish to reset the passphrase. 4.) After that, copy the passphrase component which is provided in the message. You will need this to reset your passphrase. 5.) Now, sign into Hushtools as an administrator and go to Users > Show all users to get to the list of users on your domain. 6.) Next, click on the edit link next to the user for which you wish to reset the password and then click on the Reset Passphrase option. 7.) Then, paste the passphrase component you copied earlier into the field under “Paste one of the passphrase components required for reset”. 8.) After that, enter your new passphrase in the field under “Enter the new passphrase” and confirm your passphrase. Click on the OK button, your new passphrase will be created. And this is how you can reset the password for your Hushmail account. Read the full article
0 notes
Text
What are the sbcglobal email settings for configuration

Every email service provider is known for offering something unique to its users in order to thrive in this competitive industry. While some providers are providing huge storage space and multiple security features, other email service providers are gaining the trust of the users because of the big reputed brand behind them to support them. Among these wide ranges of emails services providers, one of the renowned email services is SBC Global Email (Southwestern Bell Company Email). The company has been in the email business for years. After it took over AT&T, SBCGlobal changed its name to AT&T Inc. Last year when AT&T partnered with Yahoo Mail to share latter’s platform, it creates a lot of confusion among users regarding their SBCGlobal email account. Users were concerned as to how they will be able to access their SBCGlobal email account post the merging of AT&T email section with Yahoo Mail. The company stated complete information on various steps to merge SBCGlobal email account with Yahoo Mail platform. If you have merged your SBCGlobal email account with Yahoo and you are trying to configure your account on your Android or iPhone, you can do so easily by following the step-by-step instructions provided below in this guide. NOTE: In order to configure your SBCGlobal mail account on iPhone and Android, you will need SBCGlobal email settings for the particular platform. We have provided the complete configuration settings information for Android and iPhone. SBCGlobal Email Settings (IMAP) Incoming Mail (IMAP) Server Server:mail.yahoo.com Port: 993 Requires SSL: Yes Outgoing Mail (SMTP) Server Server:mail.yahoo.com Port: 465 or 587 Requires SSL: Yes Requires authentication: Yes Your login info Email address: Your complete email address Password: Your account's password Requires authentication: Yes SBCGlobal Email Settings (POP) Incoming Mail (IMAP) Server Server:mail.yahoo.com Port: 995 Requires SSL: Yes Outgoing Mail (SMTP) Server Server:mail.yahoo.com Port: 465 or 587 Requires SSL: Yes Required TLS: Yes (If available) Requires authentication: Yes Your login info Email address: Your complete email address Password: Your account's password Requires authentication: Yes Considering that AT&T Mail section is being managed by Yahoo Mail, you are most likely to configure your SBCGlobal email account on iPhone or Android using the above-given settings, however, if you are unable to do so, you can use the following AT&T email settings instead of above-mentioned. EMAIL PROTOCOL INBOUND SERVER INBOUND PORT SSL OUTBOUND SERVER OUTBOUND PORT IMAP imap.mail.att.net 993 Yes smtp.mail.att.net 465 or 587 POP3 Inbound.att.net 995 Yes outbound.att.net 465
Steps to Configure SBCGlobal Email Account on Android
1.) Launch the Gmail App on your Android device. This will open the Gmail account linked to your Android mobile device. 2.) In the Gmail application, you will need to tap on the Menu bar icon (three horizontal lines) located on the upper-left corner of your Gmail account’s screen. 3.) Now, under the menu bar, you will need to tap on the Down Arrow icon located just next to your Gmail address. 4.) Next, you will need to tap on the Add account option. This will direct you to a new screen on your Android device. On the next screen, you will be prompted with a list of multiple email services providers. 5.) From this list, you will need to tap on the “Other” option and wait until you are directed to the next screen. Once you are on the next screen, you will be asked to enter your email address. 6.) Enter your email password in the prompted field, tap on the NEXT button or MANUAL SETUP option. You will be directed to the next screen. 7.) On the next screen, you will need to select from the given options – Personal (POP3) Personal (IMAP) Exchange 8.) Select Personal (POP3) option and click on the NEXT button. You will be prompted to enter a password for your account. 9.) After entering the password, click on the Next button. You will be directed to the next screen where you will be prompted to provide Internet Server Settings followed by Outgoing server settings. For Incoming Server Settings, you will need to enter “mail.yahoo.com” in the provided field and click on the NEXT button. For Outgoing Server Settings, you will need to enter “mail.yahoo.com” in the provided field and click on the NEXT button. 10.) Considering that you would have done everything correctly, you should direct to the next screen where you would be able to assign your Display/Account Name. Make sure to label them appropriately, especially if you wish to add more email account in future. After that, simply wait for your emails to get loaded.
Steps to Configure SBCGlobal Email Account on iPhone
1.) On your iPhone, tap on the Settings app icon and select Mail, Contacts, Calendars option. 2.) Now, under Mail, Contacts, Calendars, you will need to tap on the Accounts and then on the Add Account option. 3.) Now, to set your SBCGlobal Mail account (using IMAP), you will need to click on the Other option. 4.) Next, you will need to tap on the Add Mail Account option and enter your information as provided below. Name: Enter your name Address: Enter your complete Yahoo Mail address Password: Enter your Yahoo Mail password Description: Enter a description for your Yahoo Mail as per your preference. Once you are done entering the information, tap on the Next button. 5.) Then, from the given options on your screen, you will need to select IMAP tab and enter the information as mentioned below: Name: Enter your name (if empty) Address: Enter your complete Yahoo Mail address (if empty) Description: Enter a description for your Yahoo Mail as per your preference (if empty). Incoming Mail Server Host Name:mail.yahoo.com User Name: Enter your Yahoo mail username Password: Enter your Yahoo mail password After entering this information, tap on the Next button. 6.) After that, you will need to enter information for Outgoing Mail Server as mentioned below- Outgoing Mail Server Host Name: mail.yahoo.com User Name: Enter your Yahoo mail username (Optional) Password: Enter your Yahoo mail password (Optional) Then, tap on the Next button. 7.) After entering all the above information as instructed, wait until the verification process gets finished. When it gets completed, select both Mail and Notes option on the next screen. 8.) Then finally tap on the Save option. Your SBCGlobal Mail account will be configured on iPhone. So, this is how you can easily configure your SBCGlobal Email with your iPhone or Android device. Read the full article
0 notes
Text
How to Sign Out From Gmail on Android?

Android offers a remarkable platform for accessing different email accounts from a single place. You need to add your email accounts once in your Android device’s Mail app, and then you will be logged in it until you wish to log out of your account on your Android device. Adding your email account to your Android device lets you have access to your email on the go. However, if you ever wish to sign out from your email account on your Android device, you may not be able to locate the option to do so. In order to help your sign out from your email account on your Android device, follow the step-by-step instructions provided herein below. Steps to Sign out of Email Account on Android 1.) On your Android device, tap on the Gmail app icon. 2.) Once the Gmail app gets open on your device, tap on the Menu bar icon (three horizontal lines) located on the top-left corner of your screen. 3.) From the menu options that appear on your screen, tap on the “drop-down” icon located next to your email address. This will open a list of email accounts associated with your Gmail app on your Android device. Also, you will see “Manage Accounts” option. 4.) Tap on the “Manage Accounts” option. You will be directed to “Accounts” settings option. 5.) Tap on the email account you wish to remove or log out from. Again tap on the email account (if prompted). 6.) Next, tap on the “More” icon (three vertical dots) located on the top-right corners of your screen. You will see two options – Cancel sync and Remove account. 7.) You will need to tap on the “Remove account” option in order to log out of your email account from the Android device. 8.) After that, you can check your “Gmail app” to know if the email account has been removed or not from your Gmail app. So, this is how you can easily log out of your email account on Android device. Read the full article
0 notes
Text
How to Backup Contacts On iPhone

Having a backup of your data in iCloud comes very handy, especially when you don’t have access to your device. From photos, videos, documents to contacts and emails, you can back up everything in your iCloud storage. If you are looking how to backup contacts on iphone in iCloud, you can do so easily by following the step-by-step instructions provided below.
How to Backup Contacts On iPhone With Simple 5 Steps
In order to back up contacts from your iPhone, you can do so by syncing it to iCloud. For this, you just need to make sure that your iPhone is properly connected to a Wi-Fi network. After that, just follow the steps mentioned below. 1.) On your iPhone, tap on the Settings app icon. 2.) Under Settings section, tap on your Apple ID and select iCloud option. 3.) Next, tap on the Contacts option to activate it. 4.) Then, tap on the Merge option when you are prompted with a message which reads “what would you like to do with existing local contacts on your iPhone” 5.) After that, wait until all your iPhone contacts get backed up to iCloud. NOTE: Synchronizing your iPhone contacts to iCloud will merge all the contacts on your different devices logged in using the same Apple ID. Alternatively, you can also back up your contacts to iCloud by following the below-mentioned steps; however, following these steps will also back up everything on your iPhone to iCloud. Here are the steps: 1.) On your iPhone, tap on the Settings app icon. 2.) Under Settings section, tap on your Apple ID and select iCloud option. 3.) Now, tap on the iCloud Backup option to turn it on. 4.) Next, tap on the Back Up Now option. 5.) Then your contacts and other items will start backing up on your iCloud server. So, these are the ways to back up contacts in your iCloud account. Read the full article
0 notes
Text
How To Recover Forgot Gmail Password

Whether you forgot Gmail password or you think your account has been hacked, changing or resetting the password is the ultimate way to easily recover your Gmail account. To know how to recover forgot Gmail password by resetting the password, follow the step-by-step instructions provided below.
Steps to Reset Forgot Gmail Password:
1.) Visit Google Sign-in page and enter your email address/phone number in the prompted field. Next, click on the Next button. 2.) Now, on the next screen, click “Forgot password?” This will be direct you to next page where you will need to provide the last password you remember for your Gmail account. 3.) Once entered, click Next button. Then, verify yourself as the owner of the account by fulfilling the requirement on the next screen. For that, either you will be asked to recognize your phone number or your email address. Depending upon the option you choose, you will receive a verification code on your email/phone. 4.) Enter the code which you received on the next screen and click Next button. 5.) If the verification code gets verified, you will be allowed to reset a new password for your Gmail account on the next page. 6.) Enter the new password in the provided fields under Create new password. Click on the Change Gmail password button, your new Gmail account password will become effective. 7.) Click on the Change password button will direct you to next page where you’ll need to review your account’s security settings. Once reviewed, click on the Continue to Gmail button. You will get access to your Gmail account. Don't Have Register Phone Number or Recovery Email? If you don't have the above details, you have to answer some of the questions which Google will ask you to verify your account. That's easy, isn't it? Read the full article
0 notes
Text
How to Add AOL Mail Login Screen Name?

Your AOL username is your unique identity on the internet which allows you to have access to services like AOL Mail. If you have an AOL email address, the first part of your email address (before @) is considered your username, however, for those having a non-AOL email address, the entire email address is considered as username. As an AOL account user, you can create up to seven different usernames for your single account. However, this depends upon the plan and account type you have selected. So, if you wish to add or change AOL Mail Login Screen Name when you send them mail using your AOL Mail account.
Steps to Add AOL Mail Login Screen Name
1.) Launch a web browser on your Computer and go to the AOL Mail sign-in page. 2.) Enter your username and password in the provided field to get access to your AOL Mail account. 3.) Once your AOL Mail account gets opened in your web browser, click on the Options button located on the top right-hand side corner of your account’s page, just above your mailbox. This will open a drop-down menu on your screen. 4.) From the drop-down menu that appears on your screen, click on the Mail Settings option. 5.) Next, click on the Compose option located in the left-hand side panel. 6.) Then, you will need to scroll down and go to the Display Name option. 7.) In the text box next to the Display Name option, enter the name that you wish to show to the recipient of your emails. 8.) Once you are done entering the desired name under the Display Name text field, click on the Save Changes button located on the lower-right corner of your screen. Now the next time you will send an email to anyone, the person will see your new name in the email along with your email address. Read the full article
0 notes
Text
How to Recall An Email In Gmail?

It can be quite embarrassing if you send an email to your boss that you were supposed to send to your wife. If you have ever done such a mistake or fear of doing it in future, well you will be glad to know that you can recall your sent email and prevent it from getting delivered to the “wrong” recipient. However, to make use of this feature, you must be a Gmail user. Gmail offers a unique feature that allows a user to recall their sent emails and prevent them from being delivered to wrong email address. To know How to Recall An Email In Gmail, follow the information provided below.
6 Steps On How to Recall An Email In Gmail
NOTE: The email recalling feature in Gmail works by delaying the delivery of the email for up to 30 seconds. This means that this feature may not work correctly if you have internet network issue when recalling the email. 1.) In order to recall emails in your Gmail account, you will first need to activate this feature. For this, sign in to your Gmail account and click on the Gear icon located on the top-right corner of your Gmail account’s page. 2.) From the drop-down menu that appears on your screen, click on the Settings option. This will open the Settings’ page on your screen.

3.) Under Settings’ section, go to the General tab and select the checkbox next to the option under Undo Send which reads – Enable Undo Send.

4.) Select the time duration from the drop-down next to the option. You will be able to delay the delivery of email no more than 30 seconds. 5.) Next, click on the Save Changes button located at the bottom of the page. 6.) Now whenever you will send an email from your Gmail account, you will see a notification – “Your message has been sent with an additional Undo option”. You will just need to click on the Undo option whenever you wish to prevent an outgoing email from getting delivered to the recipient. So, this is how you can recall an email from your Gmail account. Read the full article
0 notes
Text
How To Recover Forgot Gmail Password

Whether you forgot Gmail password or you think your account has been hacked, changing or resetting the password is the ultimate way to easily recover your Gmail account. To know how to recover forgot Gmail password by resetting the password, follow the step-by-step instructions provided below.
Steps to Reset Forgot Gmail Password:
1.) Visit Google Sign-in page and enter your email address/phone number in the prompted field. Next, click on the Next button. 2.) Now, on the next screen, click “Forgot password?” This will be direct you to next page where you will need to provide the last password you remember for your Gmail account. 3.) Once entered, click Next button. Then, verify yourself as the owner of the account by fulfilling the requirement on the next screen. For that, either you will be asked to recognize your phone number or your email address. Depending upon the option you choose, you will receive a verification code on your email/phone. 4.) Enter the code which you received on the next screen and click Next button. 5.) If the verification code gets verified, you will be allowed to reset a new password for your Gmail account on the next page. 6.) Enter the new password in the provided fields under Create new password. Click on the Change Gmail password button, your new Gmail account password will become effective. 7.) Click on the Change password button will direct you to next page where you’ll need to review your account’s security settings. Once reviewed, click on the Continue to Gmail button. You will get access to your Gmail account. Don't Have Register Phone Number or Recovery Email? If you don't have the above details, you have to answer some of the questions which Google will ask you to verify your account. That's easy, isn't it? Read the full article
0 notes