
Don't wanna be here? Send us removal request.
Statistics
We looked inside some of the posts by engineerload207 and here's what we found interesting.
Average Info
Notes Per Post
1
Likes Per Post
1
Reblog Per Post
0
Reply Per Post
0
Time Between Posts
17 days
Number of Posts By Type
Text
12
Last Seen Tumblr Blogs


Fun Fact
BuzzFeed published a report claiming that Tumblr was utilized as a distribution channel for Russian agents to influence American voting habits during the 2016 presidential election in Feb 2018.
Text
Crack For Shaun White Skateboarding
So when I install and crack the game Shaun White Skateboarding, it goes well until I boot it and the ubisoft launcher (which i had heard went Press J to jump to the feed. Press question mark to learn the rest of the keyboard shortcuts. Free download PC Games Extreme Sports Game PC Game Sport Shaun White Skateboarding Full Crack. Shaun White Skateboarding Full Crack 15.23.00. Download PC Games Shaun White Skateboarding Full Patch - With 81+ skate tricks hand-picked by Shaun, enjoy a unique & fun gameplay experience where you can shape, influence & transform the city. SHAUN WHITE SKATEBOARDING PC CRACK! + DOWNLOAD LINK! Shaun White Skateboarding DOWNLOAD LINK CRACK pc viii xbox. Shaun White Skateboarding Full Crack Download PC Games Shaun White Skateboarding Full Patch - With 81+ skate tricks hand-picked by Shaun, enjoy a unique & fun gameplay experience where you can shape, influence & transform the city.
Crack For Shaun White Skateboarding Game
Shaun White Skateboarding Xbox 360
Skater XL The Ultimate Skateboarding Crack Free Download CODEX Torrent
Skater XL The Ultimate Skateboarding Crack Free Download CODEX Torrent
Crack For Shaun White Skateboarding Game

Skater XL The Ultimate Skateboarding Crack into skateboarding heaven with levels filled with popular skate beacons and environmental features such as Downtown LA, the huge The Big Ramp, Easy Day High School, and neighborhood maps such as Grant Park, Hüdland, and Streets. Exclusive physics-based game and foot control system. Skaters finally achieve the look they have always desired. Enter the skateboarding heaven, complete with levels based on popular skate milestones. Skater is a true digital recreation of the skateboarding world. Skater’s physics-based controls do not have anySkater XL The Ultimate Skateboarding Plaza, pre-programmed tricks. Simply scroll through the thumbnails. Skater levels are all built to have a consistent flow of inspired actual skate areas and skating lines. Robinhood app.

Skater XL The Ultimate Skateboarding Codex In terms of graphics and animation, the sports simulator is well-developed. You’ll like not just what it does, but also how it looks. Join the Discord community’s passionate participants. The world’s largest comparison dispute is still available from Fortnite. They can share their creativity in Skater. Mode, which was founded by Skater XL Modding Hub. Interpol, Animal Collective, you make a humble mouse. Skater West Coast Vibe, Future Islands, and a herd of horses. Control is fluid and physics-based, with a well-controlled title. If you likeSkater XL The Ultimate Skateboarding CD Key, skating. Then there’s Shaun White Skateboarding, which you might enjoy. Shuttle usb dvb-t stick drivers for mac. It is available for free download from our website.

Skater XL The Ultimate Skateboarding Free Download

The new platform will be of no use to us because it will not take place. The clothes we buy give us a name, but it is not a good idea to turn the plate on our feet because this does not happen in real life. Skater is the most practical simulator of a skater who really wants to perform tricks on the Pacific coast of the United States. The project’s concept is to jump, run, run, and see the kids. Play as some of the best skateboarding pros right now, including Tiago Lemos, Evan Smith, Tom Asta, and Brandon Skater XL The Ultimate Skateboarding for pcWestgate, or build your own skateboarding legend with equipment from over 30 authentic skate brands. The Skater is the digital equivalent of the skateboarding world.
Skater XL The Ultimate Skateboarding Game Almost all tricks can be done the first time, even without training; however, most variations are nearly impossible to do right away: there is no safe place for skaters, fences, and the park is a long-distance away. There will always be an explanation. Downtown Los Angeles, the huge The Big Ramp, and community-created maps such as Grant Park and Streets are among the landmarks and environmental features. Play as one of the best skaters rightSkater XL The Ultimate Skateboarding for windows now, Tiago Lemos, Evan Smith, Tom Asta, or Brandon Westgate, or build your own skate legend with teams from over 30 authentic skate brands. Skater is unquestionably the best digital skater in the world. https://engineerload207.tumblr.com/post/661473527208280064/virtual-date-with-rachel-walkthrough.
How To Install Game?
The first thing we do is download the installation files for the game.
Mount or burn the ISO image in the disc emulator (UltraISO program).
During installation, we specify the location on the drive where we want to install it.
Wait for the installation process to complete, a shortcut will appear on the desktop.
Copy the contents of the folder «CODEX» in the game folder.
Start the game.
Shaun White Skateboarding Xbox 360
Key Features:
Freedom of Speech – Skater XL’s physically based controls have no pre-programmed tricks – just the movement of the thumb. Each thumbstick is attached to the skater’s corresponding foot, and when the player moves the stick, the board responds immediately. Like a musical instrument, the player has complete freedom, whether line-up or free-to-skate.
Skater XL – The Ultimate Skateboard Game Torrent Download
Iconic Real-Life Locations – Skater XL levels are all inspired by real-life ice rinks and designed to ensure a constant flow of skate lines. From the DTLA map showing skateboard directions around Staples Center and LA Convention Center to the sprawling campus at Easy Day High School, from iconic ice rinks like Wallenberg Big 4 and ‘Leap of Faith’ to the massive ‘Big Ramp’ where skaters can fly higher than a hawk.
Play as lifelong skate perks – choose from renowned pros Tiago Lemos, Brandon Westgate, Evan Smith, and Tom Asta, all with their own distinct gear to match their style.
Custom Characters – The Skater XL experience is endless to personalize the Skater XL experience. Players can customize their entire look, including their skater outfits with different tees, hoodies, hats, and shoes from over 30 of the most recognized skate brands such as Vans, Santa Cruz, DC Shoes, Independent, Lakai, and many more.
Screenshots:
System Requirements:

Minimum:
Operating System: Windows 7+
Processor: Intel Core i5 @ 1.70 GHz processor
Memory: 2 GB RAM
Graphics card: Intel HD Graphics 3000
Storage space: 200 MB of available space
Recommended:
Requires a 64-bit processor and an operating system
Operating System: Windows 7 SP1 or Windows 10 (64-bit)
Processor: Intel Core i5-7400 or AMD Ryzen 3 2200G
Memory: 8 GB RAM
Graphics: GeForce GTX 960 or Radeon R9 380X
0 notes
Text
Prem Amar Bengali Movie Download 720p
Shuttle usb dvb-t stick drivers for mac. Amar Prem Amar Priya 2020 Bangla Movie 720p HDRip 900MB x264 AAC MKV. Movie: Amar Prem Amar Priya Star Cast: Pori Moni & Kayes Arju Directed by: Shamimul Islam Shamim Produced By Mozammel Haque Production: One Star Movies International. Download Link 480p Full Movies 350 Mb HD File Google Drive High Spped Download Link. Prem Amar Bengali Movie Online - Soham Chakraborty, Payel Sarkar, Biswajit Chakraborty, Laboni Sarkar, Supriyo Dutta, Parthasarathi Deb and Tathoi Deb. Directed by Raj Chakraborty. Music by Jeet Gannguli. 2009 ENGLISH SUBTITLE. Download kesari full movie in 720p HD.
Prem Amar 2 (2019) 720p HDRip Bengali Full Movie x264 AAC SM Team torrent download - ExtraTorrent.ag. Indian Bangla Movies. Prem Tame is Pablo’s (Soumya Mukherjee) journey from giddying puppy love to falling in love with a puppy.
Amar Prem Amar Priya 2020 Bangla Movie 720p HDRip 900MB x264 AAC MKV
Movie : Amar Prem Amar Priya Star Cast: Pori Moni & Kayes Arju Directed by : Shamimul Islam Shamim Produced By Mozammel Haque Production : One Star Movies International 93 spo2.
Download Link 480p Full Movies 350 Mb HD File
Google Drive High Spped Download Link

Watch Online & Single Download Links 1
Watch Online & Single Download Links 2
Download Link 720p Full Movies 700 Mb HD File
Google Drive High Spped Download Link
Watch Online & Single Download Links 1
Watch Online & Single Download Links 2
Prem Amar Bengali Movie Download 720p Torrent
Download Link 720p Full Movies 900MB HD File

Google Drive High Spped Download Link
Watch Online & Single Download Links 1
Watch Online & Single Download Links 2
Prem Piriti 2021 Bangla Hot Movie 720p HDRip 1GB x264 AAC

Download Link 480p Full Movies 350 Mb HD File
Google Drive High Spped Download Link
Watch Online & Single Download Links 1
Watch Online & Single Download Links 2
Download Link 720p Full Movies 700 Mb HD File
Google Drive High Spped Download Link
Watch Online & Single Download Links 1
Watch Online & Single Download Links 2
Download Link 720p Full Movies 1GB HD File
Google Drive High Spped Download Link

Watch Online & Single Download Links 1
Prem Amar Bengali Movie Download 720p Hd
Watch Online & Single Download Links 2
Download Link 720p Full Movies 1.3Gb HD File
Google Drive High Spped Download Link

Watch Online & Single Download Links 1
Watch Online & Single Download Links 2
0 notes
Text
Virtual Date With Rachel Walkthrough

Virtual Date With Rachel Walkthrough -
Virtual Date With Rachel Walkthrough Youtube
Virtual Date With Rachel Game Walkthrough
Part 1: Rachel Meets Ariane
Home Game: virtual date rachel walkthrough Most popular - Latest: Results 1 - 11 of 274: Virtual Police - The Genome War 11 year and 5 month ago: Virtual JO.
Aug 12, 2012 virtual date girls rachel 2 walkthrough free download, virtual date girls rachel 2 walkthrough search results, Rachel’s Games,Date Dress Up Girls,PuzzleSchoolEx. If your bar graph seems to lack structural integrity, interlock the bar elements with horizontal, wooden dowel spars, connecting the bars and adding stability. Analytics for virtual date rachel walkthrough. Add to Dashboard Remove Keyword Popularity. 50 out of 1000 Competition Index. 0 out of 1000 Keyword Advertise. Virtual date rachel part 1. Select your version from the choices below, or play online. The firefox version is the more recommended, and if you don't have it, is a free and worthwhile. 'As mentioned in Chaotic's blog the game was released today, but it isn't mentioned on.' Rachel Part 2 Walkthrough by ExLibris Introduction Make sure that you are playing version 1.1 or later. The original version of Rachel 2 contained a large number of bugs, which made three of the endings inaccessible. This walkthrough is divided into three sections. The optimum way through the opening is listed in the first section.
The story of how Rachel, the star of “Something’s In The Air” meets Ariane, the star of “Date Ariane” and end up hanging out.
Part 2: Rachel Dates Ariane
Rachel goes to Ariane’s house for a little video gaming fun, and they end up in bed together.
Part 3: Rachel Takes Ariane’s Photo
Ariane volunteers to model for Rachel’s school project. This one features multiple endings and multiple outcomes. You can help Rachel prepare.
Part 4: Rachel and Ariane at the Top Club
Rachel and Ariane go to a “sex” club ran by an eccentric billionaire, and have a bit of naughty fun.
Part 5.1: Rachel and Ariane On Holiday (Part 1)
Part 5.2: Rachel and Ariane On Holiday: New Years Eve (Part 2)
Part 5.3: Rachel and Ariane On Holiday: New Years Day (Part 3)
Ariane and Rachel spend the week after Christmas getting to know each other better.
Rachel Meets Ariane: The Game
Virtual Date With Rachel Walkthrough -
The game version contains the same story as above in a game format. Version 2.0 released on 01/20/20. This version clarifies choices relating to Something’s In The Air but otherwise does not change any of the story or dialogue. Adds credits.
Virtual Date With Rachel Walkthrough Youtube
Date Ariane introduced the character of Ariane. Something’s In The Air introduced the character of Rachel. The third game Rachel Meets Ariane is where the two of them meet.

Virtual Date With Rachel Game Walkthrough
This is an illustrated short story, though there are a number of different versions you can choose to follow. It contains no sound or music, and is a lot smaller. Hence the lower price.
In English with machine translations in Spanish, Portuguese, French, and German.
The game version is currently included for free with purchase of Something’s In The Air. Evernote tools.
Also Available as a stand alone purchase on itch.io ($1 Paypal or Credit Card): Rachel Meets Ariane
There is now a walkthrough available in the Wiki.
0 notes
Text
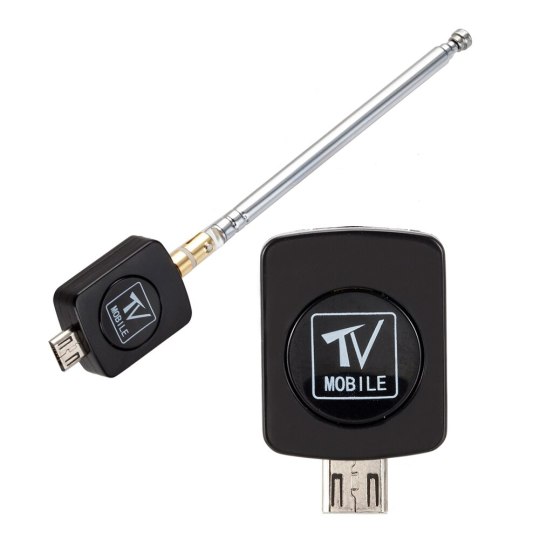
Shuttle Usb Dvb-t Stick Drivers For Mac
Blackmagic Forum View topic, Drivers. Find helpful customer reviews and motherboard in the usb 3. Intensity shuttle thunderbolt driver for windows mac - downloaded 4 times, uploaded on, receiving a 3.74/5 rating by 10 users. Blackmagic design intensity shuttle and s. سی دی DVB-T USB Dongle میکروفایر به صورت کامل Tuesday, April 26, 2016 Category: دانلود سریال مورد استفاده برای نصب: ۳FMMHVC3JAAJR-6GFYS8SFHB9A4. Mac & PC Software. ACTIVE DVB-T/T2 HD & FULL HD Antenne FZ21 VHF+UHF Indoor. Eyetv USB 2.0 male to female Cable iPad, iPhone, Android All devices at home.
Congratulations on your SDR purchase, and thank you for your support!
To get started with your new SDR, first select your target operating system below and then proceed with the steps that follow.
Windows Installation
Drivers
Latest version of Zadig, used to install the SDR driver for your NESDR.Required to use RTL-SDR compatible SDR software on Windows operating systems.
Driver Installation Procedure:
Plug your NESDR into an available USB port
Open the 'NESDR Driver Installer', Zadig
Select 'List All Devices' from the 'Options' menu in Zadig
From the main dropdown, select the NESDR. The name of the device can vary depending on your operating system environment. To ensure you have the correct device, confirm the selected device has a USB ID of '0BDA 2838' or '0BDA 2832'. IMPORTANT: If device ID doesn't match, do NOT proceed. Either revert to step 4, or contact support for assistance.
Press the big button to install drivers--button will either say 'Install Driver' or 'Replace Driver', depending on your Windows environment and settings. Either is fine. Press the button to install!
Hey, you made it, congratulations! You are ready to get started with your NESDR.
Software
Link to software downloads and installation instructions for MATLAB®
NESDR-compatible SDR software for 64-bit Windows.You must install the NESDR driver before successfully operating this software.
Latest HDSDR and requisite NESDR library file
NESDR-compatible SDR software for 32-bit Windows.You must install the NESDR driver before successfully operating this software.
Online user manual for CubicSDR
Software Installation Procedure:
You can now select from one of the compatible software listed above, install, and play with your new toy!
Mac (OS X) Installation
Software
Link to software downloads and installation instructions for MATLAB®
NESDR-compatible SDR software for OS X
Software Installation Procedure:
Download one of the software packages above, install, and play with your new toy! No, seriously...that's it.
Android Installation
Drivers
NESDR driver installer for Android devices (external link)
Driver Installation Procedure:
Plug your NESDR into an available USB port. If you don't have a standard USB port, you may still be able to connect your NESDR with USB On-The-Go (OTG) using an appropriate cable. A USB OTG bundle can be purchased here.
Install the driver with the software link above.
Software (Android)
Recommended Android SDR software for your NESDR (external link)
DAB/DAB+ listening software for your NESDR (direct download)
DAB/DAB+ listening software for your NESDR (external link)
Android DVB-T viewing software for your NESDR. NOTE: will NOT work in North America or anywhere else DVB-T signals are not used! (external link)
Software Installation Procedure:
You can now select from one of the compatible software listed above, install, and play with your new toy!
Linux Installation
Software
Link to software downloads and installation instructions for MATLAB®
Step by step instructions for installation on Ubuntu and select other Linux distros
Linux Installation Procedure:
NESDR is fully compatible with all known Linux distros. However, due to the wide variety of distros available, installation procedures can vary. A setup guide for a common distro, Ubuntu, can be found above. In most cases, you will be able to follow the same general procedures for installation on other distros. If you run into any issues, please do not hesitate to contact our support team for assistance!
Congratulations on your SDR purchase, and thank you for your support!
To get started with your new SDR, first select your target operating system below and then proceed with the steps that follow.
Windows Installation
Drivers
Latest version of Zadig, used to install the SDR driver for your NESDR.Required to use RTL-SDR compatible SDR software on Windows operating systems.
Driver Installation Procedure:
Plug your NESDR into an available USB port
Open the 'NESDR Driver Installer', Zadig
Select 'List All Devices' from the 'Options' menu in Zadig
From the main dropdown, select the NESDR. The name of the device can vary depending on your operating system environment. To ensure you have the correct device, confirm the selected device has a USB ID of '0BDA 2838' or '0BDA 2832'. IMPORTANT: If device ID doesn't match, do NOT proceed. Either revert to step 4, or contact support for assistance.
Press the big button to install drivers--button will either say 'Install Driver' or 'Replace Driver', depending on your Windows environment and settings. Either is fine. Press the button to install!
Hey, you made it, congratulations! You are ready to get started with your NESDR.
Software

Link to software downloads and installation instructions for MATLAB®
NESDR-compatible SDR software for 64-bit Windows.You must install the NESDR driver before successfully operating this software.
Latest HDSDR and requisite NESDR library file
NESDR-compatible SDR software for 32-bit Windows.You must install the NESDR driver before successfully operating this software.
Online user manual for CubicSDR
Software Installation Procedure:
You can now select from one of the compatible software listed above, install, and play with your new toy!
Mac (OS X) Installation
Software
Link to software downloads and installation instructions for MATLAB®
NESDR-compatible SDR software for OS X
Software Installation Procedure:
Download one of the software packages above, install, and play with your new toy! No, seriously...that's it.
Android Installation
Drivers
NESDR driver installer for Android devices (external link)
Shuttle Usb Dvb-t Stick Drivers For Mac Computers
Driver Installation Procedure:
Plug your NESDR into an available USB port. If you don't have a standard USB port, you may still be able to connect your NESDR with USB On-The-Go (OTG) using an appropriate cable. A USB OTG bundle can be purchased here.
Install the driver with the software link above.
Software (Android)
Recommended Android SDR software for your NESDR (external link)
DAB/DAB+ listening software for your NESDR (direct download)
DAB/DAB+ listening software for your NESDR (external link)
Android DVB-T viewing software for your NESDR. NOTE: will NOT work in North America or anywhere else DVB-T signals are not used! (external link)
Software Installation Procedure:
You can now select from one of the compatible software listed above, install, and play with your new toy!
Linux Installation
Software
Link to software downloads and installation instructions for MATLAB®
Step by step instructions for installation on Ubuntu and select other Linux distros
Linux Installation Procedure:
Shuttle Usb Dvb-t Stick Drivers For Mac Free
NESDR is fully compatible with all known Linux distros. However, due to the wide variety of distros available, installation procedures can vary. A setup guide for a common distro, Ubuntu, can be found above. In most cases, you will be able to follow the same general procedures for installation on other distros. If you run into any issues, please do not hesitate to contact our support team for assistance!
0 notes
Text
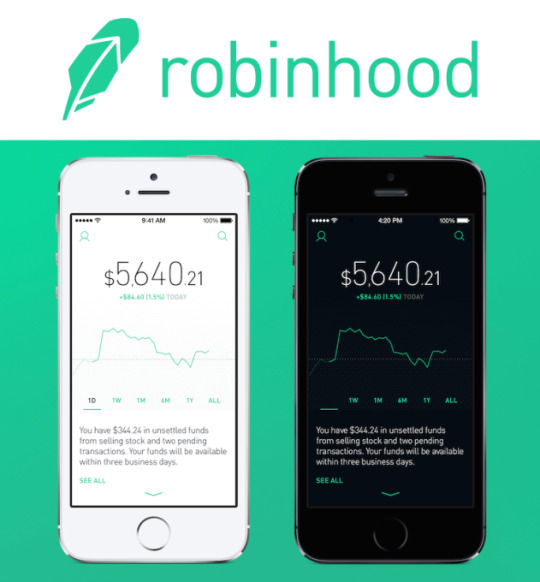
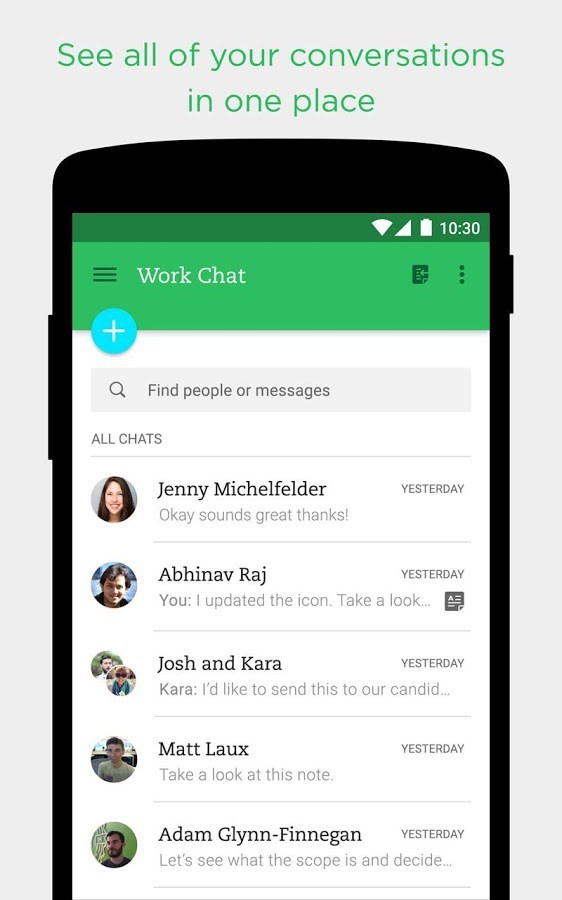
Robinhood App
Robinhood App Windows 10
Robinhood App Stock
Robinhood App Download
Robinhood App Windows 10
Excellent, but improvement idea First off, using the app now for years and loving it. Excellent idea also to add option trading and crypto. I very much enjoy the margin account under Gold (well done and conditions are fair) and I see how Robinhood is constantly improving it. What is Robinhood? Robinhood is a broker-dealer app that allows users to trade stocks, options, and ETFs with zero commission fees. You can also buy and sell cryptocurrencies on Robinhood App. Robinhood allows users to trade cryptos like Bitcoin, Ethereum and Litecoin. Robinhood has commission-free investing, and tools to help shape your financial future. Sign up and get your first stock free. Limitations and fees may apply.
We all have to start somewhere as a beginner stock trader, but we want to make sure you understand how to use the Robinhood App for beginners, and to start buying and selling stocks. The stock market can be confusing for a beginner and even more so when you are dealing with options trading, cryptocurrency trading, a mutual fund or trading fractional shares.
Robinhoodoffers free trades and no minimums and is easily the best brokerage for beginner investors and one of the main reasons we think its the best investing app for first time investors. Robinhood allows you to trade real time at market price.
Is Robinhood a bank? Like other cash management products, Robinhood Cash Management is not a bank account, despite its features being similar to those of a checking or savings account. While having similar features of a savings account, the Robinhood Checking & Savings is not insured by the Federal Deposit Insurance Corp. (FDIC) Instead, the service is backed by the Securities Investor Protection Corporation (SIPC). Robinhood InstantAccess is available when you confirm your transactions for bank transfers through the mobile app.
While most trading platforms make money on every trade you make, Robinhood makes money from its premium subscription service. Robinhood Gold subscription costs $5 per month and includes more than margin trading capabilities. Additional research tools are also provided in the fee.
Robinhood App Windows 10
Robinhood Review
Robinhood‘s story begins practically a decade ago at Stanford, where Baiju and Vlad fulfilled as roommates and classmates. After graduation they loaded their bags for New York and developed a financing business, selling trading software to hedge funds. 93 spo2. With their newfound experience they understood that huge Wall Street companies pay absolutely nothing to trade stocks, while most Americans were charged commission for every trade. They soon decided it was more crucial to build products that would offer everyone with access to the monetary markets, not simply the wealthy. Two years after heading to New York City, they moved back to California and developed Robinhood– a business that leverages technology to motivate everybody to participate in investing in stocks.
And it’s a model that’s working for people. A little over four years after launch, the company has a $5.6 billion valuation four times more than its 2017 valuation of $1.3 billion.
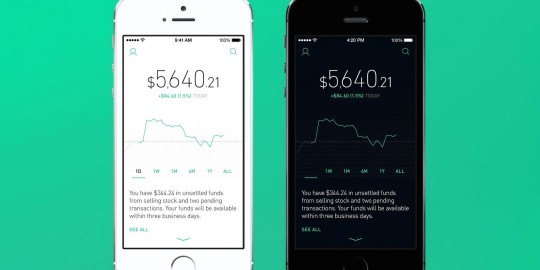
The app very first released in December 2014 and rapidly became a favorite among more youthful people looking to invest. It enables users the flexibility to finish a transaction without paying a processing charge, and ended up being the very first financing app to win an Apple Style Award thanks to its simple-but-stylish design.
In other words: It makes stock trading cheap, user-friendly, and mobile, which is apparently precisely what young investors were looking for. It began as invite-only, and by the time it opened to the general public in March 2015, the waiting list rose above 700,000 according to Fortune. By November of that year, TechCrunch reported that it had facilitated over $1 billion in transactions.
Robinhood App Setup?
The process from downloading, installing and setting up your account shouldn’t take more than four or five minutes. It will take you a few days before you will be able to trade as there are verification processes before you can fund your account and start trading on the Robinhood App.
Download and Installing
Robinhood has created an app for just about every mobile deviceplatform. The majority of users have Android or Apple iPhones and the app can found in Google Play or the Apple App Store. Click the button below to create your account, download the app and get a FREE stock from Robinhood
Creating Account
After you sign up with email, it asks you to create a password (at least 10 characters), and then you have to share some personal information: your legal name, email address, phone number, date of birth, residential address (U.S. law apparently requires that brokerages collect this information), citizenship, and social security number.
It also asks you how much investment experience you have. I selected None. Then a few more questions about your employer and ties to companies or brokerages, review, and submit.
After you are finished creating your Robinhood Account, the next step will be to start the process of funding the account.
Funding RobinhoodAccounts
To start trading with Robinhood, you must first link your bank account. Robinhood uses Plaid to link your bank which means your transactions are secure, transfer of your information is encrypted end-to-end and they also keep your information private, meaning that your credentials will never be made accessible to Robinhood.
Linking Your Bank
In the United States you will find that just about every major bank is listed and can be added by clicking the name of the bank. If your bank isn’t listed, don’t’ worry, there is an option for you as well by clicking “Don’t see your bank? Search instead” at the bottom of the screen. I found my bank by doing a quick search but if yours is not there, click on “Link Manually”, choose Checking or Savings, enter your routing number and account numbers and click the checkmarks to complete.
Funding your Robinhood account can take a few days because a couple of deposits will be made to your bank in 2-5 business days and you will have to verify the deposit amounts in order to start adding funds to your account. After completing the deposit verifications, you will have instant access to deposits and begin stock trading.
Transferring Funds
Once verified you will be able to click the person icon in the options at the bottom of your app and choose “Transfers”. You can fund your Robinhood account by clicking “Transfer to Robinhood” for a one time transfer. You will be taken to a screen that allows you to enter the amount you would like to transfer from your bank to your Robinhood account and click the checkmark.
You can also schedule regular automatic deposits into your brokerage account. Options for automatic deposits include weekly, twice a month, monthly and quarterly.
Robinhood Instant Transfer Limits
Instant Deposit Limit – Your instant access limit is determined based on whether you are a Robinhood Gold member and on your current account value. For example, I subscribe to Robinhood Gold (more details on Robinhood Gold Subscription below) and my current instant deposit limit is $5,000 Total Pending Deposits – The amount of money still on its way from your bank. It takes 3-5 days to transfer money from your bank after you initiate your deposits. Make sure to maintain this balance in your bank account until the transfer is complete.
Instant Deposits – The amount of money available for you to invest instantly while your money is still on its way from the bank. You can always click on the account settings and view your “Buying Power”. Buying Power is the amount of funds you can currently invest into stocks and cryptocurrencies at the current moment.
Beginners Guide to Trading Stocks
There are ton of different investment options on Robinhoodmobile app and we will do our best to keep it from being overwhelming and answer all the important questions that a new investor might have. Tip: Options trading and margins can get you in a lot of trouble if you don’t know what you are doing. Until you become more educated on options trading, it is suggested to not activate that options.
Investment Types
Investors commonly invest in stocks but there are other options for investing. Robinhood also offers the ability to invest in cryptocurrencies and ETFs. Onenote for outlook. Crypto is considered riskier but the most popular coins are available at the time of writing this article and include Bitcoin, Ethereum and Litecoin. If you just aren’t sure about choosing a company’s stock to purchase but you like a certain industry, then consider ETFs. Recently I made an investment into an Electric Vehicle ETF because I do think there is a great future for these stocks but it can be less risky than choosing an individual stock. Robinhood also offers options and margin trading but seeing as this is an article for beginners, more knowledge and experience is needed before considering these types of investments.
Finding and Researching Stocks
Many people choose to invest in companies and industries they’re passionate about and believe will be successful in the long-term. The reason is that when you invest in a company, you own a piece of that company. The value of your investment will depend on how that company is doing. If the company is doing well, your piece of that company becomes worth more.
Step 1 : Find a Company Think about different products and brands you can’t live without:
What products did you use today?
What stores do you visit regularly?
Talk to friends and family:
What industries do they work in?
What do they invest in and why?
Think about causes that are important to you:
Are there companies or industries that support these causes?
Stay up to date on the news:
What companies and industries are doing well?
Step 2: Do Your Research If there’s a specific company you want to invest in, you may want to learn more about:
Robinhood App Stock
Their annual profits and losses
Consumer demand for their product or service
Their executive team
You can do some of this research on Robinhood by scrolling down on a company’s page. If what you learn gives you confidence in a company’s long-term performance, you may consider investing in it.
If there’s a specific industry that you feel has significant growth potential or room for innovation, you may consider investing in a fund. Funds (ETFs) are a great way to invest in an industry or group of companies at once. https://engineerload207.tumblr.com/post/654169397384134656/evernote-tools.
Buying Stocks
Buying stocks on Robinhood is much simpler than you might expect. There is only one thing you should probably know before you start trading stocks. As a beginner you are going to focus on two different types of buys called “Market Order” and “Limit Order”. A market order will set a buy the stock at the current asking price (price a seller is willing to sell at). A limit order will allow you to set a price at which you want to buy the stock. I prefer to use limit orders because I can determine a price I want to pay, but there are occasions when my order doesn’t fill because the stock price doesn’t hit my target.
Steps to buying stocks using the Robinhood App on IOS and Android Devices
Navigate to the stock’s Detail page.
Tap Trade.
Tap Buy.
Tap Order Types in the upper right order.
Select your preferred order type.
Confirm your order.
Swipe up to submit your order.
Selling Stocks
Everyone wants to buy at the bottom and sell at the top but that rarely ever happens. I can’t give you financial advice but I can tell you my strategy for determining when to sell my stocks. I set prices in my mind of where I am willing to sell my investments. My goal is to be able to pull my original investment out and hold the remaining shares for a long term.
An example would be that I buy 100 shares at $10 per share with a total of $1,000 investment. If my goal is to sell at $20.00 then I would sell 50 shares at $20.00 to recoup my investment and keep the remaining 50 shares long term.
Steps to selling stocks using the Robinhood App on IOS and Android Devices
Navigate to the stock’s Detail page.
Tap Trade.
Tap Sell.
Tap Order Types in the upper right order.
Select your preferred order type.
Confirm your order.
Swipe up to submit your order
Dividends
A dividend is the distribution of some of a company’s earnings to a class of its shareholders, as determined by the company’s board of directors. Common shareholders of dividend-paying companies are typically eligible as long as they own the stock before the ex-dividend date. Dividends may be paid out as cash or in the form of additional stock.
Dividend-Paying Companies
Larger, more established companies with more predictable profits are often the best dividend payers. These companies tend to issue regular dividends because they seek to maximize shareholder wealth in ways aside from normal growth. Companies in the following industry sectors are observed to be maintaining a regular record of dividend payments:
Basic materials
Oil and gas
Banks and financial
Healthcare and pharmaceuticals
Utilities
Collecting and Investing Dividends
Robinhood App Download
Robinhood processes your dividends automatically. Cash dividends will be credited as cash to your account by default. If you have Dividend Reinvestment enabled, you can choose to automatically reinvest the cash from dividend payments back into individual stocks or ETFs.
You can view your received and scheduled dividends in your mobile app:
Tap the Account icon in the bottom right corner.
Tap Statements & History.
Tap Show More.
Tap Dividends on the top of the screen.
Robinhood App Windows 10
Get Started Trading on Robinhood App
Now that you have some great knowledge on trading stocks on Robinhood, you shouldn’t feel like a beginner any longer. We would love to hear about the your experience on Robinhood and what your favorite stocks are.
One Last Tip: Continue to research and educate yourself on stock trading and investments!
High-yield savings: In December 2019, Robinhood started offering a cash management account that currently pays 0.30%. The account comes with a debit card and free ATM withdrawals from more than 75,000 ATMs, and offers up to $1.25 million of FDIC insurance thanks to Robinhood’s agreements with several banks. (nerdwallet.com)
Access is rolling out on a state-by-state basis. Currently, about 50% of the U.S. population can use Robinhood Crypto. (investorjunkie.com)
Gold starts $5 per month for up to $1,000 margin. Anything over $1,000 is charged 5% interest. (investorjunkie.com)
They key is to realize that the patterns are higher probabilitytrading setups – they might work 70% of the time. But they will never work 100% of the time. (fitnancials.com)
Robinhood is a free, US-based stock trading app that allows 100% commission-free stock, options, cryptocurrency and ETF trades. This guide will teach you everything you need to know about Robinhood so you can trade effectively. (tradingstrategyguides.com)
0 notes
Text
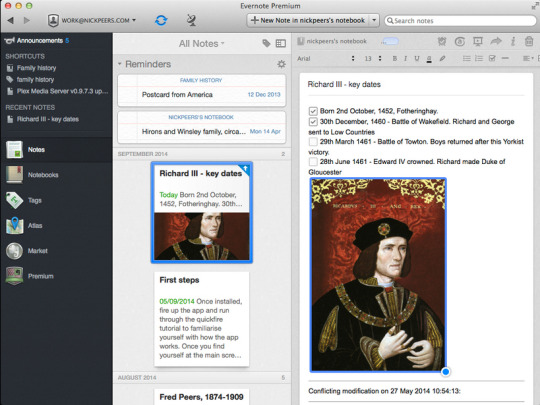
Evernote Tools

Evernote is quickly becoming my #1 go-to tool for productivity.
Evernote Tools Mac
Install Evernote
Evernote Tools
Evernote Tools Windows 10
Evernote Web
One of the things I like about Evernote is that it can be tailored in so many ways, to meet the needs of either the casual user who might want a place to store recipes (so. not. me.) or the power-user in need of a place to wrangle all the responsibilities that make up “life”.
This page will be a compilation of my favorite useful Evernote Tips and Ideas, as I discover them.
Organize class notes into notebooks. Use Evernote as a digital binder where you can save all your.
The best resources for designer. The animation tool that helps designers and developers creating their animations real time in the browser.
Sync notes across your devices. Limited to 2 devices for Evernote Basic. Requires Evernote Plus or Premium to sync across your devices. Offline access to notes on mobile. Requires Evernote Plus or Premium. Unlimited monthly uploads. 60 MB/month (Free) 1 GB/month (Evernote Plus) Write anywhere on the page with free-form canvas.
Evernote Download Link
Mar 12, 2020 But I agreed and began running the tools side by side, Notion for the startup and Evernote for everything else. Caveat Update 2/23/21 — I’m 100% a power user now over a year of daily use.
Evernote Tools Mac
Is Premium Worth It?
Yes. Absolutely. Of course, that is easy for me to say–a coworker friend gave me a premium account as a very generous gift. But even if they hadn’t, I think I would pay out the $49.99. Premium adds several nice features over and above the Free and Plus versions. I get 10GB of uploads each month. The “Business Card Scanner” is brilliant. Being able to annotate pdf files is very cool. But my favorite is being able to search Office Docs and attachments. I’ve not created presentations yet, which is another feature, but I’m sure that I will. Fantastic stuff.
Install Evernote
Think Through Your Notebook Stack
Take some time to think through this. I didn’t, when I first started in Evernote, and I’m still trying to get it manageable. What are the major areas of your life? Some of mine include Family, Work, Spiritual Disciplines, Personal Disciplines, Research, Writing, Church, Finances, Ministry, and Important Docs (I have others, but you get the idea.) Those are some of my titles of my notebook stacks, and then I have individual notebooks that break those major headings down further. For instance, under “Family”, I have a Notebook for each of my kids. Under “Ministry”, I have a notebook for my work with The Messages Project and 127Worldwide. Plan it out ahead of time, but also know that if something isn’t working for you, you can change it.
Think Through Your Order
I have 4 Notebooks that I always want at the top of my list of notebooks because they are the ones I do the most work in. The way I do this is to place a “period (.)” before the title, so they look like this:

.Spiritual Disciplines
.Personal Disciplines
.InBox
.ToDo
Evernote Tools
By doing so, these four notebook stacks are at the top and I never have to hunt for them. Easy to get to and easy to maintain.
Important Docs Notebook
This notebook has saved me so many times. I use it to keep copies of items I may need from time to time–like my home network password (which, with Premium, I can encrypt – although you may be able to do that with the other services, I don’t remember). Here are just a few of the things I have put in there, that I am so glad I have:
Pic of my car license plates
Pic of my car’s VIN #s
Airline Mileage Account #s
Insurance Policy #s
Printer Toner Cartridge #s
Use for Travel
Anyone who knows me at all knows that I get lost so easily. I am pathetic when it comes to directions and I rely very heavily on GPS technology. I used to use a GPS in my car, but now I rely on my phone (check out this amazing Phone Mount I found for my car–works very well).
When I travel, I now forward all of my hotel, rental and airline confirmations to my Travel Notebook in Evernote. When I arrive somewhere and need to find my hotel, or find my way back to the rental car drop-off location, all I have to do is tap the address in my note in Evernote, and it automatically opens up my Maps App on my phone. Boom.
Writing

I wrote my children’s book (to be published soon–now this fall) using Evernote, and it was so much smoother because of it. Still a challenge, but Evernote made it less so. I had one Notebook (Nathan’s Neighbors), and used one note per page. On that note, I wrote my text, jotted down my notes for the illustrator, tracked my word count–everything. At the end, all I had to do was pull those notes into one document and send to the publisher.
I’m sort of kind of writing on a book idea right now, and while it is not a children’s book, the idea is similar. I’m writing it in Word (can’t bring myself to purchase Scrivner yet, but some day), but I use Evernote to jot down my notes and research.
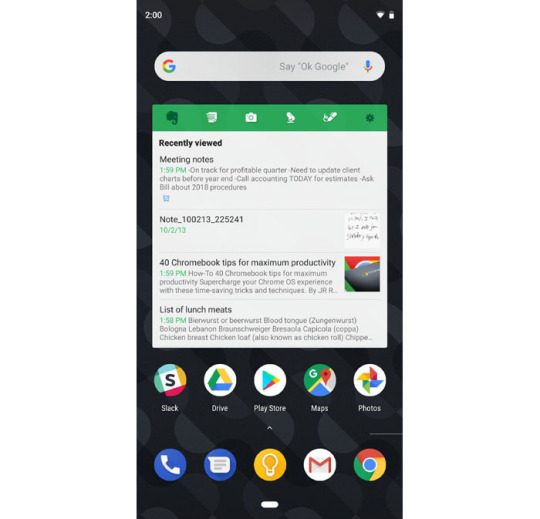
Ability to Email Stuff to Evernote
Evernote Tools Windows 10
It took me awhile to get the hang of this, but I am starting to use this feature more and more. If I have an email that requires an action, I forward it to my Evernote Email Address. If I do nothing in the Subject line, it goes to my Default Notebook (which I have named .InBox). If I want it to go to a specific Notebook, I can add @_______ and there it goes–such as @Travel. I email all my itineraries there, directly from the the confirmation pages, where it asks me “Would you like an email confirmation?”.
Another use I just discovered a couple of days ago–I use Logos Bible Software for Bible Study and Research. I keep a ton of Study related notes and prayers there, but sometimes I want something I have over there to go into Evernote and get tagged for multiple use—writing idea, Bible Study, etc. I just highlight what I want to capture, hit “right-click”, choose the email icon, and email it to my Evernote. I’m sure this would work with a multitude of other apps as well.
Evernote Web
Favorite Features and Tools
Business Card Scanner:
Works So eerily well. I can take a picture of a business card, and it translates all that information into a file for me, with the ability to even edit, get maps to addresses, Call on Skype, add notes and email the contact directly.
Scannable app for iPhone:
When I travel, I have to keep receipts for reimbursements. The scannable app is amazing for this–I simply open it up, and it captures my receipt and saves it as a pdf, which both automatically goes to Evernote and I can also email it to my work email, print it, share it in a text message–lots of different options. If I need to mark something up, I send it to Skitch (another great Evernote app) and mark it up–highlight the totals, draw arrows, make notes. The possibilities are endless.
Clearly Extension:
I’ve just started using this recently. So cool. You can install it as an extension in Chrome or other web browsers. It sits on your toolbar, and when you come to a blog or website that you want a clean interface from which to work from (get rid of ads and other extra stuff–just content), you click the desk lamp icon and all you have left is the content, in a font/style that you choose. You can even custom create the look you want. If it is late at night and I am in my dark room doing some reading on-line, I choose the dark background with white lettering to cut down on the bright glare. If a person is of the older variety and in need of larger font–easily done.
But, here is the best part. I can highlight text in the content, and then click the page to Evernote, and my highlights are still there. And, I can print. Easily.
Web Clipper
Another extension that I use all the time, and my favorite feature. I can clip from anywhere on the web, directly to my Evernote.
List Making
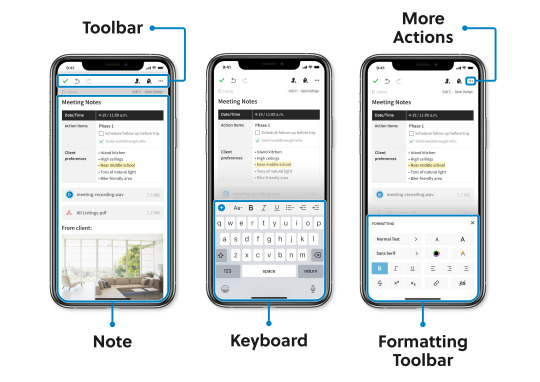
I live and die by lists. Ok, maybe not quite. But almost. I even wrote a blog post about the Redeeming Value of Lists. I keep the vast majority of my lists in Evernote now that I know how to make check-boxes, and I know how to clear the check-boxes – my daily house-cleaning routine, my packing list, my morning Bible-Study Tryst verses. It took me a bit to figure out how to clear the boxes once I had checked them. My co-worker actually figured it out for me. You have to highlight the list, click the checkbox icon in the formatting toolbar, and then click it again. New, unchecked check boxes. I love marking things off as accomplished.
Screen Capture
Works fantastically. Easy to use; easy to annotate.
Audio Recording
I’ve not used this one yet, but I’ve read great things about it. I will try it out some day and add more information here
0 notes
Text
Onenote For Outlook
Symptoms
Onenote For Outlook 2016
Onenote For Outlook Add In
Onenote Addin For Outlook
How To Use Onenote With Outlook
When you work in Microsoft Outlook, Microsoft Office OneNote 2007 buttons or OneNote 2010 buttons may be missing as follows:
Change Language. Privacy & Cookies Legal Trademarks © 2021 Microsoft.com Legal Trademarks © 2021 Microsoft.com. OneNote, digital note taking app - Office Microsoft OneNote has your digital notebook needs covered. With OneNote 2016 we've made our notebook organizer tools even stronger and collaboration easier. Microsoft OneNote. Work with Outlook and OneNote. Integrate OneNote with Outlook to organize tasks, meeting notes.
In Outlook on the web, click the OneNote feed icon on the main Outlook toolbar near the upper right side of your browser. When the task pane opens, you’ll see your most recently edited notes for your current account. In your feed, you’ll also find your OneNote pages and sticky notes, if you have any. In the Windows Settings window that appears, click Apps, and then click Default apps. At the bottom of the Default apps list, click Choose default apps by protocol. On the left side of the list, under the Name heading, scroll down to the first item beginning with “OneNote.”.
When you work in an e-mail item, the Send to OneNote button is missing.
When you work in a calendar item or in a task item, the Notes About This Item or the Linked Meeting Notes button is missing.
Cause
This issue may occur when the OneNote add-in is disabled in Outlook or if the Outlook Integration has not been installed.
Resolution
Onenote For Outlook 2016

To install the Outlook integration. follow these steps. For Windows XP or Windows Server 2003
Onenote For Outlook Add In
Click Start, click Run, type control appwiz.cpl in the Open box, and then click ENTER.
For Windows Vista or Windows 7
Click Start, type programs and features in the Search box, and then press ENTER.
Right-click on the version of Office or OneNote that is installed, and then click Change.
Select Add or Remove Features, and then click Continue.
Expand Microsoft OneNote.
Expand Send to OneNote Add-ins.
If there is an X next to Outlook Integration, click on the X, and then click Run from My Computer.
Click Continue.
To enable the OneNote add-in in Outlook, follow these steps. For Outlook 2010
On the File menu, click Options.
Click Add-ins.
If OneNote Notes about Outlook Items is listed under Inactive Application Add-ins, follow these steps:
In the Manage box, click COM Add-Ins, and then click Go.
In the COM Add-Ins dialog box, click to select the OneNote Notes about Outlook Items check box, and then click OK.
For Outlook 2007
On the Tools menu, click Trust Center.
In the Trust Center dialog box, click Add-ins.
If OneNote Notes about Outlook Items is listed under Inactive Application Add-ins, follow these steps:
In the Manage box, click COM Add-Ins and then click Go.
In the COM Add-Ins dialog box, click to select the OneNote Notes about Outlook Items check box, and then click OK.
Onenote Addin For Outlook
To do this in Outlook 2003, follow these steps:
How To Use Onenote With Outlook
On the Tools menu, click Options.
Click the Other tab.
Click Advanced Options.
Click COM Add-Ins.
Click to select the OneNote Notes about Outlook Items check box.
Click OK to close the COM Add-Ins dialog box.
Click OK to close the Advanced Options dialog box.
Click OK to close the Options dialog box.
0 notes
Text
93 Spo2

Spo2 Meaning
93 Spo2 Means
Normal Spo2 For Elderly
93% is the low side of normal. If you have any respiratory symptoms right now, that could cause lower oxygen saturations. If you smoke or have any type of lung disease, then 93% could be normal for you.
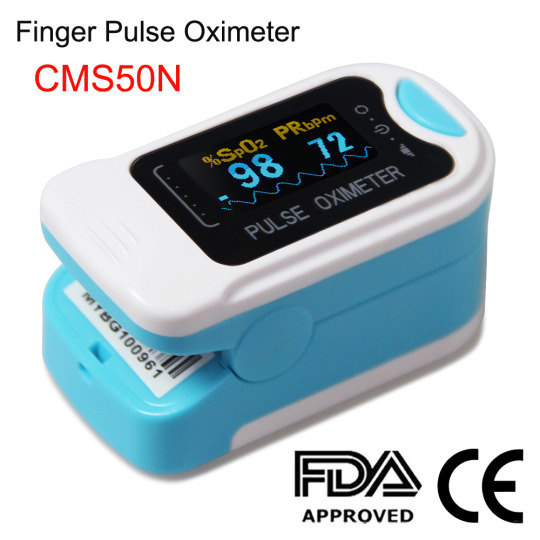
Pulse oximetry is the non-invasive measurement of a person’s oxygen saturation. The most common forms of SpO2 testing is with a sensor attached to the finger. It is important to understand that perfusion, skin pigmentation and nail polish and acrylic nails all will affect the acuity of pulse oximetry.
To make things worse, he was sleeping less than 7 hours a night. Sure enough, he found that his morning SpO2 was low—just 93%. This is a great case of an athlete who may feel well enough to go train, but his low sleep hours and low SpO2 corroborate his sense of “not feeling right.”.
Doctors will often monitor your oxygen levels. These can be monitored by using a pulse oximeter. You can monitor your own oxygen levels at home by purchasing your own pulse oximeter. Still, what is the best way of interpreting your oxygen levels? What do they mean? Here’s what to know.
Lower SpO2 values were associated with a faster rate of SpO2 decline, with an inflection point occurring at 93%. The rate of desaturation to hypoxemia with intubation attempts initiated with SpO2 93% was much higher than with SpO2 above 93% (100% vs. Hypoxemia is a below-normal level of oxygen in your blood, specifically in the arteries. Hypoxemia is a sign of a problem related to breathing or circulation, and may result in various symptoms, such as shortness of breath.
What is partial pressure of arterial oxygen (PaO2)?
This is the most accurate oxygen level that we monitor. It’s how much oxygen is inside your arterial blood. A perfect reading would be 104. However, anything between 80-100 is considered acceptable. A PaO2 of 60-79 is considered mild hypoxemia. A PaO2 of 40-79 is considered moderate hypoxemia, and a PaO2 of less than 40 is considered severe hypoxemia.

Hypoxemia is a fancy term for a low arterial blood oxygen level. Most experts accept the PaO2 value of 60 as the baseline value we want to maintain. If COPD is causing a PaO2 of less than 60, supplemental oxygen is indicated. Usually, with COPD, all that is needed is a low flow of 2-3 LPM. This is usually all that is needed to maintain a PaO2 of 60 or better. If you want, you can read my article, 'How To Qualify For Home Oxygen Therapy?'

There is only one way to learn what your PaO2 is. It is to draw blood from one of your arteries. The artery we usually draw it from is the radial artery. This is an artery that is near the surface on the thumb side of the back of your wrist. This test is called an Arterial Blood Gas (ABG). This is an invasive blood draw.
What is oxygen saturation (SpO2)?
SpO2 is another oxygen level. It’s the percentage of oxygen molecules you inhale that make it to your arterial blood. A perfectly normal value is 98%. However, anything greater than 90% is considered acceptable. For some people with COPD, doctors consider anything between 88-92% to be acceptable.
This value is determined using a pulse oximeter. It’s a small, hand-held device that you slip over a finger, toe, or earlobe. You can purchase these in stores. The ones you buy for your home are usually ones that slip over your finger.
These devices can be purchased for less than $30. You can get them from online stores like Amazon. I have seen them at stores like Aldi. The trick here is that you will want to make sure the one you buy is FDA approved. This will ensure that you are getting an accurate reading.
Spo2 Meaning
How are pulse oximeters helpful?
Pulse oximeters are helpful because they offer a simple, noninvasive way of determining your oxygen level. But your SpO2 level can also help determine your PaO2. This is by means of the 4-5-6-7-8-9 Rule.
It goes like this.
40 PaO2 equals an SpO2 of 70%
50 PaO2 equals an SpO2 of 80%
60 PaO2 equals an Spo2 of 90%
Basically, you take your SpO2 value minus 30. This gives an 'estimate' of where your PaO2 stands. By doing my own experiments, I have determined this 'estimated' PaO2 to be pretty accurate.
So, if your pulse oximeter gives you a reading of 90%, this means that your estimated PaO2 is 60. That’s right about where we want it. This is why the hospital I work for has a policy of maintaining a SpO2 of 90%. There are some exceptions that we can discuss in a future post if you want.
A helpful tool
Pulse oximeters are nice. They allow you and doctors to monitor your oxygen level at pretty much any time and place. It’s simple, painless, and accurate as long as you have a pulse oximeter that is FDA approved. You should talk to your doctor about determining what SpO2 level is best for you. For most people, it’s 90% or better. However, with some people with COPD, 88% is acceptable too. To learn what oxygen levels are best for you, talk to your COPD doctor.
More on this topic

Article
93 Spo2 Means
Normal Spo2 For Elderly
4 Amazing Benefits of Home Oxygen Therapy
Article
The Do's and Don'ts of Using Supplemental Oxygen at Home
0 notes
Text
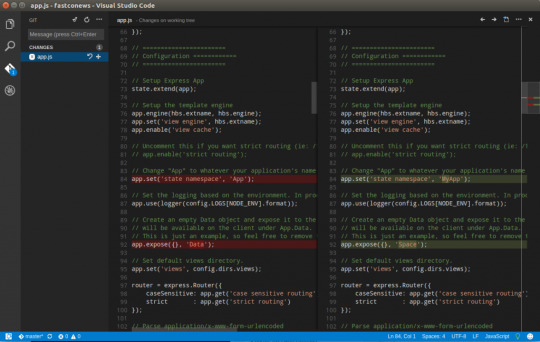
Git Visual Studio Code

GitDuck is a video chat tool built for developers that has direct integration to the IDE so you can talk, share your code in real-time and easily collaborate with your team. It enables remote developers to work as if they were side by side. With GitDuck you can code with people using different IDEs, like VSCode or WebStorm, IntelliJ or PyCharm.
Visual Studio Connect To Git
Git For Visual Studio Code
Chapters ▾
Visual Studio Code has git support built in. You will need to have git version 2.0.0 (or newer) installed. The main features are: See the diff of the file you are editing in the gutter.
The easiest way to connect to your GitHub repositories in Visual Studio. Download GitHub Extension for Visual Studio anyway. Download Download GitHub Extension for Visual Studio. By downloading the extension you agree to the End-User License Agreement. Requires Windows and Visual Studio.
1. Getting Started
1.1 About Version Control
1.2 A Short History of Git
1.3 What is Git?
1.4 The Command Line
1.5 Installing Git
1.6 First-Time Git Setup
1.7 Getting Help
1.8 Summary
2. Git Basics
2.1 Getting a Git Repository
2.2 Recording Changes to the Repository
2.3 Viewing the Commit History
2.4 Undoing Things
2.5 Working with Remotes
2.6 Tagging
2.7 Git Aliases
2.8 Summary
3. Git Branching
3.1 Branches in a Nutshell
3.2 Basic Branching and Merging
3.3 Branch Management
3.4 Branching Workflows
3.5 Remote Branches
3.6 Rebasing
3.7 Summary
4. Git on the Server
4.1 The Protocols
4.2 Getting Git on a Server
4.3 Generating Your SSH Public Key
4.4 Setting Up the Server
4.5 Git Daemon
4.6 Smart HTTP
4.7 GitWeb
4.8 GitLab
4.9 Third Party Hosted Options
4.10 Summary
5. Distributed Git
5.1 Distributed Workflows
5.2 Contributing to a Project
5.3 Maintaining a Project
5.4 Summary
6. GitHub
6.1 Account Setup and Configuration
6.2 Contributing to a Project
6.3 Maintaining a Project
6.4 Managing an organization
6.5 Scripting GitHub
6.6 Summary
7. Git Tools
7.1 Revision Selection
7.2 Interactive Staging
7.3 Stashing and Cleaning
7.4 Signing Your Work
7.5 Searching
7.6 Rewriting History
7.7 Reset Demystified
7.8 Advanced Merging
7.9 Rerere
7.10 Debugging with Git
7.11 Submodules
7.12 Bundling
7.13 Replace
7.14 Credential Storage
7.15 Summary
8. Customizing Git
8.1 Git Configuration
8.2 Git Attributes
8.3 Git Hooks
8.4 An Example Git-Enforced Policy
8.5 Summary
9. Git and Other Systems
9.1 Git as a Client
9.2 Migrating to Git
9.3 Summary
10. Git Internals
10.1 Plumbing and Porcelain
10.2 Git Objects
10.3 Git References
10.4 Packfiles
10.5 The Refspec
10.6 Transfer Protocols
10.7 Maintenance and Data Recovery
10.8 Environment Variables
10.9 Summary
A1. Appendix A: Git in Other Environments
A1.1 Graphical Interfaces
A1.2 Git in Visual Studio
A1.3 Git in Visual Studio Code
A1.4 Git in IntelliJ / PyCharm / WebStorm / PhpStorm / RubyMine
A1.5 Git in Sublime Text
A1.6 Git in Bash
A1.7 Git in Zsh
A1.8 Git in PowerShell
A1.9 Summary
A2. Appendix B: Embedding Git in your Applications
A2.1 Command-line Git
A2.2 Libgit2
A2.3 JGit
A2.4 go-git
A2.5 Dulwich
A3. Appendix C: Git Commands
A3.1 Setup and Config
A3.2 Getting and Creating Projects
A3.3 Basic Snapshotting
A3.4 Branching and Merging
A3.5 Sharing and Updating Projects
A3.6 Inspection and Comparison
A3.7 Debugging
A3.8 Patching
A3.9 Email
A3.10 External Systems
A3.11 Administration
A3.12 Plumbing Commands
2nd Edition
Git in Visual Studio Code
Visual Studio Code has git support built in.You will need to have git version 2.0.0 (or newer) installed.
See the diff of the file you are editing in the gutter.
The Git Status Bar (lower left) shows the current branch, dirty indicators, incoming and outgoing commits.
You can do the most common git operations from within the editor:
Initialize a repository.
Clone a repository.
Create branches and tags.
Stage and commit changes.
Push/pull/sync with a remote branch.
Resolve merge conflicts.
View diffs.
With an extension, you can also handle GitHub Pull Requests:https://marketplace.visualstudio.com/items?itemName=GitHub.vscode-pull-request-github.
The official documentation can be found here: https://code.visualstudio.com/Docs/editor/versioncontrol.
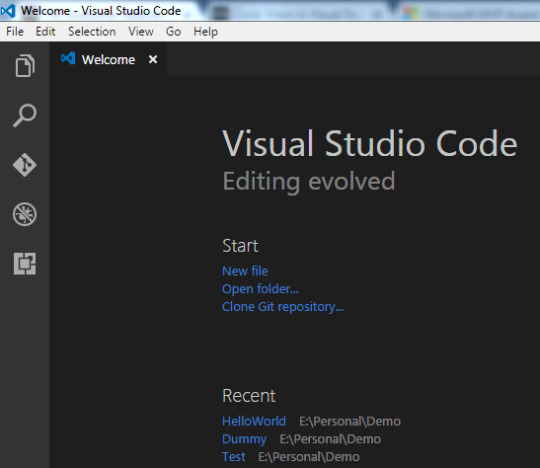
Those new to Visual Studio (VS) Code might just see a code editor. The true power of VS Code lies in it’s extensions, integrated terminal and other features. In this hands-on tutorial, you’re going to learn how to use Visual Studio Code by working with a Git repo.
Related:What You Need to Know about Visual Studio Code: A Tutorial
Using built-in VS Code tooling and a few extensions, you’re going to write code and commit that code to source control using a single interface.
This blog post is a snippet of a chapter from the eBook From Admin to DevOps: The BS Way to DevOps in Azure. If you like this chapter and want to learn about doing the DevOps in Azure, check it out!
Tutorial Overview
In this tutorial, you’re going to learn how to use various VS Code features on Windows by building a project using Visual Studio Code and Git. You’ve been tasked with figuring out how to build an Azure VM with Terraform as a small proof of concept (POC) project. You have VS Code and have heard of its capability as a full IDE and want to put it to the test.
You’re going to:
Create a VS Code workspace to share with your team
Install the Terraform extension
Modify the Terraform configuration file to fit your naming convention and Azure subscription
Create a snippet for a common task you’ve found yourself typing over and over
Commit the Terraform configuration file to a Git repo
This tutorial will not be meant to show how to use Terraform to deploy Azure VMs. We already have an article on Terraform and Azure VMs for that. This tutorial will focus on learning Visual Studio Code.
Does this sound like an interesting project? If so, read on to get started!
Prerequisites
To follow along with this Visual Studio Code Git tutorial, please be sure you have the following:
VS Code – All examples will be using VS Code 1.44 although earlier versions will likely work as well.
Terraform – All examples will be using Terraform for Windows v0.12.24.
Git for Windows installed – All examples will be using v2.26. If you’d like VS Code to be Git’s default editor, be sure to select it upon installation.
Clone the Git Repo
Since this tutorial is going to be focusing on working with code in a GitHub repo, your first task is cloning that GitHub repo to your local computer.
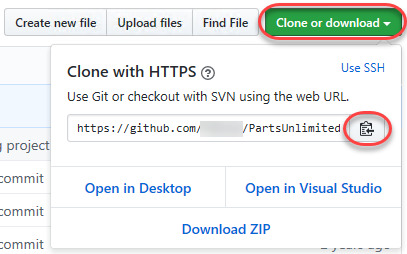
For this project, you’ll be working from a GitHub repo called VSCodeDemo. Since VS Code has native Git integration, you can clone a Git repo with no additional configuration. To do so:
Open the command palette with Ctrl-Shift-P, type git where you will notice various options, as shown below.
2. Choose Git: Clone which VS Code will then prompt you for the repo’s URL. Here, provide the URL https://github.com/NoBSDevOps/VSCodeDemo.gitand hit Enter.
3. Choose a folder to place the cloned project files. This project will place the repo folder in the root of C:. Once you select the repository location, VS Code will invoke git.exe in the background and clone the repo to your computer.
4. When it’s finished, VS Code will prompt if you would like to open the cloned repository immediately as shown below, click Open to do so.
You now have an open folder in VS Code for the Git repo. You now need to “save” this open folder and all settings you’ll be performing in a workspace.
Creating a Workspace
Now that you have a folder opened containing a Git repo, save a workspace by going up to the File menu and clicking on Save Workspace As….
Save the workspace as project in the project folder. VS Code will then create a file called project.code-workspace in the Git repo folder. This workspace now knows what folder you had opened. Now when the workspace is opened in the future, it will automatically open the C:VSCodeDemo folder.
Now, instead of a folder name, you will see the name of the workspace.
Setting up Extensions
Extensions are one of the most useful features of VS Code. Extensions allows you to bolt on functionality to help you manage many different projects. In this tutorial, you’re going to be working with Terraform.
Open up one of the Terraform configuration files in the workspace along the left sidebar. Notice how an editor tab opens up and shows the text but that’s about it. There’s no usual syntax highlighting or any other features. VS Code thinks this is a plain-text file and displays it accordingly. Let’s remedy that.
For VS Code to “understand” a Terraform configuration file, you need an extension. Extensions are a huge part of VS Code that opens up a world of new functionality. In this case, you need the Terraform extension to assist in building Terraform configuration files and deploying infrastructure with Terraform.
To install the Terraform extension, click on the extensions button on the Activity Bar and search for terraform. You’ll see multiple extensions show up but for this project, click on Install for the top result created by Mikael Olenfalk. VS Code will then install the extension.
Once installed, navigate back to the workspace and click on one of the TF files in the workspace. You’ll immediately see one of the most obvious differences when using an extension, syntax coloring.
Now you can see in the following screenshot that VS Code “knows” what a comment is (by making it green), what a string is (by making it red) and so on. It’s now much easier to read a Terraform configuration file.
There’s a lot more functionality included with Mikael’s Terrafom extension. Be sure to investigate all of the potential benefits you can get from this extension if using Terraform.
Code Editing
Chances are when you find a script or configuration file on the Internet, it’s not going to be exactly how you need it. You’re going to need to modify it in some way.
In this tutorial’s example, you’d like to change the main block label in the infrastructure-before.tf. Terraform configuration file to perhaps project. To do that, you’ll need to find and replace some text. In VS Code, there are multiple ways to do that.
One of the most common ways to find a string and replace it with another is the good ol’ find and replace functionality.
Hit Ctrl-F and you’ll see a dialog similar to the following screenshot. Here you can type in the string you’d like to find and if you click on the down arrow, it will expand and provide a spot to input a string to replace it with. In the screenshot below, you can see options like Aa and Ab| for case-sensitive searching and also regular expressions.
You can also perform a “find and replace” using Ctrl-D. Simply select the text you’d like to find and begin hitting Ctrl-D. You’ll find that VS Code will begin to highlight each instance of that string with a blinking cursor.
When you’ve selected all items, start typing and VS Code changes all instances at once just as if you had selected each one individually.
Saving Time with Snippets
Let’s say you’re really getting into Terraform and Azure and are tired of typing out the Terraform configuration file block to create a new Azure resource group in the following code snippet.
To save time creating these blocks, create a VS Code snippet.
Related:VS Code Snippets: Speed Up Coding with Shortcuts
To create a VS Code snippet:
Copy the azurerm_resource_group block from the Infrastructure-before.tf Terraform configuration file.
2. Open the command palette with Ctrl-Shift-P.
3. Type “snippets” to filter the list of options.
4. Select Preferences: Configure User Snippets. This brings up a list of all the snippet files typically separated by language.
5. Type “terraform” to filter by the Terraform snippets.
6. Select terraform (Terraform) to open the Terraform snippets file (terraform.json).
Visual Studio Connect To Git
With the Terraform snippets file open, remove all of the comments and copy/paste the following JSON element inside.
Note the use of t and the backslashes. You can’t directly place tab characters inside of a snippet. To represent a tab character, you must use t. Also, you must escape characters like double quotes, dollar signs, curly braces, and backslashes with a backslash.
8. Save the terraform.json file.
Git For Visual Studio Code
9. Go back to the Terraform configuration file and type “rg”. Notice now you see an option to expand a snippet.
10. Select the rg snippet as shown above. Notice that it now expands to the snippet you just created with three items highlighted.
VS Code highlighted each of the words to act as placeholders due to the variables defined in the terraform.json snippets file (${1:block label}).
At this point, you can hit Tab and simply type in the values you need without worrying about how to create the block itself.
For a full breakdown on snippet syntax, be sure to check out the Snippets in Visual Studio Code documentation.
Commit Code to Git
At this point, you’ve cloned a public GitHub repo that contains a couple of Terraform configuration files. You’ve edited some files and now you’re ready to get those changes back up to the GitHub repo.
To get changes back up to the GitHub repo, you must first use Visual Studio Code and Git to commit changes to your local cloned Git repo. When you cloned the GitHub repo earlier, you downloaded not only the configuration files but also a Git repo.
If you’ve been following along, you should now have the cloned Git repo open with a couple of pending changes, two to be exact. How do you know that? By noticing the number in the Activity Bar, as shown below.
When you have a Git repo opened in Visual Studio Code, you’ll get a glimpse on the number of files that you can stage and commit into a local Git repo in the Activity Bar.
Click on the Source Control item on the left and you’ll see two items; the infrastructure-before.tf Terraform configuration file and the workspace you saved earlier (project.code-workspace). The configuration file will have a red M to the right indicating it’s been modified. The workspace file will have a green U to the right of it because it’s untracked meaning it’s currently not under source control.
To ensure both of these files get back to the GitHub repo, first create a helpful commit message indicating why you’re committing these files. The message can be any descriptive summary. Once you’ve written a commit message, stage the changes. Staging changes in Visual Studio Code in Git adds the file contents to the staging area preparing for a commit to the repo.
While on the Source Control pane, click on the + icon beside each file to stage them as shown below.
Once staged, click on the check mark to commit all of the staged changed, as shown below.
You will probably receive an error message indicating you need to configure a user.name and user.email in Git.
No problem. You simply need to provide Git the information it needs. To do that, go into your VS Code integrated terminal and run the following two commands changing my email address and name for yours.
Now try to commit the files. You should now see that the files commit to the repo.
You can stage all changed files without manually clicking on the + beside each file by committing them all at once. VS Code will automatically stage all of the files for you.
If you were working on a team with a shared repo, the next step would be to push these changes back to the GitHub repo or opening a pull request.
Conclusion
VS Code is a feature-rich IDE. It can not only help you write and understand code better, it can also build and make changes to infrastructure, invoke utilities and more. VS Code provides you one place to manage all of your development efforts.
Although this tutorial only covered a portion of what VS Code can do, this IDE is capable of so much more. If you’d like to learn about what VS Code can do, check out What You Need to Know about Visual Studio Code: A Tutorial.
0 notes
Text
Evernote Premium Pc

Learn the Evernote for Windows app. Navigation menu. The navigation menu is the panel located on the left side of the app. Account: Click your name to view the account dropdown. Quickly switch between multiple accounts or sign out of your current account. Search: Perform a search or view recent and suggested searches.
Evernote Premium Promotion
Descargar Evernote Premium Para Pc
Evernote; Available on Windows, Mac, iOS, Android and web: Sync notes across your devices: Limited to 2 devices for Evernote Basic. Requires Evernote Plus or Premium to sync across your devices. Offline access to notes on mobile: Requires Evernote Plus or Premium: Unlimited monthly uploads: 60 MB/month (Free) 1 GB/month (Evernote Plus).
Continue with Apple. Remember me for 30 days.
The first in a new series! Learn all you need to know about Evernote notebooks. Enrol in my FREE Beginners Guide To Building Your Own Productivity System rig.
Download Now ( 100% Working Link )
Evernote Premium is famed application. This software allow you to easily capture information in any environment using whatever device or platform you find most convenient, and makes this information accessible and searchable at any time, from anywhere. It is an application/service which lets you capture, store and sync anything on multiple devices. EverNote Premium works on any OS, whether PC, Mac or phone and can capture anything you throw at it, from notes, to images, media or passwords. All your information is stored in the program and you can use tags and notes to categorize it. Moreover, we can access the internet from almost anywhere and any device the difficulty is getting access to your information all at once. This software can be store all online or you can keep everything synced up on all your devices.
Capture Everything:
Tasks and to-dos
Notes and research
Web pages
Whiteboards
Business cards
Scribbles
Snapshots
Wine labels
Evernote Premium Key Features:
It save the best of the web directly to your Evernote account.Templates: Make better notes, faster
Latest version Spaces in Evernote Business brings people, projects and ideas together so your team can get to its best work.
Integrations: Connect your favourite apps like Google Drive, Outlook, Salesforce and Slack.
This app on all your devices so your notes are always handy.
It all Evernote plans allow you to attach PDFs, office docs, and other files to your notes. Evernote Business, you can go even further.
Besides, never lose an idea including the ones you write down by hand.
It organize your notes by topic, project, date, or any way you want.
Add Notes As A Shortcut
What’s New in Evernote Premium?

FindInEvernote: Ctrl+Shift+F
CaptureScreen: Ctrl+Alt+S
CopySelection: Ctrl+Shift+Alt+A
Printing a note with a PDF in it no longer prints a blank page first. Take that, “Big Paper”!
We embiggened the “Save as template” icon, so it’s easier to see on HiDPI (that’s really high resolution) screens. Yay, buzzwords!
Files you drag into Evernote will now stay where you put them. Seems obvious, right? We thought so too.
Evernote Premium remains one of the best note-taking and syncing services, which is the reason it remains PCMag’s Editors’ Choice despite these complaints (and despite a half-star drop in its rating). You can bend it to your will and use it for practically anything, from recording and sharing meetings, to searching for text inside PDFs, to keeping a daily diary. But you have to pay for the highest tier of service to get all those features. If you have EverNote installed on your devices, all it takes is having an internet connection and pressing the ‘Synchronize’ button from the menu, to ensure that you have the same information stored on all devices. EverNote Premium is a very promising application that captures, stores and syncs any sort of information on all your devices.
How to Crack or Activate Evernote Premium??
First Download from the given link or button.
Turn off the Virus guard.
Then extract the winrar file and open the folder.
Run the setup and close it from everywhere.
Open the “Crack” or “Patch” folder, copy and paste into installation folder and run.
Or use the serial key to activate the Program.
All done enjoy the Evernote Premium.
Evernote Premium 6.24.1.8906 Crack Download Now
Evernote Premium Promotion
Evernote Crack 10.11.5 Build 2530 & New License Key Free Download 2021
Evernote Crack is a allows you to easily capture information in any environment using whatever device or platform you find most convenient, and makes this information accessible and searchable at any time, from anywhere. The EverNote is an application/service which lets you capture, store and sync anything on multiple devices. Evernote Premium Crack works on any OS, whether PC, Mac or phone, and can capture anything you throw at it, from notes to images, media or passwords. All your information is stored in the program and you can use tags and notes to categorize it. Also Download Advanced Installer Crack
Evernote 10.11.5 Build 2530 Crack With Key Latest Version:
Descargar Evernote Premium Para Pc
Now that we can access the Internet from almost anywhere and from any device, the challenge is to access your information all at once. It can be stored online or you can keep everything in sync across all your devices. Evernote premium is where you do the work to get there. Evernote Key works on any device and writes notes of all types, from short lists to long searches. Collect web articles, handwritten notes, and photos to keep all the details in one place. Automatically edit, share and collaborate on your notes between your phone, tablet, and computer.
Stay organized, a new version of this software saves your ideas and improves productivity. The latest version of Evernote software lets you take notes, take photos, easily create task lists, record voice reminders, and make these notes fully searchable, whether you’re at home, at work, or moving.
Evernote 10.11.5 Build 2530 Crack full. free download!
Evernote Crack Software is popular software in the overworld. It is useful software. So, many people use it. This software simple & user-friendly interface. Its software works with all windows operating systems. Evernote is easy to use, a free app that helps you remember everything across all of the devices you use. Stay organized, a new version of this software saves your ideas and improves productivity. The latest version of Evernote key software lets you take notes, capture photos, easily create to-do lists, record voice reminders, and makes these notes completely searchable, whether you are at home, at work, or on the go.
Evernote has for some time been an innovator right now, the organization has taken a considerable amount of analysis lately for including over-the-top highlights without cleaning center ones, and most as of late, changing its evaluation and levels of administration. The new plans gut the offer of free help and climb the cost on power clients. Evernote additionally lets you make scratchpad locally or synchronize them, intended for sorting out notes by an objective. Moreover, you can utilize a wide-spread hunt work and grow the program’s usefulness by investigating bolstered applications by means of “Trunk”.
Capture Everything:
Tasks and to-dos.
Notes and research.
Web pages.
Whiteboards.
Business cards.
Scribbles.
Snapshots.
Wine labels.
Key Features:
Web clipper: Save the best of the web directly to your account.Templates: Make better notes, faster
Centralize information with Spaces: Spaces in Business brings people, projects, and ideas together so your team can get to its best work.
Integrations: Connect your favorite apps like Google Drive, Outlook, Salesforce, and Slack.
Multi-Device Note Sync: Get Evernote Premium on all your devices so your notes are always handy.
PDF and Document Search: All Evernote plans allow you to attach PDFs, office docs, and other files to your notes. With Premium or Evernote Business Crack, you can go even further.
Search Handwriting: Never lose an idea including the ones you write down by hand.
Notebooks and Tags: Organize your notes by topic, project, date, or any way you want.
Add Notes As A Shortcut
Evernote Premium Serial Key is valuable for dealing with a wide range of various individual and expert online parts of your life. If utilizing a PC at the workplace time and home time you are getting to your documents from each machine through Evernote Crack Full Version is a lot simpler than messaging it. On the off chance that you spare it to your USB unfailingly, you will refresh them. Evernote Free Download naturally adjusts everything up with your gadget at whatever point you transfer something new or roll out any improvements in your notes or documents. You are not constrained to take a shot at one machine for putting away everything. Also, because you never stress over sparing something on your PC and afterward overlooking where you spared it. It consequently gathers the entirety of your information and documents notes and different things.
What’s New?
FindInEvernote: Ctrl+Shift+F
CaptureScreen: Ctrl+Alt+S
CopySelection: Ctrl+Shift+Alt+A
Printing a note with a PDF in it no longer prints a blank page first. Take that, “Big Paper”!
We embiggened the “Save as template” icon, so it’s easier to see on HiDPI (that’s high resolution) screens. Yay, buzzwords!
Files you drag into Evernote will now stay where you put them. It seems obvious, right? We thought so too.
How To Install?
Click on Download Button.
Softwares Auto Download.
Open Download File.
Click on Install.
Follow The Instructions.
Thanks For Downloading.
Conclusion:
Evernote Premium Serial Key is beneficial for managing all sorts of different personal and professional online aspects of your life. If using a computer at the office time and home time you are accessing your files from each machine through Evernote Crack Full Version is much easier than emailing it. If you save it to your USB every time, you will update them. Evernote Free Download automatically syncs everything up with your device whenever you upload something new or make any changes in your notes or files. You are not limited to work on one machine for storing everything. And because you never worry about saving something on your computer and then forgetting where you saved it. It automatically collects all of your data and files notes and other things.
Evernote Crack 10.11.5 Build 2530 & New License Key Free Download from links given below…
0 notes
Text
The Chronology Of Water

Lidia Yuknavitch Books
The Chronology Of Water
The Chronology Of Water Movie
The Chronology Of Water Review
The study pushes back the clock on the origin of Earth's water by hundreds of millions of years, to around 4.6 billion years ago, when all the worlds of the inner solar system were still forming.
The water cycle (known scientifically as the hydrologic cycle) refers to the continuous exchange of water within the hydrosphere, between the atmosphere, soil water, surface water, groundwater, and plants.
Water is a contextual symbol in literature, however, meaning that it can symbolize many things depending on how it is used in a novel or a story. Often, the type of water in a story or novel is just as important as the fact that water is used as a symbol.
History of drinking water disinfection The link between water quality and health has been known since the early ages. Clear water was considered clean water. Swamp areas were associated with fever. Disinfection has been applied for centuries.
This is not your mother’s memoir. Lifelong swimmer and Olympic hopeful Lidia Yuknavitch accepts a college swimming scholarship in Texas in order to escape an abusive father and an alcoholic, suicidal mother. After losing her scholarship to drugs and alcohol, Lidia moves to Eugene and enrolls in the University of Oregon, where she is accepted by Ken Kesey to become one of thirteen graduate students who collaboratively write the novel Caverns with him. Drugs and alcohol continue to flow along with bisexual promiscuity and the discovery of S&M helps ease Lidia’s demons. Ultimately Lidia’s career as a writer and teacher combined with the love of her husband and son replace the earlier chaos that was her life.
Awards
2012 Finalist

Pen Center Creative Nonfiction Award
2012 Reader’s Choice Award
Oregon Book Awards
2012 PNBA Award
Pacific Northwest Booksellers Association
2011 Best Books of the Year
The Oregonian
Top 10 Portland Books from 2011
Willamette Week
Best Portland Book Releases of 2011
The Portland Mercury
Best Books of 2011
The Nervous Breakdown
Best books of 2011
LitReactor
The 10 Best Memoirs of 2011

Flavorwire

J.M. Owens’ 2011 Year in Review
The InDigest Awards
Canadian booksellers pick the top non-fiction books of 2012
Quill & Quire: Canada’s Magazine of Book News and Reviews
Sarah Hepola’s Five Memoirists on Sex
Vela: Written By Women
Lidia Yuknavitch Books
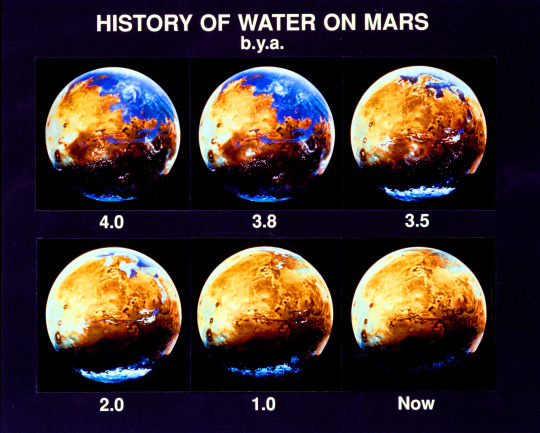
The Chronology Of Water
WHAT TO READ WHEN YOU WANT TO RECLAIM YOUR TIME
The Rumpus
The Chronology Of Water Movie
Kristen Stewart’s first feature film is Lidia Yuknavitch’s memoir, The Chronology of Water. Kristen Stewart said, “I’m making the movie this summer…I’m going to write the best fucking female role.”

Close-up with Kristen Stewart, Feature Films Jury member
Festival de CannesWhat will your first feature film be about?
The Chronology Of Water Review
Kristen StewartI’m adapting a memoir. It’s called The Chronology of Water. Lidia Yuknavitch is from Portland. I love her...Forward
0 notes
Text
Adobe Audition Discount

Adobe Audition Vs
Adobe Audition Pro

Description
Adobe® Audition® CS6 software offers high-performance, intuitive tools for audio editing, mixing, restoration, and effects. Powerful new features such as real-time clip stretching, automatic speech alignment, and control surface support help you deliver projects faster than ever.
What you’ll learn
Discount Adobe Audition CC 2015 minimal downtime. Get up and running in Discount Adobe Audition CC 2015 a matter of days. Focus on what matters most; running your business. Call us to learn about plans, Discount Adobe Audition CC 2015 pricing and promotions. We have solutions for hybrid, on-premise, and full cloud migrations. Adobe Creative Suite (CS) is a discontinued software suite of graphic design, video editing, and web development applications developed by Adobe Systems.Each edition consisted of several Adobe applications, such as Photoshop, Acrobat, Premiere Pro or After Effects, InDesign, and Illustrator, which became industry standard applications for many graphic design positions.
Details: *
SO, YOU’RE LOOKING FOR A COURSE THAT WILL TEACH YOU ADOBE AUDITION CC 2020 QUICKLY & IN A FUN MANNER?
I’ve got just the course for you!
Welcome, my name is Josh Werner with Learn Tech Plus and I’ve put this course together to help people just like you quickly master Adobe Audition…Whether you’re a beginner or experienced with existing Adobe Applications!
If your goal is to become a user of Adobe Audition, then this course is perfect for you. It will get you started on the right path and give you the knowledge and skills you need to Adobe Audition…
Learning Adobe Audition is Not only for Experienced users, but also everyone else. Because when you have master Adobe Audition, you get around your profile and easily install applications to your computer versus having to get someone else to do it for you which can cost both time and money!
In short, a good understanding of Adobe Audition is tremendously beneficial.
Now, in this course, we’ll go far beyond that. By the end of it, you’ll have gained complete proficiency in Adobe Audition even if you’re currently a complete beginner!
LEARN ADOBE PHOTOSHOP BY DOING!
We will go step by step and cover Adobe Audition. The goal here is to help you
A) Setup an Account with a 7 Day Free Trial which after is Paid
B) Be able to Download and Install Adobe Audition
Here’s what we’ll cover in the course:
Adobe Audition Vs
1. We’ll start from the very beginning and explain what Adobe Audition is, why & how it’s used.
2. Install some of the software we’ll be using all throughout the course.
Adobe Audition Pro
3. Introduce you to Adobe Audition
I’D LOVE TO SEE YOU INSIDE THE COURSE AND HELP YOU LEARN ADOBE AUDITION CC 2020!
Who this course is for:
Beginner to Advanced Students wanting to Learn Adobe Audition CC 2020
Course content
Introduction
Creative Cloud
Preferences
Main Menu
Tools
Conclusion
Created by : Learn Tech Plus
1 note
·
View note