
enskrossing
Crossin' my way downtown
Enski's Animal Crossing blog. Mostly for resources.
Credits: background
| pixels
214 posts
Don't wanna be here? Send us removal request.
Last Seen Blogs
glitchdollmemoria
i dont blog

rebeldegifs
rebelde gifs

andinotech
Andino Tech

hippieintroverted
The Introverted Hippie

randomnutta
Randomnutta
Text
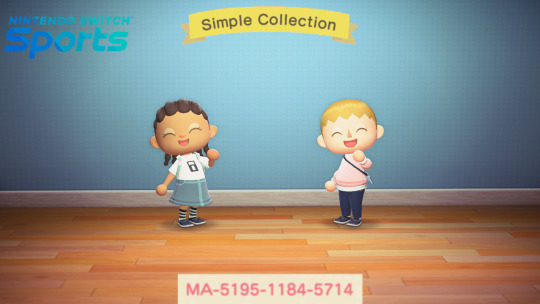
Here's the simple collection I recreated from Nintendo Switch Sports.
21 notes
·
View notes


Text
i took my first mailbox shot earlier! there aren't a ton of great vantage points on vagary for them but i think this one came out really nice
944 notes
·
View notes


Text

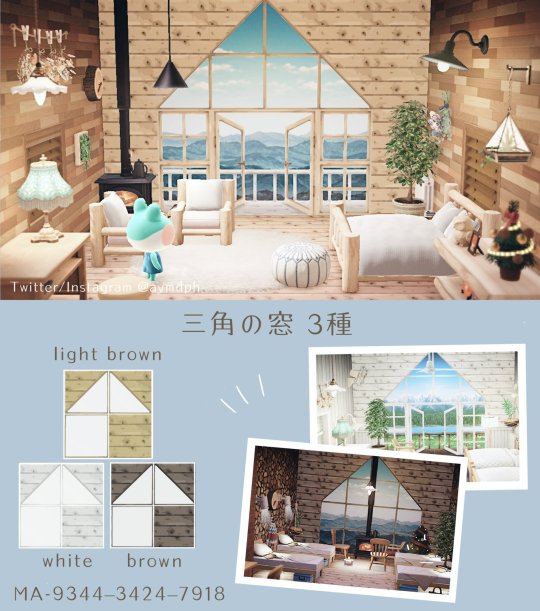
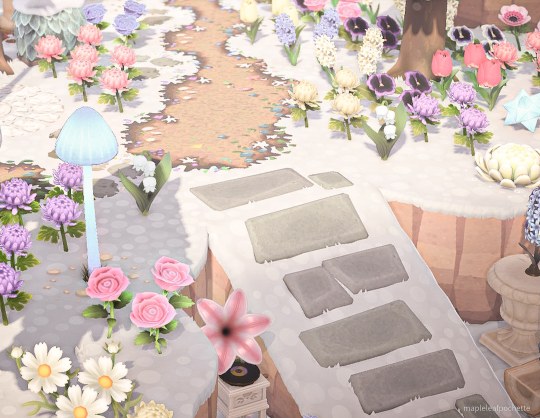
Very happy with how this area is turning out! there’s been some trial and error but I’m pleased with it so far 🤧
748 notes
·
View notes
Text
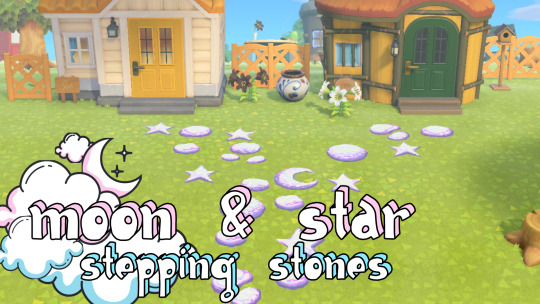


I’m back with more moon and star path stones. This time I made a 10 piece set of stepping stones in three different colors (for now)
I’ll probably keep making paths until I create one I really like for my town! Please send help because it’s a mess with random moons and stars everywhere now.
7K notes
·
View notes
Photo
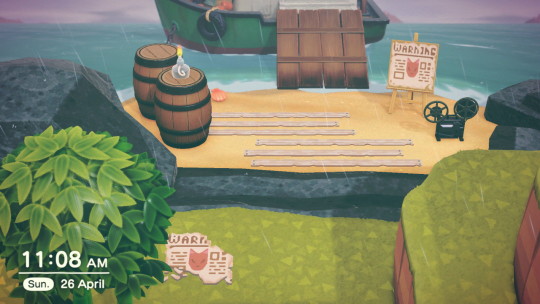
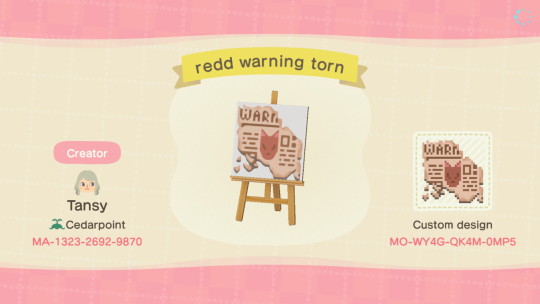
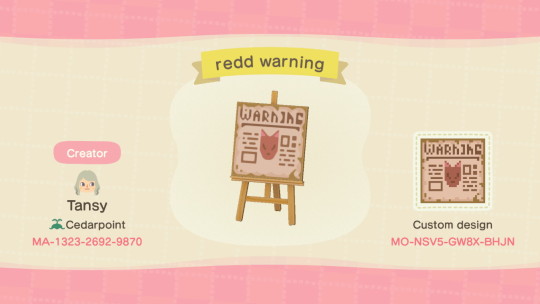
beware the fox! - warnings for your town, some in better shape than others
5K notes
·
View notes
Text

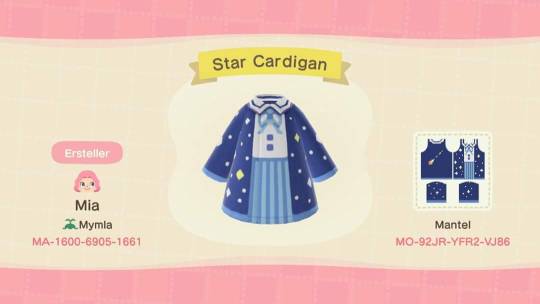
I made a night sky themed cardigan outfit to match the cloud themed one! ☁️ 🌠
9K notes
·
View notes
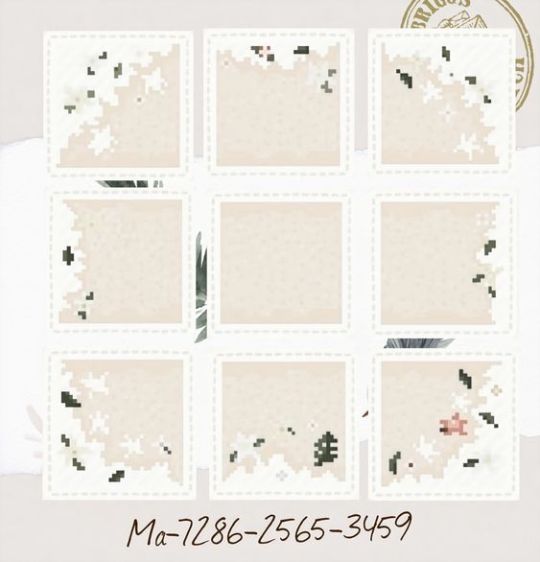
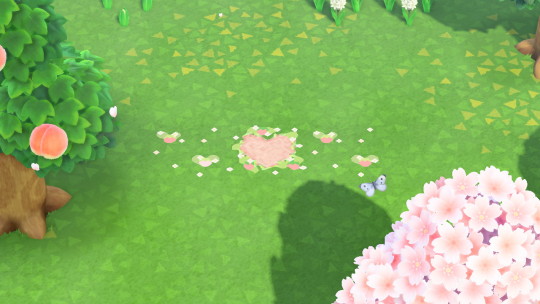
Photo
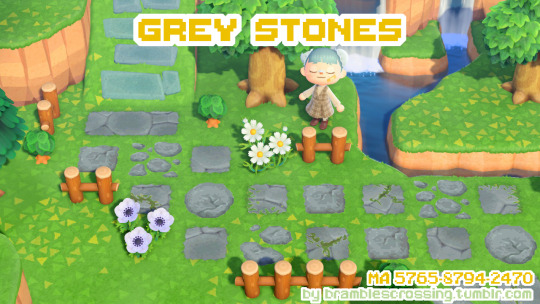
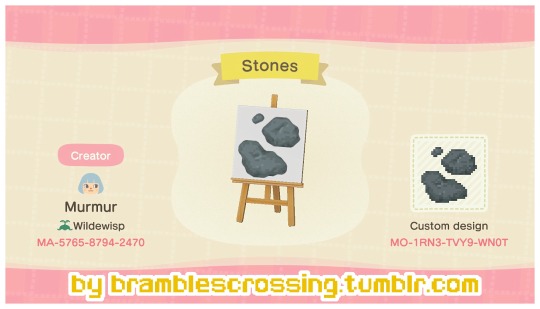
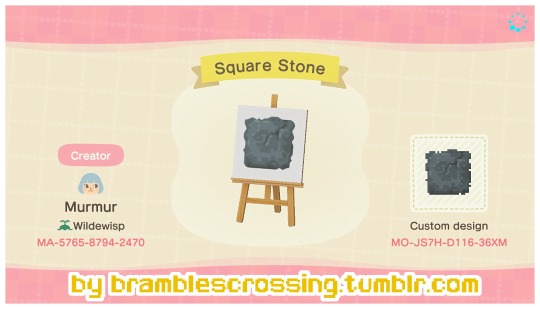
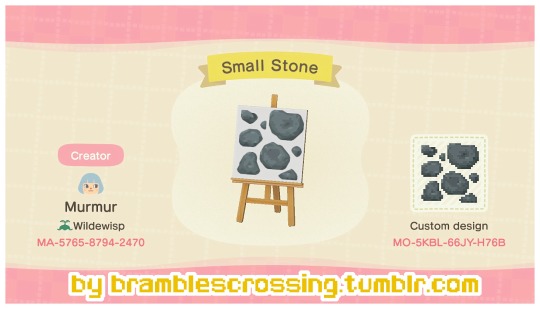
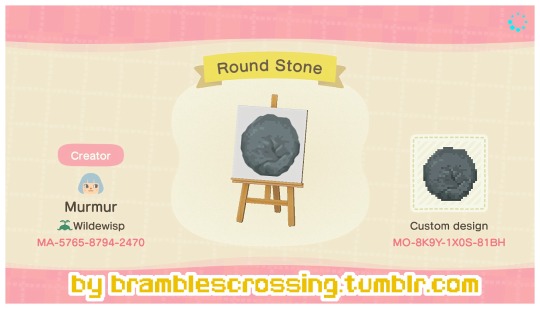
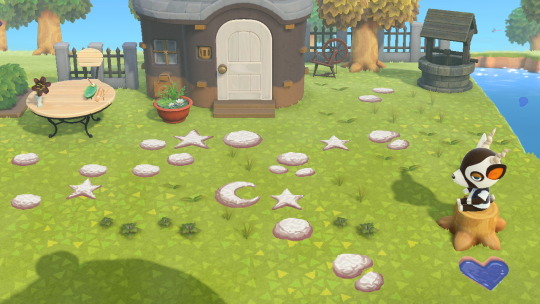
I really wanted stones that matched the colors/feel of the stone pathway, so here you go! (A tutorial is coming on which colors I used!)
Other designs pictured: moss, grassy edges
✨please reblog, don’t repost!✨
Tag me using #bramblescrossing, I’d love to see how you use it! ♡
All my designs
All my tutorials
2K notes
·
View notes
Text
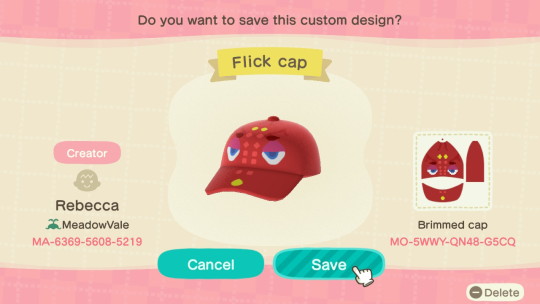


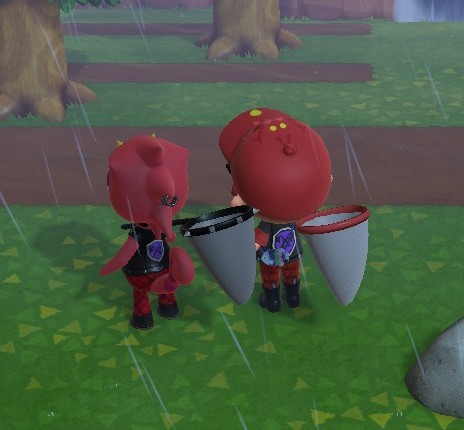

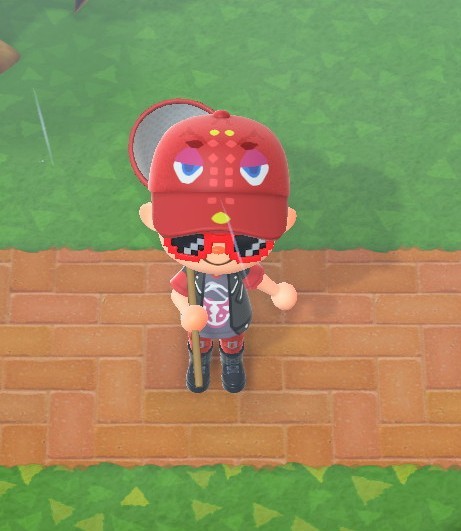


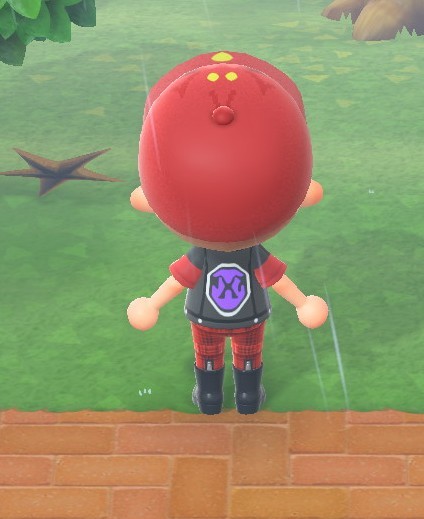
Can you guess my new favourite?!? 😆 I made some Flick clothes and finished the look with punk pants and lace up boots. Feel free to download.
656 notes
·
View notes
Text
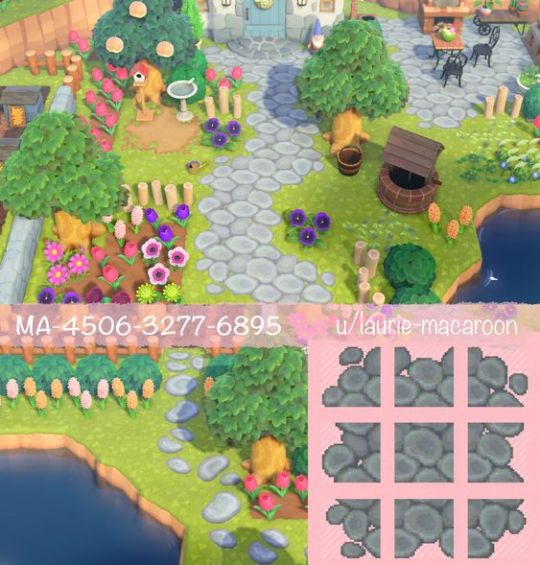
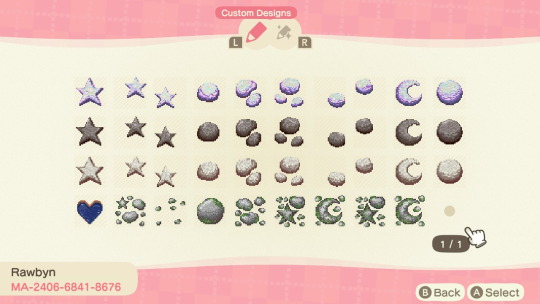
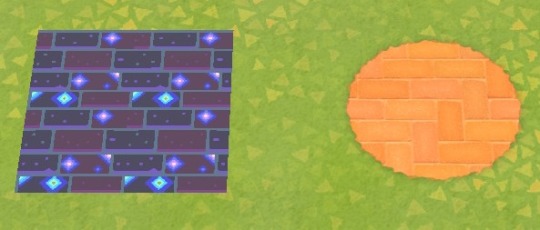
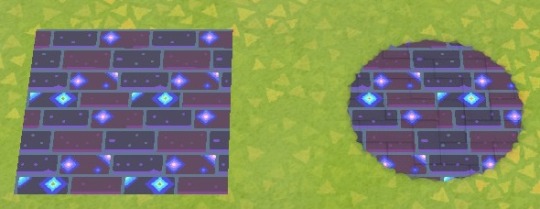
Custom Paths Overlay
I don’t know if this is obvious to everyone but me but I just found out this cool “hack” for round custom paths. In Animal Crossing New Horizons when you finally unlock your terraforming app (also known as island designer app) there are 10 different paths you can create including custom paths.
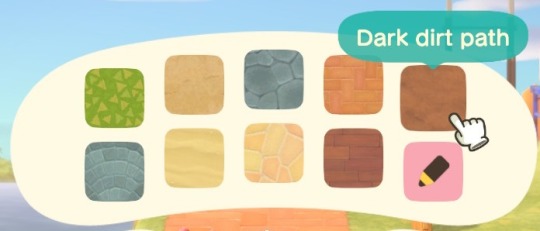
All paths except for the custom paths have a very natural look to them around the edges + they can’t be destroyed just by pressing y + they can be rounded around the corners unlike custom paths that can look unnatural and blocky.
BUT!! There is a way to fix this problem to get the best of both worlds~
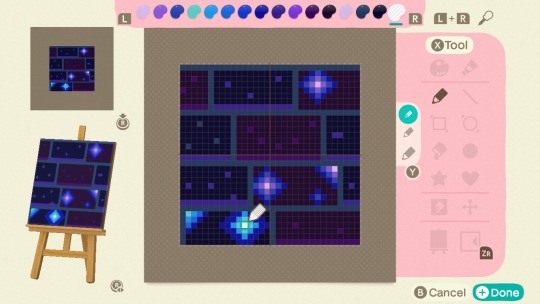
it is important to note that your custom path must have at least 1 transparent pixel to make this hack work; making all animal crossing new leaf qr code paths unusable for this hack.
The transparent paint tool is always the far right paint option for any of the color palettes. For this design I made the middle pixel of my star transparent and you can hardly tell.
So now that’s out of the way, the hack is really easy.
Lay down any of the 9 pre-made paths however you want. I chose the brick path since my custom design is brick and I wanted the sound effects to be the same. Make sure that you have it exactly how you want (with rounded corners and all) before doing step 2.
Switch to your custom design and put it on top of the pre-made path. It will act like a overlay and conform to the shape of the path beneath it.
You’re done! Step back and enjoy your finish product.
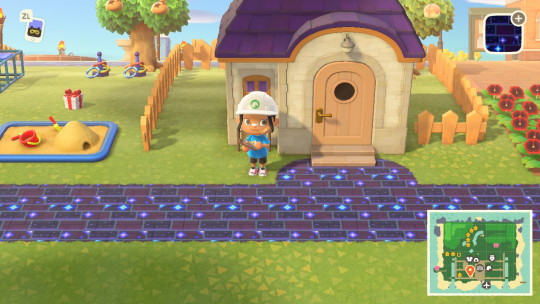
Disclaimer: Unfortunately these custom designs will still be easily destroyed if you press y while near them but the pre-made path underneath it will be left untouched.
11K notes
·
View notes


Photo

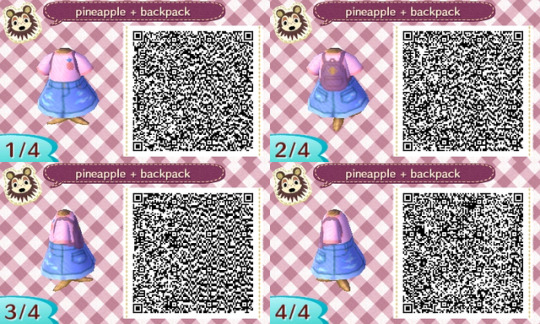
recolor of my pineapple + backpack qr! 🍍🌸
621 notes
·
View notes
Photo
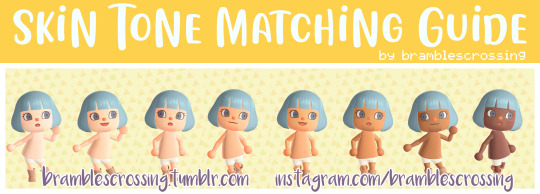
|| A guide to color matching each skin tone! ||
The pattern color is seen as face paint and a basic design shirt in the images, but when choosing the final color, I aired on what I thought looked best on the shirt (since we can have transparent patterns on the face!)
If you find a tone that you think matches better, please let me know!
All info below the cut <3
All my tutorials
Keep reading
5K notes
·
View notes
Photo

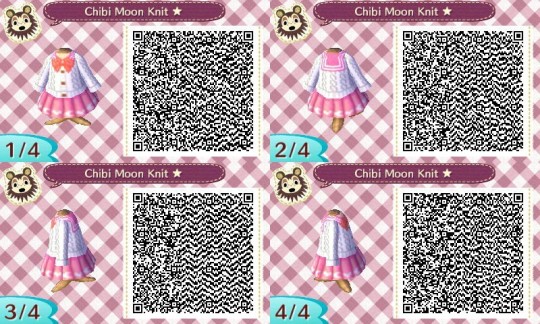
I dug up some of my QR designs from New Leaf! My Sailor Moon Knit Sweaters look even better in New Horizons! I’m sharing them here if anyone is interested in using them ✨
500 notes
·
View notes