
Don't wanna be here? Send us removal request.
Statistics
We looked inside some of the posts by fabiankingfmp and here's what we found interesting.
Average Info
Notes Per Post
0
Likes Per Post
0
Reblog Per Post
0
Reply Per Post
0
Time Between Posts
3 days
Number of Posts By Type
Text
4
Photo
13
Last Seen Tumblr Blogs


Fun Fact
Tumblr has a low social media market share in South America.
Text
Loose Time Plan
Week 1
Initial Idea generation, using the internet and brain storming to get the first concepts.
Week 2
Finer idea generation, begging to settle on a couple different final ideas, but still staying vague.
Week 3
Decisions on options for the final piece and what format I want to use.
Week 4
Researching different sculpture and fabrication methods that would be accessible.
Week 5
Begging to start the experimentation phase while still looking into other possible methods.
Week 6
Fine experimentation, nailing down my final process and deciding on all the final materials.
Week 7
Making; Starting on the foam board construction and getting all of the appropriate measurements.
Week 8
Making; The main construction, using all the different processes I decided on and allocating drying time as well as making time.
Week 9
Making; The final painting, making of the base/stand and adding extra details is time allows.
Week 10
The show
0 notes
Text
Bibliography
Dixon, N, Space Project, sculpture, woo gallery, 2013
Dixon, N, Untitled, sculpture, Nottingham Trent University,
Chapman, J&D, diorama, The sum of all evil, 2013
Chapman, J&D, diorama, Fucking Hell, 2008
Chapman, J&D, diorama, The hellscape
Speed, E, The city walk, sculpture/fashion, St. Louis, 2012
Dali, S, The Temptation of St. Anthony, painting, Royal Museums of Fine Arts of Belgium, 1946
Whiteread, R, Untitled (stairs), sculpture, The Tate gallery, 2003
Bosch, H, painting, The Garden of Earthly Delights, Museo Nacional Del Prado, 1515
0 notes
Text
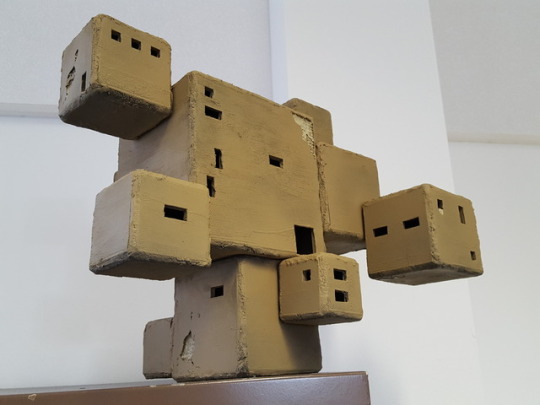
Final Evaluation
My project is what I initially set out for myself to complete, creating a 3 dimensional experimentation of architecture that is inspired by some of Derbys buildings and layout. What I ended up making was something more based off the idea of how mix matched and patch work Derbys buildings are, having a variety of weathered and old fronts from different time periods. My final piece was an representation of the weathering and structure as I saw it. From what I first imagined during idea generation I wanted to have a greater deal of detail and depth than I did but this is because a lot of my time was used to learn and experiment with the processes.
The research I did for my piece was heavily primary, gathering photographs of what I could use for reference images. These reference images were really helpful for the most part, having something to visually draw from helped my train of thought and know what I was trying to emulate. The references images I took were part of my initial idea development which was only the first part of the project. The other kind of research I did was artist and gathering reference from secondary sources. The none of artists I looked at were directly relevant, in the sense of doing exactly what I was trying to do, but they all worked in a sculptural format and had similar processes to what I wanted to accomplish.
Problem solving was a large part of my project. Because I spent so much of my time learning new processes and seeing what worked for myself I’d like to say my ability to solve problems then and there was great this project. The problems I encountered were mainly physical as I mentioned but this is how I like to work. I had to spend some time looking around and sourcing a variety of materials to experiment with, some of which I used for the final piece but mostly for experimentation.
The practical skills I employed over the final project were all easy enough to grasp and get used to as the materials and tools I were using were things I had used before just not in that combination; for example using a craft knife and foam board to cut out simple shape was something I’m used to, but using the knife to detail brick texture and cracks required more finesse. Anything I had to learn on the fly went well because any mistakes I made while trying something new could just be tried again, which is the advantage of using cheaper materials.
I think I managed my time well, recording what I did each day and keeping an ongoing plan. My general plan I did at the start of the project was loose but I kept to it, allocating the majority of my time to experimentation and fabrication. In the day its safe to say I’m easily distracted, so when I could I either sat on a desk by myself to concentrate or moved down to the 3D studio where I could have a full day.
I think If I redid this project knowing the processes and detailing techniques I do now I could produce a much higher quality piece. I spent too much of my time learning the processes and making sure it was right when it seemed like if I had some prior knowledge to the materials I could’ve moved much faster.
0 notes
Photo
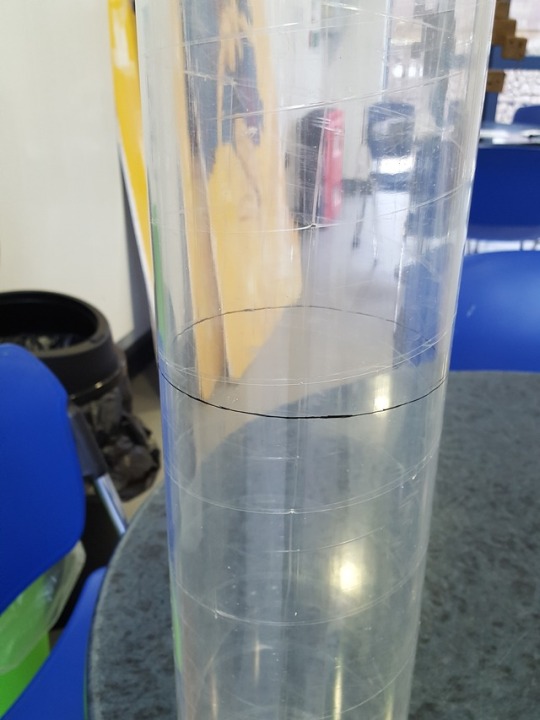
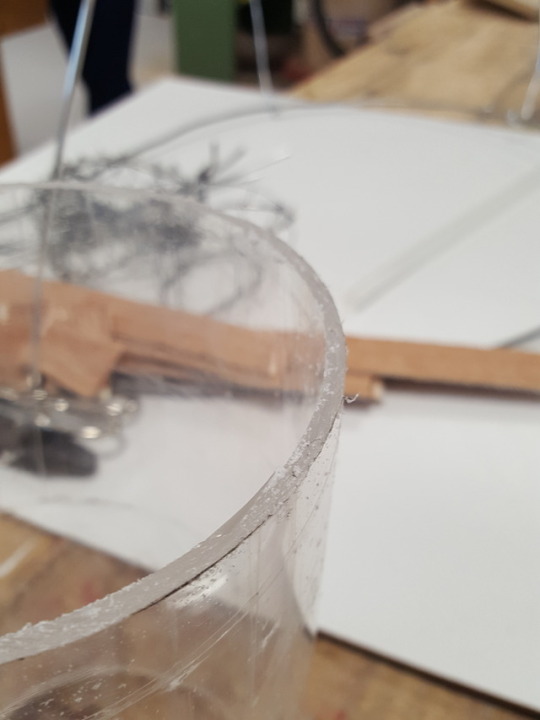
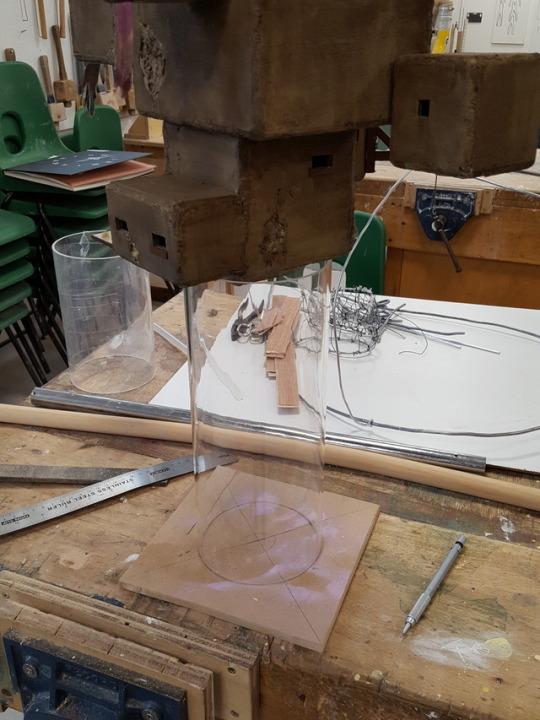
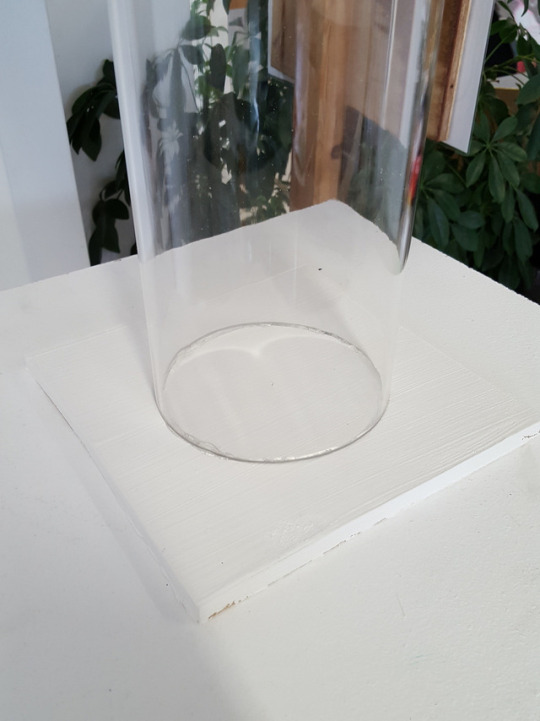
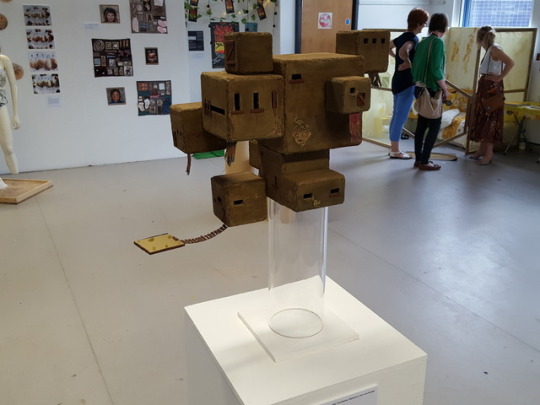
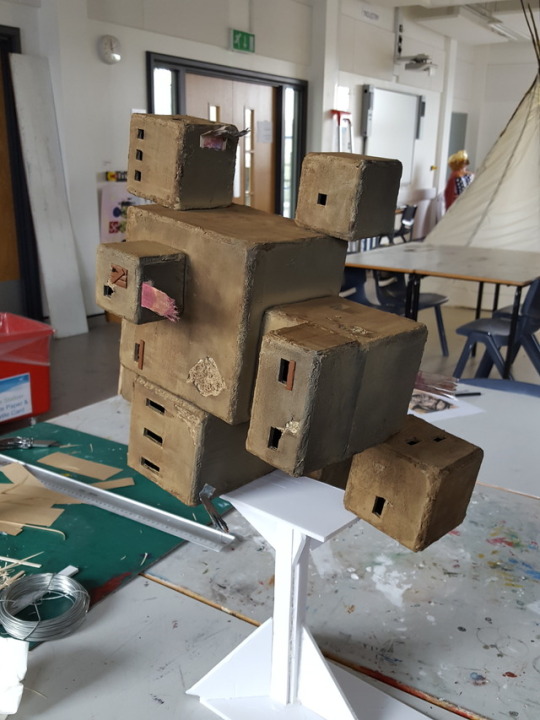
The Perspex Stand
I ordered a 50cm tube of perspex that was 12cm across and cut it down to 30cm for my desired height on the plinth. It was simple to cut because I used a hand saw and is just what I wanted to simulate floating. For the small wooden base I cut a piece of scrap MDF to 20x20cm and covered it in a couple coats of white emulsion. For a stand this works well and serves the purpose its built for, I didn't want anything flashy or complicated and thats what I made. The tube was just hot glued on to keep it in place if its knocked but thats not entirely necessary because the whole piece has its own weight and stays still if its left alone.
0 notes
Photo
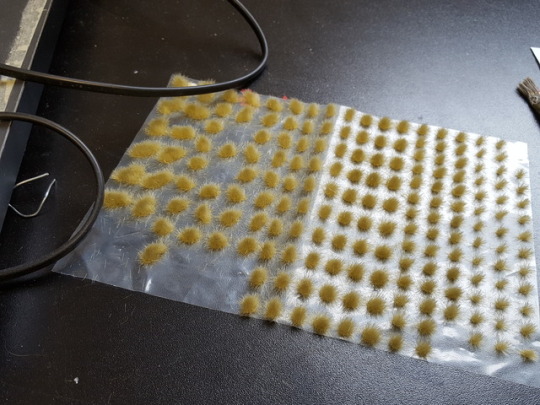
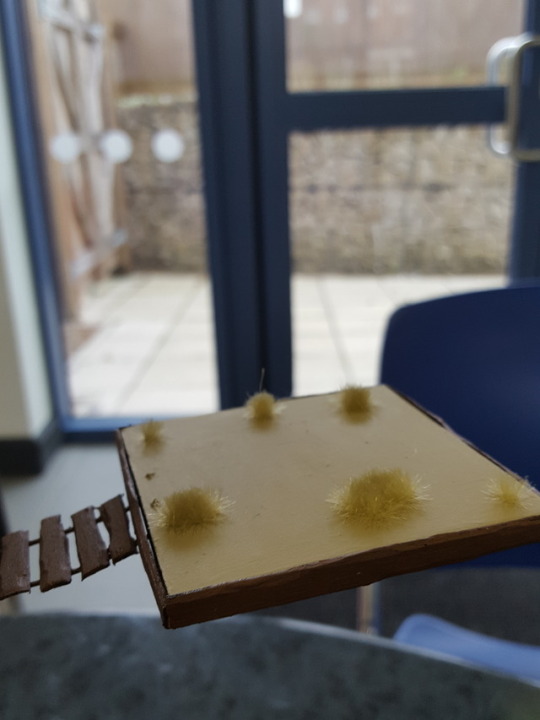
Grass Details
These grass details were bought from a local model making shop and work perfectly for adding another layer of detail to the piece. I put them on parts that had recesses so that the grass would look like its growing outwards and had taken root.
I also used the grass pieces on the platform to break up the brownness of it all. This was after I added a layer of the same color I used on the whole piece called Sandri dust by brush instead of spray can so I had more control.
0 notes
Photo

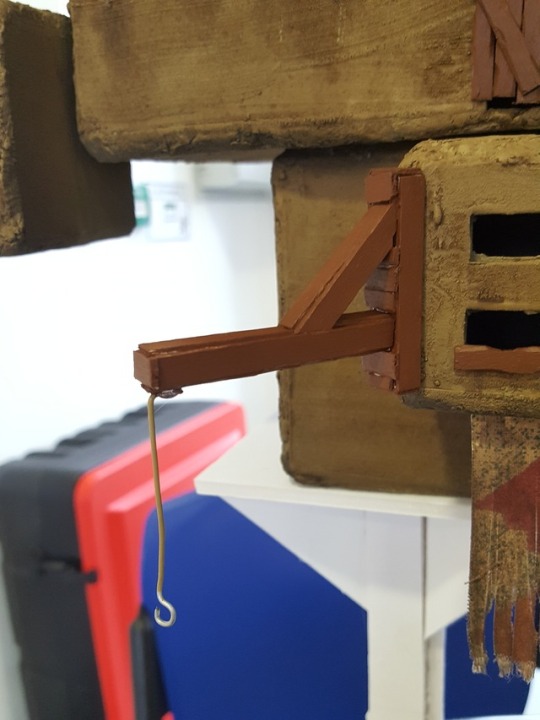
The Crane
As another added detail to one of the sides I made a small crane out of foam board and covered it in coffee stirrers, it wasn't sprayed black like the others though. For the small crane I sealed the foam and cracks before painting with watered down PVA glue because I didn't have access to my spray cans. Sealing in this way is something I discovered in my testing and experimentation, it works very well because when the PVA is watered down it doesn't fill in and details that I want to retain.
After Painting with the brown colour I attached a hook using a piece of wire bent on the end and painted a yellowish colour to look like rope.
0 notes
Photo
The Wooden Details
Now for each of the wooden details. I started by cutting a couple varying lengths of the coffee stirrers and chipping the sides like in my samples. I had a rough idea of where each side could go as well as how I could assemble each into doors. After I had finished cutting and assembling what I needed I went straight to paint and started with a blackball coat, I still used the spray paint with acetone because I know the acetone won't affect the wood. The small bridge section i made is made from a small section of foam board surrounded with coffee stirrers for the platform with 1mm stainless steel with and coffee stirrer sections to make the bridge. After painting everything black I used a dark brown model paint straight from the tub, instead of watering it down, so it got a much bolder colour quicker. Each of the sections were glued on with standard super glue because of how fast it bonds.
I’ve been using a temporary stand I made from foam board and hot glue to work on while doing all these step because the foam board wont damage anything.
0 notes
Photo

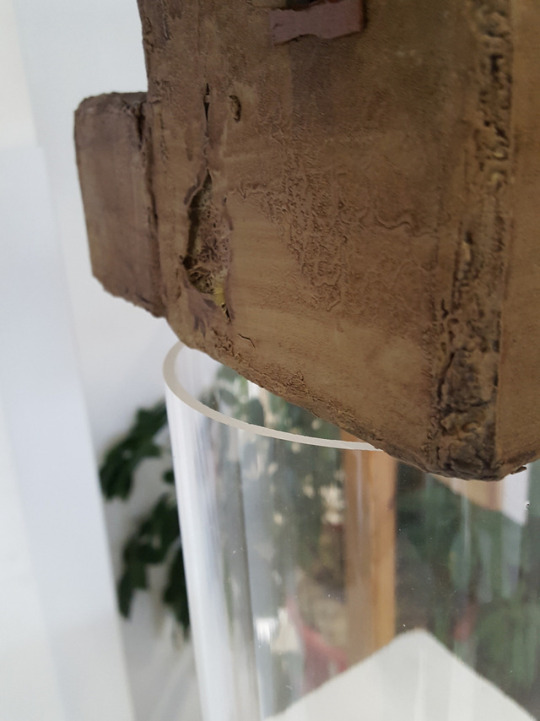
Weathering and Extra Details
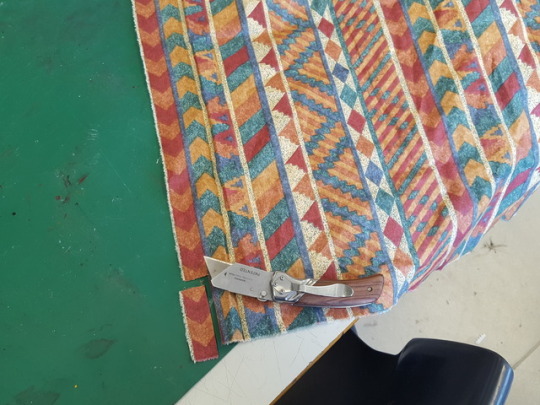
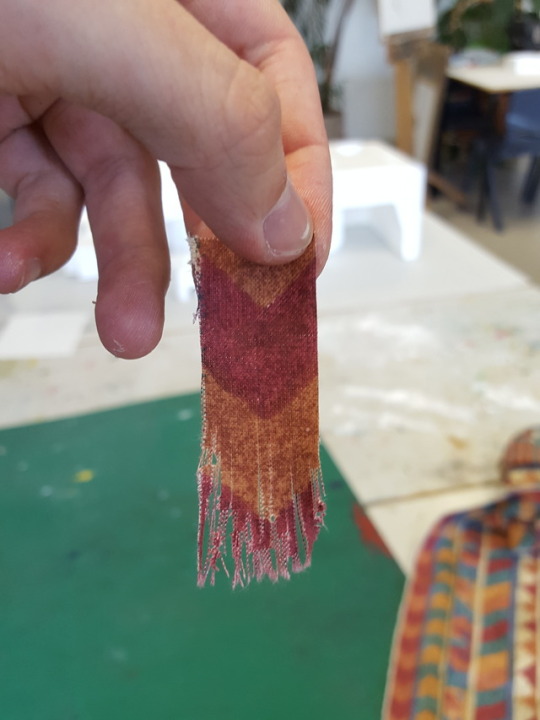
For the whole piece I used the same shading method I used on my samples, I used the citadel earth shade all over the piece and tried to focus it under windows and in cracks.
To add some more visual diversity and color to the piece I made these small banners from a piece of fabric I found in the textiles room; it has these different striped textures which I cut out individually for the banners. To weather each of the banners I used my knife to fray the bottoms and edges. After they were frayed enough I put the same shade as everywhere else on them to dirty them up and super glued each on a place that I thought needed some more visual interest.
0 notes
Photo
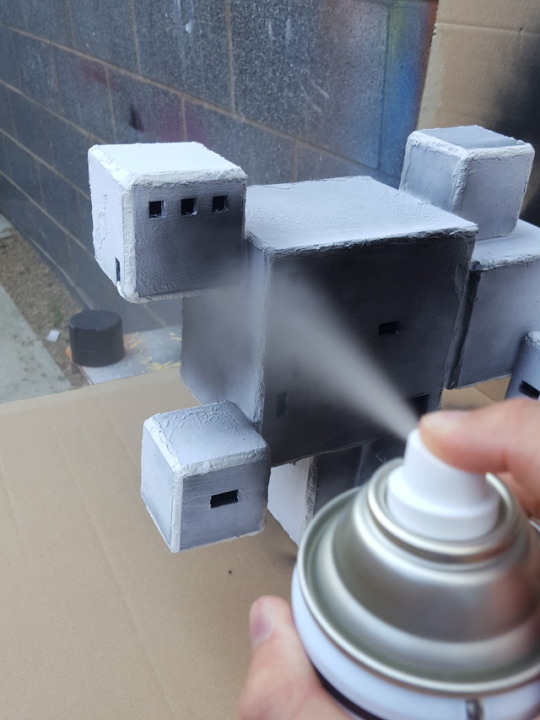

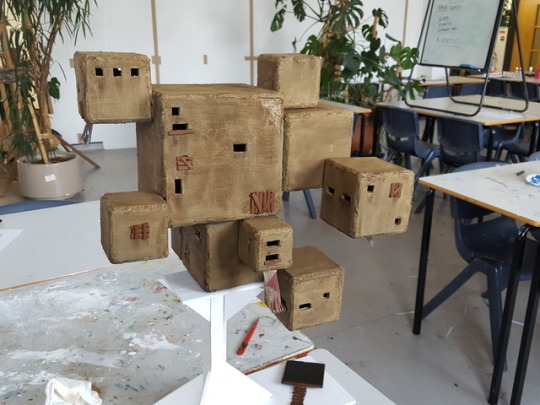
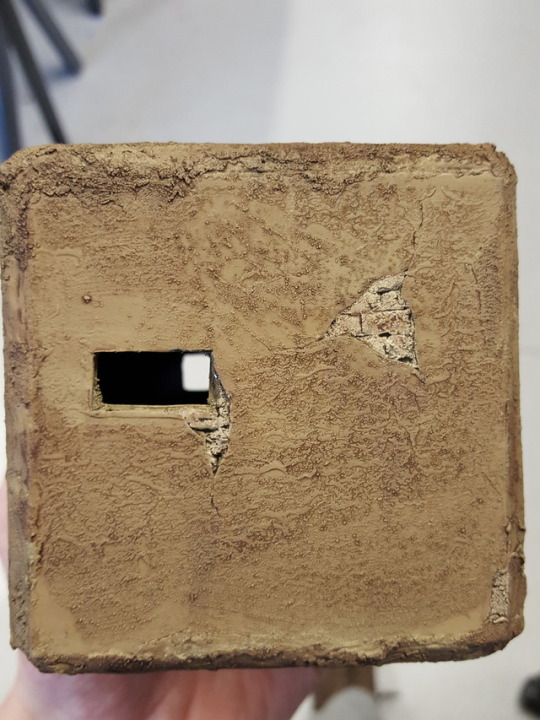
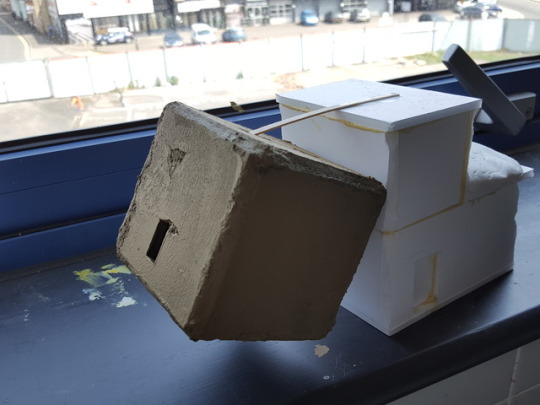
Assembly & Paint
After texturing and filling in each of the cubes it was time to start assembling the final piece. I just used hot glue for this step, it works well when using light weight substances like these and has the right properties to fill in some of the gaps along the bottom to give some more structure.
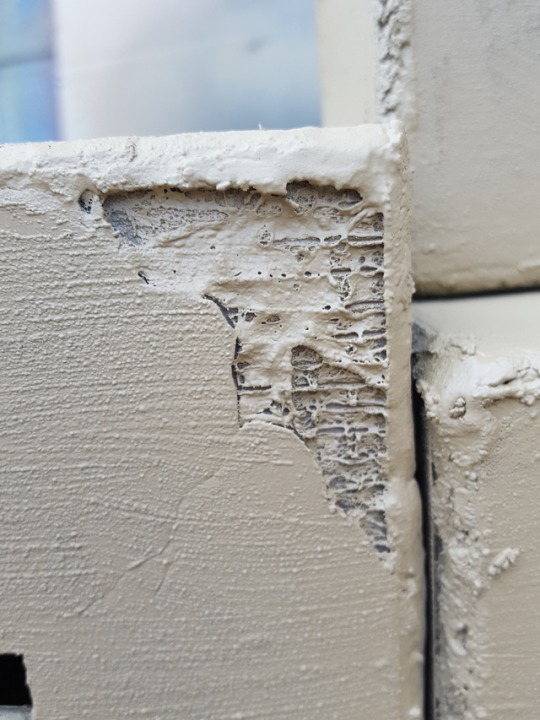
After the final piece was fully assembled just needed to get all the base colors down. Here I made a mistake that was easily avoidable but I didn't think about it at the time and its affected the final piece; instead of using primer like i should’ve I used some satin black spray paint, this didn't seal the foam properly. Because the spray paint I used had acetone in it partially dissolved the foam exposed in the details. The way this looks is much more noticeable than the brick pattern I imagined but its not necessarily a bad thing. Where The acetone dug into the foam board a nice deep bubbled texture has come through which works well with the painting process Im using. Finally for this step I painted all of those aforementioned indents and details in a different lighter colour.
0 notes
Photo

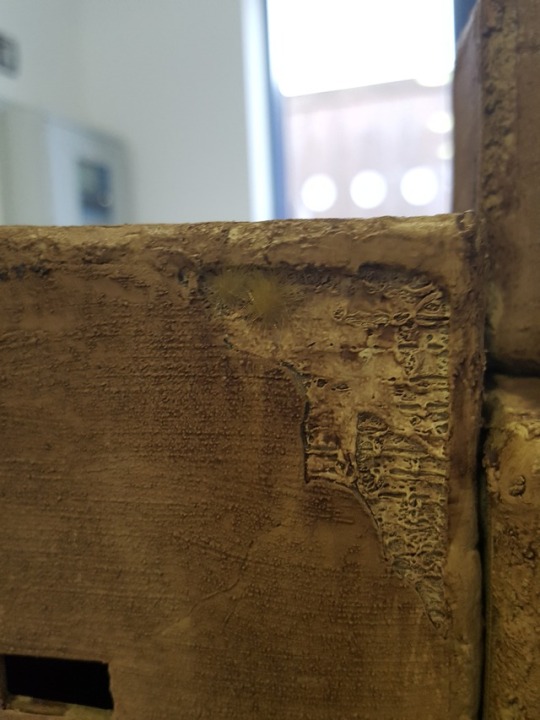
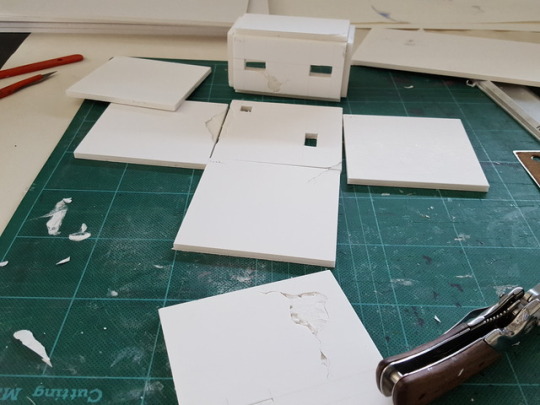
Filling in The Edges
Where I left the tops of each cube separate I spray painted the insides black, This si to give the windows some depth. Then to add the top sections back on to each I just used glue to hold it in temporarily, used wall filler in the cracks with a pallet knife to smooth over the edges and let it all dry. When they were all dry I used my finger to scrap off any of the small edges and inconsistencies that come from using a knife. Next was the texturing of each wall, I watered down some filler with about a 1 to 1 mixture and painted it all over each the cubes. The watered down filler adds texture to each surface that gets picked up when painting. I did one coat initially but to me it looked too thin, I added more coats to each wall but I couldn't get them all consistent with the same amount of layers so each wall varies.
0 notes
Photo
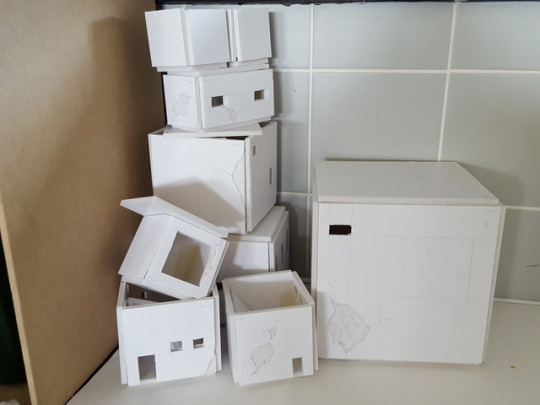
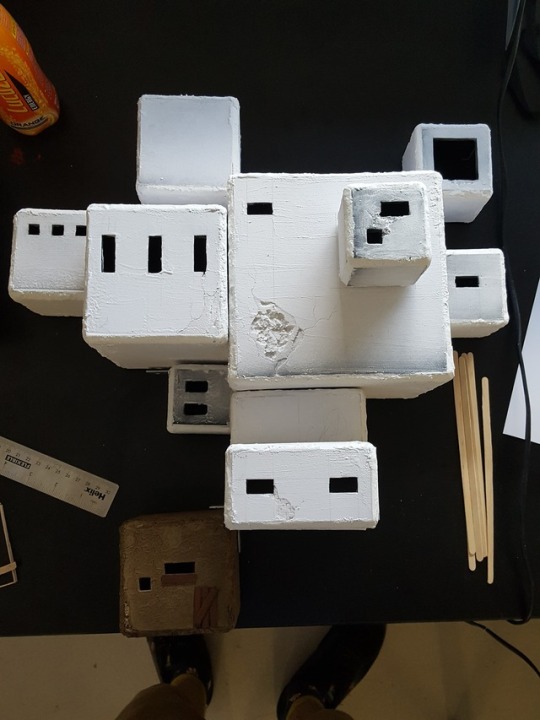
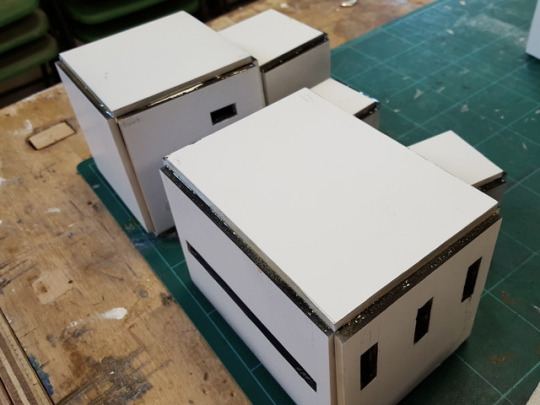
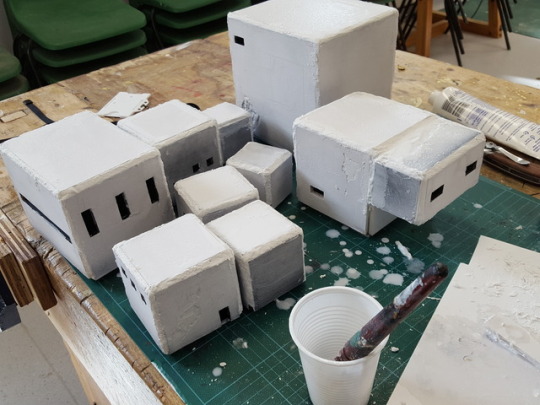
Foam Board Construction
These are the foam board constructs for my final piece that will make up the majority of the structure and substance.
I started by drawing them all out on A3 sheets and adding in any details I needed to add then such as cracks or breaks in the outer layer, because its much easier to do it now as opposed to later. I decided to do everything for each step at once to save time, this stops me having to go between work stations and materials which would mean drying times wouldn’t be synchronised.
0 notes
Text
Peer Crit
add more research on context
research another 5 artists with more substance on the blog post
more secondary research sources
evidence more problem solving
update ongoing plan
0 notes
Photo
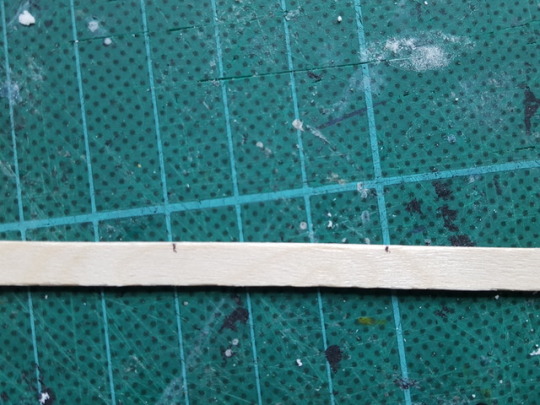
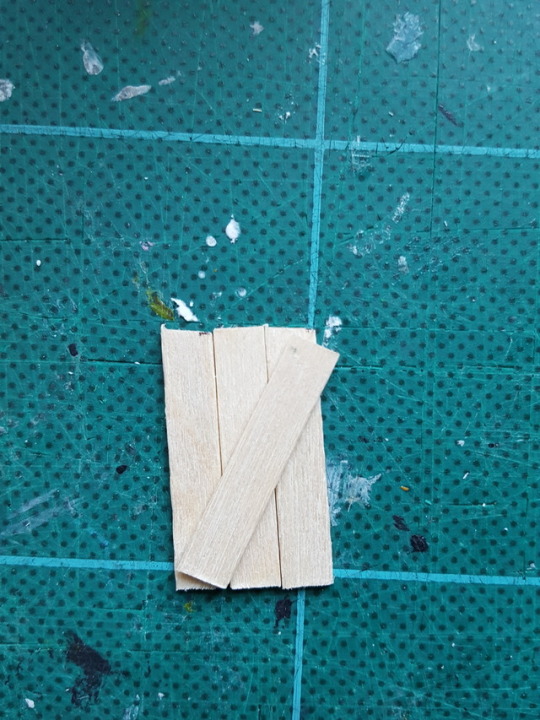

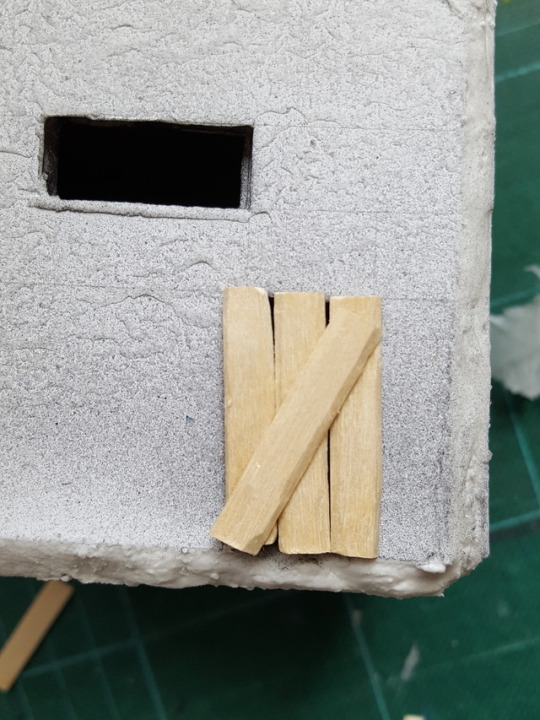
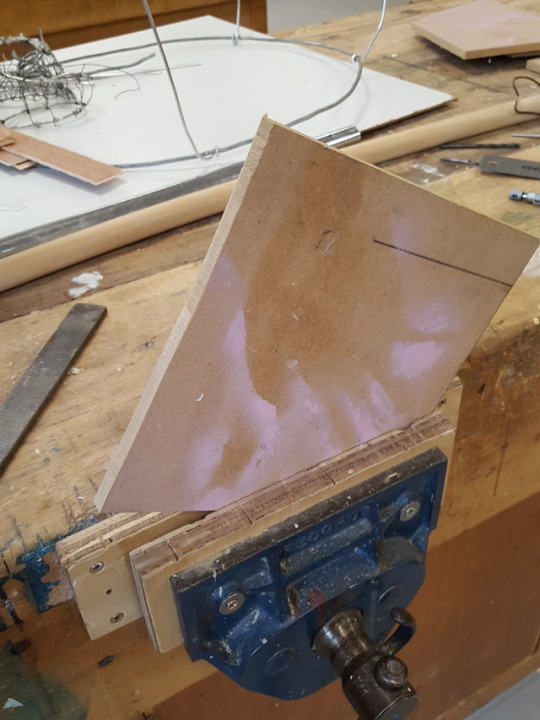
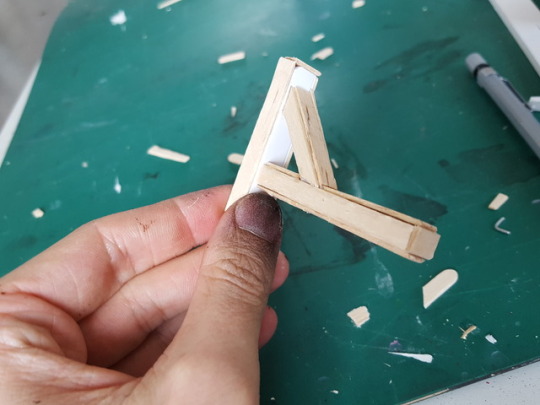
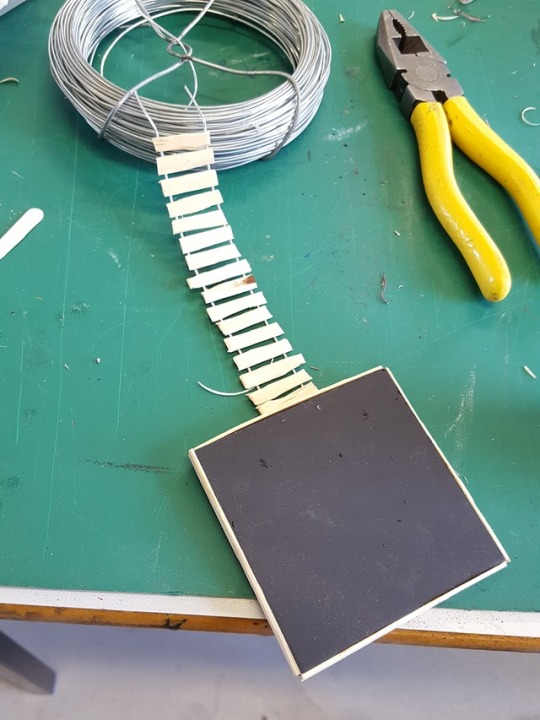
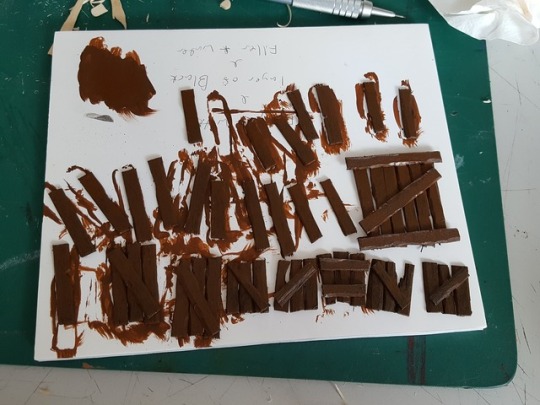
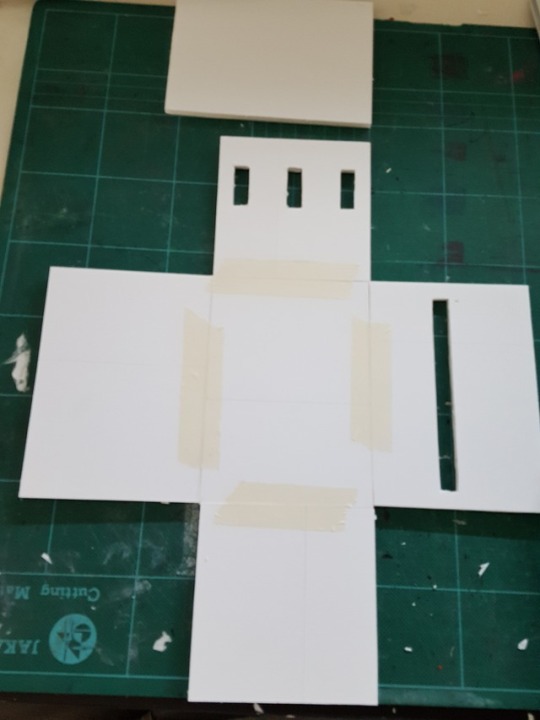
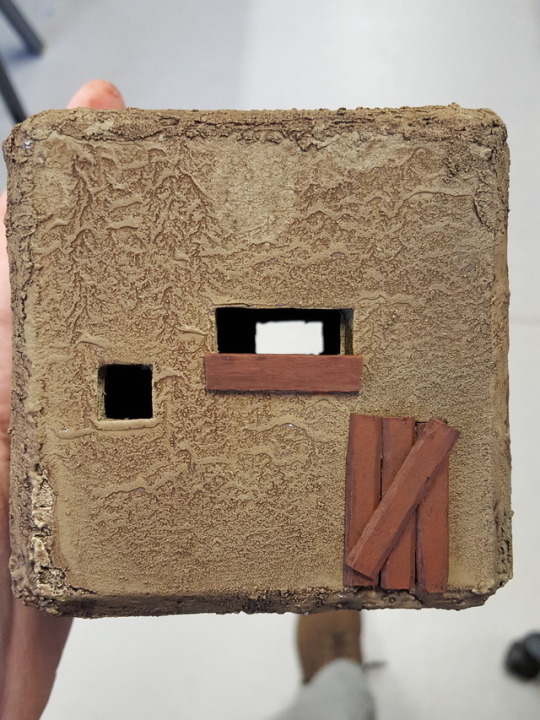
Creating a Door
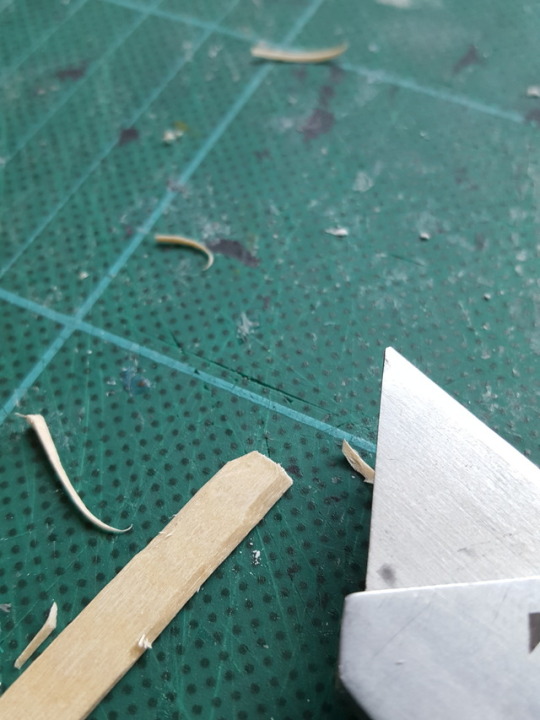
To make a door for the piece I looked at carving into foam and even trying to fabricate out of paper, but I've decided to get a decent grain Its best for me to use wooden coffee stirrers from the cafe downstairs. Then to add some further depth and texture I chipped the edges with a knife before priming in black.
To measure the lengths for each part I just lined it up with the holes I’d made and marked a little bit longer so the glue has something to stick to, then I used a mixture of marking the edges with a knife and clipping with wire cutters to do the rest.
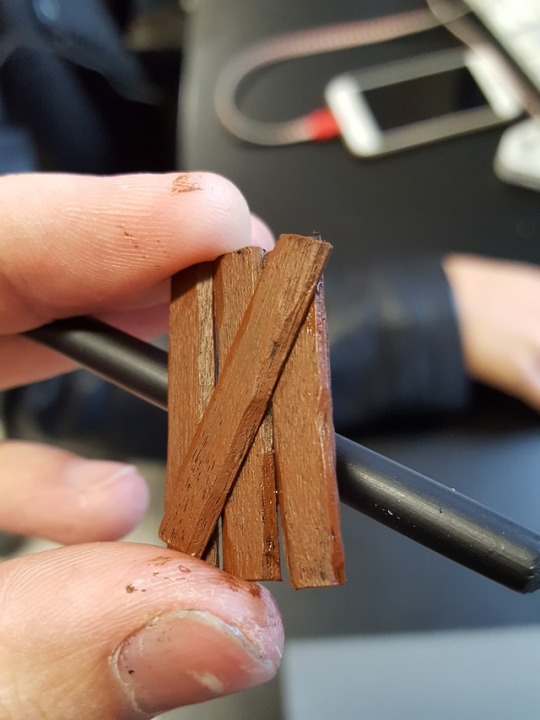
I experimented with a mixture of different paint processes; from looking at different base coating methods and sealing the wood to trying to shade in different ways and darkening the recesses.
0 notes
Photo

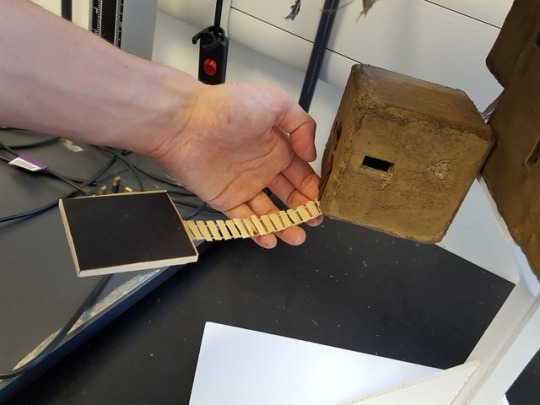
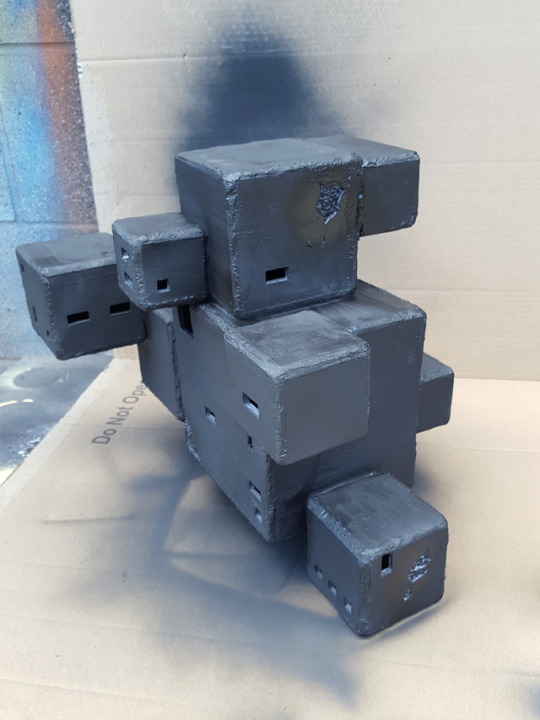
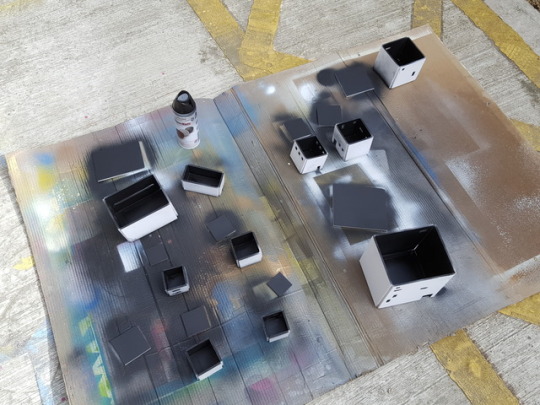
Final Painting Process
To get the full black on the inside I kept the top section separate and sprayed a cheap black spray paint on the inside because the finish doesn't make a difference. Temporarily I added a coffee stirrer to one of my first sample buildings to make a drying rack too.
0 notes
Photo
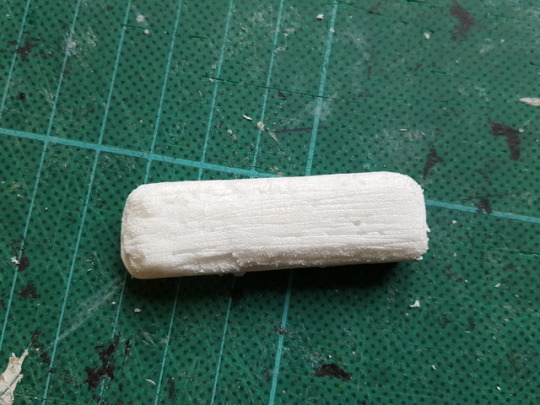
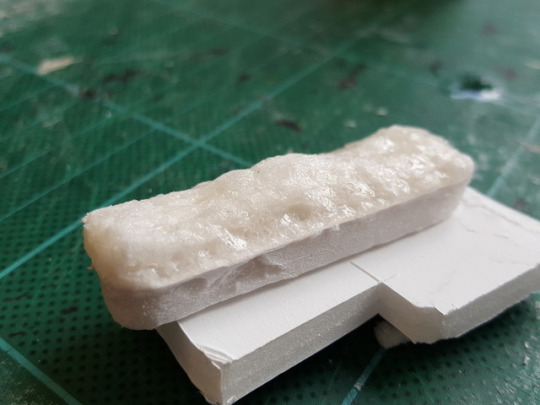
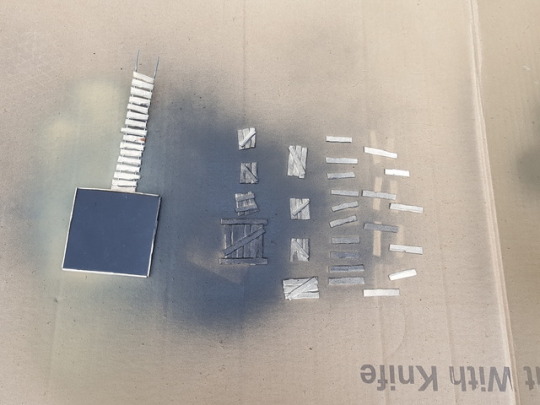
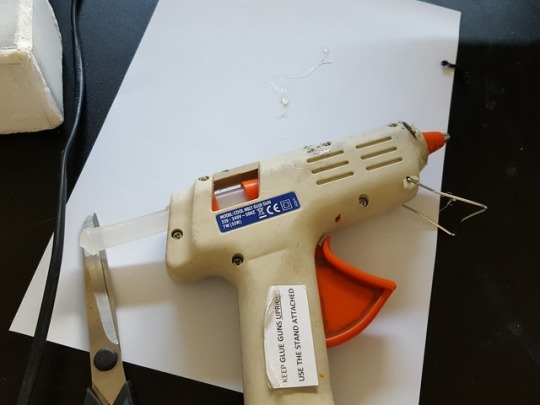
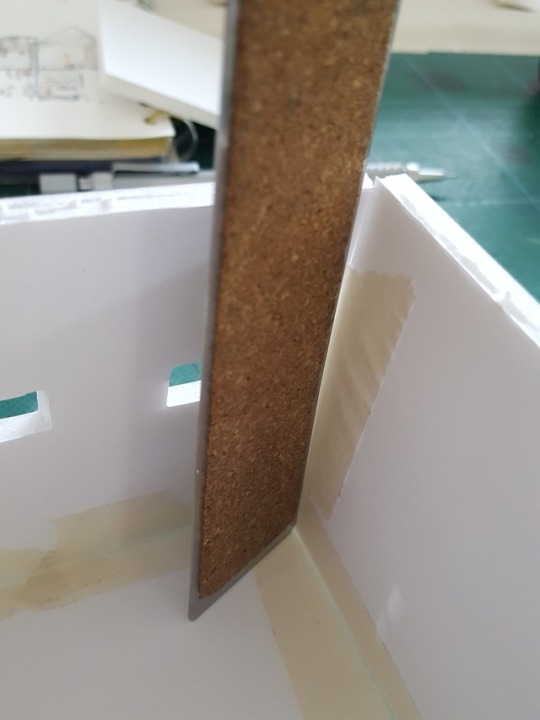
Super Glue
I heard another way of sealing a piece of foam for painting was using super glue because it dries hard and is very resistant. I carved a wood texture into a piece of foam after removing the paper outside.
However I forgot that the acetone in superglue melts and dissolves foam, it gave off some harmful gases and didn't go as planned. This is a good test to have gone through though because it means Ill be a little more mindful when it comes to using the superglue on foam and in moderation.
0 notes