
Firstchoice Speciality Chemicals Pvt. Ltd. is a leading company in the construction industry, providing premium products and expert support. They focus on customer satisfaction, offering tailored solutions to enhance concrete performance and optimize construction processes and costs. Their commitment to continuous innovation ensures top-quality and sustainable outcomes for every project.
Don't wanna be here? Send us removal request.
Statistics
We looked inside some of the posts by fcscseo and here's what we found interesting.
Average Info
Notes Per Post
1
Likes Per Post
1
Reblog Per Post
0
Reply Per Post
0
Time Between Posts
2 months
Number of Posts By Type
Text
5
Last Seen Tumblr Blogs


Fun Fact
If you dial 1-866-584-6757, you can leave an audio post for your followers.
Text
High-Performance Epoxy Grout: Installation Techniques and Best Practices
Epoxy grout has gained popularity in industrial flooring due to its superior strength and durability. It effectively protects base floors from various impacts, ensuring longevity. However, its efficiency depends on proper installation techniques. Here’s a step-by-step guide and best practices for achieving high-performance epoxy grout installation.

Installation Techniques for Epoxy Grout
1. Preparation of SubstrateBefore applying epoxy grout, ensure the surface is thoroughly cleaned. Remove any adhesive residue, dust, or old grout to create a strong bond.
2. Drilling Injection HolesDrill 8-10mm diameter holes at fixed intervals along the crack length or in a grid pattern for voids in concrete. Clean the holes thoroughly using compressed air to remove dust and loose materials.
3. Fixing NipplesAttach injection nipples (GI/PVC) to the drilled holes using epoxy sealing putty. Seal the cracks with the same putty for better adhesion.
4. Application of Epoxy Grout Mix the two components of EP GROUT LV injection grout properly. Inject the mixture through the nipples using a specialized injection pump. Apply uniform pressure until the grout flows from the adjacent nipple, then stop and proceed to the next hole.
5. Sealing and CleaningOnce the injection is complete, remove the nipples the next day and seal the holes with high-strength mortar. Clean the surface using resin-removing cream, followed by soap and water. Avoid using solvents. In case of eye contact, rinse immediately with clean water and seek medical attention.
6. Curing and Drying TimeEpoxy grout requires sufficient time to cure and dry completely. If working with professionals, inquire about the drying time to plan accordingly.
7. Post-Installation Care Following the manufacturer’s maintenance guidelines ensures the longevity and performance of epoxy grout. Regular upkeep preserves its appearance and durability.

Best Practices for Epoxy Grouting
Professional InstallationHiring experienced professionals ensures the correct application of epoxy grout like EP Grout LV for tiled and cracked surfaces.
Work in Small SectionsApplying grout in smaller sections ensures a consistent and precise finish.
Use the Right ToolsSpecialized tools are necessary for effective epoxy grouting. Professional installers use the right techniques and equipment for durable results.
Regular CleaningRoutine cleaning prevents dirt buildup and extends the lifespan of epoxy grout surfaces.
Conclusion
Epoxy grouting enhances floor strength and longevity when installed correctly. Following the proper installation techniques and best practices ensures maximum durability and performance. At Firstchoice Speciality Chemicals, we provide high-quality and durable epoxy grout solutions in India for industrial and construction applications.
0 notes
Text

Enhance durability, workability, and sustainability with microsilica admixtures. Reduce shrinkage, improve flame resistance, and achieve high-performance concrete at a cost-effective rate. Build stronger, longer-lasting structures today! Visit: https://www.fcsc.co.in/blogs/why-should-we-use-microsilica-in-concrete
0 notes
Text
Key Points for Effective Tile Adhesive Application
Ensuring a successful tile installation depends heavily on the correct application of tile adhesive. Whether working on ceramic, porcelain, or natural stone tiles, using the right adhesive and following the correct process enhances durability and aesthetics. This guide highlights crucial factors for proper tile adhesive application using FCSC’s high-quality products.

1. Choosing the Right Adhesive
Different tiles require specific adhesives for optimal bonding. For instance:
TILEGLUE 3.O – Ideal for heavy tiles due to its superior bonding strength (Available in B2B & B2C).
TILEGLUE 1.O – Best for lightweight or delicate tiles, offering precision and ease of use (Available in B2B).
TILEGLUE 4.O – Perfect for challenging surfaces, even in high-moisture areas (Available in B2C).
Selecting the appropriate adhesive prevents cracks and ensures long-term adhesion.
2. Surface Preparation
A well-prepared surface is key to strong tile adhesion. Steps include:
Cleaning – Remove dust, grease, and loose particles.
Leveling – Fix uneven surfaces before applying adhesive.
Ensuring Dryness – Moisture can weaken the bond and cause failure.
Using TILEGLUE 4.O provides a reliable solution for ensuring adhesion even on difficult surfaces.
3. Mixing and Application
Proper mixing of adhesive guarantees consistency and performance. Follow these steps:
Use the recommended adhesive-to-water ratio for uniformity.
Mix thoroughly to avoid lumps and ensure smooth application.
Let the mixture rest before re-mixing for optimal setting.
For easy application and consistent results, TILEGLUE 5.O is a top choice among professionals and DIY enthusiasts.
4. Tile Placement and Spacing
Precision is essential in tile placement. Follow these best practices:
Gently position each tile into the adhesive bed.
Use spacers for uniform gaps between tiles.
Press firmly to eliminate air pockets and enhance bonding.
5. Allowing Proper Drying Time
Drying time depends on the adhesive type, tile size, and environment. To prevent compromised bonding:
Avoid movement before the adhesive fully cures.
Use fast-curing solutions like TILEGLUE 2.O, designed for quick setting without sacrificing durability (Available in B2B & B2C).
6. Effective Cleanup
For a polished finish, clean excess adhesive before it dries using sponges and scrapers. TILEGLUE 1.O is known for its easy-to-clean formula, ensuring minimal residue.
Conclusion
Correct tile adhesive application is essential for long-lasting, high-quality tile installation. Choosing FCSC’s superior adhesives ensures strong bonding, durability, and an impeccable finish. For expert-recommended solutions, trust FCSC’s range of advanced tile adhesives.
#Tile adhesive for heavy tiles#Superior Tile Adhesive#Advanced Tile Adhesive#Durable Tile Bonding Solution
0 notes
Text
Comprehensive Basement Waterproofing: Key Steps to Prevent Water Damage
Waterproofing a basement is crucial to protecting the structural integrity of any building and minimizing water-related issues. A well-planned waterproofing process ensures that the basement remains dry, functional, and durable for years to come. Whether you're a homeowner or contractor, basement waterproofing helps lower maintenance costs in the long term while preventing structural damage. In this guide, we'll walk you through the key steps in waterproofing basement areas and ensuring long-lasting protection using FCSC products.

Step 1: Concrete Repair and External Rendering
Before waterproofing a basement, it is essential to address any existing damage, such as cracks, spalled concrete, and debris. The first objective is to repair the concrete, creating a stable base for waterproofing. FCSC offers CEMBOND SBR, a high-performance bonding agent available through B2C and B2B channels. This product improves concrete adhesion and is perfect for precast slabs and structural repairs.
For external rendering, CEMBOND SBR provides an additional layer of protection from external influences like weather and environmental factors. It is highly effective for waterproofing basements, lift pits, inspection pits, and water towers, making the structure resistant to water infiltration and ensuring long-lasting durability.
Step 2: Grouting and Joint Filling
After repairing the concrete, the next step is to perform grouting and joint filling, particularly in the joints of the concrete structure. Grouting fills voids, gaps, and cavities within the basement walls and floor to prevent water seepage.
FCSC's CEMGROUT GP is an ideal solution for cementitious grouting. It is a high-flow, non-shrink grout that seals gaps and prevents water ingress in basement construction. By using CEMGROUT GP, you ensure seamless, watertight joints in precast columns, bed joints, and duct grouting, making the basement more resistant to water damage and extending its lifespan.
Step 3: Advanced Waterproofing
Once the concrete has been repaired and the grouting completed, advanced waterproofing techniques come into play. Applying waterproofing coatings is a must to minimize water permeability in the concrete structure.
FCSC offers AQUAPROOF Crystalline, which is designed for crystalline waterproofing technology. This solution penetrates the concrete and seals the gaps to form a permanent barrier against water. It is highly effective for basement foundations, retaining walls, and overall basement protection. With AQUAPROOF Crystalline, you can safeguard your basement from water ingress, even in heavy rainfall or flood-prone areas.

Step 4: Damp Proofing and External Waterproofing
Damp proofing is critical to maintaining long-term protection in basement walls. FCSC's AQUAPROOF IW, a water-based epoxy concrete sealer, is an excellent product for damp proofing. It provides an additional protective layer, keeping the basement free from dampness and water penetration. AQUAPROOF IW can also be used for roof slabs, screeds, and reservoirs, making it a versatile waterproofing product for external plastering and other structural applications.
For even better results, pairing AQUAPROOF IW with PU waterproofing seals any remaining gaps in the basement, ensuring the structure remains watertight and durable.
Step 5: Application of Sealer
After completing the waterproofing process, it is crucial to seal the concrete surface. Applying a sealer adds an extra layer of protection to prevent water from penetrating the concrete. AQUAPROOF IW, as a water-based epoxy concrete sealer, delivers long-lasting results by keeping the basement dry and durable. This final step guarantees waterproofing effectiveness and ensures the basement remains resistant to moisture and water damage for years to come.
Conclusion
With a combination of FCSC products like CEMBOND SBR, CEMGROUT GP, and AQUAPROOF Crystalline, the waterproofing process of basement areas becomes effective, ensuring long-term durability and protection against water ingress. These products work together to create a robust barrier that keeps your basement dry, functional, and protected from future damage.
#Basement waterproofing contractors#Damp proofing for basements#pu waterproofing chemical#water based epoxy concrete sealer
0 notes
Text
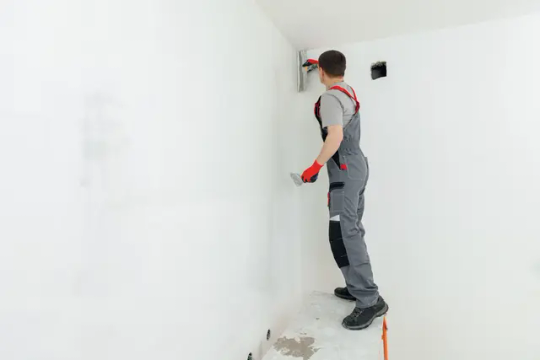
Plastering Perfection: Best Practices for Internal and External Wall Finishes
Expert Guide to Plastering Walls by First Choice Specialty Chemicals
Plastering is essential for achieving a smooth, durable finish on walls. At First Choice Specialty Chemicals, we excel in delivering high-quality plaster finishes through meticulous preparation, precise ratio mixing, and expert execution. Here’s our expert guide on plastering internal and external walls.
Internal Wall Plastering
1. Surface Cleaning: Ensure the wall is free of dirt, debris, or loose particles for better adhesion.
2. First Coat:
- Create a slurry by mixing (CEMBOND SBR) and water in a 1:4 ratio.
- Gradually add 6-7 parts of cement.
- Apply the slurry using a brush or trowel to improve bonding.
3. Second Coat: Apply another layer of CEMBOND SBR slurry within 30 minutes, while the first coat is still tacky.
4. Cementitious Repair Mortar:
- Mix AQUAPROOF IW with water (0.1%-0.4%) before adding it to the mortar.
- Maintain a low water/cement ratio for optimal performance.
5. Drying: Allow the plaster to dry for 5-7 days.
6. Finishing: Apply FCSC Wall Safe putty for a smooth finish. For unpainted walls, apply a protective coat of Cemocoat AR mixed with water (1:4 ratio).
External Wall Plastering
1. Surface Cleaning: Clean the wall thoroughly.
2. First Coat:
- Mix SBR latex and water in a 1:4 ratio.
- Add 6-7 parts of cement to the slurry.
- Apply the mixture with a trowel.
3. Second Coat: Apply another layer of slurry within 30 minutes, while the first coat is tacky.
4. Cementitious Repair Mortar:
- Mix AQUAPROOF IW with water (0.1%-0.4%) and add to the mortar.
- Use less water and more cement to protect against rain.
5. Drying: Allow the plaster to cure for 10 days.
6. Finishing: Apply FCSC Wall Safe putty, similar to internal walls, for a robust finish.
Conclusion
For long-lasting, professional plastering results, follow the methods outlined by First Choice Specialty Chemicals. Use AQUAPROOF IW and Wall Safe putty for both internal and external walls to ensure durability and water resistance. This guide helps achieve a high-quality, smooth, and durable wall finish.
#Wall Safe putty#durable wall finish#FCSC Wall Safe putty#External Wall Plastering#Internal Wall Plastering
1 note
·
View note