
Your Trusted Post Production Partner! For a trustworthy image retouching service, you can’t find a better service provider than First Clipping Path
Don't wanna be here? Send us removal request.
Statistics
We looked inside some of the posts by firstclippingpath and here's what we found interesting.
Average Info
Notes Per Post
0
Likes Per Post
0
Reblog Per Post
0
Reply Per Post
0
Time Between Posts
17 days
Number of Posts By Type
Text
16
Link
1
Last Seen Tumblr Blogs


Fun Fact
Tumblr has a low social media market share in South America.
Text
Post Production Image Editing: Transform Your Photos with These Expert Tips

Post-production image editing refers to the process of enhancing, retouching, and manipulating images in order to improve their quality and appearance. It involves adjustments in color, contrast, sharpness, and other elements to achieve the desired outcome.

Additionally, post-production image editing can also involve removing unwanted elements, adding special effects, or creating composite images. This process is vital in various industries such as photography, advertising, e-commerce, and graphic design. By utilizing specialized software and techniques, post-production image editing allows for the creation of visually appealing and compelling images that meet the specific requirements of clients or projects.
Understanding The Basics Of Post Production Image Editing

Post production image editing, also known as photo editing, is a crucial step in the process of enhancing and optimizing your images. By making adjustments and improvements to the raw or captured images, you can elevate the visual impact and overall quality of your photographs. Whether you're a professional photographer or an enthusiast, understanding the basics of post production image editing is essential to create stunning visuals that truly capture your vision. The Importance of Production Image Editing
Post production image editing serves several important purposes that can significantly enhance the quality and impact of your images. Here are some key points to consider: - Enhancing image aesthetics: Post production editing allows you to fine-tune various aspects of your images, such as exposure, color vibrancy, contrast, and sharpness. By adjusting these elements, you can create visually stunning images that grab the viewer's attention. - Correcting imperfections: Not every photo comes out perfect straight from the camera. Post production editing provides you with the tools to fix imperfections like underexposed or overexposed areas, lens distortions, noise, blemishes, and other unwanted elements. These corrections ensure that your final images are polished and visually appealing. - Expressing your artistic vision: Post production image editing allows you to add your personal touch and creativity to your photographs. Through adjustments and creative effects, you can enhance the mood, add depth, or create a specific atmosphere that reflects your unique artistic style. - Highlighting important details: With post production editing, you can selectively enhance or diminish specific elements within the image. This enables you to emphasize important details that might have been overlooked or to minimize distractions, directing the viewer's focus to the intended subject. - Maintaining consistency: For photographers who work on a series of images or have a specific style, post production editing ensures consistency across their work. By applying similar adjustments and adjustments to a collection of images, photographers can establish a cohesive visual aesthetic that defines their brand or artistic portfolio. Common Mistakes To Avoid In Post Production Image Editing While post production image editing offers countless possibilities for enhancing your images, it's crucial to avoid common mistakes that can negatively impact their quality. Here are some key mistakes to steer clear of: - Over-editing: It's easy to go overboard with image editing, resulting in unrealistic and unnatural-looking images. Avoid excessive adjustments, such as oversaturating colors, over-sharpening, or extreme alterations to the image's overall tone. - Neglecting exposure and white balance: Proper exposure and correct white balance are essential for capturing accurate colors and tones in your images. Failing to address these aspects during post production can result in inaccuracies and a loss of image quality. - Ignoring composition and subject placement: Even with post production editing, it's crucial to consider composition and subject placement during the initial capture. Correcting major compositional flaws in post production can be challenging and might result in loss of image quality. - Forgetting to save original files: Always preserve the original files before starting any post production editing. This ensures that you have a reference point to revert to if needed and prevents permanent loss of data. Selecting The Right Software For Post Production Image Editing Choosing the right software for post production image editing is essential to optimize your workflow and achieve the desired editing results. Consider the following factors when selecting your editing software: - Feature set: Look for software that offers a comprehensive range of editing tools and capabilities suited to your specific needs. This can include basic adjustments like exposure and color correction, as well as advanced features like layers, masks, and filters. - User-friendly interface: Opt for software with an intuitive and user-friendly interface. This ensures a smooth and efficient editing process, allowing you to focus on the creative aspects rather than navigating complex menus and tools. - Compatibility: Ensure the software you choose is compatible with your operating system and other hardware devices. Compatibility issues can hinder your editing process and limit your access to software updates and improvements. - Budget and affordability: Consider your budget and the affordability of the software. There are both free and paid editing software options available, each with varying levels of functionality and features. Assess your needs and financial constraints before making a decision. By understanding the basics of post production image editing, avoiding common mistakes, and selecting the right software, you can take your photography to the next level. Embrace the creative possibilities that post production editing offers and unlock the full potential of your images.
Essential Techniques for Production Image Editing
Post Production Image Editing Adjusting exposure and contrast: - Proper exposure is crucial for a well-balanced image. Adjusting exposure and contrast can greatly enhance the overall look and feel of your photos. - Use the following techniques to achieve the desired result: - Increase or decrease the exposure to brighten or darken the image, respectively. - Adjust the contrast to make the image appear more dynamic. - Use the highlights and shadows sliders to recover details in the brightest and darkest parts of the photo. Enhancing colors and saturation: - Adding vibrancy and saturation to colors can make your images pop and appear more visually appealing. - Consider the following tips when enhancing colors and saturation in post-production: - Use the vibrance and saturation sliders to boost the intensity of colors without oversaturating the image. - Adjust the hue slider to change the overall color tone of the image. - Target specific colors using the HSL (hue, saturation, luminance) panel for more precise adjustments. Mastering white balance: - Correct white balance is essential for achieving accurate colors in your photos. It helps eliminate color casts caused by different light sources. - Follow these techniques to master white balance: - Use the auto white balance setting as a starting point and fine-tune it manually if needed. - Adjust the temperature slider to make the image cooler (bluer) or warmer (yellower). - Use the tint slider to correct any green or magenta color casts. Remember, post-production image editing is a powerful tool that allows you to bring out the best in your photos. Experiment with different techniques to find the perfect balance and make your images truly shine. https://www.youtube.com/watch?v=iJdjhvFm2Bw&t=2s
Advanced Tips For Professional-Level Post Production Image Editing
When it comes to post production image editing, there are several advanced techniques that can take your editing skills to a professional level. In this section, we will explore three key tips for advanced image editing: retouching and skin smoothing, removing unwanted objects and blemishes, and adding creative effects and filters. Retouching And Skin Smoothing - To achieve professional-level retouching and skin smoothing, follow these tips: - Use the clone stamp tool to remove imperfections and blemishes on the skin. - Utilize frequency separation technique to separate skin texture from skin tone for precise editing. - Adjust the opacity of your retouching layers to maintain a natural look. - Avoid over-editing by zooming in and out of the image regularly to assess the overall effect of your retouching. Removing Unwanted Objects And Blemishes - Removing unwanted objects and blemishes from an image can greatly enhance its visual appeal. Consider the following tips: - Utilize the spot healing brush tool to quickly remove small blemishes, spots, or dust particles from the image. - Use the content-aware fill tool to intelligently remove larger objects or distractions from the background. - Take advantage of the clone stamp tool to carefully remove unwanted elements without leaving any visible traces. - Pay attention to details and ensure that the surrounding area blends seamlessly with the edited part. Adding Creative Effects And Filters - Creative effects and filters can transform a dull image into a work of art. Here are some tips to enhance your images with these effects: - Experiment with different adjustment layers, such as curves, levels, and color balance, to achieve the desired look. - Apply creative filters or overlays to add texture, depth, or a vintage feel to your images. - Don't be afraid to play with blending modes and layer opacity to create unique effects. - Use masks to apply effects selectively to specific areas of the image, enhancing the overall composition. Remember, these are just a few advanced tips to take your post production image editing skills to the next level. Practice, experiment, and develop your own style to create stunning visuals that stand out from the crowd.
Optimizing Workflow For Efficient Post Production Image Editing
As post production becomes an essential part of the photography process, optimizing workflow for efficient image editing is crucial. By organizing and managing your image files, creating and applying presets for batch editing, and utilizing keyboard shortcuts and hotkeys, you can streamline your post production workflow and save valuable time. Let's explore each of these techniques in detail: Organizing And Managing Your Image Files: - Create a consistent file and folder naming system to easily locate and access your images. - Use metadata tags to categorize and label your files based on important details such as location, subject, and date. - Utilize file management software or applications to help streamline the organization process. - Regularly back up your files to prevent loss of valuable work. Creating And Applying Presets For Batch Editing: - Develop a collection of presets for common editing tasks such as color correction, exposure adjustments, and sharpening. - Apply these presets to multiple images simultaneously, saving you valuable time and effort. - Customize presets based on specific shooting conditions or preferences. - Regularly update and refine your presets to adapt to evolving editing styles and techniques. Utilizing Keyboard Shortcuts And Hotkeys: - Familiarize yourself with commonly used keyboard shortcuts to perform editing tasks quickly and efficiently. - Customize keyboard shortcuts to match your preferred workflow and editing process. - Use hotkeys for frequently used tools or commands, improving overall workflow speed. - Regularly practice and incorporate keyboard shortcuts into your editing routine for optimal efficiency. By implementing these techniques, you can optimize your workflow for efficient post production image editing. Organizing and managing your image files, creating and applying presets for batch editing, and utilizing keyboard shortcuts and hotkeys will not only save you time but also improve your overall editing process. With a streamlined workflow, you can focus more on unleashing your creative vision and producing stunning final images.
Elevate Your Photography with Expert Post-Production Services
In the world of photography, capturing the perfect shot is just the beginning. To truly make your images stand out and leave a lasting impression, investing in professional post-production photography services is key. Whether you're a seasoned photographer or just starting out, post-production can take your work to the next level What is Post-Production Photography? Post-production photography, also known as photo retouching or editing, involves enhancing and refining images after they have been taken. It's a crucial step in the photography process that allows photographers to: - Enhance Visual Appeal: Post-production can correct exposure issues, adjust colors, and sharpen details, ensuring your photos look their absolute best. - Tell a Story: Skilled post-production work can bring out the emotions and narratives captured in your photos, making them more compelling and memorable. - Remove Imperfections: Unwanted elements or blemishes can be seamlessly removed, leaving you with flawless, professional-looking images. - Maintain Consistency: Post-production ensures that your photography style remains consistent across your portfolio, reinforcing your brand identity. Why Invest in Post-Production Photography Services? - Time Efficiency: Editing photos can be time-consuming, taking away from your shooting schedule. Outsourcing post-production allows you to focus on what you do best—capturing moments. - Expertise: Professional editors have the skills and tools to transform your photos into works of art. They stay up-to-date with the latest trends and techniques to ensure your images are contemporary and engaging. - Consistency: By working with a dedicated post-production team, you can maintain a consistent look and feel across your entire body of work, strengthening your brand recognition. - Quality Assurance: Experienced editors pay attention to detail, ensuring that every aspect of your image is polished to perfection. Post-production photography is the secret ingredient that can elevate your photography to new heights. Whether you're a portrait, landscape, or commercial photographer, investing in expert post-production services can make a world of difference. So, why settle for ordinary when you can achieve extraordinary results with the power of post-production? Unlock the true potential of your photography today!
Expert Strategies For Post Production Image Editing In Different Genres
Landscape Photography: Enhancing Nature's Beauty Capturing the beauty of the natural world through landscape photography is a truly magical experience. However, it often requires some post-production editing to fully enhance the stunning scenery captured by your camera lens. Here are some expert strategies to elevate your landscape images to the next level: - Enhance color and contrast: Adjusting the color and contrast can bring out the vividness and depth of your landscape photos. Experiment with enhancing the saturation and vibrancy to make the colors pop. - Sharpen details: When photographing landscapes, the intricate details can sometimes get lost. Focusing on sharpening the key elements, such as rocks, trees, or clouds, can add definition and make your images more visually appealing. - Adjust exposure: Proper exposure is crucial in landscape photography. Play around with the exposure settings to ensure the highlights are not blown out and the shadows are not too dark. This will help achieve a balanced and well-exposed image. - Crop for composition: Composition plays a significant role in creating impactful landscape images. Use cropping tools to adjust the composition and remove any distractions that may be present at the edges of the frame. This will help draw the viewer's attention to the main subject of the photo. - Remove unwanted elements: Sometimes, there may be unwanted elements such as power lines or litter in your landscape photos. Utilize the cloning or healing brush tools to seamlessly remove these distractions and create a cleaner and more aesthetically pleasing image. Portrait Photography: Perfecting Skin Tones And Facial Features Portrait photography aims to capture the unique beauty and personality of individuals. To make portraits truly exceptional, post-production editing techniques can be used to perfect skin tones and enhance facial features. Here are some strategies to improve your portrait images: - Retouching skin: Skin imperfections and blemishes can be easily corrected using tools like the spot healing brush or the patch tool. Smooth out rough patches, remove unwanted spots, and achieve a flawless complexion while still maintaining a natural look. - Enhancing skin tones: Achieving natural and flattering skin tones is vital in portrait photography. Adjust the white balance and color temperature to ensure accurate and pleasing skin tones. This will bring out the natural beauty of your subjects. - Adjusting facial features: Tools like the liquify tool can be used to subtly enhance facial features. You can make subtle adjustments to the shape of the face, eyes, nose, or lips to create a more balanced and aesthetically pleasing portrait. - Adding depth and dimension: Utilize dodging and burning techniques to add depth and dimension to your portraits. Enhancing highlights and shadows can help create a more three-dimensional look, bringing your subjects to life. - Applying selective editing: In portrait photography, it's essential to focus on the subject while keeping the background subtle. Read the full article
#imageediting#imageretouching#imageretouchingservice#imageretouchingservicecost#photocolorcorrectionservices#photoretouchingservices#shadowcreationservice
0 notes
Text
Transform Your Images with the Best Clipping Path Services

The best clipping path services provide precise and accurate image editing solutions, ensuring crisp and clean images. They employ expert graphic designers who use advanced techniques to remove backgrounds, create smooth edges, and enhance overall image quality. These services play a crucial role in industries such as e-commerce, photography, and advertising, where high-quality visuals are paramount for attracting customers and boosting sales. By outsourcing clipping path services, businesses can save time and resources while receiving professional-level results. With their attention to detail, quick turnaround times, and cost-effective solutions, these services have become essential for businesses seeking top-notch image editing.
What Are Clipping Path Services?
Clipping path services are crucial for achieving professional and visually appealing image editing. By definition, clipping path services involve using photo editing software to create a vector path or outline around an object or subject within an image. This technique allows for the removal or separation of the selected object from its original background, enabling it to be placed on a new background or used in various design applications. Definition And Explanation Of Clipping Path Services:

- Clipping path services utilize photo editing software to create a precise outline around an object or subject in an image. - This process involves meticulously manually tracing the edges of the object using the pen tool or other selection tools. - The resulting clipped path isolates the object, allowing it to be placed on any desired background or used in graphic design projects. - Clipping path services are commonly used in industries such as e-commerce, advertising, photography, and graphic design to enhance and manipulate product images. - These services are employed to remove backgrounds, replace backgrounds, combine multiple images, create image masks, and perform various image editing tasks. Role Of Clipping Path Services In Image Editing: - Background removal: Clipping path services excel in isolating objects from their backgrounds, providing a clean and professional look to product images. - Object manipulation: By extracting an object from its original image, clipping path services make it easier to manipulate and place objects on new backgrounds or in different compositions. - Photo retouching: Clipping path services contribute to the overall retouching process, allowing for precise adjustments and enhancements to specific objects within an image. - Image masking: Clipping paths can be converted into masks to selectively hide or reveal image elements. This technique is particularly useful in complex image editing tasks. - Creative freedom: Clipping path services offer designers the flexibility to explore different backgrounds and arrangements, enabling them to create visually stunning compositions. - Consistency: Utilizing clipping path services ensures consistent brand visuals across various marketing materials and platforms. It helps maintain a cohesive and professional brand image.
Why Clipping Path Services Are Essential For Image Transformations
Importance Of Precision In Image Editing In the world of digital imagery, precision is everything. Whether you're a photographer, graphic designer, or e-commerce business owner, the quality of your visuals can make or break your success. This is where clipping path services come into play, offering an essential solution for achieving precise results in image editing. How Clipping Path Services Help Achieve Precise Results Clipping path services utilize advanced techniques to ensure flawless and accurate image transformations. Here are key points to understand how these services contribute to achieving precision: - Clipping paths: The primary technique utilized in clipping path services is the creation of a vector path or silhouette around the subject of an image. This path precisely selects the desired area while excluding the unwanted background or objects. By isolating the subject, editing tasks such as background removal, color correction, or adding new backgrounds become much easier. - Manual precision: Unlike automated image editing tools, clipping path services involve manual work by skilled professionals. Each path is carefully drawn and customized according to the specific requirements of the image. This meticulous attention to detail ensures optimal precision and allows for complex transformations that automated solutions may struggle to achieve. - Edge refinement: Clipping path services also incorporate edge refinement techniques, smoothing out jagged edges and creating clean and seamless cutouts. This level of precision is crucial, especially when dealing with intricate or highly detailed subjects like hair, fur, or delicate objects. - Consistent and accurate results: When it comes to image editing, consistent and accurate results are vital. Clipping path services offer a reliable way to achieve uniformity across your entire image library, ensuring that all visuals adhere to your desired style and branding. Examples Of Image Transformations Made Possible With Clipping Path Services

Clipping path services empower image editors and designers to bring their creative visions to life. Here are a few examples of image transformations made possible: - Background removal: Clipping path services enable the removal of unwanted backgrounds, allowing you to replace them with more visually appealing or contextually relevant elements. This is particularly useful for product images in e-commerce, where a clean and distraction-free background can enhance the visual appeal of the item. - Object isolation: By precisely clipping out specific objects or subjects from an image, you can freely manipulate and reposition them without affecting the rest of the composition. This technique proves invaluable for creating composite images, designing marketing collateral, or enhancing product presentations. - Color correction: Clipping path services facilitate pinpoint color correction, enabling you to modify or enhance specific areas of an image without impacting the surrounding elements. This enables fine-tuning of color balance, saturation, or exposure, ensuring a cohesive and visually pleasing outcome. - Creative manipulation: With the precision offered by clipping path services, you can unleash your creativity and realize even the most imaginative ideas. From surreal photo manipulations to the seamless merging of multiple elements, these services provide the flexibility to transform and elevate your visual content. The importance of precision in image editing cannot be overstated. Clipping path services offer a reliable and effective solution for achieving the desired level of accuracy in image transformations. With their manual precision, edge refinement techniques, and ability to facilitate a wide range of image manipulations, they prove instrumental in meeting the demands of various industries and creative endeavours. https://youtu.be/umB00OTSBQA
Choosing The Best Clipping Path Service Provider
When it comes to choosing a clipping path service provider, it's essential to consider several factors to ensure that you find a reliable and high-quality option. The right service provider can make all the difference in meeting your image editing needs and maintaining the integrity of your visuals. To help you make an informed decision, consider the following factors: - Experience and expertise: Look for a provider with years of experience in the industry. They should have a deep understanding of clipping path techniques and possess expertise in working with various image editing software. - Turnaround time: Time is crucial when it comes to image editing services. An efficient and reliable provider should be able to deliver high-quality results within a reasonable timeframe. Make sure to inquire about their average turnaround time to ensure it aligns with your project requirements. - Pricing: While cost should not be the sole deciding factor, it's important to consider the pricing structure offered by the clipping path service provider. Look for a provider that offers competitive rates without compromising on quality. - Customer support: A reliable and customer-focused service provider should offer excellent customer support. This includes being responsive to your inquiries, providing clear communication throughout the editing process, and addressing any concerns or issues promptly. - Security and confidentiality: When outsourcing any image editing services, it's crucial to ensure that the provider prioritizes the security and confidentiality of your files. Look for providers that have robust security measures in place to protect your images and maintain strict confidentiality agreements. Top Features To Look For In A Reliable Provider A reliable clipping path service provider should possess certain features that set them apart from the competition. When evaluating potential providers, keep an eye out for the following: - Quality assurance: Look for a provider that emphasizes quality assurance. They should have a stringent review process in place to ensure the accuracy and precision of the clipping paths. This is crucial to achieving seamless results and maintaining image integrity. - Versatility and range of services: A reliable provider should offer a wide range of services beyond clipping paths. Look for additional services such as background removal, photo retouching, or color correction. This ensures that all your image editing needs can be met within one service provider. - Flexible pricing options: Different projects may require varying levels of complexity and customization. A reliable provider should offer flexible pricing options that align with your specific project requirements. This can include per-image pricing or bulk discounts for larger volumes. - Prompt and clear communication: Effective communication is essential for a successful partnership. A reliable clipping path service provider should communicate promptly and clearly, ensuring that they understand your requirements and provide updates throughout the editing process. - Positive customer reviews and testimonials: Do your research and look for customer reviews and testimonials. Positive feedback from previous clients is a strong indicator that the provider consistently delivers quality results and excellent customer service. How To Evaluate The Quality Of Clipping Path Services Offered Evaluating the quality of clipping path services ensures that you choose a skilled provider who can deliver professional results. Consider the following points when assessing the quality of a potential service provider: - Portfolio and samples: Request to review their portfolio or sample images to assess the quality of their clipping paths. Look for clean and precise results with accurate edge detailing. - Attention to detail: The quality of a clipping path relies on the provider's attention to detail. Evaluate how accurately they have separated the main subject from the background while maintaining fine details like hair, fur, or intricate objects. - Consistency: Consistency in the quality of clipping paths is key. Review multiple samples to ensure that the provider consistently delivers high-quality results across various images. - Customization and flexibility: Assess if the service provider can adapt their techniques and deliver customized results based on your specific requirements. They should be able to handle a variety of image complexities and provide tailored solutions. - Revisions and refunds: Inquire about the provider's policy regarding revisions and refunds. A trustworthy service provider should be willing to make revisions or offer refunds if the delivered results do not meet your expectations. By considering these factors, looking for top features, and evaluating the quality of clipping path services, you can confidently choose the best clipping path service provider that suits your unique image editing needs.
How Clipping Path Services Work
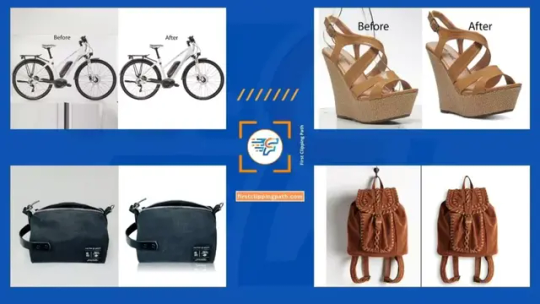
Step-By-Step Process Of Applying A Clipping Path To An Image Applying a clipping path to an image is an essential technique used in graphic design and photo editing. It allows you to isolate specific parts of an image, create precise cuts, and remove the background. If you're curious about how clipping path services work and the steps involved in this process, keep on reading! Below are the step-by-step instructions for applying a clipping path to an image: - Image selection: - Choose the image you want to work on and ensure it is of high quality. - Consider the complexity of the image, as some may require more intricate clipping paths. - Path creation: - Open the selected image in a photo editing software like Adobe Photoshop. - Use the pen tool (p) to draw an outline around the main subject or desired area. - Be precise and careful while drawing the path, following the contour of the subject. - Refining the path: - After drawing the initial path, you can refine it by adjusting anchor points and curves. - Utilize the convert point tool (shift+c) to modify the shape of anchor points. - Smooth out curves by using the direct selection tool (a) and adjusting handles. - Applying the clipping path: - Once you're satisfied with the path, apply the clipping path command. - In Adobe Photoshop, you can find this option under the "paths" panel. - Select the path you created, and then navigate to "clipping path" in the drop-down menu. - Choose the desired settings and hit "OK" to apply the clipping path. Detailed Explanation Of Tools And Techniques Used Various tools and techniques play a crucial role in achieving precise and professional results when applying clipping paths. Understanding these tools and techniques will help you execute flawless cutting and ensure the quality of the edited images. Here are some key points to consider: - Pen tool (p): The most commonly used tool for creating clipping paths. With its ability to create anchor points and curves, it provides the precision required for detailed outlining. - Convert point tool (shift+c): This tool allows you to alter the shape of anchor points by converting them from smooth to corner points or vice versa. - Direct selection tool (a): With this tool, you can manipulate anchor points and control handles to adjust the curves of the path. - Zoom in/out: Zooming in helps in achieving accuracy while drawing paths and refining curves. - Feathering: Applying feathering to the edges of the clipped subject helps create a more natural and blended appearance. - Layer masking: Combining the clipping path with layer masking allows for non-destructive editing, making it easier to make adjustments later if needed. Examples Of Before And After Images To Showcase The Transformation To provide a clearer understanding of the impact of clipping path services, let's look at some before and after images. These examples will illustrate the transformation that can be achieved by removing backgrounds and isolating subjects through clipping paths. - Before: An image of a product with a cluttered background. - After: The product is now cut out with a crisp, clean background, ready for e-commerce listings. - Before: A group photograph taken in an unsuitable location. - After: The subjects are separated from the background, allowing for a focused and professional appearance. - Before: An image of a model with distracting elements in the background. - After: The model is extracted and placed on a neutral background, highlighting their features. - Before: An image of a complex object with various intricate parts. - After: The object is meticulously cut out, emphasizing its details without any distractions. By applying clipping path services, images can be transformed, enhancing their visual appeal and ensuring they are suitable for specific purposes such as advertisements, catalogues, or branding materials. So, next time you come across an image that could benefit from a polished and refined look, consider utilizing clipping path services to achieve that professional touch. Remember to employ these steps, tools, and techniques to ensure a seamless clipping path process and create stunning visual content.
Popular Applications Of Clipping Path Services
Clipping path services are a crucial tool in the world of image editing, offering numerous applications that enhance the visual appeal of various projects. Whether you're an e-commerce business owner, a graphic designer, or simply someone looking to spruce up their images, clipping path services can be a game-changer. In this section, we'll explore some of the popular applications of clipping path services and how they can elevate your creative projects. E-Commerce Product Photography E-commerce businesses heavily rely on visually appealing product images to attract customers and drive sales. Clipping path services are widely used in e-commerce product photography to achieve a clean, professional look. Here are some key points regarding the application of clipping path services in e-commerce product photography: - Create a clean and uniform background: Clipping path services allow you to separate the product from its original background, creating a clean and consistent backdrop that enhances the overall aesthetic appeal. - Customize background and color options: With the background removed, you can easily replace it with a new one or adjust the colors according to your branding needs, ensuring your product stands out and aligns with your visual identity. - Add natural shadows and reflections: By utilizing clipping path services, you can seamlessly integrate shadows and reflections into your product images, giving them a realistic, three-dimensional effect that boosts their visual impact. Read the full article
#carphotoediting#clippingpath#clippingpathservice#imageediting#imageretouching#imageretouchingservice#imageretouchingservicecost#photocolorcorrectionservices
0 notes
Text
Best Image Cutout Service: Boost Your Website's Visual Appeal with Professional Editing

Image cutout service is a professional service that provides accurate and precise cutout services for images. With expertise in removing backgrounds and isolating subjects from images, this service ensures high-quality and seamless results for various purposes. Whether for e-commerce, advertising, or graphic design, image cutouts service offers efficient solutions to enhance the visual appeal and professionalism of images. For businesses and individuals seeking to showcase products or create visually striking graphics, image cutout service is a reliable and efficient option. With skilled professionals and advanced technology, this service ensures the accurate removal of backgrounds and isolation of subjects from images. The resulting cutouts can be seamlessly integrated into various platforms, such as websites, social media, or print materials, effectively enhancing their visual appeal. Whether it's for e-commerce, advertising, or graphic design purposes, image cutout service offers a convenient and professional solution for crisp and enticing imagery.

What Is Image Cutouts Service?
Definition And Explanation Of Image Cutouts Service

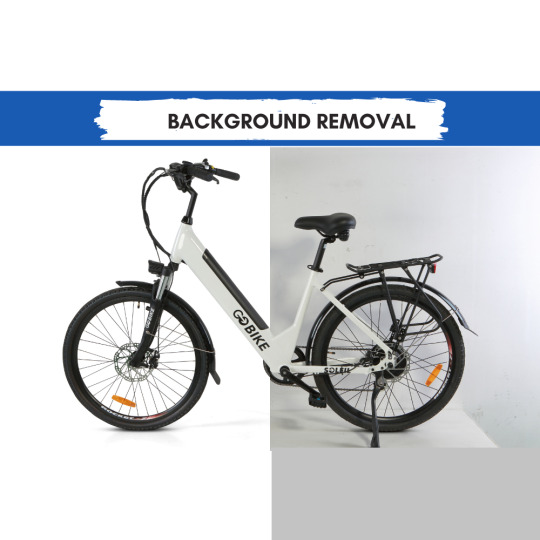
Image cutouts service, also known as background removal service, is a photo editing technique that involves isolating and separating subjects from their backgrounds. This process is typically carried out by professional photo editors who use specialized software tools to carefully remove the background from an image, leaving only the subject behind. The result is a clean, crisp image with a transparent or solid-colored background, depending on the client's requirements. Here are the key points about the image cutouts service: - It helps in isolating and separating subjects from backgrounds: Image cutouts service allows for precise extraction of subjects from their backgrounds, resulting in images with clean edges and no unwanted distractions. This is particularly useful in situations where the background is cluttered, or distracting, or when the subject needs to be seamlessly incorporated into a different background or design. - It offers flexibility in image usage: By removing the background, image cutouts service provides flexibility in using the subject image in various contexts. The transparent background allows the subject to be easily integrated into different backgrounds, layouts, or designs without any visible artefacts. This opens up possibilities for product photography, e-commerce, graphic design, marketing materials, and more. - It enhances visual appeal and professionalism: Removing the background and isolating the subject can significantly improve the overall visual appeal and professionalism of an image. By eliminating distracting elements or cluttered backgrounds, the subject becomes the main focus, leading to a more visually impactful result. This can be especially important for businesses or individuals looking to showcase products or services in a polished and attention-grabbing manner. Examples of images that often require image cutout service are: - Product photography: E-commerce websites often require images of products with a clean, transparent background. By removing the background, the product becomes the sole focus, making it more appealing and enhancing the customer's shopping experience. - Portrait photography: Image cutouts service can be used to isolate a person from the background in portrait photography. This allows for easy integration into various designs or backgrounds, such as professional headshots, social media profiles, or magazine covers. - Advertising and marketing materials: Marketers often use image cutouts to create visually impactful advertisements or marketing collaterals. By removing the background and highlighting the subject, the message becomes clear and attention-grabbing. To summarize, image cutouts service provides a way to separate subjects from their backgrounds, enhancing the visual appeal, flexibility, and professionalism of images. By precisely isolating the subject, businesses and individuals can create compelling visuals for various purposes, ensuring that their photos stand out and make a lasting impression.
Benefits Of Image Cutouts Service For Website Visual Appeal

Enhancing Product Images For E-commerce Websites When it comes to e-commerce websites, the visual appeal of product images plays a vital role in attracting customers and driving conversions. Employing an image cutout service can significantly enhance the quality of product images and provide various benefits that contribute to an overall improved user experience. Here are the key advantages of using an image cutout service for enhancing product images: - Increased focus on the product: By removing the background or unwanted elements from an image, an image cutout service ensures that the product becomes the centre of attention. This allows customers to focus solely on the product itself, without any distractions. - Improved image quality: Image cutouts involve precise and intricate editing techniques, resulting in high-quality and visually appealing product images. These edited images are sharp, vibrant, and free from any imperfections, giving the impression of professionalism and reliability. - Consistency in product presentation: Consistency is crucial when it comes to e-commerce websites. An image cutout service ensures that all product images have a consistent style and presentation, creating a cohesive and professional look across the website. This consistency helps to establish trust and confidence among customers. - Flexible usage across various platforms: By providing product images with transparent backgrounds, an image cutout service allows for versatile usage across different platforms and marketing materials. These cutout images can be seamlessly integrated into various website designs, social media posts, and advertisements, ensuring a consistent visual identity. - Highlighting product details: Image cutouts can effectively highlight specific product details or features that might otherwise get lost in a cluttered background. By isolating the product, important details such as intricate patterns, textures, or small components can be emphasized, providing customers with a clearer understanding of the product's unique attributes. Creating Customized And Unique Website Banners Website banners are an essential component of web design, as they serve as visually striking elements that capture users' attention and communicate key messages. An image cutout service can play a significant role in creating customized and unique website banners that effectively convey the desired message. Here are the key benefits of using an image cutout service for website banners: - Tailored branding: With an image cutouts service, website banners can be customized to align with a brand's unique identity and messaging. By incorporating cutout images of specific products or brand elements, banners can deliver a cohesive and personal touch, establishing a strong brand presence. - Visually captivating: Website banners are often the first element that users see when they visit a website. An image cutout service enables the creation of visually captivating banners by effectively blending cutout images, graphics, and typography. This combination creates an eye-catching and memorable design that leaves a lasting impact on users. - Enhanced message clarity: By using image cutouts, website banners can eliminate unnecessary visual clutter and distractions, allowing the main message to take centre stage. This ensures that the message is conveyed clearly and concisely, increasing the chances of user engagement and understanding. - Dynamic and versatile design: Image cutouts provide the flexibility to create banners with dynamic and versatile designs. Cutout images can be easily placed and moved within the banner, enabling the exploration of various creative layouts and compositions. This versatility allows for the experimentation of different visual elements to find the most impactful combination. - Improved user experience: A well-designed website banner contributes to a positive user experience by effectively guiding users' attention and providing them with relevant information. Image cutouts help to create visually appealing and contextually relevant banners that enhance the overall aesthetic appeal of a website, making it more engaging and user-friendly.
How Image Cutout Service Boosts Website's Visual Appeal
Creating Clean And Professional Looking Website Design When it comes to attracting and engaging website visitors, design plays a crucial role. A visually appealing website not only grabs attention but also creates a positive first impression. One powerful tool that can greatly enhance your website design is the image cutouts service. It helps to create clean and professional-looking websites that leave a lasting impact on your audience. Here are the key points about how image cutout service can boost your website's visual appeal: - Removing distracting backgrounds and focusing on the subject: Image cutouts service allows you to remove unwanted backgrounds from your images, eliminating any distractions and placing the focus solely on the subject. By doing so, you can highlight key elements of your website design and convey your message more effectively. - Incorporating images seamlessly into the website layout: Image cutouts service ensures that images blend seamlessly into your website's layout, creating a cohesive and visually appealing design. Whether you want to showcase products, share testimonials, or feature team members, properly cut-out images help these elements seamlessly integrate with your website's overall aesthetics. - Enhancing the overall user experience: By utilizing image cutouts service, you can provide visitors with a visually pleasing and clutter-free browsing experience. With clean images that perfectly fit into your website's design, users can easily navigate through your content and find what they are looking for, resulting in higher engagement levels and longer time spent on your website. - Improving website loading speed: Large images with complex backgrounds can slow down your website's loading speed, negatively impacting the user experience and SEO. Image cutouts service reduces image file sizes and removes unnecessary elements, optimizing loading times and improving website performance. - Building trust and credibility: Well-designed websites with professional images create a sense of trust and credibility among visitors. When your website looks polished and visually appealing, it reflects positively on your brand and encourages users to stay longer, explore further, and convert into potential customers. Implementing image cutouts service for your website is a surefire way to create a clean, professional, and visually appealing design. By removing distracting backgrounds, seamlessly incorporating images, and enhancing the overall user experience, you can elevate your website's visual appeal and leave a lasting impression on your audience. Ensure that your website stands out from the competition by making effective use of image cutouts service.
Case Studies: Image Cutouts Service Success Stories
Case Study 1: How Image Cutouts Service Helped Increase Conversion Rate For An Online Store In this case study, we will explore how an online store leveraged image cutout service to enhance its visual appeal and drive higher conversion rates. By using this service, the online store was able to deliver more impactful product images, resulting in improved customer experience and increased sales. Here are the key points: - Before implementing the image cutout service, the online store faced challenges in presenting its products in the best possible light. The images lacked professional quality and failed to capture the attention of potential customers. - By utilizing image cutouts service, the online store was able to remove distracting backgrounds and focus solely on the products. This helped to highlight the key features and details, making the images more visually appealing and enticing to customers. - The improved product images made it easier for customers to evaluate the items, leading to a boost in their purchasing decisions. With a clear view of the product and its attributes, customers felt confident in making a purchase, ultimately increasing the conversion rate. - Implementing image cutouts service resulted in a more consistent and professional look across all product images on the online store. This enhanced brand credibility, trust, and ultimately, customer loyalty. - By providing customers with a seamless and visually pleasing shopping experience, the online store was able to stand out from competitors and gain a competitive edge in the market. Case Study 2: Enhancing Brand Identity Through Visually Appealing Website Images This case study focuses on how image cutout service helped a brand enhance its identity through visually engaging website images. By leveraging this service, the brand was able to create a compelling visual narrative that resonated with its target audience. Let's delve into the key points: - Prior to incorporating the image cutout service, the brand's website lacked captivating visuals that accurately represented its brand identity. The images were generic and failed to leave a lasting impression on visitors. - By using image cutouts service, the brand was able to create visually appealing images that aligned with its brand message and values. The removal of distracting backgrounds and precision in image editing gave the visuals a more professional and cohesive look. - The visually appealing images helped to captivate the attention of website visitors, effectively communicating the brand's story and unique selling points. This led to increased engagement and longer user sessions on the website. - With the incorporation of high-quality visuals, the brand was able to establish a strong emotional connection with its target audience. This resulted in improved brand recognition, recall, and overall brand loyalty. - The visually consistent website images aided in reinforcing the brand's identity and distinguishing it from competitors. The brand was able to project a cohesive and visually appealing image, leaving a lasting impression on visitors. By leveraging image cutout service, both of these case studies demonstrate the significant positive impact it can have on an online store's conversion rates and brand identity. Whether it is enhancing the visual appeal of product images or creating a visually engaging website, image cutout service can be a game-changer for businesses seeking to stand out in the digital landscape.
Tips For Choosing The Right Image Cutouts Service Provider
When it comes to image cutouts, finding the right service provider is crucial for ensuring high-quality and reliable results. Whether you're a photographer, graphic designer, or e-commerce business owner, having professional image cutouts can significantly enhance the visual appeal of your website or promotional materials. To help you make an informed decision, here are some factors to consider when selecting a service provider: Factors To Consider When Selecting A Service Provider: - Experience and expertise: Look for a service provider with extensive experience in image cutouts. Their expertise will ensure accurate and precise cutouts that seamlessly blend with your desired background. - Quality assurance: Ask about the provider's quality control measures to ensure that they deliver consistently excellent results. This should include multiple reviews and revisions to meet your specific requirements. - Turnaround time: Consider the provider's turnaround time and ensure it aligns with your project deadlines. Prompt delivery is essential, especially if you're working on time-sensitive campaigns. - Communication: Effective communication with the service provider is vital to convey your expectations clearly. A provider who is responsive and attentive to your needs will save you time and frustration in the long run. Questions To Ask To Ensure Quality And Reliability: To gauge the quality and reliability of an image cutout service provider, ask them the following questions: - What software do you use? : Professional service providers use advanced software like Adobe Photoshop to ensure precise and accurate cutouts. - What is your privacy policy? : Ensure that the service provider will handle your images securely and not use them for any other purpose without your permission. - Can you provide examples of your previous work? : Reviewing their portfolio will give you an idea of their skill level and the quality of their image cutouts. - Do you offer a satisfaction guarantee? : A service provider who stands behind their work will offer a satisfaction guarantee, indicating their commitment to delivering quality results. Pricing Models And Turnaround Time To Consider: - Pricing models: Service providers may offer different pricing models, such as per image, bulk discounts, or subscription-based plans. Choose one that suits your budget and the frequency of your image editing needs. - Turnaround time: Understand the time it takes for the service provider to complete the image cutouts. Consider if they offer expedited services for urgent projects and factor that into your decision-making process. Considering these factors, asking the right questions, and assessing pricing models and turnaround time will help you choose the most suitable image cutout service provider for your needs. Remember that quality and reliability should be your top priorities to ensure visually appealing and professionally edited images for your projects.
Diy VS Professional Image Cutouts: Pros And Cons
With the advancements in technology, image editing tools have become more accessible than ever. However, when it comes to image cutouts, it can be challenging to decide whether to tackle the task yourself or seek the assistance of a professional image cutout service. In this section, we will explore the pros and cons of both options to help you make an informed decision. Read the full article
0 notes
Text
Post Production Image Manipulation: Unleashing the Power of Digital Editing

Post production image manipulation involves making changes to digital images using software tools to enhance their appearance or create new visuals. This process includes adjusting colors, removing blemishes, adding or removing objects, and altering the overall composition to achieve the desired results. By employing various techniques and tools, image manipulators can transform ordinary photographs into stunning visuals that capture attention and convey a specific message or aesthetic. With the advancements in technology, post production image manipulation has become an essential part of many industries, including advertising, fashion, photography, and graphic design. Its ability to shape the visual narrative has made it a powerful tool for creating impactful imagery that engages audiences and drives desired outcomes.

Understanding The Basics
Fundamentals Of Post-Production Image Manipulation In the ever-evolving world of photography, post-production image manipulation plays a crucial role in enhancing the final output. Whether you're a professional photographer or an enthusiast, understanding the basics of post-production editing is essential to create stunning photographs. In this section, we will explore the fundamentals of post-production image manipulation and introduce you to the world of digital editing software. Introduction To Digital Editing Software

Digital editing software has revolutionized the way photographers edit and manipulate images. With a wide range of powerful tools and features, these software programs allow photographers to bring their creative visions to life. Here are some key points to understand about digital editing software: - User-friendly interface: Most digital editing software applications are designed with a user-friendly interface, making it easy for photographers of all skill levels to navigate and utilize the tools effectively. - Image adjustment features: These software programs offer a variety of image adjustment features, such as exposure correction, color balance, and contrast enhancement. These tools allow photographers to refine the visual aspects of their images and achieve the desired look. - Non-destructive editing: Digital editing software offers non-destructive editing capabilities, meaning that the original image file remains untouched. This allows photographers to experiment with different edits without worrying about permanently altering the original image. - Image retouching: One of the significant benefits of digital editing software is the ability to retouch images. With tools like spot removal, skin smoothing, and blemish correction, photographers can enhance the appearance of their subjects and make subtle adjustments for a polished final result. - Creative enhancements: In addition to basic adjustments, digital editing software provides a plethora of creative enhancements. From applying artistic filters and effects to adding text and graphics, these tools allow photographers to add a personal touch to their images and unleash their creativity. A solid understanding of post-production image manipulation fundamentals is crucial for any photographer. By exploring the capabilities of digital editing software, photographers can take their images to the next level and create visually captivating masterpieces. So, buckle up and dive into the exciting world of post-production image manipulation!
Essential Digital Editing Techniques
Adjusting Exposure And Contrast For Stunning Results In the world of post-production image manipulation, adjusting exposure and contrast can make a significant difference in the final outcome of your photos. Whether you're a professional photographer or an amateur enthusiast, understanding the essential digital editing techniques for exposure and contrast is crucial. Here are some key points to keep in mind: - Exposure adjustment: Proper exposure is vital for a well-balanced and visually appealing photo. Adjusting the exposure can help fix underexposed or overexposed areas of your image. Some techniques to achieve optimal exposure include: - Using exposure adjustment sliders in editing software to brighten or darken the image. - Employing hdr techniques to combine multiple exposures for a wider range of tonal values. - We are making use of curve adjustments to fine-tune the overall exposure of the image. - Contrast enhancement: Enhancing contrast can breathe life into dull or flat images, making them more vibrant and dynamic. By adjusting the tonal range between light and dark areas, you can create visually striking effects. Consider the following techniques for effective contrast enhancement: - Utilizing contrast adjustment sliders to increase or decrease the overall contrast of the image. - Applying local contrast adjustments using techniques like dodging and burning to bring out details and add depth. - Experiment with tone curves to achieve the desired level of contrast in different areas of the image. Enhancing Colors To Make Your Images

Colors play a crucial role in photography, and enhancing them can take your images to the next level. Whether you want to intensify the existing colors or manipulate them creatively, the following techniques will help you achieve stunning results: - Saturation adjustment: Increasing or decreasing the saturation of colors can have a significant impact on the overall look of your image. Use the saturation adjustment tool to enhance or tone down the vibrancy of specific colors or the entire image. - White balance correction: The correct white balance is essential for accurate color representation. Adjusting the white balance can help correct color casts caused by different lighting conditions. Use the white balance adjustment tool or manually adjust temperature and tint to achieve natural and pleasing colors. - Selective color adjustments: Sometimes, you may want to emphasize or alter the hue of specific colors in your image. By selecting individual color channels, such as red, green, or blue, you can make precise adjustments to enhance or manipulate particular colors. Mastering Retouching And Restoration Techniques

Retouching and restoration techniques are invaluable in post-production to give your images a polished and professional finish. Whether you want to remove imperfections, add subtle touch-ups, or completely restore an old photograph, here are some essential techniques to consider: - Spot healing: Use the spot healing brush or clone stamp tool to remove blemishes, dust spots, or distracting elements from your image. This technique is particularly useful for portrait retouching. - Skin retouching: Achieving smooth and flawless skin is often desired in portrait photography. Techniques like frequency separation or targeted retouching can help you maintain a natural appearance while removing any skin imperfections. - Digital restoration: If you're working with old or damaged photographs, digital restoration techniques can help breathe new life into them. Techniques like cloning, content-aware fill, and manual retouching can help repair scratches, tears, and faded areas, preserving the original detail and integrity of the image. Remember, practising these essential digital editing techniques will help you elevate your post-production skills and create stunning images that captivate your audience. So go ahead and unleash your creative potential through the power of image manipulation! https://www.youtube.com/watch?v=R6jUm45vxNc
Advanced Digital Editing Techniques
Post Production Image Manipulation: Advanced Digital Editing Techniques When it comes to post-production image manipulation, digital editing software provides a plethora of tools and techniques to enhance and transform your photographs. In this section, we will explore some advanced techniques that can take your editing skills to the next level. From creating realistic effects with filters and presets to using layers and masks for greater control, and incorporating blending modes for artistic flair, these techniques will help you elevate your digital editing game. Creating Realistic Effects With Filters And Presets Filters and presets are powerful tools that can instantly add stunning effects to your images. Here are some key points to consider when using filters and presets in your digital editing process: - Experiment with different filter options to give your images a unique touch. From vintage and retro effects to dramatic black-and-white conversions, filters can dramatically alter the mood and style of your photographs. - Customize your own presets by saving your preferred filter settings. This allows you to easily apply consistent effects across multiple images, saving time and effort. - Don't be afraid to mix and match filters for a more personalized result. Layering multiple filters can create complex and visually appealing effects that can make your images stand out. Using Layers And Masks For Greater Control Layers and masks are essential tools that offer granular control over specific areas of your images. Here's what you need to know about utilizing layers and masks effectively: - Arrange your edits on separate layers to maintain flexibility and non-destructive editing. This way, you can easily modify or fine-tune each adjustment without affecting the original image. - Masks allow you to selectively apply or remove edits to specific parts of your image. Use them to target areas that require specific adjustments, such as exposure, color correction, or selective sharpening. - Experiment with different blending modes to achieve unique effects. Blending modes alter how different layers interact with each other, opening up endless possibilities for creative editing. Incorporating Blending Modes For Artistic Flair Blending modes are a creative tool that can add depth, texture, and visual interest to your images. Consider these points when incorporating blending modes into your editing process: - Experiment with different blending modes to see how they interact with your base image and other layers. Each blending mode has a unique effect, such as overlaying colors, enhancing contrast, or adding a vintage feel. - Play with opacity levels to control the intensity of the blending mode effect. Adjusting the opacity can create subtle or bold results and introduce a harmonious blend between different layers. - Utilize blending modes on adjustment layers to achieve global effects. This can help unify your image by applying consistent adjustments across all layers. With these advanced digital editing techniques, you can take your post-production image manipulation to new heights. By harnessing the power of filters presets layers and masks, and blending modes, you can create visually captivating and impactful photographs that truly stand out. So dive into your digital editing software and let your creativity soar!
Workflow Optimization
Whether you are a professional photographer or an amateur enthusiast, optimizing your post-production workflow is crucial for efficient image manipulation. With a few key strategies, you can streamline your process, save time, and enhance your editing experience. In this section, we will explore three important aspects of workflow optimization: organizing your files, time-saving tips, and the use of presets and actions. Organizing Your Files For Efficient Editing To ensure smooth and efficient editing, it's essential to have a well-organized file structure. Here are some key points to consider: - Create a logical folder hierarchy: Arrange your files in a structured manner, with main folders for different projects or clients and subfolders for specific shoots or events. - Use descriptive file names: Rename your files so that they are easily identifiable and reflect the content within. This will help you quickly locate specific images during the editing process. - Utilize metadata: Take advantage of metadata to add relevant information to your images, such as keywords, copyright details, and captions. This will enable you to effectively search and filter your files. Time-Saving Tips And Keyboard Shortcuts Time is of the essence when it comes to post-production. Here are some time-saving tips and keyboard shortcuts that can significantly boost your efficiency: - Batch processing: Instead of editing each image individually, consider using batch processing tools to apply similar edits to multiple images simultaneously. This can save you a significant amount of time. - Learn keyboard shortcuts: Familiarize yourself with popular editing software's keyboard shortcuts. These shortcuts allow you to perform various functions quickly, such as switching between tools, applying adjustments, and zooming in and out. - Customizable presets: Create your own presets for common edits, such as adjusting exposure, color balance, or sharpening. This way, you can easily apply these presets to multiple images with just a few clicks. Streamlining Your Editing Process With Presets And Actions Presets and actions are powerful tools that can automate repetitive tasks, saving you valuable time and effort. Here's how you can utilize them effectively: - Develop your own presets: Experiment with different editing techniques and settings to create your own customized presets. These presets can be tailored to your personal style and can help maintain consistency across your images. - Explore pre-made presets: Many editing software applications offer a wide range of pre-made presets, developed by professionals. These presets can be a great starting point and can be adjusted according to your specific needs. - Take advantage of actions: Actions are a series of pre-recorded steps that you can apply to your images. They can simplify various editing processes, such as resizing, applying filters, or adding specific effects. By organizing your files, adopting time-saving strategies, and harnessing the power of presets and actions, you can optimize your workflow and elevate your image manipulation process. Embracing these techniques will not only save you time and effort but also allow you to focus more on the creative aspects of editing. So go ahead and implement these workflow optimization tips to enhance your post-production experience.
Enhancing Portraits With Digital Editing

When it comes to portrait photography, digital editing can play a crucial role in making your subjects look their best. From perfecting skin tones to removing blemishes, digital editing allows you to transform your portraits into stunning works of art. Here, we'll explore some key techniques that can help you enhance your portraits using post-production image manipulation. Perfecting skin tones and blemish removal: - Skin imperfections can be easily corrected using digital editing tools. By adjusting the color balance and tone, you can achieve smooth and flawless skin tones. - Blemishes like acne, scars, or redness can be removed with precision, without compromising the overall quality of the image. - Selective editing allows you to focus on specific areas of the skin that may require more attention, such as under-eye circles or uneven patches. Guiding the viewer's focus with selective editing: - By adjusting the brightness, contrast, and saturation in specific areas, you can direct the viewer's attention to the most important features of the portrait. - Emphasizing the eyes, for example, can create a powerful connection between the subject and the viewer, drawing them into the image. - Selective editing also enables you to enhance other facial features, such as lips or cheekbones, to highlight the natural beauty of your subject. Adding depth and dimension with dodge and burn techniques: - Dodge and burn techniques involve selectively brightening and darkening certain areas of the image to create depth and dimension. - Using a soft brush, you can selectively lighten areas that you want to bring forward, such as highlights on the face or hair. - Similarly, you can use the burn tool to darken areas that you want to push into the background, ensuring the subject remains the focal point of the portrait. With these digital editing techniques, you can transform your portraits, bringing out the best in your subjects and creating captivating images. Remember, practice makes perfect, so don't be afraid to experiment and discover your own unique style of enhancing portraits through post-production image manipulation.
Creating Stunning Landscape Images
Post-Production Image Manipulation: Creating Stunning Landscape Images Enhancing colors and contrast for impactful landscapes: - Adjusting the colors and contrast of a landscape image can greatly enhance its visual impact and make it stand out. Here are key points to keep in mind: - Increase vibrancy: Boosting the saturation and vibrancy of colors can make the landscape appear more vivid and captivating. - Adjust brightness and contrast: Balancing the brightness and contrast levels can help bring out the details in the image and make it more visually appealing. - Fine-tune color temperature: Adjusting the color temperature can add warmth or coolness to the image, enhancing the overall mood and atmosphere. Mastering the art of sky replacement: - Sometimes the sky in a landscape photo may not match the desired look or may lack drama. Here's how to effectively replace the sky: - Selecting the right sky: Choose a sky image that complements the landscape and ensures a seamless integration. Consider the lighting, perspective, and colors. - Masking and blending techniques: Use masking tools to precisely select the original sky and smoothly blend in the new one. Pay attention to details like transitions, edges, and lighting to make the replacement look natural. Read the full article
0 notes
Text
Ghost Mannequin Service: Elevate Your E-commerce Product Photography
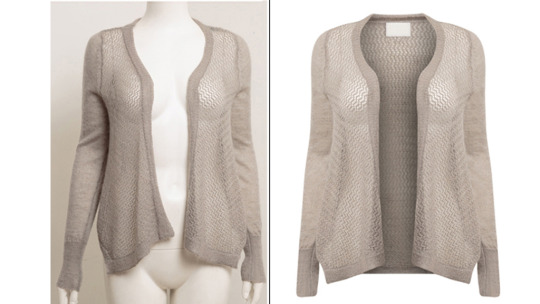
Ghost Mannequin service is a professional solution that digitally removes mannequins from clothing photographs, giving a 3d effect to the garments. This service helps e-commerce businesses showcase their products more effectively and increase sales. In the fast-paced world of online shopping, showcasing products in the most captivating way is essential. With the innovative ghost mannequin service, you can now effortlessly display clothing items without the distraction of mannequins. By seamlessly blending clothes onto invisible models, this cost-effective solution allows potential customers to envision how the garments will fit and flatter their bodies. Designed specifically for online retailers, fashion brands, and photographers, the ghost mannequin service elevates the visual appeal of your products to new heights. By harnessing this powerful tool, businesses can create compelling and attention-grabbing images that enhance the customer experience, leading to increased sales and customer satisfaction. Say goodbye to ordinary displays and unlock the potential of your apparel with our cutting-edge ghost mannequin service. Ghost Mannequin, Neck Joint, Dummy Retouching, Clothing Reshape Service
The Benefits Of Ghost Mannequin Service
In the world of e-commerce, presenting clothing items in a seamless and professional manner is paramount. That's where the ghost mannequin service, also known as invisible mannequin or 3D mannequin, comes into play. This technique revolutionizes product photography by eliminating visible mannequins or models, shifting the focus solely onto the garments themselves. By leveraging this innovative approach, potential customers can envision themselves wearing the clothing, driving engagement and boosting sales Streamlined Product Presentation The primary advantage of utilizing ghost mannequin service is the ability to showcase your products in a streamlined and consistent manner. Here are the key points to consider:
- Consistency: Ghost mannequin photography ensures uniformity across all your product images, creating a cohesive and professional brand image. - Focus on the product: By eliminating distractions, such as visible mannequins or models, customers can easily see the details and features of the garment, increasing their chances of making a purchase. - Versatility: Ghost mannequin photos can be utilized in various marketing materials, including catalogues, websites, and social media, providing a consistent look throughout your brand. Enhanced Customer Experience A positive customer experience is vital for e-commerce success, and ghost mannequin service can play a significant role in achieving this. Here's how: - Realistic representation: Ghost mannequin images create a lifelike representation of how the garment will look on the customer, enhancing their confidence in the product. - Detailed view: Customers can scrutinize the garment from all angles with the help of ghost mannequin photos, providing them with a comprehensive understanding of the product's fit and design. - Improved decision-making: By enabling customers to visualize themselves wearing the clothing item, ghost mannequin images facilitate informed purchase decisions, reducing the likelihood of returns. Increased Conversion Rates The ultimate goal of any e-commerce business is to convert visitors into customers. Ghost mannequin service has proven to boost conversion rates by: - Creating desire: Ghost mannequin images depict the clothing in a desirable and aspirational way, enticing potential customers to make a purchase. - Building trust: Professional and high-quality product images build trust with customers, making them more likely to feel confident in their online shopping experience and proceed with the purchase. - Reducing uncertainty: By providing detailed and accurate representations of the garments, ghost mannequin photos reduce any uncertainty customers may have regarding the product's appearance, fit, and quality. Cost-Effective Solution Finally, ghost mannequin service offers a cost-effective solution compared to traditional product photography methods. The following points highlight its cost-saving benefits: - No need for models: Ghost mannequin photography eliminates the need for hiring models, saving both time and money. - Efficient editing process: Ghost mannequin images are easier and faster to edit, minimizing costs associated with extensive post-production work. - Reuse of mannequins: With ghost mannequin photography, you can reuse the same mannequins for various garments, further reducing expenses. Utilizing ghost mannequin service can greatly benefit your e-commerce business. It provides a streamlined product presentation, enhances the customer experience, increases conversion rates, and offers a cost-effective solution. By leveraging these advantages, you can elevate your brand and drive sales in a highly competitive online marketplace.
How Ghost Mannequin Service Works
Ghost mannequin service is a vital tool for e-commerce retailers looking to showcase their clothing products with professional and visually appealing images. By removing the mannequin and creating an illusion of an invisible wearer, this service allows customers to get a clear view of the apparel's shape, fit, and design. In this section, we will explain how ghost mannequin service works, breaking it down into four key steps. Capturing The Initial Images To begin the ghost mannequin process, the photographer first takes two sets of images of the garment: one with the clothing on a standard mannequin and another with the inside/back of the garment exposed. These images capture both the external and internal details of the apparel, including the neckline, sleeves, buttons, and any unique features. The high-resolution photographs are crucial for achieving a seamless and realistic final result. Removing The Visible Mannequin After capturing the initial images, the next step is to remove the visible mannequin from the photographs. Skilled graphic designers utilize advanced software like adobe photoshop to carefully erase the mannequin while maintaining the integrity of the clothing. The key is to ensure that all aspects of the apparel, such as the fabric, color, and texture, remain intact and untouched during this editing process. Editing And Retouching Once the mannequin has been successfully removed, the graphic designer will meticulously edit and retouch the image to enhance its overall appearance. This involves adjusting the lighting, contrast, and colors to make the garment look as appealing as possible while maintaining its authenticity. Any imperfections, wrinkles, or blemishes are carefully eliminated, ensuring that the final image is flawless and ready for display. Finalizing The Invisible Apparel Styling The last step in the ghost mannequin process focuses on perfecting the invisible styling of the apparel. At this stage, the designer skillfully brings together the front and back images of the garment to create the illusion of it being worn by an invisible model. By aligning and blending the different parts of the clothing, the designer ensures that the final image looks natural and seamless, giving customers an accurate representation of the clothing's fit and style. To sum up, ghost mannequin service involves capturing initial images, removing the visible mannequin, editing and retouching the photographs, and finalizing the invisible apparel styling. With this service, e-commerce retailers can present their clothing products more effectively, making them appear more attractive and enticing to potential buyers. So, if you're looking to enhance the visual appeal of your clothing inventory, consider utilizing a ghost mannequin service to create captivating images that truly showcase your products.
The Importance Of Professional Ghost Mannequin Service
In the world of e-commerce, high-quality product images are essential for attracting customers and driving sales. One popular technique used to create visually appealing product photos is the ghost mannequin service. This technique involves removing the mannequin or model from the image, creating a hollow or ghost-like effect. Here's why professional ghost mannequin service is crucial for your online business: Consistency In Image Quality - Every product image on your website should have a consistent and uniform appearance. Ghost mannequin service ensures that all your product photos have the same clean and professional look. This consistency can help establish your brand identity and build trust with customers. - Without professional ghost mannequin service, your product images may vary in quality and style. Inconsistent image quality can make your website appear unprofessional and less credible in the eyes of potential customers. Expert Retouching Techniques - Professional ghost mannequin service involves skilled retouching techniques to enhance the overall appeal of your product images. Experts use their expertise to adjust colours, lighting, and contrast to make your products look their best. - Through expert retouching, imperfections such as creases, shadows, or wrinkles can be eliminated, resulting in flawless product images that grab attention and make a positive impression on your customers. Meeting The Industry Standards - The online retail industry is highly competitive, and customers have come to expect high-quality product images. By utilizing professional ghost mannequin service, you can meet and exceed these industry standards. - Investing in professional editing services demonstrates your commitment to presenting your products in the best possible light. It shows that you take your business seriously and are willing to go the extra mile to provide customers with an exceptional shopping experience. Saving Time And Resources - Taking high-quality product photos and editing them to perfection is a time-consuming process. By outsourcing your ghost mannequin service to professionals, you can save valuable time and resources. - Professional photo editing services have the tools, skills, and experience necessary to efficiently produce outstanding product images. This allows you to focus on other important aspects of running your online business. Professional ghost mannequin service is crucial for online businesses seeking to attract and retain customers. With consistent image quality, expert retouching techniques, adherence to industry standards, and time-saving benefits, investing in this service can greatly enhance your product presentation and increase your chances of success in the competitive world of e-commerce.
Selecting The Right Ghost Mannequin Service Provider
If you are in the garment or fashion industry, you know how important it is to showcase your products in the best possible way. Ghost mannequin photography has become a popular technique to highlight the fit and details of clothing while giving an illusion of an invisible mannequin. However, achieving the perfect ghost mannequin effect requires expertise and precision. That's where a professional ghost mannequin service provider comes in. When it comes to selecting the right ghost mannequin service provider for your business, there are a few key factors to consider. Here are some important aspects you should keep in mind: Assessing Their Portfolio And Expertise Before finalizing a ghost mannequin service provider, it's crucial to assess their portfolio and expertise. Take a look at their previous work and determine if their style aligns with your vision. A well-rounded portfolio will give you an idea of their skill level and creativity. Additionally, review their level of expertise in ghost mannequin photography to ensure they have the necessary experience and knowledge in this field. Checking For Client References And Reviews Client references and reviews provide valuable insights into the quality of work and level of customer satisfaction. Reach out to the ghost mannequin service provider and ask for references from previous clients. Alternatively, check online review platforms or their website for client testimonials. Positive reviews and references can be a strong indicator of the provider's reliability and professionalism. Analyzing Pricing And Turnaround Time Pricing and turnaround time are important aspects to consider when selecting a ghost mannequin service provider. Evaluate their pricing structure and compare it with other providers in the market. While affordability is a consideration, it's equally important to balance it with the quality of work. Additionally, inquire about the turnaround time for your ghost mannequin images. Make sure the provider can deliver within your required timeframe. Evaluating Customer Support And Communication Smooth communication and reliable customer support are essential for a seamless collaboration with a ghost mannequin service provider. Assess their responsiveness and effective communication throughout the initial stages of inquiry. A provider who listens to your requirements, responds promptly, and communicates effectively is more likely to understand your needs and deliver accordingly. Here are the key points to keep in mind when selecting a ghost mannequin service provider: - Assess their portfolio and expertise: - Review previous work to determine style and skill level. - Ensure they have experience in ghost mannequin photography. - Check for client references and reviews: - Seek references from previous clients. - Look for positive reviews and testimonials. - Analyze pricing and turnaround time: - Compare pricing with other providers. - Make sure they can meet your required timeframe. - Evaluate customer support and communication: - Assess responsiveness and effective communication. - Choose a provider who listens to your needs. Selecting the right ghost mannequin service provider is crucial to achieving high-quality and visually appealing results. Take the time to evaluate their portfolio, consider client references, analyze pricing and turnaround time, and evaluate their level of customer support and communication. By finding the perfect fit for your business, you can confidently showcase your products with the desired ghost mannequin effect. You know First Clipping Path
Case Studies: Success Stories With Ghost Mannequin Service
Brand A: Achieving A Cohesive Look And Feel When it comes to building a strong and recognizable brand, having a cohesive look and feel across all marketing materials is crucial. With the help of a ghost mannequin service, brand a was able to achieve just that. Here are the key points to their success story: - Consistent brand identity: By utilizing ghost mannequins, brand A was able to showcase its clothing products in a consistent and professional manner. This allowed them to establish a strong brand identity, making it easier for customers to recognize their products both online and offline. - Accurate representation: Ghost mannequins allowed brands to accurately represent their clothing items. The 3d effect created by combining the front and back images of the garments provided a realistic and detailed view for potential customers. This helped to build trust and confidence in the brand. - Streamlined editing process: With the help of a ghost mannequin service, brand A was able to streamline its editing process. By eliminating the need for models and extensive photo retouching, they saved time and resources, allowing them to focus on other important aspects of their business. - Increased conversion rates: The cohesive look and feel achieved through ghost mannequins resulted in higher conversion rates for brand a. Customers were more likely to make a purchase when they could see the garments from multiple angles and get a better understanding of how the items would fit and look on them. Brand B: Boosting Sales And Customer Satisfaction In today's competitive e-commerce landscape, boosting sales and customer satisfaction is a top priority for brands. Brand b was able to achieve these goals with the help of a ghost mannequin service. Here are the key points to their success story: - Enhanced product presentation: Ghost mannequins allowed brand b to present their clothing products in a visually appealing and professional manner. The 3d effect created by these mannequins made the garments look more attractive and desirable to potential customers, leading to increased sales. - Improved product details: By utilizing ghost mannequins, brand b was able to highlight the unique features and design elements of its clothing items. Customers could see the intricate details, textures, and patterns more clearly, making it easier for them to make an informed purchase decision. - Positive customer experience: With the help of ghost mannequins, brand b provided a positive shopping experience for their customers. The 360-degree visualization of the garments allowed customers to get a better understanding of the fit and style, reducing the need for returns and exchanges. This resulted in higher customer satisfaction and loyalty. - Competitive advantage: The use of ghost mannequins gave brand b a competitive edge in the market. By offering a better online shopping experience and showcasing their products in a more appealing way, they were able to stand out from the competition and attract more customers. Brand C: Standing Out From The Competition In a crowded marketplace, it's essential for brands to find ways to stand out from the competition. Brand c achieved this by leveraging a ghost mannequin service. Here are the key points to their success story: - Unique and eye-catching imagery: Ghost mannequins allowed brands c to create unique and eye-catching imagery for their clothing products. The 3d effect created by these mannequins made their products visually striking, capturing the attention of potential customers and setting them apart from competitors. - Brand differentiation: By utilizing ghost mannequins, brand c was able to differentiate itself from other brands in the market. The consistent and professional look achieved through these mannequins helped to establish a strong brand identity, making it easier for customers to recognize and remember their products. Read the full article
#carphotoediting#carphotography#imageediting#imageretouching#imageretouchingservice#imageretouchingservicecost#photocolorcorrectionservices#photoretouchingservices#shadowcreationservice
0 notes
Text
Post-Production Photo Editing: Maximize the Impact of Your Images

Post-production photo editing involves enhancing and refining digital images to achieve the desired final result. It plays a crucial role in elevating the visual appeal and quality of photographs, ensuring they meet the highest standards. By adjusting factors like brightness, contrast, colors, and sharpness, and removing imperfections, photographers can create stunning visuals that captivate audiences and showcase their artistic vision. From basic adjustments to complex retouching techniques, post-production photo editing allows photographers to breathe life into their images and convey their intended message effectively. Photos are powerful mediums for storytelling and communication, and post-production editing enhances their impact. This process requires skilled techniques, attention to detail, and a deep understanding of various editing tools and software. We will explore the importance of post-production editing in photography and discuss the key aspects that photographers consider when refining their images. Whether you're a professional photographer or an enthusiast looking to improve your editing skills, this guide will provide valuable insights and practical tips to elevate your photos to the next level.

The Importance Of Post-Production Photo Editing

As a photographer, capturing stunning images is just the first step in the process. The real magic happens during post-production photo editing. This crucial stage allows you to transform your raw images into visually captivating masterpieces. Here, we will explore the importance of post-production photo editing and the key benefits it brings to your photography. Enhance The Visual Appeal - Fine-tune the colors: Adjusting the color balance, saturation, and contrast can breathe life into your images, making them more vibrant and eye-catching. - Improve composition: Crop images to remove distractions and create a stronger focal point, ensuring your photos have a clear and impactful composition. - Apply creative filters: Experiment with different filters and effects to achieve unique and artistic looks, adding a touch of personal style to your images. Correct Imperfections And Enhance Detail - Fix exposure issues: Adjusting exposure levels can salvage poorly lit photos, recovering details lost in shadows or highlights. - Reduce noise: Post-production editing allows you to remove unwanted graininess, resulting in cleaner and sharper images. - Sharpen images: Enhance the details and clarity of your photos, showcasing the intricate textures and fine elements within. Create A Consistent Style And Mood - Establish a signature look: Through editing, you can define your own unique style, creating a cohesive visual identity for your photography. - Maintain consistency: By applying similar editing techniques across your body of work, you establish a unified aesthetic that reinforces your brand and artistry. - Set the mood: Adjusting the tone, contrast, and color grading can evoke specific emotions and set the atmosphere, enhancing the storytelling aspect of your images. Post-production photo editing plays a pivotal role in elevating your photography to new heights. By enhancing the visual appeal, correcting imperfections, and creating a consistent style and mood, you can truly make your images stand out from the crowd. So, embrace the power of editing and unlock your photographs' full potential.
Essential Tools For Post-Production Photo Editing

In the world of post-production photo editing, having the right tools is essential for producing stunning, captivating images. Whether you're a professional photographer or an aspiring enthusiast, these tools can take your editing skills to the next level. In this section, we'll explore three of the top tools that are widely used and highly recommended by photographers and editors alike: adobe photoshop, lightroom, and capture one. Let's delve into what makes each of these tools so indispensable. Adobe Photoshop - Versatility: Adobe photoshop is the go-to software for detailed and intricate editing. It offers a wide range of tools and features that allow users to retouch images, remove unwanted elements, and manipulate photos to achieve their desired results. - Enhanced control: With photoshop, photographers have precise control over every aspect of their image. From adjusting exposure and colors to fine-tuning details and applying intricate effects, there are endless possibilities to explore. - Layers and masks: One of the most powerful features of photoshop is its ability to work with layers and masks, enabling photographers to make selective edits and alterations without affecting the entire image. This level of control and flexibility is unmatched. Lightroom - Efficient workflow: Lightroom is renowned for its seamless and efficient workflow, making it a favorite among photographers. Its organizational tools allow for easy management and sorting of large photo collections, while its non-destructive editing capabilities ensure that the original image remains untouched. - Image presets: Lightroom offers a vast array of presets that can be applied to photos with just a single click. These presets provide photographers with instant creative options, saving time and streamlining the editing process. - Tone and color adjustments: With Lightroom, photographers can effortlessly adjust tones and colors to achieve the desired mood and atmosphere in their images. From basic exposure adjustments to advanced color grading, lightroom provides all the necessary tools for enhancing the visual impact of a photo. Capture One - Superb image quality: Capture one is renowned for its exceptional image quality and color rendering abilities. Its powerful raw image processing engine ensures that the fine details and nuances within an image are preserved and enhanced. - Precise color editing: Capture One offers advanced color editing tools with incredible precision. Photographers can manipulate individual colors, create custom color profiles, and achieve accurate skin tones, making it an ideal choice for fashion, portrait, and product photography. - Tethered shooting: Tethered shooting is a feature that sets capture one apart. It allows photographers to connect their cameras directly to the software, providing real-time image viewing, instant feedback, and complete control over the shooting process. Each of these tools brings its own unique set of features and capabilities to the table. Whether you prefer the versatility of Adobe Photoshop, the workflow efficiency of Lightroom, or the superior image quality of Capture One, having these tools at your disposal will undoubtedly elevate your post-production photo editing skills. Experiment, explore, and let your creativity shine through these essential tools. https://www.youtube.com/watch?v=RLtu14Fttq8
Understanding The Basics Of Post-Production Photo Editing

Post-production photo editing is a crucial step in enhancing the quality and visual appeal of your photographs. By making adjustments to exposure, contrast, colors, sharpening, and noise reduction, you can transform ordinary images into stunning works of art. In this section, we will explore the basics of post-production photo editing and discuss some key techniques to help you achieve the desired results. Exploring The Histogram - The histogram is a graphical representation of the distribution of tonal values in an image. - It provides valuable information about the exposure and contrast of your photo. - Understanding the histogram can help you identify overexposed or underexposed areas in your image. - By analyzing the histogram, you can make informed decisions about how to adjust the exposure and contrast to improve the overall tonal range. Adjusting Exposure And Contrast - Exposure refers to the amount of light captured by the camera sensor. Adjusting the exposure can make your image brighter or darker. - Contrast, on the other hand, determines the difference between the lightest and darkest areas of your photo. - Increasing the exposure can brighten the image and reveal more details in the shadows, while decreasing the exposure can darken the image and bring out highlights. - Adjusting the contrast can enhance the dynamic range and make your image visually more appealing. - Use exposure and contrast adjustments to achieve the desired tonal range and balance in your photo. Fine-Tuning Colors - Colors play a vital role in conveying the mood and atmosphere of your photographs. - Post-production editing allows you to manipulate the colors to create a specific visual effect. - You can adjust the white balance to correct any color casts in your photo. - Saturation adjustments can make your colors more vibrant or muted, depending on the desired outcome. - Hues can be modified to create unique color tones. - Experiment with color adjustments to enhance the overall impact of your images. Sharpening And Noise Reduction - Sharpening helps to enhance the details and clarity in your photo. - However, over-sharpening can result in unnatural-looking images. - Noise reduction techniques can minimize the graininess, or noise, that may appear in your photos, particularly in low-light situations. - Finding the right balance between sharpening and noise reduction is essential to maintain a natural and professional appearance. - Apply these adjustments judiciously to achieve optimal results. Understanding the basics of post-production photo editing is essential for creating visually appealing and captivating images. By exploring the histogram, adjusting exposure and contrast, fine-tuning colors, and applying sharpening and noise reduction techniques, you can bring out the true potential of your photographs. Experiment with different settings and enjoy the process of transforming your images into stunning works of art.
Advanced Techniques In Post-Production Photo Editing
In the world of photography, taking a great shot is just the beginning. The real magic happens during the post-production phase, where photos can be enhanced, corrected, and transformed to achieve the desired look and feel. Advanced techniques in post-production photo editing can take your images to the next level, giving them that professional touch. In this section, we will explore three key techniques that can elevate your photos: dodging and burning, frequency separation for skin retouching, and creating selective focus with depth of field. We will also touch upon the art of adding creative filters and effects. Let's dive in! Dodging And Burning One of the oldest and most powerful techniques in photo editing is dodging and burning. It involves selectively lightening and darkening specific areas of an image to enhance highlights and shadows. Here are some key points to keep in mind: - Dodging adds brightness and brings out details in the desired areas. - Burning adds depth and intensity, emphasizing shadows and creating a moody atmosphere. - This technique is often used to enhance portraits, landscapes, and architectural shots. - Use a soft brush with low opacity to achieve subtle and natural-looking results. - Experiment with different blending modes to achieve the desired effect. Frequency Separation For Skin Retouching When it comes to portrait photography, achieving flawless skin is a top priority. Frequency separation is a powerful technique for skin retouching, allowing you to remove imperfections while preserving the natural texture. Here's what you need to know: - Frequency separation separates the texture (high frequency) from the color and tone (low frequency) of the skin. - The texture layer can be retouched to eliminate blemishes, wrinkles, and other imperfections. - The color and tone layer can be adjusted to even out skin tones and enhance natural-looking skin. - Use a low opacity brush for retouching, building up the changes gradually for a seamless result. - Be mindful of not overusing this technique, as it can lead to an unrealistic and plastic appearance. Creating Selective Focus With Depth Of Field Selective focus allows you to draw attention to specific areas of your photo by controlling the depth of field. It can be done both in-camera and during post-production. Here's how you can achieve this effect: - Start by analyzing the image and deciding which areas should be in focus and which should be blurred. - Use a combination of techniques such as the lens blur filter, the depth map tool, or the field blur filter in editing software. - Adjust the blur intensity and transition to achieve a natural and pleasing effect. - Experiment with different shapes of bokeh to add a creative touch to your photos. - Keep in mind that selective focus should enhance the composition and storytelling of your image, so use it wisely. Adding Creative Filters And Effects While photo editing is mostly about enhancing the natural beauty of an image, sometimes you may want to go beyond realism and add a creative flair. Here are some ways to do so: - Experiment with vintage filters to give your photos a nostalgic look. - Play with color grading to create a specific mood or atmosphere. - Explore artistic effects such as black and white conversions, surreal overlays, or painterly textures. - Use vignettes and light leaks to add drama and depth. - Remember to balance creativity with subtlety, ensuring that the added effects enhance your photo rather than overpower it. Mastering advanced techniques in post-production photo editing opens up a world of possibilities for transforming your images. Whether it's enhancing details, retouching portraits, creating selective focus, or adding creative filters, these techniques can take your photography to new heights. So grab your editing software and let your creativity shine through!
Optimizing Workflow For Efficient Post-Production Photo Editing
When it comes to post-production photo editing, optimizing your workflow is essential for efficiency and productivity. By implementing a streamlined process, you can save time and ensure consistency in your edits. Let's explore some key techniques to enhance your workflow in post-production photo editing. Organizing And Importing Images - Start by creating a well-organized folder structure on your computer to store your images. This will make it easier to locate and access files when needed. - Use descriptive file names or rename files upon import to provide a clear indication of the photo subjects or events. - Take advantage of software tools like Adobe Lightroom or Capture One, which allow you to import images and automatically organize them into appropriate folders. - Assign relevant keywords and tags to your images during the importing process to facilitate quick searching later on. Utilizing Presets And Batch Editing - Presets are pre-defined sets of adjustments that can be applied to multiple images simultaneously. They serve as an excellent starting point for stylizing and enhancing your photos. - Create and save your own custom presets based on your preferred editing styles. This will enable you to quickly apply consistent adjustments to a batch of images with just a few clicks. - Experiment with different preset combinations to achieve your desired look and feel for various photography genres. - Batch editing allows you to apply the same adjustments to a group of selected images. This is particularly useful when you have a series of photos taken under similar lighting and conditions. Streamlining The Editing Process With Keyboard Shortcuts - Keyboard shortcuts are your best friends while editing photos. They enable you to navigate through your editing software swiftly and execute various commands without wasting precious time on manual clicks. - Familiarize yourself with commonly used shortcuts in your editing software. For instance, in adobe photoshop, pressing "b" activates the brush tool, while pressing "ctrl+z" undoes the previous action. - Customize keyboard shortcuts based on your preferences and workflow. This allows you to access frequently used tools or commands with ease. - Practice using keyboard shortcuts regularly to increase your editing speed and efficiency. Exporting And Saving Files In Different Formats - When exporting your final edited images, consider the platforms where you intend to showcase them. Different platforms require different file formats and specifications. - Jpeg is a commonly used format for web display and social media, offering a good balance between image quality and file size. - If you need to preserve maximum image quality, opt for lossless formats like tiff or png. These formats are ideal for printing or when further editing might be required. - Save your exported files in a separate folder with clear naming conventions to avoid confusion and enable easy retrieval. By implementing these strategies, you can optimize your workflow for efficient post-production photo editing. Organizing and importing images, utilizing presets and batch editing, streamlining the process with keyboard shortcuts, and saving files in the appropriate formats will significantly enhance your productivity in the editing phase. Embrace these techniques and watch your editing efficiency soar.
Leveraging Plugins And Third-Party Software For Post-Production Photo Editing
Post-Production Photo Editing In the world of photography, post-production photo editing plays a crucial role in transforming raw images into stunning, polished works of art. As technology continues to advance, photographers have more options at their disposal to enhance and manipulate their images. One of the key strategies in post-production editing is leveraging plugins and third-party software. Let's explore how these tools can take your photo editing to the next level. Read the full article
#carphotography#imageretouching#imageretouchingservice#imageretouchingservicecost#photocolorcorrectionservices#photoretouchingservices#postproductionphotoediting#shadowcreationservice
0 notes
Link
#carphotoediting#imageediting#imageretouching#imageretouchingservice#imageretouchingservicecost#photocolorcorrectionservices#photoretouchingservices#shadowcreationservice
0 notes
Text
Clothing Lighting: Illuminate Your Style with Powerful Clothing Lighting Tips

Clothing lighting helps improve visibility and highlight specific areas or features on clothing to enhance its appearance. In addition to making clothes more visually appealing, clothing lighting also plays a crucial role in retail displays and fashion shows, creating a captivating atmosphere and drawing attention to the garments. Lighting can be used to make colors appear more vibrant, illuminate intricate details, and create a sense of drama and excitement. By strategically placing lights and adjusting their intensity, designers and retailers can effectively showcase their clothing collections, boosting sales and leaving a lasting impression on customers.

Introduction: Lighting Up Your Style With Powerful Clothing Lighting
Lighting plays a crucial role in enhancing your style and making a statement with your clothing choices. Proper clothing lighting can elevate your overall look, highlighting key features and drawing attention to the right places. In this section, we will explore the importance of lighting in enhancing your style and how it can make a powerful statement. Importance Of Lighting In Enhancing Your Style To truly understand the impact of lighting on your style, consider the following key points: - Lighting sets the mood: Just like the right lighting in a room can create a specific ambience, the lighting around you can influence how your outfit is perceived. Soft, warm lighting can create a cosy, romantic atmosphere, while bright, natural lighting can bring out the vibrancy in your clothing. - Correct lighting enhances colors: The right lighting can accentuate the colors of your outfit, making them appear more vibrant and true to life. On the other hand, poor lighting can distort colors, making your clothing appear dull or different from how it was intended. - Creating focus and depth: Adequate lighting can help create focus and depth in your outfit. By strategically illuminating certain areas, you can draw attention to specific details or accessories, adding visual interest and enhancing your overall style. How Proper Clothing Lighting Can Make A Statement Proper lighting can do wonders when it comes to making a statement with your clothing choices. Consider the following points: - Highlighting key elements: Whether it's an intricate pattern, bold colors, or unique textures, proper lighting can help highlight these key elements, making them stand out and catching the eyes of others. - Enhancing proportions: Different lighting techniques can be used to enhance or disguise certain proportions of your body. Playing with light and shadows can create an illusion of length, curves, or asymmetry, allowing you to emphasize your best features and boost your style confidence. - Adding an element of drama: By using strategic lighting, you can add a touch of drama to your overall look. Whether it's through spotlighting, backlighting, or using creative lighting effects, you can create a visually compelling style that demands attention. Clothing lighting is not just about illuminating your outfit; it's about using light to enhance your style and make a statement. From setting the mood to highlighting key elements, proper lighting can transform your overall look and leave a lasting impression.
Understanding The Impact Of Clothing Lighting
How Clothing Lighting Can Accentuate Your Best Features

Uncover the hidden potential of your outfits with lighting. Lighting plays a crucial role in how your clothing appears, and it can either enhance or diminish the impact of your outfit. By understanding the impact of clothing lighting, you can strategically use lighting to highlight your best features and create a more visually appealing look. Here's how: - Choose the right lighting: The type of lighting you're in can make a significant difference in how your outfit looks. Natural lighting is often the most flattering, as it provides a balanced and soft illumination. On the other hand, fluorescent lighting can be harsh and make colors appear washed out. Experiment with different lighting conditions to see what works best for your outfits. - Highlight your face: Lighting can draw attention to your face and enhance its features. Use lighting to your advantage by positioning it in a way that shines directly on your face. This will illuminate your facial features, including your eyes, cheekbones, and jawline, making them appear more defined and attractive. - Create depth and dimension: Lighting can add depth and dimension to your outfit, making it more visually interesting. Experiment with different angles and intensities of light to create shadows and highlights that enhance the shape and texture of your clothing. This can help create a more dynamic and three-dimensional look. - Play with shadows: Shadows can be your best friend when it comes to clothing lighting. By strategically placing light sources to create shadows, you can accentuate certain areas of your body while downplaying others. This can help create a more flattering silhouette and highlight the areas you feel most confident about. - Experiment with different colors: Lighting can affect the way colors appear, so don't be afraid to experiment with different lighting colors and tones. Warm lighting can bring out the richness in certain colors, while cool lighting can create a more modern and sophisticated look. Consider the mood and vibe you want to convey with your outfit and choose lighting accordingly. - Pay attention to the background: When it comes to clothing lighting, the background can make a big difference. A cluttered or distracting background can take away from the impact of your outfit. Opt for a clean and uncluttered background that allows your clothing to take centre stage and be the focal point of the photo or setting. - Consider the occasion: Lighting can have different effects depending on the occasion. For example, bright and vibrant lighting may be ideal for a casual and playful outfit, while soft and romantic lighting may be more suitable for a fancy evening gown. Tailor your lighting choices to the occasion to create the desired mood and atmosphere. - Use lighting accessories: Lighting accessories such as ring lights, spotlights, or even a well-placed flashlight can help you achieve the desired lighting effect. These accessories can provide targeted lighting to highlight specific areas or create a specific ambience. Experiment with different lighting accessories to see which ones work best for you. - Edit and adjust the lighting in post-processing: If you're not satisfied with the lighting in your photos, don't worry. You can always make adjustments during post-processing. Editing tools and software allow you to play with exposure, brightness, and contrast to achieve the desired lighting effects. Take advantage of these tools to enhance your outfit and create a visually stunning final result. By understanding the impact of clothing lighting, you can transform your outfits into eye-catching ensembles that accentuate your best features. Experiment with different lighting conditions, angles, and techniques to create the perfect lighting setup for your outfits. With a little bit of creativity and attention to detail, you can take your outfit photos to the next level and make a lasting impression. https://www.youtube.com/watch?v=2mE_muABsQ8
Choosing The Right Lighting For Your Wardrobe
When it comes to showcasing your clothing collection, having the right lighting can make all the difference. Not only does it enhance the visual appeal of your garments, but it also sets the mood and ambience of your display area. Whether you're organizing a fashion show or simply curating your own wardrobe, evaluating different types of lighting options is crucial. Additionally, understanding the pros and cons of natural lighting versus artificial lighting can help you make an informed decision. Let's dive right in. Evaluating Different Types Of Lighting Options When choosing the right lighting for your wardrobe, you have several options to consider. Each type of lighting has its own set of advantages and disadvantages. Here are the key points to consider: - Natural lighting: - Allows for the accurate color representation of your clothing. - Creates a warm and inviting atmosphere. - Enhances the visibility of fine details and textures. - Can be unpredictable due to changes in weather and daylight availability. - May cause fading or discoloration of fabrics exposed to direct sunlight for prolonged periods. - Artificial lighting: - Provides consistent illumination regardless of external factors. - Offers flexibility in terms of brightness and color temperature. - Can be adjusted to highlight specific areas or features. - Requires an upfront investment in lighting fixtures and energy consumption. - May not replicate natural lighting as effectively. Natural Lighting Vs Artificial Lighting For Clothing Display

Now, let's compare these two types of lighting options specifically for clothing display purposes: - Natural lighting: - Pros: - Accentuates the true colors and textures of your clothing. - Evokes a sense of authenticity and freshness. - Ideal for showcasing outdoor-themed or casual wear. - Cons: - Inconsistent lighting conditions may affect the overall display quality. - Limited control over lighting intensity and direction. - Potential risk of sun damage to delicate fabrics. - Artificial lighting: - Pros: - Offers complete control over lighting conditions. - Enables highlighting of specific garments or sections. - Suitable for creating a consistent and professional display. - Cons: - Requires careful selection to ensure accurate color representation. - Can create a less natural ambience compared to natural lighting. - Higher upfront costs and ongoing energy consumption. While natural lighting provides a certain charm and authenticity, artificial lighting offers more control and consistency. Depending on the type of clothing and desired display atmosphere, you can combine these lighting options to achieve the best results. Experimentation and finding the right balance between the two can help you create an aesthetically pleasing wardrobe display that highlights your garments in the most flattering way possible.
The Power Of Colors In Clothing Lighting
Colors play a significant role in our lives, not only in our surroundings but also in the way we present ourselves. The use of colors in clothing lighting can have a powerful impact on our appearance and the overall mood and ambience of a space. Let's explore the various ways different colors can affect your appearance and how colored lighting can create different moods. How Different Colors Can Affect Your Appearance - Black: Wearing black can create an illusion of a slimmer body and exude elegance and sophistication. It is a versatile color that can be mixed with other shades for a dramatic effect. - White: Associated with purity, wearing white can make one appear fresh and clean. It also helps in creating a sense of spaciousness and can be used to highlight other colors. - Red: Known for attracting attention, red signifies power and passion. When worn, it can boost confidence and create a strong visual impact. However, it is important to use red in moderation as it can be overwhelming. - Blue: This calm and soothing color symbolizes trust and loyalty. Wearing blue can make you appear approachable and friendly. It is a popular choice for formal attire and work environments. - Yellow: Associated with happiness and energy, yellow can brighten up any look. It adds vibrancy and positivity to your appearance. Be mindful of the shade as some yellows can wash out certain skin tones. - Green: The color of nature, green represents harmony and balance. It is known to have a calming effect and can make you appear well-grounded. Green is also associated with prosperity and growth. - Pink: Often associated with femininity, pink creates a soft and romantic look. It can make you appear approachable and friendly. Different shades of pink can evoke different emotions, from innocence to sensuality. - Purple: A color of royalty and luxury, purple exudes sophistication and elegance. It is often associated with creativity and spirituality. Wearing purple can make a bold statement and command attention. - Orange: Bursts of energy and enthusiasm are often associated with the color orange. Wearing orange can add warmth and liveliness to your appearance. It is a great choice for festive occasions. - Neutrals: Colors like beige, grey, and brown are considered neutrals. They create a subtle and understated look. Neutrals are versatile and can be paired with any other color for a balanced and sophisticated outfit. Creating Mood And Ambiance With Colored Lighting Colored lighting has the ability to transform a space and create a specific mood or ambience. Here are some ways you can use colored lighting to achieve the desired effect: - Warm tones: Shades of red, orange, and yellow create a cosy and inviting atmosphere. They can make a space feel intimate and comfortable. - Cool tones: Blues and greens provide a sense of calmness and serenity. They are often used in spa-like settings to create a relaxing ambience. - Bold and vibrant: Colors like purple, pink, and neon hues can add a sense of excitement and energy to a space. They are often used in entertainment venues and nightclubs. - Accent lighting: Using colored lighting to highlight certain areas or objects can create a focal point and add visual interest to a room. It can be used to showcase artwork, architectural features, or decorative items. - Color combinations: Experimenting with different color combinations can create unique and visually striking effects. For example, combining warm and cool tones can create a sense of contrast and balance. Colors are a powerful tool that can greatly impact our appearance and the overall mood of a space. Whether it's through the color of our clothing or the lighting used in a room, understanding the power of colors can help us make intentional choices to create the desired effect. So go ahead, embrace the power of colors and let them transform your personal style and living spaces.
Lighting Techniques For Showcasing Your Outfits
Clothing Lighting: Lighting Techniques For Showcasing Your Outfits When it comes to fashion, showcasing your outfits in the best light is crucial. Lighting can make a significant impact on how your clothing is perceived, highlighting the details, colors, and overall appeal. In this section, we will explore different lighting techniques to enhance the presentation of your favourite pieces. From utilizing spotlighting to creating a soft glow with diffused lighting, we'll cover it all. Utilizing Spotlighting To Highlight Your Favorite Pieces: - Spotlighting is a powerful technique that directs focused light onto specific areas of your outfit, drawing attention to your favourite pieces. - Position spotlights strategically to illuminate key elements such as accessories, unique patterns, or intricate design details. - Be mindful of the angle of the spotlight to create dynamic shadows and depth, adding an extra dimension to your clothing presentation. - Experiment with different intensities of lighting to achieve the desired effect—a subtle spotlight for a delicate item and a brighter spotlight for a bold statement piece. - Use contrasting lighting to create drama and enhance the overall visual appeal of your outfit. Creating A Soft Glow With Diffused Lighting: - Diffused lighting provides a gentle and even illumination that minimizes harsh shadows and creates a soft glow around your garments. - Use sheer curtains or light diffusers to soften the intensity of direct light sources, such as natural sunlight or artificial overhead lighting. - Position your clothing display near windows to benefit from the soft natural light that diffuses through the curtains. - Alternatively, use softbox lights or umbrellas to mimic the effect of natural diffused light indoors. - Diffused lighting is ideal for showcasing delicate fabrics, intricate textures, and pastel shades, as it brings out their subtle details and enhances their overall beauty. Remember, finding the perfect lighting for your clothing display is a journey of experimentation. Take time to explore different techniques, lighting positions, and intensities to achieve the desired effect. Pay attention to how various light sources interact with different materials, colors, and patterns. By utilizing spotlighting and diffused lighting, you can elevate the presentation of your outfits and make them truly shine.
Lighting Innovations For Your Closet
Are you tired of rummaging through your closet trying to find the perfect outfit? A well-lit closet can make all the difference in organizing and dressing up effortlessly. Lighting innovations have brought new possibilities to brighten up your wardrobe space. From LED strip lights to smart lighting solutions, there are plenty of options to cater to your needs. Let's explore some of the exciting lighting ideas that will transform your closet into a stylish haven. Led Strip Lights For A Modern Touch - Transform your closet with LED strip lights: These lights are easy to install and provide a modern touch to your closet. - Customizable lighting options: Led strip lights come in a variety of colors and brightness levels, allowing you to create the perfect ambience. - Highlight clothing and accessories: Place the LED strips strategically to illuminate your favourite garments and accessories, making them easy to find. - Energy-efficient and long-lasting: LED lights consume less energy and have a longer lifespan compared to traditional light bulbs, saving you money in the long run. Smart Lighting Solutions For Your Wardrobe - Motion-activated lights: Say goodbye to fumbling for switches in the dark. Read the full article
#carimageediting#carphotoediting#imageediting#imageretouching#imageretouchingservicecost#photocolorcorrectionservices#photoretouchingservices
0 notes
Text
Expert Apparel Photography Services: Elevate Your Brand!

Apparel photography services provide expert image capturing and editing solutions for garments and fashion accessories. With their specialized skills and equipment, they create visually appealing and high-quality photographs that showcase the products' unique features and enhance their online presence. These services cater to businesses in the fashion industry, ensuring that their products stand out and attract potential customers. By employing professional apparel photography services, businesses can effectively communicate their brand's aesthetics and create a positive impression on their target audience. Through captivating images, these services help drive sales and boost the overall growth of fashion brands. Whether you are a boutique owner, a fashion designer, or a retailer, investing in apparel photography services can greatly benefit your business. In this digital age, where consumers rely heavily on visuals and online shopping, having visually stunning photos of your apparel and accessories is crucial for attracting customers and driving sales. Apparel photography services specialize in capturing and showcasing the best features of your products, helping you stand out from your competitors in the saturated fashion market. These services utilize professional photographers, stylists, and equipment to create visually appealing images that represent your brand's aesthetic and appeal to your target audience. With their expertise in lighting, composition, and editing, they can transform your products into eye-catching visuals that leave a lasting impression on potential customers. Don't underestimate the power of high-quality visuals in capturing customers' attention and driving sales. Invest in apparel photography services to give your fashion business the competitive edge it deserves.

Credit: www.upwork.com
Why You Need Professional Apparel Photography
In today's digital world, where online shopping has become the norm, the importance of high-quality visual content cannot be understated. When it comes to selling apparel, professional photography is a game-changer. Investing in professional apparel photography services can provide numerous benefits for businesses looking to stand out in a competitive market. Let's explore some of the key reasons why you need professional apparel photography. Enhancing Brand Perception Your brand is more than just a logo or a catchy slogan - it's the perception customers have of your business. High-quality apparel photography plays a crucial role in shaping that perception. When customers see visually appealing images of your products, they are more likely to associate your brand with professionalism, quality, and attention to detail. Here's how professional apparel photography enhances brand perception: - Showcasing product details: Professional photographers have the expertise to capture intricate details and textures of your apparel, allowing customers to get a closer look at your products. - Consistent branding: Professional photographers ensure that your apparel images align with your brand's aesthetic and style, creating a cohesive and recognizable look across all marketing channels. - Creating emotional connections: Compelling visuals have the power to evoke emotions. Professional apparel photography can help create a connection with your target audience, influencing their purchasing decisions positively. Increasing Conversion Rates In the world of e-commerce, conversion rates are crucial for the success of any business. Quality product images have a direct impact on conversion rates. Here's how professional apparel photography can help increase your conversion rates: - Capturing attention: Eye-catching visuals grab attention and entice customers to click and explore further. - Displaying product features: Professional apparel photography allows you to highlight key features and benefits of your products, making it easier for customers to understand what they are buying. - Building trust: High-quality images instill trust and credibility in your brand, reducing any concerns customers may have about purchasing apparel online. - Providing a realistic experience: Professional photographers know how to showcase your apparel in a way that reflects its true look and fit, reducing the risk of returns and dissatisfied customers. Building Trust With Customers Trust is the foundation of any successful business relationship. By investing in professional apparel photography, you can build trust with your customers in the following ways: - Authentic representation: Professional photographers have the skills to present your apparel accurately, ensuring that customers receive what they expect based on the visuals presented. - Consistency and professionalism: Consistent and high-quality images across all your marketing channels make your brand appear professional and reliable. - Reflecting your brand values: Professional apparel photography can showcase your brand's values and ethos, resonating with customers who align with those same values. Remember, first impressions matter, especially in the crowded online marketplace. Investing in professional apparel photography services can give your brand a competitive edge, enhance brand perception, increase conversion rates, and build trust with customers. Don't underestimate the power of visually appealing images and the positive impact they can have on your business.
Choosing The Right Apparel Photography Service Provider
When it comes to showcasing your apparel products online, high-quality and visually appealing photography is crucial. With so many apparel photography service providers out there, it's important to choose one that aligns with your brand's goals and requirements. In this section, we will discuss the key factors to consider when selecting an apparel photography service provider. Evaluating The Expertise And Portfolio: When evaluating potential apparel photography service providers, it's essential to assess their expertise and portfolio. Here are a few key points to consider: - Specialization: Look for photographers who specialize in apparel photography. They will have the necessary knowledge and experience to capture your products in the best possible way. - Technical skills: Ensure that the service provider has a solid understanding of lighting, composition, and editing techniques. Their expertise will directly impact the overall quality of the photographs. - Creativity: A service provider with a creative mindset can bring a unique perspective to your apparel photography. They can help you create visually appealing images that stand out from the competition. - Varied portfolio: Review their portfolio to gauge the quality of their work and see if their photography style aligns with your brand's aesthetic. A diverse portfolio demonstrates their ability to handle different apparel types and styles. Considering The Quality Of Equipment And Studio Setting: The equipment and studio setting used by an apparel photography service provider can significantly impact the final product. Here are a few factors to consider: - High-resolution cameras: Ensure that the service provider uses professional-grade cameras capable of capturing detailed and high-resolution images. Check if they have equipment that suits your specific requirements. - Lighting equipment: Proper lighting is crucial for apparel photography. Check if the service provider has adequate lighting equipment to bring out the best in your products. - Studio setup: A professional studio setting can make a noticeable difference in the quality of your apparel photography. Consider if the service provider has a dedicated studio space with ample room to set up props and backdrops. Reviewing Client Testimonials And Feedback: Before finalizing a service provider, take the time to read client testimonials and feedback. Here's why this step is essential: - Reputation: Positive client testimonials and feedback indicate that the service provider has a good reputation and delivers satisfactory results. Look for testimonials that specifically mention apparel photography services. - Reliability and professionalism: Client feedback can provide insights into the service provider's reliability, professionalism, and ability to meet deadlines. Look for comments that highlight timely delivery and exceptional communication. - Client satisfaction: Assess the overall satisfaction of previous clients by reading their testimonials. If the service provider consistently meets or exceeds client expectations, that's a positive sign. Remember, choosing the right apparel photography service provider is crucial for your brand's success. By evaluating expertise and portfolio, considering equipment and studio setting, and reviewing client testimonials, you can make an informed decision that will elevate your apparel photography to new heights. https://www.youtube.com/watch?v=65kWAvvR8NA
The Process Of Expert Apparel Photography
When it comes to showcasing apparel and accessories, high-quality photography is essential. Expert apparel photography captures the essence of the brand, highlighting the intricate details and unique features of each item. In this section, we will delve into the process of expert apparel photography, from preparing the apparel and accessories to capturing various angles and detail shots. Preparing The Apparel And Accessories Before the photography session begins, it is crucial to properly prepare the apparel and accessories. This ensures that each item looks its best and is showcased in the most appealing way. The key points to consider during this process include: - Steaming or ironing the clothing to eliminate wrinkles and creases, resulting in a clean and polished look. - Carefully inspecting each item to remove any loose threads, tags, or stains that could detract from the overall presentation. - Ensuring that the apparel is displayed in a manner that accurately represents its intended design and style. - Styling the accessories, such as belts, scarves, and jewelry, to complement the apparel and enhance the overall visual appeal. Setting Up The Studio For Optimal Lighting And Background The studio setup plays a vital role in capturing stunning apparel photographs. An important aspect of this setup is achieving optimal lighting and background effects. Consider the following key points when setting up the studio: - Utilizing natural light whenever possible, as it creates a soft and flattering illumination that highlights the texture and color of the apparel. - Using diffusers and reflectors to control the lighting and reduce harsh shadows or highlights. - Creating a clean and clutter-free background that does not compete with the apparel for attention, ensuring the focus remains on the clothing and accessories. - Experimenting with different backdrop colors and textures to enhance the overall aesthetic appeal and convey the desired brand image. Capturing Various Angles And Detail Shots To provide a comprehensive view of the apparel and accessories, expert photographers capture the items from various angles, emphasizing the unique features and design elements. Some key points to consider during this phase include: - Photographing the apparel from the front, back, and side angles to showcase its fit and silhouette. - Capturing close-up shots of intricate details, such as buttons, stitching, patterns, and textures, to highlight the craftsmanship. - Showcasing the apparel in different poses or on a model to give customers a better understanding of how it looks when worn. - Experimenting with different compositions and perspectives to create visually engaging and captivating images. By following these expert apparel photography practices, brands can ensure that their products are presented in the best possible light. Effective photography plays a crucial role in attracting customers and conveying the unique qualities of each item. So, investing in professional apparel photography services is undoubtedly worth it.
Techniques Used In Expert Apparel Photography
When it comes to showcasing apparel products, high-quality and visually appealing images are essential. Expert apparel photography requires specialized techniques to capture the garments in the most flattering and eye-catching way. In this section, we will explore the key techniques used by professionals in the field of apparel photography. Proper Lighting And Exposure Proper lighting and exposure play a crucial role in capturing the true essence of apparel products. Here are the key considerations in this aspect: - Natural lighting: Utilizing natural light sources, such as sunlight, can create a soft and flattering effect on the garments. Photographers often shoot near windows or in well-lit outdoor locations to achieve optimal lighting conditions. - Artificial lighting: In cases where natural light is insufficient or unavailable, artificial light sources like studio strobes or continuous lights can be used. These allow photographers to have full control over the intensity, direction, and color of the light for a more controlled and professional result. - Diffusers and reflectors: To avoid harsh shadows and uneven lighting, diffusers and reflectors are commonly employed. Diffusers soften the light, reducing its intensity and creating a more even illumination. Reflectors, on the other hand, bounce light back onto the subject, helping to fill in shadows and add depth to the image. - Proper exposure: Achieving the correct exposure ensures that the image accurately represents the colors and textures of the apparel. Photographers adjust aperture, shutter speed, and iso settings to balance the amount of light that enters the camera and capture the finest details of the garments. Attention To Detail And Composition The success of apparel photography lies not only in showcasing the garments but also in capturing the intricate details and presenting them in an appealing composition. Consider the following techniques: - Macro photography: By using macro lenses, photographers can capture close-up shots that highlight small design elements, textures, and patterns of the apparel. This technique adds depth and visual interest to the overall composition. - Product angles: Experts experiment with various angles to effectively showcase different features of the garment. Highlighting the front, back, sides, and details such as buttons or zippers provides customers with a comprehensive view of the product. - Framing and negative space: Framing the subject within the right amount of negative space helps draw attention to the apparel while maintaining a balanced composition. This technique allows the viewers' focus to remain on the garment without distractions. Effective Styling And Prop Use Styling and props contribute significantly to the overall aesthetic appeal of apparel photography. Here are some effective techniques used to enhance the visual presentation: - Model selection and posing: Choosing the right models that match the brand's target audience and style is crucial. Skillful posing can showcase the fit, movement, and unique features of the garment, making it more desirable to potential customers. - Prop selection: Using props that complement the apparel can help create a narrative and enhance the visual appeal. Accessories, furniture, or even themed backgrounds can add depth and context to the images. - Color coordination: Experts pay attention to color coordination between the garments, props, and backgrounds. This ensures visual harmony and a coherent overall presentation. Expert apparel photography involves various crucial techniques such as proper lighting and exposure, attention to detail and composition, and effective styling and prop use. By employing these techniques, photographers can capture stunning visuals that effectively showcase the apparel and attract the attention of potential customers.
Tips For Successful Apparel Photography Collaboration
Communication And Artistic Vision Alignment In order to ensure a successful collaboration between the apparel photographer and other creative professionals involved, such as models and stylists, effective communication and alignment of artistic visions are essential. Here are some key tips to achieve this: - Establish clear communication channels: Use various modes of communication, such as email, phone calls, or meetings, to ensure everyone is on the same page throughout the collaboration process. - Share ideas and inspiration: Discuss and exchange ideas, mood boards, and references to better understand and align with each other's artistic visions. - Clarify expectations: Clearly communicate the purpose, theme, and goals of the apparel photography project to ensure everyone is working towards the same outcome. - Listen and understand: Take the time to actively listen and understand the viewpoints, ideas, and suggestions of the models, stylists, and other collaborators to foster a collaborative and harmonious work environment. - Provide constructive feedback: Offering constructive feedback can help refine and enhance the artistic vision and bring out the desired results. - Be flexible and adaptable: Collaborative projects often evolve and change throughout the process, so remaining open to new ideas and adjustments is crucial. - Regularly review and evaluate progress: Have regular check-ins to review the progress and address any concerns or issues that may arise, ensuring that the project stays on track. Collaborating With Professional Models And Stylists Working with professional models and stylists can greatly enhance the overall quality of your apparel photography. Here are some valuable tips for successful collaboration: - Research and select the right talent: Do thorough research to find professional models and stylists who align with your brand aesthetic and target audience. - Communicate your vision: Clearly communicate your expectations, theme, and any specific requirements to the models and stylists to ensure they can effectively bring your vision to life. - Encourage creative input: Give room for models and stylists to contribute their ideas and creativity to the shoot, as this collaboration can result in fresh and unique concepts. - Provide a comfortable atmosphere: Create a welcoming and comfortable environment for the models and stylists, enabling them to feel confident and showcase their expertise. Read the full article
0 notes
Text
How to make a picture look professional in Photoshop
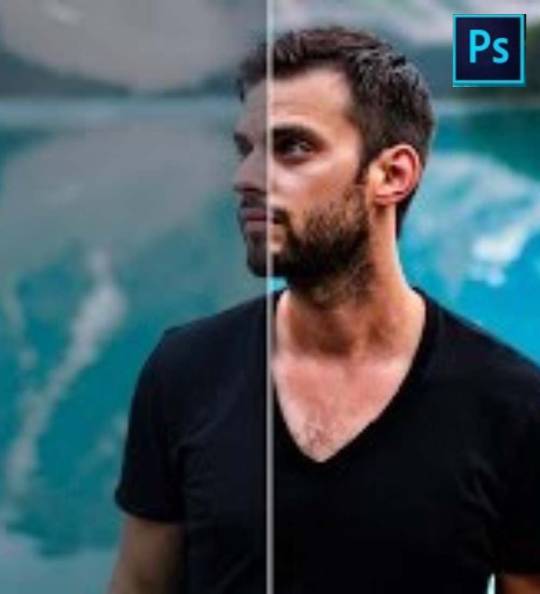
Are you tired of your pictures looking dull and amateurish? Have you ever wondered how some people manage to make their photos look so professional? Well, wonder no more! Photoshop is the answer to all your photography-related prayers. With the right tools and techniques, you can take any ordinary picture and turn it into a piece of art that looks like it was taken by a professional photographer. So if you're ready to up your photography game and make your pictures stand out, keep reading because I'm about to share some invaluable tips on how to make a picture look professional in Photoshop.
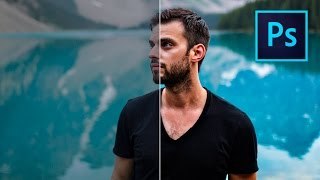
Introduction to the topic of making a picture look professional in Photoshop
Introduction to the topic of making a picture look professional in Photoshop: In today's digital age, having high-quality and visually appealing images is essential for various professional purposes. Whether you are a photographer, a graphic designer, a marketer, or simply want to enhance your personal photos, knowing how to make a picture look professional in Photoshop can greatly elevate the overall look and impact of your visuals. This blog post aims to provide you with a step-by-step guide on achieving professional-looking images through the use of Photoshop techniques. From blending modes to adding blur and selectively painting back areas, we will cover various aspects of photo editing to help you create stunning visuals for portraits, landscapes, and other types of photos. So grab your mouse and get ready to unleash your creativity in Photoshop!

Importance of enhancing photos for professional purposes
Enhancing photos for professional purposes is an essential skill in today's digital age. Whether you are a photographer, a graphic designer, or a social media manager, the visual quality of your images can greatly impact the overall professionalism of your work. By taking the time to enhance your photos in Photoshop, you can elevate their quality and make them stand out from the rest. Here are some key reasons why enhancing photos is important for professional purposes: - First impressions: A professionally edited photo immediately captures the viewer's attention and leaves a lasting impression. - Enhancing details: By using Photoshop, you can bring out the smallest details in your photos, making them more visually appealing and engaging. - Consistency: Professional editing ensures a consistent look and feel across your images and helps build a recognizable brand identity. - Correcting imperfections: Photoshop allows you to fix any flaws or imperfections in your photos, such as blemishes, distractions, or lighting issues. - Making a statement: Professionally edited photos can convey a sense of professionalism, creativity, and attention to detail, reflecting positively on your work or brand. In summary, enhancing photos in Photoshop is crucial for creating a professional and polished visual presence. It not only improves the overall quality of your images but also helps in establishing a strong brand identity and making a lasting impression on your audience.
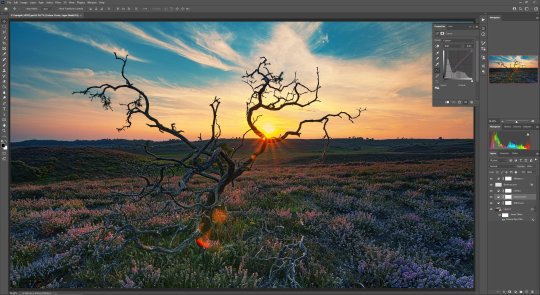
A brief explanation of the different ways to approach photo editing in Photoshop
Photo editing in Photoshop offers a wide range of possibilities when it comes to enhancing the appearance of your pictures. There are several different approaches you can take when editing photos in Photoshop, each with its own unique benefits. Some of these approaches include: 1. Basic Adjustments: This involves making simple adjustments to the exposure, contrast, and color balance of the photo to improve its overall appearance. 2. Retouching: This involves removing imperfections, blemishes, or distractions from the image to create a more polished look. 3. Filters and Effects: Photoshop offers a variety of filters and effects that can be applied to photos, such as adding a vintage or cinematic look, creating a black-and-white image, or applying a specific artistic style. 4. Blending Modes: Photoshop has different blending modes that can be used to combine multiple layers or adjust the opacity of a layer, allowing you to create unique effects and enhance the overall composition of the photo. 5. Advanced Techniques: For those with more experience, advanced techniques such as frequency separation or high-end retouching can be used to achieve professional-grade results. Each of these approaches has its own strengths and can be used depending on the specific photo and the desired outcome. It's important to experiment with different techniques and find the ones that work best for your style and the type of photos you want to edit.
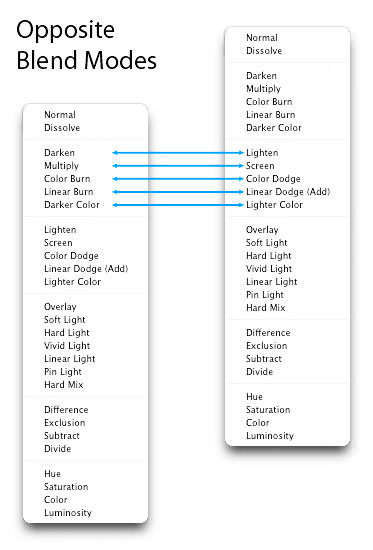
Overview of the Overlay and Soft Light blend modes
The Overlay and Soft Light blend modes greatly contribute to making a picture look professional in Photoshop. - These blend modes allow for subtle adjustments to the lighting and saturation of an image, creating a more polished and balanced look. - The Overlay blend mode intensifies the contrast and color of the photo, while the Soft Light blend mode softens the image and adds a gentle luminosity. - Both options are highly versatile and can be applied to various types of photos, such as portraits, landscapes, and product shots. - Experimenting with these blend modes can dramatically enhance the overall tone and mood of the picture, adding a professional touch to your editing.
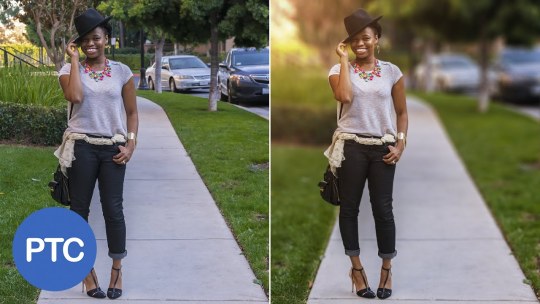
The benefits of adding a blur to the photo
Adding a blur to a photo can greatly enhance its overall professional look and feel. Here are the key benefits of incorporating a blur effect in Photoshop: 1. Softens distractions: By blurring the background or certain elements in the photo, you can reduce distractions and draw the viewer's attention to the main subject. This helps to create a more focused and visually pleasing composition. 2. Depth and dimension: Applying a blur can simulate depth of field, creating a sense of depth and dimension in the image. This technique is particularly effective in portrait photography, where a blurred background can make the subject stand out and appear more three-dimensional. 3. Emphasizes emotions: Blurring certain areas of a photo can evoke a sense of mystery or dreaminess, enhancing the emotional impact of the image. It can add a touch of artistry and create a visually captivating atmosphere. 4. Simplifies busy backgrounds: If your photo has a cluttered or busy background, adding a blur can help simplify and declutter the scene, making the subject of the photo pop. This is especially useful for product photography or in situations where you want to highlight a specific element. Remember, adding a blur should be done in moderation and thoughtfully, based on the desired effect and the style of the photo. Experimentation is key to finding the perfect balance between clarity and blurred elements for a professional look.
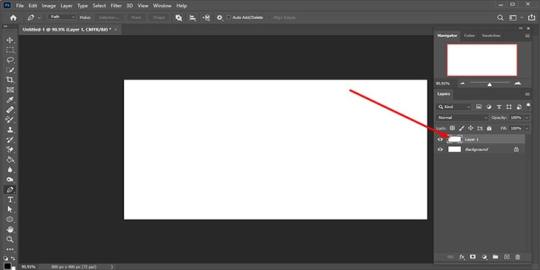
Steps to Enhance a Photo in Photoshop
Step 1: Duplicate the background layer and change the blend mode One effective way to make a picture look professional in Photoshop is by following a specific set of steps. The first step involves duplicating the background layer and changing the blend mode. This allows for a layer adjustment without affecting the original image. To duplicate the background layer, simply right-click on the layer in the Layers panel and select "Duplicate Layer." Then, choose either the Overlay or Soft Light blend mode from the drop-down menu. The Overlay blend mode adds contrast and vividness to the photo, while the Soft Light blend mode creates a subtle softening effect. Experimenting with both options can help determine which blend mode works best for the specific image. This technique is particularly useful for portraits, landscapes, and other types of photos as it can enhance the overall professional look and feel.
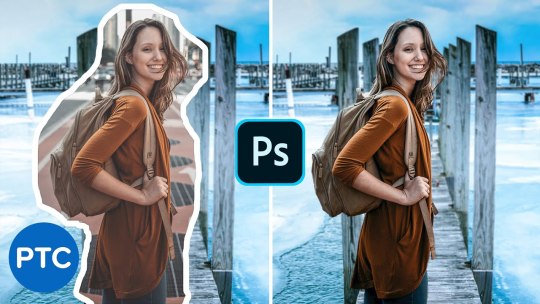
Explanation of how to duplicate the background layer
When it comes to making a picture look professional in Photoshop, one important step is to duplicate the background layer. This allows you to work on a separate layer without compromising the original image. Here's how you can do it: 1. Open your image in Photoshop. 2. In the Layers panel, you'll see the background layer. Right-click on it and select "Duplicate Layer." 3. A dialog box will appear, asking you to name the duplicated layer. You can simply leave it as the default name or give it a more descriptive one. 4. Click on "OK," and you'll now have two layers in the Layers panel – the background layer and the duplicated layer. Duplicating the background layer gives you the flexibility to experiment with different edits and effects while preserving the original image. This way, you can easily compare the changes and revert back if needed.
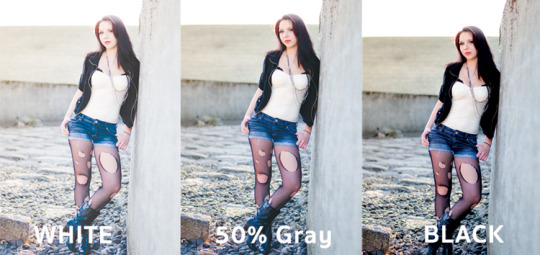
Instructions on changing the blend mode to either Overlay or Soft Light
One of the key steps in making a picture look professional in Photoshop is changing the blend mode to either Overlay or Soft Light. This can significantly enhance the overall appearance of the image. To do this, follow these simple and user-friendly instructions: 1. Duplicate the background layer: Start by duplicating the background layer of your photo. This will allow you to make changes while preserving the original image. 2. Change the blend mode: Next, select the duplicated layer and change the blend mode to either Overlay or Soft Light. The Overlay blend mode enhances contrast and saturation, while the Soft Light blend mode adds a subtle, soft glow to the photo. By experimenting with these blend modes, you can achieve different effects and find the one that best suits your desired outcome.
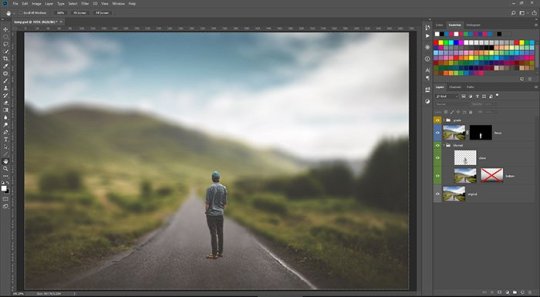
Step 2: Add a blur to the photo In Step 2 of making a picture look professional in Photoshop, adding a blur can enhance the overall quality and create a polished look. By utilizing the Gaussian Blur filter, you can control the level of blur to achieve the desired effect. Here's how to do it: - Introduce the Gaussian Blur filter: Explain that this filter allows you to add a soft, out-of-focus effect to the photo. - Find the appropriate amount of blur: Emphasize the importance of finding the right balance. Too much blur can make the image look unnatural, while too little may not have a noticeable effect. - Provide instructions: Guide readers through the process of applying the Gaussian Blur filter to the photo in Photoshop. - Use examples: Show before and after examples to showcase the impact of adding a blur. Include different types of photos, such as portraits or landscapes, to demonstrate its versatility. - Mention other applications: Highlight that this technique can also be used to create depth, emphasize certain subjects, or add a dreamy atmosphere to photos. - Encourage experimentation: Urge readers to practice and experiment with different amounts of blur to develop their own unique style and improve their photo editing skills. Remember, adding a blur to your photos in a natural and subtle way can elevate their overall professionalism and visual appeal.
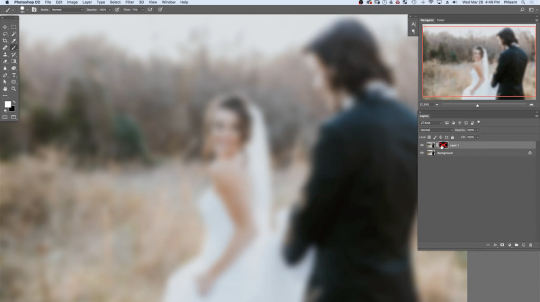
Introduction to the Gaussian Blur Filter
The Gaussian Blur filter in Photoshop is a powerful tool that can be used to add a professional touch to your photos. By applying a blur effect to certain areas of your image, you can create a sense of depth and focus, drawing the viewer's attention to the most important elements of your composition. This technique works particularly well in portrait photography, where it can help to soften skin imperfections and create a more flattering look. Additionally, the Gaussian Blur filter can also be used in landscape photography to add a dreamy and ethereal atmosphere to your images. By experimenting with different levels of blur, you can achieve various artistic effects and enhance the overall quality of your photos.
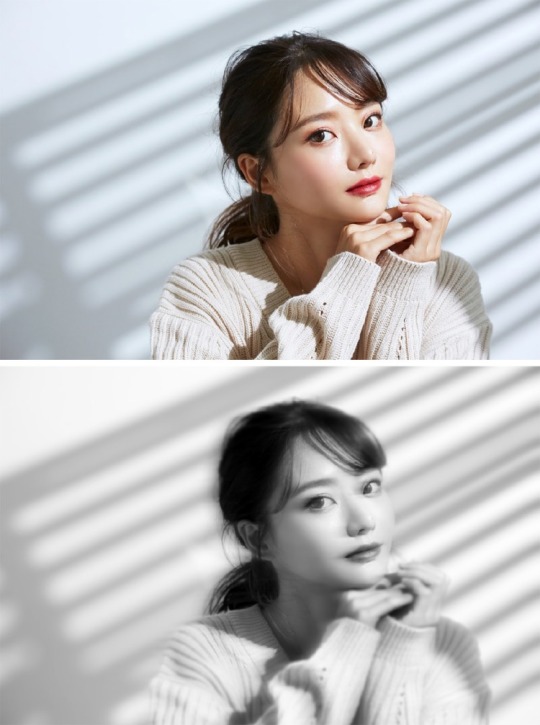
Finding the appropriate amount of blur for the desired effect
When it comes to achieving a professional look for your photos in Photoshop, finding the appropriate amount of blur is crucial to achieving the desired effect. Different photos and situations may call for different levels of blur. Here are a few tips to help you determine the perfect amount: 1. Experimentation is key: Every photo is unique, so it's important to experiment with different levels of blur to find the one that enhances your photo while maintaining a natural look. 2. Start with a low blur setting: It's always best to start with a low blur setting and gradually increase it until you achieve the desired effect. This allows you to maintain control over the final result. 3. Consider the subject and background: The amount of blur should be determined by the subject and the background of the photo. For portraits, a softer blur can be more appealing, while landscapes may benefit from a higher level of blur to create depth and a sense of distance. 4. Keep it subtle: Unless you're intentionally going for a heavily blurred effect, it's generally best to keep the blur subtle. The goal is to enhance the photo and create a professional look, not to overpower the image. By following these simple tips and experimenting with different levels of blur, you can achieve a professional look in your photos that will impress viewers and elevate your photography skills.
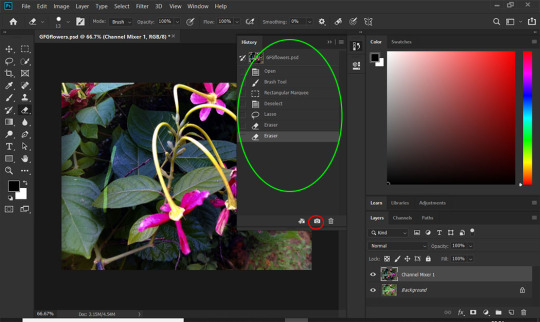
Step 3: Paint back selected areas In C. Step 3 of making a picture look professional in Photoshop, you'll learn how to bring back clarity to selected areas of the image. This technique is particularly useful when you want to enhance specific details, such as the eyes and lips in a portrait. To achieve this, you'll start by creating a layer mask, which will allow you to selectively apply the desired adjustments. Using a soft brush and painting with black, you can gradually reveal the areas where you want to bring back clarity. This technique can also be applied to other types of photos, including landscapes, by focusing on highlighting specific elements. By experimenting with this technique, you can truly bring your photos to life and create a more professional and polished look.
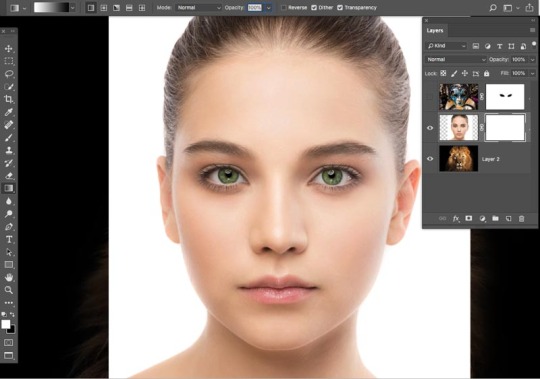
Creating a layer mask
Creating a layer mask in Photoshop is a powerful technique that allows for precise editing and control over specific areas of an image. By using a layer mask, you can paint on or off certain parts of the photo without permanently altering the original image. This technique is particularly useful when you want to bring back clarity in selected areas such as the eyes and lips in a portrait or specific details in a landscape. To create a layer mask, follow these steps: 1. Select the layer you want to add a mask to. 2. Click on the "Add Layer Mask" button at the bottom of the Layers panel. 3. You will see a white thumbnail next to the layer thumbnail, indicating the layer mask. 4. Use a soft brush with the black color selected to paint on the mask where you want to hide parts of the image. 5. To reveal parts of the image again, switch to white color and paint on the mask. By using layer masks, you can easily refine and enhance your photos in a natural and non-destructive way, giving you more control over the final result. Experiment with different brush sizes and opacities to achieve the desired effect.
Using a soft brush and painting with black to bring back clarity in specific areas such as eyes and lips
Using a soft brush and painting with black is a brilliant technique that can bring back clarity to specific areas of your photo, such as the eyes and lips. By selectively painting with black on a layer mask, you can reveal the underlying layer and restore focus and detail to these important features. Here's how you can achieve this natural-looking enhancement in Photoshop: 1. Create a layer mask: After duplicating the background layer, add a layer mask to it by clicking on the Layer Mask icon at the bottom of the Layers panel. This will allow you to selectively paint on the mask without affecting the original layer. 2. Choose a soft brush: Select a soft-edged brush from the Brush tool options. Adjust the size and opacity according to the area you want to retouch. A larger brush is suitable for broader areas, while a smaller brush is ideal for fine details. 3. Paint with black: Make sure the foreground color is set to black, as this allows you to hide the areas you paint. Start brushing over the eyes and lips, gradually revealing the underlying layer and bringing back clarity. Use gentle strokes and build up the effect gradually for a more natural result. Remember to take your time and zoom in to work on finer details. This technique can be applied to various types of photos, including portraits, landscapes, and still life, to enhance specific areas and create professional-looking results. Don't hesitate to experiment and practice with different brush sizes and opacity levels to achieve the desired effect. Using a soft brush and painting with black is just one of the many ways you can improve your photos in Photoshop. By learning and exploring different editing techniques, you can take your photography skills to new heights. Whether you're a beginner or an experienced user, practising with Photoshop and experimenting with various tools and features will help you develop your own unique style and create stunning, professional-looking images. Read the full article
0 notes
Text
"The Power of Quality Images: How It Can Impact Your Business's Success"
The quality of an image can have a huge impact on the success of a business. It can influence customers' perceptions of the business, shape the company's brand, and contribute to overall profits.
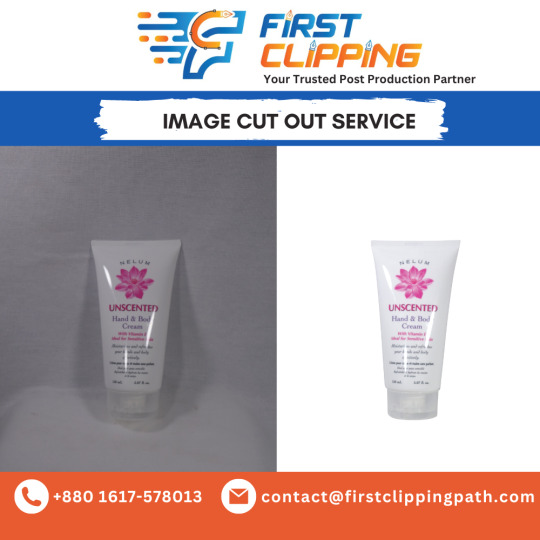
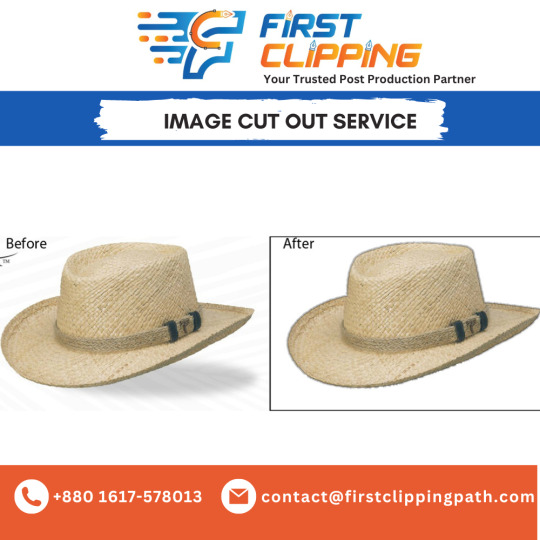
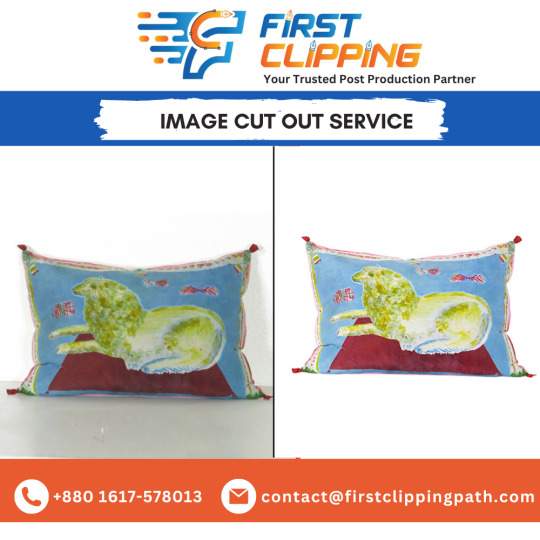
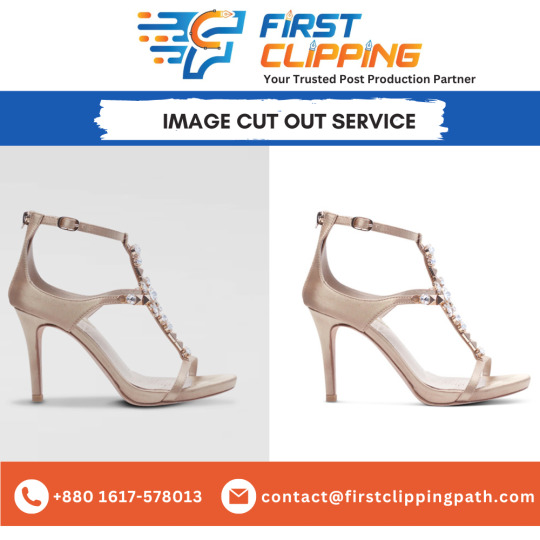
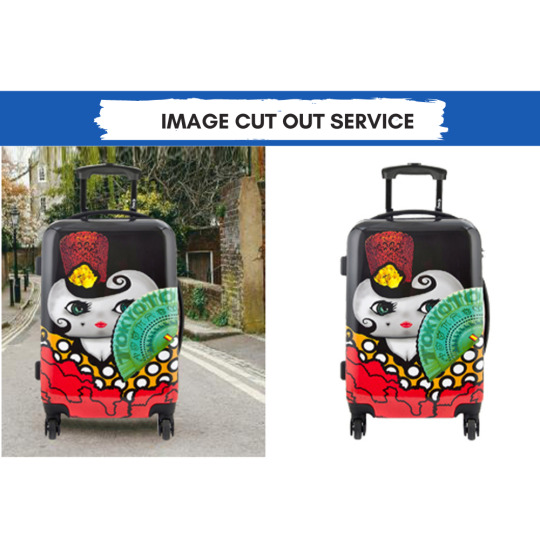
#foodporn#foodie#foodphotography#foodstagram#instafood#foodpics#photographyuk#ukphotographers#ukphoto#londonrestaurants#ukrestaurants#britishrestaurant#restaurantphotography#ukfoodphotography#whitebackground#clippingpath#productphotography#photography#backgroundremove#retouching#backgroundremoval
0 notes
Text

"Edit Your Jewelry Images with Professional Quality and Shine!"
Professional jewelry photography is a great way to make your product stand out. You can create professional-looking images with proper lighting, backdrops, and staging that will draw the eye of potential customers. In addition, you can also use software programs such as Adobe Lightroom to edit and enhance your images for an even more polished look.
- How To Create Professional Looking Jewelry Images ?
To create a professional looking jewelry image, you need proper lighting, backdrops, and staging. Additionally, software such as Adobe Lightroom can be used to edit and enhance the photos for an even more polished look.
#firstclippingpath#clippingpathservice#imageeditingservice#jewelryimageeditingservice#JewelryImageEditing
0 notes
Text
Best Budget lens for sports photography!
Hey, Are you a sports photographer looking to upgrade your gear? Are you on a tight budget but still want to get the best quality lens possible? If so, then this blog post is for you! We’ve done the research and have rounded up the best budget lens for sports photography. Read on to find out which one is right for your needs!
#firstclippingpath#clippingpathservice#bestlens#bestlensforphotography
0 notes
Text
Best lens for basketball photography
Basketball photography is an exciting way to capture the action and energy of a game. Whether you’re shooting at a professional level or just capturing your child’s weekend game, the right lens can make a huge difference in the quality of your photos. Choosing the best lens for basketball photography requires some consideration of factors like focal length, maximum aperture, and autofocus speed. In this article, we’ll look at what to consider when selecting the best lens for your basketball photography needs.
If you want to learn more please check the below link>
#basketballphotography#basketballphotographer#sportphotography#sportsphotography#firstclippingpath#clippingpath#clippingpathservice
0 notes
Text

Drop Shadow Service
0 notes
Text

Image shadow masking is a process that is used to create a three-dimensional effect on an image. This effect is often used to add depth to an image or to make an image appear more realistic.
The process of shadow masking involves using a black mask to cover parts of an image. The masked areas are then allowed to stand out more, while the unmasked areas remain in the background.
This process can be used to create a number of different effects, including making an object appear to be in front of or behind another object, or to create a sense of depth.
Shadow masking can be used on both digital and traditional images. When used on digital images, the process is often referred to as digital masking.
There are a number of software programs that can be used to create digital masks. Some of these programs include Adobe Photoshop, GIMP, and Paint Shop Pro.
Create a digital mask
1. Open the image you want to mask in your image editing program.
2. Create a new layer.
3. Select the brush tool and set the color to black.
4. Paint over the areas you want to mask.
5. Save the image.
Create a traditional mask
1. Cut a piece of black paper or fabric to the same size as your image.
2. Place the paper or fabric over the areas you want to mask.
3. Use a pen or pencil to trace around the masked areas.
4. Cut out the masked areas.
5. Place the cutouts over the corresponding areas on your image. https://firstclippingpath.com/services/shadow-making-service/
0 notes
