
despite my best intentions, i tend to lose the plot... re: memory retention, that's a skill i have not... of my few known inventions, a thousand more forgot... sans neural circumvention, i can't retain a thought!
Last active 60 minutes ago
Don't wanna be here? Send us removal request.
Statistics
We looked inside some of the posts by fleeting-special-interest and here's what we found interesting.
Average Info
Notes Per Post
828K
Likes Per Post
396K
Reblog Per Post
429K
Reply Per Post
3K
Time Between Posts
11 days
Number of Posts By Type
Text
13
Photo
2
Note
2
Last Seen Tumblr Blogs


Fun Fact
Celebrities use Tumblr as well.
Text


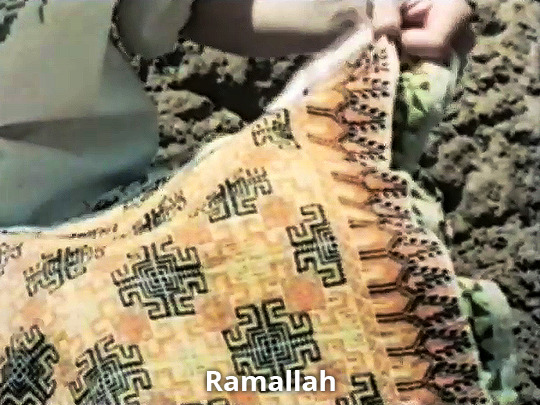
Favourite Designs: Frieda Lepold "A Knights Dress" Haute Couture Gown
39K notes
·
View notes
Text
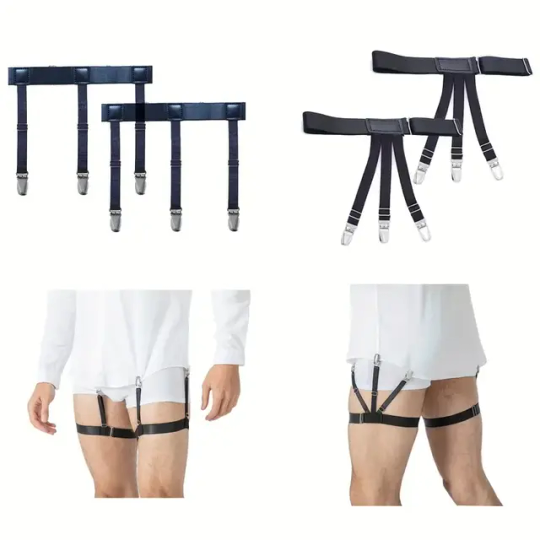
You know what, since I'm thinking about it anyways, let's talk formalwear accessories. Most of these are traditionally menswear but a bit of gender fuckery is good for the soul, and frankly most of these are about making your mass-produced clothing fit and lay properly without having to go to the tailor.
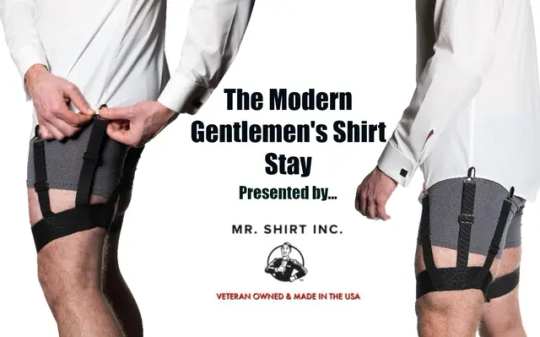
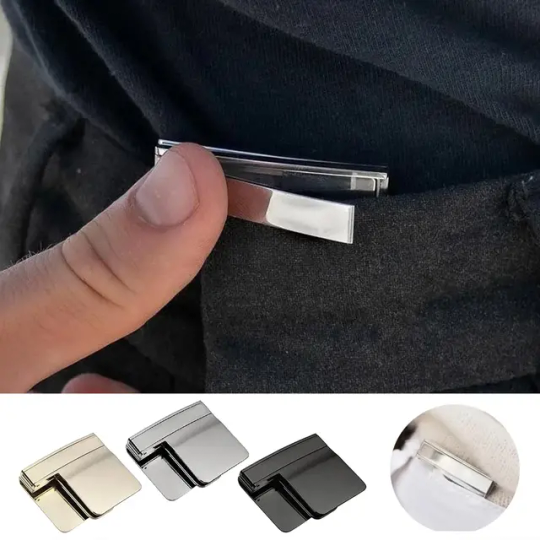
Shirt stays: these go around your thighs to hold your shirt down, so that it stays smooth and tucked in. They're usually elastic, with 1-3 clips, and if you wear skirts frequently this is a GREAT way to make sure your top doesn't ride up. The clips will be visible if you're wearing something tight, so loose pants or skirts are where these do best. There's also an insane version that clips to your socks, but that is for lunatics. If you wanted, you could also use one of these clips to hold up thigh-highs.
These do a great job of smoothing and narrowing the waist area by keeping your shirt from bunching there.
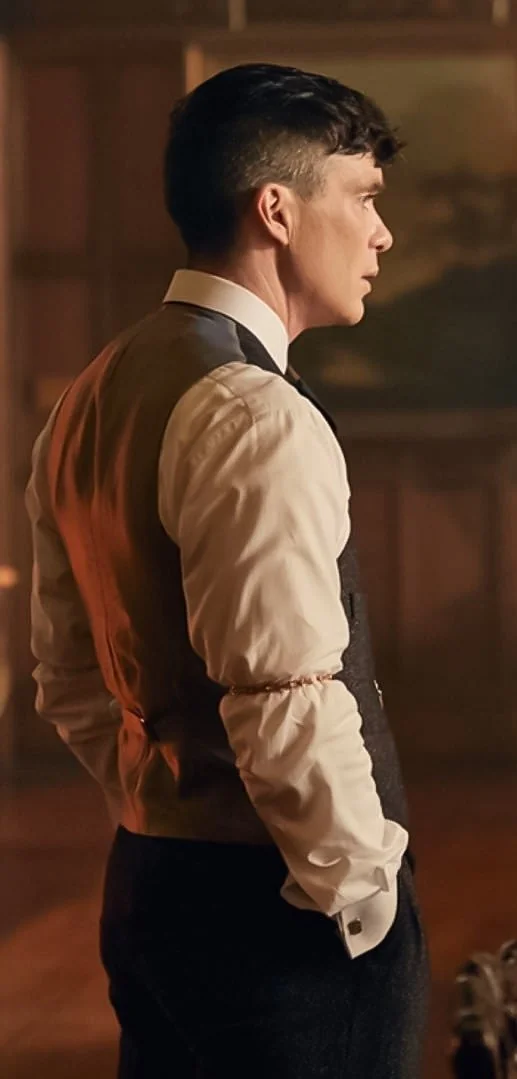
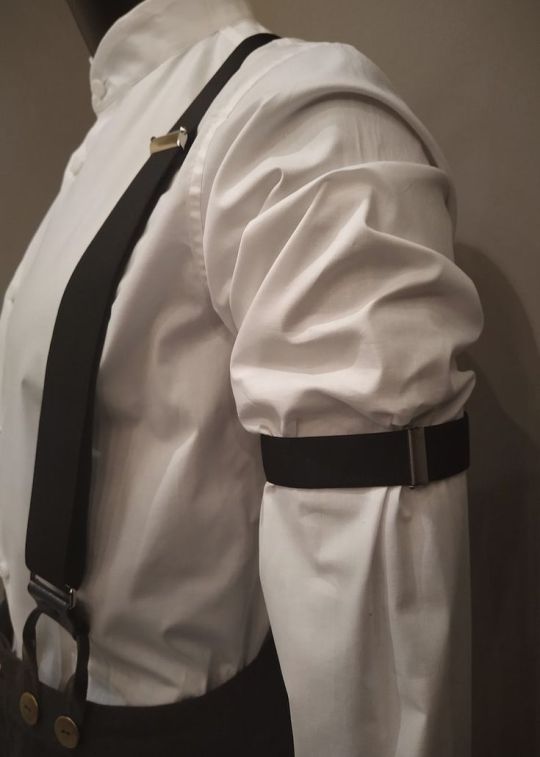
Sleeve garters: usually metal, leather, elastic, or silk. These are usually worn with button-down shirts to adjust where your cuff falls on the wrist or hand. They're properly worn on the upper arm, and you pull the fabric of the sleeve above the garter until you cuff is where you want it. Because this creates a puff of sleeve at the bicep, it also broadens the appearance of the shoulders. It's great if you're working with your hands or if your sleeves are often too long for your preference.
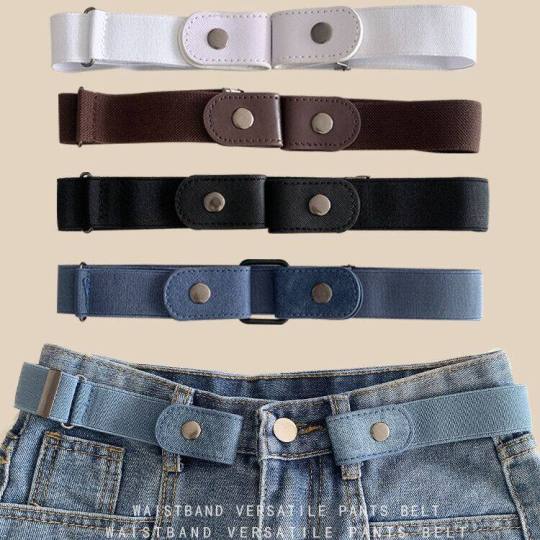
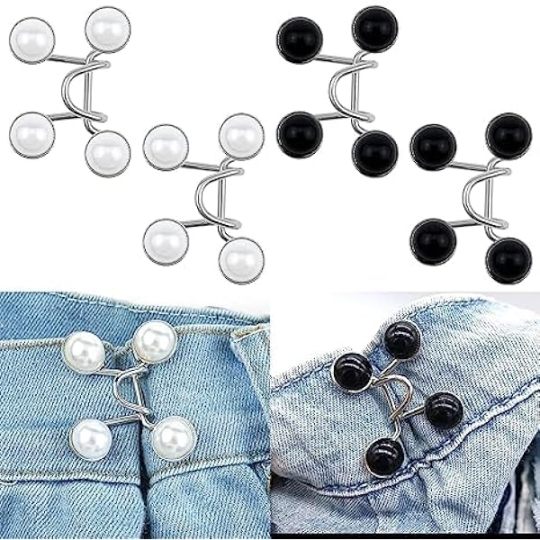
Waistband clip or belt adjustment clip/buttons
Three different ways of tightening the waistband of a pair of pants or a skirt. You're not going to get more than an inch or so tighter without weird bunching, and for most of these you'd want them to be hidden under a shirt or jacket, but they do the job if that's something you're having issues with.
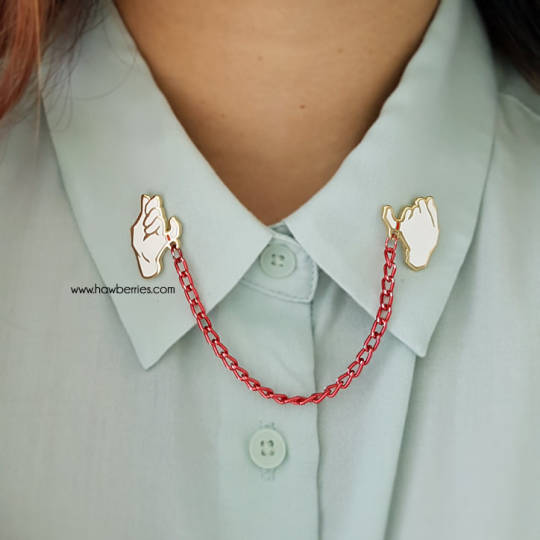
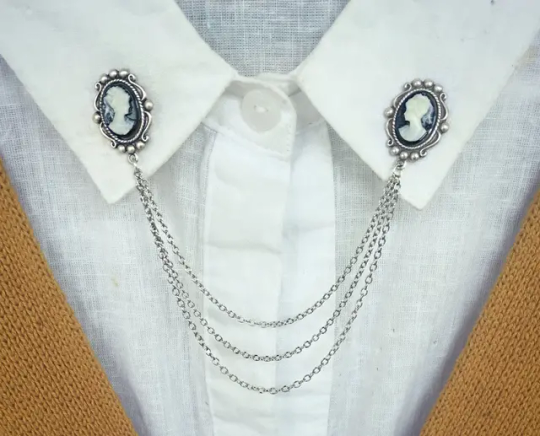
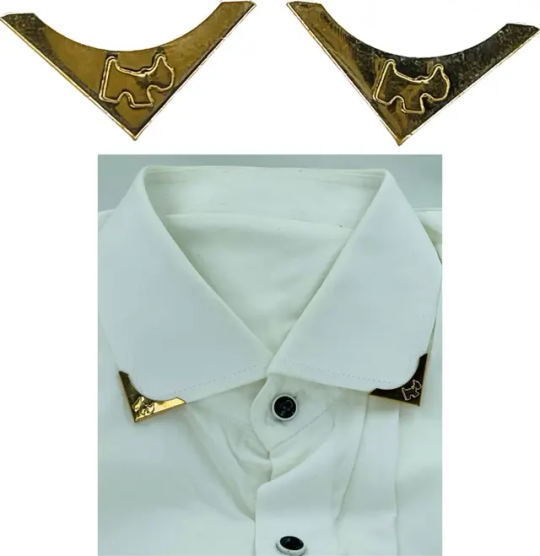
Collar pins: There are so many fun ones out there, both with and without chains. They're not terribly practical, though the slight weight may help keep your collar where you want it. Also consider collar tips, which pin (surprise) to the very tips of your collar points.
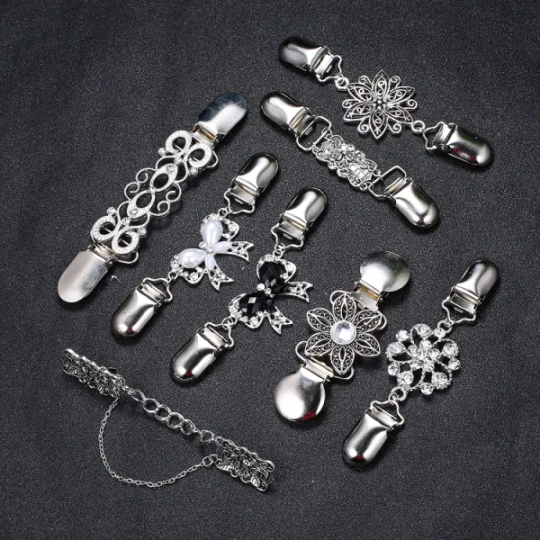
Sweater clips/guards: meant to hold your sweater or cardigan mostly closed. Great if your cardigan doesn't button, or if you don't like it to be buttoned all the way.
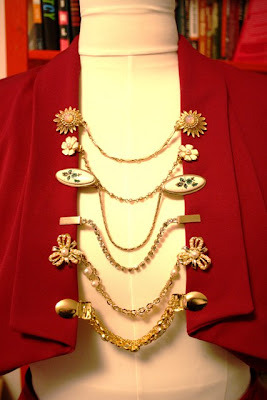
There's tons of other stuff out there like this--etsy is a great place to find this stuff. A lot of these are old solutions to the very modern problem of mass-maufactured clothes not being as one-size-fits-all as advertised, but they're also a fun way to put a bit of personality into businesswear.
43K notes
·
View notes
Text


Paolo Sebastian 'A Lover's Kiss' Fall 2024 Haute Couture Collection
9K notes
·
View notes
Text
Really says something about the dire state of offerings for men interested in sewing their own clothes that even searching things like “interesting men’s clothing patterns” brings up articles with links to four or five whole websites that primarily offer admittedly nice but practically identical patterns for making button-ups and work pants and maybe a varsity/bomber jacket if you’re lucky.
(Branching out into historical costuming for everyday wear is like your one shot at variation, and even then, the ratio of men’s to women’s patterns on every website is frustrating to say the least.)
Patternmakers as a trans man I am begging you. Give me a little more to work with here.
21K notes
·
View notes
Text
Really says something about the dire state of offerings for men interested in sewing their own clothes that even searching things like "interesting men's clothing patterns" brings up articles with links to four or five whole websites that primarily offer admittedly nice but practically identical patterns for making button-ups and work pants and maybe a varsity/bomber jacket if you're lucky.
(Branching out into historical costuming for everyday wear is like your one shot at variation, and even then, the ratio of men's to women's patterns on every website is frustrating to say the least.)
Patternmakers as a trans man I am begging you. Give me a little more to work with here.
21K notes
·
View notes
Text
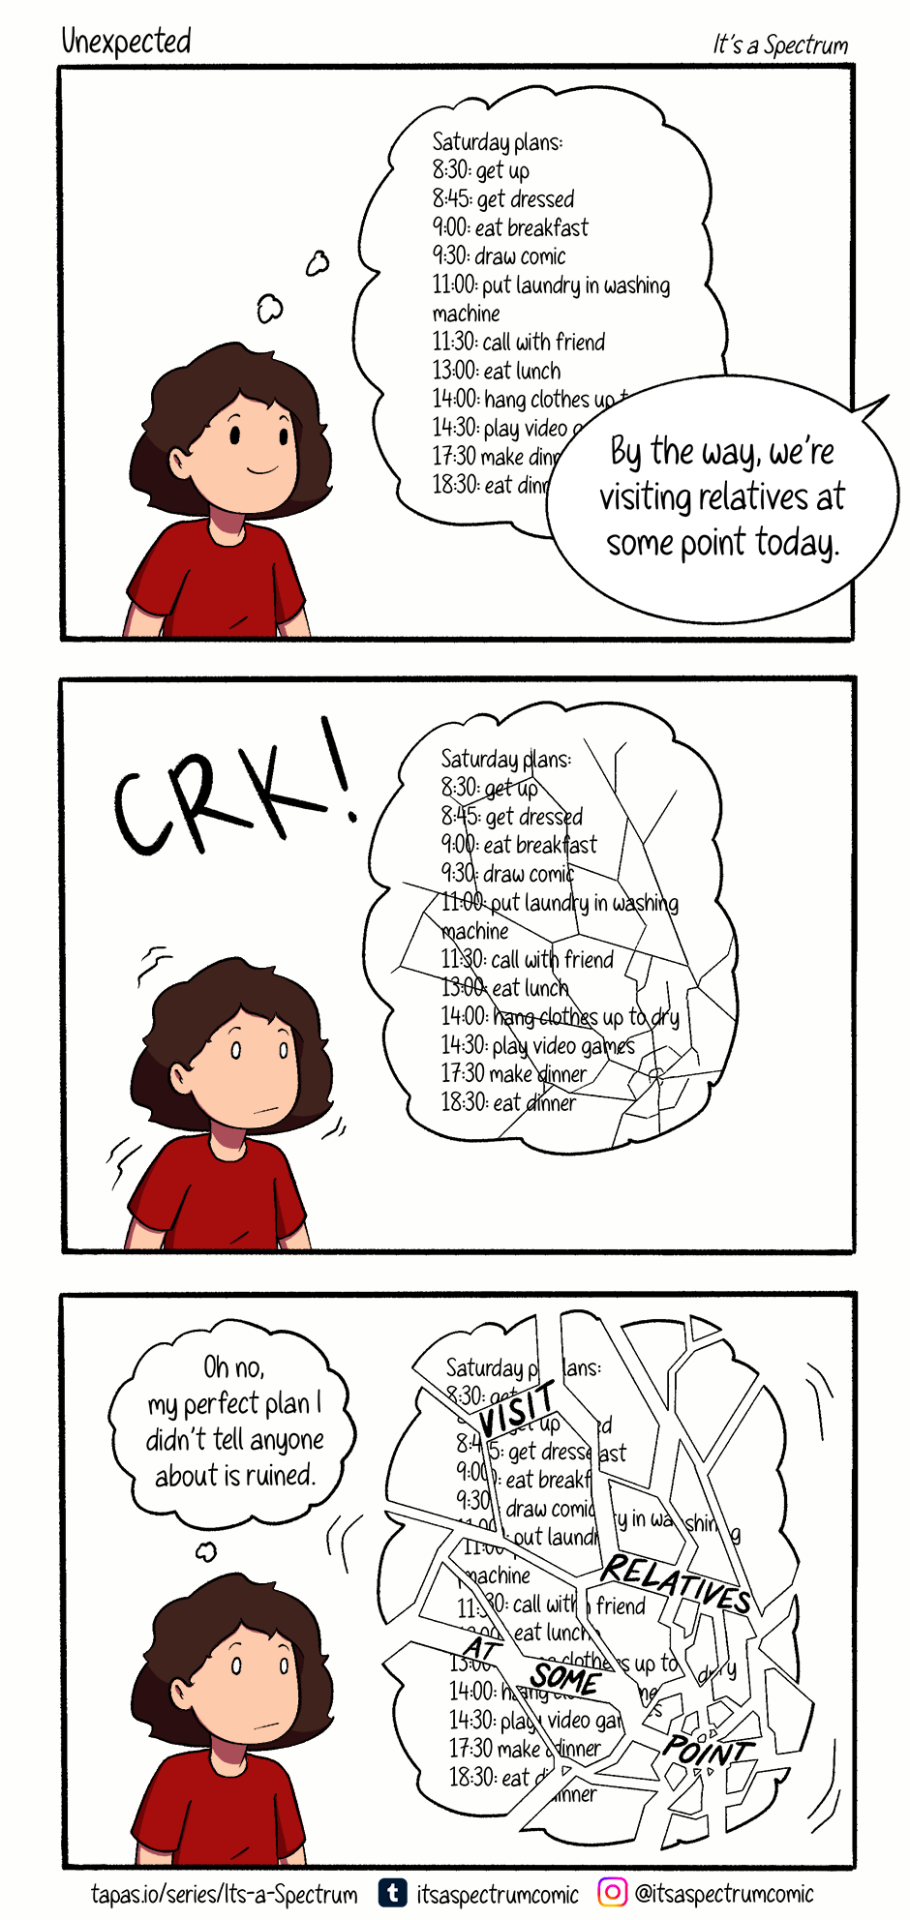
It's not that I don't want to visit, it just wasn't on the list I made in my head
82K notes
·
View notes
Photo
i have even more audhd than usual
zeekayart, with the power of phonetic pronunciation of letters, and general art snobbery!
370K notes
·
View notes

Text


New Release: YourHighness 【-The Hyakumehime-】 Qi Lolita Dress Set
◆ Shopping Link >>> https://lolitawardrobe.com/yourhighness-the-hyakumehime-qi-lolita-dress-set_p8359.html
4K notes
·
View notes

Text
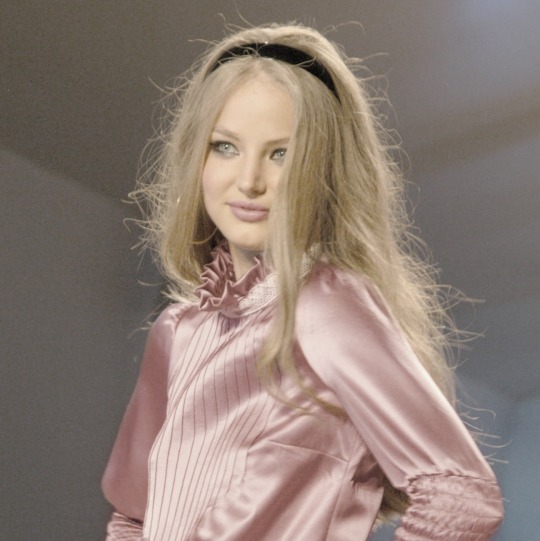
i love her
Gleaming 1950’s rose gold satin cocktail dress by Rembrandt


xtabayvintage
4K notes
·
View notes
Photo


DIY INSPIRATION | Lana Del Rey Flower Crown
113 notes
·
View notes
Text
Make A Flower Crown
❁ ❃ ❋ :: Honestly, what’s not to love about nature, especially when it involves wearing wildflowers around your head, drinking spring water, and dancing in the forest? Below is a basic how-to that will show you how to make your very own flower crown~! :: ❁ ❃ ❋
You’ll need:
a variety of fresh (or fake) flowers trimmed down to 3″ stems
2 pieces of 16 gauge floral cloth wire
green floral tape
floral shears or scissors

To begin, you’ll create the base of the flower crown out of two pieces of floral wire. Mold and gently bend each piece into a half circle. Face the half circles opposite of each other to create a circle and lay it over the top of your head to check the fit. It should be quite snug as the addition of flowers will eventually weigh the crown down. Wrap both overlapping sections tightly with floral tape.

Before adding the flowers to the base, you’ll create several small clusters of flowers. This avoids having to attach each flower individually and overloading the crown with tape. Pick a flower and continue adding 4-5 flowers, each one nestled right below the other. Tightly wrap the base with floral tape. Trim the tips if necessary.

Once you’ve made 10-15 clusters, start adding them to the base. Position a cluster of flowers against the outside of the wire base and wrap tightly with floral tape. Overlap the second cluster over the first and wrap tightly with tape. Continue layering clusters in the same direction until the entire base is filled. If you’ve used real flowers, spray the crown with water or keep it in a cool place until you’re ready to wear it!

Your flower crown is finished!


For magickal properties of flowers, check out my post: The Language of Flowers
3K notes
·
View notes
Note
How do you make the flowers for the flower crown? like specifically what material is it? Its super cool and I want to make one I just don't know what I need.
Hmm, I just reblogged it from another site, but I think I can help you in terms of what to buy and how to do it. If you click the link, it’ll take you to the complete photo post that shows you what you need. In any event, here’s the list:
Nail polish
Floral wire, a thin bendable wire is ideal. 26 Gauge is fine.
Floral Tape
Wire cutters/scissors
a pencil or cylindrical object to wrap the petals around
Ribbon (optional)
DIRECTIONS

First, you’re gonna need to make the crown. You can do this by using the wire you already have or you can use an old headband or anything that you like that resembles a headpiece. Thicker wire is also fine for this step. As you can see, OP twisted two pieces of wire together and left loops at the end (to attach the ribbon). Then they covered it in brown floral tape.

The second step is to make the flowers. Using your pencil/cylindrical object, twist the wire around it to create a ‘petal’. Repeat this until you have at least a couple of petals. 3-6 is usually fine, it’s really your call.

SLIGHTLY bend the petals back to create a natural looking petal.
After you are satisfied with the shape of your petals, cut out your flower, leaving some wire left to attach it to your crown.
Repeat the first few steps and make the rest of your flowers.

Take one of your flowers and CAREFULLY apply nail polish to it, one petal at a time. Think of it like making bubbles. It may be easier to pour the nail polish in a flat plate and dip it, or dip the entire flower into the polish.Repeat this for all your remaining flowers.

Twist the two ends of your flowers together to form a ‘stem’.

Wrap the stems with floral tape, preferably with the same color you used in the base of the crown.Repeat this for all your remaining flowers.

The third step will be attaching the flowers to your crown. You can do this a few ways. One way is to wrap the stems around the crown. Another way is to just wrap the stems with floral tape as you go along, like the OP did.Do this until all your flowers have been attached to your crown.
At this point, you can tie the ribbons to the loops like OP did, or decorate it any other way you like. :)

Enjoy your new floral crown!
TIPS
You can purchase most of the items in Walmart, Michael’s or any craft or flower store. You can also order it online. :)
REMEMBER, this tutorial is just a guide. If you don’t want to use brown floral tape or if you prefer using the green floral wire, don’t be afraid to change it up. You can use any color or material your heart desires.
I’ll refer you to an ask where I gave a few tips. ASK by starry-ponds
And here are some completed flower crowns from some lovely tumblr users. :) Alyssa & Rebekka
And here is the original link to the post. It’s in Russian.
Sorry for replying late. I hope this helps you with making your own crown. :)
69K notes
·
View notes
Note
How do you make the flowers for the flower crown? like specifically what material is it? Its super cool and I want to make one I just don't know what I need.
Hmm, I just reblogged it from another site, but I think I can help you in terms of what to buy and how to do it. If you click the link, it’ll take you to the complete photo post that shows you what you need. In any event, here’s the list:
Nail polish
Floral wire, a thin bendable wire is ideal. 26 Gauge is fine.
Floral Tape
Wire cutters/scissors
a pencil or cylindrical object to wrap the petals around
Ribbon (optional)
DIRECTIONS
First, you’re gonna need to make the crown. You can do this by using the wire you already have or you can use an old headband or anything that you like that resembles a headpiece. Thicker wire is also fine for this step. As you can see, OP twisted two pieces of wire together and left loops at the end (to attach the ribbon). Then they covered it in brown floral tape.
The second step is to make the flowers. Using your pencil/cylindrical object, twist the wire around it to create a ‘petal’. Repeat this until you have at least a couple of petals. 3-6 is usually fine, it’s really your call.
SLIGHTLY bend the petals back to create a natural looking petal.
After you are satisfied with the shape of your petals, cut out your flower, leaving some wire left to attach it to your crown.
Repeat the first few steps and make the rest of your flowers.
Take one of your flowers and CAREFULLY apply nail polish to it, one petal at a time. Think of it like making bubbles. It may be easier to pour the nail polish in a flat plate and dip it, or dip the entire flower into the polish.Repeat this for all your remaining flowers.
Twist the two ends of your flowers together to form a ‘stem’.
Wrap the stems with floral tape, preferably with the same color you used in the base of the crown.Repeat this for all your remaining flowers.
The third step will be attaching the flowers to your crown. You can do this a few ways. One way is to wrap the stems around the crown. Another way is to just wrap the stems with floral tape as you go along, like the OP did.Do this until all your flowers have been attached to your crown.
At this point, you can tie the ribbons to the loops like OP did, or decorate it any other way you like. :)
Enjoy your new floral crown!
TIPS
You can purchase most of the items in Walmart, Michael’s or any craft or flower store. You can also order it online. :)
REMEMBER, this tutorial is just a guide. If you don’t want to use brown floral tape or if you prefer using the green floral wire, don’t be afraid to change it up. You can use any color or material your heart desires.
I’ll refer you to an ask where I gave a few tips. ASK by starry-ponds
And here are some completed flower crowns from some lovely tumblr users. :) Alyssa & Rebekka
And here is the original link to the post. It’s in Russian.
Sorry for replying late. I hope this helps you with making your own crown. :)
69K notes
·
View notes
Text
Make Your Own DIY Flower Crown for Halloween + Dia de los Muertos
We love Halloween. The decorative gourds, the parties, the costumes–especially the DIY costumes. With so much to love about this holiday, we’re looking for ways to extend it for as long as possible–and wear our costumes to as many places as we can. Enter…Día de los Muertos. From October 31 to November 2, people everywhere will be celebrating this Mexican holiday with poems, sugar skulls, and lots and lots of flowers. Día de los Muertos is all about the marigolds.
In honor of Day of the Dead, our Halloween (and beyond!) costume this year is the holiday’s unofficial mascot, La Calavera Catrina. Although she was invented to skewer the haute bourgeoisie of Mexico a century ago, her floral-inspired style is timeless.
And you can get it. A Día de los Muertos flower headband (and maybe a little face paint) is all you need! Here’s a step-by-step tutorial–make your own Dia de los Muertos flower headband & create a Halloween costume to take you all the way through the weekend. Since we have a few days of parties ahead, we opted for silk flowers this time. But, you can easily substitute real flowers and wire to make a lovely single-use piece that will dry beautifully into to an autumnal wall piece.

What you’ll need: silk/fabric and real flowers, a hot glue gun, kitchen shears, and a couple non-plastic headbands.

We went for deep, autumn colors like dark red and burnt orange. But if you only have access to brightly colored flowers, those can work, too! Just stick with one color family and go wild.

First, pick the heads of the flowers off their stems. These flowers from Michael’s are easy to separate–they just pop right off with a light tug.


Once all your flowers are separated from their stems, you need to try to flatten the bottom surface of the flower by cutting off as much of the remaining plastic stem as possible. Go ahead and cut off the remaining green stem still sticking out.

After you’ve cut off the remaining stem, cover the opening with hot glue to make sure your flowers stay intact.

Now, for the fun part! Arrange your flowers how you’d like to see them on your headband. We balanced the orange and red roses and framed the crown with two auburn mums for a super lush look. If you can, omit the fabric mums and use metal barrettes to clip in freshly-cut marigolds from your local florist!

Some of our flowers were a little flimsy, so to add structure and dimension we inserted smaller flowers from the original bouquet into the larger buds.

You’ve got a design! Start hot gluing your flowers to the headband. Keep in mind that your flowers might not lie flat on the headband as they do on your workspace, so prepare to be flexible with your design. Flowers will scrunch up as you glue them and might take up less headband space than you thought, so have some extras nearby.

After some serious hot gluing, the final product:


Enjoy!
We want to see you in your Halloween & Día de los Muertos finest.
Tweet us photos of your floral-inspired costumes @bloompophq or mention us in an Instagram post (also @bloompophq) for a chance to win 20% off your next Bloompop order!
7 notes
·
View notes
Text
Ruslana Korshunova wearing Betsey Johnson Spring 2006 ♡
923 notes
·
View notes