
Don't wanna be here? Send us removal request.
Statistics
We looked inside some of the posts by fmp-sm and here's what we found interesting.
Average Info
Notes Per Post
0
Likes Per Post
0
Reblog Per Post
0
Reply Per Post
0
Time Between Posts
2 days
Number of Posts By Type
Text
17
Last Seen Tumblr Blogs


Fun Fact
Mobile Tumblr US users spend an average of 4.04 minutes per session on the app.
Text
Showcase Animations
Now that I have MP4 videos to showcase my models, I also wanted to create some simple looping GIFs of them to put on ArtStation and to possibly use for my showcase reel.
I used https://ezgif.com/ to make them.
I imported my videos and ended up cropping them on the website too, to remove most of the empty black background and highlight my models more.
I then converted them to GIFs with the highest quality I could with the website.
The below GIFs however are compressed so I can upload them on Tumblr.


0 notes
Text
Turntable Animation
Now that I have some models to showcase, as well as set up lighting for them, I needed to create a simple animation to show the angles of my models.
The best way to do this was to make a simple looping turntable animation, where the model will rotate on a fixed axis, showing a full 360.
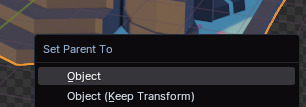
I did this in blender, by creating an Empty, and parenting it to the joined model.

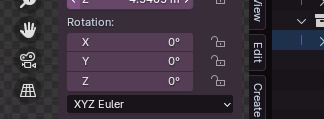
Using the key frames feature in the timeline, I made sure the model was at 0 rotation on the X axis, then imported a keyframe on the first frame of the timeline. Then, selecting a frame after the last one- In this case, I selected 301 as I had 300 frames- I changed the model rotation to 360 on the x axis, and imported another keyframe. This creates a smooth animation of the model rotating on a fixed axis.

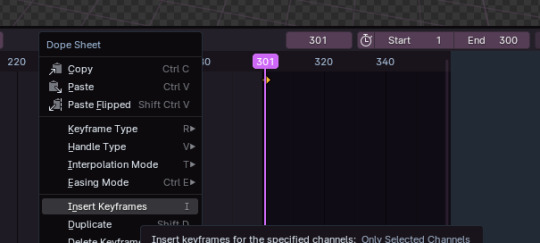
One issue I encountered was trying to figure out how to make the animation one uniform speed. By default, the animation will have an ease-in and ease-out speed. I wanted it to be one constant speed. I fixed this by selecting the two key frames I made, and changing the interpolation of the animation to Linear, instead of Bezier, which is the default interpolation used by Blender.

0 notes
Text
Lighting and cameras
With my models somewhat complete minus a few minor adjustments, I needed to make sure that I had added cameras to them, as well as lighting, to get the best results when rendering.
The camera for my models was simple to set up- I added a camera to the world and by switching between the world view and camera view, I adjusted it to be at the best distance and focal length to showcase.
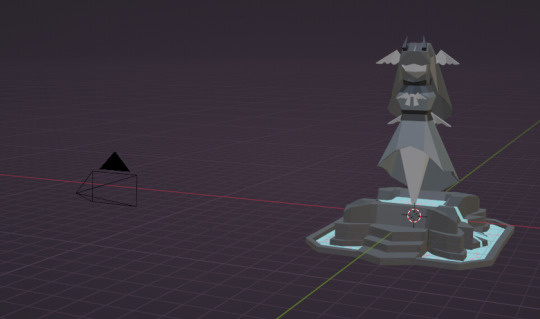
^ The camera in the world
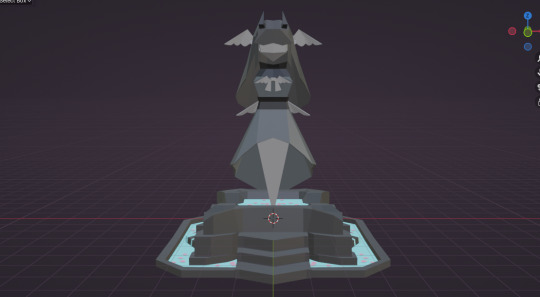
^ Camera view
The lighting however was a little bit more complicated. I wanted to have a more natural lighting, like sunlight. So I decided to play around with the settings with a lamp until I got what I wanted. You can make a sunlight from a lamp by selecting "Sun" out of the 4 light varients Blender lets you choose. I played around with the colour too to get a warm but efficient light.
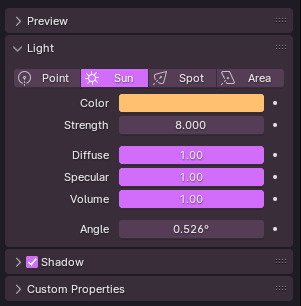
I did notice however that the shadows were a bit greyer and darker than a natural shadow. I wasn’t sure how to fix this, so I looked it up, and found that by changing the Surface colour in the World tab. I played around with the colour here until i ended up with a lighter blueish tone, which gave me the look I was aiming for.


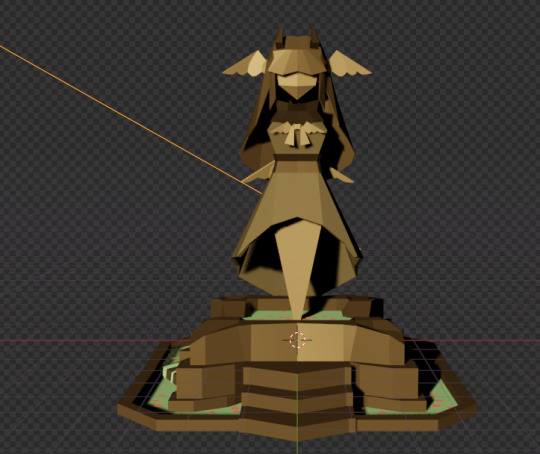
^ The light in the world
I then also played around with some render settings, such as adding bloom and ambient occlusion.

0 notes
Text
Texturing
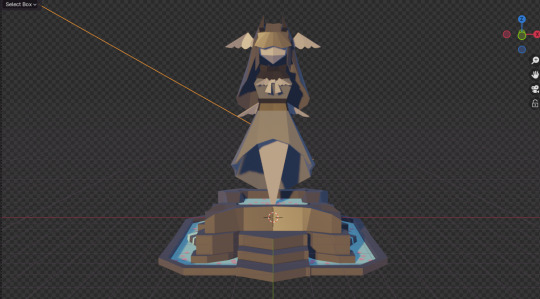
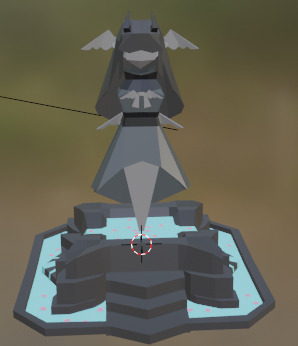
For my model, I decided to just use flat colours rather than creating any UV maps. This was both to save time- and also because I wanted to keep the statue much simpler.
For the main statue, I decided to just use varying shades of a stone grey. I did a colour for the 'skin' and wings, the hair, the dress and the darker parts of the dress e.g the centre belt and the bow. I also used this darker colour for the horns.


I chose to use the grey I used for the dress for the fountain, and then a more cartoony blue colour for the water.

I then used a light orangey-pink for the petals, as I wanted them to look like cherry blossom petals.
0 notes
Text
Modelling
I decided to change the choice I made about creating dog ears for this goddess. I felt that it didnt go with the rest of my design, so I decided to change the design choice and remove the ears. I instead decided to change them for horns, which I decided to take from my Divi model and scale down.

0 notes
Text
Modelling
Finally, I wanted to create petals, as originally in the game I was planning on having the fountain located in a cherry tree forest.
To make these, I started off with a plane, then added a lot of loop cuts to it. I scaled it down a lot, too. I then adjusted the vertecies into an almost heart-shaped pattern, and selected all of the inner edges of the petal apart from the middle edge, and dissolved them- this means that the edges will be removed and the faces will join.

I then scaled the petal down a bit more, copied it, and pasted it repeatedly all over the water areas, adjusting the roation a little bit each time to make a scattered effect.

0 notes
Text
Changing Focus
While developing, I’ve realised that I have spent significant amount of time of creating my models, leaving me far less time to create a game. Because of this, I’ve decided to change my focus to be on creating models instead, so that I can create higher quality models and not lose time to them when I should be developing my game. I will also aim on creating three models, rather than two and a game.
0 notes
Text
Modelling
My next step was to create the 'fountain' element that I wanted. I started off by adding a plane, then shaping it to fit in the top part of the stone part. I then added a few loop cuts horizontally, and used these to create a start for the streams i wanted to make either side.
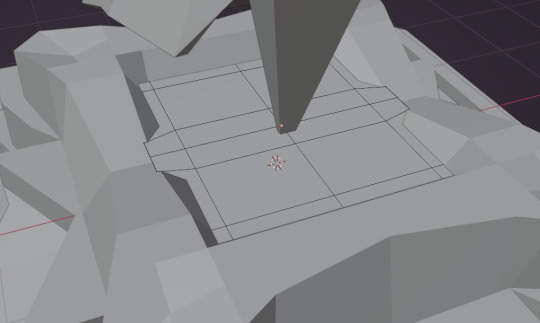
Making the streams was a bit more difficult. I extruded the edge fron the plane, then adjusted it so that nothing was clipping. I then continued to repeat this, with a lot of adjusting between, until I had a nice shape.
0 notes
Text
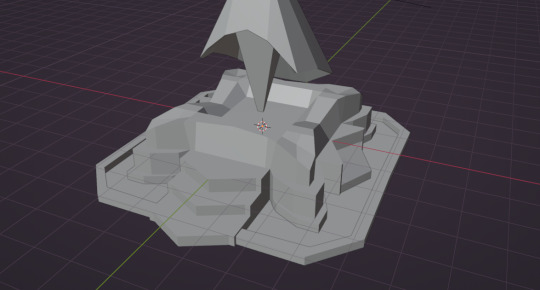
Modelling
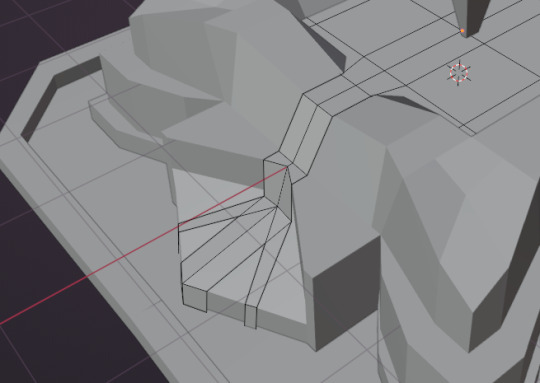
Next, i needed to make the base for my fountain. I started off by adding a cube, then adding several loop cuts around it to create an uneven grid design. I also decided to add a mirror modifier on both the x and z axis, so that I only needed to design a quarter of the base and it would replicate for the other 3 quarters.
To get a design I liked, I mostly just played around with moving, scaling and bevelling. I didnt have a particular design in mind, so I just played with it until i was happy with the shape.
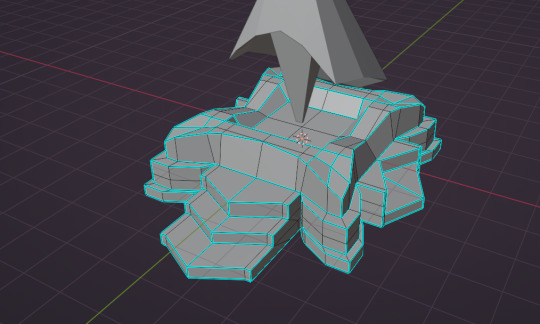
I then added a border around the edge to create a 'pond'-like effect.
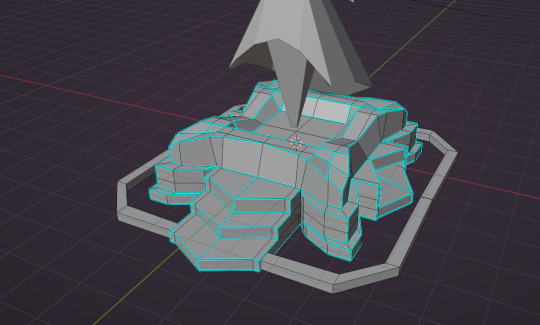
I then added a simple plane to the bottom layer to act as the water.
0 notes
Text
Modelling
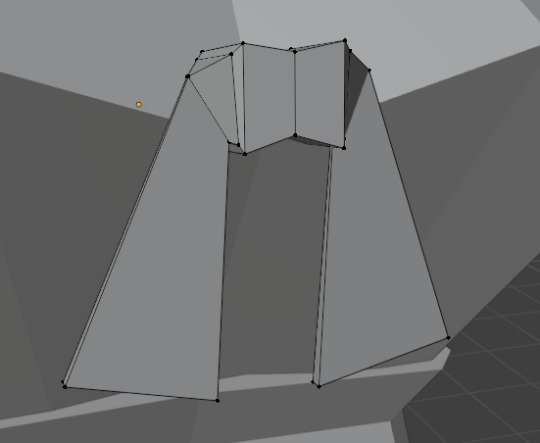
I now wanted to create some wings- inspired by the Valkyrie Eir. I started this by adding a plane, and adding a few loop cuts. I wanted to create a simple wing pattern, so I began to move the vertices on the bottom edge to create a zigzag pattern.

I also added a slight bend in the middle of the wings to make a more fluid look. Then, I added the solidify modifier.
Next, I wanted to add a bow to my design. I did this by adding a cube, and extruding each side. I dragged the new face created by extruding down and flattened it, to create a ribbon. I also added a loop cut through the middle of the main cube and scaled it down to create a cinched look. I then added a bevel to the outer edges of the main cube to create a smoother look.
I wanted to have a more unique bow, so I decided to copy the wings either side of the head and used them as the bow. I adjusted them a small bit so that they were a little bit flatter.

0 notes
Text
Modelling
-making dog ears
I Wanted to take a bit of inspiration from the Goddess Bau, who was also a goddess of dogs on top of healing. I did this by adding dog ears to the model. This was quite difficult. I started off with adding a cube, and extruding it repeatedly. I scaled down each peice, and added a loop cut through the middle. I had to do a lot of trial and error while adjusting the vertecies.

I also wanted to add a 'belt' to create a more seamless effect for the skirt. I did this by adding a cube, and making a loop cut through the middle horizontally. I scaled this down to create a belt effect.
I then adjusted the edges until nothing was clipping and it looked good. I then selected the four outermost edges and added a bevel.


I then moved on to making hair. This was done the same as my previous two times. I added a plane, loop cut it, and adjusted the vertecies until I had a good shape. The most difficult part was doing the fringe, but I managed to do it in a similar way to how I did Divi's.

0 notes
Text
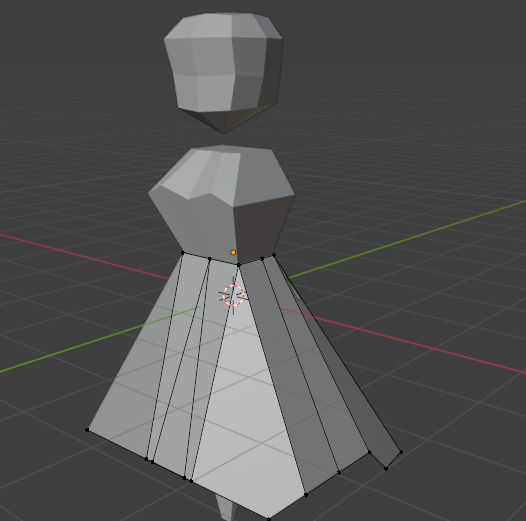
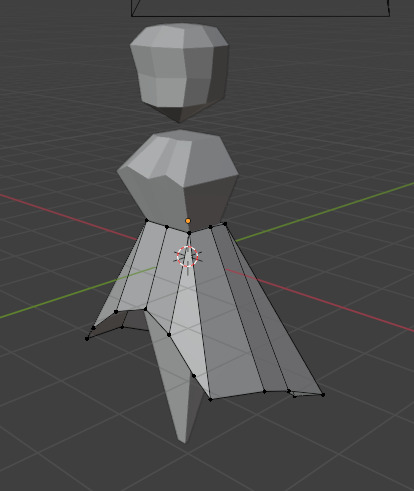
Modelling
To begin modelling, I used the base I already had, and removed the elven ears. I then adjusted the proportions slightly- mostly just making the body shorter.

Next, I wanted to create a skirt. I decided to attempt this in a similar way to how I did the hair. I added a plane and added several loop cuts to it. I then started by adjusting the centre to fit perfectly at the waist line, then brought the other edges down.
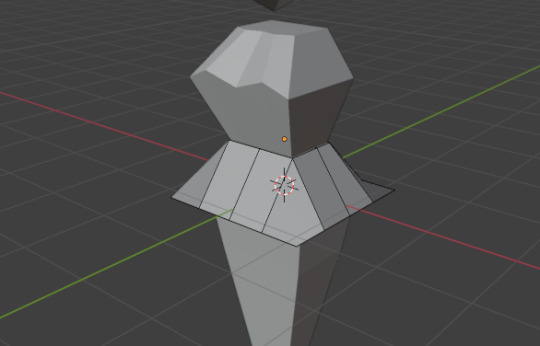
I then adjusted the edges and vertecies repeatedly until I had a shape I was happy with. I also added loop cuts and created edges where neccesary.
0 notes
Text
Game Development
I next wanted to create a world for the God statue to be located in.
I decided to make this into a cherry tree grove, for the use of different colour compared to the first world.
I first created a new level in the content drawer. I copied all of the assets from my first world- minus the foliage- and pasted it into the new level, to give me the same skybox, post processing effects, and a plane to begin with.
I then went on sketchfab to try and find some low-poly cherry tree models that I could use. I ended up finding some that were exactly what I was looking for. I also ended up retexturing the bush that I had used in the last level, to add more foliage.
Importing the FBX files of these models, I then copied them to the Foliage tool, and painted in the trees- once again, I made sure to make the trees thicker towards the edges of the plane, to create a barrier to stop the player from walking off.

I began to realised at this point that I had been over-ambitious with my targets. I decided to begin scaling down my aims, and decided to just stick with my current two levels to work on.
0 notes
Text
God Inspiration
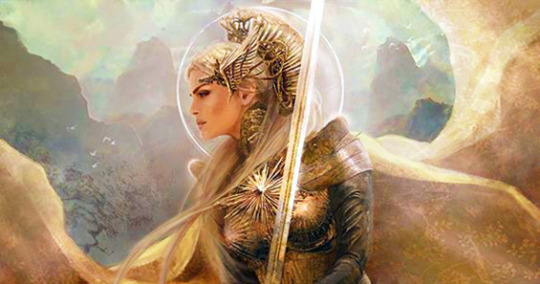
I was now onto my third model. I wanted to make a god this time, something inspired by a god of healing. I was originally inspired by a few gods- such as Gula, the Mesopotamian deity of healing and motherhood, Isis- the Egyptian goddess of healing, and Eir, a goddess/Valkyrie associated with medical skill.
Gula/Bau
"Gula (Sumerian: "the great") was a Mesopotamian goddess of medicine, portrayed as a divine physician and midwife. Over the course of the second and first millennia BCE, she became one of the main deities of the Mesopotamian pantheon, and eventually started to be viewed as the second highest ranked goddess after Ishtar. She was associated with dogs, and could be depicted alongside these animals, for example on kudurru (inscribed boundary stones), and receive figurines representing them as votive offerings." - Wikipedia
"Bau seems originally to have been goddess of the dog; as Nininsina she was long represented with a dog’s head, and the dog was her emblem. Perhaps because the licking of sores by dogs was supposed to have curative value, she became a goddess of healing. She was a daughter of An, king of the gods, and the wife of Pabilsag, a rain god who was also called Ninurta or Ningirsu." - Britannica


Isis
"Isis was a major goddess in ancient Egyptian religion whose worship spread throughout the Greco-Roman world. Isis was first mentioned in the Old Kingdom (c. 2686 – c. 2181 BCE) as one of the main characters of the Osiris myth, in which she resurrects her slain brother and husband, the divine king Osiris, and produces and protects his heir, Horus. She was believed to help the dead enter the afterlife as she had helped Osiris, and she was considered the divine mother of the pharaoh, who was likened to Horus. Her maternal aid was invoked in healing spells to benefit ordinary people. Originally, she played a limited role in royal rituals and temple rites, although she was more prominent in funerary practices and magical texts." - Wikipedia


Eir
"In Norse mythology, Eir is a goddess or valkyrie associated with medical skill. Eir is attested in the Poetic Edda, compiled in the 13th century from earlier traditional sources; the Prose Edda, written in the 13th century by Snorri Sturluson; and in skaldic poetry, including a runic inscription from Bergen, Norway from around 1300. Scholars have theorized about whether these three sources refer to the same figure, and debate whether Eir may have been originally a healing goddess or a valkyrie. In addition, Eir has been compared to the Greek goddess Hygieia." - Wikipedia
"Eir is named both as an Aesir goddess, as a Valkyrie, and as an assistant to a jotunn healing deity. This creates some confusion as to her ancestry. In the first instance, as an Aesir, we know nothing of her heritage. As a Valkyrie, she might have at one time been human, but again we know nothing of this. As handmaid to a giantess, she may well have some jotunn lineage, but as with her Aesir, or human, we can also not say this for certain."
"As a member of the Ásynjur, Eir is described as being the healer among them. Her role with Menglod at Lyfjaberg, the hill of healing, also confers upon her great powers of medicine and midwifery. As a Valkyrie, she has the gift of healing powers for warriors on the battlefield. According to some folklore sources, Eir was frequently invoked in healing ceremonies, particularly for the welfare of women and especially with all things related to childbirth. Modern-day followers of Ásatrú hold Eir in high regard and call upon her for help in all healing and childbirth endeavors."
"There are no indications of her spirit animal in the source literature, it is common in modern practice to associate her with small birds such as the sparrow or the gray jaybird." - https://vikingr.org/norse-gods-goddesses/eir

0 notes
Text
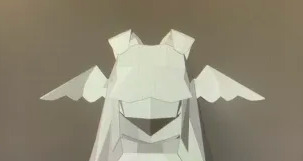
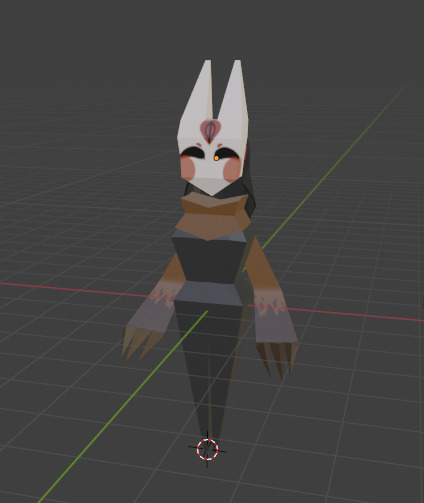
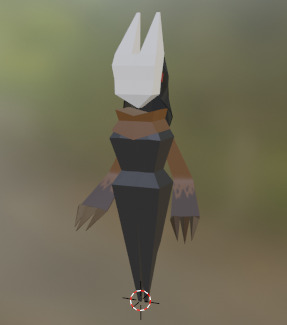
Finished model
I was now finished with my second model. I am really happy with how it turned out.
0 notes
Text
UV Mapping
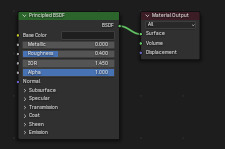
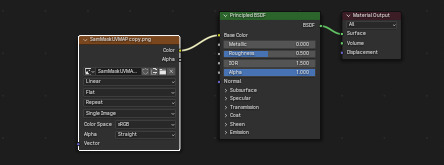
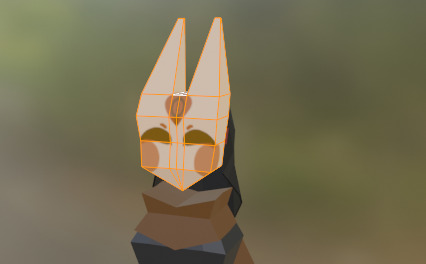
Next, I made the UV map for the mask. I followed the exact same steps- Selected the mask, Entered the UV Editing tab, unwrapped the UV, edited it to make sense, and exported it, then imported it to Photoshop.
Since the mask is mirrored, I only have to draw one half of the mask. However, I also have to be mindful to make sure everything will match up correctly.
Once I had the UV Map, I imported it to blender again, connected it to the other nodes, and I was done.
0 notes
Text
UV Mapping
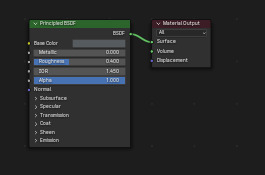
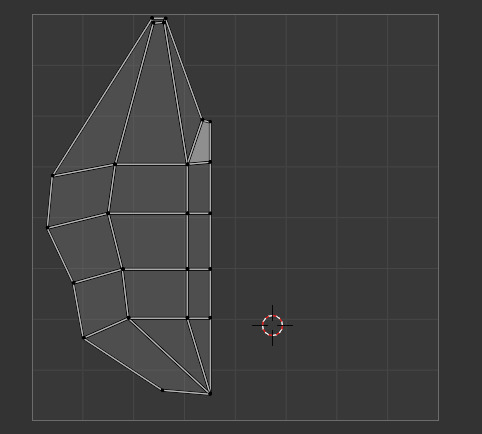
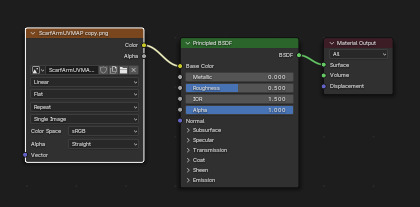
Now I had to create textures for the scarf arms and the mask. This was done identically to my previous model- I entered the UV Editing tab, selected the piece (in this case, the scarf arms), and unwrapped the UV. I then saved the UV Template and imported it to photoshop, where I then drew the design I wanted.


I then imported this to blender in the shading tab. I connected it to the other nodes, and I had a texture.

0 notes