
We are commited in Providing quality Health, Nutrition and Fitness Contents, May read our Latest contains on https://healthwises.com
Don't wanna be here? Send us removal request.
Statistics
We looked inside some of the posts by foxybluesky and here's what we found interesting.
Average Info
Notes Per Post
0
Likes Per Post
0
Reblog Per Post
0
Reply Per Post
0
Time Between Posts
1 month
Number of Posts By Type
Text
17
Last Seen Tumblr Blogs


Fun Fact
Tumblr was acquired by Yahoo for $1.1B in 2013.
Text
Don BradMan Cricket 17 PPSSPP ISO Latest Download

Don Bradman Cricket 17 PPSSPP. Welcome to the Cricket world gamers. Well in this world you can learn how to play cricket and also become like pro players in this article you will know more about the world of cricket and how amazing it is to be in it so gamers let's learn more about cricket as you read further.
Read the full article
#DonBradmanCricket17#donbradmancricket17downloadforppsspp#donbradmancricket17forandroiddownload#HowtoDownloadDonBradmanCricket17PPSSPPISO.#WhatisDonBradmanCricket17?
0 notes
Text
Call Of Duty Black Ops PPSSPP ISO Latest Download

Call of Duty Black Ops PPSSPP ISO. Call Of Duty Black Ops is here for gamers with more features to it. in this article, you will find out more about the game and its graphics alright gamers let's dive into the world of Call Of Duty Black Ops.
What is Call Of Duty Black Ops?

Written by Craig Houston in the form of a PC game that Dave Anthony and Corky Lehmkuhl are developing. with all these three individuals having writing the story future gaming. being designed by David King from the ground up. Now a nice thing to see and that is, it's a game for everyone to come and play in other words its a single-multiplayer game with competition included. Around Oct 13, 2018 Call of Duty Black Ops Wii Iso takes player profound behind foe lines into the universe of deniable tasks as an individual from a tip-top extraordinary powers unit participating in undercover fighting, ordered activities, and touchy struggles across the globe.
Requirement Of Call Of Duty Black Ops PPSSPP.
Gamers this part of my article is to let you know about the requirement it takes to get the apk file on your mobile device. - Android OS Version 7.0.1 - Qualcomm® Snapdragon™ 610 Processor (64 bit) Or Above - Android phones should have 64Gb ROM and up to 6Gb of empty internal storage is also necessary as the game size is a bit high. - There should be 35000 mAh inside mobile phones as a mobile phone does not heat while playing games. If the mobile phone heats up, the game’s FPS goes down. - Mobile phone display (QHD) = 2560×1440 pixels (1440p) should be so that you can enjoy this game in 2k quality only. Game Modes. one of the best parts you'll want to know about, trust me. you will want to get to know more about the game operation mode, mission mode, theatre mode, camping mode, and settings. now let's explain all modes listed above. Play Mode: The Completion 50 missions have been added to call of duty black ops ppsspp, which you can access with the option of Play Name. The mission of call of duty black ops is incredible. Operations Mode: Being the second most played mode of this game. In this mode, players are given some essential missions, and every mission has many boos. In this game, you can also drive a bike, helicopter, and fighter plane. Theatre Mode: It is also called watch mode because with the help of this option. You can see the previous gameplay of call of duty black ops ppsspp like theaters all at once. Camping Mode: In this mode, being more like a multiplayer mode in which the player has to complete all the missions with his partner. All the games of call of duty are offline and online. Settings: With this mode, you can control the following game settings like game resolutions, shadow graphics, sound etc.
How to Download Call Of Duty: Black Ops PPSSPP ISO.
well, gamers this is part you have all been waiting for the download process people. It is simple follow every step have laid out and you will have access to the app in no time. - First of all, download the cod black ops ppsspp iso file and download the archiver application from the play store. - Now download and install the Wii / ppsspp emulator via the following link, the controls layout of this emulator is precisely like the ppsspp emulator. - Open the Zarchiver application, then go to the folder where you downloaded the PSP ROM of the game, then select the call of duty black ops ppsspp iso file and extract it. - Open the emulator with the dolphin ppsspp version and select the remote’s icon and select the folder where you moved the game’s file. - Play the call of duty black ops ppsspp and enjoy a fun call of duty black ops android game. If you have any problem running the game on an Android phone or other devices, then comment your query must be resolved.

Conclusion On Call Of Duty: Black Ops. We are at the end of the road gamers, with all the detailed information on this app sure you will really want to have the apk on your mobile device think no more my article has provided you with lots of info about COD Black Ops. Click the download button now and enjoy the vast world of COD and be sure to tell your friends about it. As you download your favorite game, Call Of Duty: Black Ops PPSSPP ISO, Please also bookmark our website NeoLife Updates and share this post with your friends. Here at NeoLife Updates, we provide you with almost all the Game app you need and Crack Softwares If you find this application helpful, kindly like, share, and comment; share this post to your friend who may need Call Of Duty: Black Ops PPSSPP ISO Also, don't forget to bookmark our website NeoLife Updates, as we continue to provide you with the best crack and mod VPN just like Call Of Duty: Black Ops PPSSPP ISO, with all apps posted on our NeoLife Updates being 💯 safe to download and free from malware. Kindly share it with friends and family. Meanwhile, we continue to bring the best Android Games, Android Apps, Celebrity Net worth, Windows Activator, Best VPN to use. Enjoy as you uplift your mood with Call Of Duty: Black Ops PPSSPP ISO. Read the full article
#callofdutyblackopsforppssppfreedownload#callofdutyblackopsppsspp#callofdutyblackopsppssppdownloadforandroid#CallOfDuty:BlackOps#HowtoDownloadCallOfDuty:BlackOpsPPSSPPISO.#RequirementOfCallOfDutyBlackOpsPPSSPP.#WhatisCallOfDutyBlackOps?
0 notes
Text
Incline vs Decline Bench: Which is Better?

Incline vs Decline Bench Read the complete write up on Incline Bench, Decline Bench, which one is better? and why it's better, also what's the difference between incline and decline bench press You walk into the gym ready to smash your workout. You want to use a bench, but you also know that you need varying the range of motions to build every muscle group. This means you need to choose between doing an incline bench or a decline bench. But, which of these options will help you meet your fitness goals, and which one is just a waste of time?
What Is Bench Presses?

What Is Bench Presses The bench press is the gold standard of push movements. Lying on your back and pressing the weight off your chest builds pectoral muscles and the deltoid muscles. This movement also works your triceps, and in a secondary capacity works the traps and the back. Almost all disciplines of fitness use the bench press, either for targeting chest and arm muscles or for general fitness preparation. It helps with pushing power, push-up abilities, and even helps with weight loss when paired with the right diet.
Incline Bench Press

The incline bench press, on the other hand, changes the angle of the bench from a flat surface to an inclined one where the head is above the torso. Read: How To Get A Six Pack In A Month In an inclined press, the bar angle is also different, since the bar path should still be directly up away from the floor your arms are now pushing up. The muscles used in an incline bench are the pectorals, deltoids, and triceps. It’s basically the same muscles that are targeted in a flat bench, but it may have an increased impact. In fact, the incline bench press puts more strain on the upper muscles which give your pecs a flatter and more defined look. Someone who focuses only on the flat bench might put too much mass in the middle of the pecs. It may result in chest muscles that look almost like man-boobs, compared to the strong upper-body physique many men aim for. The incline bench press isn’t the perfect lift though. Most experts agree that the incline bench has very limited scope when compared to its flat bench press counterpart. While the different angle forces your upper pectorals to work harder, the lower pec muscles don’t put as much effort. Since you are focusing more of your effort on a smaller part of your chest, your overall strength isn’t getting as much of a test and your gains might be slower than with a heavy focus on the flat bench press. Read: How To Get Rid Of Back Fat In A Week
Decline Bench Press

Decline Bench Press The decline bench press is the opposite of the incline bench press. The bench is still at an angle but this time your head is lower than your torso. The bar path still goes directly away from the ground which means your arms are pushing at a low angle, almost as if you were standing where you would be pushing toward the ground. The decline bench is the opposite of the incline bench in some other ways too. In the way that the incline bench press puts more stress on the upper pectoral muscles, the decline press puts more stress on the lower pectoral muscles. While the incline bench helps to give your pecs a flatter and less round look, some say that the decline helps to build size, especially since the lower pec muscles jut out more, adding more mass to those areas will help your chest look larger and even increase strength. One major problem with the decline bench is that it is difficult to do without a spotter. The muscles used in the decline bench aren’t as strong as a flat bench, so the weight you are able to lift will decrease. Finding the right amount of decline bench can be difficult and if you don’t have a spotter that you trust it can be dangerous. The other issue with the decline bench is that other common fitness movements, such as the dip will help target those same muscles, but with a lot of less effort and specialized equipment needed. Read: How To Get Thicker Thighs And Hips In A Week And How to Build Chest Muscles in a Week
Which Is Better?
The pros and cons of each type of press can seem confusing. But in the end, it all comes down to the goals you want to achieve and the body you want to have. The incline is ideal for a balanced and strong physique and is probably more important than the decline to a normal person heading to the gym. For more great info about lifting, nutrition, and reaching those fitness goals check out more great articles from our site, https://dumbbellsreview.com/. Read the full article
#DeclineBenchPress#InclineBenchPress#InclinevsDeclineBench#inclinevsdeclinemeaning#inclinevsflatbenchforaesthetics#inclinevsflatbenchweight#whatsthedifferencebetweeninclineanddeclinebenchpress
0 notes
Text
Beauty: 10 Best Natural Remedies For Glowing Skin

When it involves facial complexions, you'd naturally wish yours to be truthful, effulgent and perfect. And whereas that will sound sort of a task, the reality is that you just will simply approach achieving constant, as long as you utilize a couple of home remedies frequently. ought to|this could} additionally facilitate clear facial blemishes if any and that they should assist you to improve your complexion. Given here are simple, yet effective home remedies for glowing skin that can help you in gaining a flawless skin With the above home remedies for glowing skin in 10 days checkup on the assorted home-based remedies for an immediate result. If you've got already tried many skin creams within the recent past, then you'd be glad to do out the assorted 10 homemade remedies For glowing Skin listed here,
Home Remedies For Glowing Skin/Face In 10 days
Milk For glowing Skin

Beauty: 10 Best Natural Remedies For Glowing Skin Of the assorted organic substances, this happens to rank right at the highest and with smart reason. Milk regulates and restricts aminoalkanoic acid, an animal pigment dominant internal secretion that is directly liable for your skin darkening. which is why Milk usually ranks at the highest once it involves fairness agents. simply wash your face, apply milk and let it sit for a while –after that, you'll wash it off. The enhancements to your complexion would be straightaway noticeable when2 or 3 applications.{how to get glowing skin overnight} Read: Health Benefit Of Drinking Milk Honey For glowing Skin

Beauty: 10 Best Natural Remedies For Glowing Skin Natural, organic honey could be a nice anti-bacterial agent; regular application of honey on your face ought to facilitate top zits, skin disorder and different facial blemishes. however, what makes honey outstanding is that it comes loaded with bleaching properties that ought to lead to a good complexion in addition. (5) Gram Flour(Besan) For glowing Skin
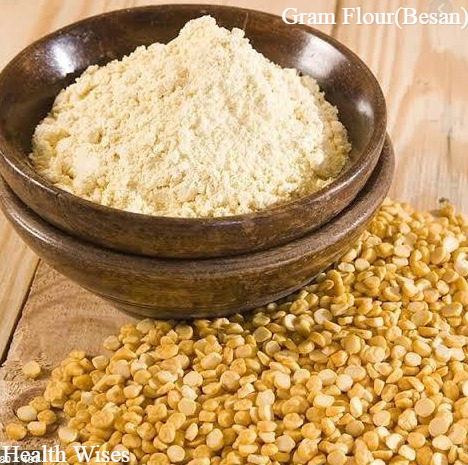
Beauty: 10 Best Natural Remedies For Glowing Skin Gram flour or Besan could be a natural exfoliator and per se, all you would like to try to do is combine some water with besan. combine it up into a paste and apply constantly to your face. Let it stay till it hardens into a mask. Wash your face when a 0.5 hour and you must have a transparent, effulgent complexion. {how to get glowing skin overnight} Read: How Long Does Alcohol Stay in Your System? Turmeric (Haldi) For glowing Skin

Turmeric Turmeric or Haldi comes loaded with numerous healthful properties associate degreed chief amongst them happens to be the very fact that it's an antibacterial agent that's why it continues to be preponderantly employed in most seasoning medicines to the present day. it's robust associate degree-oxidant and additionally contains a medicament agent known as curcumin in addition. simply take some turmeric, combine some water with it, create it into a paste and apply on to your face. Leave it on for a short while then wash your face thoroughly; it ought to facilitate brighten up your complexion in addition as cut back the incidence of zits, pimples, and different facial blemishes. Read: How To Get Rid Of Hickies Fast In A Day Lemon For glowing Skin

Lemon once it involves maintaining perfect complexion, you'll wish to stop physiological condition that is why Lemon ranks among the highest once it involves home remedies for a perfect complexion. Lemon happens to be wealthy in ascorbic acid, that interrupts the action of the animal pigment internal secretion Tyrosinase. simply rub some juice on your face and wash it when a short while. this could leave your skin reinvigorated together with your complexion, radiant. At the tip of an extended day, all it took was a lemon and quarter-hour for you to take care of your skin’s healthy glow. Read: Acne Cause And Treatment: Symptoms Yoghourt For glowing Skin

Yoghourt it's no secret that yoghourt comes with several healthful properties and infrequently figures conspicuously in most diet plans. yoghourt is nice for reducing your additional calories however additional significantly, it will facilitate nourish your skin and revitalize it in addition. It contains carboxylic acid, that has natural bleaching properties and it ought to additionally facilitate take away the dead skin cells from your face in addition. simply take some yoghourt and apply to your facial space. Wash it when0.5 hour roughly, and you must be left with a healthy glow and an effulgent complexion else. (6) {home remedies for glowing skin in 10 days } Read: Breast Cancer: Causes, Symptoms &And Home Treatment Cucumber For glowing Skin

Cucumber Cucumber is wide celebrated for its skin regenerative properties, and it comes with constant PH scale balance as your skin. therefore victimisation slices of cucumber, cucumber peels or maybe cucumber juice on your face ought to assist you to make full your skin and rejuvenate it at constant time. this could alter you to take care of that effulgent and healthy glow to your skin with ease. All you would like could be a single, cucumber and a knife to slice it with. you'll use the peels and therefore the slices directly on the skin, and therefore the same goes for the juice that you'll mix with lemon and honey for a robust mask, that ought to lead to a glowing, effulgent complexion.8) Read: How To Use Cabbage to Heal Stomach Ulcer Potato For glowing Skin

Potato Potato nowadays happens to be one in all the additional widespread vegetables, and with smart reason. however, did you recognize that Potato and to be additional specific potato juice happens to be wealthy in ascorbic acid which it will facilitate relax your complexion in addition as taking away dark marks from constant, quite easily? That happens to be the truth; all you would like to try to do is to slice a couple of potatoes and use a processor to squeeze some juice out of it. Once you've got the specified quantity, you'll then apply constantly to your face and wash it off, when0.5associate degree hour roughly. this could lead to your complexion rising for the higher. (4) {home remedies for glowing skin in 10 days } Read: Benefit Of Social Excercise Aloe Vera For glowing Skin

Aloe vera burn plant is wide celebrated for having many healthful properties, with chief among them being its anti-bacterial properties. simply take associate degree burn plant leaf, extract the gel and apply constantly to your face. make certain that you just let it remain for a minimum of time unit as that ought to be enough time for Anthraquinone to react together with your skin cells. And your skin ought to be reinvigorated and revived, as a result. (1) (3) {how to get glowing skin overnight} Read: How To Get Thick Thigh In A Week Papaya

Papaya Papaya comes loaded with an enzyme that could be a skin lightening agent; therefore it's essential that you just take some juice, and massage constantly into your skin. you'll wash it off when a short while and this could lead to your skin complexion turning into lighter. (2) Do keep in mind that one application might not do the trick and you'll need to get into for normal and periodic applications for there to be noticeable changes. This area unit a number of the house remedies that you just might want to do out promptly. Most of those home remedies for glowing skin in 10 days need no extra school assignment work on your half and every one the ingredients are often sourced regionally with ease Read the full article
0 notes
Text
Chest Workout at Home Without Weights

Chest Workout at Home Without Weights Allow me to say Bench presses and push-ups are few of the best-recognized chest exercises observed in most strength, power, and fitness programs. When you develop a bigger, stronger, and more defined chest, you often place it at the top of most lifters goals, which always means lifting weights exists in such programmes. Do you know that when a lifter may not have access to a barbell, dumbbells, and chest training machines, yet still is aiming at continuing to progress their chest development without weights? Hence, today, you'll learn from how I already set out to offer coaches and athletes some exercise hints and workout ideas on manners at which you can train your chest without weights, specifically:
Chest Workout at Home Without Equipment
Be informed. When you're set to build strength and muscle mass, your bodyweight training may fall deficit for most advanced and serious goals. That said, a mix of resistance training and bodyweight exercise is suggested for optimal chest growth.
Best Chest Exercises to Do Without Weights
Below are various aspects or techniques for the best chest exercises you should do without weights. Just as most of this exercise below is push up variations, it is crucial to understand well the unique benefits and distinct differences between each push-up variation and how they may be used within the same workouts to increase muscle growth. A vibrant and toned chest will allot you a bundle of benefit. A rugged and toned chest is attached to a bundle of benefits to serve in one's life. Read: How to Build Chest Muscles in a Week A toned and chiselled chest not only ensures great upper body strength but also gives a well-defined physique. Many always ignore training their chest muscles due to the fact that they aren't familiar with all the benefits it will give. Also, it helps people to set up their workouts for back muscles, making their upper body frame broader and stronger. To get this toned and strong chest, one doesn't need to go to the gym. Several workouts exist which can be done at home for the same reasons. Today, we'll see five bodyweight chest workouts, which you can do at home or anywhere with minimal equipment. Read: Back, Butt or Venus Dimples Push-ups

The first workout that will bring out your pectoral muscles is Push-ups. The push up is one of the most universal bodyweight exercises for chest training. It can be regressed and progressed easily and has many variations that can be suitable for nearly every lifter/athlete. By far, this is the most classic exercises you can try. Everyone can easily do it. Anyone who workout in the gyms or their homes also can. It will build overall pectoral and functional strength. It also helps in improving your body posture. To do this, you have to get into the plank place. Your body should be in a straight place from your shoulders to the heels. Now, make your arms nearer to your body but a little outside from your shoulder width. After then, lower down your chest towards the ground as low as possible. (Note: Your elbows should form a 45-degree angle while going down) After that, push back to the starting place by extending your elbows, and repeat. Do 15-20 repetitions in three sets and take 10-20 seconds to rest between each one. Read: Long Paragraphs For him, Copy And Paste
Decline Pushups

Just as Pushups have different variations, Decline Pushups is one of the best for the upper chest area. The primary purpose of doing Decline Pushups is how it increases the tension or intensity on the upper chest of a person. This is mainly down to the fact that during the process of performing this exercise a person's lower body is placed higher. Whereas, the upper part is at a lower level. It then works out the front delts, hereby helping your overall shoulder's look. To carry this out, start by placing your toes on a high bench or a couch. Your elbows must be locked and placed as much close to the body as possible. Then, lower your body downwards until your chest is just an inch away from the floor and breathe in . Step 3: Next, come back to the starting place by extending your elbows and breathe out. Then, repeat. Do 10-15 repetitions in three sets. Read: Anabolic Fasting Close Grip Push-Ups

Now, this close grip pushes up, like the close grip bench press, places a higher rate of demands on the triceps and inner chest muscles. You can always do it to reduce your shoulder strain. Read: When Can I Stop Worrying About Dry Socket Plyometric Push-Ups

The kind of push up is an upgraded push up variation that requires muscle to be explosive and also requires an eccentric strength. By adding this exercise within a push-up program, you can focus on stubborn muscle fibres that may not be fully used due to cut down contractile speed often seen in non-ballistic repetitions. Kneeling Push-Ups

Push up by kneeling is another version of the standard push up, that'll help beginners for beginners, persons who don't have upper body strength and muscle mass. It'll also aid and/or people who are exhibiting high amounts of muscle fatigue. When you carry out this kneeling Pushup, you cut the amount of loading placed on the chest and triceps, thereby making it easier for more repetitions to be finished (which may be beneficial for maximizing muscle destruction and metabolic fatigue). Read: How To Get Rid Of Stretch Marks Dips

The dip workout is the one you can try on rings, parallel bars, a bench etc. In as much as you have a reliable surface, you can do Dips to hit the chest and triceps at slightly different angles than the push-up.
Chest Workouts Without Equipment

Below are three chest workouts you can try out without equipment. The key with most of these exercises is that it reduces rest periods to maximize metabolic build-up and muscular fatigue it adds to overall training volumes/repetitions, Adds to the exercise variations to fully exhaust muscle groups. Read: How To Make Yourself Fart 100-Rep Chest Pump

This one is so much straight-forward and escalates very quickly. I actually enjoyed this one, due to the fact that it takes lesser than 5-10 minutes to do. When you are done, it leaves you with an amazing chest and triceps pump. Let alone of that, it is an activity that can be repeated and measured over and over. Every time you stop to rest, subtract the total amount of repetitions you have completed up to that point from 100 total reps, which will give you the amount of rest (seconds) that will take you before starting over again. For instance, imagine you open up with a set of 20 push-ups. You have to rest 80 seconds before starting again (100 total reps – 20 reps). On your second set, try to squeeze out another 18 repetitions. This will leave you with 62 seconds of rest (100 total reps – 20 reps – 18 reps). Just as you can see, rest periods get cut shorter and shorter as you reach 100 total reps, always leaving you to do singles, doubles, and/or triples under high amounts of fatigue with less than 5-10 seconds of rest, or less. Read: Food Stuck In Wisdom Tooth Hole 4-Way Push-Up Workout

This push-up ladder begins with the most complex and demanding push up variations and moves back towards the regression spectrum. The repetition adds up as the push-up variation turns less complex, less demanding and easier to do. As this may seem pretty easy at first, the sheer amount of volume (150-200 total repetitions) of push-ups will sneak up on you. Also, the 4-way push-up workout challenges the fast-twitch and explosive muscle fibres (plyometric push up), the inner pectorals and triceps (close grip and standard push up), and the more fatigue resistant fibres (due to the final 20 repetitions per every set) 5 Plyometric Push-Ups10 Close Grip Push-Ups15 Push-Ups20 Kneeling Push-UpsRest 60-90 secondsRepeat for 3-4 total sets Read: workout waist trainer
Chest + Triceps Workout

You can try this kind of chest workout to increase your chest hypertrophy and muscular endurance, with the increased benefit of hitting the triceps as well. The goal here is to hit various regions of the pectorals (upper chest, lower chest, etc) while also working the supporting muscles (triceps, rhomboids and scapular stabilizers, and then, the shoulders) to give a well-rounded chest pressing workout. The workout includes tempo work and supersets to increase time under tension and increase muscle fatigue and metabolic build-up. Read: How Long Does Alcohol Stay in Your System?
The Diamond Push Up

This one gets its name from the position of your index fingers and thumbs during the exercise, which forms a diamond shape. Differ from your regular push-ups, the Diamond Push Up is more efficient in working up your triceps and inner chest.
Conclusion
You don't need a gym. You are a gym, yourself. You only need to try things the right way to build your chest without weights or equipment. In all, being moderate is essential. Kindly share Read the full article
0 notes
Text
How to Build Chest Muscles in a Week

How to Build Chest Muscles in a Week Have you ever come across an expert weight lifter before? Even if a powerlifter is gigantic than you dream to be, we can actually study a lot about the power and size in their chest muscles. They tend to produce better force per unit of fibre and if you had to “peel back the onion” for each day, you would see some of the thickest, most well-developed chest on the planet. on this post, we will be discussing How to Build Bigger Chest and How to Build Chest Muscles in a Week and How Your Pectorals Works and the perfect workout for you These workouts become the basis for creating a better chest when used. And there's no doubt the bench press demands considerable contribution from the chest, but it actually needs aid from the Anterior Deltoid (the muscles on the front of your shoulders) and triceps (the muscles on the back of the arms). This is where the bench press approach makes all the difference in the world when thinking of building pec size. Rather than focus on a big bench, if you focus on the big size, you'll definitely get the best of both worlds. Although great bench press technique alone won’t build the kind of chest that contradicts the like of top professional bodybuilder. In fact, many of the top bench pressers in the world would likely say that their monster chests arrive from all else they did on bench day. That’s right, the exercises you choose will be your defining factor on adding the size you actually want. With all of this in mind, let’s properly dive into certain key success factors.to build bigger chest muscles in a week
How Your Pectorals Works

If you have looked for ways to add critical mass and definition to your chest, it is definitely due to the fact you’ve probably been overlooking some crucial things. First, trying to pinpoint the lower and middle portions of the chest by using specific exercises is simply not going to help you. Your chest muscles are best stimulated by hitting many areas. Those fibres came from the collar-bone, sternum, and your first six ribs, due to the single insertion point on the Humerus (upper arm), the muscles’ line of pull changes as you move your arm up from your waist to overhead. Guess what! The angle doesn’t change much at the sternum and rib portions of the chest. You don't get? While your intention is to hit the lower chest or increase the size of the valley between your chest, no single exercise can successfully carry that out. Therefore it is confirmed by electromyography studies (EMG) that have studied variations of angle and exercise. Meanwhile, as you change your arms place from below parallel to the ground to above your head, the upper pectoral activation changes with your whole pectorals muscle. This means you need to build your chest by angle variation, and that decline press and its variations may not officially focus on the lower chest, but they will aid the build of the overall size to the pectorals. I realised how certain people insist on the want to build a lower or inner chest. They definitely will… If you build a bigger, thicker chest overall. And you do that by making sure you isolate various movements. If you really want to get that shape and greatest thickness, you have to isolate and attack your chest with angles that form lines that compels your chest to stretch way back at the beginning of the lift and get squeezed tight at the end of the movement. The most proper way to do this is to lighten the load slightly, hit a few more reps, and do no less than four sets of each exercise. Read: How to Get Rid of Back Fat
How to Build Bigger Chest

Below are the 5 “Crucial ” exercises that will increase chest size. Add these weapons to your arsenal, and your chest will be thanking you in a few short weeks. Isolated Standing Cable Flyes For Bigger Chest

The tweaked more upright and arms location of the cable cross is one of, if not the, best exercises to increase overall chest mass. Just as the weight used is not very much, the range of motion is extreme, and with regular training, there is not an exercise that works more pectoral fibres. Step out far enough from the machine so that you can get a maximal stretch across your chest. Begin with your arms were taken out from your sides, so they are parallel to the floor (showing a 90-degree angle at your armpit). With elbows slightly bent, pull across your body at chest height until your hand's intercept. You can do this exercise seated if your pec Flye machine has that adequate range of motion. Dumbbell Incline Flyes

This only works well to improve pec size if you use moderate weight and increase the range of motion. Ensure that your arms are almost fully extended. This exercise hits the clavicular/collar bone head (upper fibres) of the chest, which improves the overall thickness. Lying against the bench, the motion is the same as the standing cable Flye. Choose a maximal range of motion with the same hugging action. Read: Shark Tank Weight Loss Wide-Grip Bench Press

Since the range of motion is the name of the game, this exercise can nail your chest with a super-stretch when you take your time and lighten the load from your normal bench press weight. If your shoulders can take the stress, take a grip outside the deep knurls on the bar. Direct the bar all the way down to your chest, wait for some time, and then fire it up. Hitting solid reps of this exercise on pec day will not only help improve your bench but add to the thickness of your chest. this one of the best way to Build Chest Muscles in a Week Single-Arm Cable Cross For Chest Muscles

Nothing supersedes a good isolation exercise that targets on a side of your body at a time. Take the right step or two away from the stack and maximize your range. Stand way upright with your arm abducted out to the side, above shoulder height, to make about a 120-degree angle at the armpit. Pull down toward your waist and come totally across the front of your body. Underhand Cable Cross (from low-pulley place)

This method is a bit tough. But it zeroes in on the whole chest to maximize fibre recruitment. Begin with your arms totally extended down at your sides with a 30-degree armpit place. Pull up, lengthening your arms out in front of you, following an arc pattern. Your arms should end up at shoulder height with arms fully extended. You can tailor down your elbows slightly during this movement. This method is a perfect way and best answer to How To Build Cheat Muscles In A Week and How To Get Bigger Chest A chest-defining schedule has two elements: several isolated moves and several variations on both the angle of attack the type exercises you carry out. Hit some big mass exercises with a pile of lean cutting rep combinations. You'll need to train your chest twice every week if you want this program to effect. The first workout of the week will be your strength or bench day, while the other workout of the week will always be your size and isolation day. Read: How to Get Six Packs
How to Build Chest Muscles in a Week
Below is the analysis of the week training plan we designed to maximize a rapid chest growth that will result in a week. Be aware that your anterior Deltoids will take a beating here, especially with the exaggerated range of motion. Be moderate while you add too much shoulder work to this program, and if you do want to hit your shoulders hard, they should be done on one of these days to maximize recovery. Day 1 Workout Barbell Bench Press Wide Grip 4 8 150Exercise Sets Reps Rest (Seconds) Incline Barbell Bench Press Wide Grip 4 10 150 Incline Dumbbell Pec Flye 4 8 120 Standing/Seated Pec Flye 4 10 120Cable Cross 4 10 120 Day 2 Workout Exercise Sets Reps Rest (Seconds)Underhand Cable Cross 4 12 90Standing Cable Pec Flye 4 12 90 Incline Dumbbell Pec Flye 4 12 90 Single-Arm Cable Cross 4 15 120 Wide-Grip Bench Press 4 10 120 Most people exhaust their support muscles too soon when bench pressing. They empty their tank for their chest as their triceps and anterior delts shouldered the load. By using an alternating strength and hypertrophy workout per week and providing a rep and rest scheme that screams hypertrophy, your chest will get the load right from the get-go. Adding this wider than normal grip to your bench pressing movements will help you to fry your chest from rep one.
Conclusion
I'd urge that you put more than enough stress on a large muscle group like the chest. You also need the best recovery especially when you train them twice every week. If you're not used to such an intense workout, don't overdo it your first time you go through this split. For the first week, push yourself but keep the intensity a bit lower than your max. This will minimize soreness and allow you to perform the following week's workout adequately. I believe this post on How to Build Bigger Chest and How to Build Chest Muscles in a Week, have been able to answer your query. Kindly share! Read the full article
0 notes
Text
How To Get A Six Pack In A Month

How to Get Six Packs In A Week The first time I realised how women go extra miles for guys with six-packs, it wasn't funny. Like... Ladies like this stuff just so much... Almost everyone who practices certain exercises regularly would always want to have that rock-hard six-pack. Unfortunately, the reality is that almost nobody does. Do you know why? They just don’t train so hard enough. More often, it’s that they don’t train well enough. The highest misconception many people develop when training abs is that more is better. But the moment you use working on your abs has very little impact on how long it takes you to get a six-pack. And just like all other muscle group, quality reps of the key moves are far more significant to your success than the measure. This results in the second most common misconception, which is that cranking out very high-rep sets is the only major way to bring out your abs. The challenge with both of these ideas is that the more your set or workout lasts, the more difficult it is for you to keep the levels of consistency, intensity and focus that are important to maximizing muscle mass growth. in this article, we will discuss about how to get six packs and how to get six packs in a month
What are Six Packs?

Six-packs are the sexy fitness appearance a male individual has, depicting six identical abs of two columns and 3 rows, well-arranged below the chest of a male individual. Six-packs are mostly got and well developed through training.
How To Get Six Packs
When clients go through training, there are six key guidelines used to aid them to build a six-pack in a month with effect and safety. I'd urge, that you keep on reading to uncover what they are. And you too can be on the fast track to having the hard abs you’ve always wanted to have. Recruit Your Abs The muscles in your abdomen (rectus abdominis) flex and extend the spine. It’s really important to recall this and let it truly sink in before you actually think of crunching. You know why? When most people “train their abs”, they're most likely to be recruiting other muscles – typically your hip flexors – and hardly paying their abs any focus. You can also tell from a far distance because they'll definitely be swinging up and down with every rep, using momentum to power the movement and never the muscles. Your abs are a muscle group just like your quads or chest or back, and you need to make sure you train them just like you work these other muscles. I always tell clients that maximal stimulation of the working muscle is much essential for growth. Always take cognizance of this when setting up to train your abs because, again, they’re like any other muscle: you have to lengthen the muscle first, then create tension on it, then contract the muscle to its shortest place. The strengthened place of an abs crunch is way further than most people go, and the contracted position is way shorter than most people can get to. Work on improving your range on a given abs move first before you consider adding any more resistance to the exercise. Improve your range When I begin working with new clients, I realised most have a poor range of abdominal movement and can’t fully engage their abs, which means the muscle group not developed. So when I design their programme, I launched everything by taking them back to basics, correct any problems, and then work them through my method of strategic progression. And the best abs exercise is one you can do perfectly. If this is just a very basic fundamental version of one move, then so be it. Almost no one I work with is really ready for the hanging leg raise from day one, for instance. The same goes for any loaded abs exercises – you need to work up to these. When I include abs exercises to a client’s programme, I begin with a small arsenal of exercises: the abs crunch on a gym ball, kneeling barbell roll-outs, and incline bench reverse crunches. Every single exercise has a progression, but it’ll take you a good couple of months of hard graft on these moves before you’re set for the advanced versions. Monitor and Study the movements Let's begin with the first. Take the gym ball crunch. During Week One, you lie over the ball and work on the stretch part of the exercise. Several people can’t help but shake at this point, which is why they struggle to do a full contraction. Following this, you would then work on contracting up halfway for a week, and so on. As you master the movement pattern you will shake less and the contraction will come easier. I like these stages to be done slowly and controlled for greatest benefit. To develop your abs you need to add load at some point, and once you can do consistent crunches, you can hold a light dumbbell across your chest. The kneeling barbel roll-out is a tough move, but one at which you can progress quite fast. From a procedure perspective, you must begin with a very small movement range. I'll advise you don’t try to drop fully to the floor because you’ll end up with a flat nose. Just as any exercise, progression is the key and you need to always feel the tension in your abs. As you lower you should feel your abs lengthening until you can’t lower any further. At this point, contract your abs hard to return to the start place. Use a wall as your marker, and kneel further away as you get stronger. Reduce momentum The incline bench reverse crunch is a root exercise for the hanging leg raise because it targets the lower abs. It gives people the room to focus on their abs and take out any swinging from their hips. If you watch most people performing the hanging leg raise, they’re swinging back and forth and certainly not making a meaningful contraction. With this in mind, starting with the reverse crunch is extremely useful. Put the bench at a 30° inclination and lay your back on it on your back with your hands over your head holding on to the bench. Locate your thighs up until your knees are bent at an angle of 90°. This is the start and end place of the exercise, and in between, there should be no swinging at all. The aim is to lift your knees to your chest, flexing your abdominal as hard as you can. As you lower your legs, maximum tension should be placed on your abs. When it’s done right this exercise is very hard indeed, and you’ll see why I use it as a pathway to the hanging leg raise. Read: How to Get Rid of Back Fat Get the reps and tempo right Training frequency is important, and I get most clients to train their abs at least twice a week. Beginners will do mainly foundational exercises, while advanced gym-goers and athletes will do more advanced versions. When it comes to rep ranges, most people aren’t strong enough to train their abs properly for high-rep sets. I like to always start with three or four sets in the ten-to-12 rep range, so long as they can keep 100% tension on their abs. In addition, you wouldn't want to believe keep the tempo pretty slow. I’m a big fan of tempos around 3030 or 2020 when training abs, so you’re taking two to three seconds to lower and raise. Using a slow tempo ensures focus on the abs through the concentric and eccentric phase of each movement. Read: Social Benefits Of Exercise For All Ages Become lean You'll only begin to see your abs when you are lean enough. Several people discover they train their abs year-round and never get a six-pack because it’s covered in a layer of belly fat. If you’re going to put so much effort into training your abs, you have to put the same level of effort into getting lean, or else, you’ll never get to see all your hard work in the gym pay off. Read: how to get a small waist
How to Get a Six Pack in a Month
Let's consider getting serious about the single greatest exercise known to humankind. Do you know it? Below is how to get six packs in a months CLEAN UP YOUR DIET. This is a major contributing factor to developing your six-pack in four weeks. ...STEER CLEAR OF EMPTY CALORIES. ...WORK YOUR ABDOMINAL MUSCLES IN ISOLATION. ...WORK THE WHOLE CORE, NOT JUST THE UPPER ABS. ...CRANK UP THE CARDIO. ...TAKE A BREAK. It's Walking. Walking will tone your entire body and burn every damn fat and calories all the time it is done. Begin to walk all the time. Walk as far as possible and as often as possible and let's see if you'll get results or not. After then tend to your diet. You need to cut fatty and sugary foods completely. This means no more cakes, cookies, or pies. No candy bars or bowls of ice cream. Chips and sodas are out, too. Does that look boring too? Read: Dimple Chin: The Difference in Between Cleft Chin and Dimple in The Chin Yes! But it's way much vital for a healthier lifestyle and the loss of blubber. Begin eating all those fruits and vegetables which you understand are so good for you. It does seem like a sucking task at that. Isn't it? But it can be done with a big heaping aid from self-discipline.
Conclusion On Six Packs
Here is how to get a six-pack, in even a month. You have to work it off one pound at a time, a day at a time, and a carrot stick at a time. It can be done, and you will become better for it. Kindly share! Check Out: Back Or Venus Dimples: Amazing Facts Health Benefits Of Drinking Milk How to Deal with Painful Arthritis? How To Get Rid Of Hickies Fast In A Day Read the full article
0 notes
Text
How To Get A Smaller Waist And Bigger Hips

How To Get A Smaller Waist and Bigger Hips Do you know that owning a perfect figure-8 body is trendy now? Because you actually don’t need “bad weight” from junk foods to gain more curves that will just implicate your whole health. And it's almost the other side actually. No lies, you can earn your curves in the appropriate places by making some tweaks to your diet and workout routine. But attempting to understand how to get a smaller waist and bigger hips, workout waist trainer would just result in muscle loss of other curves you may have. For instance, let's assume your current body fat is 35% – 40%, you are capable of increasing and emphasize your curves while making your butt appear bigger by just losing some weight from your belly. You can still always increase your butt. But have a study on yourself in the mirror for 60 seconds, and see how much more prominent your butt would be if your waistline only went one inch or two. if getting a smaller waist is your problem, then worry no more, in this article we will be discussing, how to get a small waist, workout waist trainer, how to get a small waist and bigger hips
How to Get a Smaller Waist

Do these 3 things and you will achieve the smallest waist your genetics will be capable of. These are the most cutting edge tips you will ever find in a single place hands down. Switch What You Eat You need to lose weight if you want to get a slimmer or smaller waist and this could only be got when you do exercise. Also, you should be willing to maintain a safe diet and reduce the way you consume calories, if you actually desire to truly see results. Then, you can launch a search on how to measure the accurate daily calorie intake you will need. When you're disciplined and determines, you'll surely meet your target Don't Miss a Breakfast You should attempt having a mixture of high vitamin fruits, fishes for protein and whole-grain pieces of bread or cereals for the exact and balanced breakfast. Drink a glass of water before every meal during the day breakfast included, as this keeps your body from overheating and keeps you hydrated. How to get a smaller waist is simple. Eat More Fiber Add varieties of foods rich in fibre into your diet, so as to enjoy the benefits of both insoluble and soluble fibres. Certain soluble fibres are barley and oats, citrus fruits and carrots, peas and beans, apples. While insoluble fibres include nuts, beans and green vegetables, wheat bran and foods containing whole-wheat. Fibre will make it easier for you to get a smaller waist faster Read: How To Get Rid Of Back Fat In A Week
HOW TO GET A THINNER WAIST AND GET BIGGER HIPS

It's an adventure. And your journey to a smaller waist and bigger butt can be exemplified by simply following a few easy steps: Examine Your Body Fat At first, you have to take cognizance of checking if you are meeting your body fat that’s recommended. You can examine with your doctor or if you own a gym membership, stop by and get a free check. You can always discover ways online to do it too if you prefer to do it yourself. Practice Certain Exercises In case your body fat is over 18%, it is time to set out a workout plan! This part can be fun, depending on your own view. Everyone wants to look good. As you schedule your routine, know, that the key to gaining bigger hips and a smaller waist is to target the right areas with the correct workout waist trainer A good clue is high repetitions for your core routine targeting the entire midsection and low reps with weights for toning the butt and hips. Here are some exercises to work the core. Choose at least from each section then do it two to three times per week. Related: How To Get Thicker Thigh
Workouts That'll Gift You a Smaller Waist

We at Healthwises will keep everything as simple as possible so that you can take quick action without trying to understand what workouts to do. Getting a smaller waist is on your mind, we can help. Sure ... You need to add a few exercises to your routine that will help tone your waist 1. Side Plank-Up

This trainer actually aims at toning the inner thighs, oblique, rectus and transversus abdominis. You can lie on your side forming a straight line from head to feet, resting on your forearm. Then, your elbow must be focused below your shoulder. Gently contract your abdominal muscles and lift your hips off the floor while maintaining the line. Make sure your hips are stacked and your neck is in line with your spine. Hold here for 25-40 seconds then lower. Repeat 2 – 3 times, then switch sides. (If you find this too challenging, do it with bent knees.) 2. The Russian Twist

Russian twists firms and tones the muscles on your sides and burns fat in the midsection with its twisting motions. To demonstrate the Russian twist, you should sit on the ground with your knees bent and feet flat on the ground then lean back so you form a V between your torso and your thighs at a 45-degree angle or so. Make sure you maintain a straight spine and you can have your feet propped under something sturdy or demand from someone to hold them for you to help maintain from. Intercept your fingers together out before you, then rotate them as far, to the right as you can go. Pause, then return your arms back around and go to the left as far as you can. That finishes a repetition of 10 – 15 times. Check Out: What Anabolic Fasting is All About 11 Amazing Benefit Of Pumpkin Leaf/Ugu How Long Does Vyvanse Last How Long Does Alcohol Stay in Your System? How to Make Yourself Fart When Bloated
BUILD YOUR SHOULDERS AND CHEST

When we place emphasis on the upper body, we make the waistline appear smaller. Hence, you can incorporate some chest and shoulder workouts into your workouts, to help give the illusion that your waistline is smaller than it really is. Below exercises will actually help to reduce fat on the midsection so that’s a plus. 1. Push-ups

A standard workout trainer for the arms and chest is the muscles. The easy version is you rise on your knees then lean forward to prop on your hand's palm down, shoulder-width distance. Just bend yourself down using the strength of your arms until your chest grazes the floor then push yourself back up to the starting position still using only the strength of your arms. The greater version is you start this waist workout in a high plank stance. Bend yourself down with the strength of your arms until your chest grazes the floor then push yourself back up to the plank position, arms fully extended then repeat. 2. Tricep Dips

This workout actually targets the arms and shoulders. You need a sturdy chair or a step to use when you are doing it. When you're ready to complete a bench dip, sit straight on the edge of the step or chair with your legs extended before you, and heels on the ground. Grip the edge of your seat with a strong force and then, slide off your perch, lowering your body towards the ground until your arms form a 90-degree angle.
Workout Waist Trainers

Adding waist trainers as part of your workout routine will help you get that perfect figure much quicker Wear waist workout-cinching belts When you wear this waist-cinching belts, you direct all attention to the nip in your waistline enabling it to appear smaller than it really is. These workout waist trainers (belts) are awesome to wear over long tops, dresses and even winter coats as they protrude the bust and causes a flare around the hips giving the illusion of an hourglass figure. Your option of the belt can also vary from braided, skinny, wide, jewelled, and the list is limitless! Wear A-line dresses A-line dresses are tight or narrow at the waistline but flares gradually as it extends towards the hem. This makes the waistline seem really smaller as that’s where more of the emphasis is, while just gliding over any imperfections if any, that the wearer may have around the hips and thighs. A-line dresses are perfect for almost any body shape.
Precaution Towards Attaining a Skimmer Shape
Stay off from Carbonated Drinks A simple approach to avoid excess salt is to cut down your intake of processed, packaged foods as much as possible. Much sodium makes your body store water and become swollen. When you focus at getting a tight, toned midsection, a well-balanced diet is awesome and it's really loaded with tons of benefits such as reducing the store of water weight and keeping you at a healthy weight in the long run. Do you also know that when you maintain a toned core while gradually increasing your calories, it'll tighten the waistline and increase your butt size?
Attempt a 7 Day Challenge of the Workout Exercises
Hands down, this bigger butt challenge just involves taking 7 days. It'll definitely give you amazing results. Just you're eating to support your glute muscle repair and growth. When you go by the appropriate workout routine, your body will automatically understand where to store the fat and where to get rid of it. Then, I'm sure you have heard that spot reduction isn’t effective and usually doesn’t work, however, that is not what we are trying to achieve here. Actually the other side of the coin, we are burning excess fat overall, while signalling to the body was to retain it. Check Out Back Or Venus Dimples: Amazing Facts When Should You Stop Taking Coffee for Good? How Long Does Nyquil Last? How To Make Yourself Fart
Conclusion
The key to attaining our butt goals is to effectively time our nutrients and follow the proper approach. A lot has changed over the years when it comes to bodybuilding for women and men are testifying for positive results. And then, it’s almost time women go by their footsteps and then apply their science for men's benefit. Kindly share this how to get a smaller waist and bigger hips and workout waist trainer Read the full article
0 notes
Text
How To Cure Asthma Naturally Permanently

Asthma is a disease in which a patient gets breathlessness. It can be caused by food, drugs, weather conditions, perfumes and dust. The asthmatic attack is more in the night and early morning. It can be treated by a simple home remedy. The five countries with the highest prevalence of clinical asthma were Australia (21.5%), Sweden (20.2%), UK (18.2%), Netherlands (15.3%), and Brazil (13.0%).
Causes Of Asthma
Asthma causes difficulty in breathing. It is triggered when there is an obstruction in the flow of air in the lungs. It is caused by allergies, air pollution, respiratory infections, weather conditions, food and specific medications.
Symptoms Of Asthma
Trouble Breathing Constant Wheezing Chest Tightness Decreases or changes in lung function Feeling tired, easily upset, grouchy, or moody MucusCoughing, especially at night, during exercise or when laughing.
How To Cure Asthma Naturally Permanently
Home Remedies For Asthma : While there are many medical treatments for asthma, here are some natural remedies for asthma that can provide some relief: Aloe vera

cure asthma naturally permanently Using Aloe Vera Aloe Vera is known to have many medicinal properties, and the use in the treatment of asthma is one of them. If you have asthma, all you need do is boil some aloe vera leaves in a pot of hot water and inhale the vapours. Using Aloe Vera you Can Completely cure asthma naturally permanently (1) Lemon juice For Asthma Cure
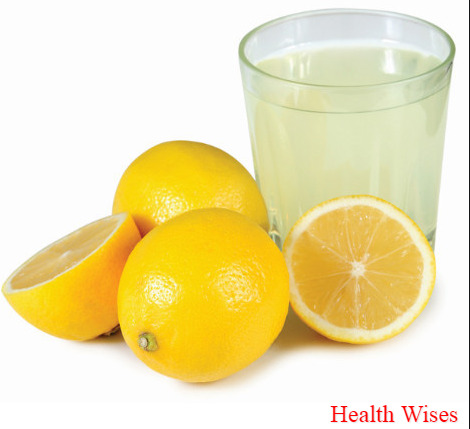
Lemon Juice: how to cure asthma naturally permanently The taking of lemon juice diluted in water has been found to be an excellent treatment that brings good results. Lemon Juice assists in curing respiratory problems, along with breathing problems and revives a person suffering from asthma. (2) Garlic For Asthma Cure

Garlic for asthma Taking garlic boiled in about 30ml of milk has been found to be an excellent medicine especially during the first stages of asthma. The mixture should be taken just once daily by the patient. (3) Onion and Honey mixture For Asthma Cure

Onion and Honey mixture: cure asthma naturally permanently METHOD: Take one onion, peel it. Cut into small pieces. Crush nicely. Take a cotton cloth and put the crushed onion inside. Squeeze the crushed onion to take out the juice.(4) Mix two spoons of onion juice with two spoons of honey. Consume it early in the morning. Don't take anything for at least two hours after taking the mixture of onion juice and honey. Continue it until you get Asthma cured permanently. Generally, it takes two months to cure permanently. AVOID Curd, rice, banana, alcohol, cold drinks, meat, pickles, fried food, fast food, milk and milk products. If you are allergic to any kind of food or fruit don't consume. As some may be allergic to chocolate, eggs, potato or tomato. DON'T DRINK COLD WATER. TRY TO DRINK HOT WATER.(5) Related: Benefit Of Drinking Milk Potatoes For Asthma Cure
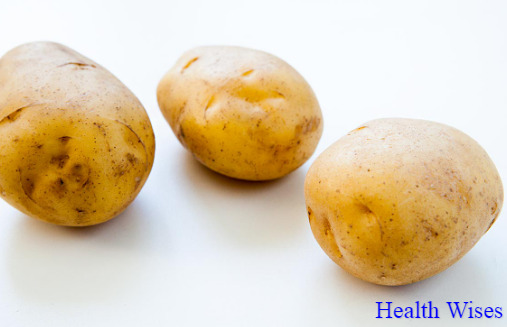
Potato: cure asthma naturally permanently Boil several fresh potatoes and then pour in a basin; covering your head and basin with a cloth to get the most out of the steam. This has proved to be a very effective trado-medical way of treatment. With potato you can cure asthma naturally permanently Mustard Seed Oil For Asthma Cure

Mustard Seed Oil: how to cure asthma naturally permanently Mustard Seed oil mixed with camphor is a potent combination for asthma treatment.it helps to cure asthma naturally permanently. Massage the mixture all over the chest, till you get relief from asthma. Warming the oil before massaging it ensures you feel the warmth which provides quick relief. Fluid from snail For Asthma Remedies

Fluid from snail : treatment of asthma The white fluid from snails mixed with honey is highly effective in the treatment of asthma. Mix a ratio of fluid from snails to 5 ratios of honey to prepare the syrup. Stir the mixture and pour into a sizeable bottle. Adult patients should take 3 tablespoons full daily while children should take one. Read: Know The Causes And Home Remedies For Bruises Bark Of Bitter Kola For Asthma Remedies

Bark Of Bitter Kola: treatment of asthma Get the bark of bitter kola and pour cold water on it; adding a pinch of salt. Allow the mixture to rest for about 12 hours. After the 12 hours, take 2 glasses on a daily, 1 in the morning after meal and another in the night before you go to bed. Figs For Asthma Remedies

Figs: When it comes to an effective home remedy To Cure Asthma Naturally Permanently, figs are up there among the best. Soak dried figs overnight in water. Eat them first thing in the morning. Drink the residual water. Coffee For Asthma Remedies

Coffee For Asthmatic Caffeine in coffee helps in asthma treatment. It clears the nasal passage allowing you to breathe easily. If you do not prefer coffee go for black tea. But, limit intake to 3 cups a day. Related: Danger Of Eating Canned Food Belly Breathing Technique Belly breathing technique: treatment of asthma This technique maximizes air distribution in your lungs. You can lie down or sit up. Concentrate on your breathing. Preferably breathe slowly through your nose. When you inhale your abdomen should go out as opposed to your chest. Exhale slowly with your abdomen pushing inward. Ideally, exhalation should be twice as long as inhalation Pursed Lip Breathing Technique For Asthma Remedies

Pursed Lip Breathing Technique This technique is helpful during an asthma attack. Since during an attack air is trapped in your lungs, this helps get more air out and make breathing easier. This involves inhaling slowly through the nose and then exhaling through pursed lips, or exhaling slowly as if whistling. Ginger For Asthma Remedies

Ginger: Asthma Complete Cure Given the multiple benefits for your health and body, it is hardly surprising that ginger is considered a superfood. It is also very effective against asthma. Prepare a potion with equal quantities of ginger, honey and pomegranate - consume it 2-3 times a day. Eucalyptus oil for Asthma Remedies

Eucalyptus Oil: How To Cure Asthma Naturally Permanently One handy measure to keep asthma at bay is through eucalyptus oil. Drip a few drops of eucalyptus essential oil in a bowl of boiling water and take its steam. This helps in opening up any nasal blockages to facilitate easy breathing.
In Conclusion
The fact cannot be denied that nature has its benefits and natural options of treatments are often far more effective than the modern ways. The above remedies discussed on How To Cure Asthma Naturally Permanently While taking any of the medication above, the patient should avoid known dietic errors like; excess intake of carbohydrates, fats and proteins, tea, coffee, processed foods and other foods that are difficult to digest. May also Consider Neolife Supplement For Asthma To Cure Read the full article
0 notes
Text
How To Get Rid Of Back Fat In A Week

How to Get Rid of Back Fat Bra Bulge appears normal but ugly. I won't lie to you. Love Handles doesn't look good. Back Fat sucks. Unfortunately, alleviating back fat isn’t as that simple as demonstrating a few push-ups and calling it a day. So, you'll learn all that you need to know in this ultimate guide. Because I'll give you the breakdown and proven details you'll need to get rid of back fat, how to get rid of lower back fat, how to get rid of upper back fat and feel more confident in your system. I urge that you carefully study what causes back fat and why you need multi-step rules to getting rid of it. Check Out: What Anabolic Fasting is All About How To Get Rid Of Stretch Marks In 2 Weeks 11 Amazing Benefit Of Pumpkin Leaf/Ugu How To Get Thicker Thighs And Hips In A Week When Should You Stop Taking Coffee for Good?
What Exactly is Back Fat, and What Causes?

It's a fact that everyone is vulnerable to develop more fat in specific places, but there are also several things that can cause back fat to accumulate or worsen. Let’s explore some of them. A reason behind back fat is that the back muscles become far less functional than the muscles on the front of the body. It appears bicep curls and push-ups are really popular. But rear delt-flys and renegade rows are a few more strange to most. When muscles go unengaged, they atrophy or exhaust in strength. When you lose strength, it encourages a loss of tone and definition. This results in those loose spots. Time to tighten those babies up; no more neglecting, start doing some back fat practices. Below are the 5 proven actions you should take to get rid of back fat: The “Spot Dwindle” Technique The time comes when you'd discover the area of fat you don’t want, you work it to death hoping with each passing rep it will leave you one day. It just won’t. Science as well says it that you can’t spot cut down your body fat. “Unfortunately, subcutaneous fat loss can become generalized with just the part that is being trained,” says Lara Carlson, C.S.C.S., president of the New England Chapter of the American College of Sports Medicine. This shows that you can’t just work the part of your body you don’t like and expect it to go away. (So if you actually want to know how to get rid of lower back fat or upper back fat specifically, it doesn’t really matter. Fat is fat.) You can, of course, point out “tone” an area through working out a specific muscle group (like muscles in your back). But for that to effect a difference with your back fat, you'd need to face the picture, with the correct nutrition, awesome strength training, back fat exercises, and cardio. Extra Pounds In case you have too much body fat, it will end up somewhere and it usually doesn’t ask your opinion as to the area that place should be. Some people actually struggle with fat on their belly, while others get sucked size of their thighs. Your back is just another place for that extra fat to live. Another sticky fact about body fat is that it is dynamic with age. Love handles might result in a problem, especially when an individual is in his 20s. The sad news? Immediately you hit your 40s, things become complicated. Hormones do crazy functions to our bodies, and ageing isn’t too friendly. If you want to get rid of back fat, the reality is that you have to get rid of fat in general. As this happens, you can work on toning and tightening the parts of your body you want to see changed. Bad Posture

I can remember I came across how The Cleveland Clinic infers how proper posture assists your outward appearance, coupled with helping you support your bones and joints healthy, reduce arthritis pain, and decrease spinal stress. It’s true, isn’t it? Posture can totally redefine your facial appearance. In essence, the way you look. Poor posture can age a person more than a few lines and wrinkles around the eyes. Also, poor posture and slouching permit extra fat and skin to “puddle” upon a part of the body in which it resides. Standing up straight and strong will lure those love handles off from your belt line and make you look lengthier and leaner.
How to Get Rid of Lower Back Fat
It's a popular saying, that knowledge is power. Let's assume this is true. Just as now when you've got the reasons for the back fat on your body, let’s tackle what you can do to change it. None of the reasons above is too big to change, so let’s get to the point of actually getting rid of lower back fat! Be is Video on how to get rid of lower and upper back fat easily in a week 1. Eat Well I came across an editorial by the British Journal of Sports Medicine. And the researchers noted that too much sugar and carbs—not physical inactivity are to blame for obesity epidemic growth. No matter how much you go ahead, eating badly is working against you and it will dominate you every time. Too much of calories, most especially, those in the form of sugar and unhealthy fats, result in fat on your body and what doesn't leave out your back. Though, eating clean doesn’t necessarily mean starving yourself. The way out is to select healthy, whole foods. Clean eating includes lots of fruits, vegetables, lean protein and healthy fats. The choices are wide open! Walk the perimeter of your local grocer or visit a farmers market just to see your options. 2. Get Moving With Cardiovascular Exercise at Least in a Week Cardio exercises deplete a lot of calories and it helps blast your body fat. The CDC recommends 2 hours and 30 minutes of cardiovascular exercise in a week. Walk, bike, dance, and just get moving! And if you really want to dig in and get serious, try out a few days of steady-state cardio and mix it with two days of some type of interval training. When you also vary your workouts to not leave out both lower intensity and higher intensity activities assists to shake up your stubborn metabolism and get things proceeding in the appropriate direction.
How to Get Rid of Upper Back Fat

Just as now when you've got the reasons for the back fat on your body, let’s tackle what you can do to change it. None of the reasons above is too big to change, so let’s get to the point of actually getting rid of lower back fat! 1. Train The Entirety of Your Body We discovered earlier about losing muscle and the effects of muscle atrophy. So what can you actually do to retrieve it? Work out the muscles, of course! “With no doubts, exercise is by far the best approach to discuss muscle loss”, as Nathan K.LeBrasseur explains. He has a Ph. D. from the Mayo Clinic. The most powerful weapon against body fat and for a better shape is to strength train the entirety of your body with a special focus on your back. And Not Just One Area. Why? Muscle tissue is very active. The more muscle you have, the better your body is at burning calories. You do want muscles on your whole body system, to become active for you all day long. Be sure to get to those larger muscles, especially legs, since those will become more efficient muscles for your body. You have to focus on those back muscles to see change. While spot dwindling doesn’t work, it is still true that as you lose fat you want to firm up the muscle below the skin to create the tighter shape you are truly looking for instead of the jiggle you so dread. 2. Stand Up Straight Finally, you can fix that posture fairly easily. Standing tall with your shoulders back and lower abs pulled in tight will result that you look both taller and leaner all over. A great rule of thumb is to align the back of your head over your tailbone and your tailbone over your heels. And if posture is actually a problem for you, try Pilates! Now it’s time to work on some exercises to cut back fat! You’ve already learned that to get rid of those love handles you need a mix of both cardio exercises to burn off fat and strength training to tone your back. This back fat workout is going to use circuit training to combine both of these types of exercises, focusing mostly on strength moves targeting your back. During this 15-minute workout, you will alternate back and forth between a strength move and a cardio move, giving you just the balance you need to make it truly work. If you have 30 minutes, go through the routine twice and really see results! For each strength move below, do the listed amount of reps, then go straight into the cardio move and do it for 2 minutes. For best results on how to get rid of back fat, try interval-style training in the cardio section by demonstrating the first minute at a moderate pace and the second minute going hard enough to breathe heavy through your mouth—you should be almost breathless by the end. Set up a mind platform and let's get started! Check Out: How Long Does Vyvanse Last How Long Does Alcohol Stay in Your System? How to Make Yourself Fart When Bloated How Long Does Nyquil Last? Fasting Break
Exercises to Get Rid of Back Fat

Below are the best exercises to get rid of back fat in the body more faster and in a week or months kindly observe this 10 exercise to in other to get rid of the back fat easily in space of 1 week Reverse Grip Row Double Arm Row: 12 repsJumping Jacks: 1 Minute Moderate. 1 Minute Go Hard!Side Plank With Arm Extension: 12 reps on the right, 12 reps on the leftJogging In Place: 1 Minute Moderate. 1 Minute Go Hard!Renegade Rows: 20 total reps, alternating right and leftJumprope: 1 Minute Moderate. 1 Minute Go Hard!Straight Arm Press Back: 12 repsSkaters: 1 Minute Moderate. 1 Minute Go Hard! Single Arm Rows: 12 reps on the right, 12 reps on the leftPower Skips: 1 Minute Moderate: 1 Minute Go Hard!
How to Get Rid of Back Fat in a Week

Do you know you can tremendously get rid of this thing in a week? Just so you have more workouts in your arsenal to wage war against fat, here are two distinct quick back fat workouts to do. Perform these below workouts first thing in the morning, on your lunch break, or on-the-go to get rid of back fat in a week.
Bye-Bye Back Fat Workout
This one is just four moves! Do 15 reps of each when you need a quick workout to tone your back and get rid of back fat for good. Plank to Mid-Back Row. In plank position, pull the right arm up to the side of your abdominal; repeat on the left side. Do 15 reps. Side Plank Scoops: Put down your bottom leg knee or go to your forearm for change. Do 15 both sides. Swimming: Lift all four limbs up off the ground, engage your abdominal. Flutter with your arms and legs from the shoulders and hips. Keep your nose pointing down in the water with a neutral neck. Count to 15. Breast Stroke: Keep the tops of your feet on the floor. Use your mid-back muscles to breaststroke with your arms. Do 15 reps.
Back Fat Blast Workout
This workout is three moves and requires a set of dumbbells. Use heavy enough weights that you feel fatigued and are working “comfortably hard.” Repeat the series twice through. Renegade rows: You can do the kneeling variation if you are not able to do a full plank. Do 10 for each arm.Reverse grip rows: Arms are in front of the body holding dumbbells at hip height with palms facing the ceiling. Do 15 reps.Overhead pulls to crunches: Keep your abdominals engaged throughout! Do 15 reps.
Conclusion
As at now, you already understand how to basically get rid of that stubborn back fat. Remember, there aren't really quick fixes in life. But if you fix your mind at it, you can do the back fat exercises, and stick to the 4 other steps. You’ll definitely have your sexy body ready in a very short while Read the full article
#exercisestogetridofbackfat#howtogetridofbackfat#howtogetridofbackfatinaweek#howtogetridoflowerbackfat#howtogetridofupperbackfat
0 notes
Text
Fasting Break: Best Foods, Fruit To Break Fasting

Don't you feel stressed out about random fasting information going around the net these days? Because it rather appears that you have to unleash all tidbits of knowledge about fasting in both heaven and on earth. Aren't we tired of these boring words? Like, they tend to make you do everything that'll make you fast, right away. And that's why I've gone all the way to analyzing a step-by-step guide that'll help you out.
How do you eat?
Do you know you have to eat the proper food in the desired amount before complements during fasting with nutrients, amino acids? In fact, you can't just break a fast. You have to go in certain ways... And that way and give your digestive system the time to adapt to food again, etc. Do you know the problem? Fasting appears hard, strenuous and even strict. And it is not. If you engage yourself in intermittent fasting now, for instance, with 16 to 24 hours fast, you don’t really need to worry. From my experience, I broke my fast 24 hours fast with 5 beers, bread, and sausages. It was stupid of course, but what I mean to say is: there is no great health risk from doing that occasionally. Although, we need to understand breaking 24 hours fast shouldn’t become complicated. When you eat once a day, you need to get one good, healthy, and nutritious meal. With meat, carbs, vegetables, etc. You shouldn’t break your fast every day with junk foods.
Best Foods To Break A Fast

But today, you'll learn about the best foods to break a fast with. And they are: 1. Diluted Apple Cider Vinegar. Some people got to realize that taking between 1 and 2 teaspoons of Apple Cider Vinegar stirred with water can sustain fasting. We also covered what we mean by Apple Cider Vinegar. You can eat this supplement as you fast too. I love the ACV because it balances alkaline PH levels. Most of the times, we’re extremely acidic than alkaline, because of alcohol, bad diet, etc. ACV could be acidic, but when consumed it actually turns alkaline. Also, it kills off bad bacteria gut since it has the ability to store fungal and bacterial overgrowth Also, it moderates blood sugar whereby the insulin levels influences and makes you feel fuller combined with eating. You may have already gone through articles on ACV and you might ponder on why I emphasize it as a food to break a fast? Since Apple cider vinegar is actually free of calories, it doesn’t create an insulin response and thus doesn’t break a fast. ACV is preventive. You can take a few tablespoons diluted in water during your fast, but I would recommend you to take some before breaking your fast. This way you’ll have two added benefits before your forthcoming meal: Measurements 10 to 12 oz water2 tablespoons of apple cider vinegar1/2 teaspoon of cream of tartar1/2 teaspoon of Pink Himalayan SaltThe juice of 1 whole lime or 2 tablespoons of bottled lime juicePossible to add stevia to taste Living in Switzerland, I have to say I never found the cream of tartar in local stores. So, I tried this several times without, sometimes replacing lime with lemon. Caution I can say it, that ACV smells strong, to the first few sips might be hard. But overall, I really like it and it’s a big change of taste from coffee, tea, and water you usually drink on fasting. Also, all the added benefits are great. The reason why I say this is if you’re not a fan of the taste but still want to get the benefits of apple cider vinegar, you can also check out these apple cider vinegar capsules (with added salt and added MCT Oil for improved consumption). (Fasting Break ) Watch Video how to use Apple Cider For Fasting Break 2.Bone broth For Fasting Break

Bone broths actually taste awesome, and that’s why! Asides from my own personal taste, bone broth is excellent after a fast since it has lots of electrolytes. You’ll find magnesium, potassium, calcium, and sodium in bone broths since one of the main challenges when fasting is mineral depletion. Your gut’s been cleaned by the fast, drinking bone broth will help use the nutrients from the broth and the food you’ll eat afterwards. Bone broth is rich in collagen and will help you keep healthy bones, teeth, and nails. Then it's rich in glycine which might help with sleep quality. In as much intermittent fasting and Keto are known to disturb sleep, that can become handy, as it has several amino acids that are anti-inflammatory. Check Out Anabolic FastingWhen You Should Stop Taking CoffeeHow Long Does Vyvanse LastHow To Get Thicker Thighs And Hips In A Week 3. Spinach, kale To Break Fasting

Don't be deceived. You may see Spinach as an easy one. Well, it is. But when fasting, you might be depleted of some nutrients and vitamins. Kale and spinach are full of them, including: Vitamin CVitamin B2Vitamin B6Vitamin EVitamin AVitamin KManganeseFolateMagnesiumIronCopperCalciumPotassium You might either have them garnished in a smoothie, raw or cooked. I’ve as well come across many times people advocating for eating them raw, but I haven’t discovered that exact facts to back this up. So, I’d recommend that you eat them as you wish. You know why? They aid digestion; guide against constipation; keep blood sugar level. Perhaps, you could attempt to buy the already made kale smoothies, even if I’d advise you to make your own (so that you actually know what it has). Although, you can find good, all-natural Spinaches like this kale powder from Koyah or this organic kale and avocado drink from Medline. 4. Eggs For Fasting Break

Eggs are great for breaking a fast. To get lots of proteins with a little food measure, break with eggs. Taking eggs is great when breaking a fast. Because the protein will prevent muscle loss. When you exercise during the fast, which on your body in the first place, shouldn't have too much of an impact, eggs are leucine-rich. Leucine is one of the amino acid responsible for muscle growth. Eggs are easy to digest, low in calories, protein-rich and a massive way to cut appetite with a small amount of food. Especially when you take eggs that are boiled. Read: Benefit Of Egg Hips Widening Long Paragraphs For him, Copy And Paste 5. Nuts, chia seeds To Break Fasting

I should have included almond, helm seeds, and pecan to this list. You'll be deprived of nutrients. But eating vitamin-rich food such as nuts and seeds is a massive way to restore nutrient balance. For instance, chia seeds contain manganese, phosphorus, copper, magnesium, calcium, selenium, and iron. Seeds are rich in good healthy fat, proteins, and fibres. 6. Fish

When you are set to decide what to eat for the first meal, if you want to thread things lightly, you could attempt getting a fish broth instead of fish meat. And taking fish for your first meal wouldn't be too much of a challenge. It won’t be hard on your digestive system and fish is a great source of protein. 7. Broccoli and Cauliflower

Would you agree with me that Broccoli, cauliflower, brussels sprouts are all cruciferous vegetables? And they’re actually rich in fibre, nutrients, and vitamins? Because with fish, I would tell that you eat them mixed or cooked. Hence, of all the cruciferous vegetables, I would recommend you to mainly eat broccoli, which is the most digestible one. Also, cruciferous vegetables are loaded with full minerals and vitamins, including vitamin C, K, B2, B9, A, B5, B6, iron, magnesium, manganese, etc. 8: Watermelon To Break Fasting

At first, allow me to confess that I do not take many fruits when I'm ready to break my fasts. Although I love fruits, they're composed of fructose. Although, when you break your fast with fruit, your body will actually break down the fructose to replenish your glycogen stores, since they’ve been emptied by the fast, it’s still not the most effective source of energy. That being said, while I would recommend when eating fruit to get something that’s also rich in fibre, just as an apple, watermelon shall be a massive way to break a long fast with semi-solid food. Watermelon is actually more than 91% of water. Therefore, making it simple to eat and digest and it could be a wonderful way to systematically start to eat again. Read: 30 List of Immune Boosting Foods to Get You Through Cold & Flu Season Benefits Of Dietary Supplements Staphylococcus Aureus: Quick Remedies. Symptoms And Causes 7 Reasons Why a Calorie Is Not a Calorie What Is The Difference Between Lemon And Lime 9. Banana

As earlier said, the fruit may not necessarily be the best way to break a fast, due to the fact of how fructose is metabolized in our body. But after some reading, I can say that banana could be a good food to break a fast. Banana is nutritious in good healthy carbs to help you out of ketosis the right way. It is as well rich in fibre. Some of them like butyrate might actually be good for your gut bacteria and it includes several vitamins and minerals like potassium, vitamin B6 and vitamin Since it’s high carbohydrates and pretty high sugar, bananas would help to increase blood sugar levels after a long fast, especially if you’re feeling down or tired from ketosis. 10. Unsweetened Yogurt, Sauerkraut, and Kimchi

Do you know that fermented foods are awesome for your gut bacteria? After fasting for a few days, eating fermented foods will help your digestive tract in repopulation with good bacteria and enzymes that it was stripped off from the fast. Asides from this, it'll also make it easier for you to digest food particles. Thanks to these probiotics. Preferably, you can start with fermented kale such as Kimchi or sauerkraut. If you opt for Kimchi, don’t make it too spicy. It could upset your stomach. You can also wait until you feel ready for dairy before eating yoghurt. Read:: How To Get Rid Of Stretch Marks How To Crack Your Neck Waffle House Nutrition 11. Avocado For Fasting Break

Avocado is popular to be the world’s fattiest fruit and, which is great for breaking a fast. It is not strange, because Avocado is really low in calories, but nutritious in healthy omega-6 and omega-3 fat. Avocado is full of antioxidants, minerals, and vitamins including: Vitamin KVitamin B6Vitamin EVitamin CCopperPotassiumFolate Moreso, it is composed of a huge amount of pantothenic acid, which is a complex B vitamin and one of the most important Vitamins. Without it, you wouldn’t be able to use macronutrients as well enough. It's worthy of note that whenever you break a fast with avocado, you'll get all those nutrients, in a rate of a high dose of pantothenic to help you use them as energy, a lot of good healthy fat (similar to MCT oil). I can remember I came across it in an article that avocado may sometimes be hard on the digestive system. It may come from fermentable oligo-, di-, monosaccharides and polyols (FODMAPs), which are undoubtedly short-chain carbohydrates. Certain people are actually sensitive to FODMAPs and will have a hard time digesting it, causing stomach-ache, bloating and other unpleasant symptoms. Other than that avocado is a very easy fruit to digest, if you’re not sensible to FODMAPs.
Conclusion
Definitely, there are wrong ways to break fasting and the longer the fast, the more you have to be thorough on your research on what to eat when breaking it. Breaking a fast the wrong way might be difficult on your digestive system, stomach, intestine, your energy levels and even your overall mood. You should not eat whatever you want when breaking a 7 day fast. Hence, what I’d urge you to do pick all these different types of food into account and consume the choice you prefer the most. Eat the food you’re of, that will not put a strain on your digestive system. Your first meal should be light. It should be around 500 calories, and it could depend on your habits and why you’re actually fasting. Read: How To Get Rid Of Hickies Fast In A Day When you do a lot of exercises, you may rank and keep growing muscles. Hence, the first food you might go to will be eggs and maybe bone broth. To sum up, you can choose to try various choices, as you're not sure of what best suits your body. Only that you shouldn't forget to see your doctor and ask him questions. Read the full article
#bestfoodstobreaka16hourfast#breakingafastwitheggs#breakingfastwithnuts#howtobreaka24hourfast#howtobreaka7daywaterfast#howtobreakafastintermittentfasting#howtobreakafastwithoutgainingweight#Whatfruitbreaksthefast?#Whatisthebestfoodforbreakingafast?
0 notes
Text
Natural Remedy for Hips Enlargement

Get Wider Hips with These twelve Exercises, And Natural Remedies To for hips enlargement or hip widening
How To Increase Hip Size
Let’s face it: we tend to weren’t all blessed Beyoncé hips at birth. however, don’t fret! If a shapelier prize and hips are your goal, understand that it’s attainable with diligence and consistency. You won’t catch long, however, you'll be able to tone your hips and bottom over time, shedding fat and achieving a firmer, rounder look. All you’ll begin may be light- or medium-weight dumbbell. If you’re a beginner, use solely your bodyweight until you feel snug. Then, decide on the exercises below and complete them 3 times per week. check that you hit every minimum once in an exceedingly week’s rotation. make certain to rest thirty seconds to one minute in between sets, too. When these moves begin to urge straightforward, up to the load or add a group to still challenge yourself — your new prize many thanks. Before we tend to start: Reps what number times you repeat AN exercise. cluster|a collection} is that the group of times you are doing that exercise. thus if you probably did ten reps for three sets, which means you probably did an exercise for a grand total of thirty times. currently, let’s get going! Aspect lunge with dumbbells For Hips Enlargement

aspect lunge with dumbbells For butt Enlargement Working in numerous planes can facilitate build the prize shapelier all around. Our bodies have totally different planes of motion: mesial, frontal, and thwartwise. Depending on that joint you progress can confirm that plane of motion your body is functioning. as an example, this exercise can work on the frontal plane. Start by standing straight, feet along, with a light- to medium- weight dumbbell in every hand. Leading along with your right foot, begin to exit wide, on to your right. Bend your knee and push your hips back. Drop your arms thus they’re sandwiching your right leg. Keep your gaze forward. Prepare to come to start: Push off along with your right foot and shift your weight to your left leg, returning to standing at the centre. Do twelve reps on all sides for three sets. 2. Aspect dumbbell abductions For Butt Enlargement

Aspect dumbbell abductions For butt Enlargement This move directly targets your core and outer thighs. Start along with your feet alongside a light- to a medium-weight dumbbell in your hand. Keep your right leg straight and start to boost your leg directly resolute your aspect. enable the load of the dumbbell to rest against your leg. Go slow and controlled, as high as you'll be able to take your leg. Slowly come back to the centre and repeat. Complete twelve to fifteen reps on all sides for three sets this will help dramatically in hip widening. (adsbygoogle = window.adsbygoogle || ).push({}); 3. Aspect leg lifts For Hips Enlargement

Aspect leg lifts For butt Enlargement Side leg lifts are the same aspect dumbbell abductions, solely you’re lying down instead. This move targets the hip and striated muscle a lot directly. side leg lift is a proven way to widen the hips Related: Social Benefit Of Excercise Lie down on a mat on your right aspect along with your back, neck, and head in an exceedingly neutral position. Rest your head on your arm, that ought to be extended on top of your head. Stack your legs on high of every different. Brace your core and start to boost your left leg as high as you'll be able to. Pause at the highest. Slowly come to the beginning position. Do fifteen reps with every leg for three sets. Read: Get Pink Lips In A Week Without Applying Any Cream 4. Hip raises For Hips Enlargement

Hip raises For butt Enlargement This exercise is additionally called a bridge. It’s nice for your glutes. Start by lying on the ground. Keep your back straight and bend your knees at a 90-degree angle. Your feet ought to be flat on the bottom. Keep your arms straight at your sides along with your palms facing down. Breathe in and come out of your heels. elevate your hips up by compression your glutes, hamstrings, and girdle floor. Rest your higher body on your back and shoulders, forming a line all the way down to your knees. Pause for one to two seconds at the highest and come to the beginning position. Complete fifteen reps for three sets. 5. Squats For Hips Enlargement

Squats For butt Enlargement This is one of the foremost elementary moves to tone the lower body. Start in AN upright position along with your feet slightly wider than shoulder-width apart. Your toes ought to illustrate slightly. Bend your knees and push your hips and butt back as if you’re near to sit in an exceeding chair. Keep your chin tucked and neck neutral. change posture till your thighs is parallel to the bottom. Be sure to stay your weight in your heels and knees bowed slightly outward. Extend your legs ANd come to an upright position. Complete fifteen reps for three sets. (adsbygoogle = window.adsbygoogle || ).push({}); 6. Squat kicks For Butt Enlargement

Squat kicks For butt Enlargement These kicks may be a cardio move, too, thus you get a lot of bang for your buck. Start along with your feet wider than shoulder-width apart and arms bent move into the front of you. Squat down, pushing your hips and butt back, till your thighs are parallel to the bottom. On the increase, kick your right foot resolute the aspect as high as it’ll go — suppose kickboxing. When your right foot comes back to the bottom, in real-time squat once more. Repeat with the left foot. A single rep is one right kick and one left kick. Do ten reps to begin for three sets. Then move up to fifteen reps for three sets. 7. Dumbbell squats For Butt Enlargement

Dumbbell squats For butt Enlargement Follow similar steps as for squat kicks, however, hold a dumbbell in every hand. The dumbbell ought to rest on your shoulders, just under your chin. this is often a lot of advanced moves, thus begin lightweight if you’re a beginner. Start in AN upright position, along with your feet slightly wider than shoulder-width apart and toes slightly got wind. Hold a dumbbell in every hand. Bend your knees and push your hips and butt back as if you’re getting to sit in an exceeding chair. Keeping your chin tucked and neck neutral, change posture till your thighs are parallel to the bottom. you must keep your weight in your heels and knees bowed slightly outward. Extend your legs ANd come to an upright position. Complete ten reps for three sets. Read: Know The Causes And Home Remedies For Bruises 8. Split leg squats For Butt Enlargement
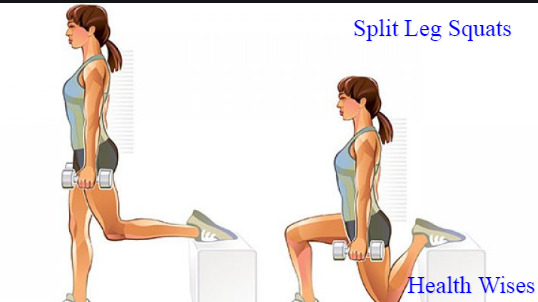
Split leg squats For butt Enlargement These also are called Bulgarian split squats. They work the legs and glutes and increase your stability. Split your stance and stand lunge-length ahead of a bench. Rest the highest of your left foot on the bench. Lunge on your right foot, keeping your chest up, till your left knee nearly touches the bottom and your right thigh is parallel with the bottom. Return to standing. Complete ten to twelve reps, then switch legs. Do 3 sets. 9. Sumo walk For Butt Enlargement

Sumo walk For butt Enlargement This move may be a good way to strengthen your quadriceps femoris. Assume a squat position along with your arms well bent ahead of you. Maintain the squat position and start to step to the correct. For AN intense burn, keep low for as long as you'll be able to. Walk ten steps to the correct, then ten steps back to the left. Do 3 sets. 10. Hip-lift progression For Butt Enlargement

Hip-lift progression For butt Enlargement When a customary hip elevate gets straightforward, strive a single-leg hip elevate. Start by lying set about on your mat along with your knees bent. Keep your feet on the ground. Face your palms down at your sides. Lift your right leg up off the bottom and straighten its move into the front of you. Keep your left leg bent. Press your left heel into the ground and elevate your pelvis up toward the ceiling. When you reach a stiff bridge position, squeeze. Slowly lower go into reverse to the bottom. Repeat for thirty seconds. Switch, and complete thirty seconds with the other leg up to spherical out this exercise. (adsbygoogle = window.adsbygoogle || ).push({}); 11. Donkey kick For Butt Enlargement

Donkey kick For butt Enlargement For best results, check that that your back doesn’t sag thus your glutes do the work. Assume the beginning position on cards, along with your knees hip-width apart, hands below your shoulders, and neck and spine neutral. Brace your core and start to elevate your left leg. Keep your knee bent, along with your foot staying flat and hinging at the hip. Use your glutes to press your foot directly toward the ceiling. Squeeze once you reach the highest. Make sure your pelvis and dealing hip keep pointed toward the bottom. Return to the beginning position. Complete twenty reps on every leg for three sets. Read Benefit Of Mango Seeds 12. Chair and different yoga poses For Butt Enlargement

Chair and different yoga poses Donkey kick For butt Enlargement A number of various yoga poses will target your glutes and hips, like chair create. To observe Chair Pose: Start standing straight along with your feet along and arms down by your sides. Keeping your feet stationary, bend your knees and send your arms straight out overhead. Your thighs ought to be as on the point of parallel as they’ll go. Keep your gaze straight ahead. Hold for thirty seconds. Other yoga poses to include are: Locust create, that is nice for strengthening lower back and glutesWarrior I, that is essentially a stationary lungeSide Plank, that directly targets your hips
The bottom line
In addition to the correct workouts, diet and biology play an important role, thus sit down with your doctor and trainer regarding what’s attainable for you. Be realistic regarding your expectations, however, understand that you simply are able to do your own Beyoncé body if you set within the work for Natural remedy for Hips enlargement and hip widening
Natural Remedy for Hips enlargement

(adsbygoogle = window.adsbygoogle || ).push({}); Or you can use the Following Method For Natural remedy for Hips enlargement and Hips Widening Below Believe it or not, the answer to most of your problems can be found out in nature. If you don’t like the size of your bottom, for example, then there are a few natural remedies you can use in order to enhance the size and shape of your butt.and also hip widening But, no matter how effective these homemade butt creams are, you still need to do other things as well in order to improve the looks of your butt, besides just using a cream for hip widening. So, prepare such cream and use it, but do other things as well, like exercising. Squatting and eating healthy foods if you really want to obtain noticeable results. Below INGREDIENTS For butt Enlargement Below are three ingredients for Hips enlargement at home Naturally and Hips Widening PotatoesEggsHoney PREPARATION • To prepare a butt enhancement cream with these ingredients, you will have to peel the potatoes and grate them first.• Then add an egg to the grated potato, plus 3 tablespoons of honey.• Mix all the ingredients well until you obtain a homogenous consistency. Read: How To Get Thick thigh By Eating APPLICATION • Apply this mixture on your butt and leave it to do its job for 25 minutes, then rinse with cold water. This treatment should be used twice a week. These homemade butt creams will help you tone your buttocks while increasing the size of your butt, with no risks involved. Still, do have in mind that Natural remedy for Hips enlargement, hip widening take longer to produce any noticeable results, so don’t lose your patience and continue the treatment as indicated until you get to your goals Check Out: How Long Does Alcohol Stay in Your System?Best Tea For Sore ThroatShark Tank Weight LossHow To Get Rid Of Hickies Fast In A DayFasting Break Read the full article
0 notes
Text
How To Fix Cracked Heels Permanently In 5 Mins

If you’ve ever experienced having dry, hard, cracked and callused heels, you know what a hassle they can be. It’s unsightly so you only allow yourself to wear footwear that hides them. It can be so hard and dry that you feel embarrassed to let anyone come into contact with your feet—so romantic foot massages are a definite no-no for you. It can be painful so you limit the time you spend walking or standing. But even more than that, it can increase your chances of infection in a part of your body that is essential for mobility. With all this and bathing suit and flip-flop season coming, it’s no wonder you want to get rid of hard skin on your feet quick! Here, we discuss what conditions could spring from having hard, dry skin on the feet, which causes severe drying and cracking in heels, and how to keep feet soft and callous-free.
Calluses, corns and cracked heels: what’s the difference?
While you may want to blame your body for making things harder for you (pun intended), you should try to understand the development of thick skin as a protective mechanism. Imagine if your skin remained soft in areas that are continuously subjected to abrasive circumstances—you’d develop rashes, blisters, wounds, and scars in no time. Our bodily tissues are more protected the thicker our skin becomes. Hard skin can come in the form of calluses or corns. Calluses are large areas of hard skin that are spread out; corns are usually smaller and appear to be radiating from a defined centre. You may observe that running your hand over a callus does not produce the same feeling as touching the other, softer parts of your feet. That’s because the skin is thickened with layers of dead cells and not as sensitive. In contrast, corns are usually painful when touched. Cracked heels, also known as heel fissures, are a result of both pressure and lack of moisture. Just like anything that is too dry, skin can become brittle and crack. If it’s on the surface, it can look rather unappealing. If it’s deeper, it can be very painful and lead to infection.
What causes severe dry skin on feet?
It has a lot to do with pressure and friction. Your feet receive the brunt of your body weight when you are upright—which is most of the time! What’s worse is if the pressure is concentrated on certain parts instead of being evenly distributed across your feet—as is the case when you wear ill-fitting shoes, when your feet have parts that jut out and rub against other material (like bunions, hammertoes or arthritis), or when the arch of your feet is either too flat or too high. The places that receive more pressure or are exposed to more friction is where you will likely develop hard skin. Loss of skin elasticity and moisture is another reason for dry, flaky and hard feet—particularly for cracked heels. Age, predisposing conditions like diabetes or obesity, and lack of skincare are contributing factors. However, one important consideration that often goes unnoticed when you think about hard skin on the feet is nutritional problems. Simply put, cracked heels and vitamin deficiency often go hand-in-hand.
How To Fix Cracked Heels
What to do: Prepare a mixture of one cup of Listerine, one cup of white vinegar, and 2 cups of water.Soak your feet in the mixture for 15 minutes.Remove your feet, and scrub them using a pumice stone to remove dead skin.Rinse with clean water.Pat dry, and moisturize. How often: Repeat every day until your heels heal. Related: Best Natural Remedy For Glowing Skin
Vitamin and Nutrient Deficiencies That Make Your Heels Cracked, Dry and Flaky
Vitamin A. One of the many functions of Vitamin A in the body is to create and repair skin cells, protect against damage, and keep inflammation to a minimum. In fact, it is used in many skincare products—you may be more familiar with its active form: retinol or retinoic acid. Cracked heels are from dry, dead skin cells, so increasing an antioxidant that helps replenish skin is definitely going to help. Aside from supplements and vitamin-infused products, food rich in beta carotene are prime sources of Vitamin A. A good rule of thumb? Look for fruits and vegetables, specifically ones that are red, yellow, or orange. Vitamin C. The C in Vitamin C might as well stand for “collagen” with how important it is to collagen production! Another prime ingredient in many a beauty product, this component helps skin heal faster and more efficiently—a powerful ally in soothing areas of the skin that suffer from the effects of pressure, friction and lack of moisture. You can get supplements and creams over-the-counter, or eat your fill of citrus fruits, broccoli, spinach, and strawberries! Vitamin E. This nutrient is an antioxidant that helps nourish the skin by improving cell function. The body naturally produces Vitamin E in the excretion of sebum. In this form, it helps moisturize the skin. We learned that cracked heels are just as much about dryness as it is about pressure, so you definitely need Vitamin E to help make it soft. It can be taken in the form of supplements, topical creams, or through the diet in the form of healthy seafood, green vegetables, seeds, and plant-based oils. Vitamin B3. This nutrient’s other name may be more familiar to you as a component of many skincare products: niacinamide. It helps the skin by boosting immunity and helping it retain moisture by optimizing the performance of the epidermis—again, a great way to fight against the dreaded cracked heel! You can get your dose of vitamin B3 by eating red meat, poultry, fish, tomatoes and asparagus. Try looking for products infused with it as well! Omega3. Fatty Acids. This is what you need if you want to improve hydration and increase protection for your skin. This nutrient keeps collagen damage at a minimum and maintains the integrity of the lipid-based cell membrane to ensure moisture is retained. Not only that, they have the added benefit of helping your heart and circulatory system running better! Use products that incorporate healthy fish oil to increase your intake of these essential fatty acids. Zinc. Zinc has been known to help with cases of severe acne—so how can it help with cracked heels? The reason why zinc is great for pimples is that it helps the skin heal from lesions, which incidentally also occur when you have heel fissures! It helps keep inflammation down and regeneration up. This mineral is not needed in large quantities, so it best incorporated into the diet. Not a problem, since you can get it from delicious chicken, lamb, beef, dark chocolate, oysters, and other common foods. Read: How To Get Rid Of Asthma Fast Watch the video below on How To Fix Cracked Heels Permanently in just 5mins
How to prevent hard, dry, cracked feet and heels?

How to prevent dry cracked feet and heels Most likely, the dryness and hardness of the skin on your feet are caused by a number of factors—not just one. So, it is best to adopt a holistic approach that targets all the problem areas. This means you need to find ways to alleviate pressure or friction while keeping your feet moisturized, while also helping your skin cells regenerate quicker. Sounds like a lot? Don’t worry, there are fairly easy solutions that won’t take up too much of your time! Start with wearing shoes that fit properly. Try on the shoes that you have and try to wiggle your toes. If there’s hardly any space for them to move, consider throwing those away and replacing them with a pair that affords more wiggle room. Next time you buy shoes, walk around in them and pay special attention that no part of your foot is uncomfortably rubbing against the shoe. If you have irregularly-arched feet, consider seeing a podiatrist help distribute the pressure. Depending on the causes, the doctor may prescribe certain exercises, special shoes, diet, or management techniques to help with weight-bearing. Read also, How To Get Rid Of Stretch Marks In 2 Weeks How To Get Rid Of Hickies Fast In A Day Keeping your feet moisturized will help prevent dryness and hardness. Remember the vitamins we discussed earlier? Look for lotions and creams with those ingredients. There are a lot of topical ointments specially formulated for those suffering from cracked heels. Below, we will list some products used in a daily routine to fix cracked heels permanently!
6 at-home remedies to permanently get rid of hard skin and cracked heels quick
Home-made foot soaks should be part of your routine to get softer, crack-less feet. Remember that the hardened skin is layers of dead skin cells that no longer receive moisture and nutrition. Removing them is key to helping the underlying healthy cells blossom. Here are some home remedies you can try. Just mix the ingredients and leave your feet in for around 10-15 minutes. Half cup Listerine + half cup vinegar + 2-3 tablespoons honey + 1 gallon of warm water. Listerine contains methyl salicylate, an exfoliant that helps remove dead skin cells. Vinegar helps prep the foot by softening the skin before Listerine works its magic. Honey offsets the drying effect of the mixture by providing moisture, as well as acting as an antiseptic. Warm water helps dilute the solution so it is not overly harsh on the skin. 3 teaspoons rice flour + 1 teaspoon honey + 2-3 drops apple cider vinegar. In this recipe, rice flour is the exfoliant that also helps purify and rejuvenate the skin. Honey is for hydration and sanitation, while vinegar helps prep the skin. 1 teaspoon Vaseline + 3-4 drops lemon juice. Lemon juice is a citrus fruit that contains Vitamin C for skin regeneration, while Vaseline is a potent moisturizer. With this method you will fix cracked heels permanently Half a cup Epsom salt + warm water in a basin. Epsom salt helps with inflamed skin and helps soften the heels. After this foot soak, rub your feet gently with a moisturizing agent—aloe vera gel, coconut oil or shea butter are great options. 2 tablespoons lemon + 1 tablespoon salt + 1 cup glycerin + half cup rose water. Glycerin and rose water are intense moisturizers that also help balance the skin’s pH level. Lemon adds Vitamin C to the mixture, while salt helps exfoliate the skin with gentle rubbing. Read: Acne Cause And Treatment: Symptoms Coconut Oil For Cracked Heels
Coconut Oil For Cracked Heels Repairing cracked heels with coconut oil is something we’ve all tried once, and it has worked wonders. Let’s check out the remedy of coconut oil for cracked heels to fix cracked heels permanently. Take a couple of tablespoons of coconut oil for cracked heels. Apply the oil liberally on both feet, especially the broken parts. After application, slip the socks on and go straight to bed.In the morning, you can bathe the usual way.If you keep on doing this daily for a few days, you will notice the difference yourself. Your feet will feel soft and smooth, and the cracks will start vanishing.There is another remedy you can try with coconut oil for cracked heels.Mix in a bowl a few drops, 3-4 perhaps, of coconut oil and some paraffin wax. Note that you can also use mustard oil instead of coconut oil. It’s a suitable replacement.Stir thoroughly while heating the mixture on the stove and let it melt properly.Now let the mixture cool down to room temperature before you paste your feet with the mixture.If you’re looking for quick and favourable results, do this before you hit the sack. Apply and put a pair of socks on and sleep peacefully.Wash the feet in the morning. Doing this every two to three times a week can be helpful.If you are a diabetic patient, then it’s recommended you don’t try this method. Also, you shouldn’t put the feet in the paraffin wax while it’s still hot. Read: Acne Cause And Treatment: Symptoms How coconut oil for cracked heels work? Well, the oil is very helpful in hydrating the skin. It can help to heal deep cracked heels or fix cracked heels permanently. It’s highly beneficial in removing all the dead cells and providing the moisture with the skin needs. The coconut oil can easily penetrate the deep layers of the skin while providing the nourishment it needs. Now you know how to heal deep cracked heels or how to fix cracked heels permanently. It’s with the use of coconut oil how to remove cracked heels is achieved. A note of caution though: don’t use the recipes that include an ingredient you are allergic to! If you find that some cause irritation—our skin types may be different after all—stop immediately and try a different recipe.
How To Fix Cracked Heels Permanently - My Routine For Perfectly Soft Skin On My Feet

If you wish for nothing more than a pair of soft, moisturized, and healthy feet, I highly recommend my personal routine for keeping those calluses, corns, and cracked heels away. Start out with weekly foot filing! I use the Electric Callus Remover from Own Harmony mostly because I got tired of scrubbing my feet with a pumice stone. It used to take me twenty minutes to exfoliate the dead skin off, but going electric has reduced it to less than half of the time. Sure, I lose my twenty minutes of a pretty intense arm workout, but I’ve noticed it takes off even the most stubborn callus with a lot less effort. Plus, it’s easy to clean, rechargeable, and has lasted me for months now. I love it! I do a foot scrub once to three times a week, depending on my schedule. I’ve recently fallen in love with the Oleavine Theratree Exfoliating Scrub. First of all, it smells amazing being chockfull of essential oils (including mint, which gives me a tingly clean feeling after I use it). It also has a bamboo charcoal powder that brings out the dirt, dead skin cells and grime accumulated by my feet (sorry for the graphic description—but you get it!). What makes it especially good at exfoliation is micro pumice and white willow bark. Since I’ve used this, bye-bye calluses!) I’ll let you in on a little secret: Read: What Happens When You Loss Your Virginity Before 22 I even use this scrub on my face and occasionally all over my body! It’s my little secret hack that many girls would never think to do. I have oily skin that needs extra exfoliating to get rid of all the built-up oils and dead skin cells. It smells minty and refreshing in the shower. If you decide to try this on your face, start with a small amount, otherwise, it will burn. You’ll feel the tingly sensation. I personally love it! My pores are clear, my skin feels softer, and my acne disappears within 5 days of using this stuff. So you know how sheet face masks are becoming a thing now? What if I told you they have the same but for your feet? I purchase the Evagloss Exfoliating and Moisturizing Foot Masks over and over again because this product is literally magic. They come in packs of three sock-like foot masks. You put on the exfoliating ones for 1-1.5 hours. In one to two weeks, your feet will be peeling heavily, but only to reveal what feels like brand new, baby soft feet underneath! The moisturizing feet masks are used within that period to help keep your feet moisturized and aid in the peeling process. If you’re the type of girl that likes to dedicate 1 day a week to throw on a plush robe, binge watch Netflix, and give yourself an at-home facial, then you need to add this foot hydration and exfoliating socks to your routine. It’s so simple and you can do it simultaneously with your facial. Read: Why Late Period Is Not Pregnancy To give my feet the extra moisturizing treatment after all the exfoliation, I like to wrap my feet in socks every night after slathering on the AHAVA Dead Sea Mineral Foot Cream. When I take them off in the morning, my feet are so soft I wish I could transfer the skin on them to my face. It’s free of harsh chemicals like parabens and phthalates, instead of relying on minerals naturally found in the Dead Sea like magnesium, calcium, and potassium hydrate. It does wonder for keeping my heels fissure-free! Lastly, I like to change it up by using any one of the home remedies I listed above. But to be completely honest, if I had to pick one that I use over and over again, it would have to be the glycerin and rosewater combination. Maybe because I just love how my feet end up smelling like roses and feeling like rose petals. Read: Amazing Benefits Of Avocado Oil In short, having dry-skinned, hard-textured and cracked feet is definitely not the end of the world. There are so many ways you can have the soft, moisturized feet of your dreams. While it may take some time and experiment with what products and routines work for you, I guarantee that one of those mentioned in this article will help you out. Before you know it, you’ll be walking around in flip flops and open-heel shoes, asking your special someone for foot massages, and enjoying pain-free walking and standing. Let us know if you have any questions or if you want to comment on your own experience with home remedies for How To Fix Cracked Heels Permanently to help other future readers out! Sharing is caring! Read the full article
#CrackHeels#FixCrackedHeelsPermanently#HowToFixCrackHeel#HowToGetACleanHeels#HowToGetRidOfCrackHeels
0 notes
Text
What Is The Difference Between Lemon And Lime

What Is The Difference Between Lemon And Lime Many people have been using Lemon and lime interchangeably. We often confuse lemon for lime, I know many of us have made that mistake. This article will centre on the difference between lemon and lime. The fact is they are completely different, though they belong to the same family of fruit. Lemon and lime belong to Citrus fruit family. They both contain ascorbic acid in large quantity. This article will compare many of its features and quality. Stating clear their difference and similarity between them. Both fruits are unique and off great benefits to the human body. Although many are yet to understand those difference and benefits of lemon and lime. Check Out: 11 Amazing Benefit Of Pumpkin Leaf/Ugu 30 List of Immune Boosting Foods to Get You Through Cold & Flu Season 11 Natural Home Remedies for Malaria The Ultimate Guide to Shark Tank Weight Loss in 2020 Waffle House Nutrition Facts, Menu
What Are Lime And Lemon?

Lime comes in different varieties around the world. It is a hybridized citrus fruit and the trees are rarely five meters tall. Lime originated from Malacca Peninsula in Southeast Asia. Lime is always green in colour and they are always smaller than lemon. While lemon is an evergreen tree from 6 to 8 meters tall. The birthplace of lemon is India, China and tropical islands in the Pacific Ocean. Its shape is ellipsoidal and its colour, when ripen, is yellow. Both fruits belong to the same family of fruits. That is the citrus family, they also have similar but not same nutritional value.
Nutritional Difference Between Lemon And Lime
Both fruits have poor calories value but very rich in vitamin C. Below are the major nutritional difference between them. Since they are of the same fruit family, they share many similar nutritional values. Vitamin C

Lime: Every 100 grams of lime contains 29 mg of vitamin C. This equals 35 per cent required to take a day. While lemon contains 53 mg of vitamin C in every 100 grams. It equals the requirement to take a day. pH Scale Lemon is slightly less acidic than like. The PH range of lemon is 2.00 to 2.60. While lime has a range of 2.00 to 2.35 and it is more acidic than lemon. There other nutrition value of lime. It is of higher value in carbohydrates and lowers in protein than lemon. Lemon is higher in citric acid and protein than lime. They are those nutritional value of both fruits but we just discussed major nutrition gotten from eating them.
Table Summary Of Nutritional Value Of Lemon And Lime
The table below gives a clear nutrient summary of Lime and Lemon. This considers 84g of lemon and 67g of lime. The nutritional value was analyzed. Macronutrients1 Lemon 84g1 Lime 67gCalories24.420.1Protein0.92 g0.47 gFat0.25 g0.13 gCarbohydrates (total)7.83 g7.06 gSugars2.1 g1.13 gFiber2.35 g1.88 gVitamins and mineralsCalcium21.8 mg22.1 mgPotassium116 mg68.3 mgVitamin C44.5 mg19.5 mgFolate9.24 mcg5.36 mcg The table below gives more insight into Lime Nutrients NutrientValueWater 88.26Energy 30Protein 0.7Total lipid (fat) 0.2Carbohydrate, by difference 10.54Fibre, total dietary 2.8Sugars, total 1.69Calcium, Ca 33Iron, Fe 0.6Magnesium, Mg 6Phosphorus, P 18Potassium, K 102Sodium, Na 2Zinc, Zn 0.11Vitamin C, total ascorbic acid 29.1Thiamin 0.03Riboflavin 0.02Niacin 0.2Vitamin B-6 0.04Folate, DFE 8Vitamin B-12 0Vitamin A, RAE 2Vitamin A, IU 50Vitamin E (alpha-tocopherol) 0.22Vitamin D (D2 + D3) 0Vitamin D 0Vitamin K (phylloquinone) 0.6Caffeine 0 Sources include: USDA
How They Taste – The Difference Between Lemon And Lime
To be of the difference between lime and lemon, one must know their taste. There is a wide difference between their taste. Lime taste sour while lemon seems to have a huge difference with higher sugar in it. Lemon taste sweeter than lime. As a result of fruity fresh lemon taste, it makes it ideal for lemonade. While due to the sour taste of lime ideal for cocktails and beverages. The fact is that eating or consuming pure lemon or lime can be irritating (tartness). This is the reason why it Is added with other recipes before it is taken. In taste, one can say that the two fruits have a wide or great difference between them. I hope that the above steps will go a long way for you to identify Lime and lemon. This will help you not to miss use them or use them interchangeably.
Storage Condition Of Lime And Lemon
We can use the storage condition of both fruits to state the difference between lemon and lime. Lemon doesn’t require must storage condition. It can be stored in the refrigerator for two months. While lime has smooth good skin that will make it perish easily. This fruit is required to be stored in the refrigerator for two weeks at 4 degrees constant temperature. Lime can be said to spoil quality then lemon. Lemon can be preserved for two weeks in the refrigerator. While lime can last two weeks provided that some certain conditions are met.
Benefits Of Lime And Lemon
Below are the benefits between lemon and lime. I will first state the benefits of limes and lemon before considering the benefits in comparison with lemon and lime. That will help us to achieve the difference between lime and lemon fruits.
Advantages Of Lime Citrus Fruit
The following are clear benefits of lime. These benefits help to differentiate it from Lemon. It has more vitamin C than lime. It can be said that it has five times more vitamin C than lime. It is essential for the rapid growth of the human body. And it is known for the presence of vitamin M (folic acid). Lime is richer in fruit acid than lemon. Lime is rich in vitamin B. It helps to overcome fatigue and nervousness. It helps to burn fat due to the presence of Ascorbic acid. Take freshly squeezed lime juice to help reduce the fat in the body. Lime is very important to pregnant women. It helps in the development of the fetus.
Advantages Of Lemon Fruits

The following are clear benefits of Lemon. These benefits help to differentiate it from the lime. They are:- Lemon helps to strengthen your blood vessel. It helps to normalize your heart work and prevent the development of atherosclerosis. It is recognized to be a natural sedative. It helps in the treatment of the lungs and strengthening the immune system. Lemon is rich in vitamin P and helps improve digestion. Lemon is believed to help the body absorb calcium and iron much better. It also helps to reduce the level of cholesterol in the blood. It can help to reduce toxin in the body. This can be achieved by drinking water with lemon in the morning. This helps to lose weight and reduce fatness in the body.
Considering General Benefits Of Lime And Lemon
Body Circulation Lemon and lime contain important level of iron. This helps in haemoglobin which will help people suffering from anaemia, characterized by weakness, cognitive fatigue, confusion, and lightheadedness to be strong. This sickness is as a result of improper iron level in the body. With the help of lime and lemon, the iron level in the body can be kept on a normal level. Weight Loss When staying the difference between lemon and lime. We discovered that they can both help you in weight loss as citrus acidic fruits. If you are watching your weight, we advise you to take a little proportion of lemon and lime. The low-calorie level and high fibre Level contained in both fruits makes it perfect for weight loss. Antioxidant Activity Lemon and limes contain antioxidants other than vitamin C. Study have shown that it helps in reducing oxidative stress and risk of degenerative diseases. Not minding the physical similarities between the fruits. I know you have joined me to explore the wide difference between lemon and lime. You can now see the huge difference between them. Now that you know the truth, no need to use them interchangeably. I hope you discovered that lime has more healing properties than lemon, if so awesome then. Both fruits are of the citrus family containing the acid. They both share many similarities but are not same. They are both sides in vitamin C and has a low-calorie level. Read: Benefits Of Dietary Supplements Know The Causes And Home Remedies For Bruises Know The Causes And Home Remedies For Bruises How To Get Rid Of Hickies Fast In A DayFasting BreakHow To Make Yourself Puke Or Throw UpHow To Crack Your Neck Substitutes For Rice Vinegar
Conclusion
Taking lime and lemon is good for the body. It will help to keep your body iron level at normal position. If you are fighting for weight loss, then you got to be taking them at a moderate rate. I hope you have learned the difference between lemon and lime. Please don’t forget to share with friends using the social media button below. Did you get a question? Use the comment box below to reach us. Our team will reply to you as soon as possible. Subscribe to our email listing or visit our blog regularly for more update like this. Read the full article
#arelemonsandlimesthesamefruit#differencebetweenlimeandlemonforface#differencebetweenlimeandlemoninhindi#differencebetweenlimeandlemontree#limevslemonbenefits
0 notes
Text
How To Get Rid Of Hickies Fast In A Day
How To Get Rid Of Hickies Fast In A Day
How To Get Rid Of Hickies Fast
Imagine heading to the bathroom to get a warm bath, and be set for dinner with your family members.
You look into the mirror, to see nothing but a horror movie scene. It seems like zombie joined you in bed and you have hickeys all over your neck too.
You suddenly become scared, because you don’t know what else to do.
Not only can you be sitting…
View On WordPress
#how to get rid of a hickey overnight yahoo#how to get rid of a hickey with ice#how to get rid of hickies fast in a day#how to remove a hickey in seconds with toothpaste
0 notes
Text
9 Best Tea For Sore Throat
9 Best Tea For Sore Throat
Sore throat hurts. It results from various factors by which adverse weather conditions play a major role. I have carefully selected the best herbal teas that can help you manage well your sore throat. Asides that, these teas are marvellous when taken in cold weathers.
Weather for two sucks. You’d feel like inviting your fiancé(e).
But you understand how you have no option than to be…
View On WordPress
#Best Tea For Sore Throat#Best Tea For Sore Throat and Cough#peppermint tea for sore throat#sore throat tea recipe
0 notes
Text
The Ultimate Guide to Shark Tank Weight Loss in 2020
The Ultimate Guide to Shark Tank Weight Loss in 2020
Have you been dreaming about losing your weight? Here is a breakthrough strategy that’ll make that come true. Shark tank weight loss is a Keto diet that assists every user to lose any amount of weight he’s ever dreamt of ever depleting.
You’d have searched all web to arrive at certain solutions to cut your weight. All that use this testify about how impressive it radiates their dream shape…
View On WordPress
#shark tank weight loss#shark tank weight loss drink#shark tank weight loss pill#shark tank weight loss product
0 notes