
Don't wanna be here? Send us removal request.
Statistics
We looked inside some of the posts by gdadp2 and here's what we found interesting.
Average Info
Notes Per Post
2
Likes Per Post
2
Reblog Per Post
0
Reply Per Post
0
Time Between Posts
10 hours
Number of Posts By Type
Text
17
Last Seen Tumblr Blogs


Fun Fact
If you dial 1-866-584-6757, you can leave an audio post for your followers.
Text
Gameplay questionnaire and feedback
Responses:
Did you understand the control system for the game?:
Everyone said yes.
Is the objective of the game clear?
Most people said that they just wandered around, and one said if I had pointed the levels finish out, they wouldn't have noticed.
Can you hear audio in the game?:
Everyone said yes.
Does the audio have an effect on the gameplay experience?:
Everyone said things along the line of "not really".
Feedback or suggestions:
Everyone said things along the line of "finish the game", one person said to make objectives clearer.
0 notes
Text
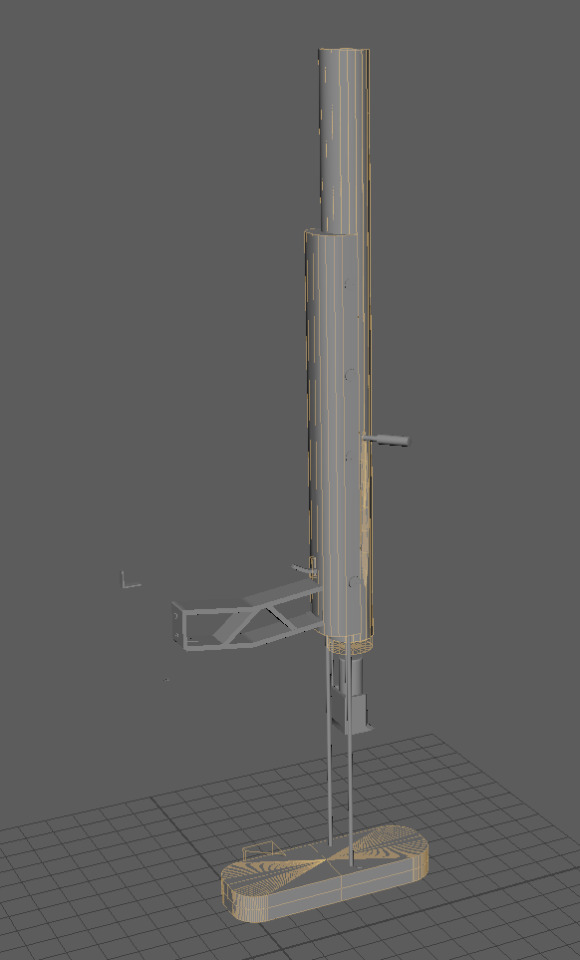
Modelling the 3D Improvised Shotgun
I started the 3D model by modelling the barrel, a simple cylinder that I hollowed out with a boolean. I then immediately moved onto sticking a handle onto it, which didn't work very well and look very bad, as it was literally just a cube attached to the barrel:
(Artists interpretation, not what it actually looked like, I forgot to take screenshots but you get the gist.)
Instead of just a barrel and a grip, I removed the grip and added a forestock instead, which is the wooden part a barrel will rest on. This was done with a stretched cube with a bevelled face, creating a curve on the bottom. Unfortunately, this did mean that the forestock clipped inside the barrel. Next, was a better grip. Instead of a typical pistol grip, I decided to use a hollowed out skeleton grip instead, because it would add to the style of an improvised gun, and it would arguably be easier to create. I did this bar creating a cube, shaping it the right length and thickness, before giving it a curve and duplicating it for the second side. I created a second cube for the bottom piece, added another two for reinforcements on the inside of the grip. and also some brackets to add to the look:

I decided to add some screws to the model just to make it look even more improvised. I did this by flattening a cylinder to the right size, and cutting some lines to create the drive recess. Instead of pushing the middle down, I extruded the two faces on the side of the drive up instead, as when I pushed the face down normally, it would create a slope, and when I extruded it down, it would clip with the faces on the edge of the screw. Now I had something that looked like a screw, I duplicated it and kept adding them to places I thought it would fit, changing the rotation each time to make sure it doesn't look completely copy and pasted. Next, I fixed the clipping between the barrel and the forestock, I cloned the barrel again, linked it as a boolean with the forestock and stopped it from clipping inside the barrel. I probably could've added it to the already made boolean, but I didn't think of it at the time.

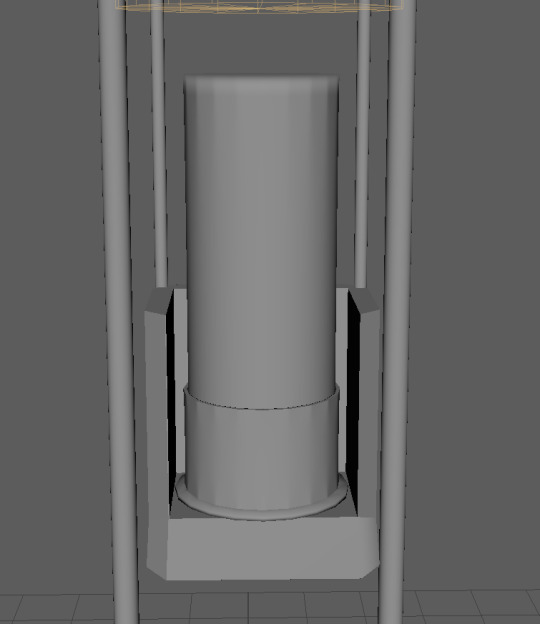
Next, was the stock. What I had in mind for this, was a simple wooden block attached the gun with some metal rods and maybe some springs on said rods so it'd compensate/absorb recoil or something, I added a cube for this, bevelling the ends to get a curve, and using two long duplicated cylinders for the metal rods. I didn't know how I could of added anything like springs, so I had to leave that out. To stop the stock from just being a really basic block of wood, I used some cubes and some booleans to kind of cut some wear and tear into the stock.

I added a charging handle to the gun, which was surprisingly more complicated than I thought it would be. The first version was two cylinders, one slightly larger than the other. When I tried to rotate and enlarge the handle, the two cylinders moved differently and ended up seperately, which was irritating. Maya crashed shortly after I tried to add a boolean, so when I reloaded and found that the charging handle was gone, I remade it again, this time using one cylinder and some extruding. To create the port where the charging handle is, I stretched a circle and made it a boolean, cutting the barrel to make the indent. After I took this screenshot, I also added some basic cubes to fill in the ends to make them look better.

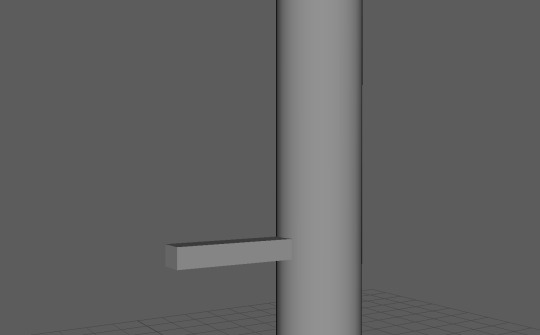
I modelled the shotgun shell by creating a lot of divisions of a cylinder so I could extrude some faces and the right length near the bottom. I extruded this face twice, with the first set of faces also getting extruded upwards to create the base. Next, I created a loading mechanism in the back of the gun. This was done by cutting three edges and extruding them to create a little part where the shell could sit. I added two metal rods, via cylinder, attaching the loader to an unseen loading mechanism inside of the barrel.
It is certainly rough around the edges, but considering this was maybe the 5th thing I ever tried to 3D model, I think it was at least a decent attempt. However, this was ruined, as when I tried to import it into UE5, every single component imported as a seperate asset, and I didn't manage to fix this before the project deadline.
0 notes
Text
Modified zombie asset

I got this free asset online and decided I could use it instead of having to create a character from scratch. However, this didn't fit into my idea of a blind enemy so I decided I should modify it a bit so that it did.

I did this by spawning in cylinders, and continually moving and extruding the top face, then making the face smaller, and smaller at the top until it became something similar to a horn. I did attempt to add more complex horns, specifically something on the fore arms, similar to Mantis Blades from Cyberpunk:

But more like organic growths, rather than a mechanical thing. For this, I tried using a cube and a cylinder this time, with the cylinders max sides reduced, to make it more like a triangle. However, I found that fitting the cube and the triangle together, while trying to make it look natural, was a bit difficult, making the triangle look like a curved blade was also difficult too.
I figured I'd altered it enough, even with only the horns on its head, so I decided to leave it there. I'm aware that it is only a small modification but it's enough to fit into the gameplay aspect of a blind enemy, and that's good enough I guess.
I did not manage to import into my game as my modifications imported as separate assets and I didn't manage to figure out how to get around/fix this in time for the project deadline.
0 notes
Text
The finished product
I'm kind of pleased with the 3D assets I've created, but not with my actual game. I didn't manage to put any assets I made into my game, which makes them kind of useless. I had the assets finished but I had issues exporting them. The gun, for example, was importing itself as all the individual pieces, and I did not manage to get around to fixing this. I had a similar problem with the zombie model, all the modifications I'd made, were importing themselves separately.
youtube
In the actual game, very, very little has been done. I created a start and an end, a greyboxed prototype level, some mechanics related to movement, (crouching and footsteps, which aren't included in the video, not sure why.) and a simple torch. As of now, all there is to do, is walk from A to B. There is no monster, and by extension, there isn't really a game.
Overall, I'm not very pleased with my game, as a lot of time was wasted on redundant things, like 3D, with very little progress being made on my actual game. Once again, like last project, I tried to do too much, but this time, I didn't even manage to get a solid foundation.
0 notes
Text
Choosing/modelling the player's weapon.
I actually put quite a lot of thought into choosing the players weapon over the start of my project, which, looking back now, I find it quite suprising that I did actually put so much thought, maybe too much, into it.
The first weapon - The PM/Makarov

I think this gun is one of the first you think of, when you think about soviet/post apocalyptic weapons. It's in quite a few different games, set in/around Russia, or in an apocalypse. Games like; Into The Radius, Tarkov and S.T.A.L.K.E.R..
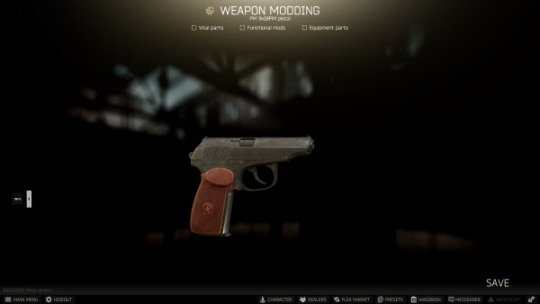


I did start 3D modelling this, but at most, it was just a couple of blocks slapped together. Instead, I picked up on this 3D model and was going to use it:

But I decided not to, for a couple reasons, which I'll explain now. At this point, when I had this 3D model, I was off for the weekend before I had the opportunity to implement it. Over the weekend, I played 2 games, Marauders, and Holdfast. In Marauders, I mainly used a small pistol, similar to the Makarov. I found that every firefight I'd get into with this pistol in Marauders, felt kind of spammy, and like my shots didn't really have much force behind it. Then, later when I played Holdfast, I used a musket. When a musket is fired, it takes a long time to reload. I found that this adds a lot more of a reason to think about your shot placement, instead of randomly firing in a direction.
I decided that I wanted to add something like this to my game, and avoid having something like the pistol from Marauders, as while this works perfectly well in the extraction shooter, high paced format, I didn't feel like it would compliment my game. So, with these loosely defined ideas in my mind, I decided on using a different, iconic, soviet weapon, that ticked the right boxes. This was:
The second weapon: The Mosin Nagant.

Being a gun that was aging even in WW2, the Mosin Nagant rarely makes many appearances outside WW2 media, and as a low tier sniper rifle in shooters.


But it did make an appearance in the, I guess, pseudo-apocalypse game, Hunt: Showdown, in two forms actually, one of which, I'll talk about next.

The Mosin Nagant is a bolt action rifle, which is why it's probably stuck as a low tier sniper in some games, but this is a pro for me, as it allows for gameplay that is more tense and strategic.
I started to model this gun next, and as I was trying to figure out the right length for the barrel, I realised, what is the player character doing? Lugging around a full length rifle in a cramped building? Is he dumb? So I decided, once again, to switch out the gun yet again, Luckily at this point, It was literally just a cylinder, so no work was really lost.
As I was trying to think what gun I could possibly use now, I remembered that Hunt: Showdown had a second, shorter variant of the Mosin Nagant. And so, we move on to yet another weapon:
The third weapon: The Mosin Nagant "Obrez"

An Obrez is the Russian word for a sawn off firearm, and in English, it's a loan word, typically used to refer to the Mosin Nagant Obrez, a weapon mainly used by criminals and partisans who needed a concealed weapon, and couldn't get a handgun. While other guns were used to create Obrez, the Mosin was very cheap and easy to obtain around the peak of it's use, so it has become near synonymous.
The only game I know to have featured an Obrez is Hunt: Showdown.

I decided, this time, I'd use and modify a pre-existing Mosin Nagant model, and make it into an Obrez. (which is pretty ironic looking back) I picked out this model and I got to work, desperately trying to make it work.

I tried removing the whole barrel completely, I tried removing the middle of the rifle, saving the barrel to re-attach it. Whatever I did, the disparity between the base model, and my crude attempts to modify it were incredibly obvious and ugly, and after a couple hours of trying to make it work, even trying to make one from scratch at one point, I decided, once again, it was simply not going to work with my current set of skills. I contemplated just ditching all the choices I'd made that got me here, and just using a base model of a gun that would kind of work in my game. But, I had a pretty good idea. If when I try to make or modify a model, it comes out really ugly, why don't I try to make that ugliness fit in with the design in the first place? And what uglier gun is there than...
The fourth weapon: The Improvised Gun
...the pipe guns from Fallout 4!
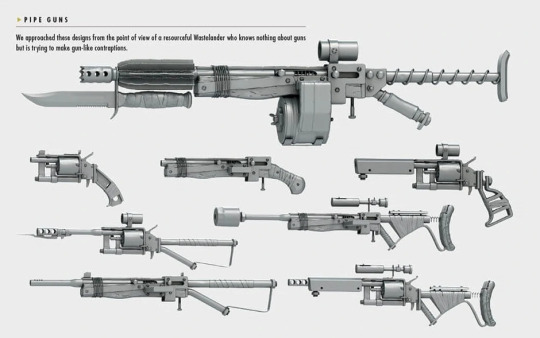
In Fallout 4, there's a whole class of pipe guns. All of these are improvised guns, made from wood, pipes and scrap metal, and it'll be easy enough to create something similar, right? Well, for some reason, I decided that this was too simple, and I needed more inspiration from elsewhere, so I decided on the slightly-more-complex-but-still-improvised-and-post-apocalyptic-and-also-easter-european-y weapons from the Metro series, specifically the two shotguns in the series' third installment, Exodus, the Ashot and the Shambler.

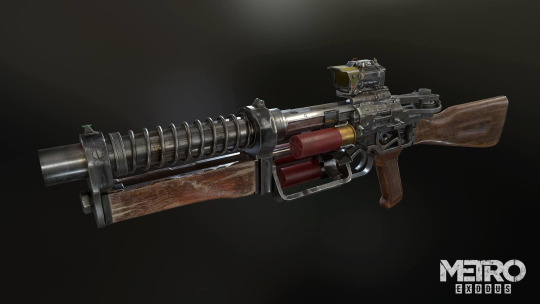
With fresh inspiration and newfound faith in my philosophy of "It's not ugly if it's supposed to look like that", and maybe a bit of pressure from the fact that I'd spent way too much time on this, I finally managed to get some decent progress, and, eventually, create a finished, half-decent 3D model. The gun I've now named (during the writing of this post) "Ol' Bearable", as it's just bearable enough for me to have some sense of pride in it.

2 notes
·
View notes
Text
3D cassette model
For a workshop, I had to create a 3D cassette model in MAYA.

First of all, I had spawned and shaped a cube into the rough shape of a cassette tape.

Next, I created some mirrored lines, created an intersecting line and pulled the vertex of the shape:

Extruding this new diagonal face I've created, I now have made the small raised part at the top of a cassette tape.
Next, I added some extra cubes, shaping one of them to be about half the size of the tape, and inserting it into the shape, about half way. I also added two small, identical cylinders and another cube that was a lot small, but went all the way through. Now, starting with selecting the base cassette, I selected all the parts, and used the boolean tool, which made all the extra shapes cut the base shape, adding details.
Next, I added a cylinder and increased it's face count to 21, which would help for adding in another detail. Using the boolean tool again, and a duplicate of one of the long cylinders from earlier, I added a hole in the the new cylinder.

I then extruded some of the faces, creating spurs in the middle. Duplicating this, I inserted them into the cassette tape, so they looked like the spools of tape.
Now, I had it assembled, and could now bevel the cassette tape, giving it a smoother, cleaner look. I selected all the edges I needed to bevel and used the tool. At this point though, MAYA decided to crash, and whenever I tried to recover the file, it crashed again. So, I had to completely restart the model, which wasn't great.

This time though, I did manage to bevel it, and finish it, without an issue. I think it came out reasonably well.
Now, I would've edited the UV map and added textures and colours. But thanks to MAYA crashing, I missed out on that part of the workshop.
0 notes
Text
Config file corrupted
Loaded up my project to add some finishing touches, but UE5 loaded into a completely different map that I hadn't made. I managed to dig around and open my actual level, but that had problems too. The screen was completely white, switching to unlit mode, I was actually able to see, so it was a problem with the lighting. I also noticed that an object I'd placed down yesterday had now duplicated itself multiple times around my level. I checked the different lighting effects and found that post-processing was the culprit behind the white screen, so I created a new, fixed one. I then deleted all the duplicate objects (still don't know why they were there)
I looked through the project files, and windows told me that the config folder had corrupted, meaning my settings for the project had been screwed up, I tried deleting the config folder to reset it, but I couldn't for some reason. Instead, I made a new blank project and migrated all my content to it. It works, for now at least
0 notes
Text
Ethics in my game
Things that could be seen as issues in my game:
Horror/fear: You are being chased/fighting against a monster
Violence: You do have to fight back against the monster, and the monster will attack you.
Guns: The player is given a gun.
Apocalyptic: The game is set in a post-apocalyptic setting.
Obviously a lot of these thing are fairly touchy subjects, with many saying the representation of guns and violence in games is desensitising. I think the apocalyptic setting could be seen as an issue because apocalypses are fairly hopeless and depressing. I personally think that as games aren't real, and as long as the more sensitive games are kept away from the impressionable, most things are ok. As for the gold standard of ethics in games, I think ArmA 3 is one the best example of how games should deal with real issues depicted in their games, with the Laws of War DLC they released.
As well as having the proceeds from the DLC go towards charity, it attempted to educate and inform the players of the game about the real life consequences of actions they might be doing without a second thought in their games.
0 notes
Text
PEGI ratings of similar games.
Alien: Isolation
18. The game was rated PEGI 18 for some occasional strong violence and strong bad language.
Amnesia
16. The game was rated PEGI 16 for sustained depictions of death or injury and the use of an expletive.
Metro: 2033
16. Contains frequent moderate violence, strong language and scenes of alcohol use.
S.T.A.L.K.E.R.: Shadow of Chernobyl
16. Violence and drugs.
Dead Space
18. This rating has been given because it features graphic violence and use of strong language.
0 notes
Text
Influence on player behavior:
youtube
The chests in Fortnite use a memorable sound, that draws players towards it. It's designed to be recognisable, so it'll draw in players and create fights.
0 notes
Text
Cube grid
The cube grid tool is a really helpful tool to quickly create greyboxed levels.

In modelling mode, select the cube grid tool and select and area.

Now, you can pull cubes;

Or push cubes.

It's pretty simple to use and you can create pretty good levels just using it.
0 notes
Text
Footsteps and crouching code

This code works by playing a random footstep from a library with random delay and pitch to add more variation. Every tick it checks if the player character is moving, and if they are, it delays for a short time, then it plays a sound. There was a problem with the first version where if you stopped moving, sometimes a footstep sound would go off about a half second after you stopped moving. This was because the the delay might still be running after the player stops, causing the late sound effect. To fix this, all I needed to add was a second movement check after the delay.

This code works by utilising UE5's inbuilt crouch function. However, I did have a problem with making it a toggle, that crouches when you press it once, and uncrouches when you press it again. To fix that, I just used a really simple variable and branch system, where it just changes the boolean "crouchable" when it's pressed once, allowing it to switch functions when it's pressed again.

Lastly, I edited the footstep code to use a quieter range and slower delay when crouched, by adding some extra branches here and there.
0 notes
Text
Cognitive Processing
A lot of games use sound cues to hint/warn/encourage the player. In stealth games, MGS for example, the player may hear footsteps from enemies when sneaking around. These enemies may also create other audio cues too, like saying out loud that they're going to investigate something they heard, or if they found a body, or, in the case of the iconic MGS ! sound effect, if they've spotted the player.
youtube
This is a great video that talks about how FNaF uses audio to alert the player to some occurrences, to throw them off, and to generally make a pretty spooky experience.
0 notes
Text
UV maps
A UV map is a 3D mesh that has been transferred to a 2D image


0 notes
Text
Quixel Bridge usage in games
I personally think that texture and asset libraries can be really helpful for devs, and is a good thing as it helps devs spend less time with high quality results. Should the game become shovelware or a asset flip though, it's not as good of a thing.
0 notes
Text
Quixel Bridge & Megascans
Quixel Bridge is an tool that is used to import/download and use the Megascans library.
Megascans is a library of 3D scans and textures of objects and vegetation taken from years of scanning.
0 notes