
Don't wanna be here? Send us removal request.
Statistics
We looked inside some of the posts by georgedunmorefmpyr2 and here's what we found interesting.
Average Info
Notes Per Post
2
Likes Per Post
2
Reblog Per Post
0
Reply Per Post
0
Time Between Posts
7 hours
Number of Posts By Type
Text
17
Last Seen Tumblr Blogs


Fun Fact
Tumblr was the first site to host the blog for President Barack Obama in 2011.
Text
Feedback Online
I posted the link to my YouTube video of my scene render on Reddit, Discord, and a couple of Facebook groups to try and get some real good feedback. From Facebook, I have heard basically nothing besides a few likes and one person commenting with emojis.

From Reddit its the same story with literally no responses and just a few upvotes:


Lastly I posted this in a few discord servers and here are some of the responses I got!
Dms with online friends:


OFFICIAL UNREAL DISCORD SERVER: 1 Response

OFFICIAL BLENDER COMMINITY DISCORD SERVER:

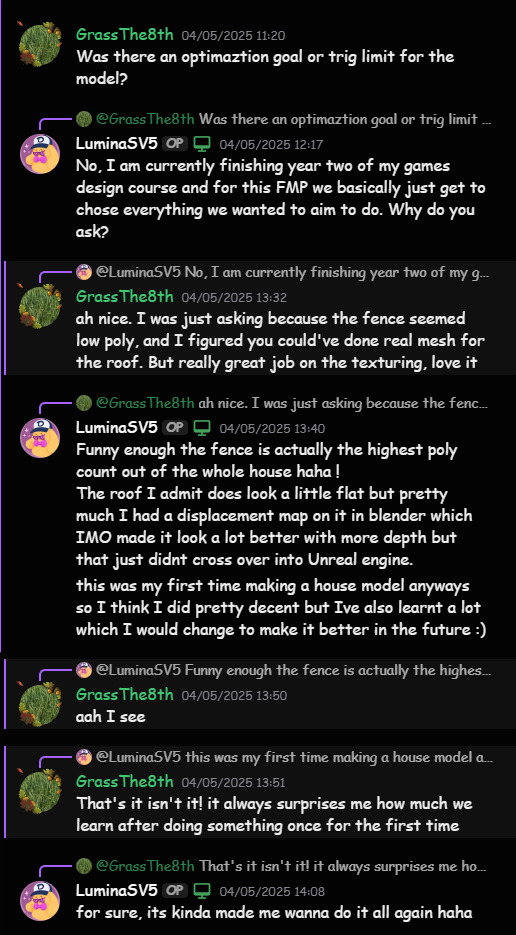
^ First real constructive critisim here which I found really useful, they mentioned how the roof would have potentially looked better if it had actual tiles and that the guard rails looked more on the low poly side.

^ I also helped someone out here who had a couple of questions about the project ! :)
And here was the last response I received in a community discord I'm in:

Overall, I got a decent amount of positive feedback and a small bit of constructive criticism that I will bare in mind for future projects ! :)
0 notes
Text
Goals for Today 06/05/2025
Finish writing up ALL remaining Blog posts (building scene etc.)
Write a short blog post if time on feedback I have received online.
1 note
·
View note
Text
Portfolio setup
I went onto my portfolio that I had previously set up on Artstation, which I used for presenting my work in my University interview. I created a new project and then put all of the links (YouTube and Sketchfab) and renders onto there. From my previous research, I found that most people on their portfolios were placing their Sketchfab models at the bottom with all their high-quality renders above. None of them had a scene really like I did so I thought it would be best to put that video in at the top to be like the "Main Attraction".

Adding Video:

Changing order:

I then set up the categorisation tab, I added the software packages I used at the bottom along with the correct tags for what my project it.

After that all that was left was to just write a nice little description of what the project is about:

"This piece is my Final Major Project for my Year 2 of Games Design and Development Course at my College. We were given complete creative freedom with this project, so I set out to design an abandoned Suburban American house set in a post-apocalyptic world/theme. I used Poliigon to source my materials and Quixel Megascans to build my environment."
The last step was to make a thumbnail or portfolio cover (I don't know what you call it) so I had a quick glance at what other people do for theirs.


^ the main thing I noticed is that they include the main piece(s) of software they used to create their scenes in the picture so for me I think I would include both Unreal and Blender just like in my youtube thumbnail:

Here is how my portfolio page looks now:

Here is the link to my page:
0 notes
Text
Goals for Today 04/05/2025
Setup Portfolio page on Sketchfab to showcase my work
0 notes
Text
Final Video
Here is the final video for my project to showcase all of my work on this house. I am super happy with how this has turned out and will be posting this online in places to hopefully receive some feedback! :)
youtube
I also made the thumbnail from a high-res screenshot I took in my UE5 scene and then added the UE5 and Blender logos to it as I think this is a nice way to credit the software packages I used. I also noticed other people using it in their thumbnails to. e.g.


0 notes
Text
Editing Cinematic
So my plan for editing this is I want a Fade in and Fade out and to add some nature sounds to the background like birds chirping, wind, and trees bustling. I then found these copyright-free sounds on YouTube to put in the background:
youtube
youtube
^ I used Audacity to record them both at the same time and adjusted both of their YouTube volumes until I was happy with the audio balance :)

I then made some slight adjustments to my movie sequence and rendered it out again, I made the whole scene 5 seconds longer to allow for a longer camera hold at the start and end. I did this as I wanted to allocate that time to allow for the fade in and fade out effects.
My chosen software I will be using is Davinci Resolve as I am familiar with it from when I used to create Youtube videos many years ago so I know how to get this fade in and fade out effect.
I then set up a project and got my video imported in:


^ You drag this little white dot along the video until you are happy with the duration of the fade in or fade out. I really like this as its such an easy way of doing it without any complex plugins or effects methods.
The next step was to add the background audio which was going fine until I played the video back and the audio was only coming through one ear. I went straight to youtube and found this video:
youtube
I then had to right-click on the audio track and change its clip attributes to change the audio format from mono to stereo and change both source channels for the left and right earcup to embedded channel 1 (all shown in the images below):
BEFORE:

AFTER:

Now that Im all happy with the video the last step was to export it. I found this video below which walked me through how to do so in the delivery tab:
youtube
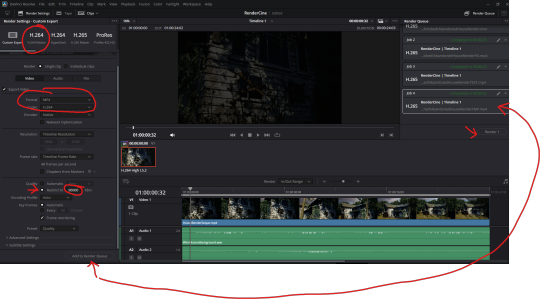
^ I had to change the codec to H.264, though as 265 I had to pay for a Windows extension to view it, which I think is stupid so I just used 264 and I still got a really good result.
NOW, After rendering out the scene something just didn't feel right to me like something was missing so I went on youtube and watched a couple of videos of people showcasing their work and this one stood out to me:
youtube
^ BUG NOISES!!! That was the thing that was missing! Crickets and grasshoppers were the missing parts of my scene as it is just so simple. I have long overgrown grass but no bug sounds? it just explains why something felt so out of place.
I then found this audio which I really liked a lot which added in some missing wind sound effects and bug noises:
youtube
I then added that into the track and rendered the video out again once more.

0 notes
Text
Goals for Today 03/05/2025 + Yesterdays Outcome
tweak movie sequence
edit movie sequence in davinci
post cinematic
------------------------------------------------------------------------------
Overall I am really happy with how yesterday went, I was able to build an entire scene and render it in a movie sequence in one day and have a really good base to make any small adjustments off of.
0 notes
Text
Setting up MP4 Movie exporter UE5
It was towards the end of the day now and I was running short on time but THANKFULLY the youtube algorithm gave me this great video that shows me how to setup an MP4 exporter so I DIDNT have to find out a way to manually put all of those frames together.
By default UE has no video encoder for exporting stuff so you have to add this piece of software to it called ffmpeg, which is a free and open-source software project consisting of a suite of libraries and programs for handling video, audio, and other multimedia files and streams. At its core is the command-line ffmpeg tool itself, designed for processing video and audio files. You add its .exe to you project settings and then add a command line encoder to my rendering output:

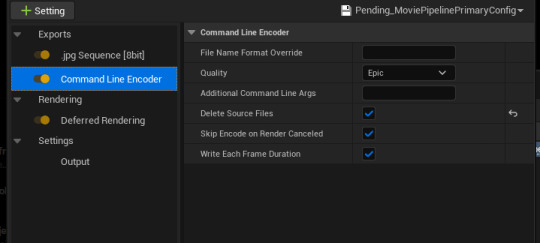
then when I pressed render I was delighted to find an MP4 file. I then tweaked a couple of settings in the output section to make the video 4k and increase the framerate as my first render was too blurry and the 24fps made it feel super choppy in my opinion:


Here is the test render for my first iteration before any editing:
youtube
Source:
youtube
0 notes
Text
Creating a Movie Sequence
So at one of the last sections in the tutorial it shows you how to:
Create a movie sequence
render the sequence
Add camera effects
To do this I had to create a Cine camera in my scene with the actors tab. To switch to the view of the cine camera I can select it in the perspectives tab:

after this I had to create a level sequence which is where I will be setting the keyframe for the cameras movement.

After opening it up I had to select the cine camera in the track section to be able to use it with that level sequencer and then set the framerate and track duration (times the framerate by the amount of seconds long I want the clip to be).


After this I set my cine camera up at the right side of the house, I did this as to me it makes more sense to start from the side I put a lot of time into modelling and texturing rather than the left side which I didn't. Plus I think this will flow a lot better into the front view of the house and it gives my camera the chance to stay still and focus in on the side of the house for a few seconds:

^ I placed the camera just at the top of the grass as it becomes blurry and out of focus which I think creates an overall really cool effect.
Now to lock that in as a key frame I had to press the little plus Icon for both the location and rotation, with my timeline lined up correctly at the start of it.

I then repeated this same keyframe a few seconds later in order to keep the camera in place so you arent INSTANTLEY moving as the video starts. After this, I moved the camera towards the front of the house and repeated the same steps for creating its keyframes and I duplicated them again to allow for it to hold that final frame:


Now, the last thing to do was add some camera shake. I added the blueprint camera shake shown in the video and just copied all of the settings he showed me to use. The only thing I changed was the multiplier for it increasing it slightly more as I didn't like how little it was the way he did it and then the last thing to do was add it to this sequence the same way I added the cine camera.

I originally had this camera shake running for the entire track but I got my mums opinion and she said it became too distracting for the final shot. So she recommended me stopping it just as the camera moves away which I didn't like as it felt so sudden, I then made istop just as it passes by a tree which is a lot cleaner of a transition in my opinion:

Now all that was left was to render this out by clicking the movie render button:

this then bring up this menu where you can customise the render config:

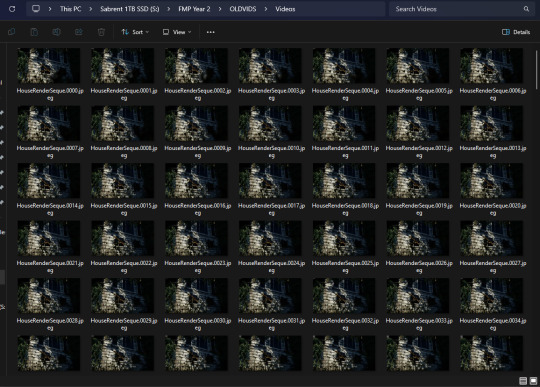
I kept everything as is besides the location it will save to and then pressed render. This is where I encountered an issue of the render only exporting as still images JPGs and not like an MP4 or anything which is super annoying. I then googled and found a solution to this in the next post I am going to make.
Source:
youtube
0 notes
Text
Adding a HDRI
A section of this video goes over how to add a HDRI to my scene, I followed along and used a different one as to before because I felt the previous one was to "grey" for the current lighting, not showing off all the houses details.
HDRI USED:

Pretty much you create a sphere, make it not cast any shadows, then create a double sided material and add it to that sphere is the simplest way I can put it. Here is the code:

Here is how it looks in my scene:


Source:
youtube
0 notes
Text
Building My Scene UE5
Okay, so first, I had to set up a brand new project. I used a blank film template for the first time as I feel like this would be more configured to what I intend to make.

After this, I added a landscape to my scene in the landscape drop-down menu:

I then browsed on Quixel Bridge for ground materials, and I ended up finding one I really liked until I realised that Quixel Bridge no longer works and there's a new Fab Plugin for unreal that works basically the same. THE ONLY ISSUE IS that the material I wanted is not listed ANYWHERE on Fab, so obviously it got lost in the transition.

after this, I was then tasked with having to find an alternative material that I matched the one shown above as closely as possible. I ended up coming across this one which I liked a lot:

now that I had this material I imported it using the fab plugin and then applied it to my landscape material which gave me this:

I wasn't super happy with this because of the repeating textures, so instead I went to YouTube to find a way to hide this in UE5 and got a really good video. It worked by blending a bunch of noise maps and vector parameters with the original material to create a 'smoother' landscape. Here is how the landscape is now looking:

Video Source:
youtube
I then added my house to the scene to get a better idea of how it would work with the landscape material:

Next, I used the lanscape sculpt and erode tools to give the landscape some shape, as I just didn't have the time to figure out how to add a height map to the terrain and ended up with this:

Next, I wanted to do a little bit of research, I had been saving to do with how I was going to approach painting my foliage and that was to gather a reference sheet of abandoned Detroit homes. Detroit has many abandoned and burnt down homes because of a mix of an economic decline, people suffering job losses and social issues. The city used to be a thriving place for car manufacturing but factories gradually moved or shut down, which then caused mass unemployment. As the jobs disappeared, people then left the city looking for employment elsewhere, which led to a shrinking population. During the 2008 financial crisis, many homes were foreclosed and left empty. I then found on top of that, Detroit became known for arson on "Devil’s Night" (the night before Halloween), where people would set fire to abandoned buildings. In 2013, the city went bankrupt and had to cut essential services like fire response, making things worse. Efforts have been made to demolish or rebuild, but the damage remains widespread.
Here is a some anaylsis I made on a few home examples:

I found this video here which shows off the devastation left behind:
youtube
This house in particular stood out to me by how much nature had overpowered it:

^ like the house is barely visible here and I think I wanna do something similar with the neighbouring houses to my main one being consumed by like the trees.
For trees I already had them added to my project from a previous blog post but the foliage for grass I didn't. Here are the main ones I used:


So all that was left was to paint the foliage in. I painted each pack individually so I could adjust the density for each to fit accordingly (did the same for the trees):

I started with the long grass as the base then painted everything else in to blender well with it afterwards:

I ended up making lots of use of the Kangaroo Paw as this really went well with my desired overgrown look (best bit foliage in my opinion, big and dense).
Here is a close up of the foliage all painted into the ground:

^ I am really happy as its super diverse and looks very believable.
After this I added the other neighbouiring houses to the scene and placed them off to the side like I said I would (hidden in trees) previously:

Next I sent a screenshot to my friend to get their opinion on the scene so far and they said they loved it expect for the house being too small compared to the trees.

I took another look and realised that was definitely off with the house so I upscaled the size of it.

Here is a wide shot of everything painted in:

Next I added some vines to the house as that's what I originally planned to have covering areas.

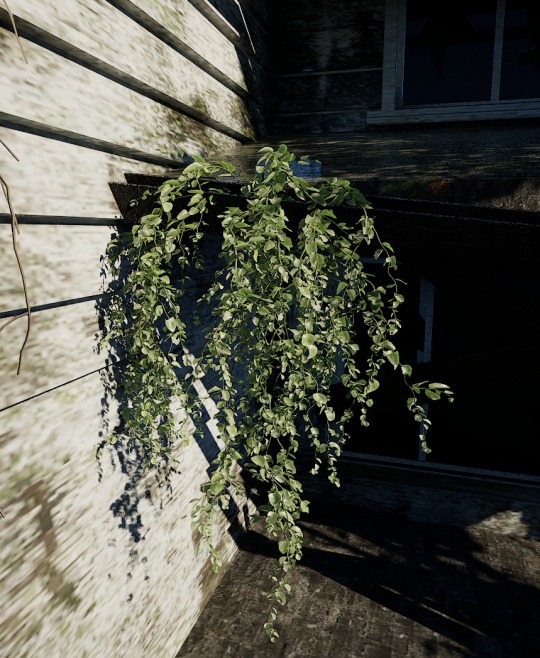

Here is my whole scene built now:

Here is a path traced high res screenshot of my scene:

Overall, I am really happy with how this scene turned out, considering I managed to build it in one long day. If I had more time, I know I could've made it even better in terms of foliage distribution and potentially lighting but overall, what I have meets my minimum expectations.
0 notes
Text
House Setup UE5
So when it came to getting my house into UE5 I had to start by exporting my model as an FBX. Once into UE5 some of the houses textures crossed over (only base colour and roughness) while others didn't (Normal Maps and Displacement Maps) so I just had to drag and drop them in.
Here is how the general setup went for each material:

^ I didnt end up using any displacement as when I would try to add it to the material the texture would be moving on the house? I didn't really understand this so I thought it was just best to leave it how it is.
And with this same process repeated for each material this is what I ended up with:

0 notes
Text
Baking Textures (Again)
So I'll keep this simple. Pretty much I had to rebake all the textures again but for UE5 instead this time I needed the normals etc so I came across this video which helped a lot and showed me how. It was as simple as swapping out the bake diffuse for a bake normal or bake roughness.
youtube

^This is how it turned out. While not as good as the procedural textures in Blender it will still look adequate enough in Unreal due to me being able to set up a displacement map.
0 notes
Text
02/05/2025 goals
Bake all House textures (Normal, Roughness, Base Colour and Displacement)
Setup house model with textures in UE5
Build Scene
Create Cinematic if time
0 notes
Text
Tree Research
This is just going to be a post where I am going to identify what types of trees are found in these Suburban American areas along with finding a tree pack that matches this as closely as possible.
I found this website which listed some common trees:
it lists these trees as being the main types:
American elm

sycamore

sweetgum


horse chestnut

linden


I found this really cool tree pack on Quixel Megascans which I believe works really and matches closely the detail my house has and matches the types of trees found in suburban American areas.

^ Has a nice variety to ensure my scene doesn't appear too "sameish".
0 notes
Text
What to do now
So this is just a short update post on what I am going to do now. As shown in the previous post I am suffering with really bad performance in Blender which is leading to no progression in building this scene. I think its best I bite the bullet here and switch over to Unreal engine as I know I can build this scene pretty fast with minimal issues.
I found this really good video which covers all the areas of setting up a HDRI in UE5 to making a camera movie sequence.
youtube
0 notes
Text
Grass Development
OKAY ! so this is a post for me developing my grass. In my Blender scene. I first started with this video which utilises the Gscatter plugin. Pretty much this plugin will spread pieces of foliage across a plane kinda like how you paint foliage in ue5 just with extra steps:
youtube
After setting this up, I encountered some major performance problems because of how dense I wanted to paint the foliage but I did try something by shrinking the whole scene as my thought was that there would be less area to cover but I was wrong as I had to resize the foliage, which meant having to paint is just as dense.

I decided to abandon this idea and look elsewhere. I came across these tutorials on how to make grass fast with a hair modifier:
youtube
I then subdivided a plane and usesd the sculpt tools to change the plane/landscape to fit around the road piece I made:

I then added the modifier and set it up exactly how the tutorial showed, and was unfortunately met by this:

Obviously, this isn't what I want, and I figured out that the more you scale the plane up, the wider the hair pieces become, so you basically have to have really small planes, or you will have a very unconvincing grass effect.
So, I first wanted to see how you set up a HDRI because at this time, I was pretty convinced I was going to be able to get the grass working. I then proceeded to find this video that quickly showed me how to add a HDRI to my scene.
youtube
I looked on Polyhaven as that was one of the first results that popped up for free hdris. I tried a couple of different options but eventually landed on this one:

After following the short tutorial (dragged and dropped HDRI into the side panel), I then tried using an array modifier on the grass plane to cover the area to have realistic grass, as previously I mentioned it needs to be dense, and YET AGAIN I encountered performance issues due to the grass's density.

^ This is how it looked with what I could manage to screenshots due to the such bad performance. Overall, I think there is gonna be to be a lot of rethinking if I am going to make this project work.
1 note
·
View note