
gunblade-revolusio
Gunblade Revolusio - PSO2 Global Info Hub
A variety blog for information on PSO2/NGS that caters towards the Global server, with a focus on the practical rather than the theoretical. All information is researched and cross-referenced from trusted sources such as the JP strategy wiki.For information regarding an alliance on Ship 1, or if you just want a direct line towards the blog admin on Discord, there is information on both of those [here].
66 posts
Last active 4 hours ago
Don't wanna be here? Send us removal request.
Last Seen Blogs


Link
On today’s episode of “where have you been?”...
I have added a lot - a LOT - more spreadsheets to this. It basically encompasses an entire network of janky resources now.
What was first just a weapon comparison sheet and a basic augment guide has turned into this:

The more and more time passes, the more I understand I’m just not consistent enough to run a blog...
I’ll probably let the domain registration for the standalone URL run out and change goals here. I might only make update posts when new equipment series and augments come out, rather than try to focus on class guides...
I have a friend who’s working on making resources that don’t rely on Google sheets to function, as well, so I’ll plug that once the time comes!
and to go with the augment guide, here’s a weapon overview sheet.
as time passes i will keep this updated with comparisons, so keep it handy!
4 notes
·
View notes
Link
and to go with the augment guide, here’s a weapon overview sheet.
as time passes i will keep this updated with comparisons, so keep it handy!
4 notes
·
View notes
Link
This is a google doc I made a few days back that talks about what augments are good and what augments should be avoided.
Most people just try to sell expensive ones or only focus on Battle Power, so hopefully this is a good resource to help you actually figure out what you should use and why you should use it.
2 notes
·
View notes
Text
Stellar Grace Recovery
A 24-hour long scheduled event that everyone on the ship can participate in.
Find and collect the scattered Stellar Grace pods to obtain rewards such as Meseta, Ores, Mastery capsules, and even Special Scratch Tickets.
Depending on how many you find, combined with how many everyone on the ship finds, you gain extra rare drop rate bonuses for 24 hours after it ends.
Essentially, it is a ship-wide easter egg hunt.
Stellar Grace comes in three types:
The common Blue - 2~4 per sector (but only 1~2 in Lake Halphia)
The uncommon Silver: 2 per sector
The rare Gold: 1 per sector

After collecting 30, the remaining ones will disappear. If you want the theoretically best possible rewards, you should aim to collect all 10 Golds, around 19 Silvers, and 1 Blue...
But this is difficult to do in a reasonable timeframe without a map, and the spawn locations are different per ship. There are also cases where a Gold will only drop two common items, so realistically speaking, it's okay to just grab the ones you run into while doing any daily gathering/farming you want to do.
No matter what, the rewards are still up to luck, so don't worry too much about it.
Mag sonar responds to Stellar Grace pods, but does not distinguish between color.
Item rewards
Each pod drops 2~5 items, regardless of color.
Blue: Monotite; Tetracite
Silver: Dualomite; Tetracite
Gold: Trinite; Tetracite
All pods share the rest of these drops:
C/Might I; C/Precision I; C/Technique I
C/Might III; C/Precision III; C/Technique III
C/Mastery II
Special Scratch Ticket
2,500 Meseta; 5,000 Meseta
Gold and Silver pods are slightly more likely to roll on higher value items before rolling lower value ones.
Rare Drop boosts
When the 24-hour recovery period ends, you then gain a boost to drop rates based on how many were found.
The Personal bonus caps at 10%; and increases by 1% per pod found.
The All bonus caps at 10%, but in increments of 2%. It requires all players combined to find over a hundred thousand of them for the full boost.
Reward information taken from SWiki: https://pso2ngs.swiki.jp/index.php?ワールドトライアル
1 note
·
View note
Text
Gigantix and PSE writeups updated
Gigantix is mostly just cleaning up some stuff, but the PSE information is relatively big.
You will basically get a burst every 5 minutes at maximum now.
1 note
·
View note
Text
Preliminary Information
Relik drops in Dustyl Vera and Magead Lower Rank 2.
5* equipment takes 40,000 upgrade EXP, compared to 4* taking 35,000 EXP.
1 note
·
View note
Text
Seasonal Gigantix Drops (November)
According to current research, Eldi Scythe seems to have the same drops as Nogleth, and Ard Banser seems to have the same drops as Oruq.
Nex still seems to drop everything, and Daityl Axe's drops appear to be unchanged.
1 note
·
View note
Text
Gifoie parrying

Uncharged Gifoie has guard frames near the start of the attack’s animation.
If you successfully block an attack with Gifoie from a Rod and you have the Elemental Bullet skill, it will automatically launch the counterattack projectile from Elemental Bullet before the attack animation has finished.
If you already have an Elemental Bullet saved from a previous Weapon Action, however, you will still only launch one projectile.
18 notes
·
View notes
Text
Update to the PSE writeup...
Did some more research on the JP strategy wiki after I had an E marker spawn spike the PSE down from 4 straight to 1. Quoting this page:
https://pso2ngs.swiki.jp/index.php?%E3%83%95%E3%82%A3%E3%83%BC%E3%83%AB%E3%83%89%E8%A8%AD%E5%82%99%E3%83%BB%E6%88%A6%E9%97%98%E3%83%BB%E7%8A%B6%E6%85%8B#pse
“EマーカーはPSEレベルの増減やトライアルの発生に関わりはない。
あくまでプレイヤーがまとまって行動しやすくするための導線と思われる。”
A rough machine translation, combined with cross checking with a friend, comes to this:
“The E Marker has no effect on PSE level nor the occurrence rate of Trials. It seems to simply be a lead that makes it easier for players to act together.”
The PSE post has been updated in regards to this, and I apologize for contributing misinformation.
2 notes
·
View notes
Text
Item Enhancement (NGS)
In New Genesis, item enhancement is straightforward - upgrade the item you want to enhance by giving it material items. However, the cost is generally much higher than it was in classic PSO2, and your money may run thin rather quickly. This is a guide to help you get the most bang for your buck possible while the max rarity is currently 4*.
There is a fairly wordy preamble here about mechanics; use your browser's search function and look for "this is the part you probably care about" to skip down to examples.
Common upgrade materials
Silver Primm - 600 EXP
Drops from Silver-titled enemies.
Matching name 4* item - 900 EXP
Silver Primm +20 - 2850 EXP
Created by feeding five extra Silver Primm items into the base Silver Primm. Costs 10,000 N-Meseta to create.
Matching name 4* +10 - 3525 EXP
Created by feeding ten 3* items to a second 4* item; usually Theseus Armors into 4* armors of your choice. Cost of creation is 40,000 N-Meseta.
3* item +20 - 4100 EXP
Usually a Theseus Armor. Created by combining 15 matching-name 3* items together into the base fodder; costs 45000 N-Meseta if all items are dropped.
This item is technically worth 4287 EXP if created naturally due to overflow going from +19 to +20, but for simplicity's sake I am listing it as 4100.
Gold Primm +20 - 4550 EXP
Only use Gold Primm Sword in weapon enhancement if it is the Gold Primm Sword +20 dropped from Aelio Troopers. Do not merge Gold Primm Swords together as they can be recycled into Augment success rate boosters.
3* item +30 - 7850 EXP
Usually a Theseus Armor. Created by combining 29 matching-name 3* items together into the base fodder; costs 87,000 N-Meseta if all items are dropped.
Gold Primm +30 - 8300 EXP
Created by adding another 7500 EXP worth of items to a +20 Gold Primm. The general path of least resistance is three Silver Primm +20, with a creation cost of 9,000 N-Meseta and 3 N-Grinders. Not really recommended.
4* item +40 - 18100 EXP
This is what our current armors are going to be worth when Retem comes out, but are also the current end goal.
Upgrading a target 4* item to +40
(this is the part you probably care about)
You can either go for the target of 35,000 total EXP without a Great Success, or you can aim for only 17,500 EXP with one.
Do note that this is primarily for users with the resources to dive straight in to +40 - for newer players, upgrading three armors to +20 then focusing on raising them one at a time each to +40 will be a much more powerful use of resources. At +20, items will handily outperform gear imported from classic PSO2, and unlock their third augment slot.
It requires 10,500 EXP to raise a 4* item to +20.
Without a great success - 35,000 EXP
39 matching-name 4* items
If you've been farming for a really long time, this is technically the cheapest option if you have farmed each and every drop yourself. Costs 156,000 N-Meseta on its own but the cost rises exponentially if you have to buy the other items.
Silver Primm +20 (x12) + any way of getting the last 800 EXP you want
Straightforward. Costs 168,000 to create the Primms and then use them, and an extra 4,000 or 8,000 depending on how you get the last 800 EXP; either through a same-name 4* or just throwing two more un-grinded Silver Primms at it. Cost goes down by 10,000 for each run of Aelio Troopers you do.
Same-name 4* item +10 (x10)
Costs a total of 440,000 N-Meseta if you create the materials by hand, but price rises quickly if you have to buy any material items.
3*+30 (x4) + 3*+20 (x1)
Costs a total of 413,000 N-Meseta if you create the materials by hand, including the cost of combining the items into your target 4*.
3*+30 (x4) + Same-name 4* (x4)
Costs a total of 380,000 N-Meseta if you create the materials by hand, including the cost of combining the items into your target 4*.
Gold Primm +20 (x7) + Same Name 4* +10 (x1)
Costs seven runs of Aelio Troopers and 40,000 for the +10, + 32,000 for enhancement costs. Difficult to quantify the cost of it, but when running a lot of Aelio Troopers you’ll build a nest egg of Gold Primms anyway.
This isn’t recommended though; if you have shop access then you get more value of the Gold Primm +20s by selling them on player market and buying basic Gold Primms to exchange for Augment success boosters.
With a great success - 17,500 EXP
Note that this does not take into account any of the costs associated with getting a 100% Great Success booster. If you wish to use lower value boosters, be warned that these methods can and will fail and you'll need to make up the remaining EXP yourself!
Same-name 4* item+10 (x5)
Costs 220,000 N-Meseta if you create the items off nothing but drops, but price rises quickly if buying material items. Very straightforward.
3*+30 (x2) + Same-name 4* (x2)
Costs 190,000 N-Meseta if you create the 3* items off nothing but drops. Also very straightforward and can be passively created through Rig Defense mission inventory compression.
3*+30 (x2) + 3* +13 (x1)
Kinda janky numbers at this point. Costs roughly 210,000 N-Meseta if all material items are created from drops.
Gold Primm +20 (x2) + Silver Primm +20 (x3)
Costs three runs of Aelio Troopers, which may happen on its own when leveling or helping friends level. Enhancement cost is 20,000.
Gold Primm +30 (x2) + Same-name 4* (x1)
It's kinda difficult to put an actual N-Meseta price to this one due to the cost of upgrading a Gold Primm from +20 to +30...
+40 4* (x1)
If a new 4* armor comes out and you want to finally retire an older Vialto Armor. Costs whatever it costed to make it the first time, then another 4,000 N-Meseta for the upgrade fee.
These are all the examples I can personally think of or have been listed on the JP strategy wiki page - if you can find one that’s relatively cheaper, don’t be afraid to share it!
The math behind the madness
The cost per material item is based on the rarity of your base item, not the material items you feed it.
1* items need 1,000 N-Meseta per material item.
2* items need 2,000 N-Meseta per material item.
3* items need 3,000 N-Meseta per material item.
4* items need 4,000 N-Meseta per material item.
Thus, it will cost 20,000 N-Meseta to use five material items on a 4* item, regardless of if those are Primm Swords or if they're Foursis Rifles.
Finally, you cannot use items imported from classic PSO2 as materials.
Experience gain
Experience gained per material item is based on item rarity.
1* items are worth 100 experience.
2* items are worth 200 experience.
3* items are worth 350 experience.
4* items are worth 600 experience.
If a material item has an Esperio-series ability, it will be worth more experience when used.
Esperio I is worth an extra 400 experience.
Esperio II is worth an extra 450 experience.
If a material item is upgraded, half of the total experience it has gained is added to the item's value when used as a material.
If a material item has the exact same name as the base item, it will be worth 1.5x experience.
A Great Success doubles experience gained. The base rate is 10%; boosters add to this at a flat rate.
Thus, with all this in mind, you can figure out how much experience an item is worth as a material with the following formula:
(Base EXP + (EXP gained through enhancement/2) + Esperio) * Same name bonus * Great success bonus
Experience required by rarity
For the sake of sanity, I will skip 1*.
A 2* item needs a total of 4500 EXP to reach +20.
A 3* item needs a total of 7500 EXP to reach +20, and 15000 to reach +30.
A 4* item needs...
3,500 EXP to reach +10
10,500 EXP to reach +20
21,000 EXP to reach +30
35,000 EXP to reach +40
A 5* item needs 40,000 EXP to reach +40.
With all these numbers combined, we can attach tangible N-Meseta costs to common upgrade items and figure out how much you need to spend (before player shop fees) to upgrade an item.
JP strategy wiki page on item enhancement: https://pso2ngs.swiki.jp/index.php?%E3%82%A2%E3%82%A4%E3%83%86%E3%83%A0%E5%BC%B7%E5%8C%96%E3%83%BB%E9%99%90%E7%95%8C%E7%AA%81%E7%A0%B4
3 notes
·
View notes
Text
The word is out, and Straga Blades supposedly drop from Gigantix Nogleth.
Gigantix post has been updated with this information as well!
0 notes
Text
Due to more information about Battledia Purple coming out, the Battledia post has been updated with more accurate information about its spawns and drops!
0 notes
Text
The Rig Defense post has been updated with some general notes about waves 7 and 8!
Boy are they a doozy.
1 note
·
View note
Text
Battledia Quests
Battledia Quests are a quest type that require special items to accept.
To play a Battledia Quest, you must first find and access the relevant Battledia Portal. These portals will be shown through Mag Sonar.
Each quest requires its own entry item, and currently they both require five each. Battledia Triggers can drop from any enemy in any area at any level, and have rates roughly on par with 4* weapon drops.
Nothing affects Trigger drop rates other than rare drop boosts.
Triggers will go to Material Storage if it is active, and count as a Material item. They do not have a high enough rarity to trigger rare drop notifications, so it is possible to not notice you have them.
Triggers can be bought and sold on the player shops.
In a party, only the host must pay the entry fee for the Battledia Quest.
West Aelio - Aelio Troopers

This quest requires five B-Trigger/Ael Yellow.
A quest similar to Bonus Quests in classic PSO2, it rewards roughly 35,000 EXP upon clear, along with pre-enhanced items to be used in item upgrading.
This quest also introduces Silver and Gold Primm Armors, which will make upgrading new units a much more straightforward affair.

Gold Primm Armor is a 3* so it can technically be upgraded to +30, but this is a dubious use of resources at best.
Due to the straightforward nature of the mission, as long as you have entry-level gear and can perform adequately, you can clear in solo play with plenty of time to spare.
North Aelio - Aelio Destroyers

This quest requires five B-Trigger/Ael Purple.
A high-difficulty quest that spawns multiple Gigantix enemies in a row - the enemy lineup is Bujin, Varas, Nogleth, Nex Aelio, and Destragras. You have a limited time to defeat them all, and will gain rewards based on what you manage to clear.
Its drops include...
Evolcoat weapons
Straga weapons
Qual de Armor variants (the red box armors, but can have Fixa now)
Dolz Soul
Ragras Soul
Nex Soul
Gigas-series augments
Special Scratch Tickets
Despite listing a recommended Battle Power of 1363, you shouldn’t challenge this quest without at least 1406. If you challenge this quest at level 19 or below with less than 1406 Battle Power, you will not be able to deal damage to the bosses.
2 notes
·
View notes
Text
Region Mags

Region Mags are regular installations across the world map that grant various boosts to players when fed.
Each Region Mag grants its own unique ship-wide boost, in addition to a rare drop rate boost to individual players that feed it enough.
These boosts are only active per region, so if the Aelio Region Mags are starved, it will not affect Retem. Similarly, feeding Retem Region Mags will not affect Aelio.
R Mag Boost [All]
Also referred to as the “Full Stomach Bonus” in the overview, this is a bonus granted to all players for 24 hours upon being fed enough.
If a certain Region Mag’s Full Stomach Bonus isn’t active, it will be marked on the map as asleep.
In order to make it easier to re-activate the Full Stomach Bonus, a sleeping Region Mag will gain more points from wish list items.
It currently takes a combined total of 1,350,000 points across all players to activate the Full Stomach Bonus.
Each Region Mag has its own Full Stomach Bonus, and point totals are not shared, so feeding an awake Region Mag will not contribute to waking up another one.
R Mag Boost [Personal]
A boost to your drop rate, based on how many points you've contributed to Region Mags. It has three levels.
Level 1 - 100 points - 3% Drop Rate Up
Level 2 - 200 points - 9% Drop Rate Up
Level 3 - 400 points - 20% Drop Rate Up
Upon activation, the personal boost will last for two hours and the duration cannot be refreshed until it is activated again.
Activating a higher level of the boost will not refresh the timer.
Even if you insert thousands of points worth of items into a Region Mag, the boost will only go up to a max of level 3 with a two hour duration, so be careful.
Wish List
Each Region Mag has a Wish List of items that rotates daily - a specific item (+200%) and a general category (+50%).
These boosts are multiplied further if the Region Mag's Full Stomach Boost isn't active, meaning a specific item can have triple or quadruple its normal value.
Sourcing for claims is from both in-game testing and references from the JP strategy wiki’s Region Mag page: https://pso2ngs.swiki.jp/index.php?%E3%83%AA%E3%83%BC%E3%82%B8%E3%83%A7%E3%83%B3%E3%83%9E%E3%82%B0
8 notes
·
View notes
Text
small update: upon actually paying attention, destragras in wave 6 dismounts its ride armor when all four legs are broken instead of “after dealing enough damage” as i previously stated.
also the localized name for the cannon’s photon art is “burst glider” and not “boost glider”
these have been fixed!
2 notes
·
View notes
Text
Aelio Rig Defense: The Basics
Quest reward details
Earned EXP, N-Meseta, and item drops are based on how many enemies you defeat. If an enemy leaves battle without being defeated, then it won't award EXP or drops.
Similar to Buster Quests, the quest will still "clear" if all of the Rigs are destroyed. You will gain drops from defeated enemies.
Rank does not affect drop quality nor does it affect drop quantity. It simply affects how much N-Meseta you gain on clear.
S-Rank: 80% or more HP remaining; 10,000 Meseta
A-Rank: 40~79% HP remaining; 7,500 Meseta
B-Rank: 1~39% HP remaining; 5,000 Meseta
C-Rank: All bases destroyed; 2,500 Meseta
As this post has grown lengthy, the remainder shall be left under a read more now tab.
Collectasigne

Collectasigne are the same as crystals from defense missions in classic. Collect them, earn points, and unlock perks to make clearing the quest easier.
At the start, each Collectasigne is worth 10 points. After wave 3 it is worth 20 points, and after wave 6 it is worth 30 points.
Every Collectasigne gathered restores 5 PP.
Every player gets their own use of each perk, so you can have upwards of eight uses of each perk. Don’t be afraid to use them!
Repair rig: 2,000; 7,000
Restores HP to the selected Rig. Cannot be used on a Rig that has already been destroyed.
As quest rank is based on remaining Rig HP, this can raise the quest clear rank if used near the end.
Barrier shield: 500; 3,500
Activates a barrier at the selected Rig.
The barrier does a light amount of damage and prevents the Rig from taking damage for its duration. Additionally, it will instantly destroy Backhacks upon activation.
Use special equipment: 1,000; 7,000
Can only be used from terminals through the map.
Calls the Mobile Cannon, replacing your character's moveset for 90 seconds.
The Mobile Cannon offers powerful attacks at a wide range, but restricts your movement while active. The cliffs on the south part of the map are actual obstacles when using the Mobile Cannon, so be warned.
The Mobile Cannon scales off player stats, so its HP, PP, and Defense are directly tied to yours. Additionally, its base attack depends on the base attack of your currently equipped weapon at the time of activation - imported gear from classic PSO2 will perform slightly worse than NGS gear. If you call it from an empty weapon palette, attacks will do next to no damage.
Weapon potential abilities do not affect Mobile Cannon damage, nor do preset abilities.
It is not fully tested if augments affect Mobile Cannon damage.
The effects of Quick Food seem to be applied to the Mobile Cannon.
If your HP is reduced to 0 while using the Mobile Cannon, the deployment ends early and you will be incapacitated. You can use Restasigne while using the Mobile Cannon, but you cannot use Reversasigne as it isn't on the subpalette.
Normal attack: Rapid Fire
An action similar to the Assault Rifle's normal attack, it rapidly pelts the enemy with high-damage projectiles. The individual per-hit damage may seem low, but the DPS is higher than many Photon Arts and the range rivals Techniques.
Photon Art: Burst Glider
Startup: 60 PP; drain an additional 14 PP per second to rapidly travel forward.
Turning can be difficult and vertical movement is locked, similar to Rocket Rodeo-0 in classic.
Upon release of the attack, you will rapidly travel to the ground while slamming the Cannon. The per-hit damage is fantastic, but it has functionally similar DPS to Rapid Fire.
Special attack: Charge Blaster
An attack that you can only use five times per Mobile Cannon deployment.
Charge energy and launch a powerful shot forward. Deals devastating amounts of damage (1000+ on body shots) in a wide area, making it fantastic for clearing out packs of enemies.
Other basics
Meldram
Similar to the Falspawn Artillery in classic. Appears on the map with a sound cue, a tracer beam, and a map icon - if enough time passes, it fires a beam at the tower it's aimed at. Can and should be destroyed.
If the wave ends, then any active Meldrams will immediately deactivate and disappear.
Backhack
Similar to the infection cores in classic. Appears on a Rig and begins dealing damage - if left unchecked, it progressively does more and more damage over time. Can be destroyed either by attacking it, or by using a Barrier Shield.
Unlike classic, it will immediately deactivate and disappear when the wave ends. If there are only one or two enemies remaining, it's usually better to just defeat them than turn around to break the Backhack unless you're stalling the wave out for points.
Rigs affected by a Backhack will have a red outline for a few seconds before it begins to deal damage.
Barriagle Core
Similar to Falspawn/VR Walls in classic, these are the weak points on barriers that limit map movement. However, to take down these walls, you must destroy all three of the cores on the wall instead of attacking anywhere on the wall.
Enemy Aggression
To prevent you from easily farming Collectasigne, Boms, Bomks, and Goro-class enemies will flash red and begin attacking Rigs while ignoring players if left alive too long. Enemies in this state will have a unique aggression indicator icon - instead of the normal eye symbol, you will get a red symbol that resembles the Rig map icon.

Boms and Bomks
These are similar to Pettas enemies, with the addition of mounted explosives on their backs. If a wave times out and there are Boms/Bomks on the field, they will drop everything and rush at the rigs in an attempt to explode on them for heavy damage.
This explosion can easily defeat players and a fresh wave of Bomks can destroy a Rig on their own if they spawn in as the wave is ending.
A Barrier Shield will stop their advance and buy you some time.
Other general notes

Triangle indicators on the map indicate minibosses. The most notable one is on wave 5, which can spawn a Nogleth. Nogleth can reach the Rigs within five seconds of appearing and is very capable of wiping them out if left unchecked.
Destragras
Destragras appears in wave 5, 6, and 8.
In wave 5, Destragras takes to the field in a sleek form that uses attacks similar to ARKS Photon Arts. A player confident in their ability to safely battle it can attract it and duke it out while the rest of the party deals with the rest of the enemies.
Destragras will appear in a random lane, at the back of the map where the first enemy wave appears at.
Destragras will passively gain aggression towards the Mining Rigs, and if not attacked regularly, will get bored and head towards them. Similarly, if it doesn't take enough damage, it will head straight for them and ignore its attacker.
Destragras is vulnerable to being stunned by the Freeze status effect, and it expose its weak point while frozen.
If wave 5 ends through time out, Destragras will drop everything and attempt to use a rig destruction attack. If successful, it will destroy the targeted base leave the battlefield - this does not count as defeating it, so you do not get to roll on its drops.
It is similar to the one used in wave 6, but the charge time is much faster - roughly five seconds. The safest way to deal with it is to defeat Destragras before the wave times out, but after that putting up a Barrier Shield before it goes off will protect the rig, and finally defeating it before it gets the attack off will protect the rig as well.
In wave 6, Destragras appears at the far north side of the map in the center lane, piloting a ride armor. If it reaches the Mining Rigs, it will not stop its assault on them until it is defeated or they are all destroyed.
If it reaches the Rigs, it can be stunned by breaking two legs, destroying the energy ball while it charges its laser attack, and inflicting the Freeze status.

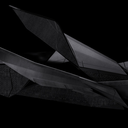
Low-quality image of Mounted Destragras’s legs. The legs with exposed blue energy have been broken, while the armored legs (with Barta Blot on them) have yet to be broken.
Upon enraging, if it is at the Rigs, it will dismount from the ride armor and begin charging an attack next to one of the Rigs, indicated by a miniboss indicator triangle next to the targeted Rig.
If this attack is allowed to go off, it will immediately destroy the Rig.
This can be interrupted by dealing enough damage to its main body before it can finish the attack. Seek out Destragras’s location on the minimap (a triangle next to a tower) and unload all your damage onto it as quickly as you can! By preventing this attack, it will return to its ride armor and the fight will continue as normal.
You cannot prevent this attack by attacking the ride armor. You MUST attack Destragras at the rig it is targeting to prevent this attack.
It's not all bad news, however. You can prevent its advance on the Rigs by waiting for its appearance during the wave 6 cutscene. By dealing enough damage to it, it will retaliate against its attacker instead and thus will stay up in the far north side of the map duking it out with the player without advancing on the Rigs. In this scenario, it won't use its Rig destruction attack when enraged, so a safe strategy is having one confident player battle it while everyone else defends the Rigs.
It is still vulnerable to stuns via Freeze and breaking legs, but it will not do its attack where it charges a laser.
However, be warned that if not attacked frequently enough, it will get bored just like in wave 5, and resume charging towards the Rigs.
By breaking all four legs, you will destroy its ride armor, and then it will resume the battle in the same form used in wave 5.
If wave 6 times out and Destragras is no longer in the ride armor, it will use the same tower destruction attack it uses in wave 5.
Waves 7 and 8
Added with the October 13th update, the quest now includes extra waves. These are much higher difficulty than the last, and have more ruthless gimmicks.
Wave 7 starts off with one of two variants: either it will begin spawning loads of enhanced enemies, or it will spawn a horizontal barrier.

The horizontal barrier is map-wide and can prevent you from returning to the bases if you’ve gone too far north, but similarly if you are all too close to the bases, it can prevent you from reaching Meldrums, so either way you want to take the wall down as soon as you can.
Wave 7 also features a Daityl Sword - if left unattended, it will leap towards the targeted Mining Rig and proceed to wail on it. If it spawns on an enhanced enemy wave, it will be enhanced, so be prepared.
There is a very high chance that wave 7 will time out - if the wave times out, be prepared to use Barrier Shields on the Rigs in the case of approaching Bomks. Due to their extreme defense, it’s very likely they will succeed in destroying their targeted towers with their explosion, so it’s better to play safe than sorry.
Wave 8 is fairly straightforward, but it features Nex Aelio.
Nex Aelio will start out at half health in its enraged state, and will immediately run towards its targeted Mining Rig. If left unattended, it will reach the Rig within about four seconds, and proceed to do its wide area explosion attack.
Upon defeating Nex Aelio and its cohorts, a second Mounted Destragras will spawn. It has all the same mechanics as the one in wave 6, but it can gain ground on the rigs easily if somebody isn’t prepared to catch it ahead of time.
Item drops
As mentioned before, neither item drop quality nor quantity depends on quest rank. It simply depends on how many enemies you defeat.
This quest drops large quantities of Theseus Armors, in addition to all non-Gigantix 4* weapons and Vialto Armor variants. It also drops Alts Soul, Dolz Soul, and Alts Secreta capsules due to the enemies present.
Ragras Soul capsules will only drop if you defeat Destragras. Defeating both Destragras spawns will give you more rolls on it.
For further, more detailed strategies, such as wave spawns and Meldrum/Backhack timings, visit the swiki page on this quest [here]. This page also serves as my source for other listed claims.
12 notes
·
View notes