
Don't wanna be here? Send us removal request.
Statistics
We looked inside some of the posts by hridaymehta and here's what we found interesting.
Average Info
Notes Per Post
0
Likes Per Post
0
Reblog Per Post
0
Reply Per Post
0
Time Between Posts
2 days
Number of Posts By Type
Text
17
Last Seen Tumblr Blogs


Fun Fact
130K people were victims of a chain letter scam that affected Tumblr in May 2011.
Text
Final Product
Coursework Development - Post 12
Below attached is the link to the final product created by my team.
Below attached are links to the answers of each CCR question.
Question 1 - How does your product use or challenge conventions and how does it represent social groups or issues?
Question 2 - How does your product engage with audiences and how would it be distributed as a real media text?
Question 3 - How did your production skills develop throughout this project?
Question 4 - How did you integrate technologies - software, hardware and online - in this project?
0 notes
Text
Sound Links
Coursework Development - Post 11
Below attached is the link to a folder in Google Drive, containing a PDF of all the sound links we tested over YouTube.
0 notes
Text
My Final Takeaways
Coursework Development - Post 10
There are certain things I have learnt as a person over this project, I have already spoken about my learnings as a teammate and editor, but as a person, there are certain lessons I have learned over this project, individually and with my team.
I have learnt how to manage time efficiently, and multitask amongst several things. I have learnt to cope with classmates I hadn't really spoken to, and have seen their strengths and weaknesses over the course of these couple of months. I have learnt to support my reason with evidence and experience when making a collective decision.
Coordinating with my team earlier used to be way harder as we all had varying opinions and individual differences which lead to an ineffective decision being made for the project. The biggest lesson I have learnt up until now is:
"Don't make decisions which you think are right, rather make decisions which are beneficial for the project."
Thinking about the above lesson, it has made me understand of its importance over the pre-production, production and post-production phases of this project. This lesson implicitly tells us that we need to step out of our comfort zones in order to do what is right for the project, and not work within our comfort zones and expect a good outcome just from that.
All of the things I have taken away with me from this project are the reason how I have not developed just as a team coordinator or an editor, but also as a person and decision maker in any situation, where I can make decisions after analyzing the weightage of that particular decision's benefits as compared to its drawbacks, in order to achieve the best outcome possible.
0 notes
Text
Closing Notes on the Final Product
Coursework Development - Post 9
The final product came out to be completely different from what we had imagined it to be. Initially, during the story idea development phase, we decided to choose the plot below.

This was a perfect plot for a thriller, however, after planning the cast and looking at the resources available, it would be a difficult job to put together the correct cast with the perfect shoot location, regardless of it being a good plot, hence we decided to scrap the above idea and go ahead with the one below.
This was finalized only a few days before the shoot, but looking at the final product, it was a good decision we made collectively as a team.
I am happy with the production phase of our project, as everything went relatively smoothly and we were able to capture all the footage we required in 1 shoot day, which saved us time.

The editing phase was my favourite, as it was the time where I had the most responsibility, and I had the power to make the film go from just raw footage slapped in a timeline to making the first and final cuts under the time constraint, completing titling, adding background music and folly sounds, complete sound mixing and finally colour grading the film to give it its unique aesthetic.
More than appreciating the final product itself, I thoroughly enjoyed the process of the shoot and edit way, way more than looking at the final product, as the product was simply an output of my team's effort and collaboration, but the process itself was to learn new things with every shot, every edit, and that was the best part of it.

This project has been the most fun I have had in my school working upon, along with it the things I learned and will incorporate in future projects over time.
My thoughts on the final product are that apart from being a great product created by us, I personally think that it could've looked much better, after viewing the final product. But as a first project that was done properly, I'd say it was a great one, and I hope to continue making myself and the projects I work on better with every project, one at a time.
0 notes
Text
Development as a Teammate and Editor
Coursework Development - Post 8
Over the past few months since the groups were made, I have developed not just as the team's editor, but also as a teammate.
All the way from working on my blogs, communicating over online meetings, to coordinating with my group for the pre-production, production and post-production, I have become a lot more flexible in relation to prioritizing and multitasking.

At the start of the formation of groups, I really hoped I was teamed with my friends and the people I could easily communicate with, which would make the work so much more easier for all of us. Little did I know, my sir had other ideas in mind. He instead paired every single person in groups where no one really spoke much to each other, and most of us weren't satisfied with our groups, me included.
As a media student, and someone who wanted to join a school which server media studies as a subject, wanting to pursue media in the future, I had certain expectations regarding the type of teammates I would be grouped with. I expected them to have an interest in the subject, take part in activities and give their inputs in discussions for not just the project, but any decision we needed to make as a team.

At first, when the teams were made, I lowered my head and tried to think of a way to convince my sir to change our groups just a bit, changing out one of our teammates for another. There were others in my team and other teams who faced the same issue, and sir asked us, "Will you get the opportunity to choose your peers as you begin working when you are older?" and that answered everyone's question.
I realized that I had to work with the team I had, and there was no way around it. It was a little hard to communicate with my teammates, as I had never spoken to them before. Over time, as I began discussing about the story idea, the cast, etc. I was able to communicate with my team more effectively as time went on.

I have even developed as an editor over time, especially since the editing workshop, as this was the first time of not only using Final Cut Pro X, but my first time interacting with the MacOS. As a person who has used Windows over the years with no exposure to MacOS, it was challenging for me initially to even go to the desktop, or to run a software. With practice during the editing workshop and especially the editing days, my skills of navigating around MacOS and using Final Cut Pro X increased drastically, as compared to the first time when I started using it.

All of the above experiences and difficulties faced have shaped me as a teammate and an amateur editor, who still has a lot, lot more to learn in the upcoming years, and I am excited for that.
0 notes
Text
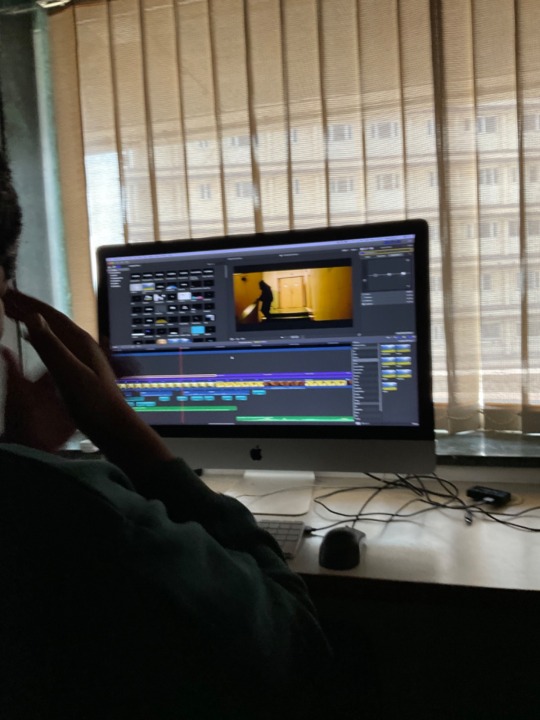
Showing Opening Sequence to Audience
Coursework Development - Post 7
After days of work, it was finally time to show my work to the audience. The person who I showed my film to was my mother. She was excited to see the film and insisted that I show it to her as soon as it was ready.
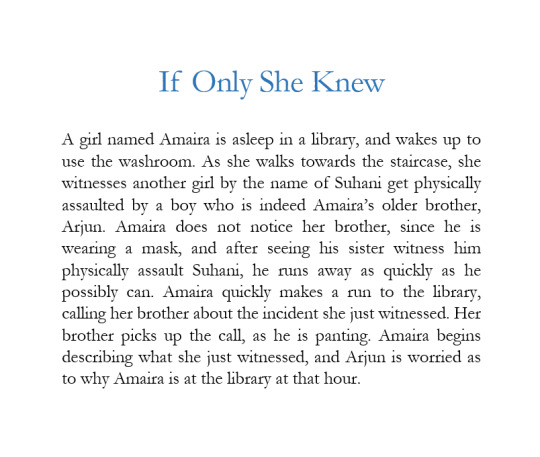
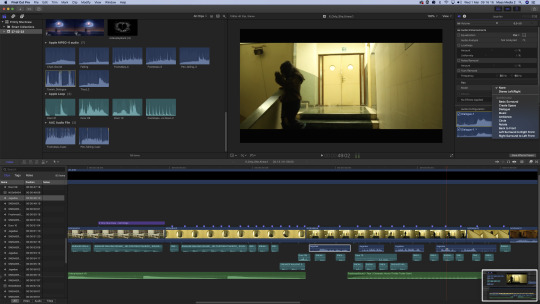
The below images were captured whilst she was watching the opening sequence.


Her feedback began with saying that the opening sequence was amazing, and complimented upon how well of a job me and my team did and created a final product which was visually grasping.
She even told me how my film creates suspense and how well the main actor has acted. She gave me feedback that the editing was greatly executed, however the cinematography of the team could be better, but regardless of that, she enjoyed watching the final product.
My experience was alright, the helpful information I gathered was that it was overall well made, but even though she complimented on my editing work, I could've performed way, way better.
Receiving my mothers feedback helped me visualize the opening sequence from the audience's perspective, so that the next time I work on a project, I look at how the audience is going to look at it, and what exactly they understand from when they begin watching it with no information about the plot or story of the film, and accordingly I can edit in a way to convey the message in a better way to the audience.
0 notes
Text
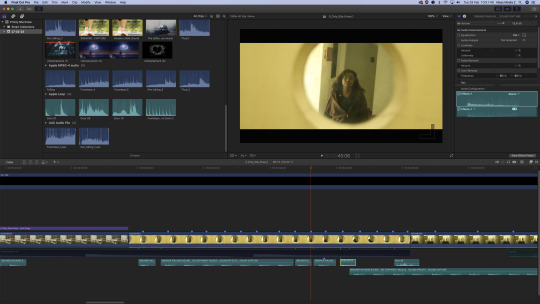
Editing Day 3
Coursework Development - Post 6
The last day of editing. I was excited to see the final product taking shape, and was unable to wait and see how the final product would look. All of the work I had accomplished in the previous 2 days lead to this moment.
Entering the editing room, we began with going through the footage that we had edited up until now, then moving on to sound mixing. In sound mixing, the main objective was to add any necessary SFX along with panning the diegetic and non-diegetic sounds, so that the final product was more polished.
I first detached the audio from the video of each clip, then assigned audio roles to the clip audio, background music and the folly sounds, in order to work in an organized manner. I even sorted my media bin by the type of file, so the MP4 files were in one section, and MP3 in the other, so I knew all the media and where it was, in case I needed to use that during sound mixing.
I then moved on to changing the amplitude of each footstep by changing its decibel value, so when Amaira is walking towards or away from the camera, the sound of the footsteps accordingly become more audible or faint, respectively.
Sound mixing is an integral part of editing, and I learnt this by listening to the entire opening sequence before and after sound mixing, and sound mixing makes the final product appear to be more realistic, as the sound is configured in a way that it would be heard like in real life, with respect to the person's position, and what direction is the sound being heard from, with what intensity along with any SFX.
For the mobile phone conversation, we used a telephone static tone to shift the audience's attention towards the telephone conversation. This was the only SFX we used for the opening sequence.

We finished sound mixing by playing back the entire opening sequence, making sure that the dialogues were heard over the background music, making sure that the footsteps along with the background music was correctly matched and that the footsteps' decibel values were varying according to the distance of the walking/running with respect to the camera, and that there was an L cut with the changing from Scene 2 to Scene 3, where the door closing folly sound can be heard in Scene 3.
Our team moved onto colour grading, where we explored the different parts of a frame, where it is concerned with the highlights, mid tone and shadows of a particular image. We even saw the exposure interface, to change the exposure of the image.
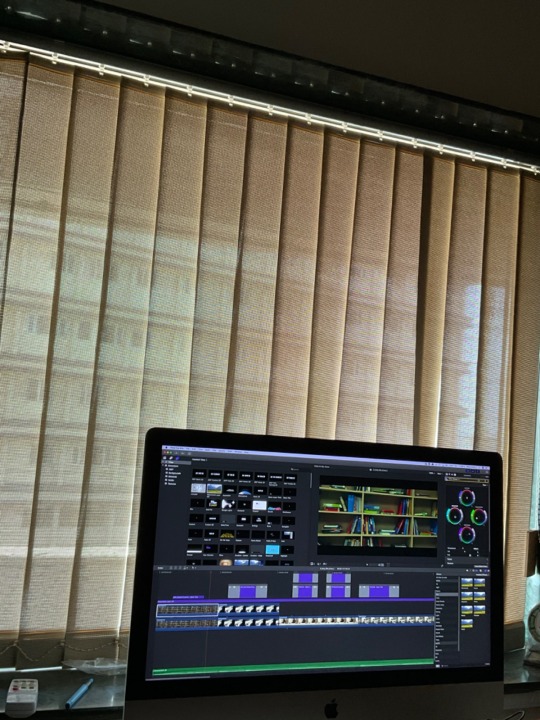
For some unknown reason, my team's cinematographer completely forgot that they were supposed to bring a colour palette in the form of images or any media form, so we could use that as a reference whilst colour grading. This was the biggest issue we faced in the editing phase, throughout the 3 days. The cinematographer was even supposed to give reasons for choosing a particular colour palette, and why that palette was chosen to appeal to the audiences in terms of creating a mood, or with respect to the content of the opening sequence, in order to convey a deeper meaning implicitly, and clearly they forgot to do that as well.
The director was furious, and could not grasp why such a mishap took place when our sir had reminded her about this twice earlier. The production designer and I were upset as well, moreover I was frustrated, as I was receiving input from all 3 teammates at the same time, and they had varying opinions, since there was no reason given for choosing a particular colour palette, I was mentally drained out. This was a learning experience that I had taken into consideration, as I want to pursue media in the future.
Moving on, we finally decided to incorporate a warmer tone for the library scenes (Scene 1 and 3), with a slight hint of green. The colour palette for the staircase corridor was purely orange with hints of yellow, indicating evening time, and even showing that the location was warm. The colour grading of the shots with the physical assault were towards a darker shade of red, with a bit of orange.
Another interesting task which I learned during colour grading was not just adjusting the exposure of the shot, but even changing colour grades during the swish pan movement between Amaira and Arjun, since the clips were not separate, however they showed both sides of the staircase, with different colour grades. We had to adjust and manage the colour grading for this frame by frame, to match the scenes effectively whilst maintaining their individual colour grades, and this task was rather fun for me, as it was interesting to experiment with the changes in colour grade during the swish pan taking place.
After all of this, our product was finally complete, where my team and I reviewed the entire final product 3 times, making sure everything was done correctly, making any necessary minute changes.
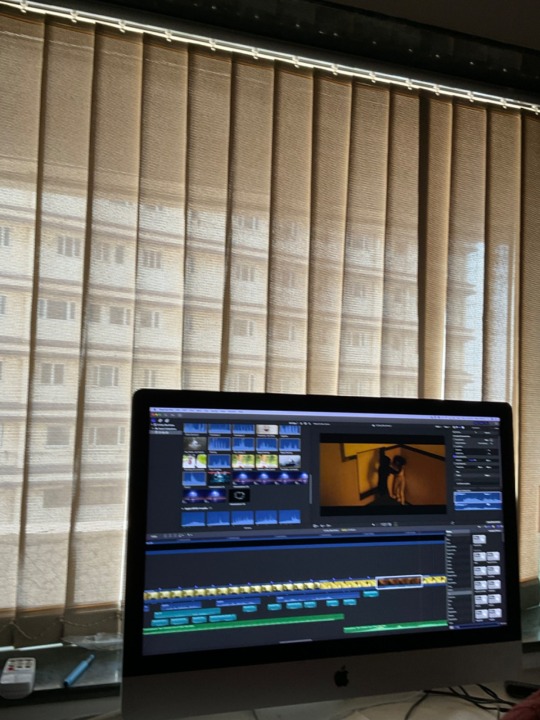
Throughout this entire editing phase, I learnt so, so many things about editing, all the way from the configuration of audio clips, to the transition of colour grades within a single shot, and this process may have been stressful towards the end, but I had a great time working on this project, learning along the way. Below is the final timeline of the opening sequence to my film - If Only She Knew.

0 notes
Text
Editing Day 2
Coursework Development - Post 5
Day 2 began with us entering the studio complex and then the editing rooms, my teammates knowing that they had a long day ahead of them, recording and searching for folly sounds, while I would be waiting for them and enjoying myself (I would be searching for folly sounds on YouTube to make use of time constructively).

The folly sounds we required were a pen falling, chair wheels rolling, footsteps, door opening and closing, and panting. These would be diegetic sounds, as compared to the non-diegetic background music, hence we would have to make use of panning, to give the source of sound a direction with respect to the placement of the source of sound relative to the viewer.
We even required dialogues as diegetic folly sounds, so my teammates acquired the necessary dialogues by recording audio from our classmates, where we required sounds of a boy and a girl, for Arjun and Amaira. These dialogues were panned as well according to the source of sound in the scene relative to the viewer.
Below is the image of the file containing all the audio files we tested and used, part of the source files. We acquired these clips from YouTube, recording folly sounds ourselves and even through the Final Cut Pro X audio library, where we acquired door opening and closing noises from, as well as the SFX for Scene 3, where Amaira is speaking to Arjun over the telephone.

As the editor, I made sure that each footstep matched the footstep that is being seen, so syncing the audio with the video, which took a while, cutting, copying and pasting the audio clips to match the visual. I matched all the other folly sounds to their visuals, the pen dropping, chair wheels rolling, door opening and closing, etc.
Approaching the end of Day 2, I realized that it was impossible to complete the project in 2 days of editing, as we just finished folly sounds, and it was the end of the school day. As an editor, I realized how long it takes to edit a 2 minute opening sequence, giving perspective on how long it takes to create a 2-3 hour film.

0 notes
Text
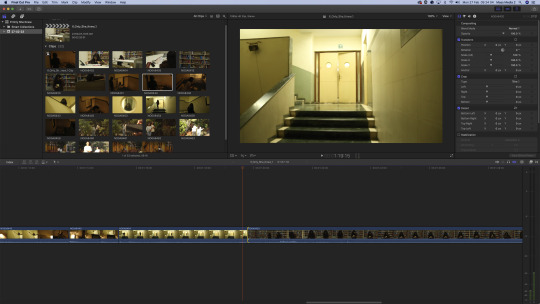
Editing Day 1
Coursework Development - Post 4
Finally. The day I had been waiting for during the entire project had finally arrived, and I was more excited than I could ever be. I walked into school, ready for what was to come next.
My team and I entered the studio complex, and then the editing rooms to begin turning our raw footage into a work of art.
------------------------------------------------------------------------------
The edit was going to take place in intervals, spread across 3 days:
Day 1
Import the "OK" takes to the software for beginning work
Complete the First Cut
Complete the Final Cut
Complete the titling
Add background music
Day 2
Record and add folly sounds
Day 3
Complete the sound mixing
Complete the colour grading
------------------------------------------------------------------------------
We began with importing footage on Day 1, then completed the First Cut. We unfortunately had to cut out Scene 4 completely as it may have been a great element, however the time constraint forced us to cut it out, and it was not as important as the other footage needed to create a successful opening sequence, hence it was the only option, and my teammates were very sad.
We went ahead and made appropriate cuts for Scene 1 and 2, then placed the clips on the timeline shot after shot. Scene 3 was the last scene, but no cuts were made to it since the entirety of Scene 3 was a one-take shot.
After placing all the clips on the timeline and cutting of unnecessary footage, we had the Final Cut ready as well, which consisted of all the final clips in the correct order, as they would be seen in the opening sequence from the viewer's perspective.

We then moved ahead with titling, and here is where opinions from the director, production designer and cinematographer clashed, and as the editor, it was not a great experience, taking inputs from all three teammates at the same time. We eventually finished titling, choosing the same font type, size, text border and colour for the opening credits, but different for the title of the film.

We then moved onto the final task of Day 1 - background music. Choosing background music from the internet was a harder task than I could ever anticipate (easier than choosing folly sounds). We spent very long going through multiple tracks over TouTube, downloading the suitable background music for the opening credits (Scene 1), the staircase scene (Scene 2), and the next library scene (Scene 3).
We chose a pleasant sounding background music for Scene 1, showing that Amaira is studying and complementing the scene as a whole. Scene 2 had an intense, negative sounding background music to it, which gives the viewer the sense of danger incoming. Scene 3 was an eerie, subtle, unsettling background music used, so it makes the viewer feel uncomfortable after witnessing Scene 2, and so that the dialogues between Amaira and Arjun with respect to the background music are not too faint.

After background music, we just had folly sounds, sound mixing and colour grading remaining, before the final product were ready. Me as a Day 1 editor believed that we could easily complete the final 3 tasks on Day 2, only to realize later on that the entirety of Day 2 goes for folly sounds...
Day 1 was probably the most important day of the 3 days, as I had learnt how to use MacOS effectively along with the applications and collection of software it has to offer, and as an editor, I was acclimatized to the new operating system I had just started using, which would set the foundation of Day 2 and 3.
0 notes
Text
Shoot Day
Coursework Development - Post 3
We began with setting up the library with the books required, we faced a shortage of books and hence requested our classmates if we could use their books for the set design.

We even put together the final cast and got them ready for the shoot. We began shooting Scene 1, then Scene 3, then Scene 2 and finally Scene 4 (which unfortunately did not make it into the opening sequence). Below are evidences of us preparing the cast before their scene begins.


We began with the cast's make up, then beginning with the test shots to see how the frame will appear in the final product, using the storyboard as a reference. We then learnt the commands as the director, cinematographer and the editor before beginning to shoot a scene. We finally began shooting for Scene 1, which would be used for rolling in the opening credits during post-production and show Amaira leaving the library temporarily to use the washroom.


As a team we decided to shoot the scenes with respect to the location, so Scene 1 and 3 were shot in the library itself, then we shot Scene 2 at the staircase, where Amaira witnesses Suhani get assaulted by Arjun, and finally Scene 4 is shot as a montage in the parking lot, where they are having fun. We shot these scenes in this manner so we save time and the time of actors/school facilities required for the shoot (example books), and this efficient method of working as a team lead us to complete the shoot in one day itself.
As an editor and team coordinator I learned how shoots are organized, either according to the location, scene, or actors' convenience, in order to complete the same amount of work in the same amount of time, with fewer resources, hence more efficiently.

For Scene 4, we took footage in the parking lot, unfortunately this footage does not make it into the final product, due to the given time constraint. Below are some of the evidences of Scene 4.


0 notes
Text
Test Shots on Shoot Day
Coursework Development - Post 2
Before beginning our actual shoot, we had a couple of tests so that we learnt the commands for beginning to shoot a particular take, of a particular shot, of a particular scene.
The director, cinematographer and editor had certain commands to state in order to initiate the shooting process, where the director asks "Camera?" and the cinematographer replies with "Rolling" after the adjustments to the settings are made according to the exposure triangle. Then the director commands "Clap in" and the editor claps into the camera's frame, stating the take, shot and scene being shot. The director finally exclaims "Action!" and the cinematographer begins to record.

As the editor, I used a digital clapperboard which is available for free on the App Store, for clapping in a shot. Above is the clapperboard I used by the name of DigiSlate, a clapperboard mobile application.
We conducted some test shots before beginning to shoot. Below is one of the shots that we tested, out of the many tests.

These test shots improved our skillset of each role we played in our group, contributing towards the betterment of our project.
As the editor, I was clear of my role in the production phase of this project, since my main purpose is fulfilled in the post-production phase, so learning the commands and clapping in for the shoot during production made me contribute to the project in a way, giving me an insight into how it takes place in the real world.
0 notes
Text
Film Title
Coursework Development - Post 1
The font title beginning with the name of our school, followed by the project created by AS Level, then the name of the director, cinematographer, production designer, editor and finally the actors are all showcased.


The first 5 evidences contain titling which is of the same font type, colour, border colour width border width. The final title, which is the title of our product is in a different font, of a different size, colour, without a border and has a shadow to it. This title is different from the rest as we wanted to keep the opening credits of a similar font, but the font of the product title to be different. The font used for the titling of the first 5 evidences is Copperplate, whereas the font of the product title is a sans-serif font.
The reason we chose copperplate for the opening credits is due to the fact that it looks simple, and fits the aesthetic of our film's genre. It is not fancy or too plain, just perfect to be used as an opening credits titling font.
The reason we chose a sans-serif font for our product title is due to the fact that it is different from the opening credits in terms of font type, size, colour and shadow. We collectively decided to keep the product title black in colour as the title is not only similar to the colour of the table when white, but also because the opening credits were white, and making the product title font black in colour would make the audience viewing the opening sequence wonder why it is black, implicitly connoting that the film may be about something darker, raising an issue about a certain matter (in our product about the schizophrenic social group).
Above are the reasons for our titling, I faced a number of colliding opinions amongst my teammates, and became a little frustrated, so this was an indication of improving our communication as a team. We finally decided on the above two font types, sizes, colours, borders and shadows, using fade-in and fade-out transitions for the opening credits and then a title template from the library for the product title.
0 notes
Text
Editing Workshop
Research and Planning - Post 20
Before beginning on working on our project, we took part in the Editing Workshop at our school, where we learnt about how editing happens, the software we were going to use for editing, etc.
We began with discussing what a pixel is. It is the tiniest square in an image holding a particular shade of colour. Multiple pixels of various shades (or even of the same shade) come together to form an image.
There are 2 types of software, ones that use pixels and ones that use vectors. A vector software enables the user to design and manipulate computer images using geometric and mathematical commands.
There are 2 other types of software, layer based and node based. Layer based software uses multiple layers of certain text, photos, videos or audio which are 'layered' one on top of the other to produce the final output, in video the topmost layer showing the most amount of significance, however in audio layers the significance is equal. A node based software links images, texts, audio and video to produce the final output, appearing to be like a tree diagram, or a flowchart.
An example of a layer based software is Final Cut Pro X, which layers different forms of media to create a product, whereas an example of a node based software is Nuke, a great software used for VFX.
Moving on, we began with learning about the Final Cut Pro X video editing software's user interface, analyzing what each panel, tool, function and button is used for whilst editing. We explored different interfaces as well, for editing, adding any VFX or SFX from their respective libraries, titling libraries, transitions and colour grading.
At first looking at the software without having an understanding, I was a little bit overwhelmed by the appearance, looking at all the tasks it could carry out. After seeing it in action with some footage our sir edited to show how it performs, I had a clearer idea of how to edit. These skills immensely get enhanced and polished during the post-production phase of the project.
I have never used MacOS or Final Cut Pro X in my life, so getting used to their interfaces and keyboard functions was a task at first, but eventually I got used to it, and its safe to say that Windows is far superior. Before learning to use Final Cut Pro X, I learned using the MacOS and getting used to it, eventually learning Final Cut Pro X.
Our sir explained to us how the keyboard is more reliable than using a mouse while editing, since you can use all 10 fingers on the keyboard, rather than 2 on the mouse. It is not just easier to master or faster to use, but most importantly the most accurate way of editing. Zooming in on the timeline to see if audio and video have synced all the way to inputting decibel values for each audio clip, even cutting or copy-pasting, I agreed with him on that, as during the workshop I may have found it hard to believe, however after actually using the editing software I was able to make a judgement, that keyboard is better.
Below are some of the evidences of us editing in Final Cut Pro X.


0 notes
Text
Camera Workshop
Research and Planning - Post 19
Before beginning on working on our product, we took part in the Camera Workshop at our school, on 2 separate days, where we learnt concepts to keep in mind as the cinematographer and the usage of media equipment, and how those concepts are applied in practicality.

We learnt about the camera shutter speed, exposure, aperture, ISO and how each concept contributes in taking a certain shot.
We also learned how an image captured can be visually manipulated with regards to how fast the shutter speed is, the amount of exposure the camera allows, along with the aperture and ISO settings.

Shutter speed determines how much light enters in an interval before an image is captured, and captures all the light it can in that time before a photograph is captured. A high shutter speed results in an underexposed image (relatively darker) and a low shutter speed results in an overexposed image (relatively brighter) and cinematographers use this to their benefit. This is highly used in light painting, which uses the slow shutter speed to capture all the light it can, before capturing an image.

The aperture is another factor playing a role in the exposure of an image. allows the amount of light entering, and it can be manually or automatically configured to capture a perfect image. Capturing image with higher aperture allows more amount of light to enter through the lens, whereas lower aperture allows lesser amount of light to enter through the lens.
The final factor contributing to the exposure is the ISO, which is the sensor detecting the intensity of the light entering through the lens. A higher ISO means more sensitivity to light and lower ISO means less sensitivity to light.
Another role of ISO is that by setting it very high, it can produce grainy images which make an image not just relatively brighter, but even grainy in appearance, which is a widely used aesthetic in films which want to give it a vintage look and feel.
All of the 3 above factors - shutter speed, aperture and ISO are the factors contributing to the exposure of an image, hence being called the 'Exposure Triangle' where the exposure and overall appearance of an image depend on these 3 factors.

We then practiced these on the camera, capturing images with various levels of shutter speed, aperture and ISO.
Below is an underexposed image captured, with higher shutter speed, lower aperture and lower ISO.

Below is an overexposed image captured, with lower shutter speed, higher aperture and higher ISO (the image appears to be defocused, which was a mistake made by me during capturing this photo).

We also spoke about depth of field, the most commonly used camera composition in cinematography, which decides what part of an image gets focused or defocused, and whether that object is in the foreground, midground or background.

We learned how focusing on one object causes the camera to make another object image become defocused, and how rack focus is used in films to shift focus amongst characters or events when they serve a certain relevance/meaning in that shot.
Another important aspect we discussed about was the importance of light in capturing an image. Studio lighting is placed around a subject/object in a manner that one part of the subject is greatly exposed with respect to the other, and how the placement of light can define the foreground, midground and background relative to that subject/object.
The image below is captured using one source of light from the left side of the frame, positioned in front of the subject, so their face is visible clearly, exposing the left side of their face (from the camera's perspective) more than that of the right side of their face (from the camera's perspective).

The image below is captured using two sources of light, one positioned like the one in the previous image, and one positioned on the left side of the frame, behind the subject. This clearly separates the subject from the background and is normally used to make the audience focus on that subject rather than on the foreground or background, as the subject is in the midground.

All of the above concepts, techniques, compositions and activities have helped me understand cinematography in a clearer manner, and how crucial each concept is to understand in order to achieve the perfect product. As an editor, this gives me an idea of how to communicate with the cinematographer and give inputs on how the shot must be taken, so that in the edit I can transition, cut and colour grade effectively with respect to each shot.
Another notable concept we learnt in cinematography was the 180-Degree Rule of Cinematography. This rule is used by many cinematographers to convey meaning, normally showcasing how dominance and minority are portrayed, and how each application that's followed is used to make the plot interesting. Below are some of the evidences explaining the 180-Degree Rule of Cinematography in detail, and how this rule creates emotion in the viewer.


0 notes
Text
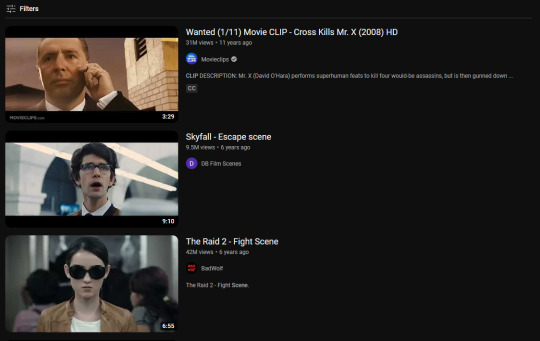
Research as an Editor
Research and Planning - Post 18
As the editor of my team, I researched things throughout the project regarding not just editing, but even for the type of shots needed to be captured during production, the research for the presentations and content of our story, etc.
In the pre-production phase of the project, I looked up movies of similar genre which we were adhering to. I saw clips on YouTube on how the conventions of thriller are followed to create that particular cinematic experience for the audience.
Below is the evidence of me browsing for Hollywood Thriller Movie Clips on YouTube, to see how editors create a mood.
Before beginning with the post-production (editing) phase, I had researched about the software I was using to edit, which was Final Cut Pro X, and searched for videos regarding the shortcuts I could use to edit more effectively and efficiently.
These editing shortcuts would be used repetitively to make relevant and accurate cuts during the edit, as the accuracy in matching audio and video, the values of text size and the fade-in and fade-out is key to editing a good opening sequence.
Below is the evidence of the videos I referred to for shortcuts I could use in Final Cut Pro X.

However, in order to create a visually appealing product, learning shortcuts is not the only crucial step to achieving my goal of creating a good opening sequence, I even researched the editing techniques I could use, with their relevance as to what meaning each edit conveys when being used in a film.
This helped me understand how I could manipulate the cinematography of our opening sequence, and accordingly make those edits during post-production.
Below is the evidence of me watching a video of StudioBinder based on editing techniques, which is one of the best YouTube channels in my opinion for learning media as a whole.
All of the above research has lead to me and my team achieving our goals of this project, which is not just to create a cohesive product, but along the way learn new skills, work on any mistakes we encountered and developing ourselves with respect to the role we play in the group.
0 notes
Text
Difficulties Encountered
Research and Planning - Post 17
During the pre-production phase, my team and I encountered some issues related to the script of the opening sequence, the entire story, and with casting.
The first task given to us was to come up with a story idea, and eventually develop the opening sequence and the entire story. Coming up with an idea for the plot did not take long, however my team was not satisfied with the idea, as the story synopsis was good, but executing it would not be possible, considering the cast required, and the difficulty of its execution we would face if we went ahead.
Another difficulty was the script for the opening sequence, as we came up with a good plot, but eventually had to change it as it did not make much sense.
Below is the idea of the story we were originally going to be using for the script and developing the entire story.

We then decided to use another idea.
We went ahead with this idea, however decided that the character would be a girl studying in a library, and this would be during the evening, so the above idea was modified and developed upon.

Below is the final summary of the story we would be using for our opening sequence of the film - If Only She Knew.
We at last came up with an idea which could be well executed following the conventions of the genre we chose - thriller.

We finally had a baseline for the opening sequence which we were satisfied with, however we had further trouble in developing the complete story, not only the opening sequence, but the entire story.
Another major issue we faced was the casting. My team and I could not put together a cast for a long time, only to somehow manage and put together a cast consisting of 2 AS Level students and 1 A Level student as the actors, just a couple of days before the shoots began.
After facing the above difficulties, we have been more prepared since then, as our production and post-production went smoothly without any issues restricting us from working at our full potential.
0 notes
Text
Project Budget
Research and Planning - Post 16
For our film "If Only She Knew", we did not use a budget as everything we required was already present, and the project did not require any budget. From actors, to locations, production design, etc. there was no budget required for the pre-production, production or even post-production, so the film was created on a zero budget.
0 notes