
hutaoisms
hakuna natata
the wait is over, my comrades!
27206 posts
Don't wanna be here? Send us removal request.
Last Seen Blogs


littleworldsworld
daddy’s good girl

mummyplace09
Cross-dressing male

anh-gai-xinh-dep
anhgaixinhdep.net

batista2023
Sem título
Text
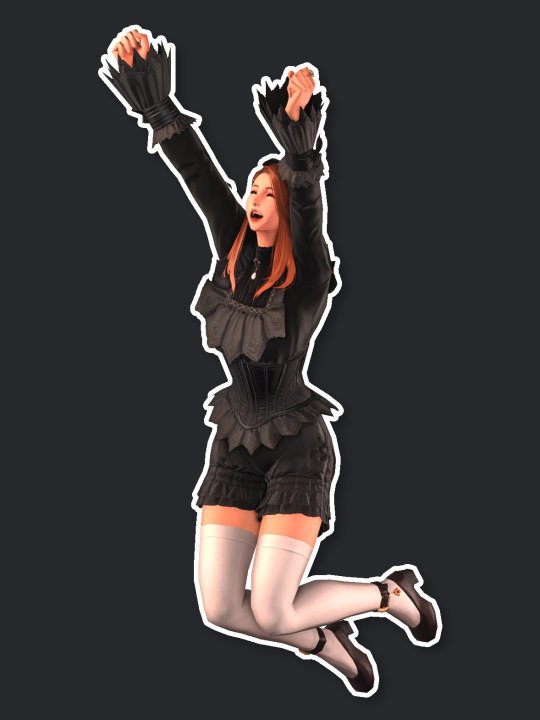
GShade Guide: Transparent shots with Chromakey
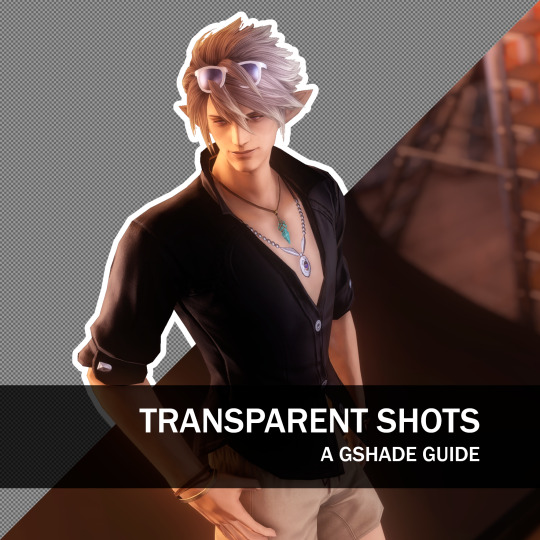
Want a nice cut-out picture? transparent chromakey shots are here to save the day!
You can achieve this with a combination of two features in gshade: ChromaKey, a technique that generates a greenscreen effect:

and Clear Alpha Channel, a setting at the very bottom of the Home tab:

Ready? So here's the step-by-step: first, make sure Chromakey.fx is placed right after FFRestoreUI.fx. Also, check if the Keying Color is set to Alpha Transparency.

Next, set up your scene and position your subject with some clearance around it for the chromakey effect.
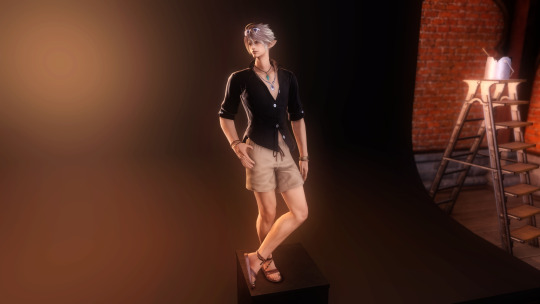
Now, make sure the Clear Alpha Channel setting is disabled, and enable the Chromakey.fx filter. After that, adjust its distance in the Definitions panel, like this:
You want to cover as much as possible of the background without cutting into the subject itself. While the only thing you'll see in-game is a black background, the final screenshot will actually replace it with proper transparency!

(Important: make sure to re-enable the Clear Alpha Channel setting after taking your shots, otherwise you may end up with a bunch of fully transparent pictures!)
Chromakeyed, transparent images can be used in several different situations! For example, I often use it to create tutorial slides:
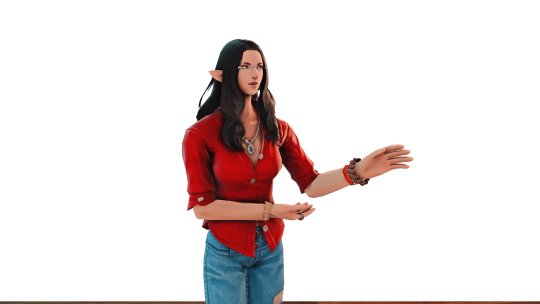

What about reference cards for art commissions?

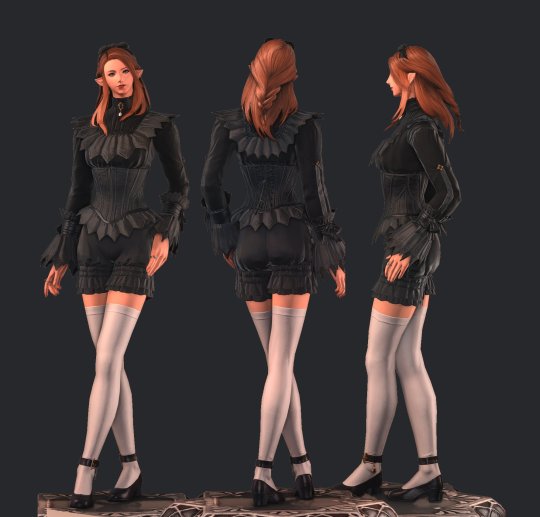
Or maybe stickers with your friends. Or Discord emotes. Or whatever strikes your fancy. The sky's the limit!
606 notes
·
View notes
Text
GSHADE 3.5.0 Cracked Tutorial Feb.2023
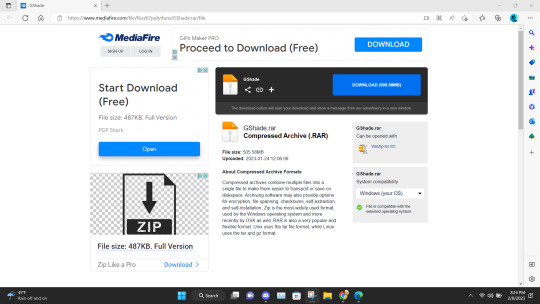
‼️Update:3/2023‼️ Due to gshade somehow being online again! You can still install the program with this tutorial but to avoid the update to version 4.2 notification keeping you from proceeding-Download the program from mediafire and then turn your pc to airplane mode and continue the process below! Note that when you turn your internet back on that your going to get the notification still ignore it. That what I’m doing.
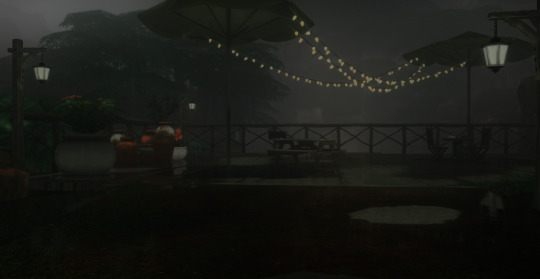
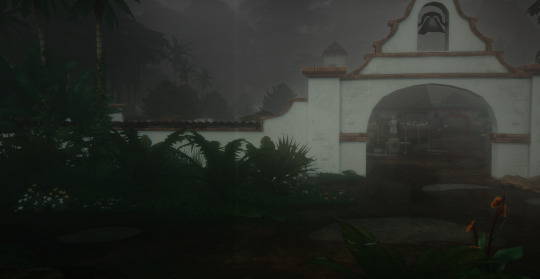
Alright with the recent events regarding the development team of GShade figuratively going under and the current version of this program available being far from perfect. It would be lovely to back to a version of GShade that doesn't have malware, the changes that disabled the depth of field effects, and the removal of some older shaders. So here's a tutorial on how to install 3.5.0 of GShade. It's the version that we as a collective switched to all those months back, when GShade popped off in the community. Also the version I used to take this picture and got from @toskasimz who sent me the files. She's the reason why I have my pretty pictures back. It took a long time to get my preset to look like this and the modern versions of Gshade and Reshade don't have the shaders for this anymore. The suggested skill level for this is basic knowledge of how to install Reshade/Gshade and knowledge of where to find the game Bin file and Program Files on your pc.
Note: This version is before the code that shut down your PC, if you manipulated the code of the program, was introduced. Use at your own risk. I personally have no issue with using it. I'm using my laptop I do school work on and I have no money to buy a new one so that's my assessment on how safe it is.
To start download this media fire file. It's a Rar file. Unzip it.
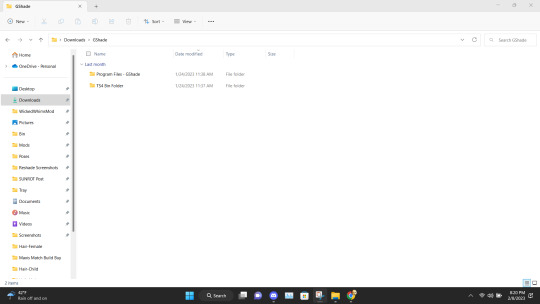
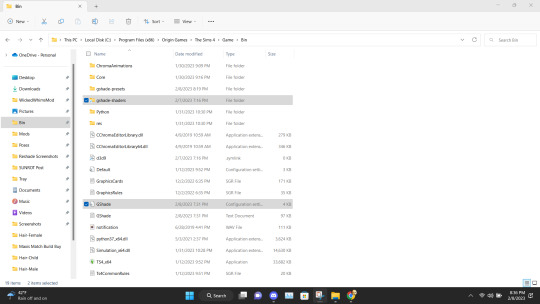
In the unzipped version of this file, you should have a folder that's highlighted below called GShade.
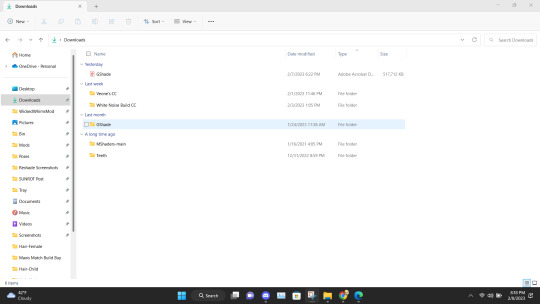
Inside that file are two folders. Program Files-G-Shade and TS4 Bin Folder. These folder names correspond with where the contents of these will go on your pc.
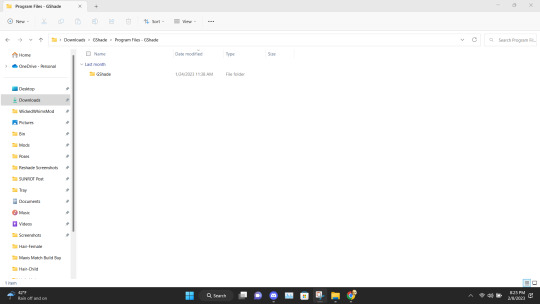
Alright inside the folders you should have the following content in the Program Files-G-Shade
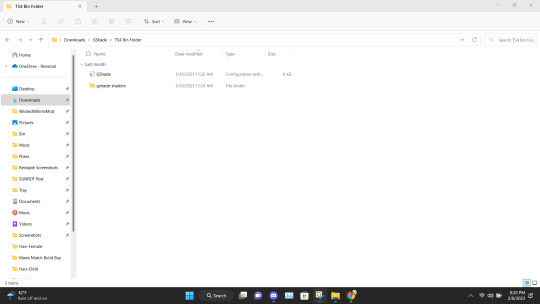
Inside the TS4 Bin Folder, you should have the following contents inside it.
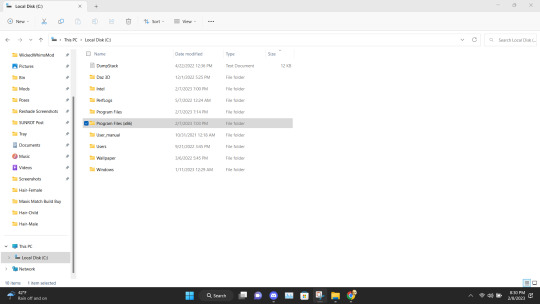
Place the GShade folder from the Program Files-G-Shade into your computer's Program(x86) file. This may have a different name based on your computer.
Next Place the contents of the TS4 Bin Folder which should be the G-Shade configuration file and the folder of GShade-Shaders into your Bin folder. (note I have gshade installed already so you won't have the extra files before installation.)
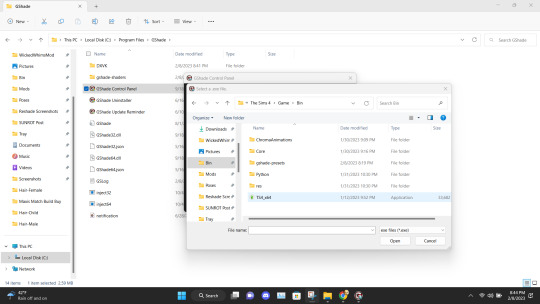
Now go back to the Program(x86) file on your PC and go into the G-shade folder.
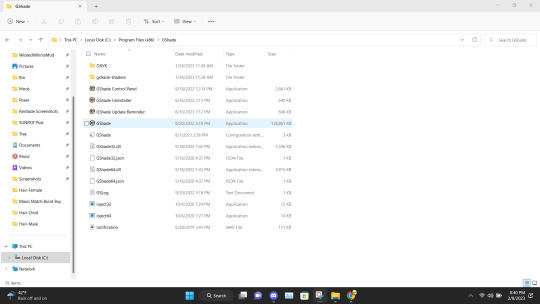
Double Click to run the program.
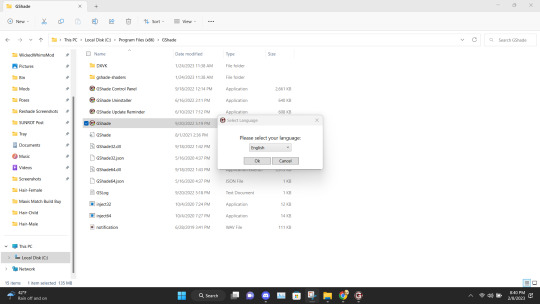
This is where you gonna need to pull your Reshade/Gshade knowledge. You just install the program as normal to the game. I will say I don't know if this will work with other games.
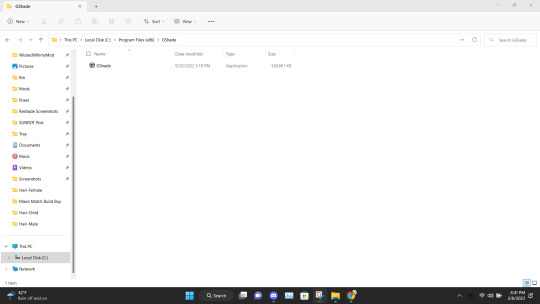
Alright, this is what you should be left with after installing G-Shade. Everything transferred to the Program Files with the exception of this folder. Leave it be and go to the Program Files file on your pc.
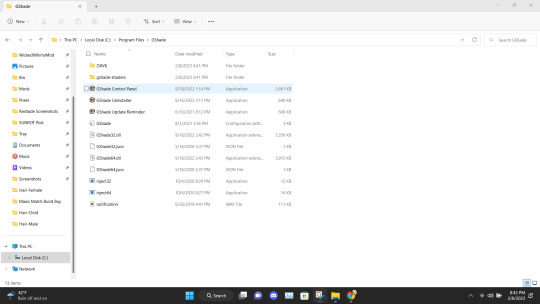
Once in the Program Files folder double click the GShade Control Panel.
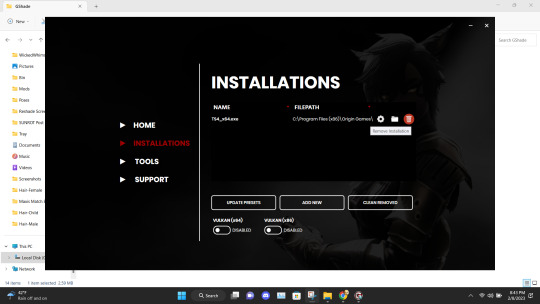
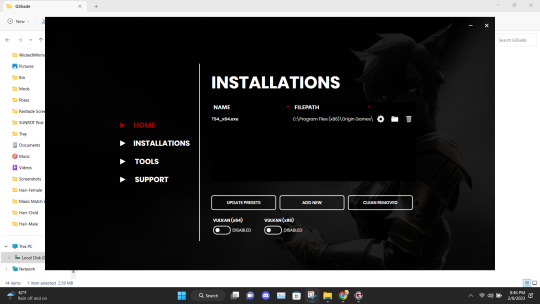
You should get the following screen Go to the Installations tab. Delete this file path. This is a very important step. It's not gonna work if you don't reinstall the program. Delete it and click Add New.
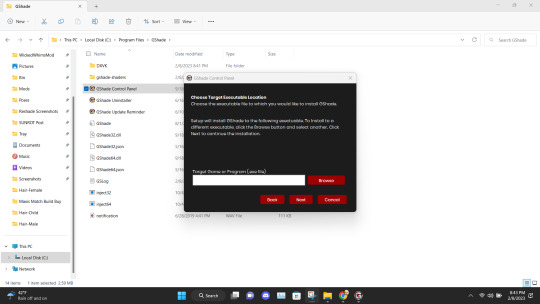
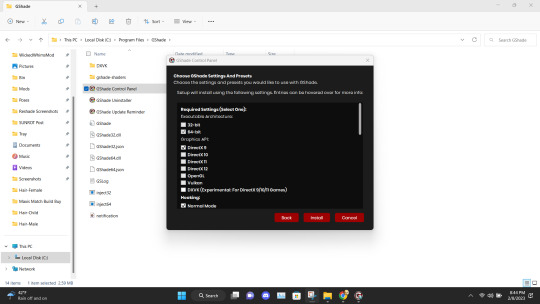
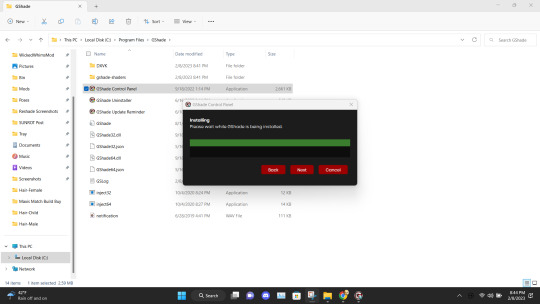
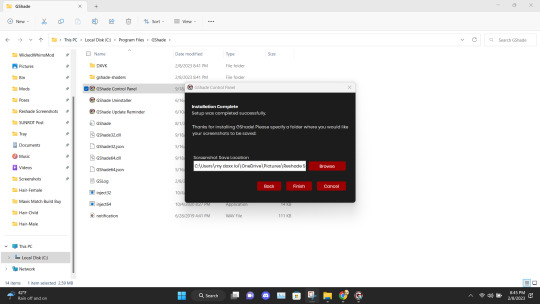
Install the program as viewed above. Click Next and set up your screenshot folder.
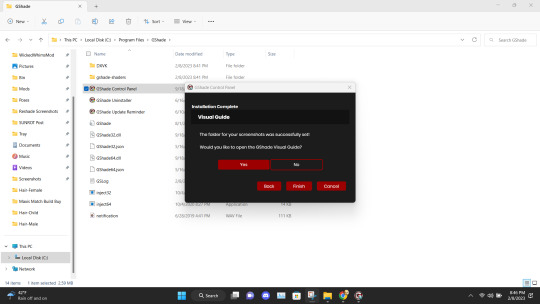
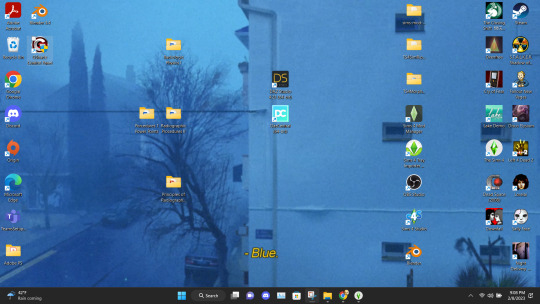
Click No on viewing the guild. You should have a control panel on your desktop. You can go in a convert you reshade presets if needed.
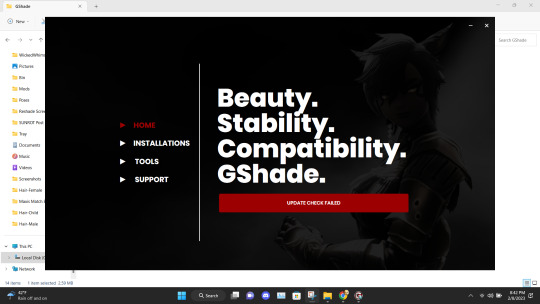
Alright if everything was done correctly open your game. It'll take a moment to load and when it does you greeted with the following screen on start-up.
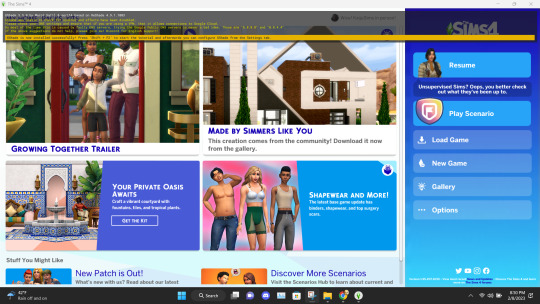
Ignore the yellow text on the top. It says that your effects are disabled because it's not online. It works I could be misinterpreting what "effect" means but my shader work so I'm not complaining.
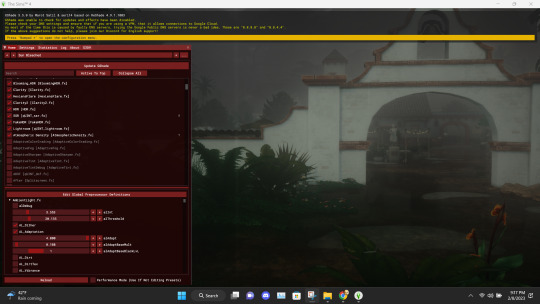
And there you go. Installed, and works perfectly. Don't update it. I don't know what it'll do. I have not tried. I will upload an edited version of my preset later this week or tonight. I have to tweak the color of the fog and make a decent post. Enjoy! I am open to helping under this post and in dms!
2K notes
·
View notes
Text


> Shadowheart: Show off new friend!
you hold up your excitable new friend to lae'zel, she seems incredibly irritated by this action! you can't imagine why!
> Karlach: Open the barn doors.
oh god. you really didn't mean to intrude… but now that you are, it is becoming increasingly more and more difficult to look away!
> Karlach: Save Astarion!
thank the hells you had this barrel of firewine on you to put him out. he'll be fixed up in no time!
==>
OH GOD HOW CAN FIREWINE BE SO FLAMMABLE
> Wyll: Calm down Karlach.
pt. 1
2K notes
·
View notes
Text
For the Earth's Future, I'll be of Service Nyah!
404 notes
·
View notes
Photo

finally a magical girl reboot i care about!
6K notes
·
View notes
Text
I am very much not immune to Astarion 🩸
23K notes
·
View notes


Text


THE FOREST A GSHADE PRESET
The Gshade preset used in my animation THE FOREST:
Due to the harsh shadows and effects used in this preset, I have added a UI mask so it will be easy to use while filming and taking screenshots
KEEP UI OFF:

KEEP UI ON:

IMPORTANT: YOU CAN TWEAK THE VALUES BUT DO NOT CHANGE THE ORDER OF THE PRESETS BECAUSE SOME EFFECTS MAY BROKE!!
Some effects used in this preset are only available in Gshade so it will not work with Reshade :
Tutorial of GShade Installation:
Toggle Keys :
KeepUi ON/OFF : (F9)
MXAO 4.0.2 : (F10)
AdaptiveFog : (F11)
ADOF : (F12)
Preset File Location : C:\Program Files (x86)\Origin Games\The Sims 4\Game\Bin\shade-presets.
Download Here (Public Release 09/05)
387 notes
·
View notes
Text

14 gshade/reshade presets that will make your game aesthetic!!
these all work in ts4, and at the time of writing.
tofu by ellcrze
strudel by elania
thunderstorm by mushroom-whims
sweet/sour by asimsa
strawberry-milk-tea by malixa
minty-fresh by draeyad
lunar by simancholy
daises by breezytrait
ellcrze by ellcrze
dreamy by gloomie
draincore by gloomie
lottie/planet by moonivys
on-cloud-9 by the-blonde-simmer
cranberry by elania
1K notes
·
View notes
Photo


i made this preset awhile back when i first switched to gshade, and i’m finally releasing it to the public! it’s called rose milk tea
♡ important info ♡
highly recommend downloading these lighting mods so the preset looks exactly the same as the pictures: x x x
make sure to turn off edge smoothing so mxao & dof work properly
if you want smoother gameplay, turn off mxao & dof
i set toggles for mxao & dof so you can turn them on/off easily
effects used & download link under the cut
Keep reading
3K notes
·
View notes
Photo
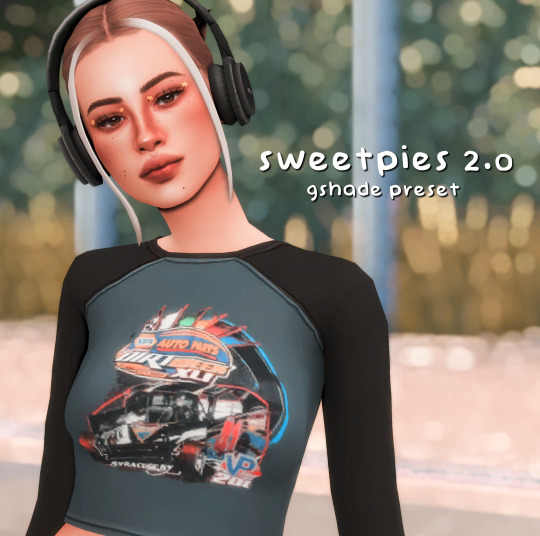

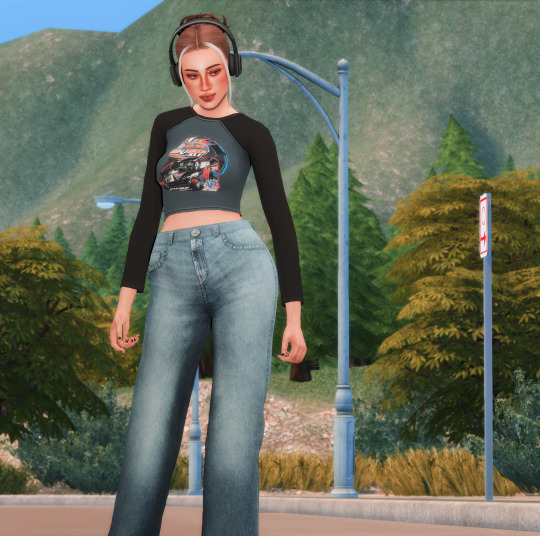
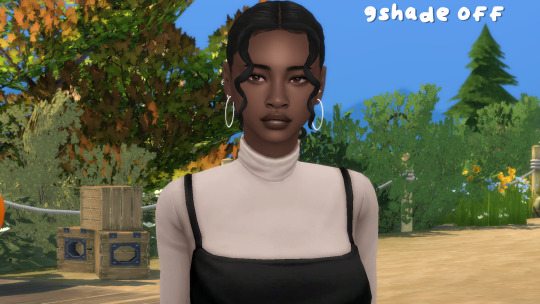
sweetpies 2.0 by elaina
since this preset was a FAN favorite with reshade.. i decided to enhance/update it for gshade. i have been meaning to do this for a while and finally decided too. some shaders were added but honestly majority of them are the same. i decided to add some toggles for screenshot purposes as well.
INSTALLATION TUTORIALS: anything not mentioned in these videos i unfortunately can’t help with but this video shows how to install gshade + presets.
my MUST have aesthetic mods to ENHANCE your game ♡ *g-shade install + tutorial* // the sims 4
oshin sims���s gshade tutorial
IMPORTANT: i use lighting mods/terrain overrides in my game. without those there is a chance your game may look different then mine. i will link all lighting mods/terrain overrides below.
milk thistle v2, no blu, no glo, tech-hippie terrain override
TOGGLE KEYS: pirate bloom off/on (shift + 3)
adof on/off (shift + 4)
adaptivesharpen/film grain (shift + 2)
FILE LOCATION: C:\Program Files (x86)\Origin Games\The Sims 4\Game\Bin\shade-presets\custom
TOU: do not reupload and claim as your own. do not use as a base, tweak, and try to claim as your own. tweaking for personal use is completely fine. i hope you enjoy this preset. if you use it make sure to tag me so i can see 😊
*all preview pictures are unedited. the environment pictures were taken in summer around 2pm. i also used srwe to take these screenshots.*
download (free)
1K notes
·
View notes
Photo


strudel by elaina gshade preset ♡
another preset wooo, i am obssesed with this one bc its so soft and warm. especially since fall is near i wanted to me a preset that would make your game feel cozy. this preset is intended for gameplay and screenshots!
this preset was made using gshade so i am unsure if it would work with reshade.
anything not mentioned in these videos i unfortunately can’t help with but this video shows how to install gshade + presets!
https://www.youtube.com/watch?v=Sk7B_XyvIrg&t=754s
https://www.youtube.com/watch?v=bzaSskKHeE8
IMPORTANT: i use lighting mods/terrain overrides in my game. without those there is a chance your game may look different then mine. i will link all lighting mods/terrain overrides below.
milk thistle v2, no blu, no glo, tech-hippie terrain override
when you startup your game the startup preset is the one i use for gameplay. if you would rather play without mxao or if you want to take a screenshot with a nice blurred background you can toggle those using the keys below!
toggle keys: mxao 4.0.2 off/on (shift + 2)
gaussian blur, magic bloom, cinematic dof on/off (shift + 4)
this file goes into your C:\Program Files (x86)\Origin Games\The Sims 4\Game\Bin\shade-presets\custom
do not reupload my preset and claim it as your own
do not edit or change presets and upload it as your own
you can edit and tweak for personal use but don’t reupload and always make sure to credit. I would love to see your screenshots or gameplay using it ♡
download (free)
839 notes
·
View notes
Text
jesus christ. fine. ill say it. im sleepy. im sleepy, okay? do you know what being sleepy does to a person? to their spirit? i should be pitied.
139K notes
·
View notes
Photo


+ Jamais Vu +
┊┊┊⇢ ˗ˏˋ “ How many times have you died ? ”
347 notes
·
View notes