
Don't wanna be here? Send us removal request.
Statistics
We looked inside some of the posts by iainsprottvideoblog-blog and here's what we found interesting.
Average Info
Notes Per Post
0
Likes Per Post
0
Reblog Per Post
0
Reply Per Post
0
Time Between Posts
8 days
Number of Posts By Type
Text
9
Last Seen Tumblr Blogs


Fun Fact
In Q3 of 2020, 31% of US users access the Tumblr app daily.
Text
Final Video & Evaluation
Final Video
youtube
https://youtu.be/ponF62c95l4
Evaluation
I am extremely happy with the outcome of my promotional video I created for Jason Markk, I have created some videos before including a mock movie trailer which involved a lot more post production than this promotion video but without a shadow of a doubt, this is the best video I've ever produced.
I'm going to link my trailer video below and then analysis why I think this promotion video is much better than the trailer I previously produced.
youtube
https://youtu.be/pJK1yA2ALok
So what are the positive and negative aspects of this trailer;
The Positives
The framing of all the shots are all well done
There is a good range of shot types such as long shots and extreme close-ups
Music and foley sounds are used effectively
Some nice post-production video effects added
Good narrative throughout video and suits the genre of “Thriller”
The Negatives
Sound recordings are not up to standard with rest of the video
There are zero uses of camera movement such as camera pans or zooms
There are no transition effects used all clips just jump of after another
Some camera shaking in one of the scenes when the camera is used free hand which is not fixed in post-production
How do I feel the Jason Markk stands up in comparison;
The Positives
Good diversity in the shot types
Nice use of different camera movements including pans and slider zooms
Music suits the video very well
The transitions are fluid linking into each other very
Graphics are legible and good use of fonts
The video appeals to its target audience
The Negatives
The opening clips has some unintentional blurring which happened during editing which I could not fix
Some of the framings of the clips were slightly too low and cut off the top of products off.
What am I proud of when making this promotional video?
I am really happy with the amount of effort I put in and how the video came out. I went out multiple times into Belfast with different people and every single time was useful to the project in some sort of capacity. I am extremely thankful for the help Thomas and Matthew gave as they had no obligation to help me but decided to anyway.
I am happy with how noticeable the amount of research I put into this video is as it is reflected in the video itself. I am also happy with the preproduction work I did putting together storyboards which laid the framework for my video and am proud I was able to record and use all of the clips that I had planned my storyboards.
What do I feel I could have improved or if I were to redo this projects what would I have done differently?
One of the main things I forgot about was how important music and sounds are within a video not only to set the theme but to create transitions. One of the things I would do differently when doing pre-production on this project would be to determine the music before shooting the clips and create clips suitable length to match the music. Another thing I would do if I were to revisit this task would not just think about the clips I want to get when storyboarding but also think about the how I can create transition while shooting the clips, such as whipping the camera fast in a certain direction at the end of a clip then whipping it that same direction at the start of a different clip.
Another few improvements I would make would make sure I check the framing of the clips I am taking before and after recorded to ensure everything is in the frame that I want to be in the frame. I also think a really nice addition the video would be a few foley sounds interlaced throughout the video.
0 notes
Text
Post Production
After I was happy with all the clips I had collected, separating out all clips that weren't suitable for the video and put the good clips into a folder that could easily be used within Premiere Pro.
I started a new Premiere Pro project and started putting the clips in the order that I had them originally arranged in my storyboards. I then played the preview of the clips but was not satisfied with the feel of the video and how the clips transitioned into each other as I had alternating types of clips going from the product shot to on foot shots back to product shots.
I then went back, looked at my research and watched how their clips all transitioned together. This is where I realised I missed a massive part of these videos, the music. The music is such a crucial part of the videos as it sets the tone, pace and atmosphere of the videos, the music also helps with transitioning the clips together. It seemed that the clips would change the beat which made the quick jump cut transition seamless and didn't leave me thinking why did that cut there.
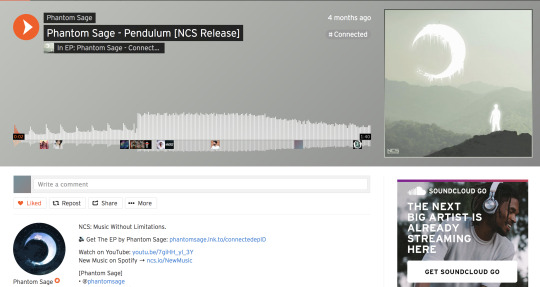
With this new knowledge of how to lay out my video and create seamless transitions, I went looking for Copyright Free music that had a noticeable beat constantly throughout the song. I knew of a few places I could find free music such as Youtube’s Free Music Library (https://www.youtube.com/audiolibrary/music) and NoCopyrightSound on Youtube (https://www.youtube.com/user/NoCopyrightSounds/featured?disable_polymer=1). I knew I wanted the music to be more leaning toward the electronic genre as this is a faster genre with noticeable beats I can sync the clips to. Knowing this I decided to get my music from NoCopyrightSound but because I needed noticed beat hits in the sound I decided to look throw their songs on their Soundcloud page as Soundcloud shows the waveform of all the song uploaded and this would help find song with noticeable beat hits are I just need to look for peaks in the waveform.
I eventually settled on Phantom Sage’s Pendulum (https://soundcloud.com/phantomsage/pendulum?in=nocopyrightsounds/sets/connected), although it is on the artist own page it was released by NoCopyrightSounds (NCS) and falls under their copyright free for creators system. As you can see from the image below of the waveform the start of the song is very quiet with noticeable beat hits and then there is a sudden change in within the song and it becomes a long louder and faster.
My idea behind choosing this song was to change the way I had originally thought I would arrange my clips and had them storyboarded. Instead of having alternating subjects of the clips i.e, product then shoes then back to product shots, I thought that because there is such a difference in the two parts of the song I could use all my product clips at the start of the video and then when the song changes I would swap to on foot shots.
Now that I had the music settled, how I was gonna arrange my clips to the music and transition them. I started another new premiere pro project and pulled the music onto the timeline along with added markers with the audio track on all the beats (see image below) so that when adding clips they would snap to the marker of when the beat hits.
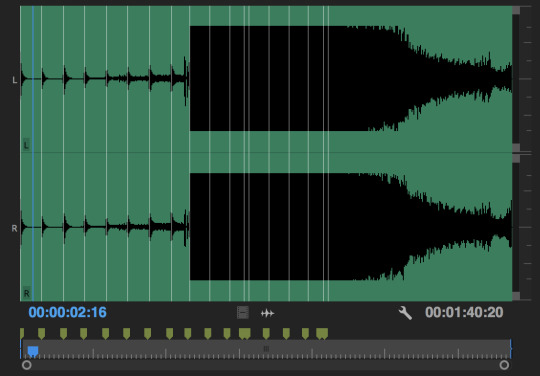
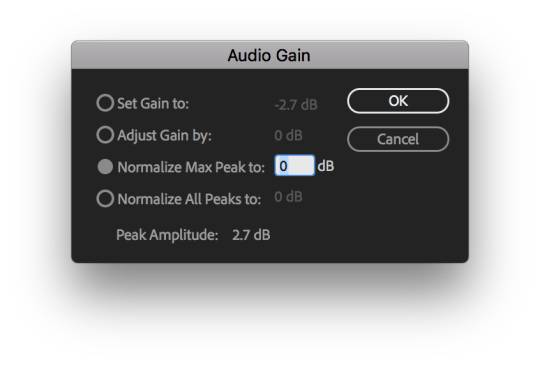
One thing I had to do with the stack was to normalize its audio peaks this was because the volume of the when the track change to its louder part was far too loud and was distorting while playing through speakers. Setting the max peak meant it would not surpass a certain amount of dB and not cause any distorting through the speakers. You can see this in the image of the waveform above as the waveform flattens out where I set the max peak.
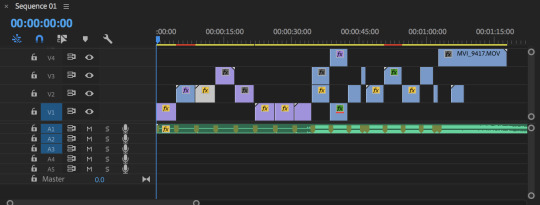
Below is a screen grab of the sequence timeline where you can see all the clips placed between the markers of when the beat hits occur in the audio track.
To allow this to happen I had to use two techniques to change the length of the clips, the first being relatively simple while the second was slightly more complex. To make the clips short to fit between the markers all I had to do was hover over the start or the end of the clips and the trim selection tool would appear allowing me to drag the clip to whatever size I wanted, even snapping the markers.
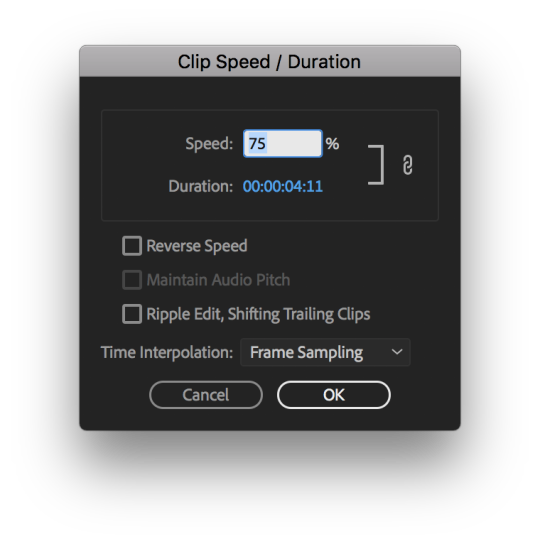
Not all of the clips were too long to fit between the beat markers some of them were too short and I had to use the Clip Speed / Duration tool to slow the clips down and make the clips the length of time between markers. The Speed / Duration tool also came in helpful when I need to reverse some clips and I did this by just setting the speed to -100% which meant it played backwards at normal speed.
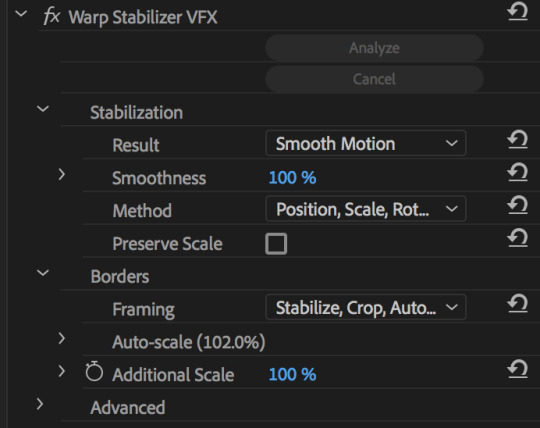
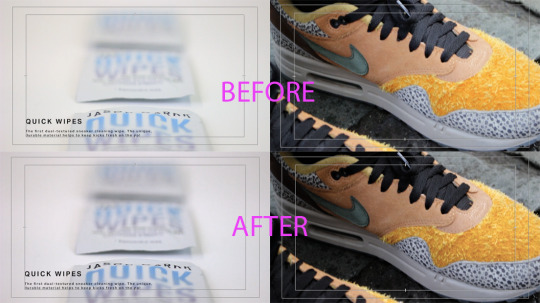
Another effect I used was the Warp Stabilization effect. This effect is added on top of existing clips and reduces the amount of shake within the clip. Below you will find a screenshot of the effect settings I used to make the most effective use of this effect as well as a side by side comparison of a clip before and after applying the effect.
youtube
https://youtu.be/QiFlcijg7Lw
After I was happy with the arranging of the clips and adding any effect I needed to add to improve the quality of the clips, I started into creating the graphics for the videos such as the title sequence and the product names and descriptions.
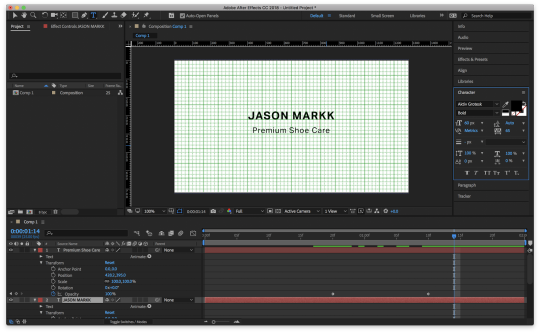
To create the opening title sequence I just opened After Effects up, downloaded the font from the Jason Markk website called “Aktiv Grotesk” in two weights bold and regular. I used the bold in all caps for the words Jason Markk and then the regular for the words Premium Shoe Care. I then used simple opacity changes on the text layers to get the text to fade in.
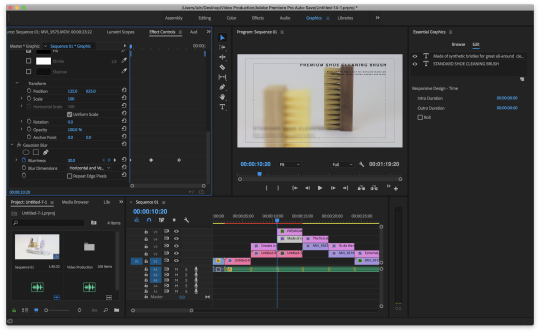
For the product titles and descriptions, I used the built-in graphics view within premiere pro. Again I used the two different weights of Aktiv Grotesk, bold being for the product title while regular was used for the description of the product. These titles and descriptions were taken from the product page of the respective product on the Jason Markk website.
For one of the graphics overlays of text I used a gaussian blur effect to mimic the products coming in and out of focus, this was just simple key-framing the blur to be high when the respective product was out of focus and then remove the blur when the product was in focus.
The final piece of editing I added onto all of the clips were Lumetri Color effects that I downloaded from www.premiumbeat.com/blog/free-premiere-pro-lumetri-looks/. I downloaded all 14 and tested each one out trying to figure out which suit the clips the more.
I decided upon two different one for the different style of clips.
I used Knife Jogger on the clips I filmed with Thomas the second time as I felt this filter pulled forward the highlights within the shots and add a slightly more clean and edgier feel to the clips that appeals to the young a lot more.
I used Hogwash Express on the studio clips and the clips I took with Matthew. I used this filter as it seems to bring the shadows forward to be more noticeable and darken the shot slightly. Before and After screengrabs can be seen below.
0 notes
Text
Assignment Hand Out
Today the assignment brief was handed out for this module by Michael. This assignment is worth 100% of the unit and will be graded on my own individual effort.
The assignment is broken up into two main sections;
Section One, which is my design portfolio that I have been accumulating over the past few weeks and the weeks to come. This is where I will show my breadth of knowledge on the individual components of this unit as well as my ability to replicate and use the techniques I have been taught.
Section Two, this section I am tasked with creating a promotional video for a product of my choosing. First carrying out research into the product, then presenting this research to my tutor on what product I have chosen and why I want to create a promotional video for the product. After I have presented my chosen product to Michael and he has given his approval of the idea, I will then be able to start into pre-production of the video. This is when I will create storyboards, shot lists and a short synopsis of what this video is being produced and what it will entail. When all these steps have been carried out I can then start into producing the video i.e going out and shooting clips for the video. Finally, when I am happy with the clips I have collected and feel I can turn the clips into a fully fleshed out promotional video, I will begin the post-production stage, pulling all the clips off of the camera’s SD card and taking them into Adobe Premiere Pro where I will edit the length, speed, colour, etc of the clips as well as adding any necessary text or graphics into the video.
The conclusion of this assignment will be a presentation where I show all of the steps from original research of the product, pre-production steps, shooting of the clips, post-production and finally analysing the final product.
Choosing my product for the video
I struggled for a while coming up with an idea of what I could use as the subject of my promotional video, I looked at what past students had done for their video but this did not help me much for coming up with ideas for what I could use as my subject. They all seemed to be local businesses such as a cafe or a tattoo studio that the past student had connections to or a was a friend that needed help promoting their new business. I have no such local businesses or acquaintances that I can message and ask if they would like.
This is when I asked Michael if the subject has to be local business or product. I was told no, the subject can be on anything as long as it is a promotional video it does not matter what it is on.
I then thought to myself what subject matter can I produce a video on that personally have a passion about and that others I know what be passionate about that if I needed to call on actors to help me that I could easily think of friends that would likely agree it help. I instantly thought of sneakers and the friends I made last year within the department who are true sneakerheads and would not hesitate to help me out with anything sneaker related.
So I have decided upon the subject matter of sneakers but what product or business can I produce a promotional video on?
I originally thought about producing a video on Adidas sneakers as they had seen a massive increase in popularity thanks to the release of new shoe silhouettes, Ultra Boost and NMD trainers. I decided against this idea as I realised Adidas was already a massive brand and everyone has already heard of them. I see no benefit in producing a promotional video for Adidas.
I took a step back away from the idea of using a singular sneaker company as that pushes into polarizing groups within the sneakerhead community of fanboys that only like one brand and slander other brands that they do not like. The product I would have to choose would have to appeal to everyone within the sneakerhead community.
I had to think about what everyone sneakerhead has in common when it comes to there sneakers and how they look. They want them to look as clean and fresh as possible no matter what. This is when I settled on a going down the route of producing a video on a shoe care company but which one.
There are two main shoe care brands within the UK, “Crep Protect” and “Jason Markk”
Crep Protect

Crep Protect products are available at massive sneaker retailers such as Footlocker and JD Sports. They seem to be targetting the youth and the general public by offering shoe care products and how they produce their promotionally material for example please watch this youtube video below.
youtube
https://youtu.be/09bhOioDtLU
In this video, you can see a pair of Adidas Yeezy 350 V2′s in Cream White which would cost you over £300 to purchase as they were a limited release. The shoes are worn out in a field where they were then plunged into a muddy puddle and entirely covered in mud then allowed to dry and then are cleaned, all while high-intensity music is playing over the video. In my opinion, this video is not targetted at sneakerheads who do their utmost to keep their sneakers clean. This video is produced for the young, casual sneaker fan who would is impressed by the recklessness of the video and how the product then cleans the shoe.
Jason Markk

Jason Markk is a much less recognizable brand as their products are in a lot less high street retail stores the only one it is in is “Size?” as small retail chain supplying all things streetwear within in the UK. Jason Markk markets itself as a premium brand when it comes to shoe care, this is put across in how their products are designed and how they produce their promotional material. Their branding is extremely clean and striped backed using very little colour and simple typography.
Jason Markk’s existing promotional videos are all extremely well produced incorporating many different shot types, pans and focus techniques. Their videos they produce are nowhere near as gimmicky and scream of professionalism. For example, see video below.
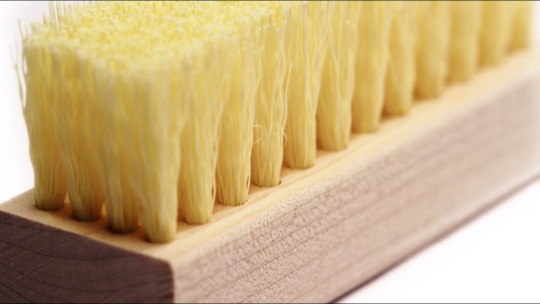
vimeo
https://vimeo.com/153568786
This is a promotional video on one of Jason Markk’s products, a simple shoe cleaning brush but look how much time and effort is put into shooting the product from different angles, in a professional studio environment. You can tell Jason Markk takes great pride in their products not only in how they well they work but the design of them as well. They also do not patronize the sneakerhead community almost destroying an expensive shoe and then cleaning it, they show are slightly muddied shoe but not taken to the extreme like crep protect. The audio track used is fast-paced again but not as much as the crep video but is used perfectly with the clips as transition effect between clips with the beat of the music.
My choice of company and why.
I have decided upon producing my video on Jason Markk products as I am impressed by the aesthetics of the products themselves which I feel will photograph extremely well. I will also potentially be able to to have access to a lot of Jason Markk products as Thomas Hamill ones of the massive sneaker enthusiasts I mentioned earlier, already has a large majority of Jason Markk products and I will message him about borrowing them from him to use for filming instead of buying all of the products myself.
Research into Jason Markk
Now that I have decided upon Jason Markk I am going to look deeper at the videos they have already produced and make a decision whether I want to create similar looking and feeling video to there already existing videos or whether I will go in a totally different direction.
Here are a few videos I looked at while making my decision.
vimeo
https://vimeo.com/153568788
vimeo
https://vimeo.com/153568787
I have grabbed a few screengrabs of shots I really like from these videos and would like to try to incorporate into my own video maybe.
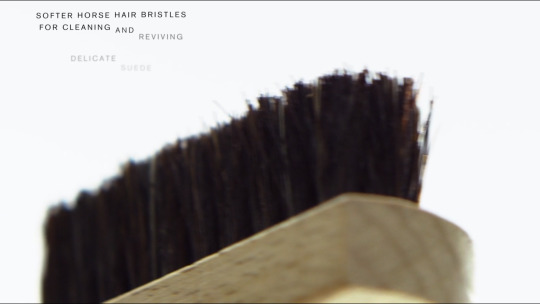
This is an out of focus shot of the suede brush which pans across the frame never going into focus. This has opened my eyes that not every single shot I am going to take needs to be perfect and crisp.
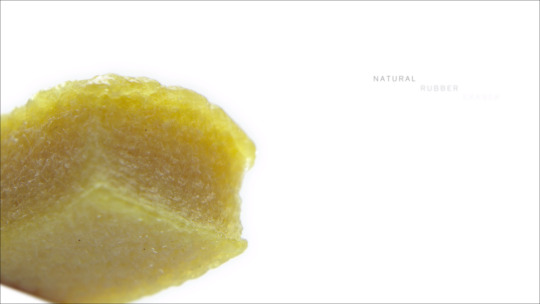
This is a shot of the suede eraser when the aperture seems to be extremely low as you can see the details of the rubber that is set further back while the closer and further away parts of the eraser are slightly out of focus. The shot also slowly zooms into the eraser which I love and think I will try to incorporate into my own video as it main there will be less static clips that are can be boring.
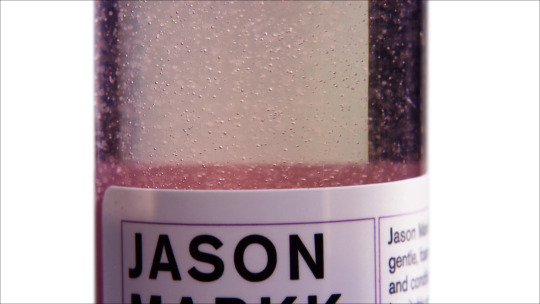
This is a shot of the cleaning solution from the essentials kit as bubble rise up from the solution this is an extremely beautiful shot but would be extremely hard to replicate with the camera set up I will be supplied with for this assignment.
Here is another depth of field shot again using an extremely low f-number. I do like the effect of having different parts of the shot in focus and out of focus at the same time.
The creative direction I want to take my video
Although I really like the existing promotional videos for Jason Markk as you can see from the screengrabs above all of the shots I like are close up or even extreme close up. In a studio environment, this makes sense to do because you can set up perfect lighting to really show off the detail of the products but for this assignment, I feel that if I am wanting to achieve higher marks I will need to use a range of different shot types and shot in different locations instead of just close up shoes in a studio environment.
To get a better range of shot types I am going to ask the sneaker enthusiasts I mentioned earlier if they would be willing to come into Belfast wearing their best sneakers so that I could get some nice on foot shots of some sneakers using different camera techniques and put those in my video alongside the studio clips.
Examples of what on foot shots I would be looking to recreate.
https://www.facebook.com/thesolesupplier/videos/1485369751547046/
https://www.facebook.com/thesolesupplier/videos/1483437565073598/
https://www.facebook.com/thesolesupplier/videos/1478620172222004/
Unfortunately, Tumblr does not allow the embedding of facebook videos so I will pull some screengrabs of the shots I like and some consistencies throughout my the different videos I noticed while researching.
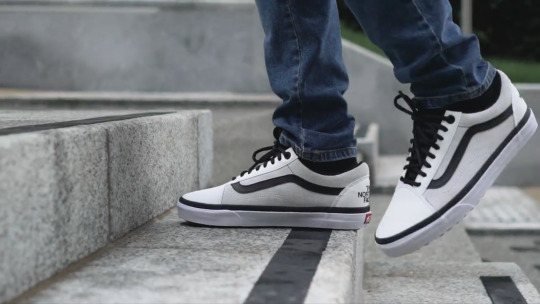
This is a tracking shot as the shoes walking up a set of steps. The shot is medium shot, with the focus being on both feet and the background is blurred.
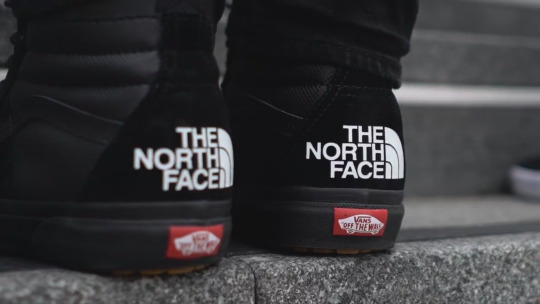
This is a close up on of the back of the shoes displaying the branding. The focus is on the right shoe while the left is out of focus
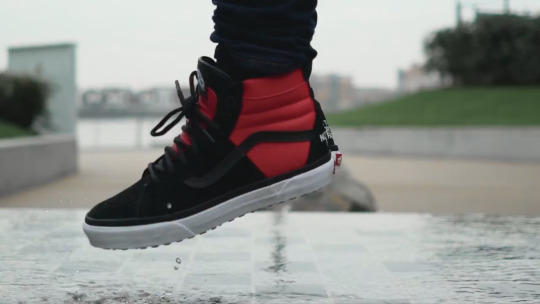
This is a shot of a pair of shoes jumping in a small water feature, the shit is a medium close up and the whole shoe, part of the water and the water drops that are pulled up while jumping is in focus I think there use of water in this video is really good.
This shot is a medium close up while the camera slowly pans around the shoe. The focus of the shot is on shoes and a slight bit of the ground around them, the rest of the shot foreground and background is out of focus.
A different video but a shot of jumping shoes is used again. This time in a pile of leaves that follow the shoes up again like the water did. Yet again the shoes and leaves are in focus when they are moving. The shutter speed is also quite high as there is little to no motion blur.
This is a close up of the shoes in which one shoe is in focus and the other is out of focus. I really like this shot and think it would be easy to replicate as all you need is a 50mm lens with good aperture settings.
This is another medium shot but this time is taken from the behind the shoes which shoe off some of the details otherwise missed with only panning the front of the shoes. For the focus of this shot, the focus is on the foreground with a mild blurring of the right shoe and then full blurring of the background.
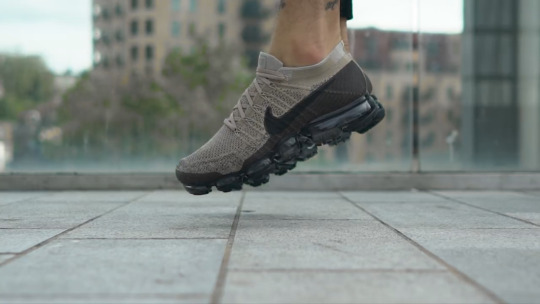
This is yet another shot of the shoes jumping in the air, this seems to be a running them in on foot videos of shoes and I may try to implement it into my video.
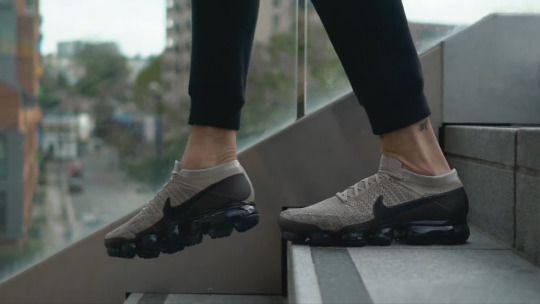
Another shot of shoes walking on a set of steps, this too seems like a consistency across many videos so I might try to incorporate into my video.
That will do for my research into how sneaker cleaning and on foot video clips look otherwise ill get lost in a cycle of watching sneaker videos.
The editing of these videos
So after researching what clips go into the videos now let's talk about any edits to the original clips in terms of colouring, brightness or saturation, whether clips are speed up slowed down or digitally zoomed in post-production and finally how the clips transitioned together.
If we look at the Jason Markk product videos first they do not seem to be too much editing of the original clip in terms of colour correcting or effects of that kind but I am sure there is a small amount of editing on each clip just to sharpened the image slightly and make the highlights stand out a might more from the background.
As for effects to speed of clips or changing of framing in post-production within each promotional video from Jason Markk’s there seems to always be at least one or two clips that either a digitally zoomed (usually a jump cut zoom instead of a slow zoom), slowed down after showing the beginning of the clip at full speed or ever the same short clip is repeated right after itself.
The transitions between the clips are all just simple jump cuts there are no complex transitions in the between the clips once the last clip ends the next clip just starts. The one thing I will say is that the clips of the same subject matter are grouped together and transition together this makes the jump cuts easier on the eye.
Onto the on-foot shots by Sole suppliers and how they are edited in post-production.
Yet again the same as the studio shots there is not a lot of noticeable colour correction or changes to contrast or saturation is but there is more than likely a mild filter added on top of the clips to give them a sharper look but the clips seem to be kept as natural as possible.
With the Sole supplier clips, they seem to be slowed down a lot especially when the subject is walking and then when there is an action shot, for example, a jump the clip it will jump zoom in and then back out.
All the clips are very short and edited together in a quick sequence but this time there are actually some clip transitions other than jump cuts such as clips swiping across the scream into the next one.
How is text presented in these videos?
For the Jason Markk videos, the text that is used seems to be the same one as their branding and is used in an extremely clean way with a lot of white space around the text and seems to fade in and out of the clips. This really goes with the aesthetic of the video and compliments the clips perfectly.
I was able to find out what the font Jason Markk use themselves thanks to a web extension for chrome called “WhatFont”. I went onto the Jason Markk website and used the extension and it grabbed the information form the CSS code of the website and was able to tell me the font used were AktivGrotesk and in two font weights, Bold and Regular.

0 notes
Text
Workflow and Sound
For this entry, I am going to merging two tasked together. I will be added the sound task to the workflow task.
This task was to recreate a scene from an existing movie and go through the full workflow of starting from idea generation all the way through to the final product. We would not be exactly following along with totally copying an existing movie scene instead we would little through a list of sound clips supplied to used by our tutor and select the one we feel we can create the best Horror movie inspired video from.
The audio clips we were supplied with were from an Italian Horror Studio, all of the clips seemed to be slow and very dark except for two. We agreed the tracks 5 and 14 seemed to have the most potential as they were faster paced and would work well for the Horror style scene we were gonna create.
The premise behind the video we decided upon would be what seems to be a chase scene of the main protagonist running away from someone following him who is simply walking after him. This goes with the audio as it starts off very dramatic and then at the very end it calmed down, this calming end part is when the protagonist can get away from the person he thinks is chasing him.
We wrote a quick synopsis which goes like this;
Synopsis
In this video, a character is going to come running and bursting through a door as dramatic, fast and dark music plays, the audience will then be shown another character following the last character the same direction though they are only walking. This same scenario will repeat itself in different locations around the campus until the character finally hides and the person behind walks past where the ominous music will calm down.
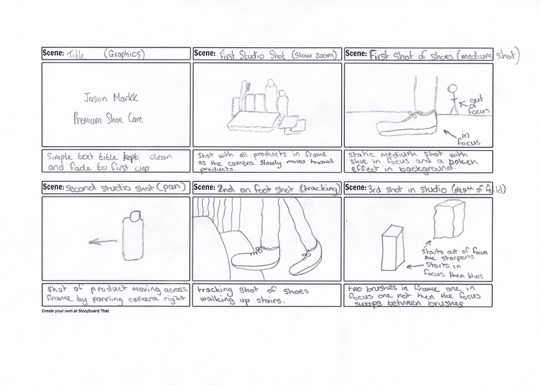
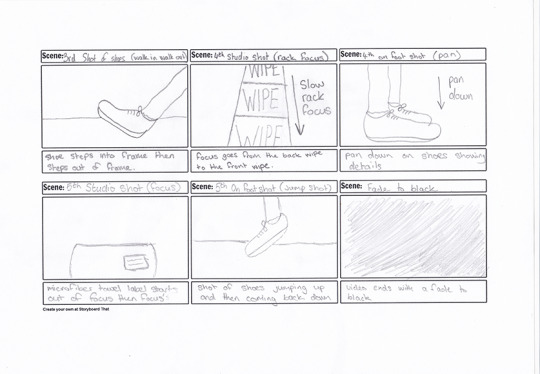
Storyboard
Below is the storyboard of the what we wanted the shots to look like before we left the classroom and went shooting.
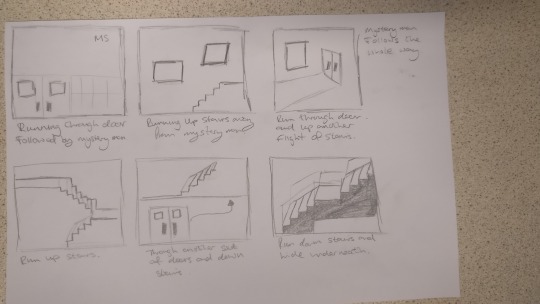
Shot-list
Below is a shot-list of all the different clips we were aiming to get before we left, the list includes what type of shot, the type of pan and a description so the actors know what they are to be doing in the shots.

Post-production
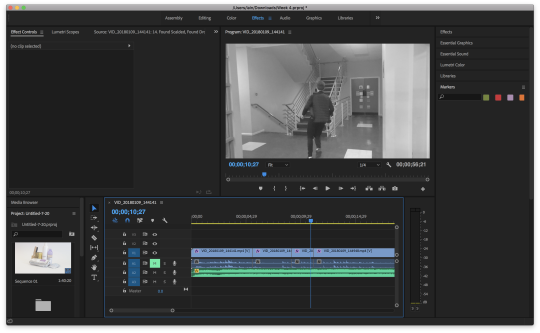
After all the clips were shot they were then arranged in order with the audio track that was chosen before filming any clips, the clips were trimmed down slightly because cues needed to be given etc. The audio recorded along with the clips was muted to make the music all the more ominous. Finally, there was a black and white filter added on top of all the clips to give the video that extra horror feel.
The Chase Video
vimeo
0 notes
Text
Cinematography & Lighting
Three Point Lighting
The 3 point light is a technique used within cinematography to make the subject being shot stand out a lot more than its background and surroundings. This is done by using three different light sources, a key light, a fill light and a backlight.
The key light is the most important light and illuminates most of the subject. It tends to be the brightest light and set up facing the subject at roughly a 45-degree angle beside the camera.
Here is an image taken by myself slowly introducing the 3 point lighting technique one light at a time. Starting off with only the Key light.

You can see the Key light in use above positioned to the right of the camera and the subject as they look past the camera which means there are shadows on the right side of the subject's face.
The Fill Light is the used to fill in the shadows that the key light casts across the subject. The fill light is placed on the opposite side of the camera from the key light.
As the fill light is on the left-hand side of the camera and the subject is looking off to the right of the camera the fill light illuminates a lot more of the subject than the key light originally would.
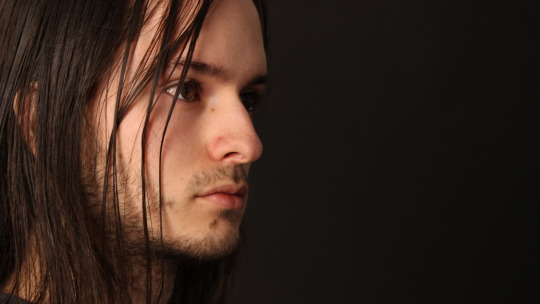
Finally the backlight, this is the weakest of all the lights in the 3 point lighting techniques. This light is placed behind the subject and illuminates the subject from the back causing a glowing effect as the light flows over the hair and shoulders. This light is the weakest because if the light is too bright the effect that has on the subject can ruin the shot such as red glowing ears were the light just shines straight through it is that bright.

Here is an image I grabbed of the subject with only the backlight on, because of the framing, the position of the subject and the general weakness of the backlight it might just seem like this shot is light by overhead classroom lights but that is not the cause. If you look at the left side of the subjects face as he faces away from the camera you can see the light from the backlight shining through the individual strands of hairs
Bibliography
En.wikipedia.org. (2018). Three-point lighting. [online] Available at: https://en.wikipedia.org/wiki/Three-point_lighting [Accessed 19 Jan. 2018].
Hyman, I. (2018). Three Point Lighting: Learn About Key, Fill, and Back Lights. [online] Izzy Video. Available at: http://www.izzyvideo.com/three-point-lighting/ [Accessed 19 Jan. 2018].
Mediacollege.com. (2018). Three Point Lighting. [online] Available at: http://www.mediacollege.com/lighting/three-point/ [Accessed 19 Jan. 2018].
0 notes
Text
DSLR Video Techniques
ISO & Aperture
ISO and Aperture are grouped together as they behave in the same manner when adjusting them on your DSLR camera. So let me explain what each of them does.
ISO - The ISO setting on a camera is where you set how sensitive to light the camera's sensor. The lower the ISO number the lower the less sensitive the sensor is when capturing images or footage. So the lower the ISO number the darker your shot will be and the higher the number the brighter the shot will be.
Think of it like how your eyes are super sensitive to light after spending a lot of time in a dark room and then you step out into the sunlight and it takes a minute for your eyes to adjust. This is the sensitivity you are adjusting when changing ISO numbers.
When shooting in natural daylight or in a controlled studio setting it is advised to keep the ISO between 400 and 800 as the higher you go up into the ISO numbers the grainier the image or footage will become. That being said when low light shooting you will have to use higher ISO number otherwise your shot will be far too dark and will be left with a horrible image.
Aperture - The Aperture on a camera although it does roughly the same thing as ISO, actually can change a lot more things in your shot other than just the brightness. Aperture numbering is also a little bit more complex than the simple numbering of ISO, Aperture is adjusted using “f” numbers which stand for “focal ratio”. These “f” values are situated a lot closer to each other unlike ISO which goes up by hundreds at a time “f” value can go up in decimals at a lime.
Its all well and good talking about these numbers but what do they actually change physically in the camera to adjust the shot? There is an iris inside of D-SLR lens which opens and closes allowing different amounts of light into the camera. Changing the aperture settings is what opens and closes this iris.
The wider open the iris the lower the f-number and the more light/information gets into the sensor. While the tighter the iris is closed the higher the number and less light/information is allowed into the sensor.
I used the word information as well as light as aperture settings do not only change how bright your shot is. It also changes the range of focus of the camera. The focal range is how sharp of a blur is added to the rest of the frame that is not in focus, this is also how you create a depth of field shot. With a high f-number, almost everything is kept in focus and very little is blurred out. With a low f-number, you can create pinpoint sharpness and while the rest of the frame is totally blurred out and also create beautiful depth of field images and bokeh effects, which is when lights in the background of your image are out of focus so much that they the sensor perceives them as simple bright geometric shapes such as circles or hexagons.
Example Video of Aperture I created as part of a small group. The example shows the massive differences in the in depth of field between a high f-number and a low f-number. As you can see in the example below an aperture of f11 tries to get everything in the shot in force as much as possible while an aperture of f2 concentrates on a different depths of the shots.
youtube
Shutter Speed
Shutter Speed also referred to as exposure is a setting measured in seconds but mostly fractions of a second, these fractions reference to the number of seconds that light is allowed into the camera sensor for. The longer the sensor is exposed to light the more motion is picked up within the frame this creates an effect called motion blur. Motion blur is when the camera shows the motion in a still image where the movement starts out of focus and then ended as in focus this causes a trail of blurred light in the frame.
Example of a how different shutter speeds can affect the sharpness of moving vehicles in a scene I filmed with Matty. I really like this example as you can see truly see the difference in the blurriness of the text on the van shot at a 1/50 Shutter speed 11 seconds into the video compares to the
youtube
White Balance
This camera setting controls how the camera perceives colours, depending on your white balance settings your camera will alter the warmth of the shot depending on the lighting set up you are using but adding more a yellow tone if the light is too cool and adding blue to the shot if the shot is too warm.
Colour temperature (measured in Kelvins (K)) plays a huge part in the inner workings of white balance. Think of it like acids and alkalis. there is natural colour temperature sitting around 5000K, warm temperature around 3000K and cool colour temperature around 8000K
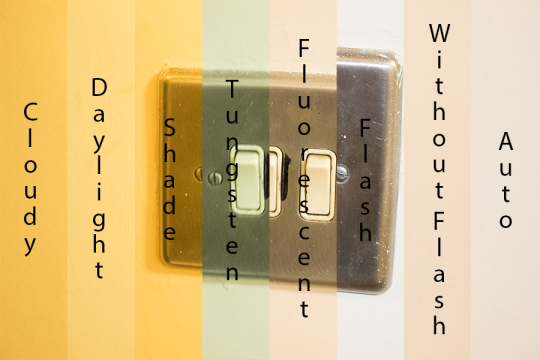
There will normally be 7 different setting profiles you can choose from when it comes to white balance on your camera.
Auto - Choose this profile when you do not want to keep flicking through the different profiles everytime you change location and the type of lighting changes. The small computer within the camera will determine the suitable amount of Kelvins that is needed to capture a well-coloured image.
Cloudy 6000K - This setting should be used outdoors when you are out int the open but sunny is hidden and there is no direct sunlight hitting the camera lens. This setting will usually warm the shot up a bit as cloudy days can make for some quite dull images without this profile and come out with a slightly blue tone.
Daylight 5000K - This setting is to be used outdoors again when there is direct sunlight hitting the subject you are shotting. Daylight is normal a quite neutral tone of light and does not need that much of a temperature change.
Shade 8000K - When shooting outdoors but underneath the sun this setting should be used just to add some more yellow tone to the shot.
Tungsten 3000K - Tungsten lighting is just lighting under traditional bulbs usually incandescent bulbs. These bulb usual radiate a much warmer light compared to office or studio light for instance. This setting will add blue tones to the shot to make it more neutral.
Fluorescent 6500K - This indoor lighting is a lot cooler than tungsten and means the shot needs to be warmed to make the balance neutral.
Flash 5400K - The flash on the camera is a very cool light which means on this setting the shot is warmed slightly.
Below is a series of photos of a light switch where the only thing that is changed is the white balance setting within the camera. There are two sections for flash, both using the flash white balance setting just one had the flash on while the other did not.
Bibliography
Digital Photography School. (2018). Introduction to Shutter Speed. [online] Available at: https://digital-photography-school.com/shutter-speed/ [Accessed 19 Jan. 2018].
Digital Photography School. (2018). Introduction to White Balance. [online] Available at: https://digital-photography-school.com/introduction-to-white-balance/ [Accessed 19 Jan. 2018].
Mansurov, N. (2018). Understanding Aperture - A Beginner's Guide. [online] Photography Life. Available at: https://photographylife.com/what-is-aperture-in-photography [Accessed 19 Jan. 2018].
Meyer, J. (2018). White balance explained: how cameras correct the color of different types of light. [online] TechRadar. Available at: http://www.techradar.com/how-to/photography-video-capture/cameras/white-balance-explained-how-cameras-correct-the-color-of-different-types-of-light-1320993 [Accessed 19 Jan. 2018].
0 notes
Text
Production
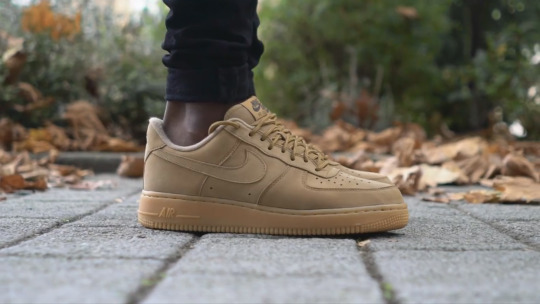
Production started on the video when Matthew one of the sneaker enthusiasts that I asked to help with this video said that he was going into Belfast before his classes started to take a few photos of the Cathedral Quarter for one of his modules, he asked me if I wanted to come along with him and get some on foot shots.
We arranged times and met up in town, I took the camera that I had rented out from the department in college which was a Canon 1000D with 2 lenses a 50mm and an 18-55mm, along with a filming tripod and the storyboard I had drawn out.
Once in town, we spend around 2 hours filming different clips one thing came quickly apparent though, when I started filming to get the best framing of the shoes you have to be extremely low to the ground.
This made it difficult for me to view what I was filming as I would need to lay on the ground to be able to see what was on the screen as the screen is in a fixed position. Matthew was kind enough to offer me his camera which has a Canon 600D which has a screen which can tilt out from the main camera body.
youtube
https://youtu.be/X2KKpxyOW14
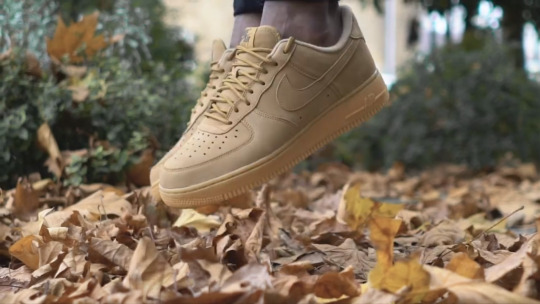
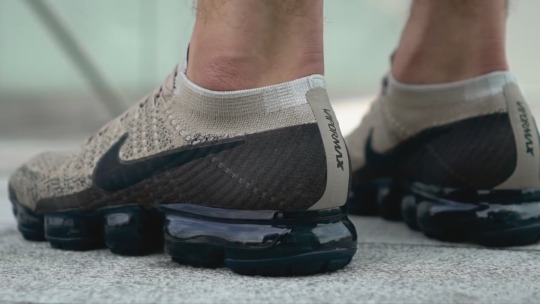
I managed to get 36 clips of on foot shots (some of which can be seen above) including all of the shots I had storyboarded out. After we were done filming we went into college and while in college I had a conversation with Thomas about going out filming, as well as him bring in some Jason Markk products for me to get shots of.
We arranged to go into town that same week before one of his class and one of the days I was off. I always asked Thomas to bring all the Jason Markk products he had at the time so that I could set up a studio environment in on of the classes once we were done in town and he had to be in class.
When the day finally came around to go filming with Thomas the weather was against us as it was raining in Carrickfergus so Thomas did not want to risk ruining some of his best shoes. He asked me if I still wanted to film or not because he was not willing to wear his best shoes. I decided to go ahead with filming anyway as it would be a good way to get used to how to set up shots that when we go out again with better sneaker it would not take as long.
Here are some of the clips I took of Thomas when we first went out together.
youtube
https://youtu.be/svXUF-8T7Kg
After finishing filming in Belfast we travelled back to college, this is when Thomas gave me the Jason Markk products to film while he went to class.
After getting the Jason Markk products off Thomas, I asked Michael if it was alright to set up a studio setting within one of the classrooms. I got the go ahead, I started by draping a good length of white background paper of a table, setting up a key light and fill light of so the shot would be fully light from both sides.
At the start of when I was shooting clips, I was only using a tripod and using panning and racking the focus between two different products. This is when Michael said I would get much cleaner looking clips if I used a camera slider.
Using the slider made it much easier to get unique shots like using an extremely low f-number and setting the focus at the end of the slider so when you slide the camera to the ender the products slowly come into focus.
Here are some of the shot is took while using the studio set up.
youtube
https://youtu.be/AIxqY5UKo4k
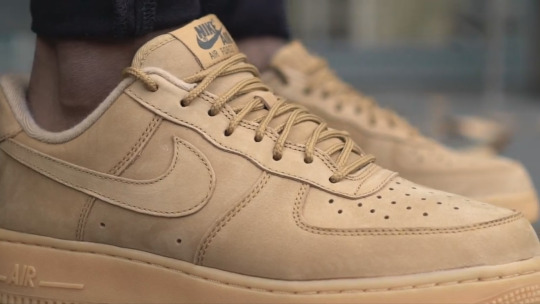
Since the first time going out with Thomas was not the most eventful for getting clips I was happy with I made plans to go out with him again but this time I thought it would be a good idea to bring the camera slider along with me. This would turn out to be quite awkward to carry around between locations because of its sizes but I believe it was fully worth it because of the clips I was able to take.
The final trip out I got a lot fewer clips than the other times going out with the guys but I feel the clips I did get were so much more professional looking and I would not be throwing many of them away.
Here are a few of the clips I took during the final day of shooting with Thomas in Belfast
youtube
https://youtu.be/KYWQedwyIX4
0 notes
Text
Pre-Production
This is where the pre-production begins, I’ll think about and draft up how I am going to conduct all the aspects of production of the video such as;
Writing a quick synopsis explaining what the video is so that if I need to explain what I am the video is for any actors I need to help with the filming, as well as laying out a creative direction.
Creating a storyboard for filming so that I don't have to think about what I need to film I can just look down at the sheet and there is it the next shot I need to take.
I will also be going out before filming to scout locations around Belfast to film and taking recce shots as part of pre-production this will help with story-boarding as the location can determine what clips I will shoot there.
Synopsis
I am going to create a promotional video for Jason Markk, Jason Markk is a premium shoe care company which produces products for the general public to clean their shoes to keep them looking brand new.
I am going to take two different approaches when I come to filming for the video. The first approach I will take in to set up a studio within the college and shoot the Jason Markk products there in a clean environment.
The second approach will be to go into Belfast with some highly rated shoes within the sneaker community and shoot on foot shots of these shoes, adding them to the video as well. This will grab the interest of a sneakerhead and keep their attention as they watch the Jason Mark products.
Recce Shots
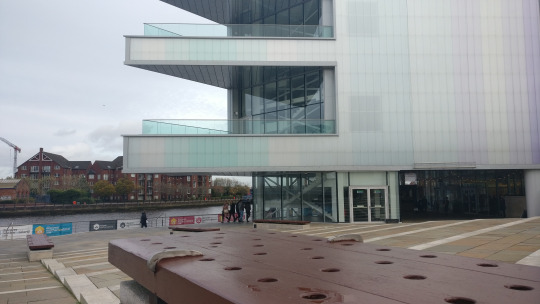
Outside the Waterfront’s exhibition hall entrance
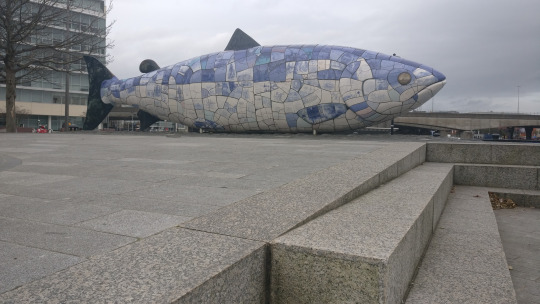
The Big Fish with steps
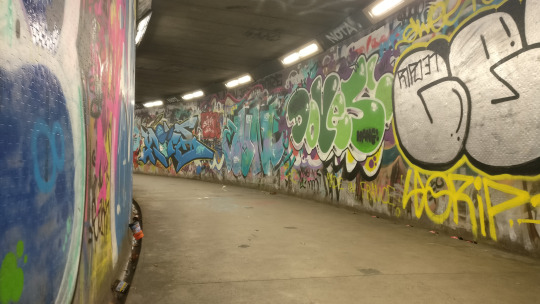
A subway under a main road
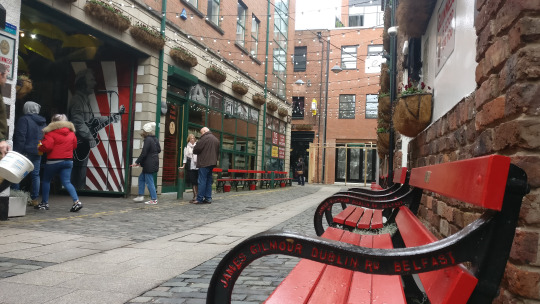
Commercial Court
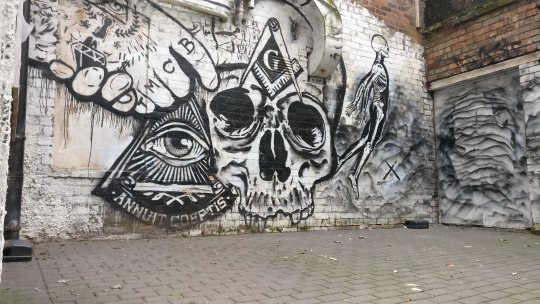
Mural opposite The Muddlers Club
Set of steps at Writers Square
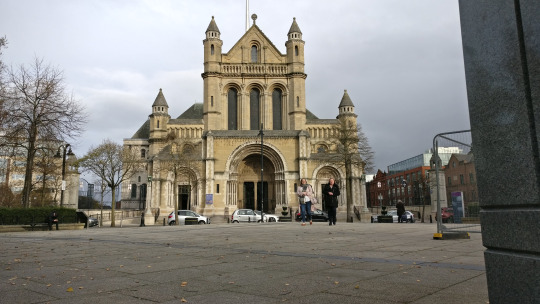
Saint Anne’s Cathedral shot from Writers Square
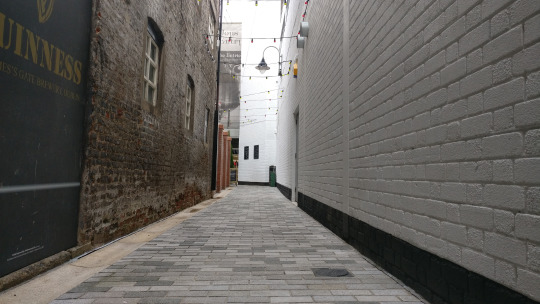
Joys Entry
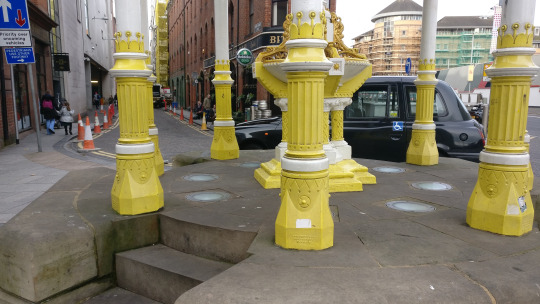
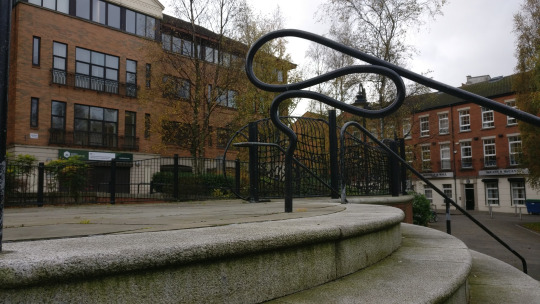
Jaffe Fountain at Victoria Square
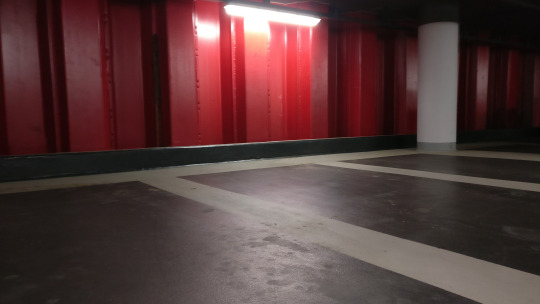
Victoria Square car park
Story Boards
0 notes
Text
Camera Angles and Shot Types
During this first week, we have been looking at different Camera Angles and Shot Types. We were shown a presentation showing different types of shots used in cinematography, within this presentation was information about the following main shots;
Extreme long shot (ELS) Long Shot (LS) Medium Shot (MS) Close-up (CU) Extreme close up (ECU)
Extreme Long Shot (ELS)
This shot is where the entire subject matter is within the shot, but only takes up a small amount of the frame. This allows the viewer to see the surroundings and the setting the subject matter is in. For instance, if a character in a field an Extreme Long Shot allows the viewer to see the character while also seeing the surrounding area. This allows the viewer to see if the character is secluded or surrounded by people, it also allows the viewer to grasp an understanding of scale.
Long Shot (LS)
This shot is very much similar to the Extreme Long Shot as the entire subject matter will be in frame from head to toe, but this shot adds much more detail of the subject matter while also giving it space to move within the frame without the camera having to readjust its zoom or shooting angle like it might need to on a closer shot.
Medium Shot (MS)
This shot the subject matter will be framed to take up roughly one-third of the shot, though only half of the subject matter will be shown for instance a character will only be shown from the waist up. This shot allows for more emotion to be felt while still allowing the audience to see the surroundings.
Close Up (CU)
This shot the subject matter takes up the large majority of the shot, usually more than half of the shot is the subject matter. This shot also only shows a small section of the subject, though for instance, if in a close up involving a character it would usually only show from the neck upwards. Close Up’s are very effective at conveying emotion across to the viewer.
Extreme Close Up (ECU)
This shot the subject matter nearly takes up the entirety of the shot and framing only concentrates on one specific part of the subject matter. If an Extreme Close Up were to be framed on a character it would only show one specific part of a character’s body such as their hand or their eye.
Task
Look at scenes from The Third Man by Robert Karsker and compile instances of major shot types and why the director used there shot types.
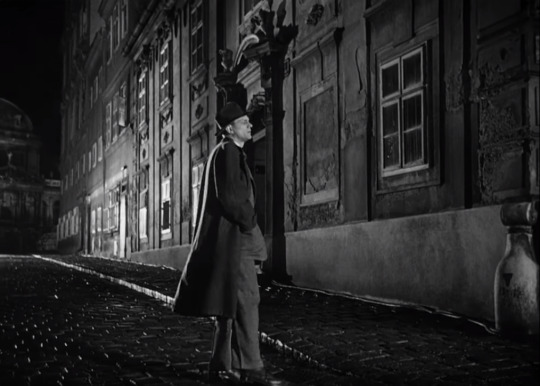
Extreme Long Shot

Karsker uses this shot to establish the setting of where this scene is occurring and how far into the Ferris Wheel ride the two characters are as one of them has opened the door. Karsker uses this shot as one of the characters asks the other character “Would you really real any pity if any of those dots stopped moving forever?”, using an Extreme Long Shot means that the Viewer does not feel any emotional response to the people below as they can not see their faces, their emotions or any details amount them. This helps to create a disconnect towards these people and the Viewer feels no emotional investment towards them.
Long Shot
This shot is used in this scene as it allows the character to move about the frame, without the camera having to track and move to keep the character within the scene which can be disorientating to the view. The frame also allows the viewer to see the changes in the body language of the character as he is being very lackadaisical as he strolls slowly through the streets kicking a can and slowly turning around when he hears a noise and suddenly becomes aware he's being watched and becomes nervous and takes cover behind a wall shouting to his watcher.
Medium Shot
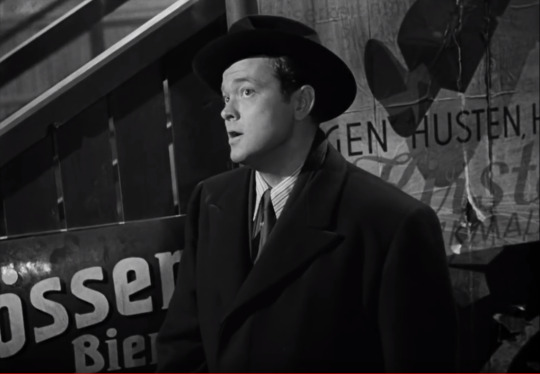
Karsker uses this shot as the character is starting a passionate speech about how Italy was gripped by war and terror and the outcome was great artists influenced by their experiences during those times while Switzerland has had peace all they produced is a cuckoo clock. The type of shot allows the viewer to see the passion and enthusiasm on the characters face without it being too intense if the director used a closer framing.
Close Up
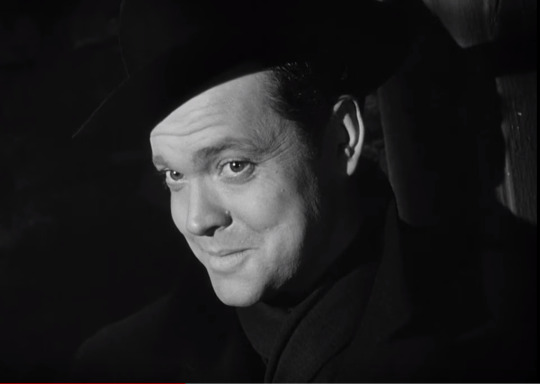
Karsker does a quick close up zoom into this Characters face as he is illuminated by a light. The character does not say a word he only stands there and smirks. A close up allows the viewer to get the full effect of the scene as the emotion conveyed is powerful.
Extreme Close Up
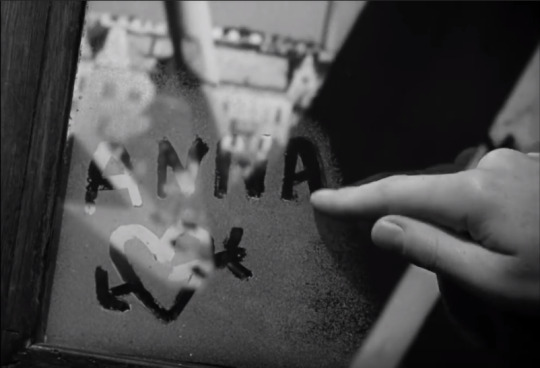
This Extreme Close Up is used after the character is seen drawing on the window off-camera during a Medium Shot. Karsker then shows an Extreme close up of the character's finger as he finishes his drawing/writing.
Task
Choose scenes from movies of your choosing and show what type of shot type was used and why you think it was used.
The movie I have chosen is Shaun of the Dead directed by Edgar Wright.
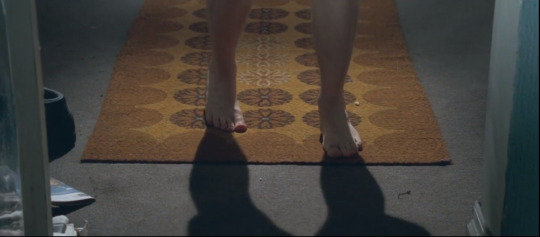
One of the opening shots of Shaun of the Dead is a Close Up of the feet of the main character Shaun stumbling towards the camera. The viewer does not know it is Shaun though and as he is stumbling towards the camera the viewer hears a deep groaning sound making them think this might be a zombie but as the camera pans up Shaun's body the viewer realizes that it is not, in fact, a zombie.
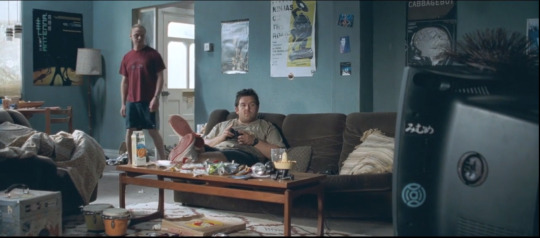
After the Close Up the shot then snaps to a Long Shot from the corner of the living room, revealing the other main character Ed lounging on the sofa playing video. This shot allows the viewer to get an understanding of the type of people the main characters are and how they live.
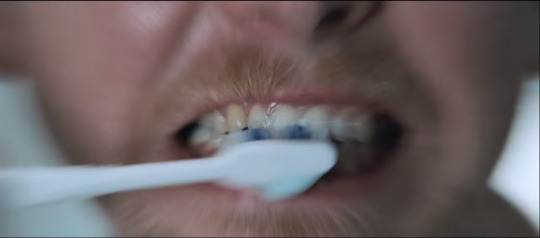
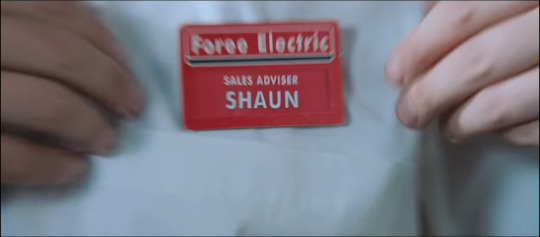
Throughout this movie, Edgar Wright uses a series of Quick Cutting 1-second Extreme Close Up clips to show mundane tasks such as Shaun getting ready in the morning so that the next scene can be more interesting instead of showing a boring bathroom scene of him getting ready, it also gears the viewer for the pace of the movie. One of the scenes also shows Shaun putting is name badge on for his job. After seeing his general age, seeing where he works and his position the viewer gets more of an understanding of the character.
0 notes