
Don't wanna be here? Send us removal request.
Statistics
We looked inside some of the posts by imagesmastersjournal and here's what we found interesting.
Average Info
Notes Per Post
1
Likes Per Post
1
Reblog Per Post
0
Reply Per Post
0
Time Between Posts
5 days
Number of Posts By Type
Text
5
Last Seen Tumblr Blogs


Fun Fact
There are dozens of funny blogs to kill time on Tumblr.
Text
The Learning Process of E-Commerce Image Editing

The learning process of e-commerce image editing involves mastering software tools and understanding design principles. It requires consistent practice and an eye for detail.
E-commerce image editing is a vital skill for online businesses, as compelling product visuals can significantly boost sales and engage customers. A beginner must start by familiarizing themselves with image editing software like Adobe Photoshop or GIMP, each offering a suite of tools for enhancing product photos.
Grasping concepts like image retouching, background removal, color correction, and shadow creation form the foundation of this expertise. The learning curve might seem steep initially, but with tutorials, online courses, and a community of fellow editors, an individual can quickly become proficient.
Visual designers in the digital marketplace aim for perfection, knowing that quality imagery leads to better customer trust and conversion rates. Developing this skill set not only enhances the aesthetics of an online store but also contributes to its commercial success.

Credit: www.techsmith.com
Elevating Visuals In E-commerce
In an online world where your audience's first interaction is often with an image, mastering e-commerce image editing is vital. Creating striking product visuals can significantly influence customer decisions. Let's delve into the importance of top-notch imagery and mastering the art of balance between beauty and truth in product representation.
The Role Of Imagery In Online Sales
Imagery acts as a silent salesperson in the e-commerce landscape. High-quality, engaging images can tell a story about your product, inviting customers to envision it in their lives. A picture is worth a thousand words, and in e-commerce, it can also be worth countless clicks. Here's how compelling imagery can bolster online sales:
Enhancing first impressions and deterring bounce rates.
Facilitating quicker purchase decisions through visual appeal.
Improving customer understanding of the product features.
Building trust with realistic and detailed visual representations.
Balancing Aesthetics And Accuracy
While it's essential to create visually alluring images, it's equally crucial to present products accurately. Misrepresentation can lead to customer dissatisfaction and high return rates. Here are tips for maintaining the perfect balance:
Edit for color vibrancy and contrast to grab attention - Ensure edited images reflect the true colors and textures.
Use backgrounds that complement the product - Keep the scale and proportions honest to avoid confusion.
Add elements that evoke emotions or lifestyle connections - Include multiple angles and close-ups for a full product view.
Core Skills For Editing E-commerce Images
youtube
E-commerce image editing is not just about making pictures look better. It's about turning visuals into stories that sell products. To do that, certain core skills are essential. These skills help editors create images that pop, tell a cohesive story, and engage customers.
Mastering Image Manipulation Software
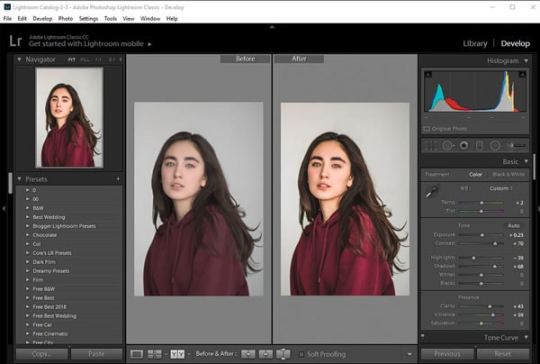
At the heart of editing is powerful software. Programs like Adobe Photoshop and Lightroom stand as industry standards. Editors must learn tools like layers, brushes, and selection techniques. Mastering these functions allows editors to refine and transform images into commerce-ready visuals.
Layers: Building images with adjustable layers.
Brushes: Fine-tuning details with a range of brushes.
Selections: Isolating parts of an image for editing.
Understanding Color Correction And Grading
Color plays a vital role in e-commerce images. Proper use of color can make products stand out. Editors must understand how to adjust hues, saturation, and brightness to make images look consistent and appealing. Skills in color correction ensure that every image reflects the product's true colors.
Hue Adjustment - Corrects colour tones to match product reality.
Saturation Editing - Enhances or reduces color intensity.
Brightness Control - Ensures images are not too dark or overexposed.
Workflow Optimization
Within the bustling world of e-commerce, capturing the consumer's eye is key. A smooth and efficient image editing process not only saves precious time but also catapults product appeal. Workflow optimization becomes a crucial step to streamline operations, ensuring quick turnover and consistent, striking visuals. Let’s delve into how this can transform an e-commerce image editing pipeline.
Batch Processing For Efficiency
Batch processing is a game-changer in image editing. By handling multiple images at once, brands maximize output without sacrificing quality. Critical steps like resizing, cropping, or applying preset adjustments happen like clockwork. The result? A faster journey from shoot to showcase.
Steps to Implement Batch Processing:
Select images with similar editing needs.
Queue up actions in your photo editing software.
Process in batches, not one at a time.
Creating Consistent Visual Branding
Consistency is the heartbeat of brand recognition. A cohesive visual style ensures products are instantly identifiable and resonate with viewers. Uniformity in colour palettes, image sizes, and themes speaks volumes, establishing trust and brand professionalism with each click.
Adapting Images For Multiple Platforms
Online stores need great images. Shoppers can't touch or try products. They see them on screens. Images must look good on computers, phones, and tablets. This means editing images to fit different platforms.
Resizing And Formatting For Web Standards
Images need sizes that work online. Large images can slow websites. Fast load times are crucial. Google favors sites that load quickly. Here's how to make images the right size:
Choose the right format: JPEG for photos, PNG for graphics.
Find the best dimensions: Usually 1000-2000 pixels wide.
Use compression: Tools like Adobe Photoshop can help.
Ensuring Mobile Responsiveness
People shop on their phones more than ever. Images must look good on these screens. They should change size and shape for different devices. This is mobile responsiveness. Steps to make images mobile-friendly are:
Flexible images: Use CSS to make images scale with the screen.
Testing: Use tools to see how images appear on various devices.
Optimize for touch: Ensure images are easy to view with a touch of a finger.
Advanced Techniques And Trends
As e-commerce evolves, so does the art of presenting products online. Engaging visuals make online shopping irresistible. Advancing your image editing skills is a game-changer. The latest trends and techniques bring products to life. Let's dive into some of these cutting-edge methods.
Exploring 360-degree Product Views
360-degree product views are changing the scene. They let shoppers see every angle. This view feels like holding the product. You'll need skills in photography and editing to create these views. Here's what to learn:
Shooting multiple angles – Snap photos around the product.
Editing software mastery – Stitch images together smoothly.
Online integration – Make sure it works on your website.
These steps will give a virtual 'hands-on' experience. They boost buyer confidence and reduce returns. Learn this to stay ahead.
Incorporating Interactive Imagery
Interactive images engage more than static ones. They increase time on page and excitement. You will need new skills. Here are key features of interactive imagery:
Hotspots – Clickable areas that reveal information.
Zoom and rotate – Let users closely inspect the product.
Customization previews – Show changes in real-time.
You'll learn to use special tools. Shoppers will try different colors and styles. Your product pages will become more interactive. Equip yourself with these trendy techniques.
Avoiding Common Pitfalls
Editing e-commerce images can be tricky. To shine online, every image must look perfect. Businesses often stumble in this learning process. Recognizing and steering clear of these mistakes is crucial for success.
Maintaining Image Quality
Quality is key in e-commerce imagery. It affects customer perception and trust. Below are tips to maintain high-quality standards:
Choose the right resolution: Aim for clarity across all devices.
Edit with precision: Use professional tools for best results.
Regular checks: Always review images before uploading.
Frequently Asked Questions Of The Learning Process Of E-commerce Image Editing
What Is E-commerce Image Editing?
E-commerce image editing refers to the process of enhancing product photos for online stores. It involves correcting colors, removing backgrounds, and adding shadows for a professional look that can increase sales.
Why Is Image Editing Crucial In E-commerce?
Effective image editing can make products more appealing, build customer trust, and lead to higher conversion rates. High-quality visuals are essential for an online store's success.
How To Learn E-commerce Image Editing?
You can learn e-commerce image editing through online tutorials, courses, and practicing on various software like Photoshop or Lightroom. Start with basic edits and gradually move to advanced techniques.
What Tools Are Best For Editing E-commerce Images?
Photoshop and Lightroom are widely used for e-commerce image editing. Other tools include GIMP for a free alternative, and Canva for simple edits and design layouts.
Conclusion:
Mastering e-commerce image editing is an evolving journey. As trends shift, staying adaptable ensures your product visuals remain impactful. Keep practicing, stay updated on new tools, and always prioritize quality. Your efforts will help drive sales and elevate your brand's online presence.
Embrace the learning curve—the rewards are worth it.
0 notes
Text
How to Get The Best Clipping Path Service Provider: Top Tips Revealed!

To find the best clipping path service provider, research and compare companies based on their portfolio quality and client testimonials. Ensure they offer precision, timely delivery, and customer support.
Engaging a top-notch clipping path service provider enhances the professionalism and visual impact of your images, crucial for businesses that rely heavily on visual content for marketing and sales. Quality photos can significantly boost online presence, and skilled clipping path services ensure your images are cut out with sharp, clean lines for a refined look.
These providers employ expert graphic designers who use advanced software like Adobe Photoshop to remove backgrounds or isolate objects, essential for e-commerce sites, photographers, and advertising agencies. The right provider will have a robust gallery showcasing their expertise and a clear communication channel for project discussions. Checking reviews and ratings online helps in assessing customer satisfaction and service reliability.
Finding The Right Clipping Path Service Provider
Choosing the best clipping path service provider is vital for high-quality image editing. Professionals, e-commerce sites, and photographers need these services. The right provider ensures images look clean and professional. It requires precision and an eye for detail, making the selection process crucial.
Know Your Requirements
Before searching for a service provider, understand your project needs. Consider the complexity of images and volume of work. Knowing these details helps in finding the right match for your tasks.
Image complexity: Simple, medium, or complex edges?
Volume: Small batches or large-scale projects?
Turnaround time: Do you need a fast service?
File formats: What formats do you require?
Research Multiple Providers
Don't settle for the first option. Take time to research and compare different providers. Look at their portfolio, customer reviews, and pricing options.
Provider Name - Quality of Work - Customer Reviews- Pricing - Turnaround Time.
Provider (A) - High Quality Work - Positive Reviews - Competitive - 24 Hours.
Provider (B) - Good Quality Work - Mixed Reviews - Affordable - 48 Hours.
Focus on providers that align with your specific requirements. Ensure they maintain high-quality standards.
Evaluating Clipping Path Service Providers:
Choosing the right clipping path service provider is crucial. The right team can make your images shine. Missed details can harm your brand. Let's look at the main points to consider.
Quality Of Work:
Quality determines the final look of your images. Check portfolios for consistency and precision. Showcase-ready images need flawless clipping. Look also for shadow creation services. This adds depth and realism to your images. Make sure the provider can handle these details well.
Turnaround Time:
Speed is key in dynamic markets. A fast turnaround means staying ahead. But do not sacrifice quality. Find a balance. Check the provider's time for delivery. Review client testimonials. This helps in gauging reliability and efficiency.
Customer Support:
Support builds trust. 24/7 support is essential. You might need revisions or updates. Good support resolves issues quickly. Check for a provider with an excellent support system. This ensures a smooth workflow. Email, chat or call options are signs of strong customer support.
Pricing And Payment Options:
Choosing a clipping path service provider involves understanding their pricing and payment options. Cost efficiency matters in photo editing. Clients should look for transparency and value for money. Payment flexibility adds to the ease with which services can be accessed.
Comparing Prices:
When scouting for a clipping path service, comparing prices is crucial. Clients need to find an affordable solution without compromising on quality. A table can help contrast the offerings of different providers:
Providers may offer discounts on bulk orders. Always inquire about special deals.
Flexible Payment Options:
Flexible payment options are a sign of a customer-centric service provider. Clients should look for a provider that allows different payment methods:
Credit Card Payments
PayPal
Bank Transfers
Monthly Invoicing for Regular Clients
Providers that offer multiple payment options show a willingness to accommodate diverse client needs. It reflects their commitment to ease of business. Always verify the security measures for online transactions.

Credit: www.shutterstock.com
Online Reviews And Testimonials
Online reviews and testimonials are crucial when selecting the best clipping path service provider. These feedbacks reflect the quality and reliability of the services offered. They help you make an informed decision.
Check For Authenticity
It's important to ensure reviews are from real clients. Look for reviews on well-known platforms. Check profiles of reviewers when possible. Real ones often have a history. They don’t just have a single review.
Look For Consistent Positive Feedback
Service providers should have a steady stream of happy clients.
Positive feedback over time indicates consistent performance.
Be wary of service providers with only recent reviews or none at all.
Quality providers often showcase their work. They may use a "clipping path in photoshop" to demonstrate skill. This shows their expertise and confidence in their services. Testimonials can include before-and-after images to highlight the impact of their services.
Detail - Look for specifics in reviews that mention the quality of the clipping path.
Volume - Higher numbers of reviews can indicate more trust.
Response - A provider's response to reviews shows customer service.
Communication And Collaboration
When seeking the best clipping path service provider, effective communication and collaboration hold the key to success. This vital duo ensures your vision translates into reality with precision and speed. To navigate this process, two aspects stand out.
Articulate Your Requirements Clearly
Clear requirements are the foundation of any successful project. Start with a detailed brief. It should include the following points:
Image formats needed
Resolution specifications
Editing boundaries
Specific style guides if any
Delivery timeframes
Use simple language. The provider must understand what you need. An example image helps too. They match your expectations with less guesswork.
Ensure Effective Communication Channels
Choose a provider with multiple communication methods. These should be available:
Email - Instant messaging.
Phone calls - Video conferences.
For official requests - For quick queries.
For in-depth discussions - For visual demonstrations.
Regular updates matter. Ask for them. This ensures ongoing projects stay on track. Feedback loops are important. Use them to guide the provider and correct course when necessary.

Credit: www.proglobalbusinesssolutions.com
Frequently Asked Questions Of How To Get Best Clipping Path Service Provider
How Do I Choose The Best Clipping Path Service?
To choose the best clipping path service, prioritize providers with a strong portfolio, positive client testimonials, prompt turnaround times, robust customer support, and competitive pricing. Ensure their technology aligns with your project's complexity.
How Do You Make A Perfect Clipping Path?
Select an image with clear edges and open it in photo editing software. Use the Pen tool for precise control while creating the path. Zoom in for accuracy, and create anchor points around the object's edges. Lastly, save your path and apply it to clip the image cleanly.
What Is The Basic Clipping Path Service?
The basic clipping path service is a photo editing technique that isolates objects by tracing their edges to create a precise outline for background removal or alteration.
What Is The Main Requirement For A Clipping Path?
The main requirement for a clipping path is the precise and clean outlining of the object to ensure accurate image cut-outs.
Conclusion:
Selecting an outstanding clipping path service provider is crucial for impeccable image editing. Prioritize expertise, fast turnaround, and customer service. Remember, quality outcomes hinge on skilful hands. So choose wisely to ensure your visuals stand out. Propel your project's success by partnering with the best in the field.
0 notes
Text
How Can You Edit a Jpeg Image Correctly

To edit a JPEG image, use photo editing software such as Adobe Photoshop, GIMP. Open the image, make the desired changes, and save your work.
Editing JPEG images can breathe new life into your visual content, enhancing the clarity, mood, and messaging of your pictures. Whether aiming to crop, adjust colours, apply filters, or insert text, the right tools make a world of difference. Simple applications like Microsoft Paint offer basic functionality, while advanced programs like Adobe Photoshop provide a comprehensive suite of editing features for more intricate tasks.
As JPEG is a widely accepted format, most image editing software supports it, ensuring compatibility and ease of use. With the prominence of visual media in digital marketing, mastering JPEG image editing stands as a valuable skill for creating engaging and SEO-friendly content. Remember, regular software updates can expand your editing possibilities, so keep an eye out for the latest versions.
Jpeg Image Fundamentals
JPEG images are everywhere, from social media to digital cameras. Understanding how JPEG files work is key to editing them effectively. This section dives into the basics of JPEG images and demystifies common editing myths.
The Nature Of Jpeg Files:
JPEG stands for Joint Photographic Experts Group, which is the team that developed this image standard. When a picture is saved as a JPEG, it undergoes compression to reduce file size. This is perfect for sharing online but can affect image quality.
The process of compression in JPEGs involves a balance between image quality and file size. A high level of compression leads to smaller files with lower quality. On the other hand, less compression keeps the quality higher but the file size larger.
Common Myths About Jpeg Editing
Quality Loss On Every Save: While JPEGs do lose some data during initial compression, re-saving the image without making changes does not notably degrade quality.
Cannot Be Edited Without Quality Loss: Though some data is lost during compression, editing a JPEG image, such as adjusting brightness or contrast, does not automatically mean a loss of image quality.
Editing Is Limited: With the right tools, much editing flexibility still remains for JPEG images. This includes cropping, color adjustments, and applying filters without affecting the overall structure.
Credit: repairit.wondershare.com
Essential Tools For Jpeg Editing:
Editing a JPEG image unlocks endless possibilities for creativity and correction. With the right tool, users can easily adjust colors, crop unwanted sections, add effects, and much more.
Desktop Software Favorites:
When it comes to powerful editing, desktop software stands out. Programs like Adobe Photoshop and GIMP offer extensive features that cater to both professionals and hobbyists.
Adobe Photoshop: A top choice with myriad tools and filters.
GIMP: A free, open-source alternative with robust capabilities.
Corel PHOTO-PAINT: Part of CorelDRAW Graphics Suite, for skilled editors.
Paint.NET: Lightweight and user-friendly for quick tweaks.
Adobe Lightroom: Ideal for photo correction and management.
Online Editors Worth Trying
Web-based editors offer the convenience of editing without downloads or installations. Tools like Canva and Pixlr provide a wide range of functionalities that are accessible from any web browser.
Canva: Great for adding text and basic graphic elements.
Pixlr: Provides a Photoshop-like experience in your browser.
Fotor: Simple interface with essential editing options.
Photopea: Advanced features akin to desktop-class software.
iPiccy: User-friendly for quick edits and touch-ups.
Mobile Apps On The Go
For editing directly from your smartphone, several apps stand out for their convenience and functionality. Whether you're an Android or iOS user, these apps bring JPEG editing to your fingertips.
Adobe Photoshop Express: A mobile version of the desktop giant.
VSCO: Known for its stylish filters and presets.
Snapseed: Google's complete and professional photo editor.
PicsArt: Combines photo editing with social sharing.
Lightroom Mobile: Powerful editing and cloud syncing on the move.
Basic Editing Techniques
Entering the realm of Basic Editing Techniques for JPEG images opens up endless possibilities for creativity and enhancement. Editing a JPEG image is like giving it a new lease on life. The process isn’t just about changing how an image looks; it’s about ensuring it conveys the intended message and emotion. Here are some basics to start transforming your images.
Cropping And Resizing:
Cropping helps to focus on the main subject by cutting away the unnecessary parts. To crop, select the crop tool and drag the corners to get the desired frame. Resizing changes the image’s dimensions. Remember, smaller images load faster, crucial for web use. Always maintain the aspect ratio to prevent distortion.
Adjusting Brightness And Contrast:
The right balance of brightness and contrast can make an image pop. Increasing brightness can unveil hidden details. Contrast amplifies the difference between light and dark areas. Use the sliders in your editing software to adjust these settings and watch your image come to life.
Colour Correction Explained:
Color Correction is essential for creating a natural look. It fixes color issues and ensures the colors match the original scene. Tools like ‘Hue/Saturation’, ‘Color Balance’, and ‘Levels’ adjust the colors. Aim for a real-to-life balance or set a particular mood.
Understanding these basic techniques is the first step to mastering image editing. Practice with different tools and effects to discover the full potential of your images.
Advanced Jpeg Manipulations
Exploring advanced manipulations. Editing a JPEG image goes beyond basic tweaks. There are sophisticated techniques that turn a simple picture into a masterpiece. Advanced JPEG manipulations involve detailed editing methods. These are not limited to but include layer-based editing, application of filters and effects, and even removing or replacing elements within the image.
Layer-based Editing In Jpegs:
While JPEGs do not naturally support layers, editing software allows for temporary layer work. This technique is vital for non-destructive editing. Users can make changes without permanently altering the original image.
Create duplicates of the JPEG background layer.
Edit non-destructively with adjustment layers.
Apply multiple edits and merge layers as needed.
Using Filters And Effects
With filters and effects, transform a JPEG image's appearance dramatically. Choose from various options designed to enhance the visual appeal of an image.
Select the appropriate filter from the editing software.
Adjust the intensity and settings for a custom look.
Combine multiple effects for unique results.
Removing And Replacing Elements
Removing or replacing elements within a JPEG is intricate work. This process can range from simple object removal to complex compositional changes.
Remove objects - Clone Stamp/Healing Brush - Clean up distractions
Replace backgrounds - Selection Tools - Change contexts
Add elements - Copy/Paste & Transform - Enhance composition
youtube
Preserving Quality While Editing
When editing JPEG images, maintaining quality is a top priority. A JPEG image can lose clarity each time it undergoes editing and resaving. This guide outlines methods to edit JPEGs without sacrificing their quality.
Understanding Compression
JPEG images use lossy compression. This means data is lost each time the image is saved. Knowing how JPEG compression works is key to preserving quality. To reduce quality loss, edit the image as little as possible, and avoid frequent resaving.
Best Practices For Saving
Preserve the original JPEG file. Always save your edits as a new file. Utilize the highest quality settings when saving edited JPEGs to minimize compression artifacts.
Choose 'Maximum' or 'High' quality in save settings.
Limit edits and save cycles.
Work with copies, not the original.
Converting To Other Formats
Consider converting JPEGs to a lossless format like PNG or TIFF before editing. These formats do not lose data with each save. After editing, you can convert them back to JPEG with these steps:
Open the lossless file in your editor.
Make necessary edits.
Convert back to JPEG for distribution, using high quality settings.
Credit: www.pdfgear.com
Common Jpeg Editing Challenges
Editing JPEG images seems straightforward, but it can be tricky. Even pros face obstacles. This guide dives into the common issues you might encounter. Discover tricks to enhance your JPEG editing skills.
Fixing Pixelation
Pictures can look blocky and blurred when too stretched. This problem is called pixelation. Before starting, have a crisp, high-resolution source file. You can:
Zoom out on the image to lessen noticeable pixelation.
Use editing tools like sharpen or blur sliders to refine image clarity.
Apply anti-aliasing to smooth out rough edges.
To prevent pixelation:
Avoid over-stretching images.
Maintain the original aspect ratio.
Choose advanced software with built-in anti-pixelation features.
Repairing Corrupted Files
Corrupted JPEGs won't open or look weird. Various signs indicate a damaged file:
Error messages - Software can't read the file.
Partial images - Some parts are missing or wrong.
Gray areas - Empty sections instead of content.
To fix these:
Try opening the JPEG with different programs.
Use a file repair tool specifically for JPEGs.
Reverts to backups if the file becomes too damaged.
Dealing With Large Images
Large JPEGs slow down websites and are hard to manage. Here's how to handle them:
Resize the image using a trusted editor.
Compress the file to a smaller size without losing quality.
Store large images on external platforms and embed them in your pages.
Remember:
Always keep a backup of the original file.
Test image quality after each edit.
Balance image size and quality for the best performance.
Frequently Asked Questions On How Can You Edit A Jpeg Image
Can Jpeg Images Be Edited Easily?
Yes, JPEG images can be easily edited using various graphic software. Popular programs like Adobe Photoshop, GIMP, and Adobe Illustrator offer JPEG modifications.
What Tools Are Needed To Edit A Jpeg?
To edit a JPEG, you'll need image editing software like Adobe Photoshop, GIMP, or online platforms like Pixlr. These tools provide features like cropping, resizing, color adjustments, and filtering for enhancing JPEG images.
How To Crop A Jpeg Image?
Cropping a JPEG is simple. Open the image in an editor, select the crop tool, drag to define the new boundaries, and apply the changes. This trims the image to your preferred size and focus area.
Is It Possible To Change Colors In A Jpeg?
Absolutely. Color adjustments in a JPEG image can be made through levels, hue/saturation, and other color-balancing features in most image editing software, allowing for a broad spectrum of visual changes.
Conclusion:
Wrapping up, and editing JPEG images is no longer a complex task. With the right tools and techniques, anyone can enhance their photos and use this process as a service provider. Remember, practice makes perfect. Keep experimenting and watch your image editing skills soar! Ready to get started? Your picture-perfect journey begins now!
1 note
·
View note
Text
A Guide To Learn Clipping Path In Photoshop

Learning the clipping path in Photoshop involves mastering the Pen Tool to create precise selections. Follow a step-by-step tutorial to gain proficiency in this essential image-editing skill.
Clipping path, a fundamental technique in Adobe Photoshop, allows users to isolate objects and manipulate images with high precision. Perfect for graphic designers, photographers, and e-commerce professionals, mastering this skill enhances your editing capabilities, enabling the creation of clean, professional-looking visual content.
A good guide should simplify this learning curve, providing clear instructions and practical examples that cater to both new and intermediate users aiming to elevate their Photoshop expertise. Engaging with tutorials and practising on different images, you can swiftly become adept at using the clipping path for various applications, from product photo editing to creating intricate photo compositions.
Overview On Clipping Path:
Editing images perfectly is an art. Photoshop's Clipping Path is a magic wand. It helps remove backgrounds. It is like drawing a line around what you want to keep. This guide helps you understand and learn it easily.
What Is A Clipping Path In Photoshop
A clipping path is a vector graphic. It outlines an object in a photo. Photoshop users create it using the Pen Tool. The path isolates the object. Anything inside the path is kept. Anything outside is hidden.
Importance Of Clipping Path
Professional-looking photos: They help create clean product images for websites.
Background removal: It is essential for removing or changing backgrounds.
Detail: It provides a precise edge selection for complex objects.
Edit Specific Areas: You can edit just parts of a photo without affecting the whole.
Tools And Techniques:
youtube
Diving into the world of Photoshop presents an array of tools and techniques waiting to unleash your creative potential. Mastering the art of the clipping path is essential for crisp, clean image edits. With the right know-how, this skill can transform your graphic work, enabling precision that elevates your projects.
Selection Tools In Photoshop
Photoshop's selection tools are the first step to mastering clipping paths. These tools allow you to outline specific parts of an image. Let's break down the essentials:
Marquee Tools: For basic shapes like squares and circles.
Lasso Tools: For more freeform selections, tracing around your desired area.
Quick Selection and Magic Wand: Quickly pick sections based on color and texture.
Pen Tool: For precision, creating paths point by point.
Start practicing by selecting different parts of an image with each tool. Notice how some are better for certain tasks!
Creating And Editing Paths
The Pen Tool is key for creating custom paths. Below is a simple guide to start:
Select the Pen Tool from the toolbar.
Click on your image to create the starting anchor point.
Add more points around the area you want to clip.
Connect the last point to the first by hovering over the initial anchor point until a small circle appears beside the pen nib, then click.
To edit a path, use the Direct Selection Tool (A) to adjust the anchor and direction points.
The Pen Tool offers unparalleled control, but it takes practice. Keep refining your technique to achieve smooth, precise paths.
Types Of Clipping Paths
Mastering the art of CLIPPING IMAGES in Photoshop boosts your design skillset. Whether for product photos or graphic design, understanding different types of clipping paths is essential. Let's explore.
Basic Clipping Path
The basic clipping path is the starting point for beginners. It suits simple images with clean, straight lines. You can quickly isolate your subject from the background. Examples include:
Books
Mugs
Frames
The basic clipping path process involves:
Opening your image in Photoshop.
Choosing the Pen tool.
Creating a path around the object.
Saving the path.
Applying the clipping path to remove the background.
Complex Clipping Path
For intricate images, a complex clipping path is necessary. It handles:
Jewelry - Small details.
Furniture - Multiple edges.
Chain links - Individual loops.
This method involves:
Selecting the Pen tool for precision.
Drawing paths with multiple anchor points.
Zooming in for intricate sections.
Using a combination of paths to clip out detailed designs.
Clipping images with accuracy requires practice. By understanding the types of clipping paths, quality and efficiency improve vastly.
Applications Of Clipping Path

Credit: www.melyssagriffin.com
Entering the world of Photoshop opens up a realm of possibilities. Clipping paths stand out for their versatility. They let us isolate and manipulate images with precision. This guide walks you through the diverse applications easily grasped and applied. Let's explore how to harness the power of clipping paths across various fields.
E-commerce Product Editing
youtube
Clean Background: A must for product listings, clipping paths help remove distractions.
Consistent Look: Align product images for a seamless shopping experience.
Color Accuracy: Ensure the product colors pop and match reality.
Multiple Formats: Prep images for varied platforms with different image requirements.
E-commerce thrives on clarity and detail. Mastering clipping paths lets your products shine and stand out. Crisp images lead to more clicks and better conversion rates.
Graphic Designing
Logos & Branding - Clipping paths make logos crisp by placing them on any background effectively.
Marketing Material - Brochures and flyers engage more with clear, well-defined images.
Web Design - Images with precise edges enhance the aesthetic of websites.
Photo Manipulation - Bring creativity to life by combining elements from different images seamlessly.
Graphic designers rely on clipping paths to create visuals that capture attention. This skill is essential for impactful designs that communicate the message directly and effectively.
Tips And Tricks
Mastering the Clipping Path technique in Photoshop can be a game-changer. With these tips and tricks, users can fine-tune their skills. Clipping Path is not just about creating paths but about perfecting edges and controlling layers. We'll explore how to refine those jagged edges and wield layer masks like a pro. Let's dive into the tricks of the trade!
Refining Edges
When working with clipping paths, edges can make or break the final image. Use the Refine Edge tool to smooth and feather edges. This tool helps in blending the cut-out object seamlessly with new backgrounds. Here's a quick guide:
Select 'Refine Edge' from the options bar after making a selection.
Adjust the Smooth slider to soften the edge.
Increase the Feather for a gradual transition.
The Contrast setting sharpens the edge, while Shift Edge can bring it in or push it out.
Tip: Always refine edges on high-resolution images for better control and results.
Using Layer Masks
Layer masks are crucial with Clipping Paths. They allow for non-destructive edits, meaning you can hide and reveal without losing pixel data. Here's how to use them effectively:
Create a clipping path around your object.
Convert this path to a selection by pressing Ctrl+Click (Cmd+Click on Mac) on the path in the paths panel.
With the selection active, click the Layer Mask icon at the bottom of the layers panel.
Any part of the layer outside the Clipping Path will now be hidden, but not deleted. You can edit the mask further with brush tools for precise control.
Remember: Black conceals and white reveals in layer masks. Use this to your advantage for top-notch edits.
Frequently Asked Questions On A Guide To Learn Clipping Path In Photoshop
How Do I Use Clipping Path In Photoshop?
Open your image in Photoshop and select the Pen Tool from the toolbar. Create a path around the object you wish to clip. Right-click the path and choose 'Make Selection. ' Finally, apply a layer mask to hide the background, isolating your object.
What Is The Difference Between A Path And A Clipping Path In Photoshop?
A path in Photoshop is a vector-based outline of an object, used for creating complex shapes. A clipping path, however, specifically isolates an object, making its background transparent for use in other applications.
How Do You Create A Clipping Path In Photoshop 2024?
Open your image in Photoshop 2024. Select the Pen Tool from the toolbar. Carefully draw around the edge of the object to create the path. After closing the path, save it by clicking on the Paths panel and naming your path.
Lastly, convert this path into a clipping path from the panel's menu.
What Is The Main Requirements For A Clipping Path?
The main requirements for a clipping path include a precise definition of edges, consistent zoom level during creation, a clean and exact path that closely follows the object's outline, no unnecessary anchor points, and the path should be fully closed.
Conclusion:
Mastering the clipping path technique in Photoshop unlocks a world of precision and creativity. This guide has equipped you with the foundation to refine your skills. Start practising and watch your imagery transform. Embrace the power of detailed, clean-cut graphics - the possibilities are truly endless.
Keep experimenting and enjoy the journey toward impeccable editing expertise!
0 notes
Text
A Full Guideline - How to Edit Image Size in Illustrator

To edit image size in Illustrator, open the image, then navigate to the "Object" dropdown menu, select "Transform," and choose "Scale." Adjust the dimensions as desired and click "OK" to apply changes.
Crafting visual content often requires precise adjustments to fit specific layout needs, and Adobe Illustrator stands as a powerful tool for vector image editing. Editing image size in Illustrator is a fundamental task, essential for designers who aim to maintain the quality of graphics when scaling for various applications.
The process, though simple, provides fine control over the artwork dimensions, ensuring the final product meets exact specifications. Whether it's for print or digital media, understanding how to modify image size is crucial for creating visuals that are both aesthetically pleasing and functionally effective. This guideline aims to streamline the resizing procedure, making it accessible even to those new to the program, and guaranteeing a seamless design workflow.
Illustrator's Image Editing
Adobe Illustrator stands out for vector graphics design. Users create logos, icons, and complex illustrations with precision. Editing images, including resizing, is a vital Illustrator skill. Understanding the interface and resizing tools can streamline your design process. Let's explore how to effectively manage image sizes within Illustrator for various project requirements.
Read More: Clipping Path In Photoshop.
The Importance Of Image Size
Correct image size ensures quality and functionality. For web use, smaller images load faster. For print, larger dimensions maintain clarity. Resizing images in Illustrator retains sharpness regardless of size, a paramount feature of vector graphics. Balancing quality and practicality is crucial across media.
Common Scenarios For Resizing
Web Graphics: Optimize for quick loading times and responsive designs.
Print Materials: Adjust for high-resolution outputs in brochures or banners.
User Interfaces: Scale elements for clarity on various screen sizes.
Branding: Standardize logo sizes for different applications.
Accessing Image Size Tools
Editing image size in Illustrator is a smooth process essential for good design work. Let's dive into how to access these size-altering features.
Navigating To The Image Size Panel
Locating the image size panel is simple. Here are the steps to follow:
Open your project in Illustrator.
Select the image or object you want to resize.
Go to the top menu, and click on "Object".
Choose "Transform" and then select "Scale."
This action opens the Scale dialog box where you can change image size.
Keyboard Shortcuts For Efficiency
Shortcuts save time. Here are quick keys to edit image size:
Object scaling: Press "S" and click to scale.
Proportional resizing: Press "Shift" while dragging a corner.
Remember these shortcuts for a faster workflow.
Adjusting Dimensions And Resolution

When editing images in Illustrator, adjusting dimensions and resolution is a game changer. Master these, and you'll ensure your visuals are perfect for print and screen.
Understanding Aspect Ratio
The aspect ratio is the width-to-height proportion of an image. It's crucial for maintaining the image look when resizing. Let's break it down:
Lock Aspect Ratio: Avoid distortion by keeping the aspect ratio constant.
Flexible Scaling: Unlock to reshape an image freely, modifying width and height separately.
Changing Width And Height
Need a specific size? Follow these simple steps to adjust width and height:
Select the image or object.
Find the Transform panel or use the control bar.
Type in new values and press Enter.
To retain quality, use the link icon to keep the aspect ratio intact while changing dimensions.
Modifying Resolution Without Affecting Quality
Boosting resolution is about enhancing image clarity, especially for print. Do it right with these steps:
Step:
Action
Select the image.
2. Go to Effect > Document Raster Effects Settings.
3. Set your desired DPI (Dots Per Inch).
4. Click OK.
Remember, modifying resolution affects file size but, with these steps, not your image quality.
Using The Transform Panel For Precision
Mastering the art of image editing in Adobe Illustrator becomes simple with the use of the Transform Panel. This powerful tool allows for precision and ease when altering image dimensions. Learn the steps involved to manipulate your artwork with accuracy.
Scale Objects With Precision
Effortless scaling of your images ensures every detail remains intact and undistorted. Open the Transform Panel through the Window menu or by pressing 'Shift + F8'. Enter exact values for width and height. Confirm your changes by pressing 'Enter'.
Constrain Proportions Accurately
Keep your images proportional with the click of a button. Find the 'Constrain Width and Height' icon in the Transform Panel. This locks the aspect ratio. Your images will resize without losing their original shape. Quality images mean a professional end product.
youtube
Advanced Techniques For Resizing
Mastering the art of resizing images in Illustrator can take your designs to new heights. With advanced techniques, you'll ensure every graphic is perfectly tailored to your project's needs. Now, we'll dive deep into sophisticated methods for modifying image dimensions.
Working With Artboards
In Illustrator, artboards represent the canvas where your designs live. Adjusting artboards can be a strategic way to resize your visuals. Here's how:
Select the Artboard Tool from the toolbar or press Shift + O.
Click and Drag the corners to adjust the size, or enter specific dimensions in the top control panel.
Use the Artboard Options dialogue to set up multiple artboards for different parts of your design.
Batch Processing Multiple Images
When working with several images, batch processing saves time. Adobe Illustrator's Actions feature automates resizing for numerous files:
Open the Actions Panel by going to Window > Actions.
Create a New Action and record the resizing process.
Apply the Action to multiple images using the Batch command under the Actions panel's menu.
Creating Responsive Designs
Crafting designs that look great on any device requires responsive resizing. Use Illustrator's responsive features as follows:
Enable Responsive Resizing for objects by using the 'Responsive Resize' option in the Properties panel.
Set Constraints to control how objects adjust as you resize your artboard.
Test Your Design on different screen sizes to ensure every element scales appropriately.
Best Practices And Tips
Edit your images in Illustrator like a pro! Understanding the best practices and tips is key to mastering image editing. Prepare to surprise yourself with the quality and precision you can achieve. Here we go:
Maintaining Image Quality
Keep images crisp and sharp. Here's how:
Start with high resolution. More pixels, better quality.
Use vector graphics when possible for scalability.
Preserve Aspect Ratio. Shift + drag to resize proportionally.
Avoid upscaling beyond the original dimensions.
Set your document to the intended output resolution.
Common Pitfalls To Avoid
Stay clear of these traps:
Don't rush the export. Check settings before saving.
Forget raster effects at low DPI; they blur.
Don't scale without paying attention to anchor points.
Avoid unnecessary resampling. It reduces quality.
Frequently Asked Questions Of A Full Guideline - How To Edit Image Size In Illustrator
How To Resize An Image In Illustrator?
To resize an image such as an e-commerce-related product image in Illustrator, select the image with the Selection Tool (V). Then, drag a corner handle and hold the Shift key to maintain the aspect ratio. Alternatively, use the top toolbar dimensions to input exact values for width and height.
Can You Change the Image Resolution In Illustrator?
Yes, you can change image resolution in Illustrator. Go to 'Effect' > 'Document Raster Effects Settings' and set the desired resolution. Keep in mind that increasing resolution can affect the file size and quality of the image.
What Is Illustrator's Best Image Size For the Web?
For web use, it's best to set images to 72 PPI in Illustrator. Choose an image size relevant to your design's intended placement, commonly within 1920 px in width for full-size backgrounds, and smaller for other elements.
Is It Possible To Edit Multiple Images At Once In Illustrator?
Yes, Illustrator allows for editing multiple images simultaneously. Use the 'Transform Each' command under the 'Object' menu, or apply changes to a group of images for uniform sizing and positioning.
Conclusion:
Editing image size in Illustrator is a clear-cut process once you get the hang of it. With the steps outlined in this guide, you're now equipped to resize images with confidence for any project. Remember to save your work in the right format to preserve quality.
Happy designing and stay creative!
0 notes