
isolatedstandardart
isolation and isolated standard art.
Nolfi Noir
234 posts
Don't wanna be here? Send us removal request.
Last Seen Blogs

rotop100
www.rotop100.com 丝足控

papsonsports
PapsonSports

sparklinshadow
Lust is life

mother-fucking-dragon
Dragon

photo-mundum-blog
PHOTOMUNDUM
Text
Steel Bike Diary : Bianchi Selvino

This steel bike is Bianchi Selvino which was traditionally a budget friendly bicycle. People rode this bicycle like I do. It was not for a professional rode racing bike. People rode this Selvino mellow and comfortable. You can see the original Bianchi Selvino’s photos on the link below.
http://www.biciclassiche.com/2013/04/bianchi-selvino-1953.html?m=1
So I followed the tradition.
I am also trying to assemble a super comfy touring bike lately. But this is not easy at all. I have a gravel bike: Bombtrack Hook EXT which has 49cm tubeless tyres. I also have Alex Moulton AM20 which has a front suspension and a rear bushing. And now I will start assembling an adventure bike which is Surly Cross Check.
These bikes are supposed to be comfortable and they are really comfortable, but somehow my Bianchi Selvino is the best of the best comfortable bikes in my experience. However, I am not sure why it has the best comfort among my collections.
So now I would like to find out the reason why.

0 notes
Text
Surly Cross Check 2
これが正解だった。Turtle 52
https://store.sim-works.com/collections/simworks-by-honjo/products/turtle-52
https://store.sim-works.com/collections/simworks-by-honjo/products/simworks-by-honjo-diamond-plate
https://store.sim-works.com/collections/simworks-by-honjo/products/turtle44brass
https://store.sim-works.com/collections/simworks-by-honjo/products/smooth41
1 note
·
View note
Text
Surly Cross Check
Retro Cyclocross theme
- Brakes: Paul (どれにするか) - https://www.paulcomp.com/product-category/components/brakes/
- Handle Bar: Ride Farr Supa-Wide Alloy Drop Handlebar V2 (size650) - https://ridefarr.com/product/supa-wide-alloy-drop-handlebar-v2/
- Stem: (silver) 手持ち
- Rim: Alexrims cx24 - https://www.mizutanibike.co.jp/products/detail/1666/
- Tyre: パナレーサー グラベルキングSK GRAVEL KING SK 700x32/35/38/43 グラベル用タイヤ
- Quick Release:
- Seat Post: *WHISKY* NO.7 carbon seatpost - https://store.bluelug.com/whisky-no-7-carbon-seatpost.html
- Pedal: MKS Solution (red) - https://www.mkspedal.com/?q=ja/product/node/408
- Front / Rear hub: White Industries (silver)
https://www.whiteind.com/product/mi5-front/
https://www.whiteind.com/product/mi5-rear/
- Brake Shifter: Shimano Ultegra
- Head Set: White Industries (silver)
- Crank Set: White Industries (silver), crank cap (red), size-170mm or 165mm
- Bottom Bracket: white Industries (red)
- Front Gears: 46/32
- Rear Cassette: 11-32
- Front/Rear Derailleur: Shimano Ultegra
- Saddle: Brooks Cambium C17 Carved All Weather Saddle - black
- Front Rack: *SURLY* tv tray rack platform (black) - https://store.bluelug.com/surly-tv-tray-rack-platform-black.html
- Rear Rack: *NITTO* R10 bag supporter - https://store.bluelug.com/nitto-r10-bag-supporter-silver.html
Honjo フェンダー シルバー / ダイヤモンドプレート 黒
1 note
·
View note
Text
There are two different kinds of double aperture ring lenses.


Here are Konica Hexanon AR lens and Super Canomatic lens R. One is a so-called “Preset ring”, and another one is called “Preview ring”. The reason, why they are called differently, is quite identical when you see the back of the two lenses.


The right side has no aperture lever for closing aperture blades when the shutter release is pressed. And the left side lens has a aperture lever. However, during the time this lens were released, the cameras didn’t have the preview button on the camera bodies. That is the reason why the lens has the second aperture ring for previewing. This is part of an early time history of Japanese 35mm camera lenses.
0 notes
Text
Film Photography Diary : ADOX CMS 20 II PRO
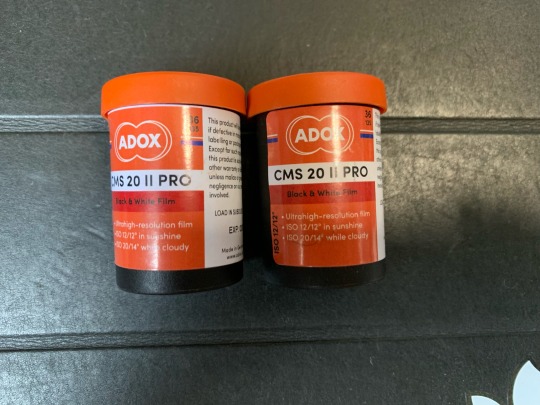
ADOX CMS 20 II PRO is a unique monochrome film. You can choose ISO value from 12 to 20 depends on the light situation, but I basically choose 12 ISO for any situation. The reciprocity failure factors are not given specifically, but from 1/10 to 1/1000 the shutter speed stays same as it is. ADOX is saying that “At 1 second add + 1/2 Stop, At 1/1000 seconds add + 1/2 Stop.” However we don’t know what to do for the slower shutter speed than 1/10 till 1 second. So some ADOX user gave us this information from his experience;
1 sec give 1/3
2 sec give 1/3
4 sec give 2/3 or 1.5X
8 sec give 1 stop or 2X
15 sec give 1 1/3rd stop or 2.5X
32 sec give 1 2/3rd stop or 3X
64 sec give 2 stops or 4X
This is quite useful. Also what I am thinking is this film is negative, so I imagine this film is also forgiving. And my film cameras are very old. These cameras don’t have 1/3 of adjustments. So my adjustment of the reciprocity failure is undoubtedly intuitive.
Anyway, my first roll was quite lovely.
https://www.fotoimpex.com/shop/images/products/media/30945_5_PDF-Datasheet.pdf
https://www.photrio.com/forum/threads/reciprocity-for-adox-cms-20-ii.184938/?amp=1


0 notes
Text
https://anchor.fm/nolfinoir/episodes/Coffee--Pipe--and-Camera-e1e5a8p
0 notes
Video
vimeo
Twice The Effort, Double The Pleasure - Toronto 4x5 Large Format Photography from Chris Marquardt on Vimeo.
In August 2012, ten people met in Toronto to celebrate one of the most magic ways of making photographs: with a 4x5 (and 8x10) camera and using film. They spent three days to learn and explore every facet of the large format, from portraiture to landscape and architecture, from tilt and swing to rise and fall, from push to pull and from beginner to expert. This is the full version of the video.
More information at discoverthetopfloor.com
0 notes
Video
vimeo
Photo 2.0 – Online Photographic Thinking / SPE Conference at Light Work from Light Work on Vimeo.
Photo 2.0 - Online Photographic Thinking
Photographers + Publishing: SPE Joint Regional Conference
Hosted by Light Work
Panel discussion with Andy Adams (moderator)
Molly Landreth, Amy Stein and Phillip Toledano
Saturday, November 5, 2011
4:30pm – 5:45pm
Light Work
Robert B. Menschel Media Center
316 Waverly Avenue
Syracuse, NY 13210
lightwork.org
PANELIST BIOS
Andy Adams is an independent web producer + photo publisher whose work blends aspects of digital communication, online audience engagement, and web-based creative collaboration to explore contemporary ideas in photography. Recent projects include The Future of Photobooks, a cross-blog conversation that considered the impact of internet culture on photographic production, exhibition and distribution and 100 Portraits — 100 Photographers, a digital exhibition of contemporary portraiture that has shown at the Corcoran Gallery of Art, the Australian Centre for Photography and numerous festivals in the U.S. and abroad. In his spare time he publishes FlakPhoto.com, an online art space that promotes the discovery of artists, bookmakers and photo organizations from around the world.
andyadamsphoto.com
Molly Landreth is a Seattle based artist who explores concepts of identity and community by way of intimate large-format film photography and multi-media collaboration. She was recently featured in the New York Times Magazine, The Guardian, Time Magazine's Lens Blog and in The Advocate for her work on "Embodiment: A Portrait of Queer Life in America." Landreth holds an MFA in Photography,Video, and Related Media from the School of Visual Arts, New York; and a BA in Studio Art from Scripps College in California. She is faculty at The Photographic Center Northwest in association with the Art Department at Seattle University.
mollylandreth.com
Amy Stein is a photographer and teacher based in New York City. Her work explores our evolving isolation from community, culture and the environment. She has been exhibited nationally and internationally and her work is featured in many private and public collections such as the Philadelphia Museum of Art, the Museum of Contemporary Photography, the Nevada Museum of Art, the Nerman Museum of Contemporary Art and the George Eastman House Photography Collection. Amy was raised in Washington, DC, and Karachi, Pakistan. She holds a BS in Political Science from James Madison University and a MS in Political Science from the University of Edinburgh in Scotland. In 2006, Amy received her MFA in photography from the School of Visual Arts in New York. Stein teaches photography at Parsons The New School for Design and the School of Visual Arts in New York City. Amy is represented by Robert Koch Gallery in San Francisco and ClampArt in New York.
amysteinphoto.com
Phillip Toledano is a conceptual artist for whom everything starts with a idea. The themes of his work are primarily socio-political, although he has of late strayed into the deeply personal. The idea determines the execution. Consequently, his work varies in medium, from photography to installation, sculpture to painting. His first book, entitled Bankrupt (photographs of recently vacated offices) was published by Twin Palms in 2005. The second book, Phonesex (again by Twin Palms) came out in December of 2008. His third, Days with my father, was published by Chronicle, and was released in June of 2010. The rights for Days have been optioned to be a movie. A fourth book: A new kind of beauty (Portraits of people who've recreated themselves through plastic surgery) will be published by Dewi Lewis and released in the fall of 2011. Toledano's work has appeared in the New York Times Magazine, The New Yorker, Aperture, and Harpers, amongst others.
mrtoledano.com
0 notes
Video
vimeo
Wet Plate for fstoppers from LeClair Photo + Video on Vimeo.
Supplies used: The chemicals I used are in the 'Complete Wet Plate Collodion Set for 4x5' from Bostick & Sullivan bostick-sullivan.com/cart/product.php?productid=1077&cat=366&page=1 - the package comes with a guide for mixing the chemicals that makes it pretty easy.
I found a old Graflex Crown Graphic 4x5 camera to shoot with, but you can use pretty much any film camera you can get a plate into (see Ian Ruhter's film vimeo.com/55837466 where he uses a Holga)
Mask: you must have a mask to protect you from breathing in the chemicals!! I bought this mask from Bostick & Sullivan and it worked great bostick-sullivan.com/cart/product.php?productid=763&cat=250&page=1 - if you try to just use a mask from your local hardware store, it won't work. As you can see in the video I tried using one of those, and had a nasty cough soon after.
Gloves: I got a box of black nitrile gloves - you'll want to wear gloves and some junk clothes - if you get the silver on your skin it will leave a brown stain for a few days.
Darkroom: I was lucky enough to use an actual darkroom - if you don't have access to a darkroom just make sure whatever you use is well ventilated. The chemicals have a strong odor and will stink up more than just the room you do the process in.
Step 1: Clean the plate. I poured the collodion on a piece of 4x5 tin plate. There are a couple of different ways to do this but I found that pouring quite a bit in the center of the plate and then moving it to each corner works the best. Pour generously so that you completely coat the plate - if you pour to little it will leave dry spots where the photo won't appear. Collodion should be mixed about a day ahead of use in my experience.
Step 2: Silver Nitrate bath. After the collodion is on, it goes into the silver nitrate bath where the plate sits for 3 minutes and becomes light sensitive. At this time the lights in the darkroom go off except for the safelights which are either red or amber and at a very low power. Wet plate collodion has a film speed (ISO) of approximately 5, so this means that it takes quite a bit of light to affect the plate. Place the plate in gently or it will actually wash away part of the collodion, resulting in blue streaks that you see on some of these photos.
Step 3: Take it to the camera, shoot the photo! Put the plate in an old film holder so that it's light tight. Now you’re ready to take the image. As said before, this film has an ISO of approximately 5 - so you either need directly sunlight exposed for 5-10 seconds, or do like I did and shoot in the studio with a couple of lights at full power within 1-2 feet from your subject.
Step 4: Develop. Back into the darkroom, take the plate out, and cover the plate in developer. Rock it gently back and forth for about 10-15 seconds until you start to see your image appear. If you're shooting on something dark (black aluminum or glass for example) it will show up as a negative first - if you're shooting on clear glass it will show up as positive. Then a gentle water wash until the plate washes off the developer - you'll notice it looks like the plate is waxy at first until the developer washes off. Put it into the fixer and develop for at least 5 minutes - when it's in the fixer for a few seconds you can turn on the lights again, and watch the image switch before your eyes!
Step 5: Dry and Varnish. I just had a drying rack to put the plates on and let them sit for a day or so. The varnish in this kit can destroy your plates because the alcohol is to strong - it's a real bummer to get your first plate done only to see it disappear within 10 minutes. I called Bostick & Sullivan and they recommended putting 1-2 drops of water and that fixed the problem for me. I let the varnish dry over night and it was ready to go. It has a nice smell of lavender!
0 notes
Video
The Motor Guy at work - wanna see his toolset? from Benedikt on Vimeo.
In-Flight PID tuning: rcgroups.com/forums/showthread.php?t=2101335
Micro MWC Flight Controller
Discussion: rcgroups.com/forums/showthread.php?t=1993117
Shop: hobbyking.com/hobbyking/store/__657__501__Multi_Rotors_Parts-Flight_Controller.html
Carbon Frame discussion: rcgroups.com/forums/showthread.php?t=2136987
coreless micro motors
discussion: rcgroups.com/forums/showthread.php?t=2009496
shop: micro-motor-warehouse.com/
808 #16 camera
discussion: rcgroups.com/forums/showthread.php?t=1556994
shop: stores.ebay.com.au/eletoponline365/
Turnigy 9XR radio
software: open-tx.org/
discussion: rcgroups.com/forums/showthread.php?t=1628785
shop: hobbyking.com/hobbyking/store/__309__190__Radios_Receivers-2_4Ghz_Turnigy.html
0 notes
Video
How to setup a Micro MWC board - flashing and basic configuration from Benedikt on Vimeo.
A quick rundown on setting up the Micro MWC flight controller.
micro-motor-warehouse.com/collections/electronics/micro-mwc-fc
config check list:
- FTDI driver installed
- correct port selected
- programmer = USBasp
- board = Arduino Pro / ATMega328
0 notes
Video
QuadFlyer Carbon Micro-H from Benedikt on Vimeo.
designed by QuadFlyer.net
made by smartshapes.de
motors: micro-motor-warehouse.com/products/cl-0820-15
FC: micro-motor-warehouse.com/products/alien-fc
cam: 808 #16
0 notes
Video
SpeederBike "Dream Edition" from Benedikt on Vimeo.
This is a custom micro quad frame. It is the combination of the Zippin SpeederBike and the DreamCatcher.
The print file is available here: thingiverse.com/thing:580322
The related discussion thread is here: rcgroups.com/forums/showthread.php?t=2299573
0 notes
Video
This is how I FPV! from Benedikt on Vimeo.
just having a bit of fun on a Sunday morning ;)
0 notes
Video
"Throttle Management" - the propellerhead approach from Benedikt on Vimeo.
I have developed my own way of dealing with the throttle on my copters:
- centering throttle stick
- custom curves
- discharge compensation
0 notes
Video
How To solder a Micro MWC flight controller from Benedikt on Vimeo.
WIP
0 notes
Video
How to hot-glue like a boss! from Benedikt on Vimeo.
Hot glue is great, hot glue guns are terrible.
If you want to hot-glue small stuff, a SMD heat gun is the solution!
0 notes