
Statistics
We looked inside some of the posts by justmiha97 and here's what we found interesting.
Average Info
Notes Per Post
13K
Likes Per Post
10K
Reblog Per Post
3K
Reply Per Post
241
Time Between Posts
11 days
Number of Posts By Type
Text
17
Last Seen Tumblr Blogs


Fun Fact
Total funding amounts to $125.3M.
Text
I've discovered this method a few years back.
It requires mesh duplication and multiple useage of data transfer modifier. It's a bit tedious, but simple, and if you understand how it works and why it works, you'll remember it forever and be able to get perfect results on seam fixing and custom normals, all inside blender, every time.
Never wrote a tutorial for it so I'm glad that the same method worked for another creator and that it's now shared with the rest of the community.
Fixing bad normals along seams in blender

I struggled. Is it the shoes? The skirt's legs? Lets fix the shoes... Ok it is the legs, shoes are fine with other stuff! Lets redo the legs... Nope didn't work. New WRK project? Nope. Redoing the MTK process ... Nope.
Let's just say i ended up with 3 wrk projects, 8 wso's, and a scrambled brain.
I ended up asking @justmiha97, who had a solution - a while ago he used it and might not work, but it did! So I wrote it down for myself and others.
Tutorial here
You need:
- Obj files/meshes of top/feet/bottom/head (depending on your cc) with all morphs, these should be thoroughly checked to have good normals and preferable unscathed fresh from EA, as they are what the seams of your item have to align with. I used the EA feet (Geom and morphs exported from TSRW) and my edit of JVSmith's torso (for its preg morph) for this skirt.
- Smugtomato geom tools
- Any version of blender that has the data transfer modifier & that works with geom tools (I use 3.6)
101 notes
·
View notes
Text
I will probably use this even as it is right now!!! I love the idea behind it, and it does exactly what it's supposed to! However, I'll add my two cents on the problem you're facing. This most likely has to do with the fact that when a sim is exported from CAS as an actual character file ready to be used as a sim in game, all the individual textures (eye color, eyelashes, makeup, clothes, brows and all the rest customization options) are composited into 4 different textures: - face - body - scalp and solid hair - alpha hair parts With the last two using the same hair texture composited over the skin scalp texture for the solid parts. If your face skin texture is lower resolution than your sclera texture, it will be composited into the face texture resolution, losing details in the process. Solution? Not sure. I think actual accessories like glasses don't actually get composited and are in fact kept separate, but again, not sure, as this I have not tested. Below on how Sims 2 (and by extension most games) optimize in-game customizeable characters. I hope people find this useful.
You are right, CAS/Bodyshop shaders are severely different from in-game ones because CAS is just a character exporter, it has more complex shaders in order to be able to display all those customization options (texture layers) and quickly switch between them as the player chooses them. It can afford that because it's a separate game mode that is only specialized for character creation and does not utilize any other resources for anything else. The compositing that happens when you save a sim is used to heavily simplify in-game shaders (limit it to 4 final textures) for optimization purposes (game probably wouldn't even be able to run well with CAS shaders if there were multiple sims on a lot, most likely would cause severe memory errors, esp bc sims 2 is 32bit app).
This is also true for sims 3/4 as EA uses same technique (and almost all games that have character customization do).


Bad news everyone...
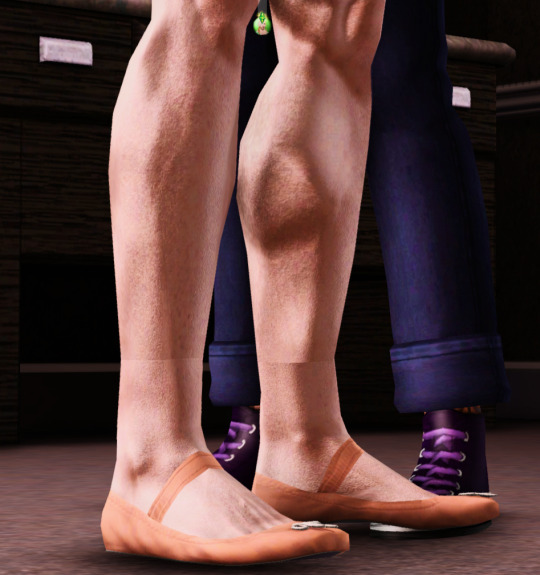
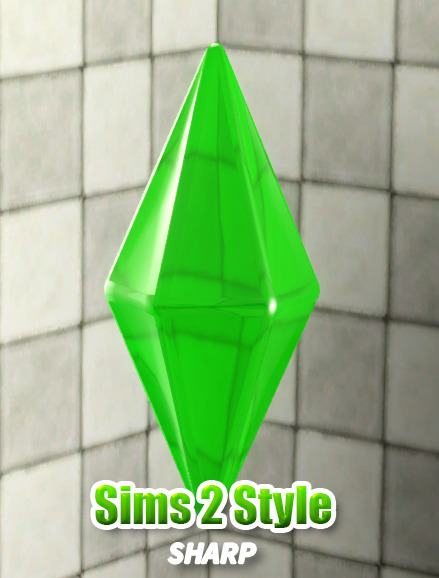
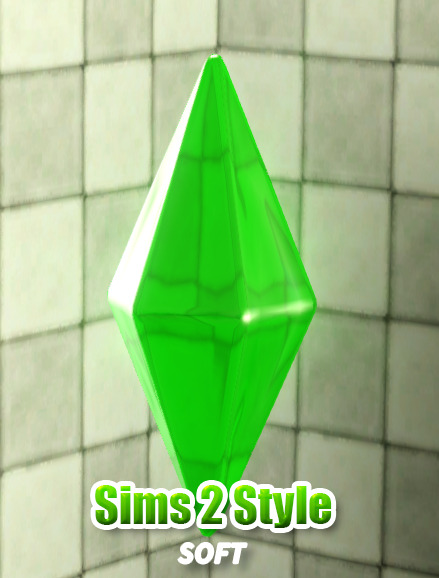
Unfortunately, the release of the sclera accessory is delayed because I have a problem that I can't solve.
I worked for a texture that would suit me, and at first I checked how it looks only in Bodyshop, where it looked good, and then I checked how it looks in the game, and it disappointed me.
The screenshots show how smooth the gradients and transparency of the texture look in BS and CAS, and how rough it is in the game.

I tried SimStandardMaterial, StandardMaterial and SimSkin, AlphaRefValue 0/127/255, AlphaMultiplier 0/1 — but all in vain.
It seems that shaders in CAS and the game work according to different rules. I have already encountered the consequences of this when I wanted to make an accessory with transparency, an animated texture and several groups. Then the object also looked good in CAS and bad in the game.
If you have any ideas on how to solve the problem without redoing the textures, please share.
64 notes
·
View notes
Text
Oh I'm so going back to ts2 now!
@lamare-sims you sneak! this is so cool, thank you for uploading this to MTS. I'm immediately checking this out rn!
611 notes
·
View notes
Text
Hey, I know I'm late on this, but the eye stuff is correct! Eyes UV map island and it's UV vertex position data is being moved and stretched to animate eye movement. Idk what kind of a rig control EA had regarding this, but the eye movement is insanely deliberate and satisfying. The game uses same technique to animate textures on models, like for example the repo-man gun. Also, geneticizing these newly imported faces with new morphs might be impossible with current tools. I don't think much people even understand how the system behind it works, besides targeting vertices of a defined area, and assigning their positions to the child sim as well. The face structure mesh is saved PER SIM for this exact reason, which makes genetic combinations practically unlimited and often highly irregular. I'd like to think it's based on vertex groups, but that might not be the case at all. If anyone knows anything about face features genetics in sims 2 more than what I already outlined here, please let me know.
👩🎨 Extracting Hidden Face Morphs in The Sims 2
In The Sims 2, Sim faces contain hidden morphs that can be extracted in different ways. For a long time, only two morphs were known, but there are actually more.
1. Extracting Morphs via SimPE
What You Need:
SimPE (enable "Advanced Mode" in the settings).
Sims2Pack Clean Installer (if no ready-made files are available).
MilkShape 3D 1.8.5
Steps:
Get the Face File:
If you have a SavedSims folder, choose any file from it.
If not, extract any Sim using Sims2Pack Clean Installer and locate the Face Preset file.
Open the File in SimPE:
Open the file in SimPE.
Find the Geometric Data Container (GMDC) resource.
Select the Sim's age group.
Export the Model with Morphs:
Click Export..., save the file in SMD format.
When prompted "Do you want to export Morph Meshes??", select Yes.
View Morphs in MilkShape 3D:
Import via File → Import → Half-Life SMD....
Select a morph and uncheck Rename Bones.
What Do the Morphs Contain?
One morph shows a smiling expression.
Another shows an angry or displeased expression.
2. Extracting All Morphs via 5gd File
What You Need:
SimPE.
Blender 2.80+.
GMDC Importer/Exporter (Blender plugin).
Steps:
Export the Face Model as a 5gd File:
In SimPE, open GMDC.
Right-click → Extract....
Save the file as 5gd.
Import into Blender:
Install the GMDC Importer/Exporter plugin.
Open Blender 2.80+ (Blender 2.79 only shows 4 morphs).
Import the 5gd file.
What Do the Morphs Contain?
Importing into Blender 2.80+ reveals all hidden morphs.
Additional Information
You can replace the default face model with one of the morphs to create a new default preset.
It works correctly in BodyShop and CAS.
There may be even more hidden morphs in the game that have yet to be discovered.


If you have any additional information about these hidden morphs, feel free to share!
Source (RU):
102 notes
·
View notes
Text
Had some fun with Reshade in Sims 2
So I'm deciding to share it! Introducing...
CinemaSim2 Reshade Presets
The Game already looks great with radiance lighting (I'm still developing my own version of it, currently on evening lighting), but I decided to throw in reshade in the mix, and the game is looking gorgeous!
UI is still affected because sims 2 (unlike sims 3 and 4) cannot exclude UI from the Reshade shader influence, however I've tried to keep the readability of the UI as intact as possible.
Here are some lovely screenshots:


Prerequisites:
Any working Reshade version (this is tested on 6.2, 6.3 and 6.4).
Specific 6.2 Reshade Shader files, it won't work correctly without these (you can also get them here).
Keep reading to download...
I've made multiple presets, each much more complex than the previous. Get them from the list below.
Regular Presets included are:
Very Low
Low
Medium
High
Very high
Experimental (significant FPS drop for minor, and sometimes buggy features) Presets included are:
Ultra (includes some edge value based reflections).
Extreme (includes depth angle based Screen Space Reflections).
What is included in these presets:
AO, multiple layers of these (some are disabled on lower end presets).
DOF, for close and far distances (disabled on lower end presets).
Chromatic Abberation, for some added realistic camera lense effect, not too distracting, very delicate.
HDR, and balanced Bloom in one single technique, so that lights, emission shaders and scene colors can POP, adds glow to really bright spots. (disabled on Very Low preset).
Bump Map effect based on texture contrast (disabled on lower end presets).
Reflective Bump mapping which adds reflections to the edges of the objects affected by the bump map (disabled on all presets except for experimental ones).
SSR with 'raytracing' (yes, it actually looks like planar reflections and reflects everything, even moving objects, albeit it's not really accurate at all, but looks cool). (disabled on all presets, except for Extreme one).
Adaptation techniques to always keep values in check (never too bright or too dark. Some are disabled on Very Low preset).
Distance Fog techniques to make the world feel more real, closer to sims 3/4.
59 notes
·
View notes
Text
NEED


Breakup, New Family Member, and Go Steady Wants/Fears Mod
This was made by a member of my community, Riftwalker, who graciously gave me permission to upload their edited version of the EA WantTrees.
THIS FILE DOES NOT GO IN YOUR MODS FOLDER.
This overwrites: The Sims 2 Ultimate Collection\Fun with Pets\SP9\TSData\Res\Wants\WantTrees.package
What is this?
EA broke their 'Break Up' wants in vanilla Sims 2. This fixes it, along with other fixes:
Teen, Young Adult, Adult and Elder sims of all aspirations can get a want and a fear for Break Up.
Teen, Young Adult, Adult and Elder sims can get a want and a fear to Go Steady.
This is already possible, but Riftwalker added "True" so that teens of all aspirations (instead of just family) and children can get a want "New family member", which is cute and it's them basically saying they want a new sibling.
Teens can roll woohoo wants. (Credits to Syberpunk on MTS)
In one instance, Uni wants for all aspirations has been enabled, and in another instance, engagement and left at alter wants and fears for all aspirations is enabled.
DOWNLOAD: Simsfileshare | Google Drive
980 notes
·
View notes
Text
Updated all the links!
Dropbox might be giving you some issues, as it seems to always does, but G-Drive should work completely!!!
Clean UI 1/3 Beta Release!
Updated with improved style and some CAS additions as a sneak peek. UPDATED ALL LINKS as well. They should work now.
For those who cannot download from dropbox, I’ve re-added it to G-Drive as well (hopefully this time it does not go missing):
UI Main Loading Screen Gamefreak’s Loading Screen compatible patch (REPLACES the original mod if you use Gamefreak’s Loading Screen Overhaul already).
DROPBOX Download below >>>

It’s finally HERE!
So what is this you wonder? It is a first third of clean UI release, currently in beta testing phase. What does it include? Well, here’s the list:
- Completed Game Intro Loading Screen (separate download) - Complete Main Menu - Complete Save Loading Screen - Complete Buy mode (without blueprints) - Complete Build mode (without blueprints) - Most of live mode in progress (without most of EP content)
That’s 30% of it complete already. Here’s some images of it:


Issues with this build: - going into CAST in build/buy gets rid of half camera control background graphic - career tab days off are colored light blue and are thus barely readable These are two issues that don’t seem to be easily fixable but for final release I’ll try my best.
Now onto downloads!
- Clean UI Main download - HERE - Clean UI Game Loading Screen - HERE (no need to download if you already got it from here)
THIS NEXT ONE IS REQUIRED! I accidentally made clean UI itself this mod compatible, will make a version that does not require this mod!!!
- Clean UI compatible Gamefreak’s Loading Screen Overhaul - HERE (required if you use Gamefreak’s Loading Screen Overhaul!!! REPLACE THE ORIGINAL MOD!!!)
Some final words.
Thank you everyone who follows this project. I hope this is enough for now, there’s more to come later, but I will be taking a break from this project for a bit. Next module is CAS and edit town/tutorial/family management. I also have a Ko-Fi page here that is open for donations. If you want and can please consider donating. Thank you once again.
3K notes
·
View notes
Text
New day, new project!
So what's this?
With recent re-release of The Sims 1 and The Sims 2, I decided to fix my UC install (yay!) and return to an old project! It's been a couple of years but I learned how to edit sims 2 lighting, and thus I decided to get Radiance lighting closer to what I've always been expecting of it.

So what's new in this?
For now, only night has been significantly changed, but I plan to apply this to all the weathers and times of day, as well as make the time of day switch just a bit smoother.
Keep reading for some more details:
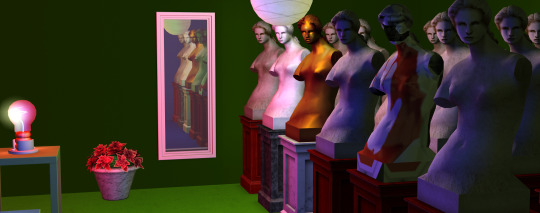
Lights are a bit more intense, and the highlights are more visible, while shadows are darker (but still affected by the room color). Blue ambience minimized.

Outdoor lights get the same treatment (and yes, that is a base game light, they all have different shapes)!

More precise and dramatic window light spillage indoors (Now also affecting objects)!

Same applies to the outdoor objects (The spillage is softer but still visible)!
For now, this is what I've done, but for example, day is too bright, and there's still way too many shadows during overcast. There's not a lot to be done (day, morning, evening, overcast, winter, spring and autumn all have their own modes, besides the night, which I just finished) and it's easy to edit and test this (just keep reloading the lot), so I think it will most likely take just a couple of days to finish it.

Will keep you posted on this one.
#thesims#sims2#ts2#the sims 2#thesims2#sims 2#the sims legacy#sims#sims 2 mods#ts2 mods#lighting#video game graphics
103 notes
·
View notes
Text
Updated for people who couldn't download it from Dropbox. Now it's on Dropbox AND G-Drive!
Clean UI 1/3 Beta Release!
Updated with improved style and some CAS additions as a sneak peek.
For those who cannot download from dropbox, I’ve re-added it to G-Drive as well (hopefully this time it does not go missing):
UI Main Loading Screen Gamefreak’s Loading Screen compatible patch (REPLACES the original mod if you use Gamefreak’s Loading Screen Overhaul already).
DROPBOX Download below >>>
It’s finally HERE!
So what is this you wonder? It is a first third of clean UI release, currently in beta testing phase. What does it include? Well, here’s the list: - Completed Game Intro Loading Screen (separate download) - Complete Main Menu - Complete Save Loading Screen - Complete Buy mode (without blueprints) - Complete Build mode (without blueprints) - Most of live mode in progress (without most of EP content) That’s 30% of it complete already. Here’s some images of it:
Issues with this build: - going into CAST in build/buy gets rid of half camera control background graphic - career tab days off are colored light blue and are thus barely readable These are two issues that don’t seem to be easily fixable but for final release I’ll try my best.
Now onto downloads!
- Clean UI Main download - HERE - Clean UI Game Loading Screen - HERE (no need to download if you already got it from here) - Clean UI compatible Gamefreak’s Loading Screen Overhaul - HERE (required if you use Gamefreak’s Loading Screen Overhaul!!! REPLACE THE ORIGINAL MOD!!!)
Some final words.
Thank you everyone who follows this project. I hope this is enough for now, there’s more to come later, but I will be taking a break from this project for a bit. Next module is CAS and edit town/tutorial/family management. I also have a Ko-Fi page here that is open for donations. If you want and can please consider donating. Thank you once again.
3K notes
·
View notes
Text
Clean UI
UPDATE
Yes, you read that right. I was forced to update clean UI because Google Drive failed me (and I've returned to Dropbox, write me in DMs if there's issues with this new download), so now you'll have the most up to date version of it, which isn't much at all, and a similar version to it has been publicly available on my Discord server already. There you can also get updates on the development of this project.
This version includes a lot of changes to the overall style of the UI elements, synchronizing them over the board and making them easier on the eyes.
It also includes some additional UI elements, as well as some parts of CAS redone in that style. None of these changes are fully consistent. However it is not to the detriment of live mode, and live mode's actually looking way better than before, even if not fully consistent (lots of popups have not been updated for the new style, but main parts of the UI all are). CAS however is... well... currently a mess, because it's still in development. However, I've returned to work on Clean UI so expect this to change soon.
Clean UI 1/3 Beta Release!
It’s finally HERE!
So what is this you wonder? It is a first third of clean UI release, currently in beta testing phase. What does it include? Well, here’s the list: - Completed Game Intro Loading Screen (separate download) - Complete Main Menu - Complete Save Loading Screen - Complete Buy mode (without blueprints) - Complete Build mode (without blueprints) - Most of live mode in progress (without most of EP content) That’s 30% of it complete already. Here’s some images of it:
Issues with this build: - going into CAST in build/buy gets rid of half camera control background graphic - career tab days off are colored light blue and are thus barely readable These are two issues that don’t seem to be easily fixable but for final release I’ll try my best.
Now onto downloads!
- Clean UI Main download - HERE - Clean UI Game Loading Screen - HERE (no need to download if you already got it from here) - Clean UI compatible Gamefreak’s Loading Screen Overhaul - HERE (required if you use Gamefreak’s Loading Screen Overhaul!!!)
Some final words.
Thank you everyone who follows this project. I hope this is enough for now, there’s more to come later, but I will be taking a break from this project for a bit. Next module is CAS and edit town/tutorial/family management. All of my downloads have also been migrated to google drive, because drop box banned me for some reason. All links on this blog work once again. I’m back on dropbox due to popular demand. I also have a Ko-Fi page here that is open for donations. If you want and can please consider donating. Thank you once again.
3K notes
·
View notes
Text
These are used for animations, all facial animations, and are a reason why sims 2 facial animations still look great. There is actually 27 of these morphs (A lot of maxis documentation that has resurfaced recently confirms this). I've extracted them long time ago using blender, in 2019 possibly, as part of various instances of The Sims 2 Beta Server where a lot of ts2 related research was going on in various channels, also where a lot of simmers recently debunked corruption myths, before Rachel Black stepped to the scene to finish the job. The only way I've ever been able to extract these faceblends (that's how they're officially called by maxis of that time) is in a group of 4, where they're exported into 4 different blend shapes (they're widely known as this in the game industry) in blender, as mix of various of those 27 actual blend shapes. I've managed (inaccurately, because I did this manually) to separate all 27 shapes from the 4 that get exported, but the problem is, you can't import MORE than 4 of these using SimPE, since it only allows for import of 4 copies of vertex data. This, of course, breaks the file, and in game facial animations in return. This started as sims 2 reface project, but the problem was the fact that I had no idea how to import these back in the game, so I just gave up.
I'm glad someone was able to export all of them correctly, if they could be imported back in the game we could make changes to sim's faces, and there could possibly even be a rig made that allows for facial animation controls! (albeit importing animations of that type would need some research, possibly extensive one) I do think someone in this community must know about this way more than I do tho :D Keep reading for a rant on these and why they're still a big deal:
On a side note, I had adopted this type of facial animation control, because it can be very precise, I'm using it in my own rig creations. This type of animation is still widely used, especially for cartoony, more stylized graphical elements. They work super well as deformers/correctors too, when bone based rig is not enough to convey deformation, wherever the mesh intersects due to animation, these can be used to correct the intersection. It's safe to say they have found their use widely both in the game and the animation industry. Blendshapes are also used in epics new meta human creator!
It's also to be noted, it's not a coincidence these were used in sims 2, since some of ex Pixar employees were working on sims 2 animations back in early 2000s, and were most likely highly familiar with these rigging techniques.
👩🎨 Extracting Hidden Face Morphs in The Sims 2
In The Sims 2, Sim faces contain hidden morphs that can be extracted in different ways. For a long time, only two morphs were known, but there are actually more.
1. Extracting Morphs via SimPE
What You Need:
SimPE (enable "Advanced Mode" in the settings).
Sims2Pack Clean Installer (if no ready-made files are available).
MilkShape 3D 1.8.5
Steps:
Get the Face File:
If you have a SavedSims folder, choose any file from it.
If not, extract any Sim using Sims2Pack Clean Installer and locate the Face Preset file.
Open the File in SimPE:
Open the file in SimPE.
Find the Geometric Data Container (GMDC) resource.
Select the Sim's age group.
Export the Model with Morphs:
Click Export..., save the file in SMD format.
When prompted "Do you want to export Morph Meshes??", select Yes.
View Morphs in MilkShape 3D:
Import via File → Import → Half-Life SMD....
Select a morph and uncheck Rename Bones.
What Do the Morphs Contain?
One morph shows a smiling expression.
Another shows an angry or displeased expression.
2. Extracting All Morphs via 5gd File
What You Need:
SimPE.
Blender 2.80+.
GMDC Importer/Exporter (Blender plugin).
Steps:
Export the Face Model as a 5gd File:
In SimPE, open GMDC.
Right-click → Extract....
Save the file as 5gd.
Import into Blender:
Install the GMDC Importer/Exporter plugin.
Open Blender 2.80+ (Blender 2.79 only shows 4 morphs).
Import the 5gd file.
What Do the Morphs Contain?
Importing into Blender 2.80+ reveals all hidden morphs.
Additional Information
You can replace the default face model with one of the morphs to create a new default preset.
It works correctly in BodyShop and CAS.
There may be even more hidden morphs in the game that have yet to be discovered.
If you have any additional information about these hidden morphs, feel free to share!
Source (RU):
102 notes
·
View notes
Text
An update to this mod as well, finally finalized, unless I get other resolutions requested (besides standardized resolutions, there's a lot missing still).
Sims 1 Alternative UI UPDATE
With this new-old The Sims 1 Legacy edition releasing, I decided to finalize this mod, and release an update that fixes a few things and adds a new resolution.
So, what is new/fixed?
Game Loading screen no longer has copyright text overlap the design border on resolutions 1920x1080 and up
Magic Town and Studio Town map UI no longer has visual glitches
Magic Town and Studio Town map UI now have deco plumbobs, like the rest of them
Added a new resolution, 2560x1080
And with that the mod now supports these resolutions:
1024x768
1366x768
1920x1080
2560x1080
2560x1440
Get the mod HERE!


Read old text below:
Keep reading
448 notes
·
View notes
Text
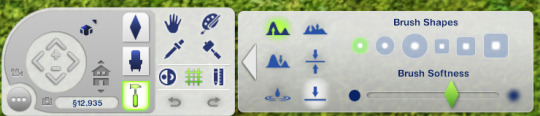
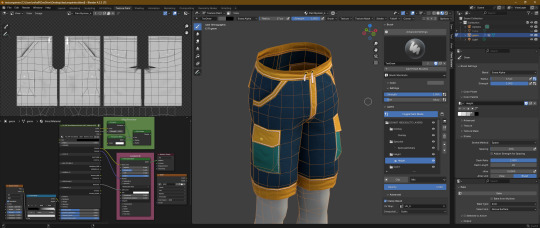
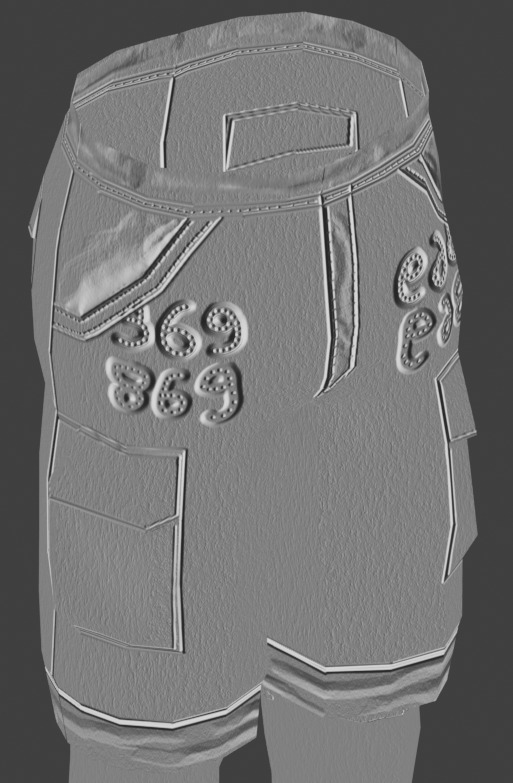
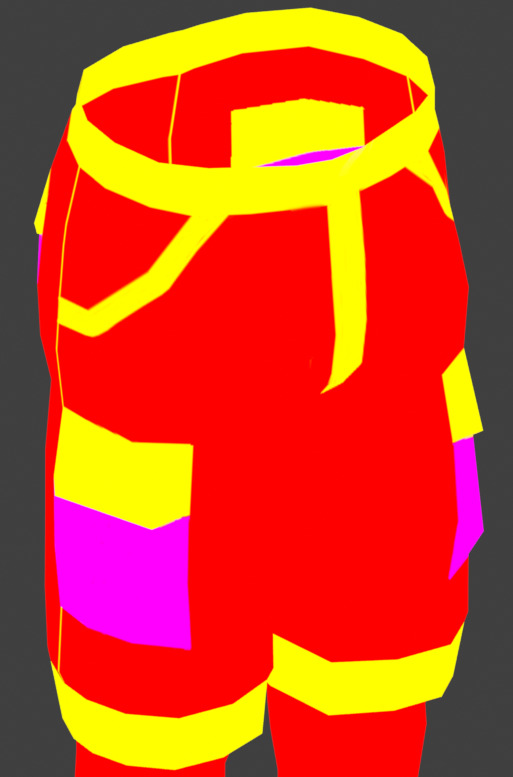
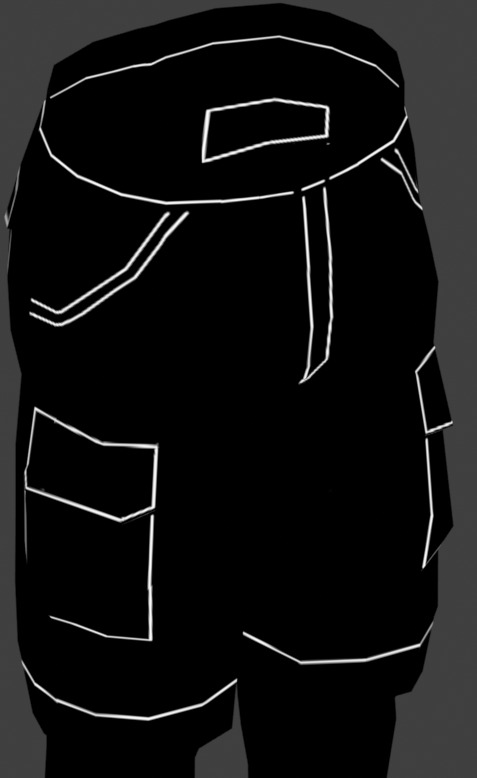
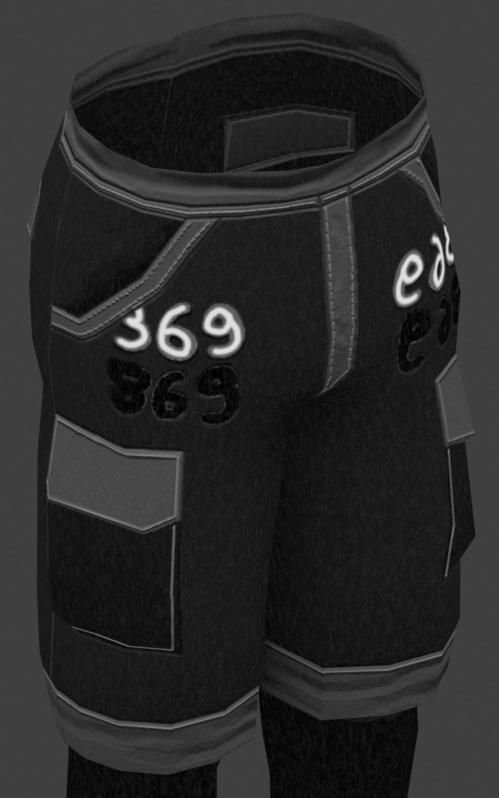
Updated the painter with few minor fixes and addons, and included an in-depth, INTERACTIVE tutorial on how to use it.
The Sims 3 Material Painter Final Version
UPDATE
I've updated the painter, and with it, included some new things as well as a fully interactive tutorial on how to use it.
NEEDED Prerequisites:
Blender 4.2+
Blender Paint System Addon - HERE (you can donate to the original creator, or get it for free, great little plugin!)
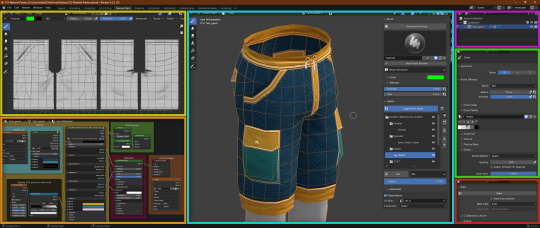
THE TUTORIAL
The tutorial is extensive, done in numbered steps, and is UI and workflow oriented, allowing you to click on any relevant UI element to learn more about it, and how it relates to the complete workflow. There's an additional, advanced chapter, for people who are interested in learning more about blender texture painter's functionality and techniques.
PAINTER ADDITIONS
The Painter has been slightly fixed, with multiplier's lines and depth shading being shifted to the correct depth, and with AO being more pronounced. This will make multiplier output even more accurate. Added some new minor tweaks to UI and Color Palettes to accommodate for the tutorial.
DOWNLOAD
Get updated templates with new files HERE!
If you only want to access the tutorial, you can do it HERE.
You can access the original post below:
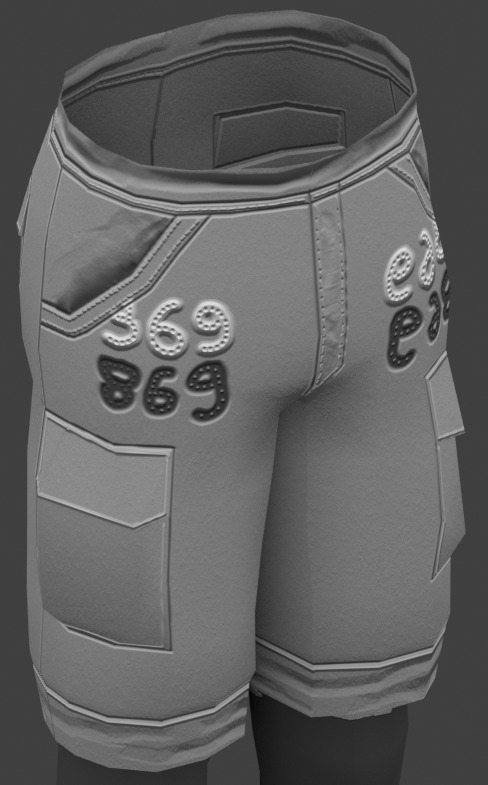
Been working on a tool that easily creates The Sims 3 material maps based only on a few texture layers, most of it derived from height data. This was done long time ago, but very sloppily, and it was not at all approachable.
Discovering THIS free blender add-on that lets you plaint layers in it, made me return to this project and finalize it for release.
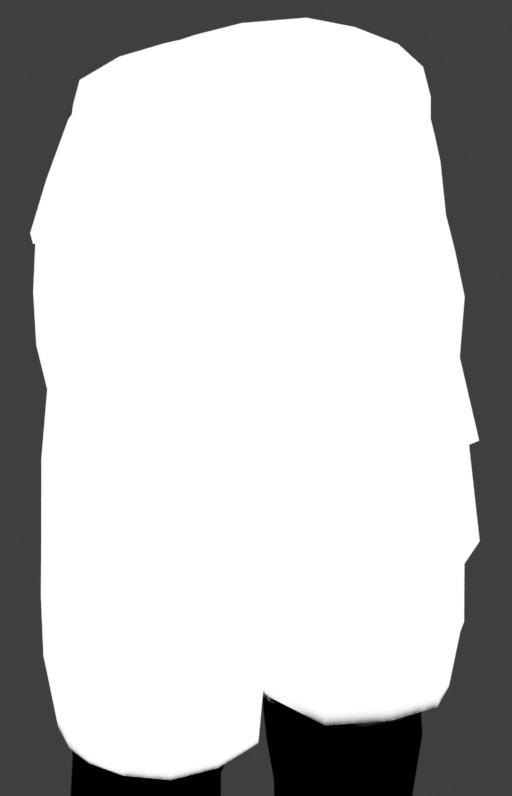
The tool can export:
- Multiplier, RGB+A
- Normal Map, RGB+A
- CAST Map, RGB+A
- Specular Map
- Overlay, RGB+A

OLD VERSION BELOW!
//~~Get it HERE, and please, make sure to get THIS blender plugin, it's NEEDED for this to work. Blender 4.2+ is also needed for these to work together.~~//
206 notes
·
View notes
Text
The Sims 3 Material Painter Final Version
UPDATE
I've updated the painter, and with it, included some new things as well as a fully interactive tutorial on how to use it.
NEEDED Prerequisites:
Blender 4.2+
Blender Paint System Addon - HERE (you can donate to the original creator, or get it for free, great little plugin!)
THE TUTORIAL
The tutorial is extensive, done in numbered steps, and is UI and workflow oriented, allowing you to click on any relevant UI element to learn more about it, and how it relates to the complete workflow. There's an additional, advanced chapter, for people who are interested in learning more about blender texture painter's functionality and techniques.
PAINTER ADDITIONS
The Painter has been slightly fixed, with multiplier's lines and depth shading being shifted to the correct depth, and with AO being more pronounced. This will make multiplier output even more accurate. Added some new minor tweaks to UI and Color Palettes to accommodate for the tutorial.
DOWNLOAD
Get updated templates with new files HERE!
If you only want to access the tutorial, you can do it HERE.
You can access the original post below:
Been working on a tool that easily creates The Sims 3 material maps based only on a few texture layers, most of it derived from height data. This was done long time ago, but very sloppily, and it was not at all approachable.
Discovering THIS free blender add-on that lets you plaint layers in it, made me return to this project and finalize it for release.
The tool can export:
- Multiplier, RGB+A
- Normal Map, RGB+A
- CAST Map, RGB+A
- Specular Map
- Overlay, RGB+A
OLD VERSION BELOW!
//~~Get it HERE, and please, make sure to get THIS blender plugin, it's NEEDED for this to work. Blender 4.2+ is also needed for these to work together.~~//
#thesims3#thesims#sims3#thesims3cc#the sims 3#sims3mods#ts3#sims 3#sims3tools#thesimstools#simsc#simscreation#sims creator#blender#blender3d
206 notes
·
View notes
Text
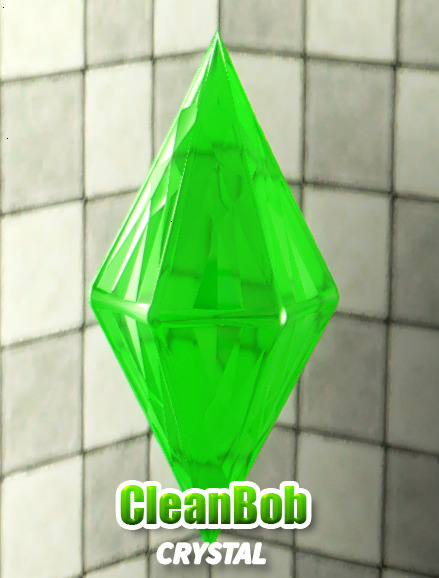
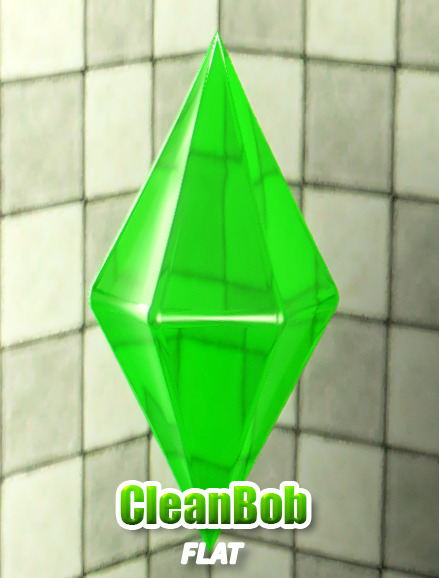
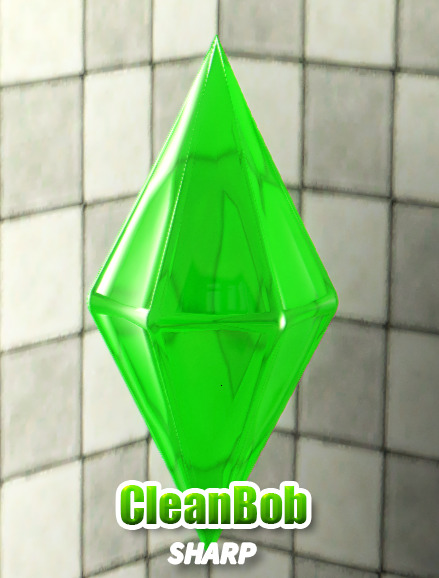
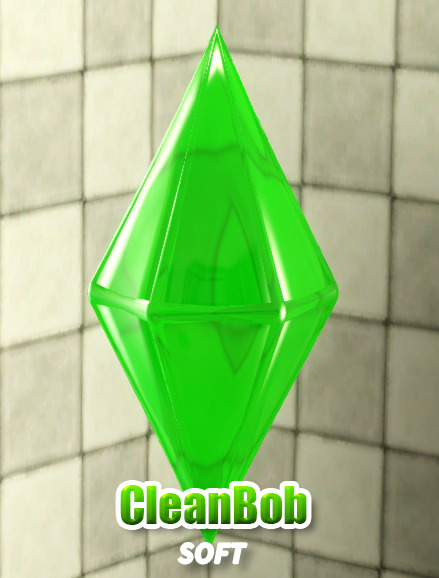
I was bored today, should've worked on Clean UI but default sims 3 plumbob bothered me... So I decided to change it, and provide some options! Get them HERE! I've also added the .blend files I used to create these. Use with blender 2.79 and blender TS3 object tools (get those here).
642 notes
·
View notes
Text
[TS3] Less Banding


Haii honey buns!!! :3
This is an ASI mod for TS3 that addresses banding by giving the game a bit more color depth. Unlike my older attempt using shaders, this one doesn't have any weird artifacts!
Download: Patreon (Free)
Instructions are in the post. Simply drop wininet.dll and BandingFix.asi into your Game/Bin folder in your Sims 3 installation directory.
As a caveat, screenshots taken in-game will still appear banded as normal. You can get around this by using print screen or an external screenshot tool and using F10 to hide the UI.
Source Code/Mirror
576 notes
·
View notes
Text
Oh my god!!!
BHAV to Diagram Tool
I've just released a web tool for The Sims 2 modders that converts SimPe BHAV code to Mermaid diagrams. It's intended to make BHAV functions easier to understand, especially the big ones.
BHAV to Mermaid diagram (cosmatevs.github.io)

185 notes
·
View notes