
Don't wanna be here? Send us removal request.
Statistics
We looked inside some of the posts by kindleappkeepscrashing and here's what we found interesting.
Average Info
Notes Per Post
0
Likes Per Post
0
Reblog Per Post
0
Reply Per Post
0
Time Between Posts
21 days
Number of Posts By Type
Text
17
Last Seen Tumblr Blogs


Fun Fact
Tumblr Inc. has $15.1M in annual revenue.
Text
How to Connect Canon Printer to Wifi (1-888-272-8868)
Canon printer is a smart device that can print, copy, scan, and fax, on paper. It is also known for providing high-quality photos print, with great quality color accuracy. But what if the Conon printer didn’t connect to WiFi?
This problem is expected while using the printer, and you don’t have to worry, as we have got you covered. This problem is curable and can easily be fixed with some simple and easy fixes.
If you are also one of those, who is struggling with the Canon printer not connecting to WiFi. Then you arrive at the right destination. In this, you will get a brief guide on how to solve the Canon printer not connecting to the WiFi issue.
There are various factors, such as corrupt or incompatible printer drivers, network issues, and changes in the WiFi network that can lead to the same problem. But no need to get upset, here we have listed some troubleshooting fixes to resolve not connecting to the WiFi problem.
Steps to Resolve the Canon Printer to Wifi Network Issue
Once you have understood the root causes, now it is time to fix it as soon as possible. Below is the list of some tested easy-to-follow methods to solve the not connecting to WiFi problem.
1. Update the Faulty Printer Driver
If there is any faulty printer driver or your device is running on an outdated version of the driver. Then you will encounter the Canon printer to Wifi network issue. So, keeping the driver updated is required. To update the printer driver, follow the below instructions.
Firstly, by using the Windows search, visit the Device Manager.
Then click on Print Queues and click on the Canon printer, you want to update.
After this, choose the option Update Driver and choose Search Automatically for Drivers.
Next, allow Windows to search for a new Canon printer driver and wait during the process.
Once updated, restart the computer and see if the problem is solved or not.
2. Uninstall and Re-install the Canon Printer
The next method to fix the problem is to uninstall and reinstall the Canon printer. Here is how to uninstall and re-install the printer.
Press the Window and R keys to open the Run dialog.
Now enter Control and click on OK, to access the control panel.
Next, visit Programs and click on Programs & Features.
Then locate the Canon printer series MP Driver from the list and click on Uninstall.
After this, confirm the action by clicking on Uninstall, then follow the on-screen instructions to remove the printer thoroughly.
Once the printer is removed successfully, then reinstall the Canon printer.
3. Update the Firmware of the Canon Printer
Another way to solve the Canon printer not connecting to WiFi is to update the firmware. The following are the steps to update the Firmware.
Turn on the printer and ensure it is connected to the Internet.
Then press the Menu button, and choose the option Setup.
After this, click on OK and choose Device Settings.
Next, choose Firmware Update and then Install Update.
Now by clicking on Yes, confirm the intention to update firmware.
At last, initiate the update by clicking on Yes.
Once updated, Update Succeeded will displayed.
Sum up
Hope the above fixes help you with how to solve connect Canon printer to Wifi network issue. Follow the provided fixes as given to fix the Canon print not connecting to WiFi.
0 notes
Text
How do I connect my Kindle tablet to WiFi?
Struggling with Kindle Won't Connect to WiFi, and wondering how to fix it. Well, there is no need to stress, as we have got you covered. Here we will provide you with some easy and effective troubleshooting methods.
Kindle is a movable wireless reading device for e-readers. It lets users read ebooks, that they bought on Amazon, library ebooks, and personal documents available.
To read e-books on the Amazon Kindle, you should have an active and working internet connection. You can do many things when it is not connected to the internet.
But with a sturdy internet connection, your experience can be more impressive. But there are many users who don’t know How do I connect my Kindle tablet to WiFi.
If you are one of those, then no need to get upset. The following guide will assist you in how to connect the Amazon Fire tablet to the WiFi network.
Methods to Connect Kindle to the WiFi
Connecting the Amazon Fire tablet to the WiFi network is not a problematic job, it is more detailed than you think. Go through the following instructions to connect your device to the WiFi.
Visit “Settings” of your Amazon Fire tablet, and scroll down to launch “Quick Menu.”
Then choose the gear icon and below the settings click on “Wireless Network” or another internet network.
After this, switch on the toggle of “WiFi Mode” and choose the WiFi network you want to connect.
Now you have to fill in the WiFi password, and choose the option “Connect.”
Once it gets linked, the wireless icon will appear on the top of the menu bar.
Why does Kindle Won't Connect to WiFi?
While using the Kindle, sometimes, users encounter problems like it is not connecting to the WiFi network. As with other digital devices, experiencing problems with Kindle is quite common.
The Kindle Won't Connect to WiFi can occur, if the Airplane mode is on, software or data conflict, slow and weak internet connection, and outdated software.
Facing issues is quite frustrating. But the good thing about this is, that the Kindle Won't Connect to WiFi is curable and can be fixed in some simple steps.
Go through the following simple and effective problem-solving methods to rectify the not connecting to WiFi problem.
Steps to Troubleshoot the Kindle Won't Connect to WiFi
If you having trouble connecting your device to the WiFi network, then no need to worry. Thoroughly follow the given troubleshooting steps.
1. Turn Off the Airplane Mode
At moments, users turn on the airplane mode to prolong the battery life, as occasionally it takes a day or weeks to read books. So, you need to ensure that the airplane mode is off.
If it is not, then visit the “Quick Menu” and click on the “Plane” icon to turn it off. To do the same, you can visit your device “Settings, and click on “Wireless.” Then find the airplane mode option and turn it off.
2. Update the Kindle
If after turning off the Airplane mode, you still facing the same problem, then try to update your Amazon Kindle. Here is how to update the Kindle.
First, go to the “Home” screen, and click on the downward-facing arrow icon, to launch the control panel.
From the control panel, visit “All Settings” and click on the “Device” option.
After this, select the option “Advance”, and then “Update.”
Then restart your device, once the update gets completely done.
Now if the “Update” option turns grey, then your Kindle device is running on its latest version.
Sum up
Certainly, the above comprehensive guide will assist you with How do I connect my Kindle tablet to WiFi. So, to rectify the Kindle Won't Connect to WiFi issues, follow the above methods as provided.
0 notes
Text
How to Install Brave App for Kindle Fire?
How to Install Brave App for Kindle Fire? The Brave app is a free and safest web browser. It blocks privacy-interfering ads or trackers and also blocks third-party data storage. So, if you are looking for a fast, free, and protected web browser, then the Brave browser is the best option. Installing the app on the Kindle Fire adds an extra wall of defense. It protects your device from malicious, that can damage your device. And also, keeps trackers away from obtaining your data.
From those apps, that contains ads, for example, YouTube, with the Brave app you can easily control interrupting ad. However, many users don’t know the steps to download the Brave App for Kindle Fire.
If you are also one of those who don’t know how to do so and wondering How to Install Brave App for Kindle Fire. Then you are at the correct location.
Here we will get a comprehensive guide, that will assist you in doing the same. All you need to do is go through the below simple and easy steps.

Methods for How to Install Brave App for Kindle Fire Installing the Brave app is not a complicated task, it is more simpler than you think. However, it requires a little workaround, as is not officially available on the Amazon App Store. Follow the below steps to do the same
Allow the App Installation from Another Source As it is not officially available, you need to allow the installation from unknown sources. Here is how you can allow installation from another source.
Visit “Settings” on your Kindle Fire tablet. Then click on the option “Security and Privacy.” After this, choose the “App from Another Source” option, to allow the installation from unknown sources.
Download the APK Files Once you have successfully permitted the installation from another source. Now you have to download the APK files on your device. The following are the methods to do the same.
To do the same firstly, on your device, launch the Silk browser or any other browser. After this, go to the official site, and search for “Brave Browser APK Files for Kindle Fire.” Now you have to download the latest version of the Brave browser APK from the trusted or verified source.
Install the Brave Browser As of now, you have downloaded the APK files, now you have to install the Brave App for Kindle Fire. The following are the steps, that will assist you in installing the browser.
After downloading the files, locate the “Downloads” folder. Then click on the “APK” file to begin the installation process. Now confirm the prompt that will appear while installation. After this, the browser will be installed on your Kindle Fire tablet within a few minutes. Sum up Hopefully, the above instructions will assist you in resolving the How to Install Brave App for Kindle Fire. So, it is recommended to follow the above steps as given.So, before you seek assistance from someone else, it is recommended to obey the above instructions to download the Brave App for Kindle Fire.
0 notes
Text
How to Fix Kindle Won't Turn on Issue?
Have you ever encountered the Kindle Won't Turn on issue? If yes, were you able to resolve the problem? If not, then here you will get a step-by-step guide to fix the problem.
Kindle is a smart electronic device for reading e-books. As with other devices, facing issues with it is quite common, every user faces this problem.
It is quite frustrating when the Kindle Won't Turn on issue occurs. But the good thing is that this issue is curable and can be fixed easily.
If you don’t know How to Fix Kindle Won't Turn on Issue? Then the following are some simple and effective problem-solving solutions to rectify this problem.
Why Kindle Won't Turn On? It becomes much more straightforward to identify and implement an efficient, and adequate solution when we know the underlying cause of the problem. The following are some common causes for the same problem.
The battery is low on the Kindle device.
Damage charger or the power outlet.
The Kindle is stuck on the battery exclamation mark.
Internal hardware issue.
Corrupted and damaged files in the device. Steps to Troubleshoot Kindle Won't Turn on As now you know the causes of the problem, now it is time to fix it. If you are unable to find the How to Fix Kindle Won't Turn on Issue. Then thoroughly follow the below steps to do the same.
Charge the Kindle Device The most common reason for this problem is, that its battery completely drained out. So, in this, you need to charge your device.
To do this, simply plug your Kindle into a power outlet, and check if it wakes up after a while. And if in case, it didn't turn on, then leave it on charging overnight.
Restart your Device Another way to rectify the Kindle Won't Turn on issue is to restart the device. Doing this will help in resolving the issue, which is causing this problem.
And it also gives a fresh start to the device. To restart the device, you just need to press and hold the power button to reboot it. Once it turns on completely, check if your device is turned on.
Check the Charging Cable and Adapter If charging the Kindle device won’t help you out, then you might be using a faulty charger to charge the device.
Therefore, you should use a legitimate charging cable and power adapter and ensure there is no visible damage to it.
You can also try to plug the charger into a different wall outlet source. Because it is possible that the wall outlet is damaged.
Check for Any Hardware Issue Another possible reason for Kindle Won't Turn on is a hardware issue. A hardware issue means the connector, that connects the battery to the motherboard might become loose.
Alternatively, there might be some other impairment to the motherboard of the Kindle. To fix this, you need to visit a mobile repair shop. Sum up Hopefully, the above problem-solving solutions will help you with How to Fix Kindle Won't Turn on Issue. Follow the above techniques to rectify the Kindle Won't Turn on issue.
0 notes
Text
Why is My Firestick Remote Not Working Even With New Batteries?
Are you struggling with the fire stick remote not working? And unable to find ways to rectify the same problem. Then here you will learn Why is my remote not working even with new batteries?
The Firestick and other devices use remotes, which are slightly distinct from most of the other remotes around your house.
And to figure out, Why is my remote not working even with new batteries might be difficult. Encountering this issue is quite frustrating and to get access to your Firestick device, it is required to fix.
If you are unable to do this on your own, then obey the following instructions to rectify the fire stick remote not working.

Why is the Fire Stick Remote Not Working? Before implementing an efficient and adequate solution, it is required to get familiar with the causes of the issue. The following are some common causes for the same issue.
The battery is inserted improperly.
Obstruction between the remote and the device.
Interfere with Bluetooth connections.
Compatibility issue.
The remote isn’t paired with a firestick.
External damage. Methods to Resolve Fire Stick Remote Not Working Now you get to know Why is my remote not working even with new batteries? Now it is time to address the issue promptly.
Fixing the fire stick remote not working issue is not a complicated task, it is simpler than you think. Go through the below problem-solving solutions to rectify the same issue.
Restart the Firestick If your remote is not working, then restart your Firestick device. Restarting will allow any update to be installed correctly.
And it also reduces the possibility of a software issue, which hinders the functioning of your remote properly. In this, you need to unplug your Firestick for a minute and plug it back.
Doing this will allow a power cycle to take place and also rectify some issues that may take effect.
Check the Status of your Remote If restarting the device does not help you out, then you should check the status of your remote. Below are the instructions for how to check the status of your Firestick remote.
Firstly, head over to the settings menu,
Then click on “Control and Bluetooth Devices.”
After this, check the status of your Firestick remote battery.
If the firestick remote battery status is “OK”, then this indicates a software or interference issue is causing your issues.
Firestick remote battery status shows offline when there are dead batteries, signal interference, and any software issue.
Check Whether the Remote is Paired or Not Another thing you should do, to check if your Firestick remote is not working is, to ensure that it is paired to your device. Here is how to check whether the remote is paired or not.
First, you need to restart your Firestick, by unplugging it for a minute.
Then allow the device to boot into the main menu.
After this, the remote will automatically get paired.
Now on the remote, hold the home button for 20-25 seconds. And then see if the remote is responding.
If it gets paired successfully, then you will get a successfully paired notification.
Sum up Certainly, the above instruction will assist you with Why is my remote not working even with new batteries? Follow these problem-solving methods to fix the issue before seeking assistance from others. Also, make sure to obey the above problem-solving methods as given to rectify the fire stick remote not working.
0 notes
Text
How to Fix Fire Stick Remote Not Working Problem
The Fire Stick is a popular streaming device and comes with a smart remote. It is common for the device's remote to work perfectly most of the time, but sometimes users are facing a problem with the Fire Stick remote not working. It is important to understand why a FireStick remote isn't working to fix it. Several factors can cause this error. Fire Stick remotes can malfunction for a variety of reasons.
There are usually three kinds of problems: a dead battery, an obstruction blocking the remote's signal, and interference from other electronic devices.

Methods to Fix Fire Stick Remote Not Working
It is also important to use the best ways to solve Fire Stick remote not working. You can quickly use the below methods to fix the issue.
Check the FireStick Remote Batteries
Amazon Fire Stick remotes have a power consumption issue. Whenever the Fire Stick's remote doesn't work, the batteries are almost certainly dead, based on our experience with it over the past few months. Battery life rapidly diminishes without warning. When your Firestick remote stops working suddenly, you may need to replace it. Amazon Fire Stick remotes feature Alexa and voice recognition. There may be a problem with Alexa. It's not always the case that the remote listens.
The Alexa button on a remote is pressed to listen. Batteries for remote controls are continuously consumed, even when they aren't in use. This occurs because Alexa is always listening since the Alexa button is always on. The battery can run out without warning due to the constant drain on it, resulting in the Fire Stick remote not working. Make sure the FireStick remote is working now.
Pair the Fire Stick Remote Properly
Remotes are pre-paired with FireStick devices. The device will automatically pair if it is not already paired. FireStick remotes that don't work may also be incorrectly connected if they are new or replacements. It is simple to pair devices. You will be guided through the process in the following steps:
Using the HDMI port on your TV, connect the FireStick to it.
Switch on both your TV and FireStick.
Keep the remote's 'Home' button pressed for at least ten seconds after FireStick boots up.
There must be compatibility between the Amazon FireStick remote and this device.
When pairing fails, hold the home button for 10–20 seconds.
Before pairing was successful, many users repeated the process several times.
There is a limit of seven Bluetooth devices that can be connected to the FireStick, including remote controllers. When you have already connected seven devices, you must disconnect at least one. You can check if the Fire Stick remote not working is fixed or not.
Restart the Firestick TV
It's a good idea to restart your Firestick device when your remote stops working. You can improve your remote functionality by restarting your Firestick to ensure that updates are properly applied. Before reconnecting your Fire Stick, unplug it for a few seconds. You may experience a power cycle when you do this due to software issues with your remote. When you reach the remote pairing screen after a few seconds, unplug the TV and reconnect it. Additionally, you also need to press and hold the Home button for a few seconds. After this, you can check whether the problem of the Fire Stick remote not working is solved or not.
Wrapping Up You can quickly use the above methods to solve the problem of the Fire Stick remote not working. It is also important to pair your remote with the Fire Stick properly.
0 notes
Text
How to Troubleshoot Kindle Fire Won't Turn on?
Are you struggling with my kindle fire won't turn on issue? If yes, then no need to worry you are at the right place. Here are some troubleshooting steps to rectify the same issue.
Kindle is a small handy electronic device, which is used by e-readers for reading books. It permits you to study and buy, install, and read e-books, newspapers, and other digital media through wireless networks.
But at times due to various reasons, it causes multiple issues, including Kindle Fire Won't Turn on. Facing this issue is quite frustrating, especially when you are in a hurry to access some data which you have stored in it.
There are many causes for this issue, the good thing is that this issue is curable and you can fix it without asking for help from someone.
It does not matter what is the causing root of the issue, it is necessary to fix it as soon as possible. If you don’t know how to do so, then simply through the following techniques to do the same.

Why does my kindle fire won't turn on?
It becomes much more straightforward to recognize and implement an efficient, and adequate solution when we know the causing root of the issue. Below are some common causes, which can lead to Kindle Fire Won't Turn on.
Files on the device are corrupted or damaged.
Defective charger, and the port.
Insufficient power.
The battery is low.
The internal hardware is damaged.
Troubleshooting Methods to Resolve Kindle Fire Won't Turn on
Hope now you have understood, why my kindle fire won't turn on. Now it is time to rectify the same issue as quickly as feasible. If you are unable to do this on your own, then obey the following problem-solving solutions to rectify the same issue.
1. Charger the Kindle If your Kindle gets charged slowly, then it may not turn on while it is charging. So, in this, you have to wait until it gets fully charged. And once it is completely charged, check whether the Kindle Fire Won't Turn on issue is resolved or not.
2. Check the Charger If your charger is damaged, then it will not be able to charge the Kindle. So, in this, first, make sure that you are using the charger, that came with your device.
And if it is damaged, then replace it with a new one or find another cable and adapter, which is compatible with Fire tablets.
3. Soft Reset the Amazon Fire Tablet Resetting the device may help in fixing all the minor glitches of the device, and also give a fresh start to the device. To reset the Kindle, press and hold the power button for a minute.
And then release it, when the screen goes blank. After this, within 40-5 seconds again press and hold the power button to turn it on. And when you hear a boot-up sound, then release the power button.
4. Update the Kindle to its Latest Software To rectify the Kindle Fire Won't Turn on, you need to update your Kindle device to its latest software.
Here are the steps to turn on the device, and then immediately apply software updates so that the tablet runs a stable Fire OS.
Firstly, make sure that your Amazon Fire HD is turned off.
Then press and hold the volume up and power button for a minute to turn on the tablet.
After this, go to the power on and off button when the device is booting up.
Now continue with holding the volume up button, until you see the “Installing the latest software” message.
And then wait until the latest software installation gets complete.
And at the end, see if the issue is fixed or not.
5. Uninstalled the Third-Party Apps If you have recently installed any new app from a third party. Then it is possible, that those apps may be causing the Kindle Fire Won't Turn on.
So, in this, it is recommended to uninstall the recently installed third-party app. Below are the steps to do the same.
Firstly, launch the apps drawer of the device.
And from there search the apps that you installed recently from unidentified sources.
Then visit the “Games and Apps” section, and click on the “Library” option.
After this, find the app, which you want to delete, and click on the “Ellipses” or “Three dots” icon.
Now from the drop-down menu, click on “Manage All Applications.”
And then find the app, you want to delete, and now pick it, and click on “Delete from Device.”
6. Factory Reset the Amazon Fire Tablet The last step to settle my kindle fire won't turn on issue, is to perform the factory reset. Factory reset will remove all the settings and data, which you saved, and also bring it back to its factory setting. Here is how to factory reset the Amazon Fire Tablet.
Firstly, when the device is off, press the volume down and power on and off button simultaneously.
After this, enter the Android Recovery mode.
Then with the help of the volume up and down button select the “Wipe Data/Factory Reset” command.
Now this Android recovery will remove and wipe the device data and settings.
And then once it is completed, choose the “Reboot System Now” command.
Once it is completed successfully, see if the Kindle Fire Won't Turn on is fixed or not.
Sum up
For some users, facing the Kindle Fire Won't Turn on issue may be new, but the good thing is that this issue is curable. And you can fix this issue without asking for help.
But before fixing this issue, it is needed to get familiar with What does the purple light mean? This may help you in finding a simple and effective resolution.
If you don’t know How to fix my kindle fire won't turn on, then certainly, these above troubleshooting fixers will help you with rectifying the same issue.
So, before asking for help from someone, go through the above instructions, to resolve the same issue.
0 notes
Text
Kindle won't charge or turn on - Exclamation mark fix (!)
Facing such issues, with the Kindle device causes headaches to the users. Encountering kindle not charging is not new, every user faces, this kindle not charging issue onetime with their device.
If you are also suffering from the Kindle Won't Charge. No need to worry, you are at the right place. Here you will get to know how to fix Kindle won't charge or turn on - Exclamation mark fix (!).
Kindle is a smart device, which is mainly designed for reading books. It allows users to read and purchase ebooks, library ebooks, and many more. In this, you can store thousands of books at one time.
But sometimes, any technical glitch, and low or faulty battery lead to this Kindle won't charge or turn on - Exclamation mark fix (!) can lead to this problem.
And other reasons include problems with the power adaptor, charging cable, charging socket, or even connectivity issues with the cable and charging ports.
But no matter what the reasons are, it ought to fix it as quickly as possible. If you are incapable to specify this kindle not charging issue.
Then in this, you will find some troubleshooting methods to rectify the Kindle Won't Charge problem. Simply go through the following instructions, to get rid of Kindle won't charge or turn on - Exclamation mark fix (!).

Why Kindle won't charge or turn on - Exclamation mark fix (!)?
It becomes much easier to determine, and implement an efficient and effective solution when we know the causing roots of the issue. The following are some common causes for the kindle not charging problem.
The battery got damaged.
Dirty charging port.
Insufficient power on the power outlet.
The adapter is damaged.
Faulty charging cable.
Charging the device overnight quite repeatedly.
Methods to Resolve Kindle Won't Charge
Hope now you have comprehended why the kindle not charging issue arises. Now it is time to fix it as briefly as possible. Resolving Kindle won't charge or turn on - Exclamation mark fix (!) is not a difficult task, it is simpler than you think.
If you are incapable to settle this issue. Then simply obey the following methods, in order to get rid of this Kindle Won't Charge issue.
1. Restart Kindle Restarting the device is the simple, and easiest task. It helps in fixing all the minor glitches of the device. And restarting the device also gives a fresh start to the service.
Therefore, the first and foremost step, to rectify the kindle not charging problem is restating the Kindle device. So, before proceeding with further steps, restart your kindle device.
And after restarting the device, try charging again your device. If your device is connected to the USB port, first you need to unplug it from your device.
After this, press the power button, and hold it for 30-35 seconds. And release it once the logo seems on the screen.
2. Check the Charging Cable and Adapter If the above step is unable to fix the kindle not charging issue, then check the charging cable and adapter of the device.
Because another possible reason, for this issue is a broken cable or adapter. Whether you are using a USB cable or a charger, you can check if they are physical damage. And if the charger is fine, you can move on to the next fixes.
If you are using a broken charger, then it is time to replace it with a new one. And if it is wet, refrain, then your device will be in danger if you do not replace it immediately.
3. Clean the charging port If the charging port has debris, then it can also cause Kindle won't charge or turn on - Exclamation mark fix (!).
So, in this, you need to clean your power outlet and charge your device again. The following are a few things, that you should take care of while cleaning the charging port.
Make sure that you do not use a wet cloth to clean the charging port.
Do not blow the dust from your mouth, into the port as it might wet the area.
While cleaning the port, a bristle maybe got stuck inside.
Below are the instructions for cleaning the charging port, in order to rectify the Kindle Won't Charge.
Turn off your Kindle, if it is on.
And then use a flashlight or torchlight, to see inside the charging port.
Now take a dry or non-conductive tool, like a toothpick and a bulb syringe.
After this, carefully pull out any debris, that is stuck in the charging port.
Sum up It is required to know the causing root of the problem first, before fixing the kindle not charging issue.
In this, firstly, figure out the reasons, which can lead to this Kindle won't charge or turn on - Exclamation mark fix (!) issue.
Certainly, the above methods will help you How To Troubleshoot Kindle Won't Charge?
So, before seeking help from someone, go through the above steps to rectify the Kindle Won't Charge issue.
0 notes
Text
What to Do When Your Kindle Book Won't Open
Kindle is an electronic reading device developed and marketed by Amazon. It is used to read e-books, digital magazines, and other digital content. It has a touchscreen display that enables users to read digital content on the device. Your Kindle lets you read books, magazines, newspapers, and articles. Now it is easier for readers to manage all their books and other stuff perfectly. Sometimes users also face the Kindle book won’t open issue.
With Kindle, readers can now access content quickly and easily, making it an efficient way to read all types of digital content. It is not uncommon for users to encounter Kindle book won't open, which prevents them from accessing them.
The primary reasons for the Kindle book not opening are a defective charger, a broken screen, an internal issue, or a virus-infected battery.

Ways To Fix Kindle Book Won't Open
You can use the below methods to solve the Kindle book won't open problem. It is also important to read all the instructions carefully and follow them accordingly.
Check Kindle Charger
A Kindle charger must also be used correctly. There is a possibility of a defect in the USB cable or adapter. Your charger should be checked to ensure it is working properly. It is best to try your charger on another device to determine whether it works or not. Kindle chargers that don't work need to be replaced immediately. If the problem persists, you can check whether it has been resolved.
Charge The Kindle Book Properly
Your Kindle can either be charged, or you can do nothing if you are still experiencing an error. Kindles can be charged for up to five hours. Keep the device away from touch while it is charging. A properly charged device will allow you to determine whether or not the problem has been resolved.
Replace the Screen of the Kindle Book
When your screen is damaged, it shows a Kindle book not opening. It is also crucial for you to fix the damaged screen of your device because it also affects its performance. There is a need to change the screen and check whether the Kindle book won’t open is fixed or not.
Replace Kindle Battery
A damaged battery is also a major reason for the Kindle book not opening. It also becomes necessary to replace your battery quickly and fix the issue. There is also a need to use a genuine battery to reduce the chances of errors.
Hard Reset
Kindle devices need to be hard reset if the book will not open. It is also important to remember that after a reset, your device will return to its default settings. Connect the device to the charger and then disconnect it. In the next few seconds, slide the power button. You must re-set up your Kindle Book device after resetting it. The reset will clear out any stored data and settings that are causing the problem and restore the device to its original factory settings. This will allow you to start fresh and hopefully resolve the Kindle book not opening issue.
Wrap Up
You can use the above method to solve the Kindle book won’t open problem. It is always important for users to use the original batteries and adapter for their Kindle.
0 notes
Text
What Can I Do When My Kindle Locks Up?
Are you struggling with Kindle stuck on lock screen? Then you are at the right place here you will get to know how to fix kindle paperwhite frozen.
Kindle is a device, which is, designed for reading books. It allows users to read and purchase ebooks, library ebooks, and many more.In this, you can store thousands of books at one time. But sometimes, it fails to work properly. And as a result, the user faces numerous issues, including the kindle stuck on lock screen.
No matter what is the causing root of the issue, it's important to address and resolve the issue promptly. If you are unable to find the right guide to fix this issue.Then go through the below troubleshooting methods to rectify the kindle paperwhite frozen.
Why is the Kindle stuck on lock screen?
It becomes much simpler to identify and implement an efficient and effective solution when we know what is the causing root of the issue. The following are the common causes for kindle paperwhite frozen.
Low battery.
Outdated firmware.
Downloaded a corrupted Ebook.
Overworked processor.
Overload and simultaneous activities.
The Kindle device got broken.
Methods for kindle stuck on lock screen
Hope now you have understood why kindle paperwhite frozen, now it is time to fix it. Fixing this issue is not a challenging task, it is simpler than you think.
If you are unable to find What Can I Do When My Kindle Locks Up, then simply obey the below instructions.
1. Soft Reset the Kindle
The simplest and most easy way to fix many issues is resetting the device. Doing this fixes all the minor glitches, and it is a universal method yet.
To soft reset the Kindle, press and hold the power button for at least 40 seconds even when the device turns off.
Doing this will automatically reboot your device. And once it reboots successfully, examine the issue is fixed or not.
2. Hard Reset the Kindle
Hard reset is the relied-on process to fix the kindle paperwhite frozen issue. If you don’t know how to do so, then here is the instruction to do the same.
Press and hold the power button on the Kindle, until you see the Kindle logo on the screen.
After this, plug the device into the charging port.
Then after plugging it into the charging port, repeat the first step again.
3. Update the Firmware
Another possible reason for kindle stuck on lock screen is outdated firmware. So, in order to resolve this update the firmware of the Kindle.
To do this, firstly, visit Amazon’s Kindle software update page, and download the appropriate software update.
Now connect your Kindle to your PC, and pull the software update file to the Kindle.
Once it is complete, disconnect the Kindle from your PC.
Then click on the menu, then on settings, and lastly on Update your Kindle.
4. Factory Reset the Kindle
If none of the above steps are helping you out, then a factory reset may help you in fixing this. Doing this will erase everything from the Kindle.
So, after this, you need to reconnect your Amazon account and redownload your books afterward. The following are the steps to do the same.
Firstly, go to the menu, and click on settings or all settings.
After this, click on the device option and then click on reset.
Now click on reset device again, and click on yes.
Lastly, wait until it resets properly, and review the error is fixed or not.
Sum up
Certainly, these methods will help you with What Can I Do When My Kindle Locks Up. Go through each step to get rid of kindle paperwhite frozen.
It is quite normal for a Kindle Paperwhite to have lagged and delay problems, especially if you are using it continuously.
So before seeking help from someone, obey the above easy and effective troubleshooting methods to rectify the kindle stuck on lock screen.
0 notes
Text
How to Fix a Kindle Fire That Won't Turn On
There is a new trend that readers are giving preference to reading e-books because it is comfortable to read them. For e-books, you can use the Kindle devices. Amazon offers the best features in their Kindle Fire but sometimes readers face the issue of Kindle won't turn on or reset. The battery may be completely drained, the power cord is loose or disconnected, or there is a hardware problem with the device.
Battery life may be reduced when left unused for long periods. An unplugged or loose power cord will not deliver power to the device. Professional repairs or replacements may be needed if the device has hardware issues. Users must fix the Kindle won’t turn on or reset in the best ways.

Ways to Fix Kindle Won’t Turn On Or Reset
It is also imperative for you to quickly fix the Kindle won’t turn on or reset. There is a need to use proven methods for solving the error so you can quickly again read the books. Here you can check the latest ways to fix the issue.
Restart Kindle
You can restart your Kindle device if it freezes or does not respond. Your device can be turned off by pressing and holding the Power button for a few seconds. The device must be turned on by holding the same button for 4-5 seconds. When you hold the Power button on some Kindle devices, a menu can appear. Tapping the Restart button is all you need to do to restart your computer.
Charge Your Kindle Properly
The Kindle is charged for at least two to three hours before use. A fully discharged Kindle battery needs to be recharged at a slower rate. You may have to wait a while for your Kindle to start. A Kindle wall charger can also be used to recharge a discharged Kindle battery. When your Kindle is connected to your laptop instead of a power adapter, it will charge faster. After this, you can check whether the Kindle won’t turn on or reset is fixed or not.
Reset Your Kindle Device
Your Kindle may refuse to turn on even after charging for several hours when it is stuck on the "Kindle Battery Critical" screen. Hard resetting your Kindle device is the most effective option.
Kindles can be connected to computers via USB ports.
An "Orange Light" shows your device is charging. Kindle batteries that are fully charged display this indicator.
Your Kindle can be restarted by holding down the "Power" button for a few seconds. When you release it, you can see the screen blink once.
It is time to press the power button again.
Users can charge their Kindle for at least 30 minutes.
If the Kindle screen is still down, you will need to repeat all the steps.
Here you can check whether the issue of the Kindle won’t turn on or reset is solved or not.
Replace the Battery
It is always best to change or replace your Kindle battery so you can fix the issue quickly. Most of the time, when you can change the battery of the Kindle, it automatically fixes the problem that the Kindle won’t turn on or reset.
Change the Cable or Adapter
There is also an option for you to change the cable or adapter on your Kindle. It helps in solving the issue quickly. When you are using the defective cable or adapter, you will face the issue that your Kindle won’t turn on or reset. It is vital to replace it quickly.
Wrapping Up
You can use the above methods to solve the Kindle won’t turn on or reset problem. It is always imperative to use the original wires and charger, so various issues will not occur.
0 notes
Text
Get Your Kindle Connected to Wifi Again: Simple Steps
There are numerous reasons that can lead to the Kindle Won't Connect to Wifi. But do not get upset, this issue is short-lived and you can efficiently fix it. The first step to get the device working is to connect it to the internet. Kindle is a small handy electronic device that is utilized by e-readers for reading books. It authorizes users to search and purchase, download, and read e-books, newspapers, and other digital media via wireless networks. But at times due to some issues, it fails to serve adequately and leads to many problems, one of them is the Kindle Won't Connect to Wifi. So, in order to get out of this, follow the below techniques.
Reasons for Kindle Won't Connect to Wifi:
It is good to know why your Kindle Won't Connect to Wifi, in order to find an effective fixer. These given reasons are the causes of this issue.
Airplane mode is on.
The firmware of the Kindle is outdated.
Slow and weak internet connection.
The conflict between software and data.
Methods to resolve Kindle Won't Connect to Wifi:
Unable to fix Kindle Won't Connect to Wifi, and looking for the solution to fix this If Kindle Won't Connect to Wifi, then it does not mean your device is useless. There are many fixers that can help you to get rid of this issue. Here are some troubleshooting steps, follow them to connect the Kindle to the wifi.
1. Restart the Kindle:
If you are unable to connect the Kindle to the wifi, then restart your device to resolve this. This will shut down the non-responsive software, which is causing trouble requesting an internet connection. To restart the device press and hold the power button until the screen goes blank, then wait for some time. After this, turn it on back and check whether the issue is fixed or not.
2. Factory reset the Kindle:
If restarting does not fix the issue, then factory reset your Kindle device. Doing this will bring your device to its original settings and restart it. Everything will be removed, that you have downloaded or transferred to your Kindle. If you downloaded something, which is causing this error then removing it will fix your Kindle. To perform factory reset, go to the settings on the Kindle, and then on devices options. Lastly, tap on the reset option.
3. Turn the Airplane mode off:
It is possible that you have turned the airplane mode on, to prolong battery life, and later you forget to turn it off. If airplane mode is on then it can also stop the device to connect with the wifi. So, make sure that this mode is off on your device.
Sum up:
Undoubtedly, the overhead methods will help you in settle the Kindle Won't Connect to Wifi. The working of the Kindle totally depends upon the internet which means that a wifi connection is required. Kindle is not connecting to the internet issue occurs due to numerous reasons, but fortunately, this problem is curable. Follow these methods step by step and you will be able to connect your device.
0 notes
Text
How to Update My Kindle Paperwhite If Not Connecting to Internet?
If you are unable to update your Kindle device because your Kindle Paperwhite won't connect to wifi. Here are some easy and effective steps to fix it. Connecting your Kindle device to the internet is the first step to getting the device working. Kindle is a small handy electronic device that is used by e-readers for reading books.
Kindle Paperwhite offers e-readers to buy, download, and read e-books, newspapers, magazines, and other digital media through wireless networks. There could be many reasons, which is causing the Kindle Paperwhite won't connect to wifi like it being stuck in flight mode, outdated software, entering the wrong username and password, and internet problems.

Techniques to fix the Kindle Paperwhite won't connect to wifi:
Struggling with Kindle Paperwhite won't connect to wifi issues then do not get upset. Most of the time, resetting the Kindle device resolves minor glitches in the device. This issue is curable and you can fix it easily. Go through the below-given steps to rectify Kindle Paperwhite won't connect to wifi:
1. Power cycle:
Press and hold the power button, and turn the device off.
Keep pressing the power button for another 40-45 seconds.
Then release it and leave it idle for 1-2 minutes.
Again press and hold the power to turn on the device.
At last, try to connect your device to the internet.
And see if the issue is settled or not.
2. Update Kindle firmware:
If it has been a little longer since you haven’t used your Kindle device, then it might need a software update. Old software might have bugs that are preventing the Kindle Paperwhite from connecting to the internet.
3. Check your home network:
Connect your phone to the wifi network.
If it is working with the network, then leave the other steps.
And if you face connectivity on that device as well, restart the home network.
Follow the below steps to do so.
Turn the modem and the wifi router off.
Also, take out the power cable from the power outlet.
And then leave the device idle for 4-5 minutes.
After this, plug in the power cord and turn it on.
Wait until the light stops blinking on the router.
At last, connect again to the Kindle Paperwhite to check whether the issue is resolved or not.
And if the issue still persists, then check that the airplane mode is not turned on.
Kindle Paperwhite will disable all the connections if the airplane mode is on.
So, in order to fix it, disable airplane mode.
Sum up:
Certainly, the above methods will help you in resolving Kindle Paperwhite won't connect to wifi. The working of the Kindle totally depends upon the internet which indicates that a wifi connection is necessary. Kindle Paperwhite is not connecting to the internet issue occurs due to many reasons, but fortunately, this is fixable. Follow the above methods step by step and you will be able to connect your device.
0 notes
Text
Wi-Fi Woes with Your Kindle? Here's How to Fix Connection Issues
Many readers now giving preference reading ebooks. You can also use the Amazon Kindle to read your favorite books. Most of the time you can use the Kindle easily but sometimes there is the issue of the Kindle won’t connect to wifi. It occurs because Kindle needs fast and strong and there is also an issue with your router or ISP. Sometimes readers enable their airplane mode to save the battery so it also becomes the cause of this error. When you are using the low version of your Kindle, the issue will occur. It is vital to solve the issue of Kindle won’t connect to wifi.

Methods to Fix Kindle Won’t Connect To Wifi
It is also important to use the best methods to fix the Kindle won’t connect to wifi. You can also follow all the steps correctly so you can quickly solve the issue and start reading books again.
Turn off Airplane Mode
Many users use different ways to increase the battery life of their Kindle devices. They also use airplane mode to enhance the battery life but they forget to disable it after reading the books. It is also crucial to disable airplane mode to solve the problem of Kindle won’t connect to wifi. It is a simple process, and you need to go to Quick Menu. Here, you can navigate to settings > wireless > airplane mode. It is now necessary to disable airplane mode.
Restart Kindle Device
Kindle won't connect to WiFi when airplane mode is disabled. You must restart your Kindle device. It takes only a few minutes to restart. It has a power button that users can find. You can now hold it for a few seconds. Once this is done, you can check if the issue is solved or not. To fix the error, you can try another method.
Update Kindle Firmware
A firmware update is also necessary for the Kindle. Various issues on the device are automatically fixed when users install the latest update. By making it easier to use, users can get more out of their Kindles. Check these steps for updating the firmware of Kindle.
First, there is a need to connect your Kindle device to your laptop or computer.
Here you can go to its software page and check the available latest software.
It is also vital to enter the model number and tap on it.
After this downloading process will start and move the file to the Kindle device.
Now you can go to the menu on Kindle and open the settings.
There is a need to choose to update the Kindle.
Here you can tap on Ok.
Restart Your Internet Network
When the issue of Kindle won’t connect to wifi is not solved there is a need to restart your wifi network. You can follow these steps to restart your wifi device.
There is a need to turn off your router and modem.
Here you can disconnect the power cable from the power outlet.
Now wait for a few minutes and again connect the power cord.
You can turn the modem and router on.
After this, you can wait for a few seconds so the LED light stop flashing.
Now you can check whether the issue of Kindle won’t connect to wifi is solved or not.
Wrap Up
You can use the above methods to solve the problem of Kindle won’t connect to wifi. It is also vital for users to check that their internet network is working properly. If it is not working, there is a need to contact your ISP.
0 notes
Text
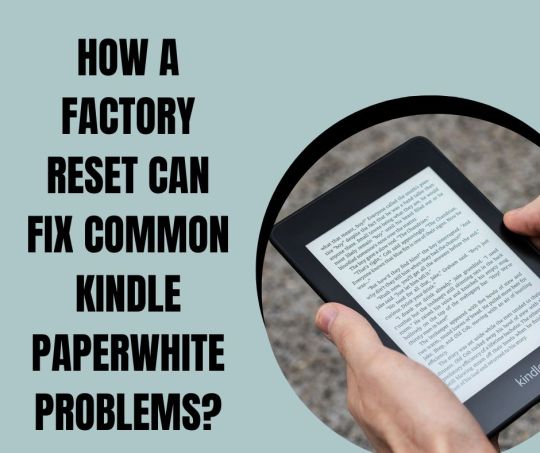
How a Factory Reset Can Fix Common Kindle Paperwhite Problems?
Kindle is a small handy electronic device that is used for reading books. E-readers can buy, download, and read e-books, newspapers, magazines, and other digital media through wireless networks. Working of the Kindle paperwhite device totally depends upon the internet connection.
But at times users face the Kindle paperwhite issue; this issue is a very common issue usually faced by users and is easily curable. You can fix this issue by Factory Reset Kindle Paperwhite, and resetting the Kindle device will remove all of your settings and books. Make sure that you have charged your device before resetting it in order to avoid possible errors.
Steps for factory reset Kindle paperwhite: Struggling with the Kindle paperwhite issue, do not get upset. Factory reset kindle paperwhite will help you in resolving this issue. Most of the time resetting the Kindle device resolves the Kindle paperwhite problem. Go through the below steps to get rid of the Kindle paperwhite issue:
Click on the three horizontal lines of the kindle home screen.
Then go to the settings and again click on three horizontal lines.
After this click on the reset device.
And then a warning message will appear on the screen reminding that the Kindle will return the device to factory defaults.
It will delete all your settings and library, and you would have to download all the books again.
After resetting you need to do all the setups again for example signing in to your Amazon account, downloading books, and changing settings that you made previously.
Method to reset unresponsive Kindle paperwhite:
If you are suffering from the Kindle Paperwhite getting frozen and unresponsive then you can fix it by doing a hard reset. Hard reset is quite different from reset because the hard reset will not reset the settings and delete your library whereas reset will remove all the settings and books. Instead of this, it forces the device to reboot itself and it is less rigorous than a factory reset. Perform a reset if you want to sell, trade, or want to give the device away or if you are facing the issue regularly.
In order to do a hard reset, press and hold the power button for at least 4-5 seconds on the device located on the bottom edge. And then the power menu will appear, having the restart option. After that turn your Kindle paperwhite screen off and keep holding the button down. At last, the device will shut down and restart and it will hardly take 20 seconds to make the device responsive.
Sum up: Certainly, these steps will be useful to you and help you in resolving the Kindle paperwhite issue. Factory Reset Kindle Paperwhite removes all the stored and saved data from the Kindle device and it will return to its factory position. If you are suffering from any Kindle paperwhite error and are not able to fix it on your own then get in touch with Kindle customer care service they will provide you with full assistance in resolving the problems related to the Kindle devices.
0 notes
Text
How to Resolve Issues When Your Kindle Book Won't Open?
You can easily read books, newspapers, articles, and various other things on Kindle book. It becomes easier for readers to manage all their books and other kinds of stuff properly. Sometimes users face the issue of Kindle book won’t open so they won’t able to read the books. There are different reasons for this issue such as broken screen, defective charger, virus issue battery, or internal problem. It is also critical to solving the problem of the Kindle book won’t open.

Methods To Fix Kindle Book Won't Open
You can quickly solve the problem of Kindle book won’t open with the methods mentioned below. It is imperative that you follow all steps properly and don’t skip any instructions, so it becomes easier to fix.
Check Kindle Charger
It is also crucial to use the correct charger for the Kindle. There is a chance of defects in the USB cable or adapter. It is imperative to check whether your charger is working properly or not. The best way is to attach your charger to another device to see if it is working or not. If it is not working, there is a need to replace the Kindle charger quickly. After this, you can check whether the issue of the Kindle book won’t opening is solved or not.
Charge The Kindle Book Properly
You can either do nothing or let your Kindle charge if you are still experiencing the same error. You can charge the Kindle for at least four to five hours. While the device is charging, do not touch it. After proper charging, you can check whether the problem is charged or not.
Replace Screen
Many Kindle Book readers don’t give much attention to damaged screens. When your Kindle's screen is broken at any point, address it right away. If your screen is broken, it can lead to many dangerous effects. There is a need to replace the screen properly. After replacing the screen, it is essential to check whether the error "Kindle Book won’t open" is fixed or not.
Replace Kindle Battery
When the Kindle battery has been damaged the problem of the Kindle Book won’t open occurs. It is crucial to replace the Kindle battery quickly so it works perfectly. There is a need to replace the kindle battery with the original battery because in the market there is a different types of batteries available.
Hard Reset
When the issue of the Kindle book won’t opening is still not solved it is necessary to perform a hard reset of your Kindle device. It also needs to be remembered that your device comes back to its default settings after resetting. There is a need to unplug the device from the charger. After that, slide the power button for a few seconds. After resetting, there is a need to again set up your Kindle Book device.
Sum Up It is essential to fix the issue of the Kindle Book won’t open quickly. You can use your favorite method to solve the problem easily. It is also vital to use an original charger and batteries with your Kindle.
0 notes
Text
The Ultimate Guide to Fixing Kindle Fire Authentication Problem
The Kindle Fire is the best way to read multiple ebooks. It is an affordable and easy-to-manage device. Readers can read their favorites easily, but sometimes the Kindle Fire authentication problem will arise. It is a common problem, and it will occur for various reasons. When the internet network is not stable or the signals are weak, it shows an authentication problem.

Reasons for Kindle Fire Authentication Problem
There are multiple reasons for the Kindle Fire authentication problem. The Kindle Fire is an Android device with features and twists. It may be the Wi-Fi settings on your Kindle device that are causing the authentication issue, or it may be your network that is causing the issue.
Usually, it occurs when the Wifi router is operating incorrectly. Moreover, if your mobile is trying to get an update, it may be a driver problem. It is also possible for security attacks to cause problems with gadgets. Another reason for the Kindle Fire authentication problem is a poor connection or a router block.
Methods to Fix Kindle Fire Authentication Problem
You can use different ways to solve the Kindle Fire authentication problem. It is also important to use and follow all the on-screen instructions. Let us check the leading ways to fix the error.
Switch On and Off Airplane mode
Sometimes users enable airplane mode, so the Kindle Fire authentication problem occurs. There is a need to disable airplane mode so you can fix the error. You can follow these steps to switch to the on or off mode.
You can swipe down the Amazon Fire notification bar.
Here you can click on Wireless.
Now click on Airplane Mode.
You can toggle it On them Off.
It quickly fixes the specific network issue in Kindle and also solves the existing error. There is also a need to restart your wifi router.
Reset WiFi Router
You can reset your WiFi router to its factory settings to resolve the Kindle Fire authentication problem. You can find or reset buttons near the LAN/WAN ports of WiFi routers. Resetting your device will be performed by pressing the power button if this button is not present. Holding down the Reset or Power button for a few seconds can help.
Remove WiFi Network
There are times when you end up with too many routers saved on your Kindle device. Your saved WiFi network list may contain the old SSID name if you rename your wireless access point or change its authentication key. However, the updated one is added as a separate entry.
You can also remove all the extra entries by going to Settings > WiFi > Switch on Wifi. Here you can tap on ‘Delete Saved WiFi Passwords."
You need to reconnect to WiFi and enter your wireless authentication key or password again after this. Now you can check whether the Kindle Fire authentication problem is solved or not.
Wrap Up
It is a simple process to fix the Kindle Fire authentication problem. To resolve the problem, you can use the methods above. After this, you can skim your favorite books on Kindle Fire.
0 notes